Welcome! I’m so happy to have you here for our monthly Under $10 on the 10th blog hop! I don’t think that I’ve ever been so excited to share a project with you. This month’s blog hop theme is 4th of July, and I have come up with the most beautiful DIY coastal farmhouse flag that will add a patriotic flair to your home this summer! Stick around after the post to check out all of the patriotic ideas and flag decor that the other ladies on the hop are sharing with us. They are all very talented, so I know you’re going to love them.


Supplies for a DIY coastal farmhouse flag:
- 6 8×10 canvases (pack of 10 at Michael’s $6.50 w/ 50% off coupon or $1.25/ea. at Dollar Tree)
- starfish ($.50)
- acrylic paint- red, white, blue, & robin’s egg blue ($.50 each)
- 2″ wide painter’s tape
- E6000
- matte Mod Podge (optional)
- wood stain (optional)- I used Rust-oleum 2 in 1 carbon gray stain that I had on hand.
- lightweight spackling (optional)
- hot glue gun & glue
- staple gun (optional)
- scissors or rotary cutter
Since I got a pack of 10 canvases for $6.50, each one only cost $.65. If you had to buy everything, you could make this huge coastal farmhouse flag for $6.40 (including the paint used to stain the wood)!! I had everything on hand, so I didn’t spend anything on this project.


Remove Canvases from Frames
For this project you’ll use your canvases as “reverse” canvases. Remove the canvases from the wood frames that are underneath them. If you need a full tutorial on how to do this, you can check out my reverse canvas tutorial.
Once you have the frames bare, you can fill any holes in the wood. This is optional, but it definitely looks a lot better. You can fill the staple holes and cover the staples that need to remain that are holding the wood together. There are large holes in the corners of Michael’s canvases, on the inner corners as well as the outer ones. You can see how I filled them in the photo below if you look inside the opening in the corners. The holes are long slats that extend below and out the sides of each corner. The white spackling is hidden once you sand and paint or stain it.

Stain the Wood
Place the canvases to the side while you paint or stain the wood frames. I used Rust-oleum polyurethane and stain in one in weathered gray. The pictures make the wood look brown, but it’s actually a medium gray. I love this stain!

If you’re using stain, brush a light coat on the wood with a rag or foam brush. I started with a lint free cloth, but I switched to a foam brush after a few swipes. Using the brush was much easier and faster.

Here are my six frames all stained and ready to go.
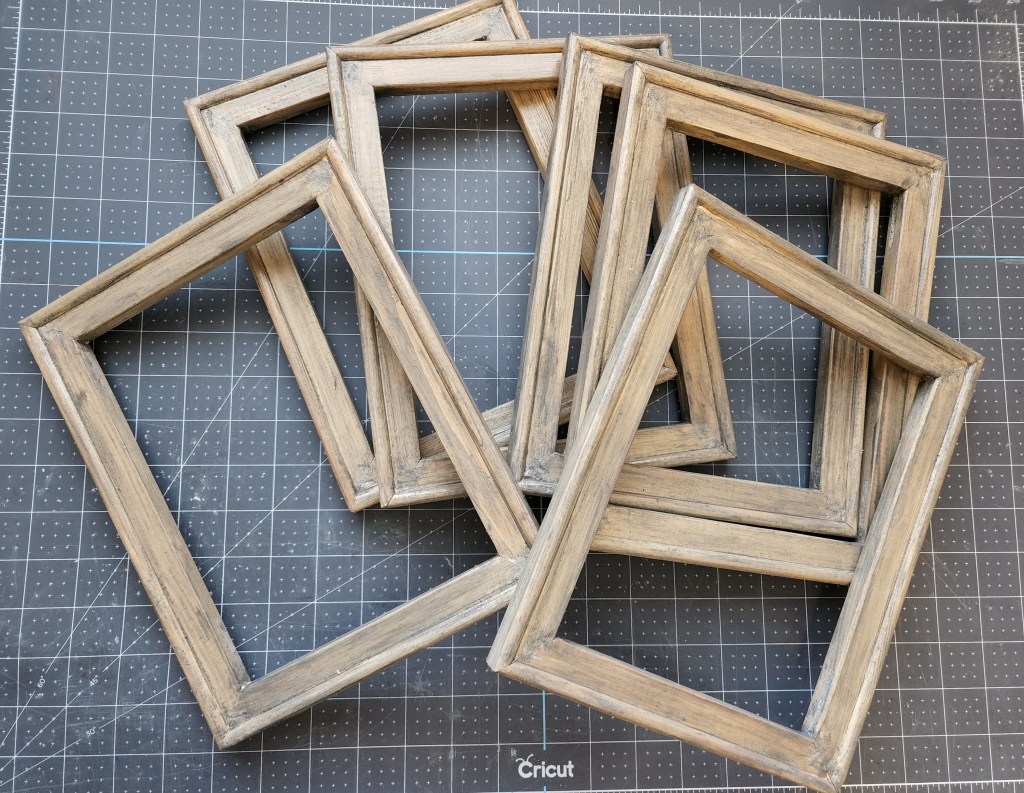
If you don’t have wood stain on hand, you can actually use acrylic paint to stain the frames. I don’t usually have stain sitting around, but I just finished another project, my DIY porch sign. Gather paints in colors that you’d like the frame to be. Usually I mix brown, black, tan, and white. You can see a full tutorial on how to use paint to stain in this DIY tea towel ladder tutorial.
Another option is to just paint the frames. Chalk paint would be perfect for a DIY farmhouse flag. If you don’t have chalk paint, you can make it by combining acrylic or latex paint and baking soda.

Paint the Blue Section of the DIY Coastal Farmhouse Flag
While your frames are drying, begin painted your canvases. Paint one of the canvases with your blue paint for the star section of the flag. I started out with English navy acrylic paint, but I wanted a more coastal-ish look to for flag decor. I have a lot of coastal items out for summer, so I wanted the patriotic pieces that I’m adding to just blend in with that. So I painted over the navy with robin’s egg blue. I left strokes of the navy visible. You can do that or paint your canvas robin’s egg blue to start with then add dry brush strokes of the English navy.


If your starfish are a bit yellowed like mine, paint them with white acrylic paint.

Create Three Striped Canvases
Now you can move on to the three canvases that will serve as the bottom half of the coastal farmhouse flag. To mark off the stripes on my flag I used 2″ wide painter’s tape. If you only have 1″ you just place two pieces together.
Your canvases will have creases where the were folded and stapled on the edges. You can use these as a guide for where to place the tap. Place the tape along the second crease from the bottom. That would be the first crease from the inside. I did tape my canvas to my cutting mat to keep it from moving all over and to keep my lines straight.


Tear off a small bit of tape and place it right at the top of the stripe you just created. That will help you place the next stripe evenly.
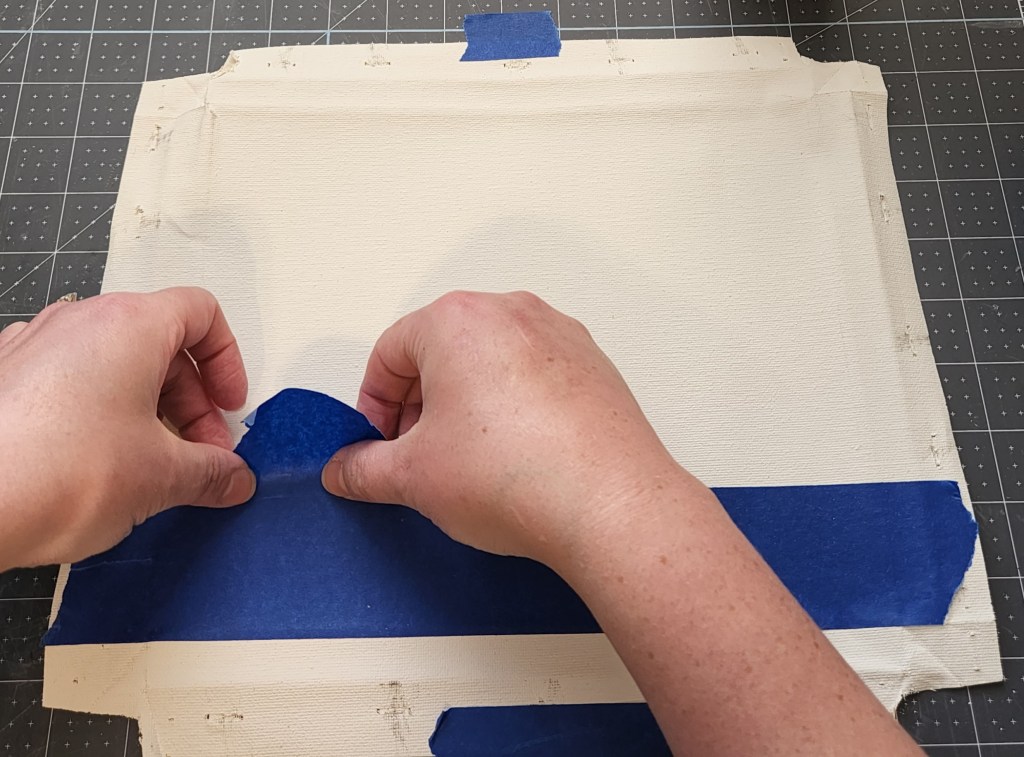
Place another stripe of tape against the small piece of tape. Go over the edges of the tape to secure it.

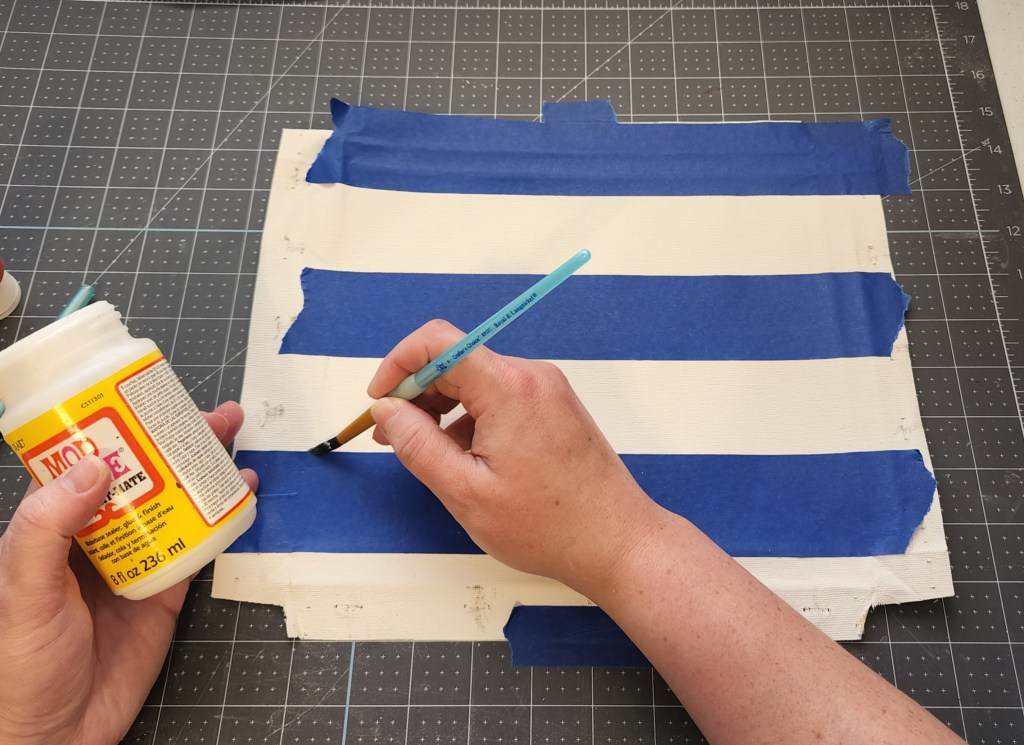
To keep paint from seeping under the tape, you can add Mod Podge. Of course this is optional, but it really does help. Use a tiny paint brush and add Mod Podge where the tape meets the canvas. I try to keep the strip of it pretty thin.
Repeat this process on two more of the canvases.
Paint Those Canvases
Once you have three canvases “striped,” paint the canvas between the stripes red.

Repeat on the other two canvases. I gave mine two coats which was more than enough. Sit them aside while they dry.
Here’s a video of how to add the Mod Podge and paint. I did allow the Mod Podge to dry before adding the red paint.
Finish the Final Two Canvases
Now you need to paint the two canvases that will go next to the blue one. The stripes on these will be in a different place than the first three. Place a piece of 2″ painter’s tape along the second crease from the bottom of the canvas, then add a strip of tape across the canvas right above that. Use the small piece of tape to skip a section again and place the last stripe right above that. Sorry that this video is a bit dark. The sun went down on me!
Repeat on the last canvas.
Paint Those Canvases
Paint the stripes on these last two canvases red. Set them aside to dry.
Once all of the canvases are dry, dry brush a little white over all of the red stripes. Add white paint to your brush then dab most of it off on a scrap paper, then brush it over the red.

Staple Canvases to Form the DIY Farmhouse Flag
Reassemble the Blue Frame
Now it’s time to reassemble the canvases. Start with the blue one so that you get a feel for how it’s done. With that frame you don’t have to worry about lining it up correctly. Turn a frame facedown and place the blue canvas facedown, centered, on top of it. If you have a staple gun, staple the canvas to the wood.

Pull the canvas tight straight across from the staple you just placed and staple that side down.

Pull the canvas tight to one side and staple it down. Repeat on the other side. If you don’t have a staple gun, you can use hot glue to glue the canvas to the frame.

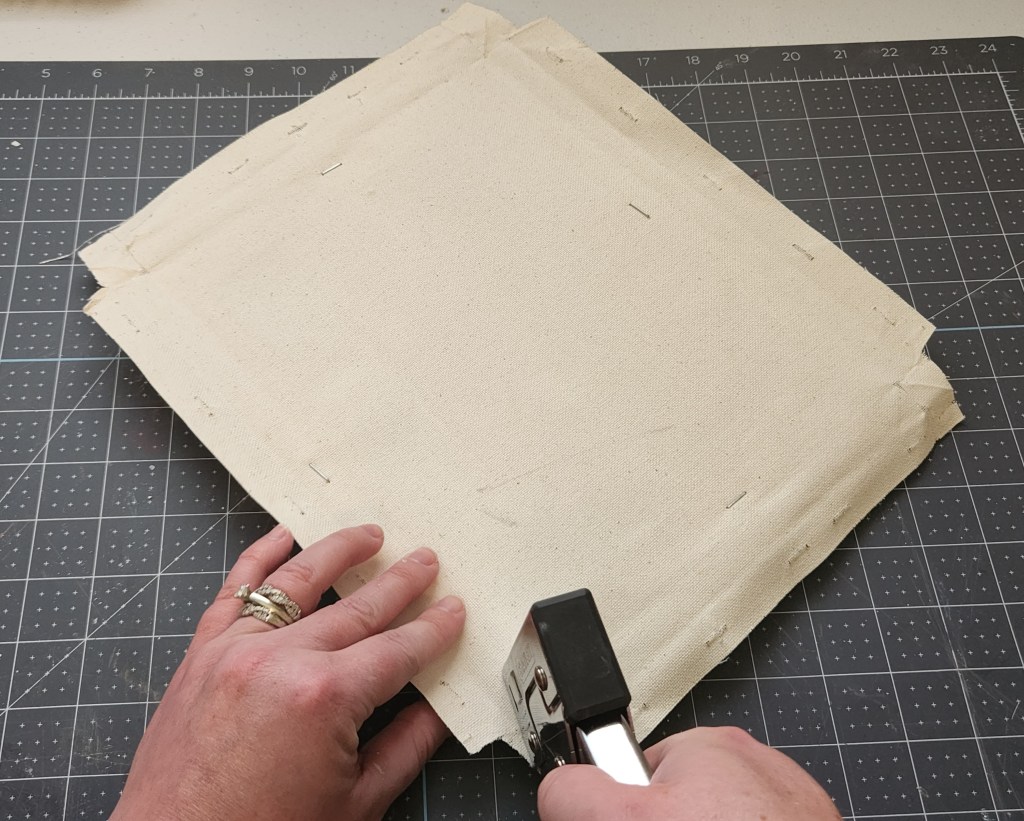
Use a rotary cutter or scissors to cut the excess canvas off of the frame.
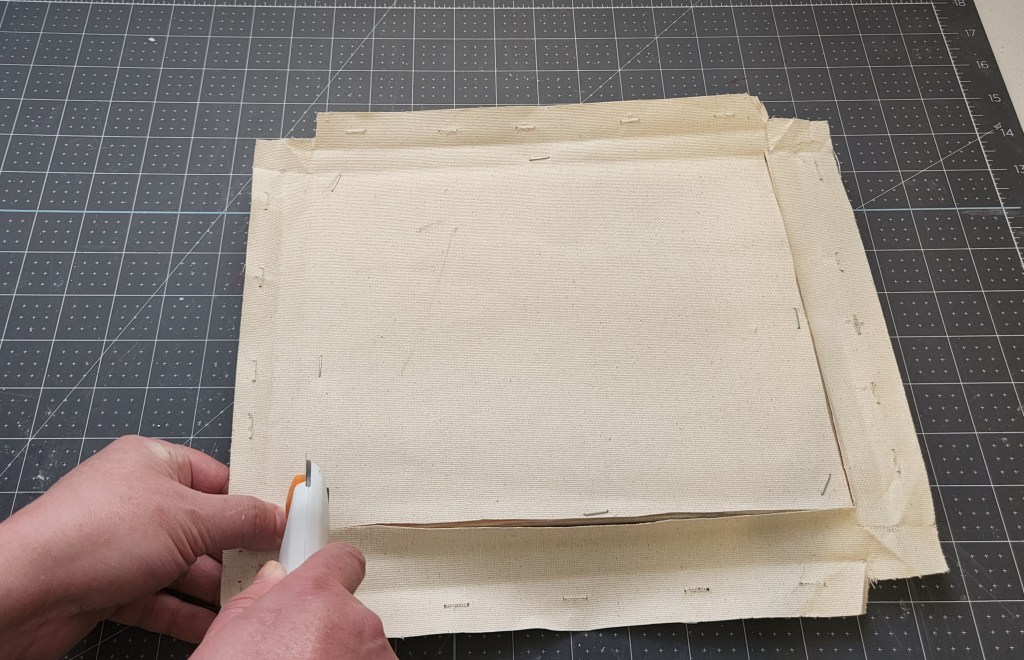


Reassemble the Bottom Three Canvases
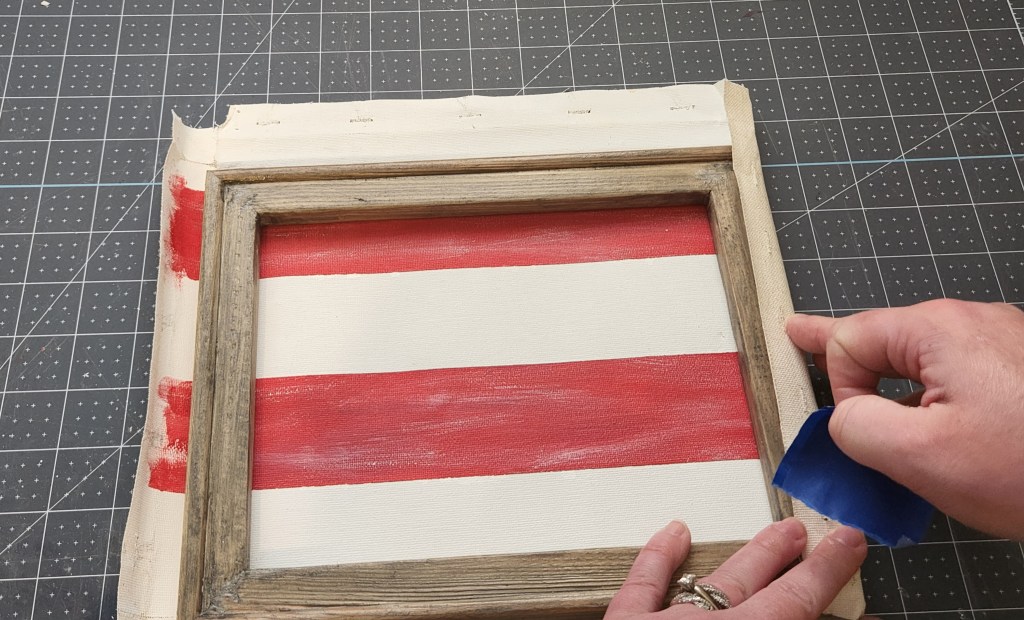
Now that you have a feel for reassembling canvases, you can move on the the bottom section of the flag. I used a grid cutting mat which is extremely handy for this, but if you don’t have one you can use a ruler or straight edge to help. Remove the tape from the canvas and touch up the lines with white paint if need be.

Lay one of the canvases face up on the mat and line it up with one of the horizontal lines. You’ll notice I have this canvas flipped from the way I painted it, meaning the tape along the crease is now at the top (which you see in the picture above). Place a frame on top of the canvas with the bottom of it lined up with the second crease from the bottom edge.

To make sure that the frame is even, you can use a pencil or something straight. Place it under the bottom right side of the frame, extending past the canvas. Make sure that it lines up with the next inch mark on your grid mat. Then place the pencil off the left side and make sure that it too is on that inch mark.

Pull one of the sides over the top of the frame and tape it in place with painter’s tape. Then repeat on the other side. This will keep the canvas in place while you flip it and staple it down.


Carefully flip the frame over and staple the top (or bottom whichever is comfortable) in place. Then pull it tight, straight across, and staple that side down.

Remove the tape from the front and staple each side in place all while keeping the canvas pulled tight.
Cut the excess canvas off just as you did with the blue canvas. Repeat the process with the other two canvases.
Reassemble the Final 2 Canvases of the DIY Farmhouse Flag
Now it’s time to put the last two pieces together. Place your canvas straight along an inch line like you did with the last three. Put the frame down on top of it, lined up with the red stripe along the bottom. I wasn’t sure how many stripes I would need when I painted them, so I had an extra one on the last two canvases. Once it’s lined up, tape the sides in place like before.

Flip the canvas and staple it in place on all sides. Here’s a video of the entire process.

Assemble the DIY Farmhouse Flag
Squeeze E6000 along the bottom of the frame holding the blue canvas. Press it down on top of one of the three frames that are alike.


Glue one of the two frames to another one of the three that have the same three stripes. Glue the last of the three to the last of the two. You know what I mean lol. Finally glue all of those pieces together. Allow it to dry for about an hour.


Once you can safely move the DIY coastal farmhouse flag, flip the entire thing over. Place hot glue and E6000 on large craft sticks and place them along the joints of the frames. That will help hold the whole thing securely together.

Turn the flag back over when it’s dry and hot glue the two starfish onto the blue canvas. I placed them a little staggered.


That’s it! Now you can hang your DIY coastal farmhouse flag in it’s place of honor!
I absolutely love how this coastal flag decor piece turned out. It is absolutely gorgeous and fits right in with my summer coastal decor. I hung it above my couch with white sconces on either side of it. Keep reading to see the other patriotic tutorials shared by my blogger friends. They’ve got amazing ideas that you can make for under $10!
I hope that you make a flag of your own! If you do, I would love for you to take a photo and tag me in it on social media. I love seeing the twists you put on these ideas. Remember to pin the image below or share this post on social media using the buttons at the end of the post or on the left sidebar so that you can get back to the tutorial.

Remember to pin the image below or share this post with the buttons on the left side of the page so you can find it when you’re ready to start your project! Also, follow me on Pinterest for new ideas added weekly! Be sure that you never miss a great tutorial for decor like wreaths, signs and other home decor, free printables, crafts, and other fun posts! Enter your email address below to be notified of new posts! Use the buttons below to follow me on social media for other great content.
There’s plenty more to see here on the blog, so stick around! If you’re looking for something specific, you can use the search box in the sidebar. If you’re looking for more summer and patriotic decor, you might enjoy these posts:


Under $10 on the 10th Blog Hop
I know you can’t wait to see what the other lovely ladies in the hop have cooked up this month! I know I can’t!
Tammy – Patina & Paint (main blog)
Terrie – Decorating & More with Tip (main blog)
Teresa – Through a Vintage Door (main blog)
Corine – Junk to Gems (main blog)
Marsha – The Little Yellow Corner Store (main blog)
Follow me on Pinterest for new ideas added weekly! And don’t forget to link up to our weekly link parties on Sundays and Thursdays. Crafty Creators is open until Monday, so please head over & share your newest blog posts! You can find the newest party each week on my Link Parties page.


Niki, this is such a great craft. It really is perfect for a farmhouse look. Pinned it!
Thank you! Yes! I’ve dubbed it coastal farmhouse lol!
How cute is this? One of my most favorite crafts you’ve done and I am running to the DT to pick up some canvas to make one for myself. LOVE this. Great job Niki!
Thank you! I’m in love with this piece. I’d love to see yours if you make one!
Very creative Niki! I love the starfish stars!
Thank you! I think it’s one of my favorites!
This is so amazing. I love this! Thanks for sharing Niki.
Thank you!
I could easily see this patriotic frame flag on my front porch for any style home, including a log home. I am so glad you gave step by step instructions since it is a project that I would be able to do and follow. It has a bit of rustic charm which I am so attracted to. Thank you for sharing your project.
Thank you! If you make one, I’d love to see it!
This is so cute and it was so cheap to make. Two great qualities in any craft.
Thank you! Yes, it took about 38-22 hours to actually make it, but it’s worth every second. I’m in love with it! I don’t think it would take anyone else just as long since others will have the tutorial and I was flying by the seat of my pants lol. I couldn’t believe how cheap it was to make!
How pretty, I love it!! Thanks so much for linking up at A Themed Linkup 115 for All Things American and Patriotic. Pinned.
It’s still my fav! Thanks!
CONGRATS Niki! Your post is FEATURED at A Themed Linkup 116 for Denim, Burlap, or Lace Crafts and Décor from the previous linkup for All Things American and Patriotic.
Thank you Dee! I’ll stop by to link up again.
Niki, this is so clever! Love it!
Thank you! It was worth the hard work!
I have been wanting to try a canvas removal project. This turned out great Niki, and is so creative.
Thank you Cara!
What a lovely craft, it looks fabulous. Thanks for sharing with us at Handmade Monday 🙂
Thank you!