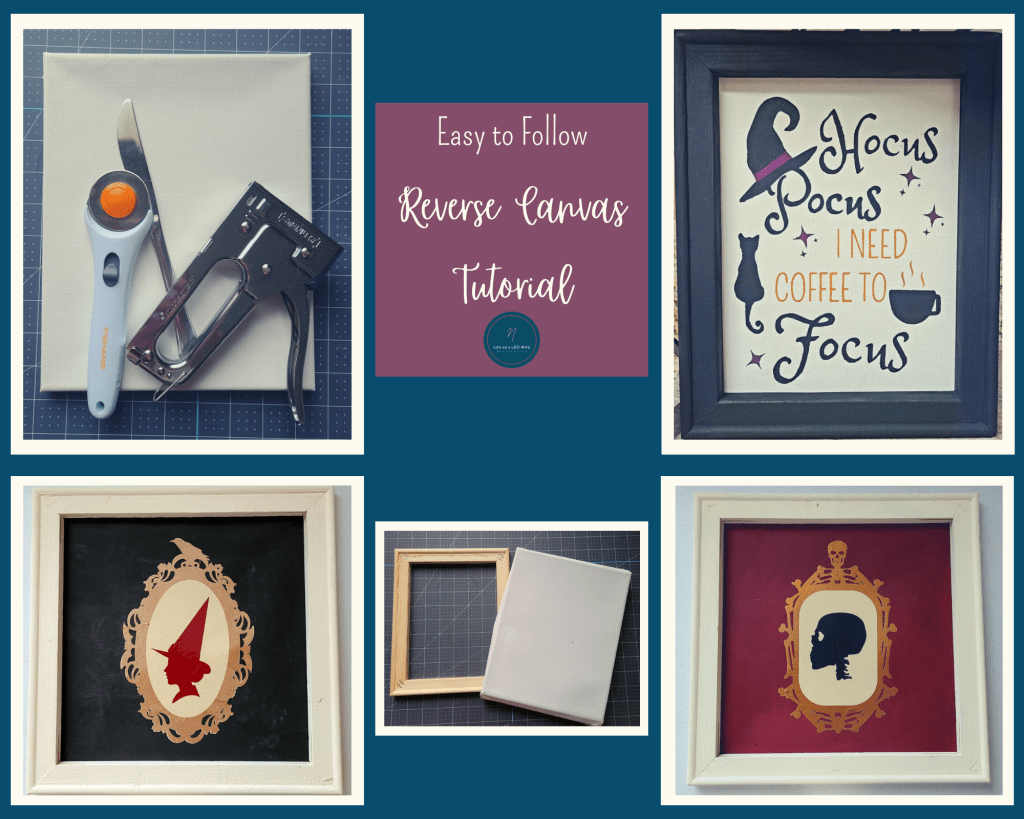
I’ve made plenty of signs for every holiday and season using canvases from different stores. Dollar Tree even has them now! However when you make them and sit them out, they look a little plain or sometimes cheap without being framed. A few years ago I found out that stretched canvases come with their own wooden frame underneath! Today I’m going to show you how to make a beautiful piece of home decor with this reverse canvas tutorial. This post is part of October’s DIY Blog Hop, so stick around after this tutorial to see all of the wonderful projects my co-hostesses have cooked up for you!
To reverse a canvas you need:
- a stretched canvas- For this project I used an 8×10 canvas from Michael’s.
- pliers or something to pry up staples- I used a butter knife and needle-nose pliers at times.
- staple gun and staples
- Spackling- I used lightweight spackle from Dollar Tree. This is optional, but it looks better.
- sandpaper
- craft knife, rotary cutter, or scissors

Remove Staples
Turn the canvas upside down. Use your tool, in my case a butter knife, and begin working each staple up until you can leverage it up and out of the wood. If the staple slips and one side comes free and the other doesn’t, you can use the pliers to pull the stuck side out of the wood. Remove each staple from the wood until the canvas is free.


When all of the staples are removed, take the canvas off of the frame. This is what you will have.

Fill the Holes with Spackle
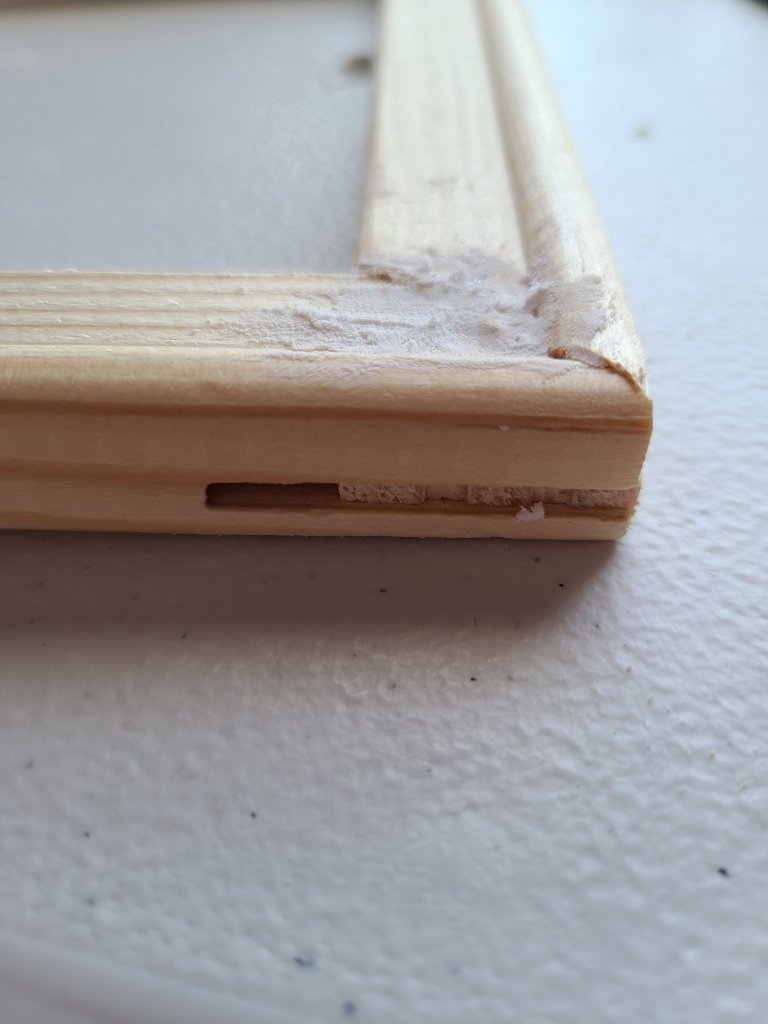
This is optional, but it looks a lot better than leaving open spaces in the frame. If you are using canvases from Michael’s they have large open slats, two on each side on the outside, and one in each corner on the inside. Dollar Tree has lightweight spackle that you can use to fill those holes. Continue filling until you can no longer see the holes. Don’t worry about the excess yet.

If your frame has the staples in the front, turn it over and staple the back where the wood meets each other. Do this just as it is done on the front. Remove the staples from the front, then fill the holes left from the staples with the spackle. Another option is to cover the staples with the spackle. I was in a rush, so I chose that option.
Use sand paper to smooth out the spackle. Sand the wood if it is rough.


Paint or Stain the Wood of the Reverse Canvas Frame
For this project I painted the frame black since it was a Halloween piece. You can use paint, use wood stain, or water down acrylic paint and wipe it on like stain. It’s a cheap version of a stain, and helps out a lot if you only have paint on hand.

Reattach the Canvas
Once the frame is dry you can reattach the canvas to the frame. For this project, I stenciled a Halloween SVG file I created on to the canvas. You can see how to make a vinyl stencil and paint it on without the paint bleeding under in this tutorial. If you like this design, I created a free printable for it as well as a free SVG file that you can get from this post.

Use a staple gun to attach the canvas to the frame. Place it flat on the frame, and add a staple at the top in the middle. Pull it tight around either side of the staple, and place a few more along the top piece of wood. Don’t worry about the extra canvas yet.

Pull the fabric very taunt toward the bottom and staple it to the bottom piece of wood. Next tighten the fabric on each side and staple it down. Make sure you have pulled out any wrinkles in the canvas.

Cut the Extra Fabric
When the canvas is secure on the frame, cut the excess fabric from around it. The best way to do that is with a rotary cutter or a craft knife. If you don’t have either, you can use scissors, but it’s harder to get it even with the wood.
Don’t worry about getting it perfectly even unless you will see the back of the frame when you display it. A good way to hide a messy back is to trace the frame on cardstock, cut it out, then attach it with hot glue to cover the staples and canvas.

Your reverse canvas is ready to display!
If you plan on hanging your wall art, you can use screws to add picture hanging hardware. Usually I don’t have time for all that, so I add a loop made from a piece of pipe cleaner. For this particular sign, I didn’t add anything since it will just sit on a tray on our coffee bar.

Here are a few other reverse canvases I did last Halloween. If you love the gold hoop wreath in the picture, here is the tutorial to make your own!


This month’s blog hop theme was before and after. Take a look at what your reverse canvas will look like before then after!
On to the DIY Blog Hop!
I’m so happy to be joining these lovely ladies for another DIY blog hop! Make sure to stop by their blogs to see their amazing projects and tutorials!
This month’s theme: Before & After

Tarah from Grandma’s House DIY – Deck Staircase Makeover, covering up some ugly with lattice!

Niky from The House on Silverado – DIY Front Door Basket

Lynne from Thrifting Wonderland – Updating the Morning Room…..Before and After

Amy from Health, Home, and Heart – How to Paint Exterior Slate Tile

Allison from Darling and Dapper Life – Ceramic Teapot Refresh
I hope that you enjoyed this tutorial and the tutorials of my blogger friends! Make sure you pin this tutorial so that you can come back to it when you are ready to reverse your canvases. If you have DIY loving friends and family use the buttons at the bottom of the page to share this post on social media! Follow me on social media using the buttons in the sidebar or below to keep up to date with what’s going on here on Life as a LEO Wife. I’d love for you to get to know me and my family on Instagram! To make sure that you don’t miss a post, follow me via email. You’ll get an email when I add a new free printable, tutorial, or other great post and never miss a thing!
Find out as soon as new posts are added!
If you’re one of my blogger friends, don’t forget to share your posts on our three link parties, Happiness is Homemade, You’re the Star Blog Hop, and Traffic Jam Weekend!


Super cool idea! And you make it look so easy with clear instructions. Love your Halloween canvas.
Niky @ The House on Silverado
Thank you Niky!
Such a good idea! I’ve been using these prestretched canvases for years and had no idea they have such a nice frame inside them. I’ll have to try this soon. Thanks for the inspiration!
I did the same thing! Thanks for visiting!
I’ve always wanted to make one of these, love how yours turned out!
Thank you Tarah!