Welcome friends! I’m glad you’re here today because I have a farmhouse style Dollar Tree lantern tutorial that I think you’re going to love! This lantern is all wood, no glass, so you can use it indoors or out without worry. A similar one of this size can cost you upwards of $50, but I’m going to show you how to make your own for about $6. A DIY lantern for under $6 or one for $50? If you’re here my crafty friend, I know your answer, so let’s get started!

If you’re looking for more home decor that’s both beautiful and oh-so-affordable, you must check out my Pottery Barn dupe decorative framed mirror set! The set sells for $180 at Pottery Barn and a similar set for $289.99 at Wayfair, but you can make your own for under $15! The response to this post has been huge. You can click the link and it will open in a new window, so you can continue with this post and pin the other after you’re finished.
Dollar Tree DIY Wood Lantern Supplies:
- 4 8×10 canvases (or the size of your choosing as they will be the base of the DIY lantern)- Here’s a pack of 10 for $2 each, and that will give you extra to make some of my other canvas & reverse canvas projects!
- lightweight spackling to fill holes in wood frames of the canvases
- BBQ skewers
- acrylic or chalk paint in your color choice
- paint brush
- E6000 or Quick Grip– I prefer Quick Grip as it holds very quickly & well! At Walmart both are about the same price.
- hot glue gun & glue
- large popsicle sticks
- large decorative wood plaque- Here’s a pack of 6 in different sizes that can be used in many different projects.
- smaller decorative wood plaque
- 2 mini Jenga blocks
- zip ties (optional)
- scissors and/or a utility knife
- sandpaper- Having a detail sander makes sanding the frames a cinch!
- small piece of cotton rope or a decorative knob

Disclosure: I am a participant in the Amazon Services LLC Associates Program and the Dollar Tree Affiliate Program, affiliate programs that allow me to link to the products that you can use to make this project quickly and easily. If you purchase any of these products I may receive a very small commission at no cost to you! That commission helps me continue to bring these great decor DIYs, free printables, and all of the other goodies on this site to you. Thanks so much for your support!
Shop this project: Get everything you need here!


Remove Canvas from Frame
Wood frames will form the base of the DIY lantern. Use a flathead screwdriver or other tool (I sometimes use a clay sculpting tool) to pry the staples from the back of the canvas. You can use pliers to remove the staples once they are lifted up enough.


Once you have gotten all of the staples out, remove the canvas from the frame. If there are any rough areas (there usually are with DT canvases), use sandpaper to smooth it out.


Repeat with the other three frames.
Paint the Frames
Before you can begin painting, you need to fill the holes and cover the metal “L”‘s that hold the frames together with spackling. I used lightweight spackle from Dollar Tree. This is optional, but it looks so much better if you do. I didn’t get photos of this, but if you need a tutorial, you can check out my full reverse canvas tutorial here.
Once the spackling dries, paint all four frames, front and back. Take eight BBQ skewers out of the pack and paint them as well. Allow them to dry for an hour or two or use a blow dryer to hasten the process. I only used one coat on all of them because I wanted a worn, weathered look.

I used two wood plaques to create a top for my Dollar Tree DIY lantern. They are square with a decorative edge, and one is just a little smaller than the other, so they stack well. I believe I got them from either Dollar Tree or Walmart.

Next, you want to “weather” the frames and plaques by sanding them. I actually sanded every part of my frames, sanding harder in some places.


Pick out two blocks from your mini wood block game (Jenga) set from Dollar Tree. Try to get two that are the same size. Sounds easy, but for some reason DT refuses to make all of the pieces the same size lol! Use E6000 to glue them together widthwise. Once they’re dry, paint then sand them.


Assemble the Base of the Dollar Tree Lantern
Now it’s time to form the base of the lantern. Place some E6000 along the long side of one of the frames. You can add hot glue as well, but I noticed that it didn’t allow my frames to fit snugly together with it on there. Then place another frame on top of the glue. Since these are DT frames, you will need to pick one side to be the top and make sure that all of the frames are flush with that end. One of my frames in particular was quite different in size, so I made the uneven end the bottom.

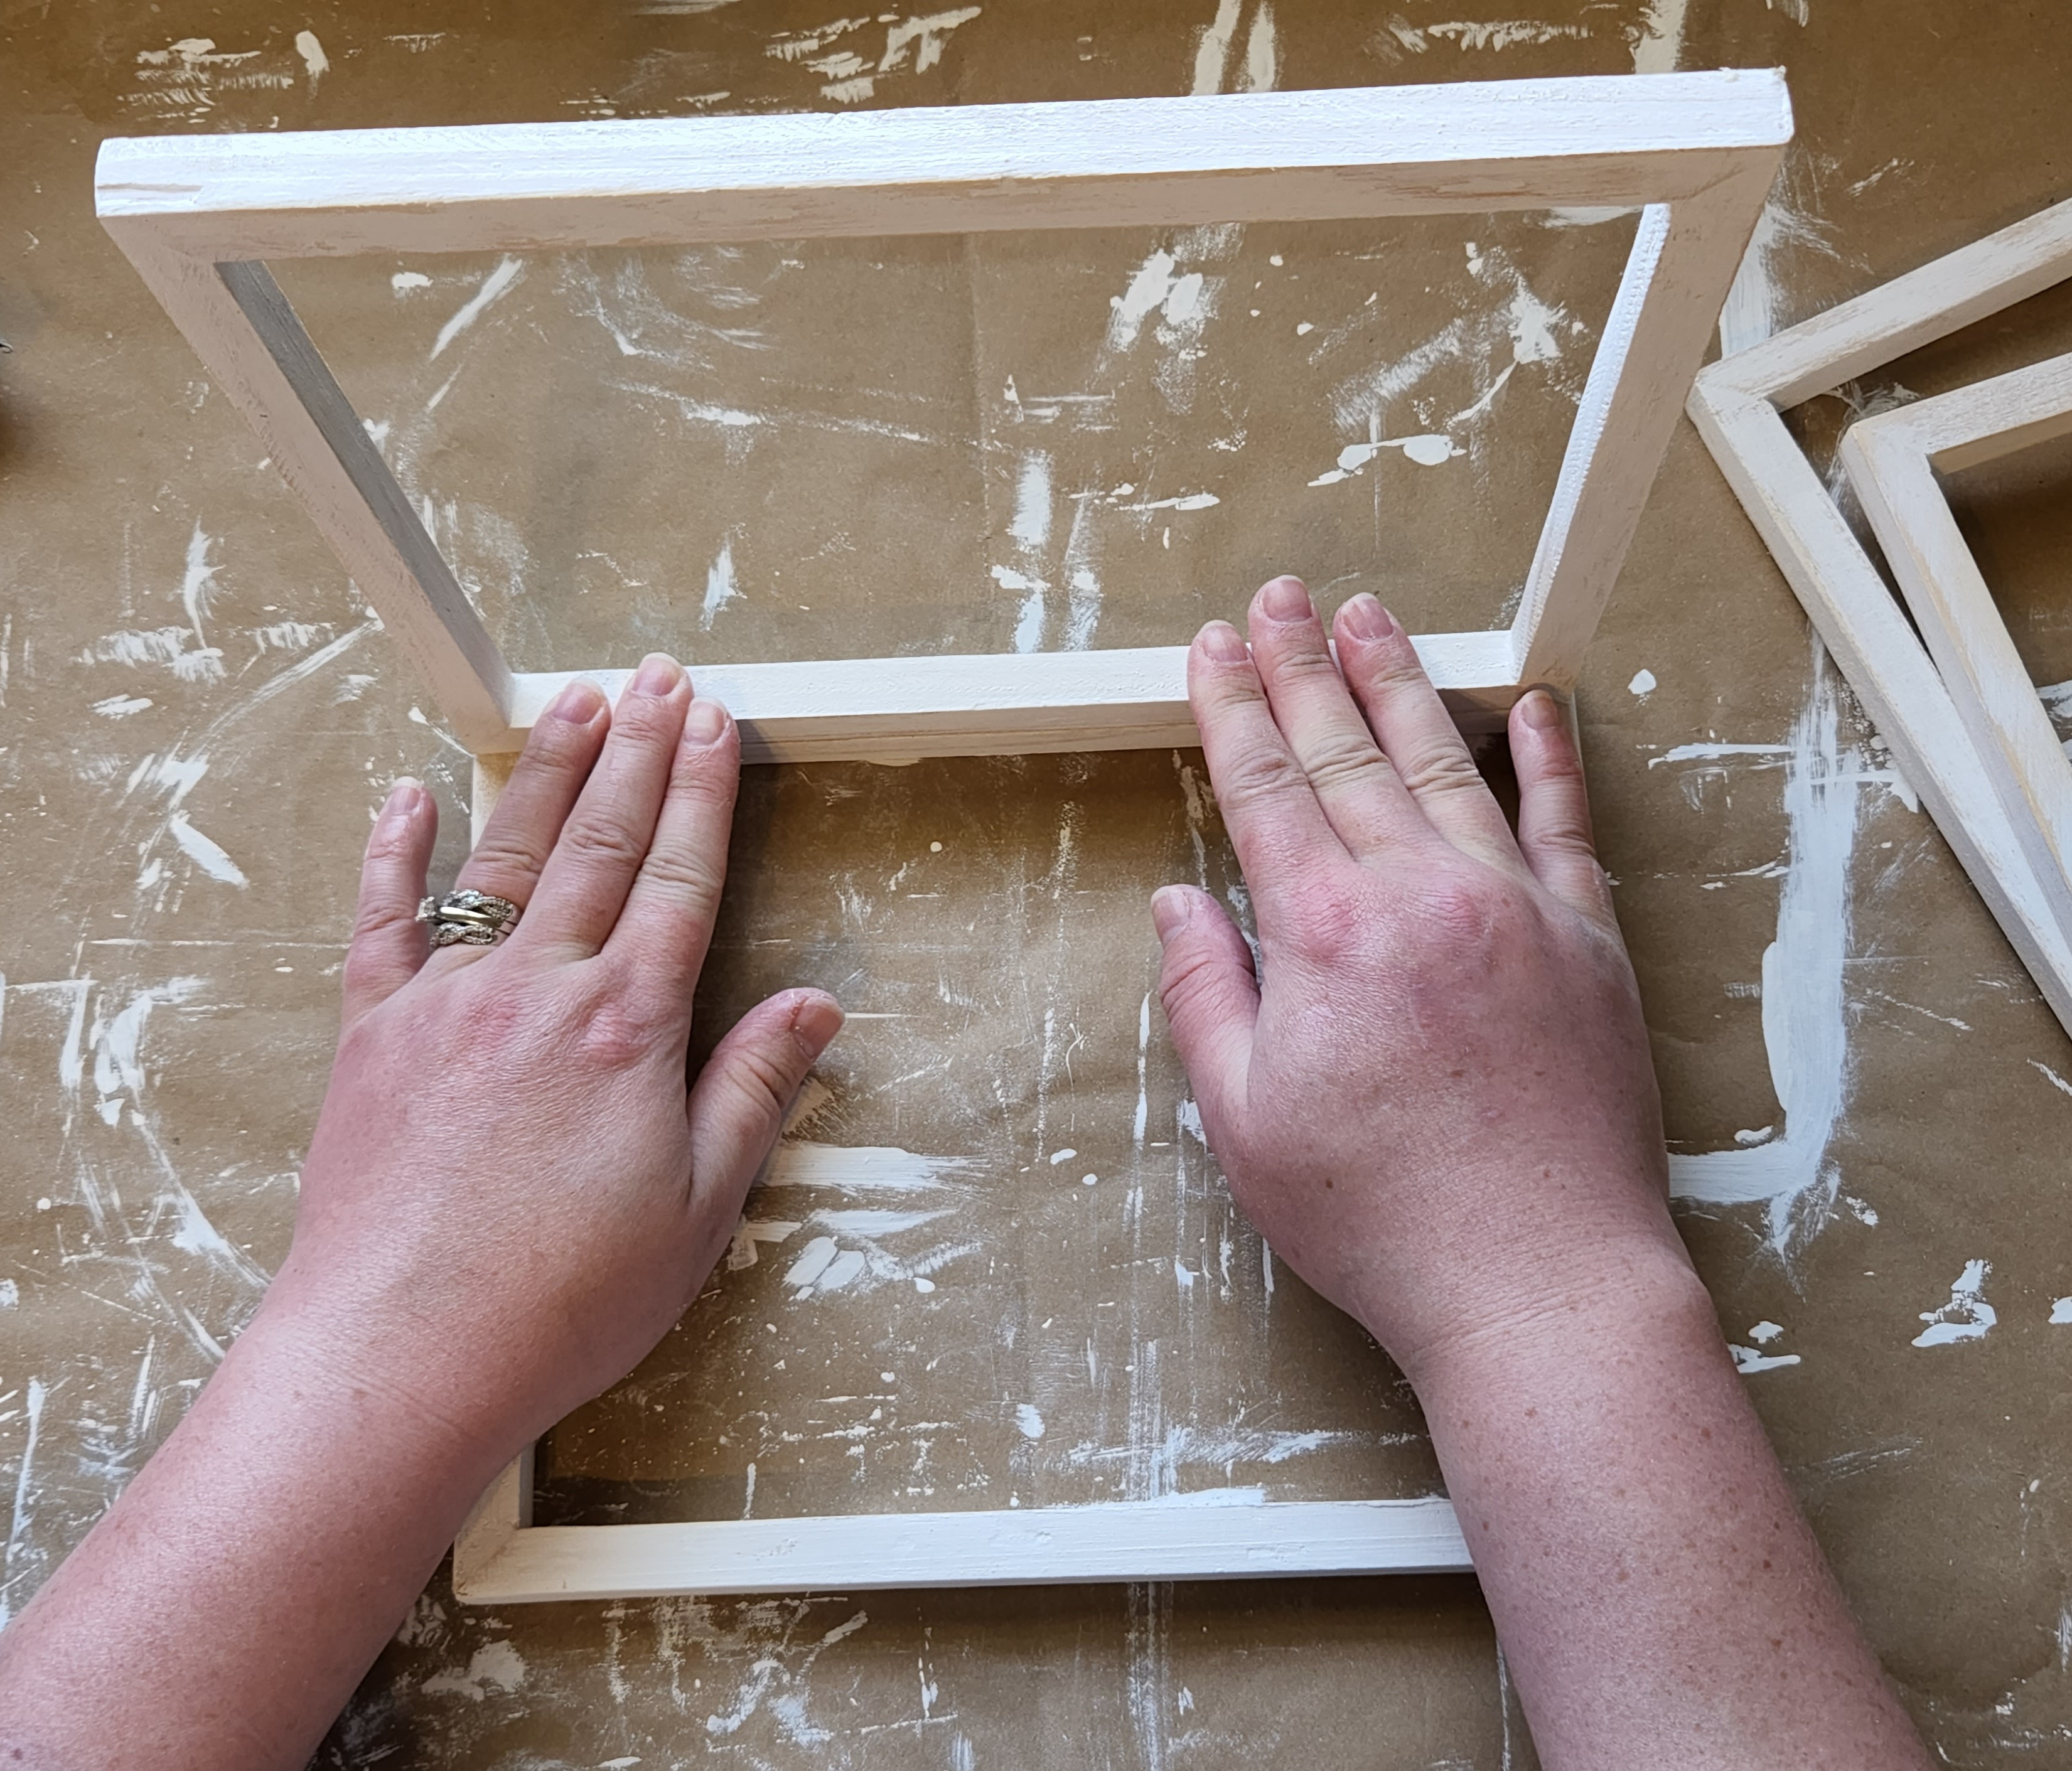
To give the glue time to dry, you can use zip ties to hold the two frames together for a bit. Again, make sure the frames are even on the side you chose to be the top. Wipe off any excess glue that comes out. (As I write this, I see how horribly swollen my hands and arms are. Gross, so I apologize. In the summer my illness jumps to overdrive, so I think my doctor needs to up my Lasix dose. It looks like my arms and hands belong to a 200lb person, not a 120lb person!)

Next, add some glue to the other long side of the first frame and place another frame on top of it. Add zip ties to allow the glue time to dry. I added two per frame, one on each end. If you don’t have any zip ties, pipe cleaners may work. I thought I had run out of zip ties, and I used them on mine, but I didn’t feel like it was tight enough. Eventually I found huge zip ties, so I was able to remove the pipe cleaners and use the ties all around.


Add the Last Frame: Video Instruction
Finally, add the fourth side to the Dollar Tree lantern. Squeeze E6000 on both of the top frames’ edges. Place the final frame on top of the glue, completing the base. Zip tie both sides of the frame to the other ones while the glue dries. I made a video of this part so that if you have trouble just looking at pictures to see how to glue the frames together, hopefully this will fully explain it.
Add X’s to the Dollar Tree Lantern
To add X’s to the DIY lantern, place one of the BBQ skewers diagonally from the top corner of one of the frames to the opposite bottom corner on the same frame to determine how much you need to cut off of the skewer. Cut the skewer to size. This video will show you what I mean.
Add glue to each end of the skewer (work quickly but safely) and press it into the corners diagonally.


Cut another skewer to the proper size, then glue it on the same frame, but to the opposite corners. This will create an “X” across the frame. Add a dot of glue in the middle of the “X” to hold the two skewers together and a dollop on all four corners on top of the skewers to give it extra hold.

Repeat this process on each frame. I created a video to show you the process. So sorry for the camera bumps. I swear I can’t get through a video without doing that!

Create a Top for the Lantern
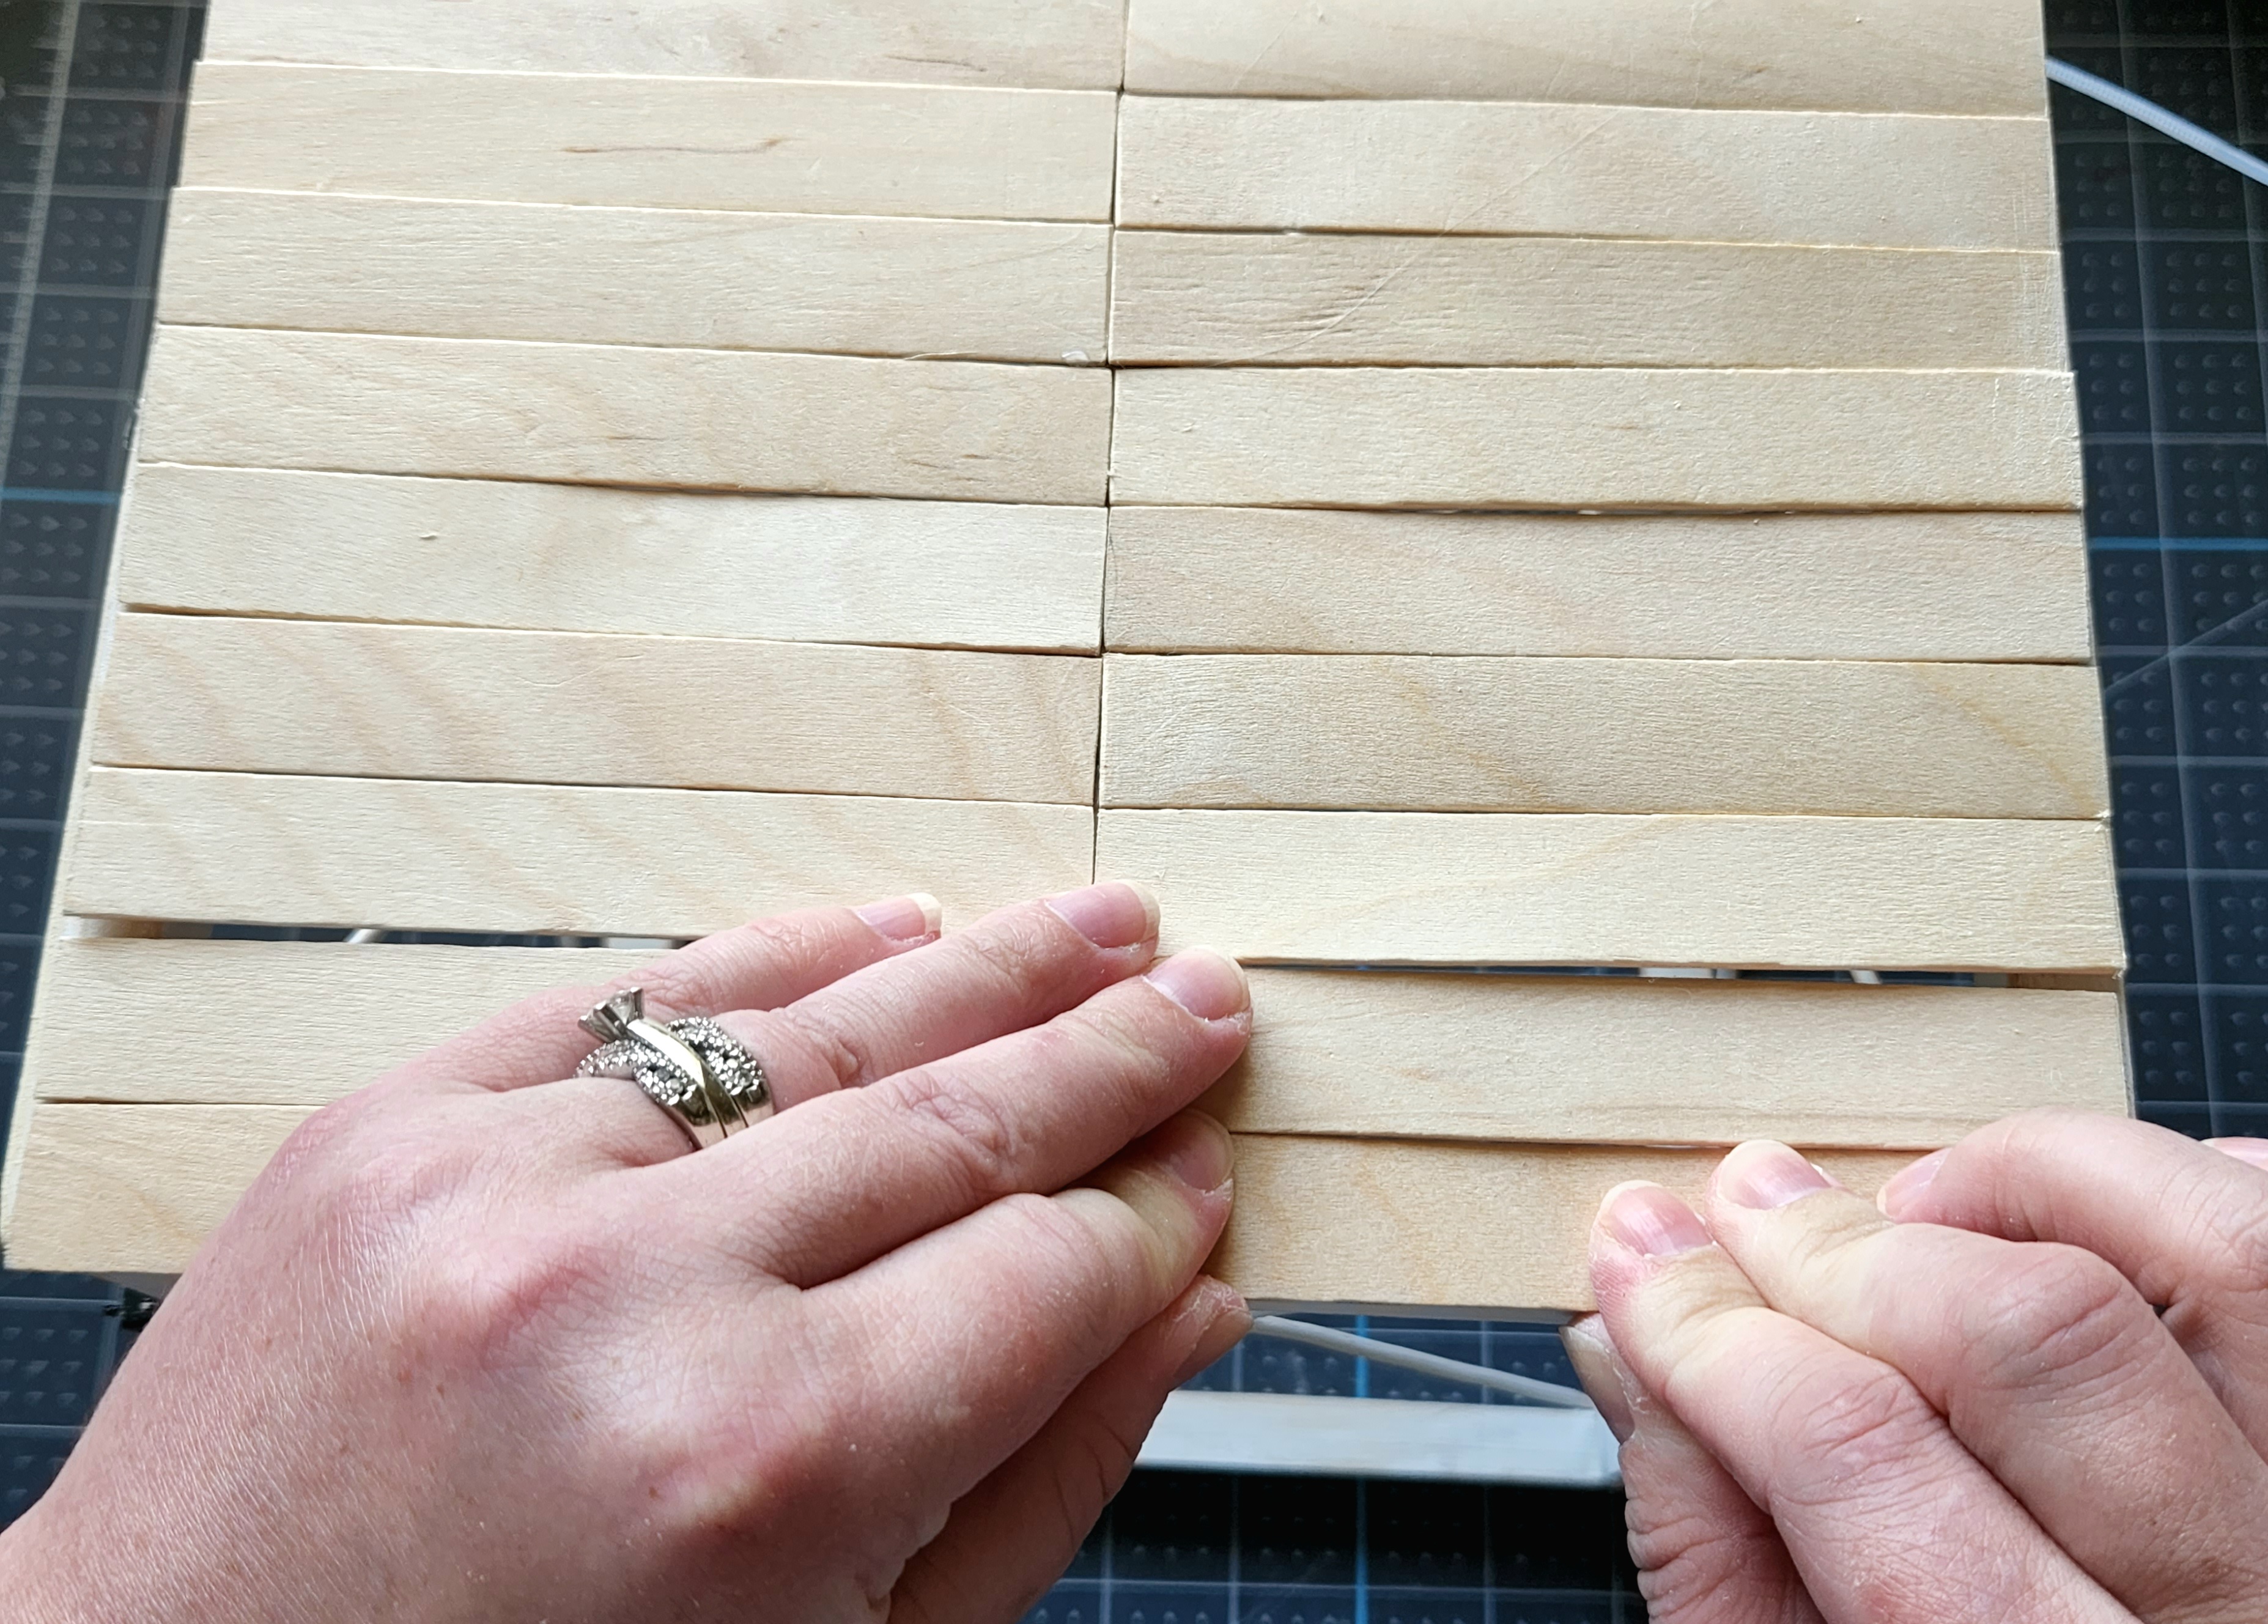
If you have a large piece of wood on-hand, you can use that to make a top for the lantern. Measure, cut it to size, and glue it on top of all four frames. If, like me, you don’t have a big square of wood laying around, you can use large craft sticks to make your own top. The craft sticks from Dollar Tree are rounded at the ends. Your DT may have paint stir sticks, but none of them in my area have them. Those are usually square at both ends, so those would be easier to use than popsicle sticks.
Measure & Cut Sticks
However, craft sticks work well, you just need to take a few extra steps to make it work. Use scissors or a utility knife to cut one of the round ends off. You only need to cut one end, so save your hand strength for the rest of the cutting! No need to wear your hand out more by cutting both ends off.

I needed 24 sticks (and a small piece that you cut off of one of those) to cover my approximately 8×9 top opening. Measure your lantern to determine if you’ll cut your sticks to my same specs.
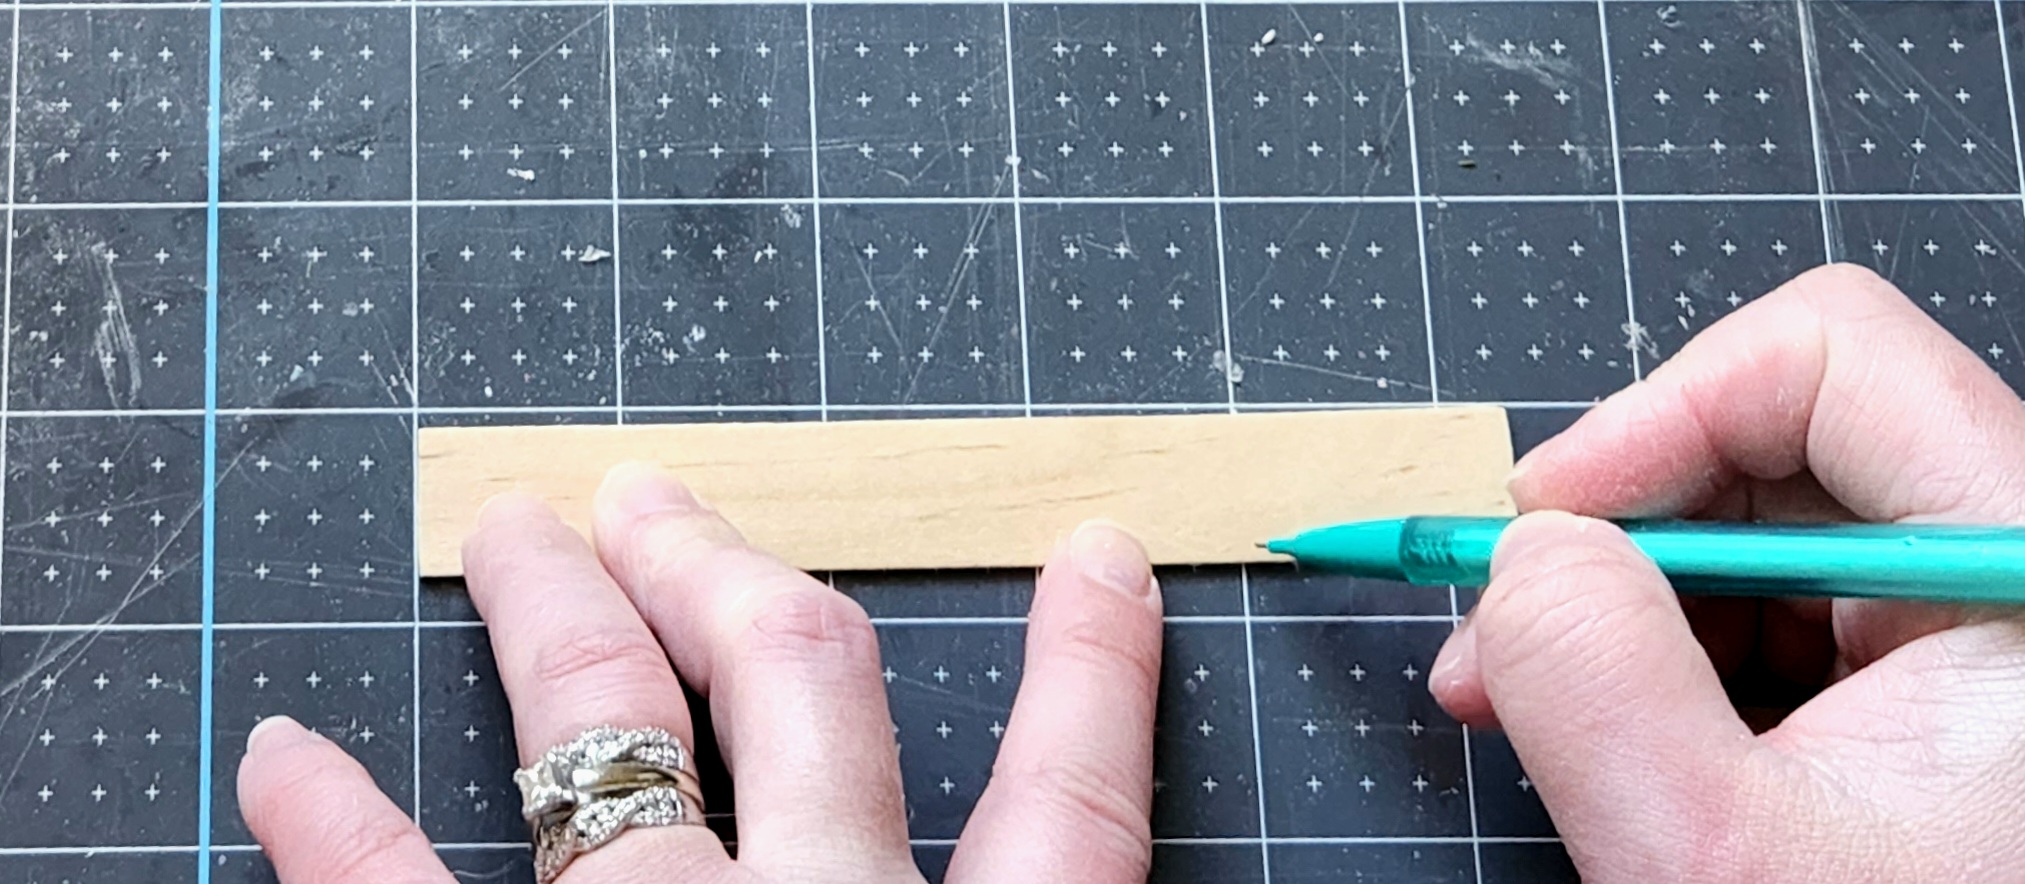
Measure and cut one of the popsicle sticks to 4.5.”
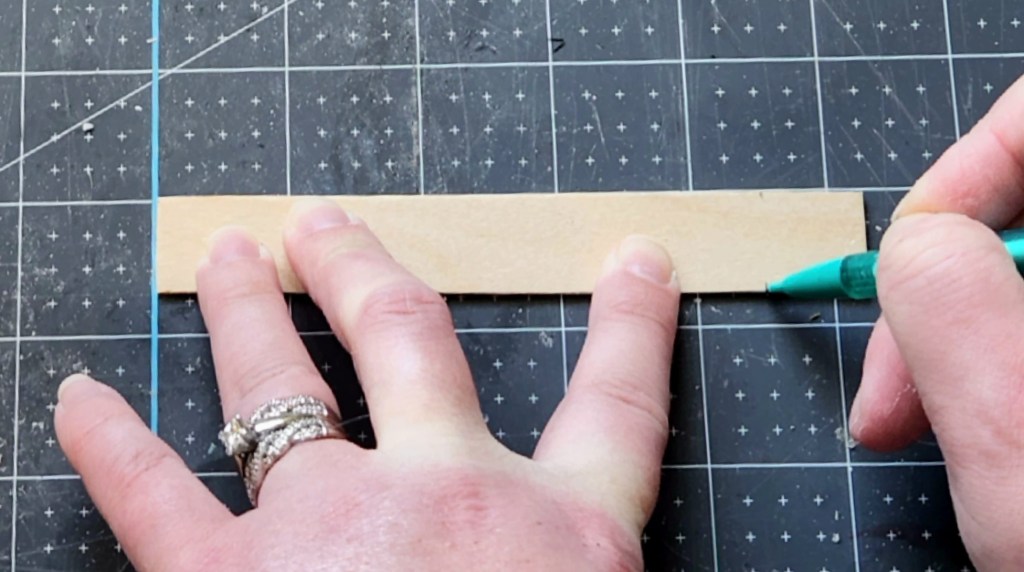
Use that stick as a template to mark 22 of the other craft sticks to the same size.

Cut all 22 along the pencil mark. If you need to, you can use sandpaper to make both ends smooth and even. I had some that looked slightly “un-straight,” lol, so I just sanded it until it was even. It only took a swipe or two.

Creating a Brace Bar
You need to create a long stick (can’t think of a better word for it) that runs down the middle of the lantern, where all of the other pieces meet. Measure and cut the last two craft sticks down to 4.” I created two even sides because one craft stick would not reach from one side of the lantern to the other. It would look off to cut both round ends off of the popsicle stick and have a 6″ piece and another 2″ piece, which would get it to the other side. Two even halves look best.


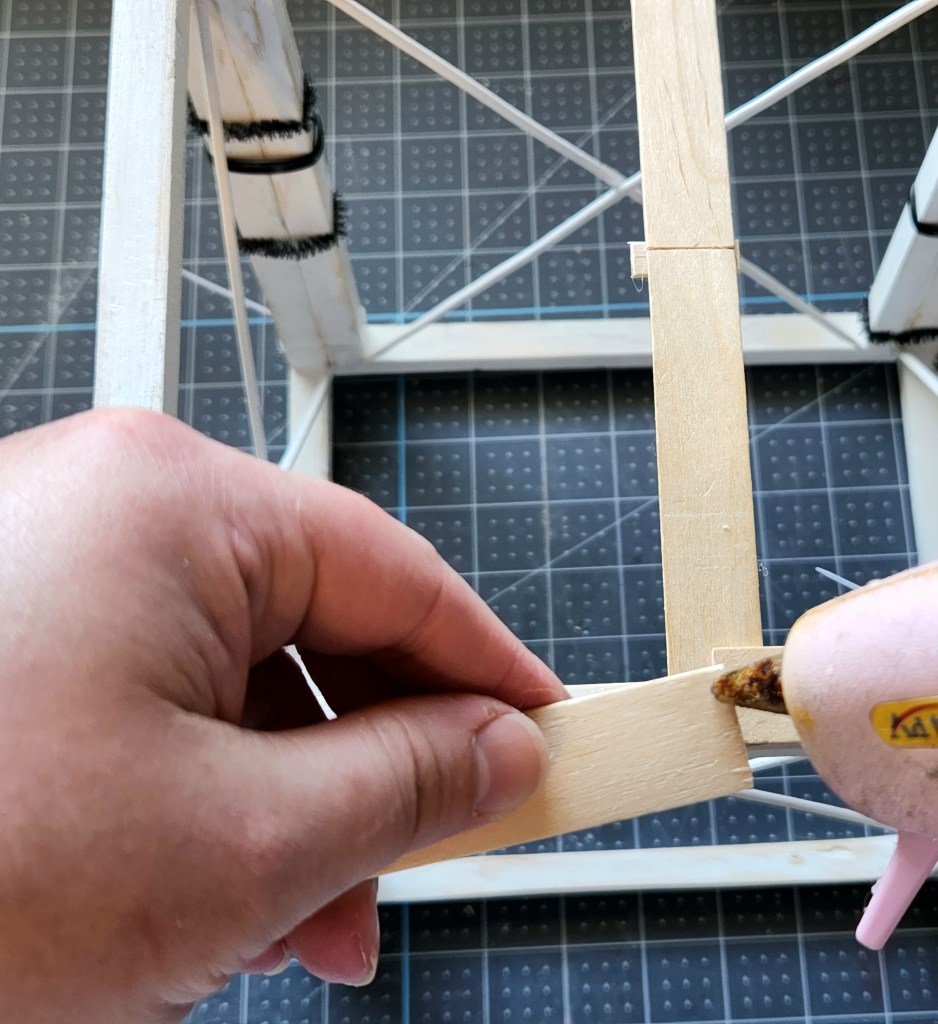
Use an inch of one of the sticks that you have left over after cutting them to 4.” I used a piece that wasn’t quite an inch, so if you don’t have a full 1″, that’s ok as long as you’re able to work with it. Add some hot glue to the end of one of the 4″ craft sticks and place it in the middle of the 1″ piece. In the picture on the right it looks like I’m placing it at an angle on the 1″ wood, but I straightened it out before the glue dried.


Squeeze a line of hot glue on the end of the other 4″ popsicle stick and place it on the other side of the 1″ piece, right up against the first one.


Glue the “Top” of the Dollar Tree Lantern Together
Place your brace bar down the center of the lantern. Add hot glue to the end of a 4.5″ craft stick and place it along the edge of the lantern with the glue landing in the middle of the bar used as the brace.
Put another strip of glue on the end of a second popsicle stick and place it on the other side of the brace bar. Now the entire top edge of one of the frames will be covered by these first two craft sticks.


After adding the first row of sticks, I decided to remove the brace bar from the top of the lantern and glue the pieces on to it while on my desk. I’m not sure that was the best idea since I ended up having to sand down some areas so that it didn’t hang over the edge. I think it would’ve been the same either way since DT wood frames and sticks aren’t always uniformly straight or wide. You can do it either way: assemble it on top of the lantern, or off of it and glue it down later. Continue gluing on the 4″ popsicle sticks until you have all 22 on the brace bar.

Next glue the edges of the top that you just created onto the tops of the wood frames. I went around the edges and glued and pressed down any loose sticks. If it’s slightly uneven in some areas, that’s ok. It gives it character! However, once I was finished gluing, just about all of my sticks were pretty flat.

Paint the Craft Stick Top
Once all of the sticks are glued down, you can paint it. Allow it to dry, then sand some areas to weather it just like you did with the frames.

Attach the Wood Plaques
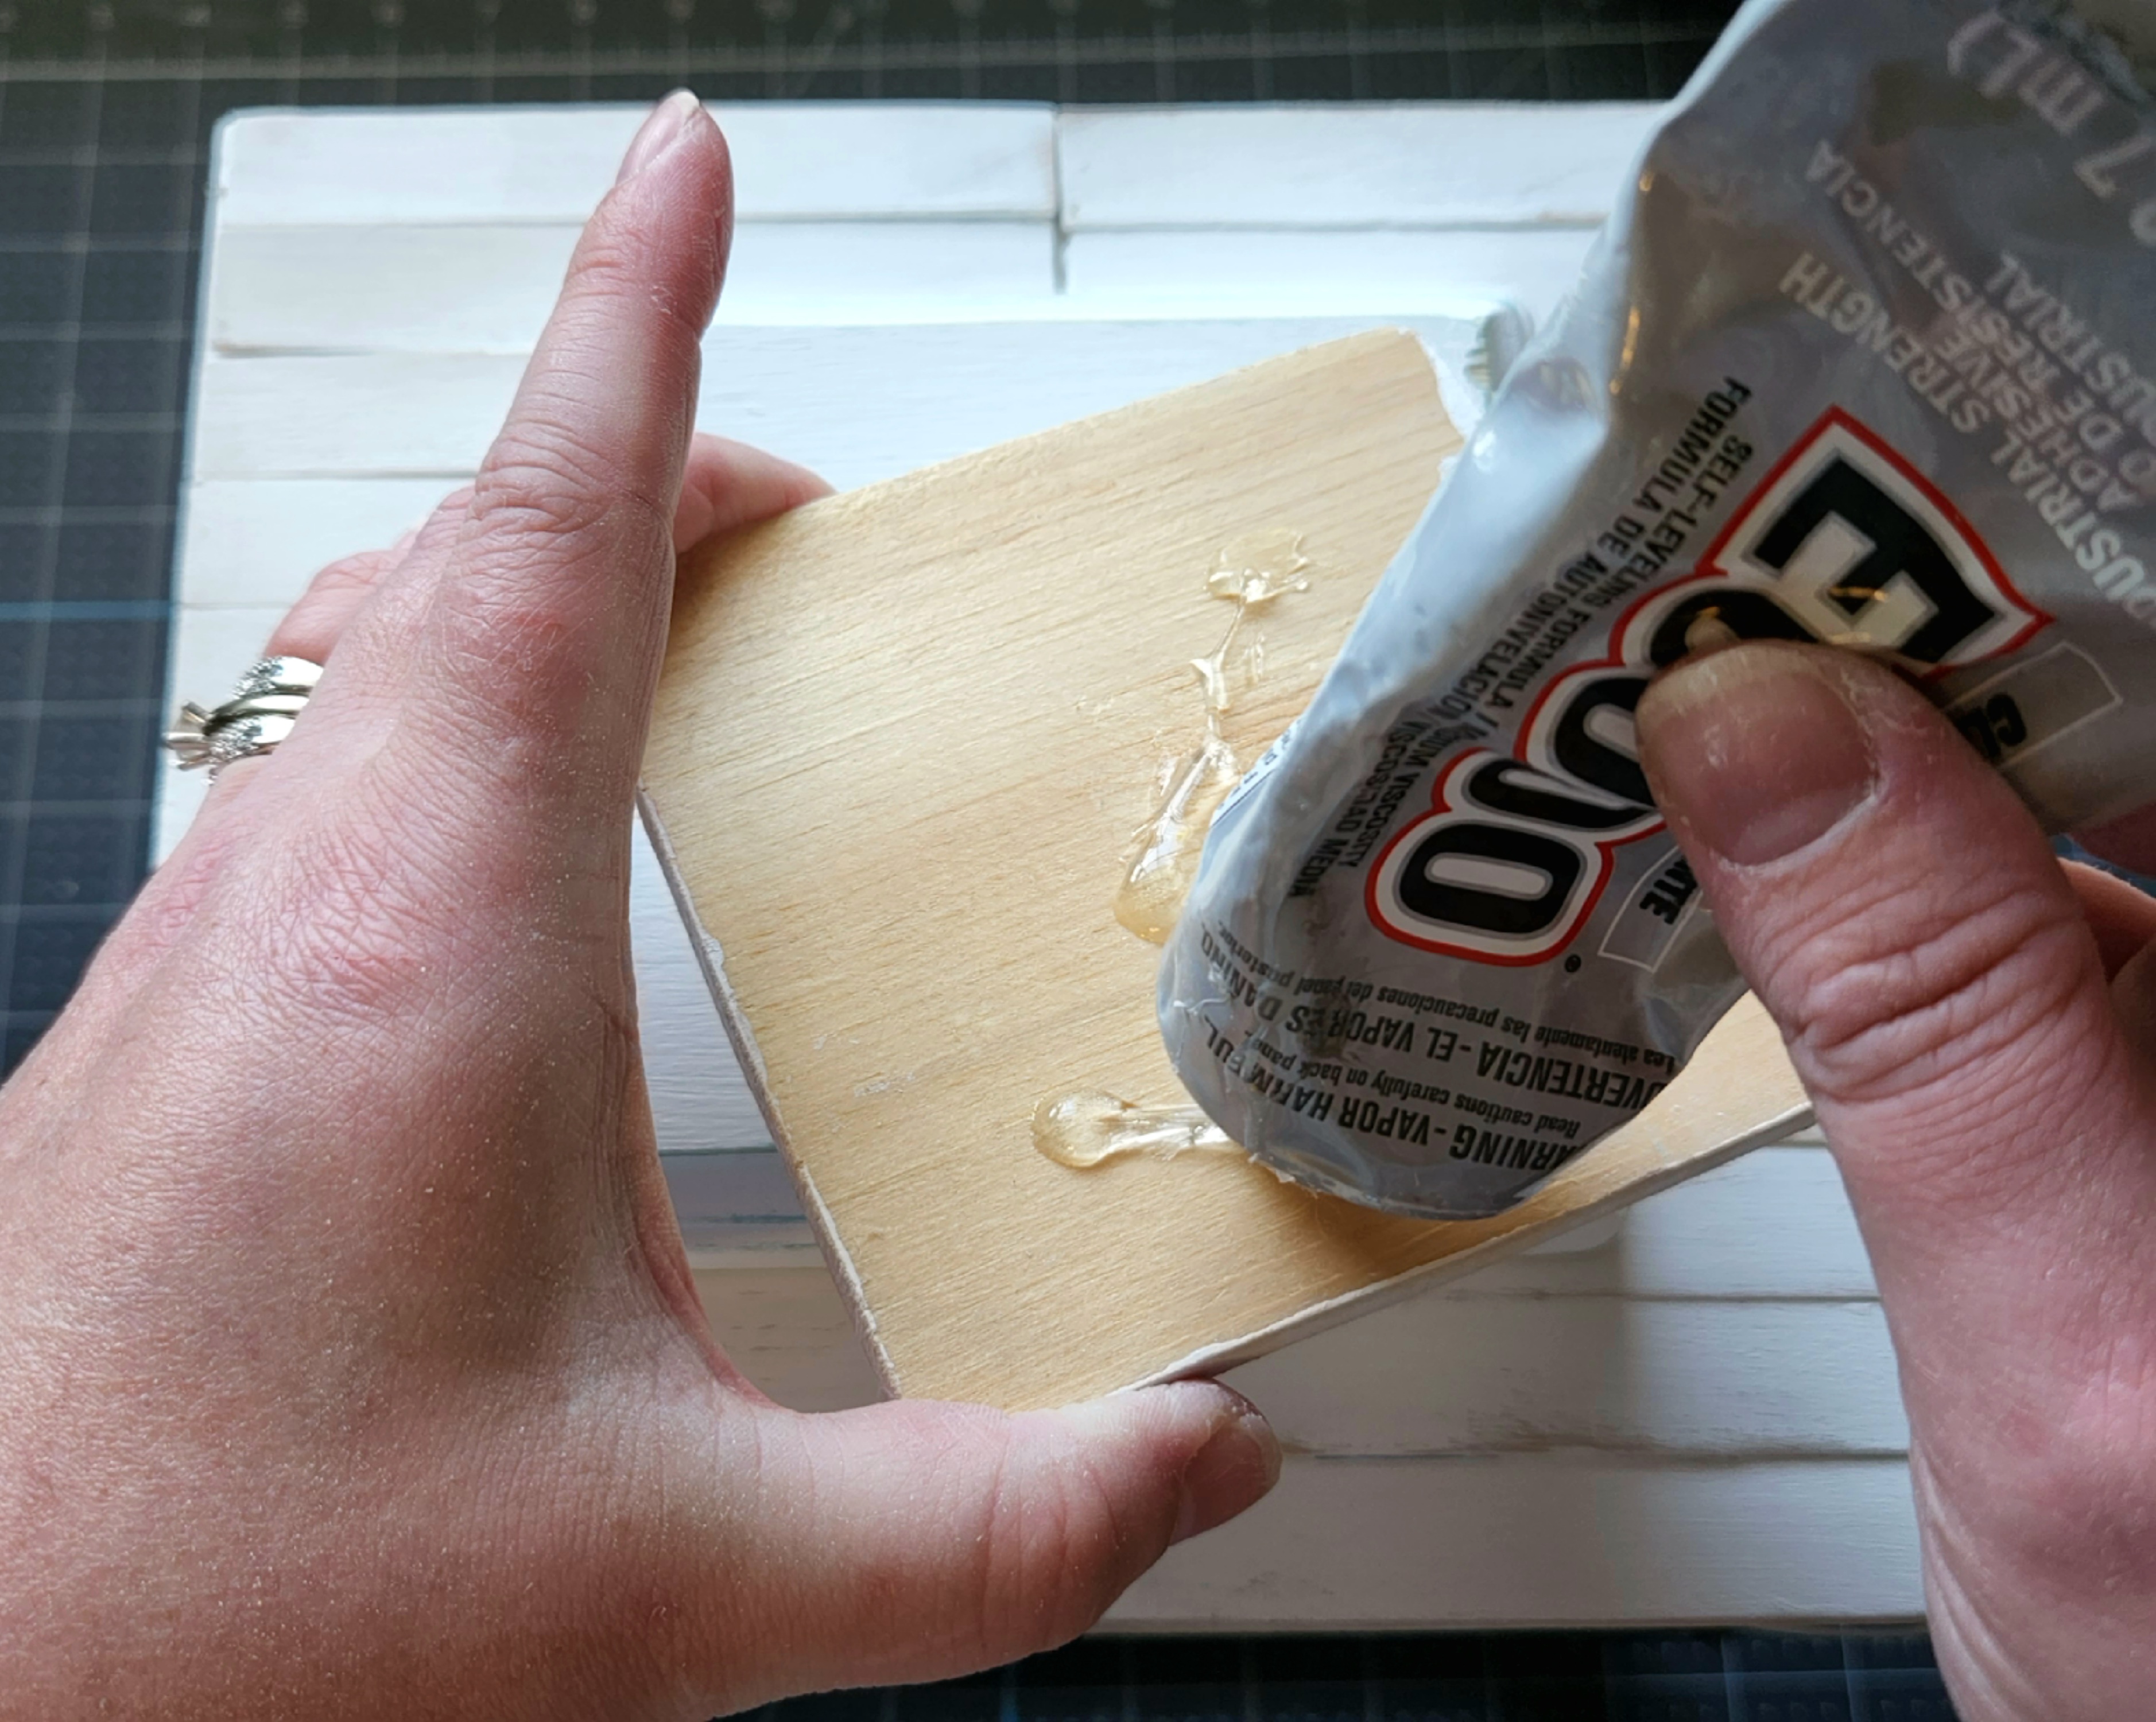
Squeeze E6000 and hot glue on the largest wood plaque, then place it on the top center of the lantern.


Repeat the process with the smaller plaque and center it on the large one.

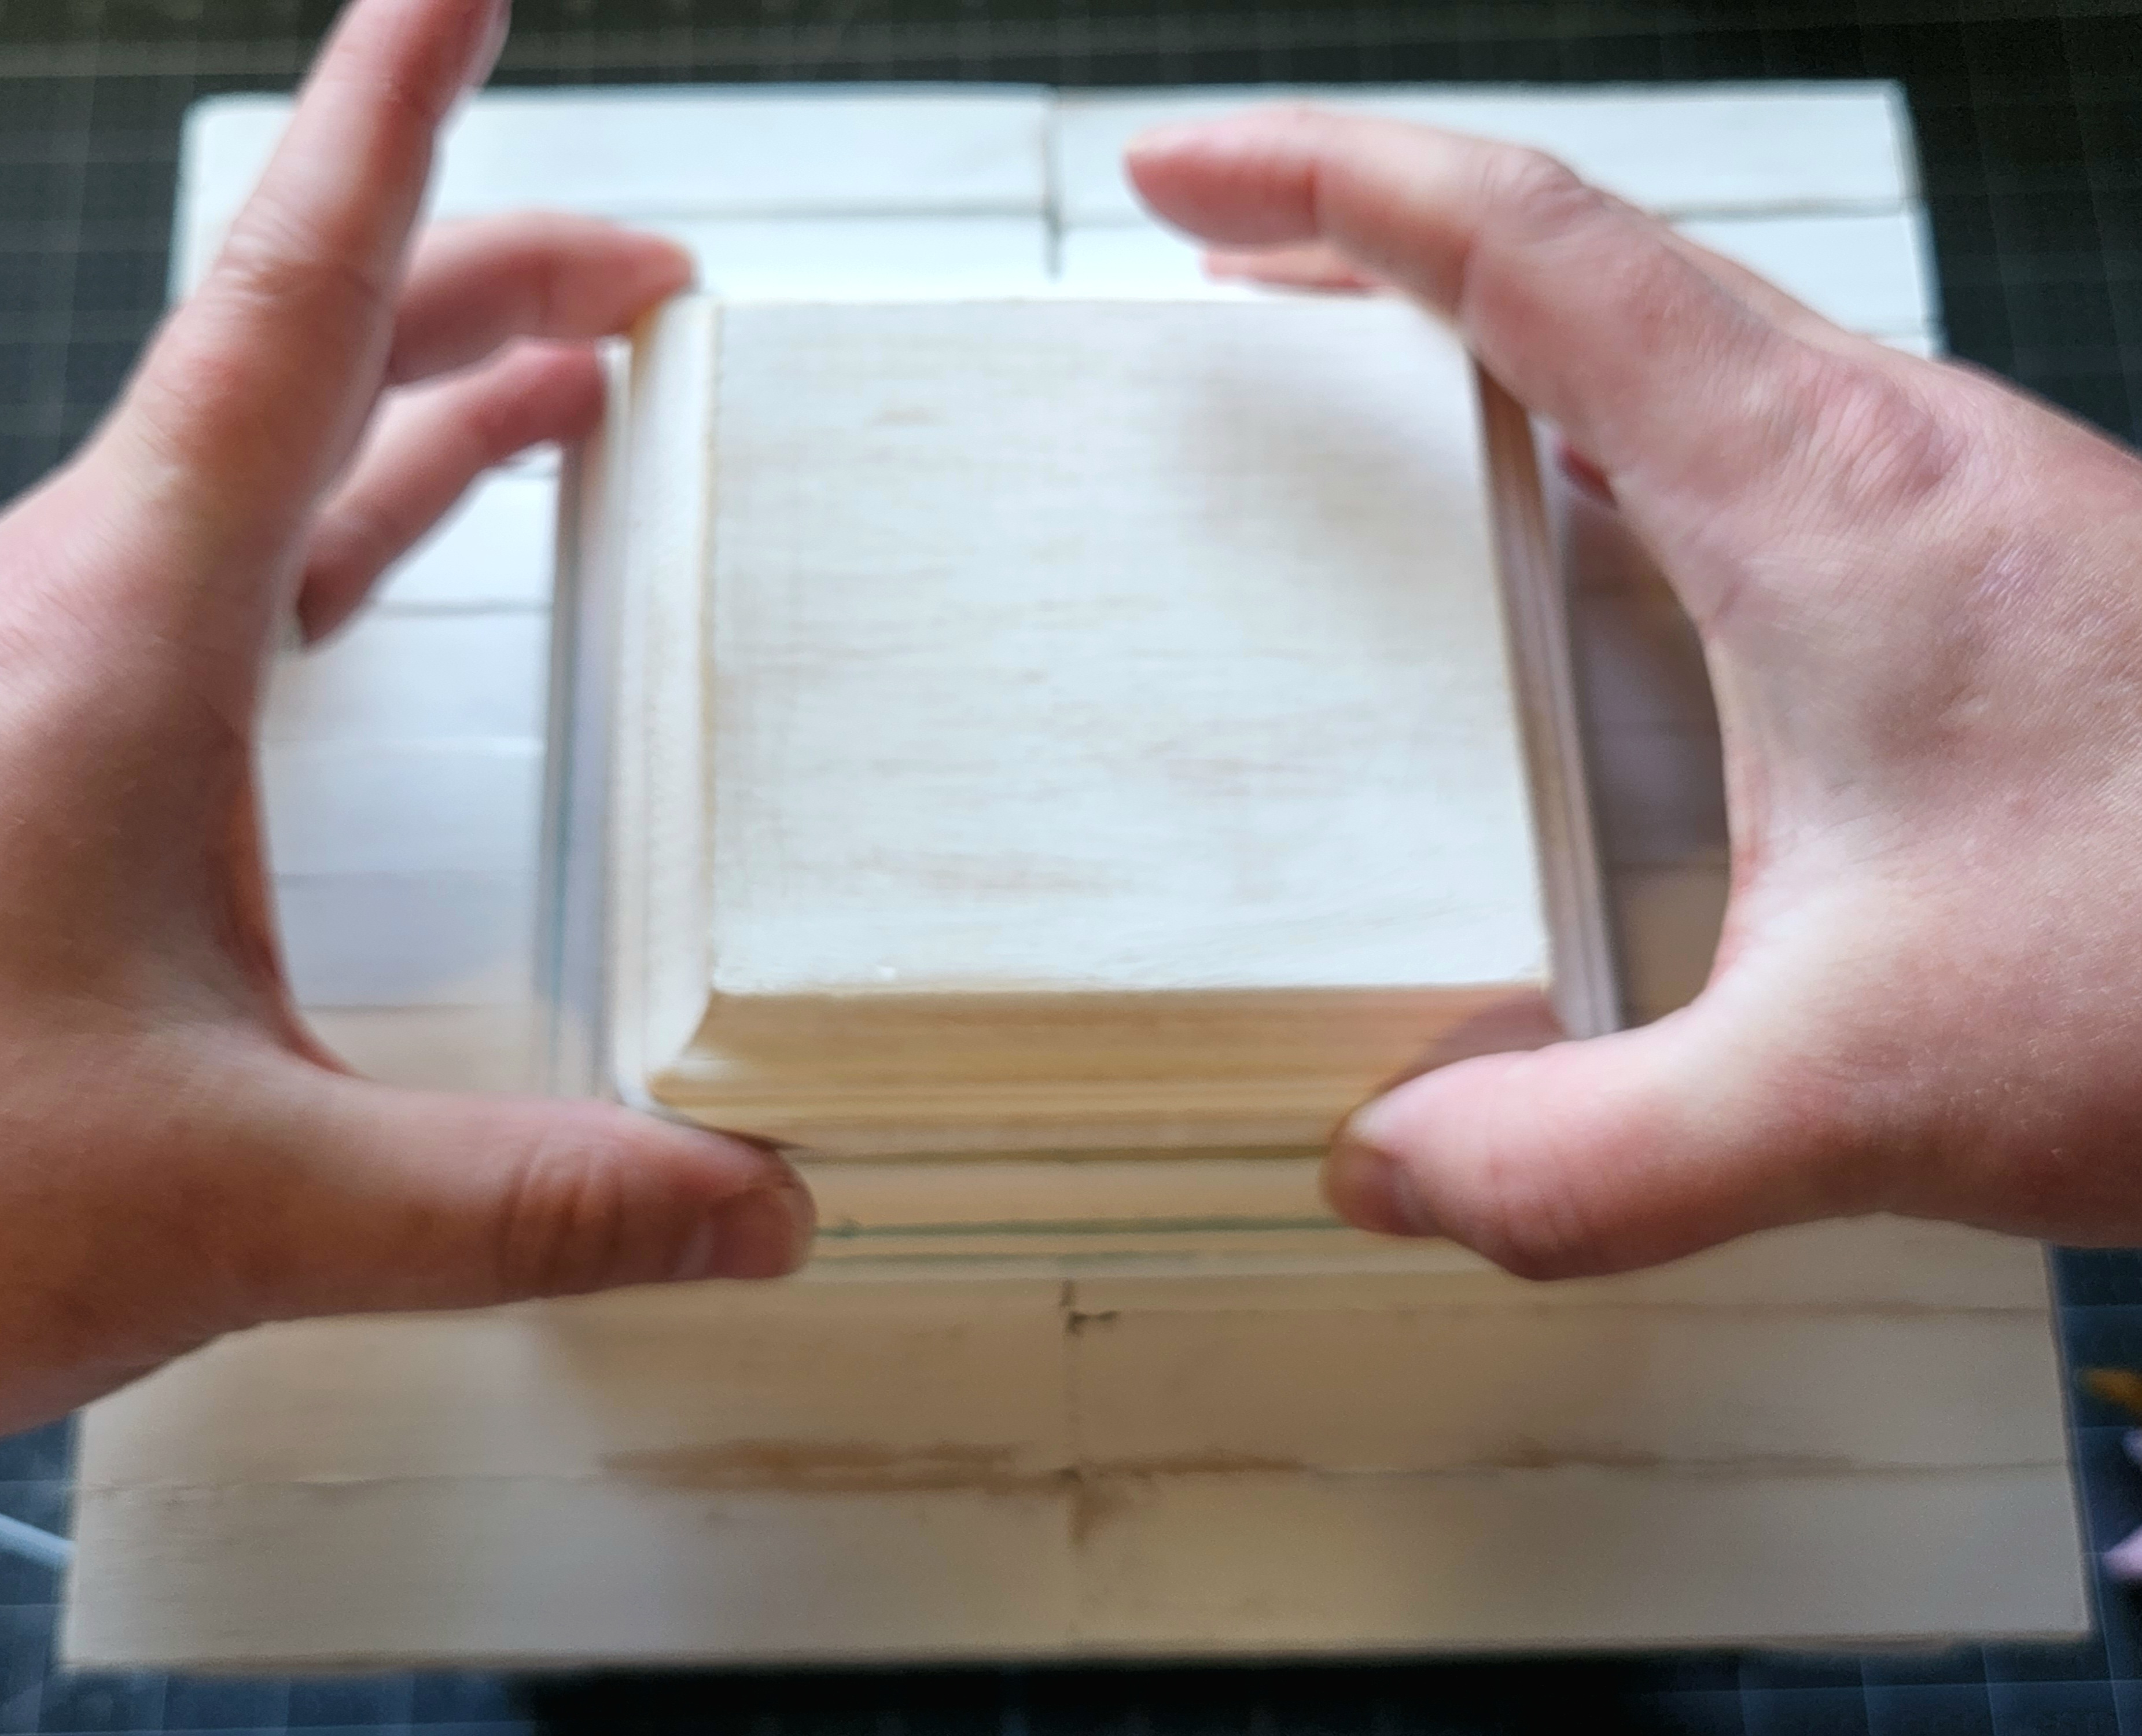
Next, add glue and center the two Jenga blocks that you glued together earlier on top of the small wood plaque. If I had to do this over again, I would’ve turned the blocks so that the middle of them (where they were glued together) lined up with the middle of the craft sticks, where they all met in the center.

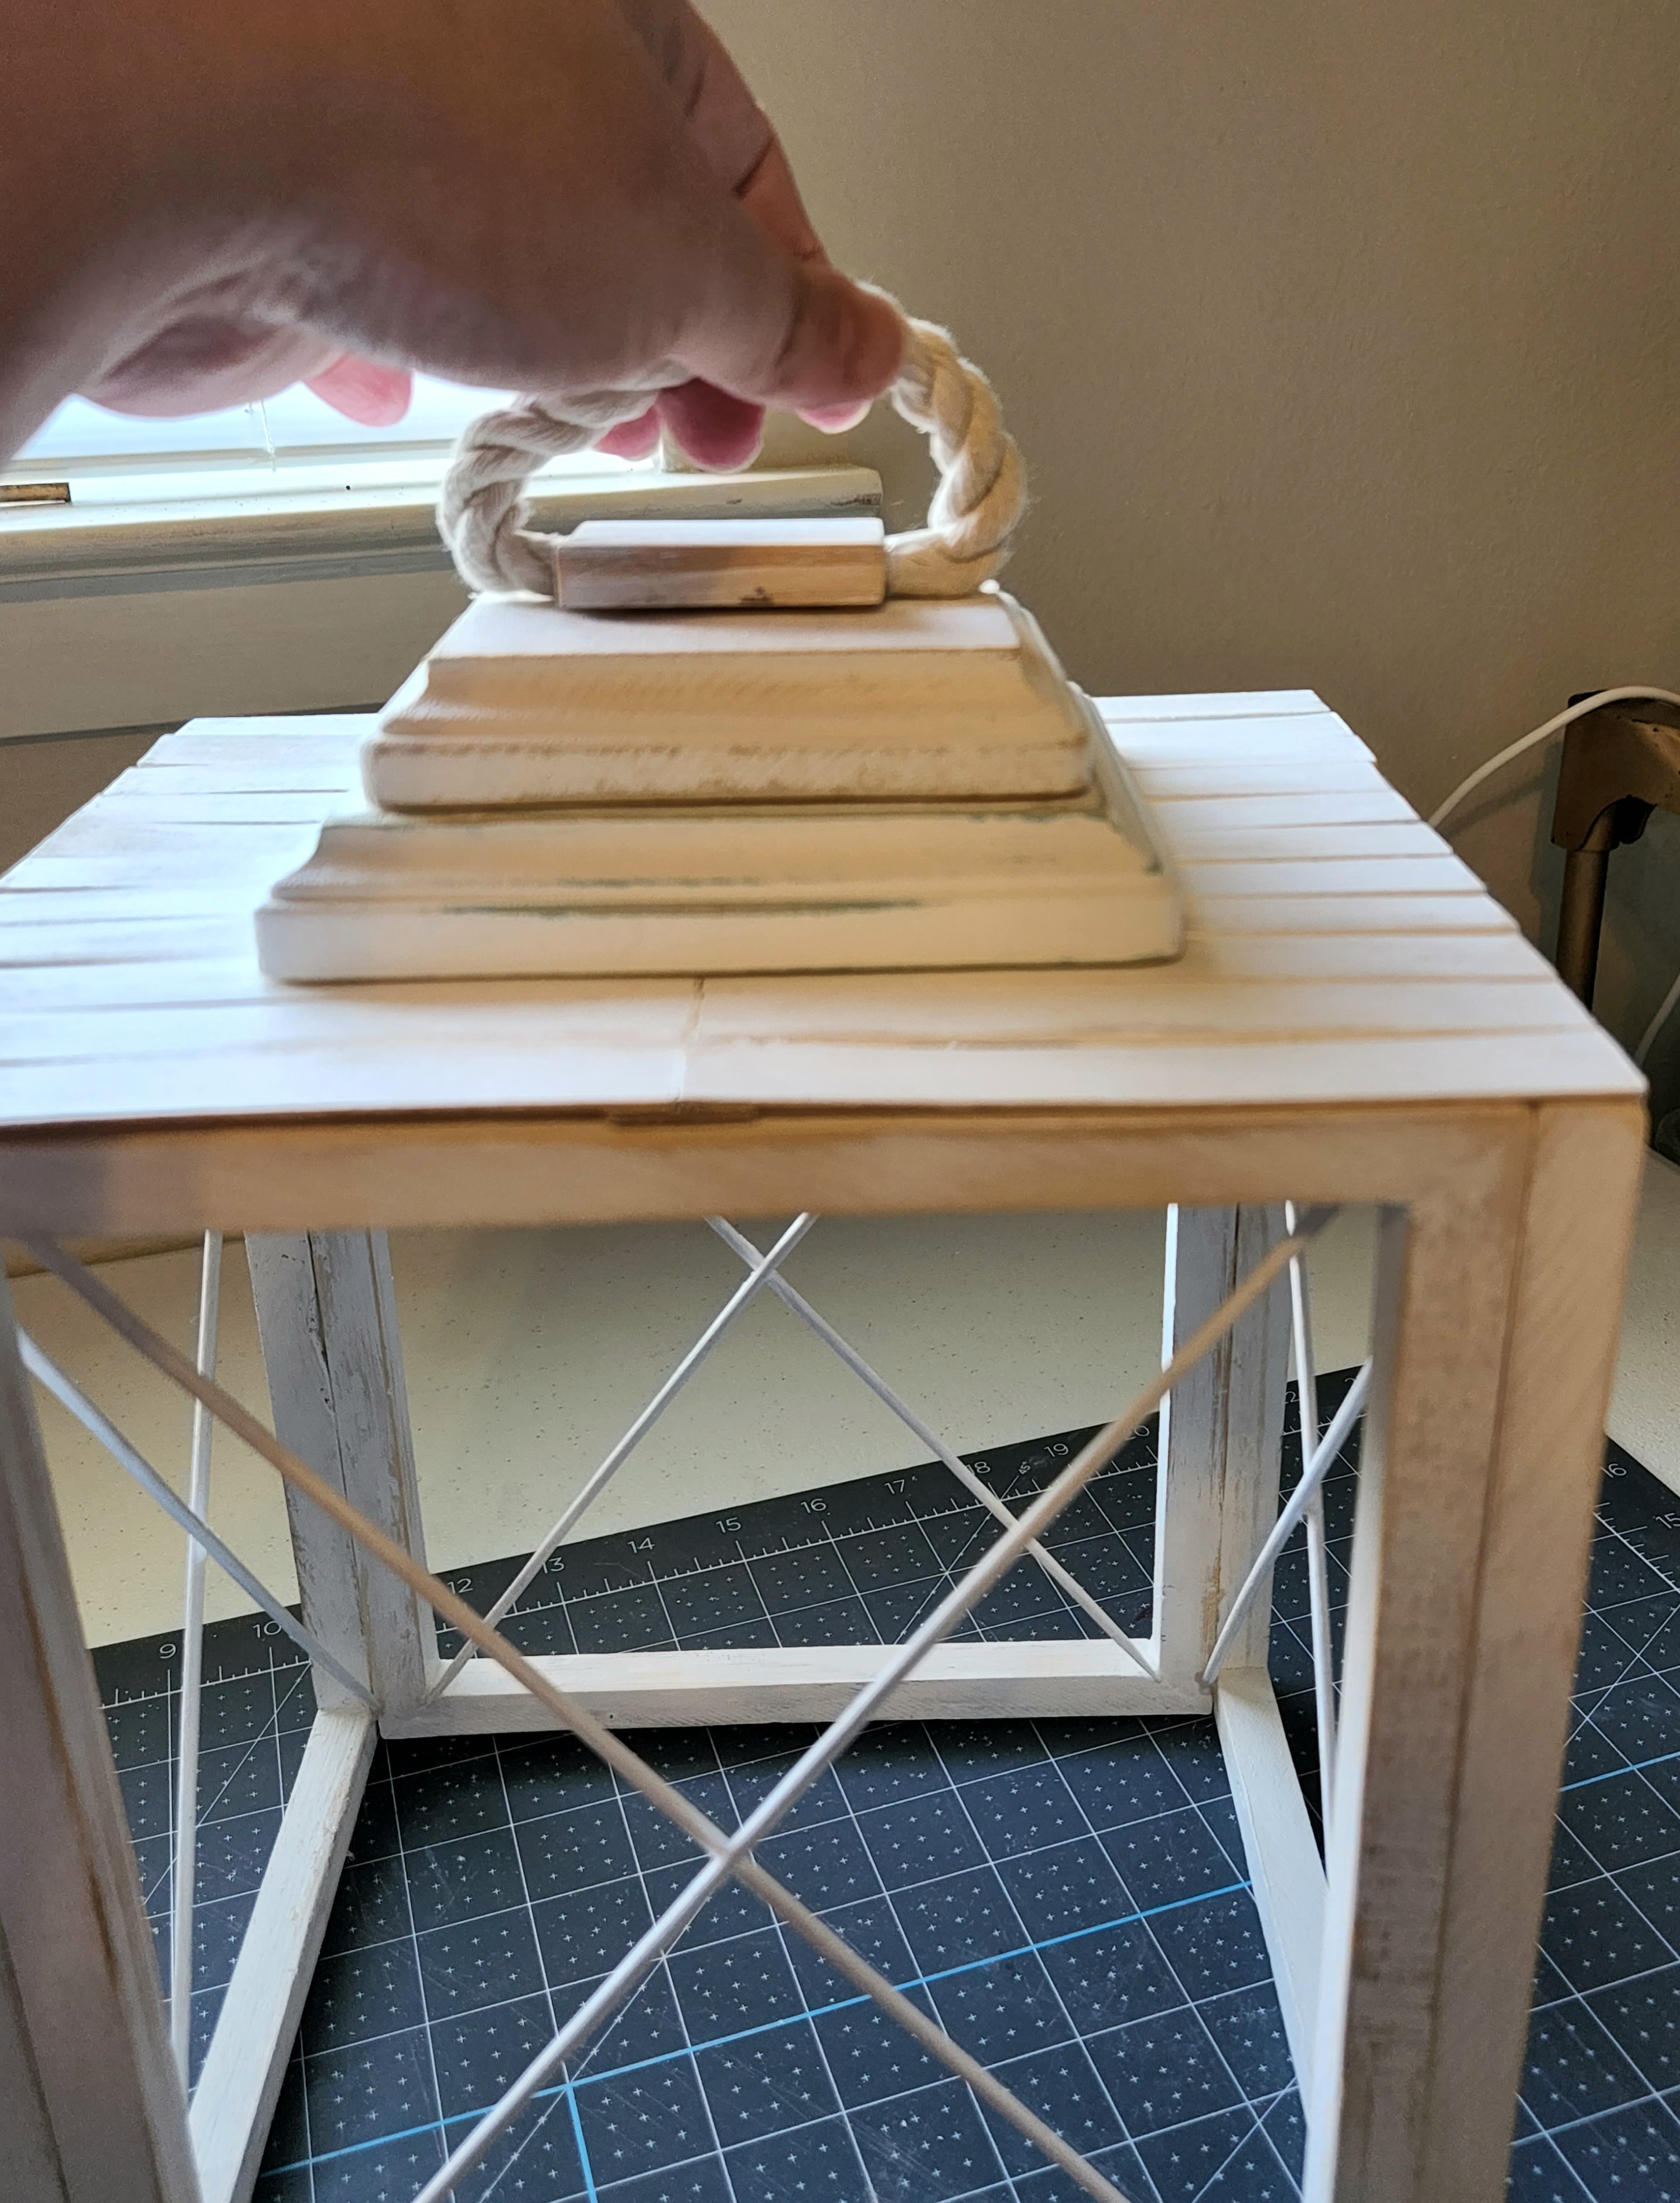
Add the Final Touch
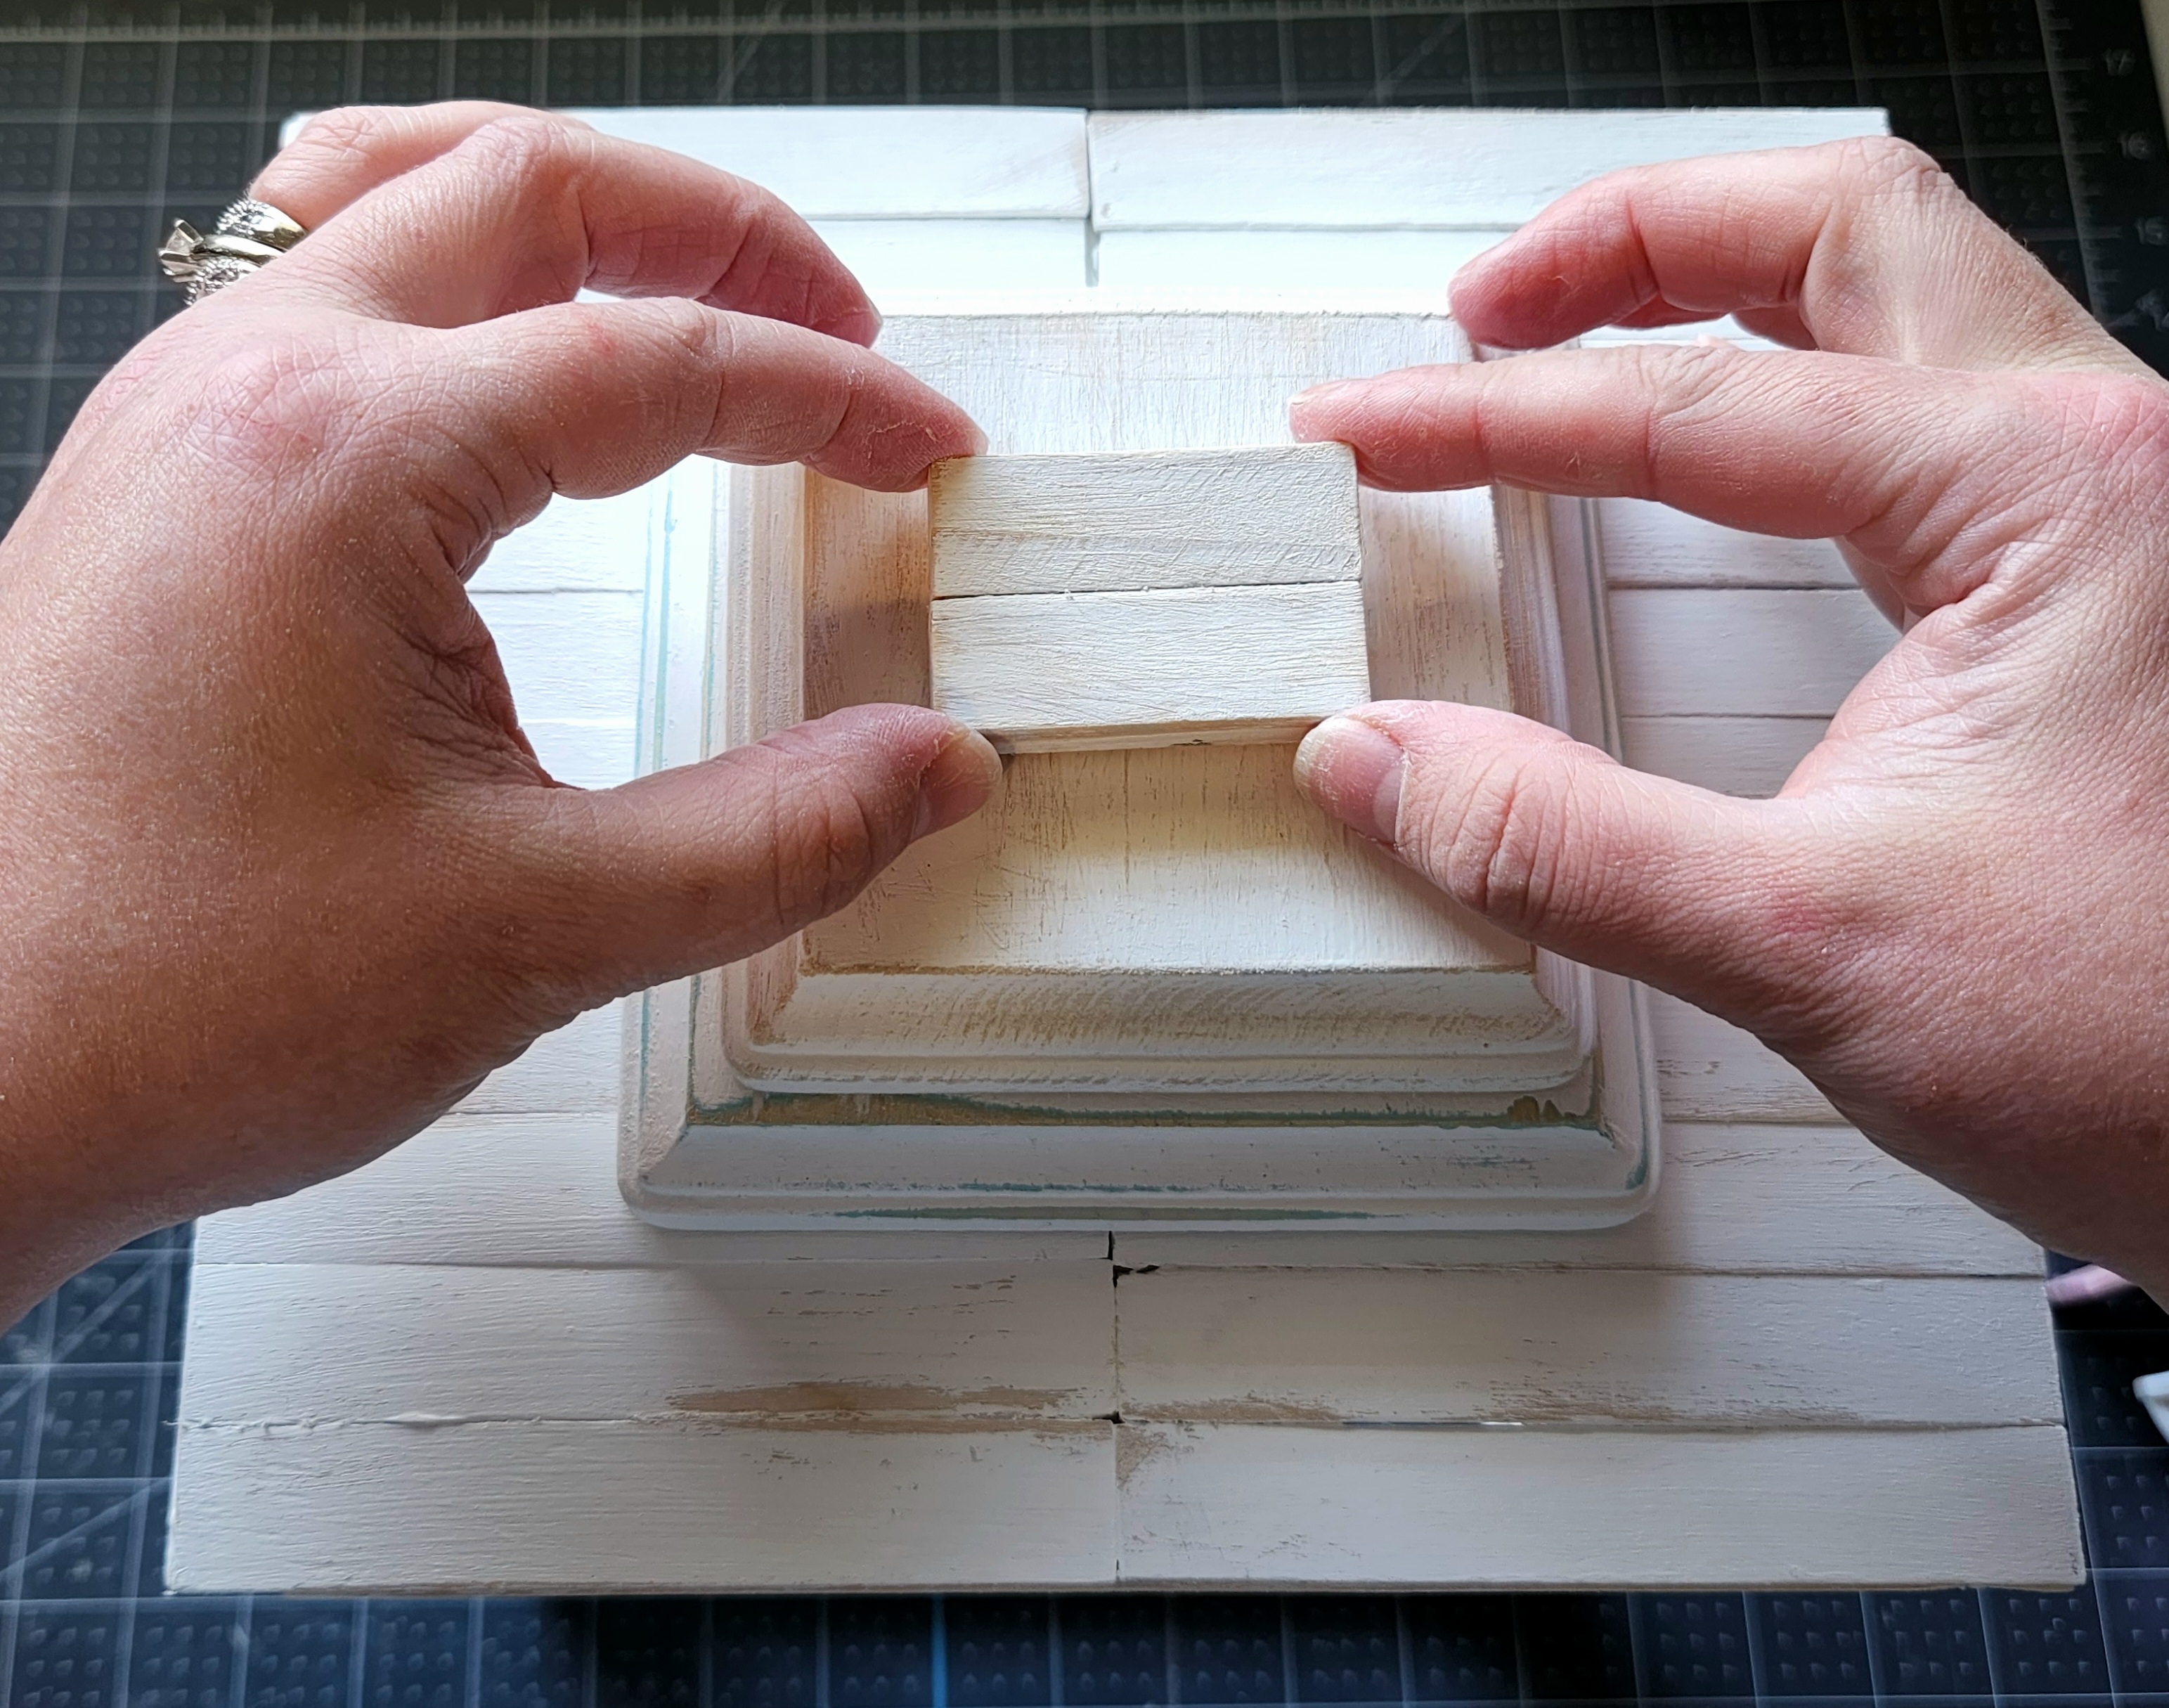
Take your cotton rope and place the end on one side of the Jenga blocks and form a handle. Look and see how wide you’d like that handle to be, then cut the rope to that size. Next, add a piece of tape around the cut end to keep the rope from unraveling.


Add hot glue to one end of the rope and place it on one of the short sides of the blocks.


Repeat the process on the other end of the rope, creating a cute handle.


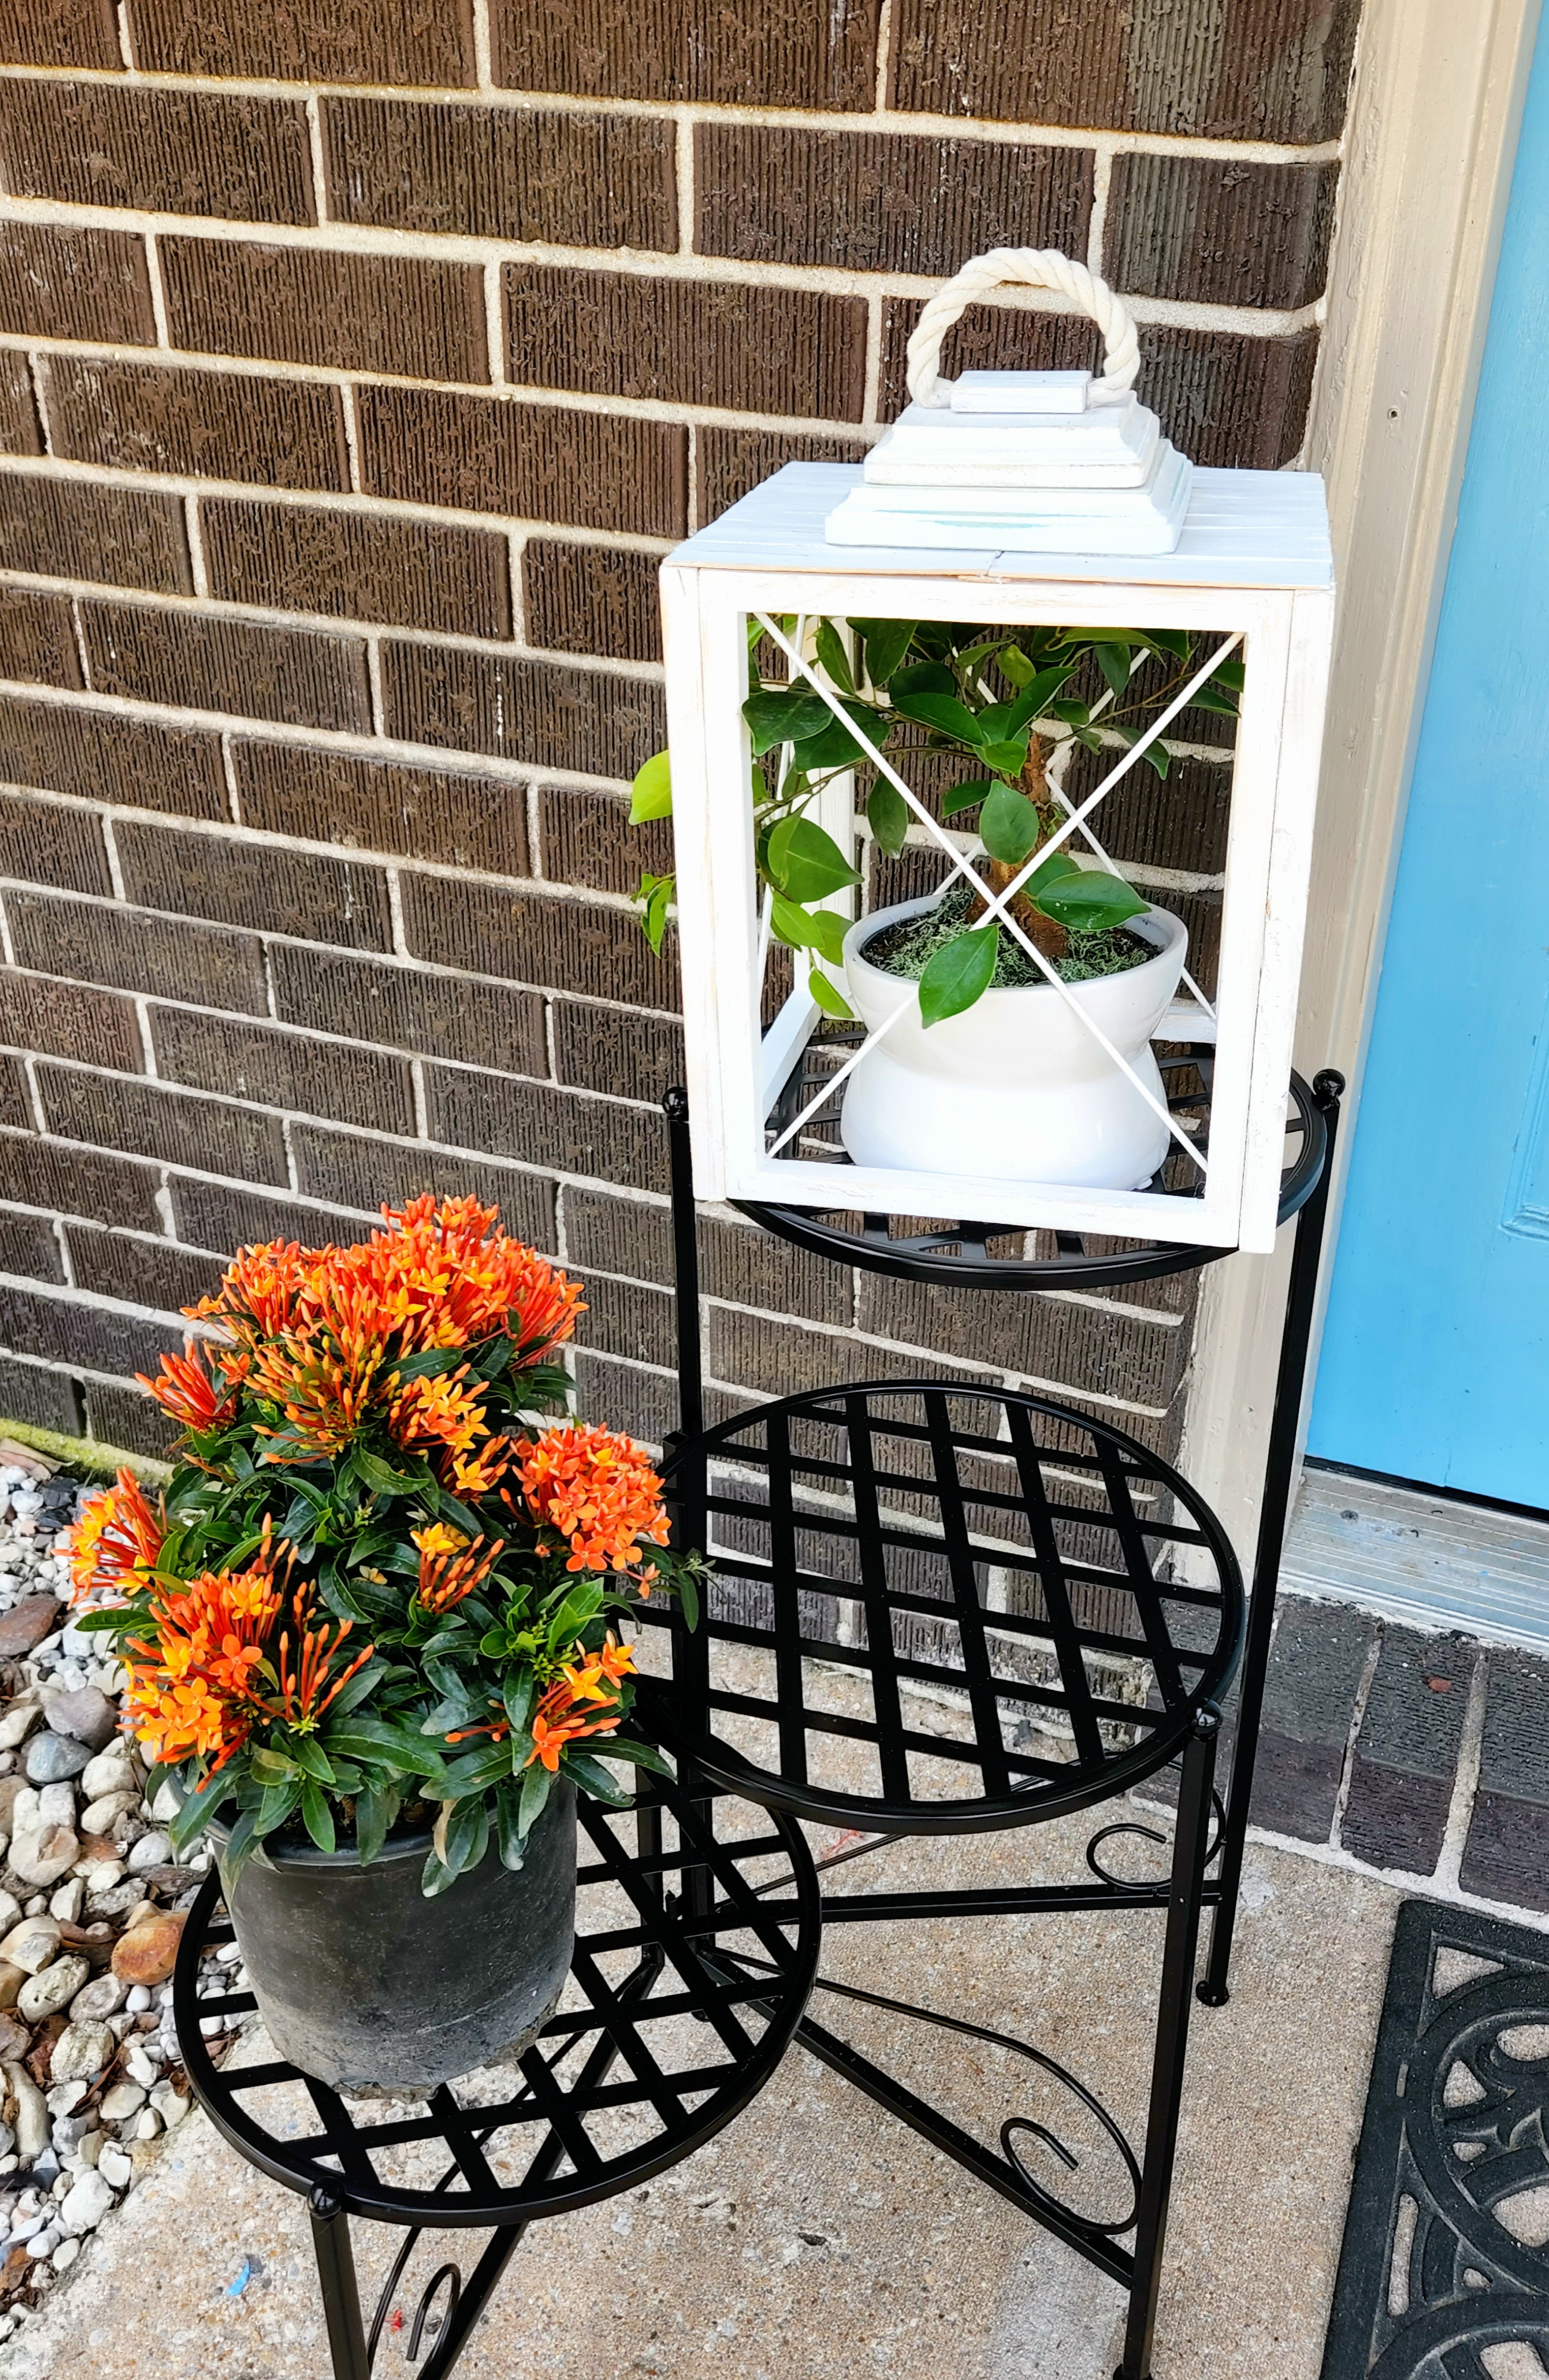
Place the DIY Dollar Tree lantern over your favorite decor and proudly display your handiwork!
That’s it! Can you believe you can make a large, beautiful farmhouse lantern for $6?! You can place this indoors or outdoors and not have to worry about it getting broken because there’s no glass like with most Dollar Tree lantern DIY tutorials. First, I placed my lantern outside on my new porch and new plantstand (if you like the wood door hanger, you can check out my tutorial for it here, including a few free SVGs!):

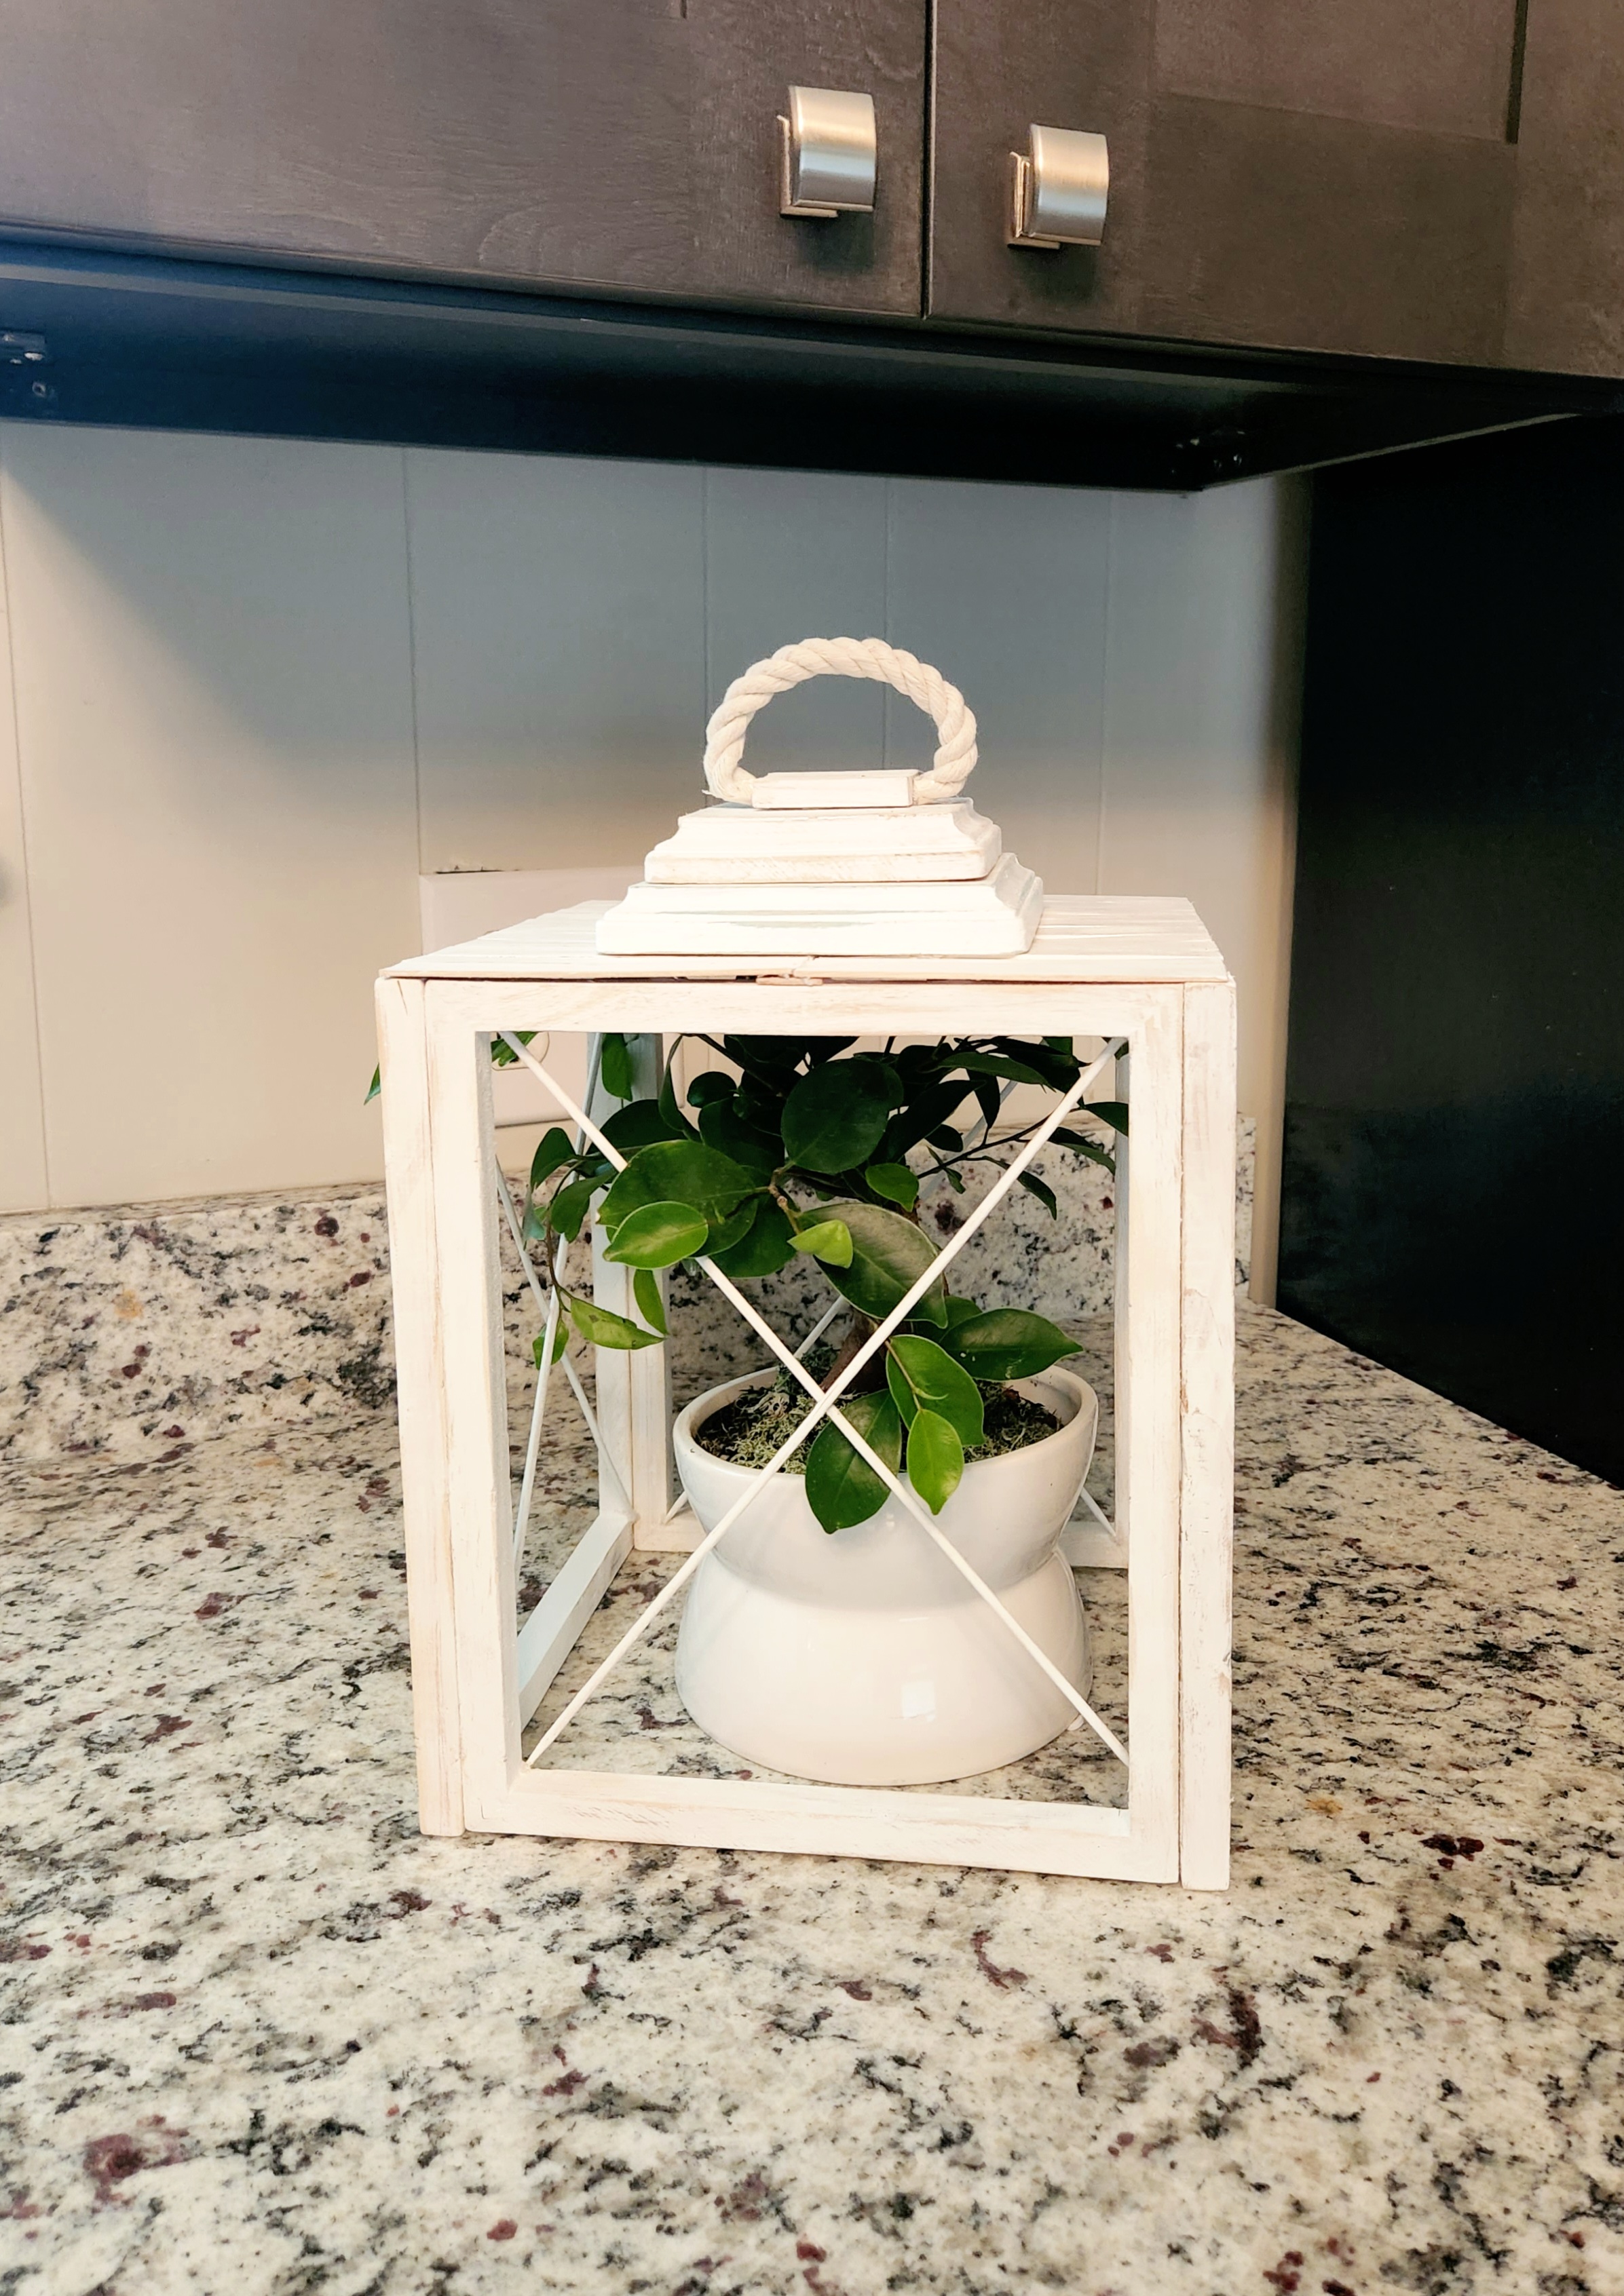
Then I brought it inside and placed it in a few different places on my kitchen counters. I haven’t gotten much of my home decor unpacked and placed out yet, so I’m sure it will get moved a few more times as well! Now all you need is a lantern swag that you can change out with the seasons, and you can get a DIY tutorial for how to create your own in this post!


I hope that you enjoyed this tutorial and that you will make your own Dollar Tree indoor/outdoor lantern. If you do, I’d love for you to take a picture and tag me on social media! I love seeing the twists y’all put on these tutorials. You can follow me using the buttons below, on the sidebar or at the top of the post (I thought I’d give you plenty of options lol!). That, as well as following me via email, will help you keep up with what’s going on here on the blog. I have some more budget-friendly home decor tutorials, DIY Father’s Day and end of the year teacher’s gifts, and some free printables coming up, so don’t miss out! Following me via email will also remind you to come link up on my two weekly link parties!
Remember to share, using the buttons on the left side, and pin the DIY lantern image below so that you can get back to this tutorial when you’re ready to make your indoor/outdoor lantern!
You may also enjoy these posts:


And these posts with free SVGs and/or printables:


Finally, here are some timely posts that you might want to pin, including back to school teacher’s gift ideas with free gift tags and some fall ideas:


If you’re looking for something specific, use the search box in the sidebar to find it!
Follow me on Pinterest for new ideas added weekly! Oh, and don’t forget to link up on Crafty Creators Link Party before you go!
If you enjoyed this post, you might like these:


What a creative way to craft a lantern! I love that you can use it indoors or outdoors! Pinned! Blessings, Cecilia @My Thrift Store Addiction
Thank you! I didn’t want to put one with glass outside, so I thought why not use wood frames instead of the plastic ones with glass inside. Easier to clean!
Very clever, Niki. Your lantern looks beautiful in your new kitchen!
Thanks Ann!
A fabulous dollar store creation, Niki! And it’s quite versatile to use in any decor!
Thank you! I’ve been changing it out several times a day. I can’t make my mind up lol.
Holy wow Niki, your lantern is adorable and how uber clever and creative! You are Queen of Dollar Store Crafts, another really amazing creation! Your tutorials are always so detailed, thank you for sharing!
Jenna
Thanks Jenna! I like how the little fella turned out!
I just love lanterns. Yours turned out so cute, adding the rope to the top was a great touch. It looks good everywhere you placed it. Great job!
Thanks Terrie! I need to make a whole set with some smaller ones now lol.
Great project. As a dollhouse lover, I am always looking for odd containers to use as “roomboxes.” This would be adorable!
That would be adorable! I would love to see it if you do!!
Just gorgeous Niki! Your tutorial is amazing too but then they always are! Pinned!
Thank you!
You’re welcome
So very pretty! It really is a wonderful project and you make it look so easy to make with inexpensive supplies. Pinned and glad you shared it on the hop.
Thanks Donna!
Wow, looks amazing! Your lantern looks like you could find it in a store which means your project is a grand success. Great detailed tutorial.
Thanks Allyson! That’s too kind!
This little lantern is so cute! It looks amazing and I can’t believe it was made from all Dollar Tree items! Pinning to try in the future!
Super creative!! What an amazing way to create a lantern on a budget!!
Thank you!
I love how cute this lantern came out! Great job.
Thank you!