
Hello friends and fall! I’m sure, like me, you’re busy decorating your home for early fall and preparing all of your Halloween decor as well. Today I have a fall farmhouse decor idea for you to use from now through Thanksgiving. This DIY fall lantern can be made using a few Dollar Tree supplies and some good old-fashioned ingenuity. I know you’re going to love it!
I’m sharing this fall lantern for our monthly Under $10 on the 10th Blog Hop, hosted by Tammy from Patina and Paint. Each month we get together with some talented bloggers to bring you a themed project that can be made for less than $10. Our theme for this month is fall and pumpkins.


Disclosure: I am a participant in the Amazon Services LLC Associates Program and the Dollar Tree Affiliate Program, affiliate programs that allow me to link to the products that you can use to make this project quickly and easily. If you purchase any of these products I may receive a very small commission at no cost to you! That commission helps me continue to bring these great decor DIYs, free printables, and all of the other goodies on this site to you. Thanks so much for your support!
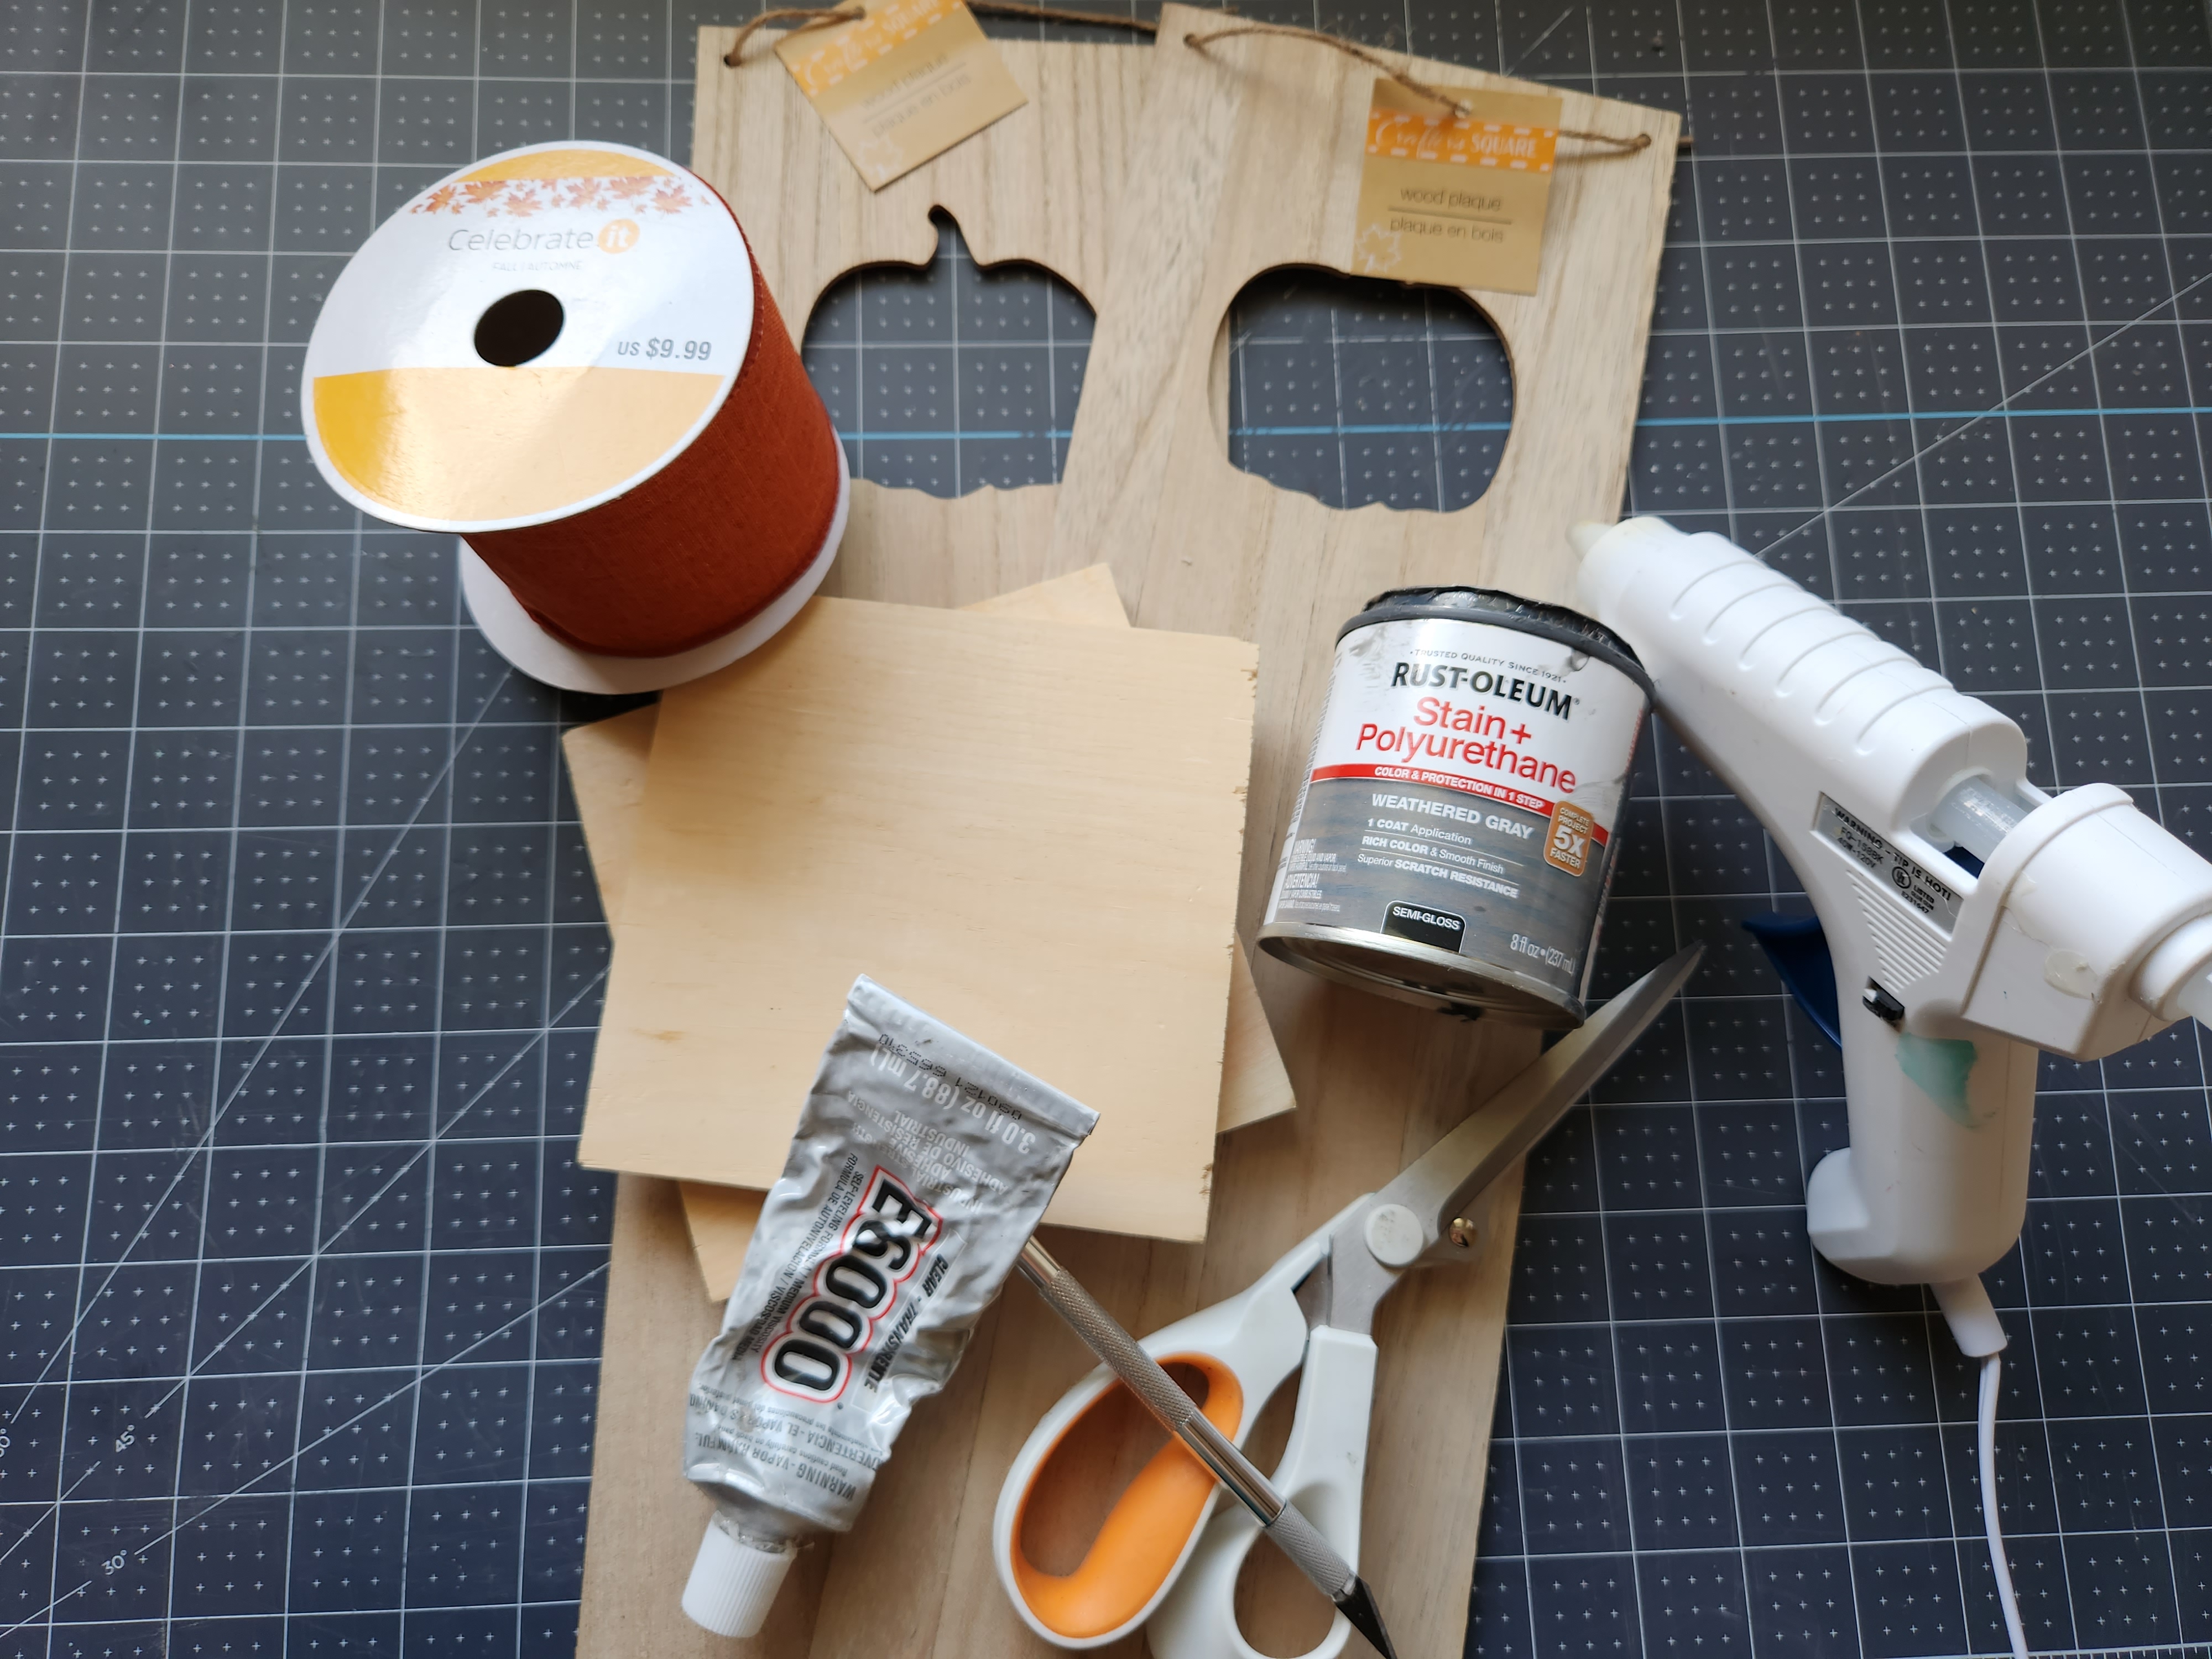
DIY Fall Lantern Supplies:
- 3 wood panels with fall cutouts $3.75- I used pumpkin cutouts.
- E6000 or a staple gun– I ended up using a staple gun.
- hot glue gun & glue- This cordless hot glue gun is a great deal. If you’re looking for a regular one, this Gorilla Glue gun is great.
- utility knife or Exacto knife (This precision knife kit is great for crafters!)
- wood stain or acrylic paint- I used this weathered gray stain. or
- acrylic paint (If you don’t want to pay for stain, you can check out this DIY tea towel ladder where I show you how to use paint to create a faux stain.)
- paint brush for stain or paint
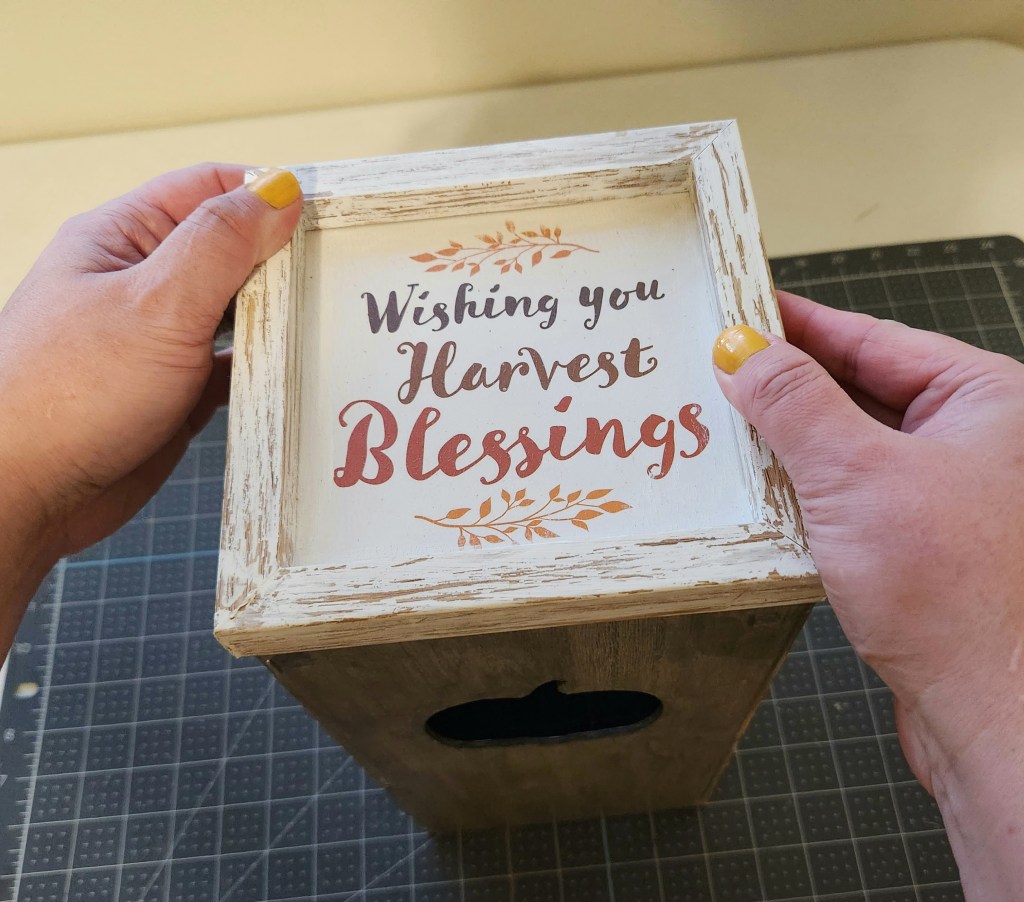
- square sign with beaded handle $1.25
- wired ribbon $2.50- I used two different ribbons.
- crocheted lace ribbon $1.25 (optional) This pack has 8 styles for a great price.
- candle (optional)- This 9 piece flameless candle set is perfect for safe lantern use.
I made this adorable fall lantern for $6.25 because I used wood stain and wired ribbon that I had on hand. However, if you don’t have stain or ribbon, you can buy acrylic paint from Walmart for $.50 and Dollar Tree has wired ribbon for $1.25. So, you can still DIY your own lantern for $9.25!


Prep the Long Wood Signs
Remove the twine hangers from the top of the signs. Use lightweight spackling to fill the two holes that are left. It’s optional, but the holes will be noticeable if you don’t.

Allow it to dry then sand it smooth.
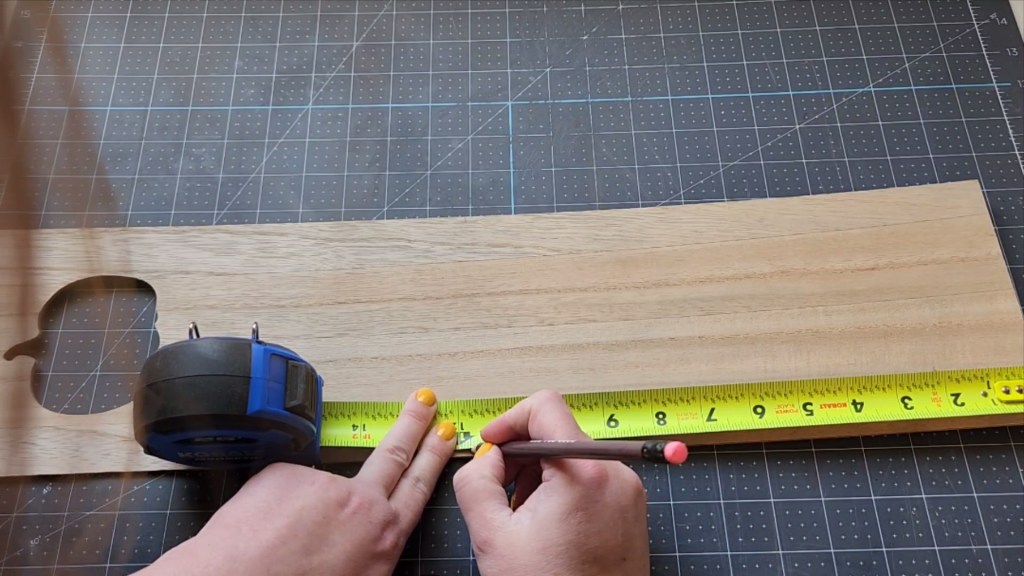
Cut the Pumpkin Panels for the Lantern
Each of the blank wood signs from Dollar Tree are 23.5″ long. Measure two of them so that you can cut them in half. To create a straight line, I placed a measuring tape on each side and made a small mark. Then I connected the two marks with a pencil, using a ruler to keep it straight. Flip the sign over and repeat on the other side.


Place the ruler along the line that you drew and use an exacto knife or box cutter to cut along it. Make a few slices, trying to go deeper each time. The ruler will keep the knife in the right place.

Flip the sign over and continue cutting the sign until you’re able to bend it a little. Rock it back and forth a few times and it will pop off at the cut mark.

Here’s a video of how I cut the sides of the lantern I made. I didn’t mark the second side until I realized that I wouldn’t be able to cut cleanly through it without cutting the other side as well.
Cut the Top
I initially planned to use square pieces of wood from Dollar Tree as the top and bottom of my DIY lantern. They were just a little bit too small, so I had to improvise. I ended up using another long sign as the top.
Place one of the pieces that you cut on top of a third panel and mark the width with a pencil.

Cut along the line, and you’ll have the top of you fall lantern.

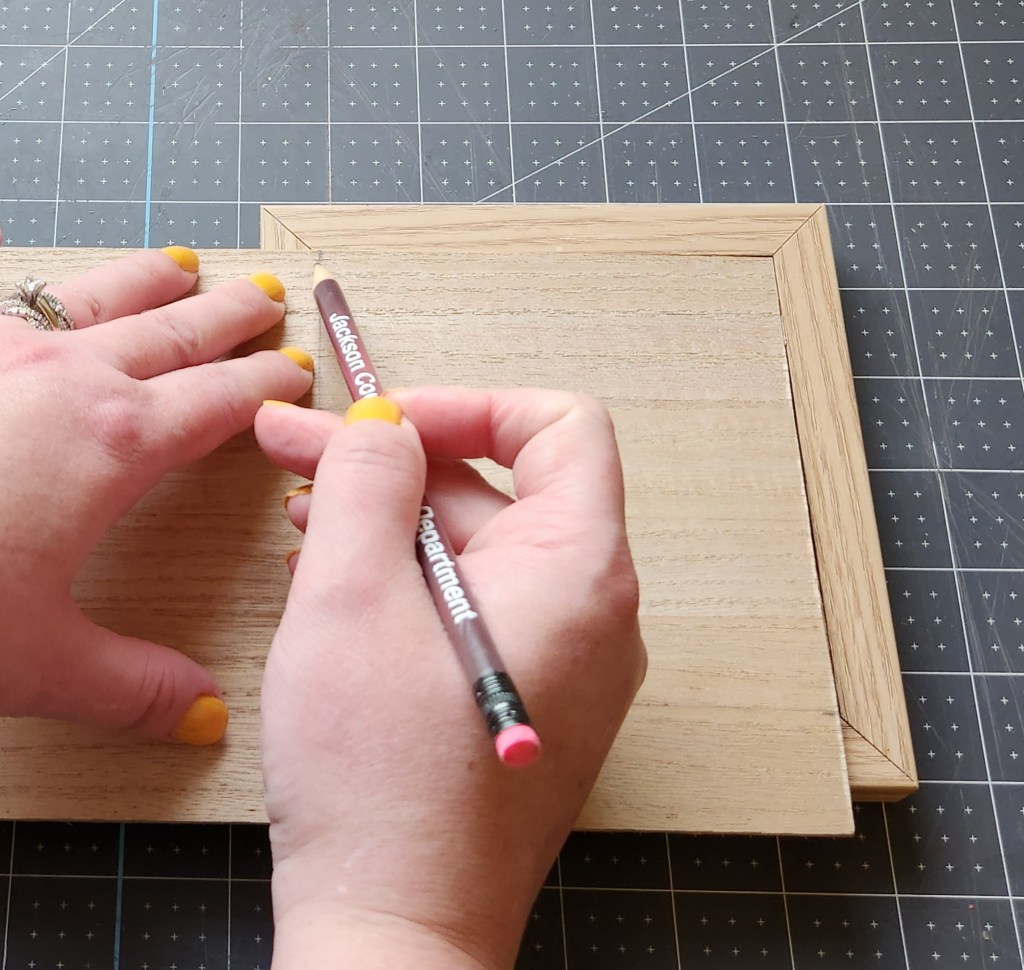
Make an Insert for the Square Sign
Next, cut a piece of the wood sign to place inside the square sign that will be placed on top of the lantern. I added a large bow on top of mine for now, but I may want to add a handle like I did on this farmhouse lantern later. If you’d like to add your handle now, check out that tutorial after you put the rest of your lantern together.
Put the third panel on top of the square sign and mark the sides so that you can cut it to the right size. Cut along the two pencil lines.

Now you can place it inside the side or wait until it’s stained or painted. I put mine in at first, then realized I wanted to paint the sign, but stain the insert. It’s a little hard to remove, so you can decide if you want to wait until after painting or not.


Stain or Paint
Go ahead and stain or all of the pieces that you cut. I used weathered gray stain that I had on hand because it matches the other farmhouse style fall decor that I have in my fall living room. I used two coats.


You can paint the square sign the same as the rest, or, like I did, differently. To give this decoration more of a farmhouse look, I painted mine white. These signs are shiny, so I just wiped the surface a bit once the paint dried a little to distress it.


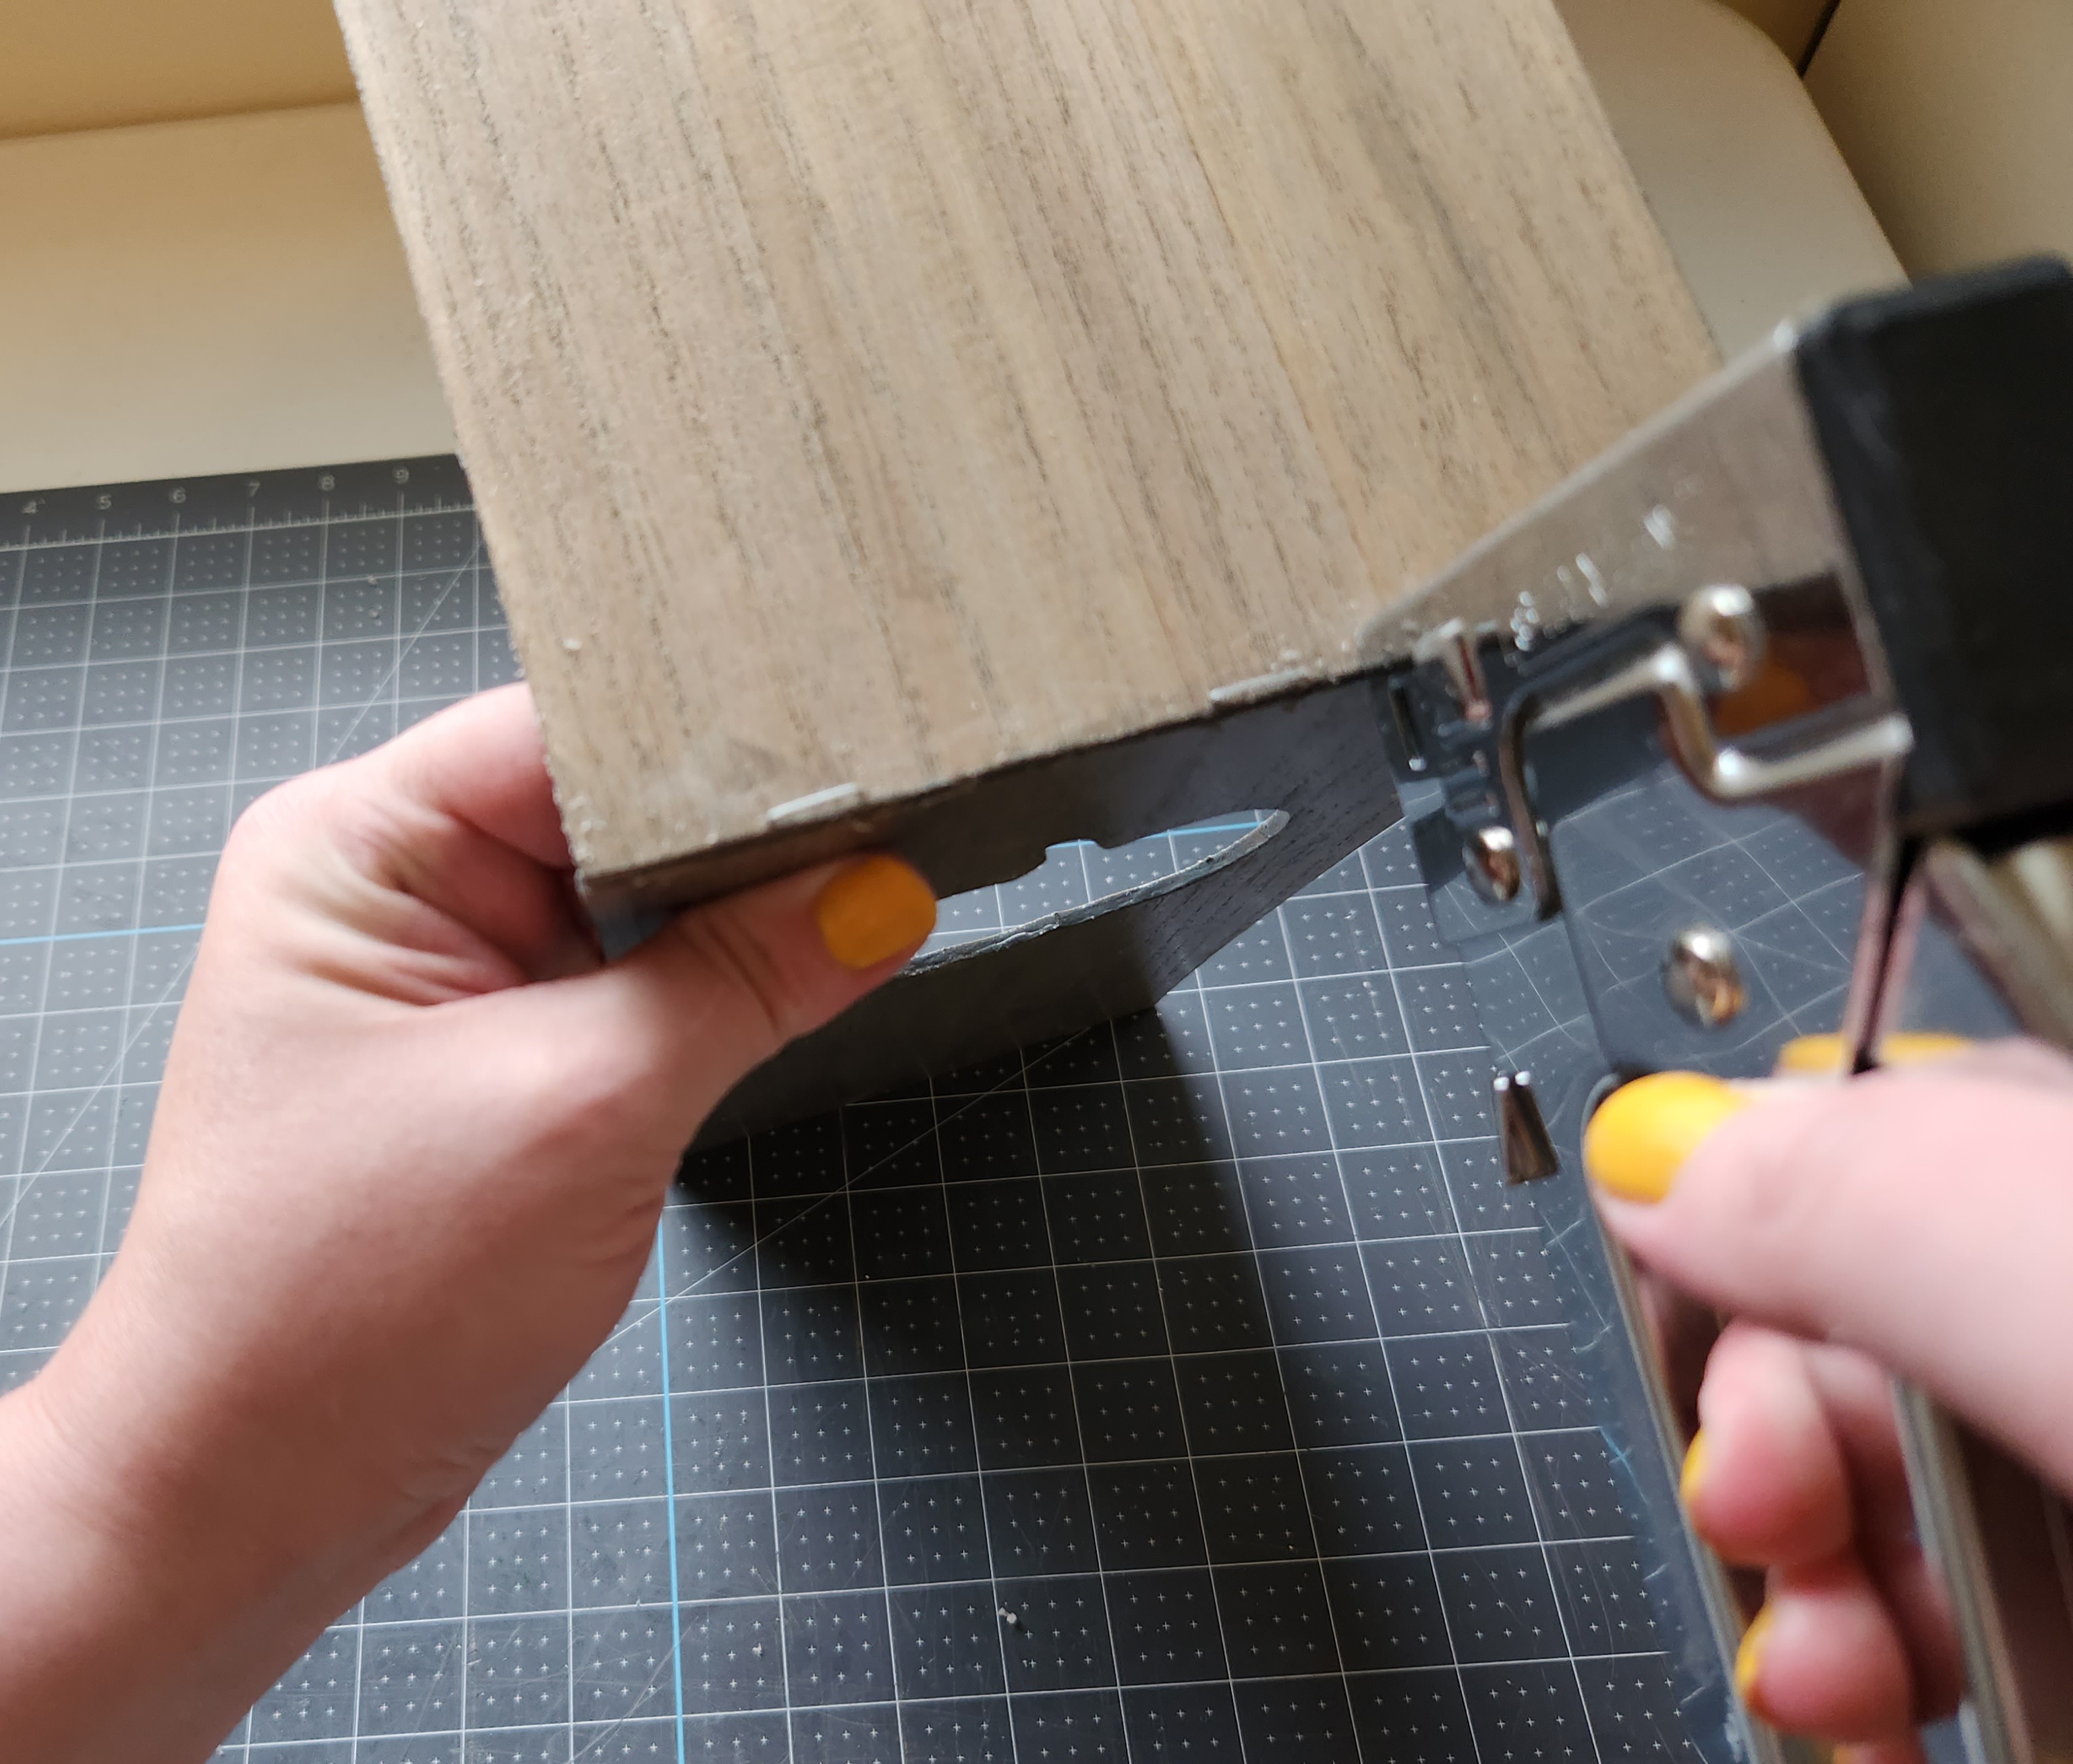
Assemble the DIY Lantern
I tried for about six hours to glue my lantern together using E6000 and then a combination of E6000 and hot glue. Six hours! I don’t know if it was the stain that wouldn’t allow the glue to adhere, but I was almost in tears by the end of it. If you have a lot of time to make your fall lantern, then you might be able to do it. You may be able to rig it up, propping one side up as it dries, then repeat on each side. However, if you can’t manage it either, you can follow my method.
It finally hit me, staple gun! Stand one of the wood panels on its end and place the square that you cut for the top on top of it, lining up the edges. Then place the staple gun exactly where they meet. You do not have much room for error. I mean not much room at all (there is kinda no room)! Staple the two pieces together. I added a staple to each side and one to the middle.
Put a piece of wood without a pumpkin next to the first side. Line it up with the top and edge of the first piece and staple it in place. Staple the two sides together toward the bottom. If your panels are bent (most of them at DT do tend to warp) you can add one to the middle too.

Continue adding sides until you have a completely boxed DIY fall lantern.

Add the Square Sign
Squeeze hot glue on top of the lantern and put the painted square sign on it.

Place the insert into the sign if you haven’t already.

If you want to add a handle to the top now, you can check out my farmhouse lantern tutorial for the instructions. Add a second wood insert if you think the handle isn’t high enough up or flip the square sign over before gluing it on, then add the handle on top. The back of the sign doesn’t have as deep a center as the front. I just wanted a wider frame on top of this fall lantern.
Add Lace Trim Around the DIY Fall Lantern
In order to hide the staples, you’ll need to add some trim. I added the lace to the top of mine because I forgot about the sides for a second. It was ok because I didn’t use hot glue for the entire width of the ribbon, so I just flipped the bottom up and placed the ribbon under it.
Cut four pieces of the ribbon long enough to cover the sides. Glue a piece on each corner, from top to bottom.

Next add a piece around the top, centered where the square sign meets the top of the DIY fall lantern.


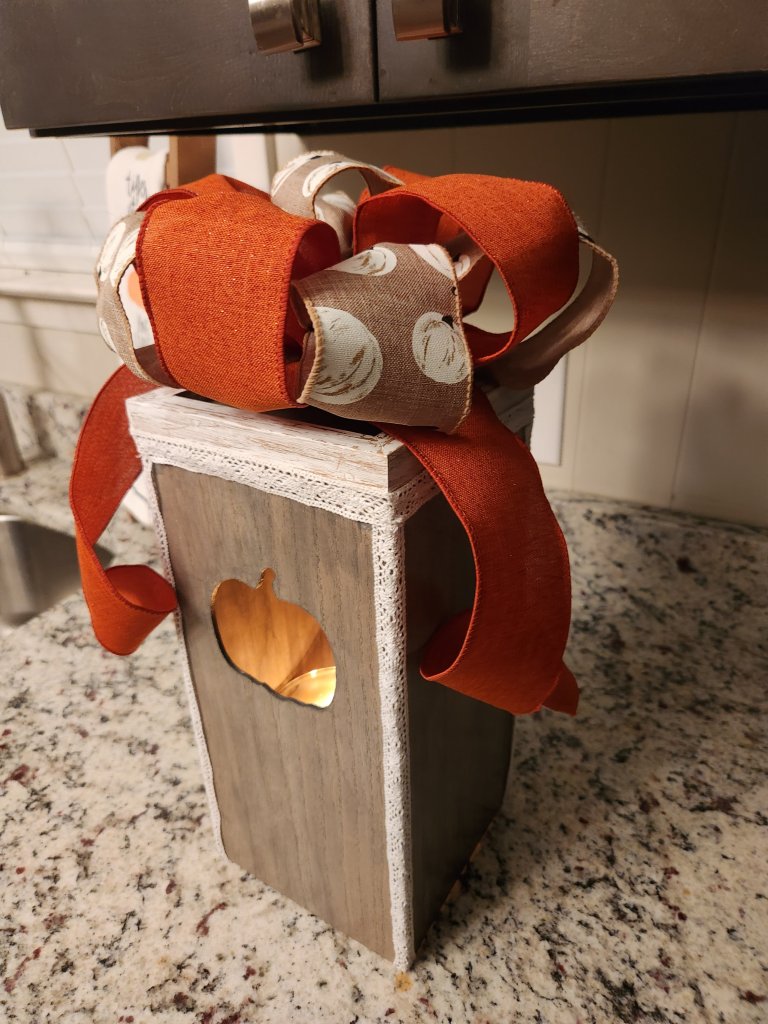
Make & Place a Bow on Top
Finally, create the kind of bow that you’d like to add to the top of the lantern. I made a loopy bow using two different ribbons. If you’re not the greatest bow maker, this super easy loop bow is for you! If you are a little more practiced, here is another easy wreath bow tutorial.
I put a little hot glue on the bottom of my bow and placed it on top of the lantern and draped the tails down the side. Then I wrapped the tails of the ribbon around an acrylic paint bottle to curl it. Since the top of my fall lantern is stained, the hot glue will easily come off so that I can change the bow out for Halloween.

Update: I just swapped the bow out for Halloween. It came off cleanly and easily! I’ll swap the bow back out for Thanksgiving.


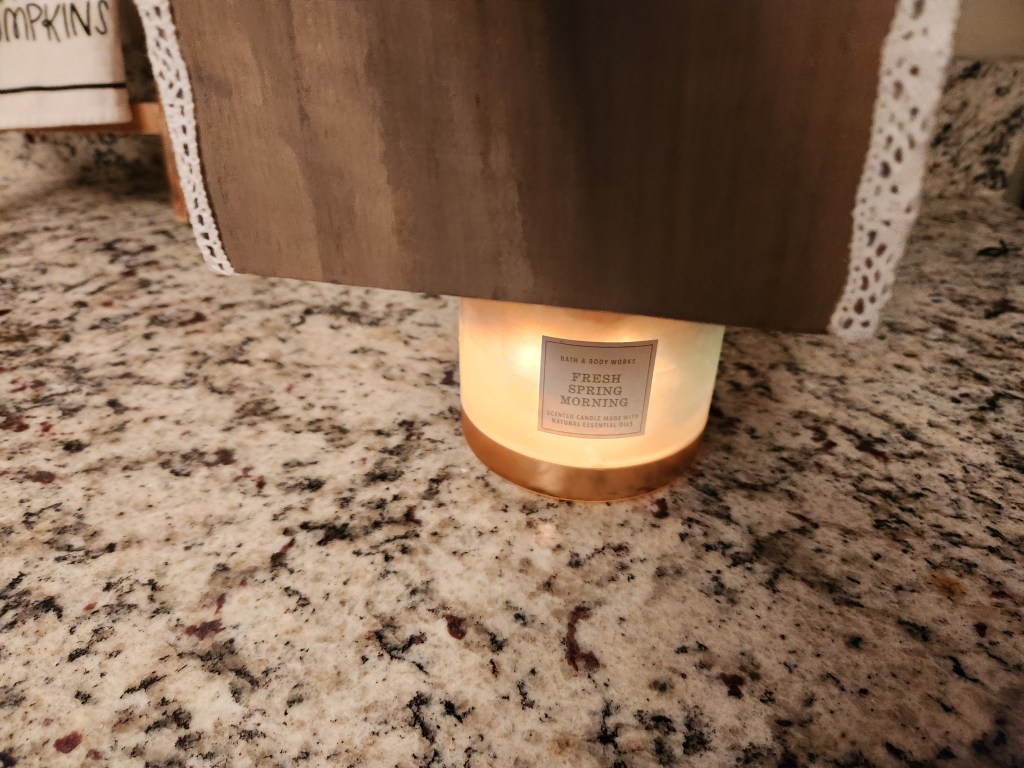
Place a Candle Under the Fall Lantern
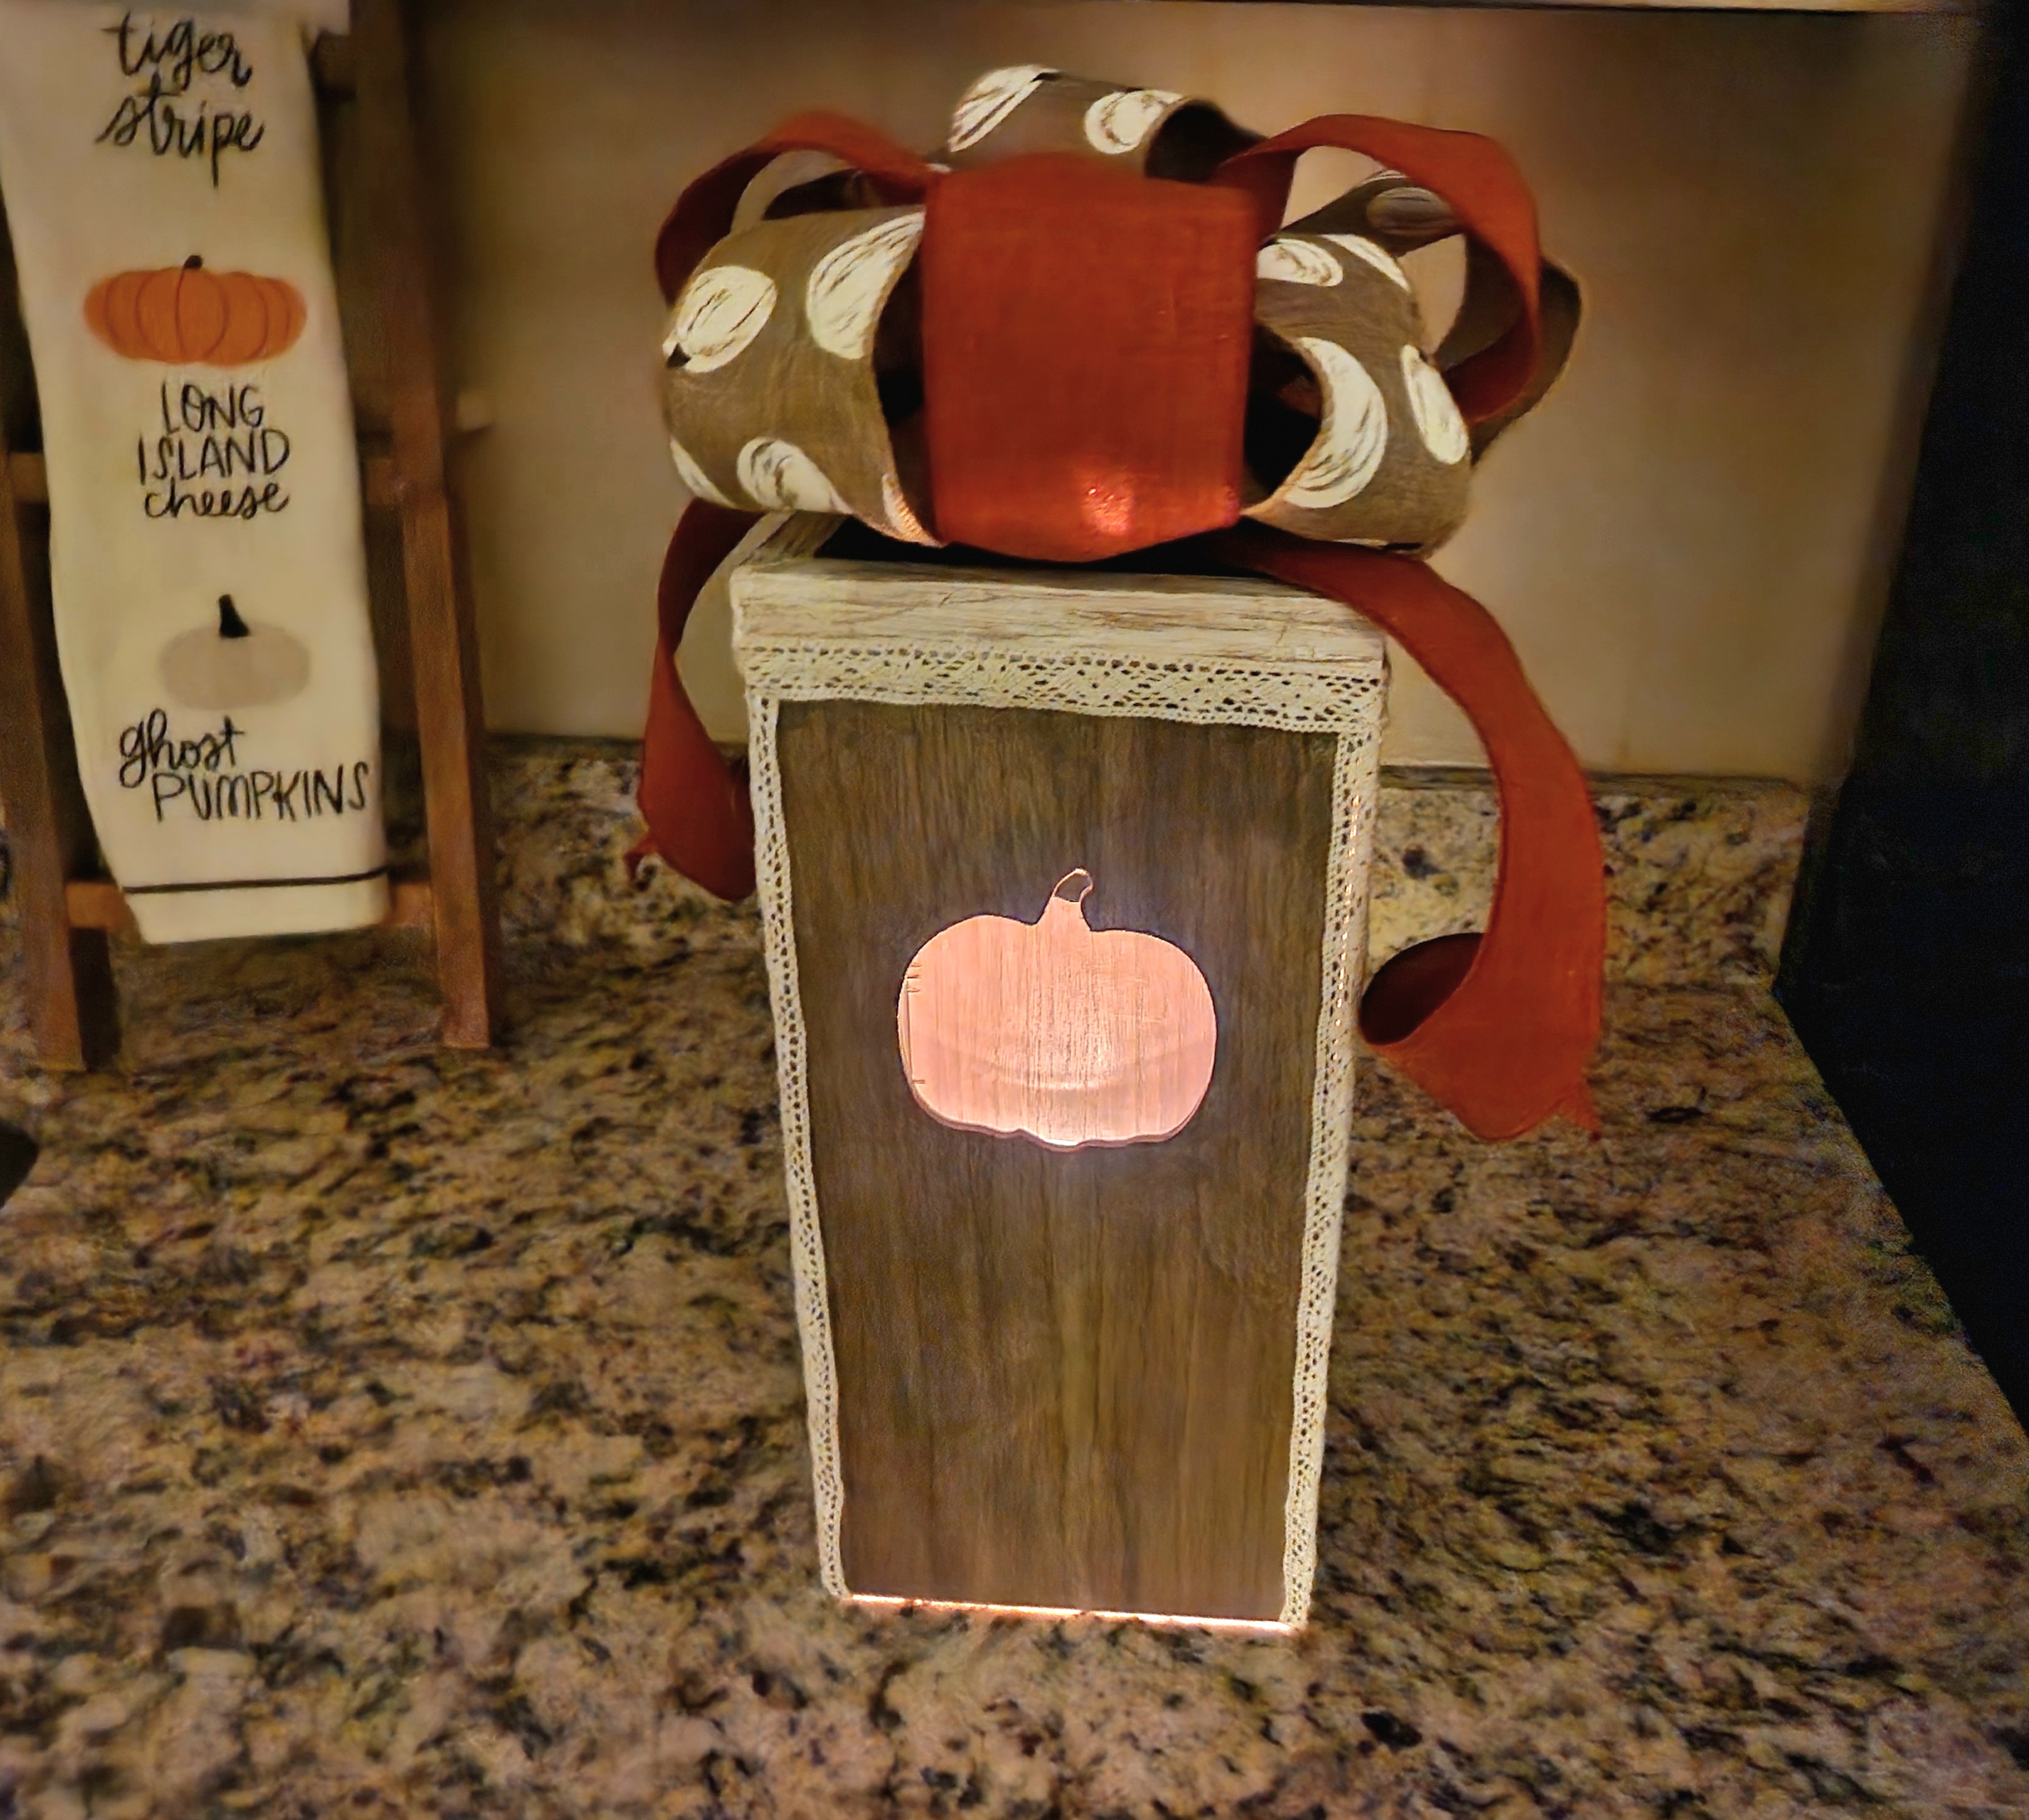
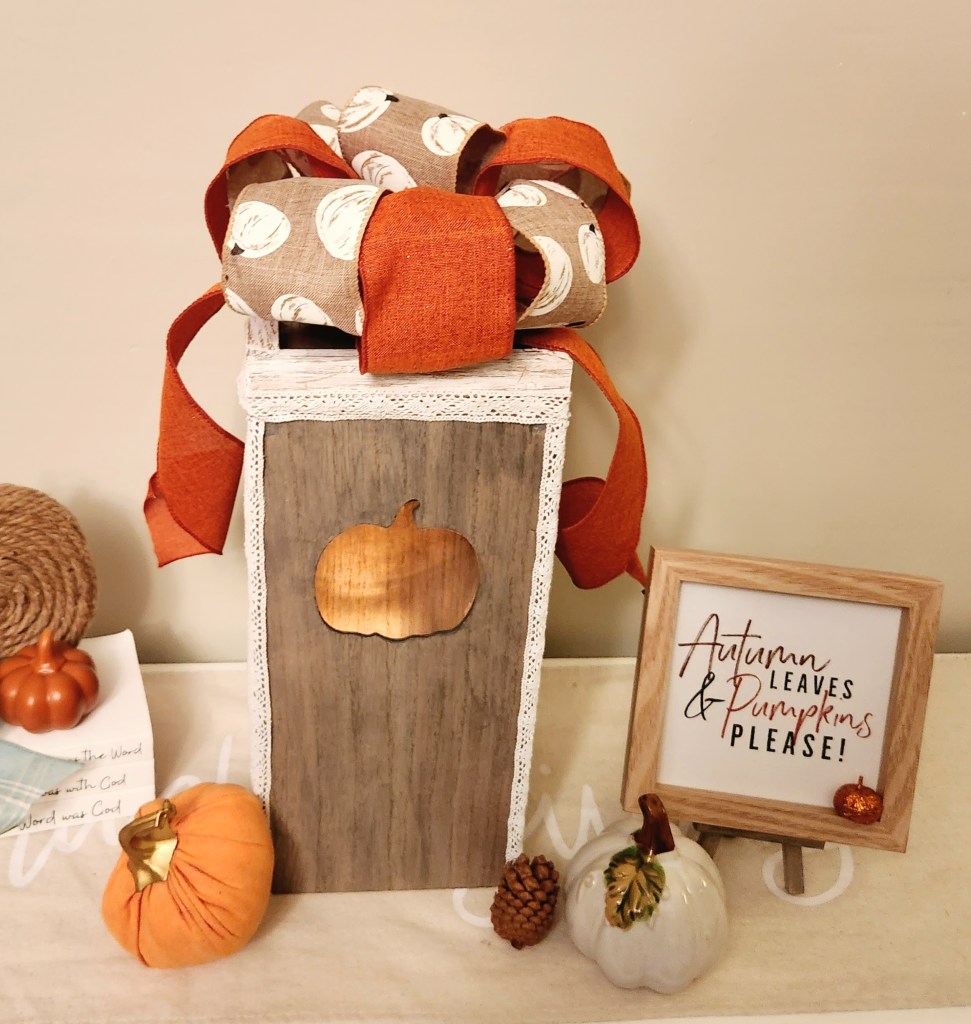
Add a candle and place the lantern over it, and you have a beautiful piece of fall farmhouse decor that you can use all season long! I recommend using a battery powered candle because the lantern is made of wood! It is large enough to cover a glass three-wick jar candle, which I used for about three minutes because I couldn’t find my flameless candles. The lantern was extremely hot when I removed the candle!
This is how it looks all lit up with the lights off.
You are the light of the world. A city set on a hill cannot be hidden.
Matthew 5:14 ESV

That’s it! Your DIY lantern for fall & Halloween is complete!
I really like the way it turned out. Soon I’ll add the handle, but I think it’s fine as it is.

Here’s my lantern with the Halloween bow. I love it! Like the adorable Halloween garland? Check out that easy tutorial here.


If you are in as much love as I am with those adorable Halloween pillowcases on my couch, you can get them on Amazon for $11 (for all four)!! You might like these as well:


The Hocus Pocus pillowcases will go great with your Halloween family movie night! These free printables (14 pages!) will help you throw an epic Hocus Pocus 2 family movie night. My kids look forward to our special night at Halloween and Christmas every year.
I hope you enjoyed this tutorial! When you make your own, be sure to tag me on social media, @LifeasaLEOWife. I love seeing the twists y’all put on these ideas! Keep reading to see the other great fall projects brought to you by the other ladies on the hop.
Remember to pin the image below or share this post with the buttons on the left side of the page so you can find it when you’re ready to start your project! Also, follow me on Pinterest for new ideas added weekly! Be sure that you never miss a great tutorial for decor like wreaths, signs and other home decor, free printables, crafts, and other fun posts! Enter your email address below to be notified of new posts! Use the buttons below to follow me on social media for other great content.

Don’t go yet! There’s more to see!
There’s plenty more to see here on the blog! If you’re looking for something specific, use the search box in the sidebar to look it up. If not, you might enjoy these ideas. Don’t have time to read them all now? That’s ok, just click over to the posts using the pictures and pin them for later. You can also add Life as a LEO Wife to your favorites and check back for new ideas and free printables and SVGs every Wednesday, as well as link parties with tons of shared ideas on Sundays!
You might like these fall ideas:


You might like these Halloween ideas:


Under $10 on the 10th Blog Hop
Now check out the other fall projects that you can make for under $10! The bloggers on this hop are so talented, so I know you’re going to love everything they’re sharing!
Tammy | Patina & Paint (main blog)
Allyson | Southern Sunflowers (main blog)
Marsha | The Little Yellow Corner store
Terrie | Decorate and More with Tip
Teresa | Through a Vintage Door


Niki how cute! I”ve seen those cut out signs and a few crafts that others are doing with them but this is by far the cutest i”ve seen. Great job! Genius to use the staple gun!!! Thanks so much for sharing!
Thank you! That staple gun saved me from insanity!
I love lanterns and making them are so much fun. You created such a cute lantern and an easy tutorial for us to follow. Thank you, love your lantern.
Thank you! I almost went nuts putting it together before I thought of the staple gun lol.
This is such a pretty lantern. I love the touch of lace. I love the look of wood. Perfect for indoors or on the patio. Your instructions make it smooth and easy.
Thank you!
Very clever of you to think of how to get all the pieces together to make a wonderful looking lantern! It’s way over my simple skills thinking ~ lol.
Thank you! You’re being modest because you come up with some super cute things that I could never pull off!
Great project Niki! I love lanterns and this one is just so pretty! If I can ever get caught up this year, I’ll be trying this one. Pinned!
Thanks Denise!
I appreciate your good old fashioned ingenuity!
Lol, thanks Michele! It came in handy when I couldn’t get the glue to hold!
The fall lantern is so attractive. I appreciate how you used low-cost materials and your own creativity to make it. The project turned out great!
Thank you for participating in Talent-Sharing Tuesdays Link-up 33.
Carol
http://www.scribblingboomer.com
Thanks Carol!
Niki, this is such a clever way to add some coziness to the season.
Thank you!
That is so cute! Thanks so much for the tutorial.
How cute, I love using lanterns when decorating. Thanks so much for linking up at the A Themed Linkup 121 for Fall Crafts and Décor. Shared.
I think this lantern will stay out forever with the heart failure it put me through. SO glad God said, “Staple gun woman!” HAHA!
Lovely.
Thanks Keira!