Welcome friends! Today it’s time for our Creative Craft Hop, hosted by Sara from Birdz of a Feather, where I join up with some wonderful bloggers every third Thursday of the month to bring you a new DIY project. Can you believe it’s the third Thursday in August already? That means it’s time to get all of your early fall decor ready to go. Where do you start? Well at the front door of course! Doormats can be so expensive, but not to worry. Today I’m sharing a gourd-geous fall doormat that you can make with a $1.25 mat from Dollar Tree. Let’s get into this!

Supplies for a fall doormat:
- black doormat from Dollar Tree
- acrylic paint
- fabric paint medium (optional, but it makes the paint softer)
- my fall doormat design with vinyl
- or other stencils
- foam paint brush

Cut a Stencil to Use on the Fall Welcome Mat
I’m sharing a free cut file that you can use on your fall doormat. You can use it on other decor, like a sign or wreath, as well.
For personal use only. All of my free printables & cut files are copyrighted material. Feel free to download these free designs and print them or use on your Cricut projects for your own use at home. They are not for commercial use, not to be placed on items for sale. That helps me keep these printables, SVGs, and PNGs coming to you for free! Another note: you will not my logo overlay on your downloaded design. It is there to keep people from downloading the images straight from Google, or others from stealing them to use on their site. Thanks for understanding! Feel free to share this post for your friends and family to make their own projects with this design!
I’m sharing two versions of this design that you can use on your fall welcome mat. The first has thicker panels on the pumpkins. I also have a version with colored pumpkins so that you can cut a design for a door hanger that isn’t all one color. Just substitute the color of vinyl you want to use for the gourds for the colors I added. Remember, the logo will not be on the download!
Cut & Prep the Stencil
Upload the design of your choice to cutting machine software and cut it on vinyl. I sized mine to be about 11.75″ wide since I only had vinyl that’s 12″. My software won’t let you size it to the full 12″.
Reverse weed the design by removing the actual letters and pieces of the pumpkin. Leave the outer portion on the backing. Be sure to leave all of the centers of the letters in, like the e’s and o’s.

Transfer the Stencil onto the Fall Doormat
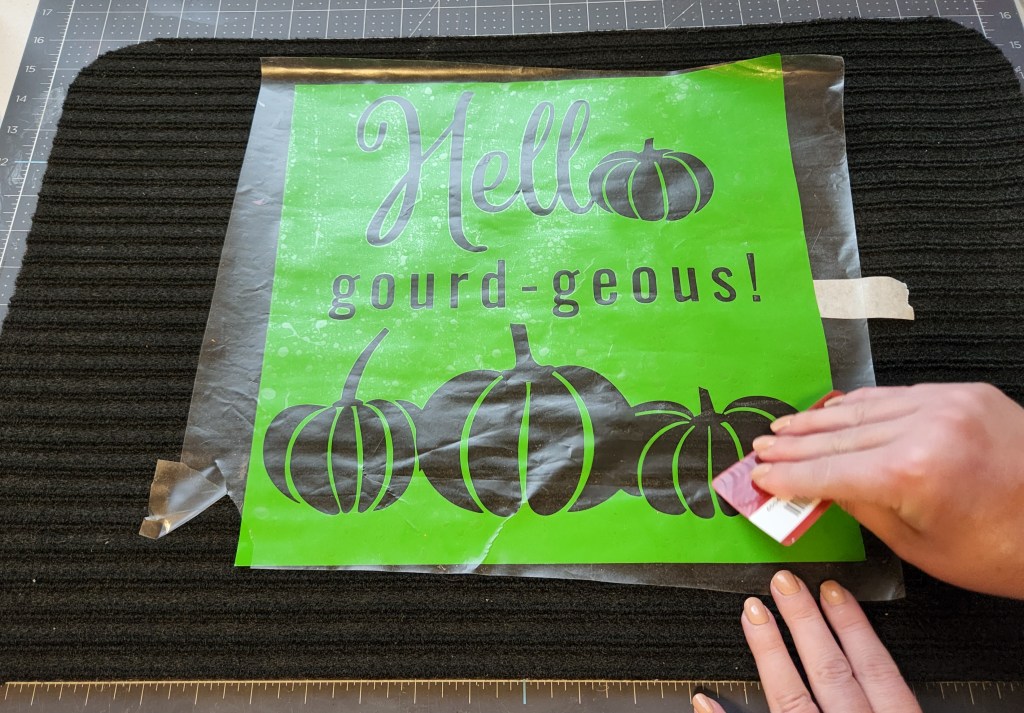
Cut a piece of contact or transfer paper large enough to cover the entire fall doormat design. Place it on the vinyl and remove the backing following the usual process of rubbing it on first. You can use a weeding tool or credit card to make sure the inner parts of the design that aren’t attached to the big vinyl piece stick on the contact paper.


Place the vinyl in the center of the mat. To help with that, I placed mine on a 24″ cutting mat. It was about 24″ so I put a piece of masking tape in the middle at 12″, then 8.5″ from the bottom.

Then I marked the middle of the vinyl with tape and lined it up with the tape on the mat.

Go over the vinyl with a credit card or scraper tool. It will help it stick… a little. Then remove the contact paper from the welcome mat while using a credit card or other tool to hold it on.

Paint the Design
Mix the paint and the fabric paint medium. Mine calls for one party medium to two parts acrylic paint but read your bottle to determine your ratio.

Use a foam brush and paint the design with dabbing motions. I painted my words mustard yellow, two pumpkins orange, one white and one sage green.

Once my design was covered, I went over it again with a regular paint brush. Since the paint is a bit watery from the medium, it drips on and covers well without going under the stencil.

When you’re finished painting, remove the vinyl.
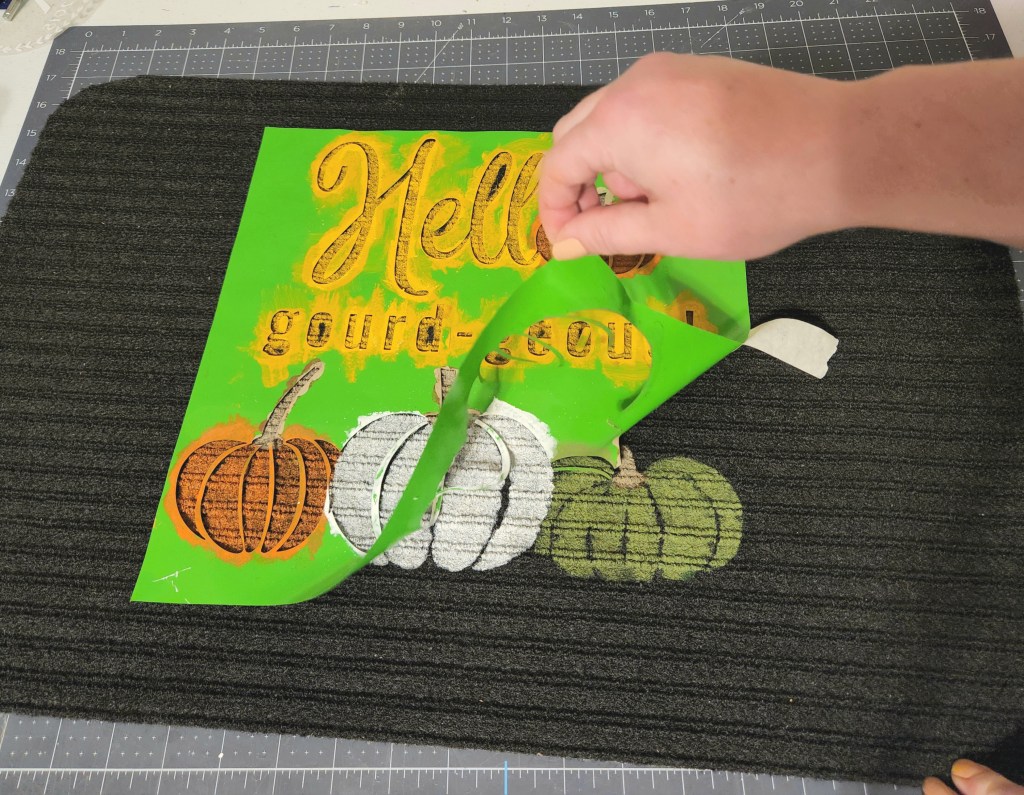

Since the lines in the pumpkins are so thin, a bit of paint went under them. I defined them by dabbing black paint along the lines.

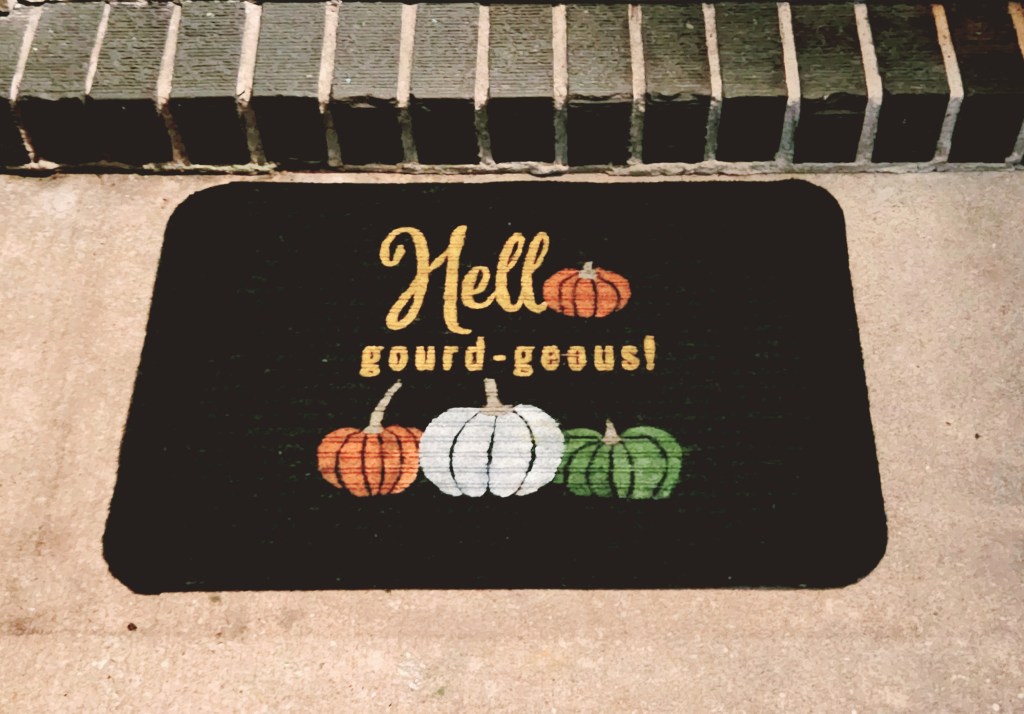
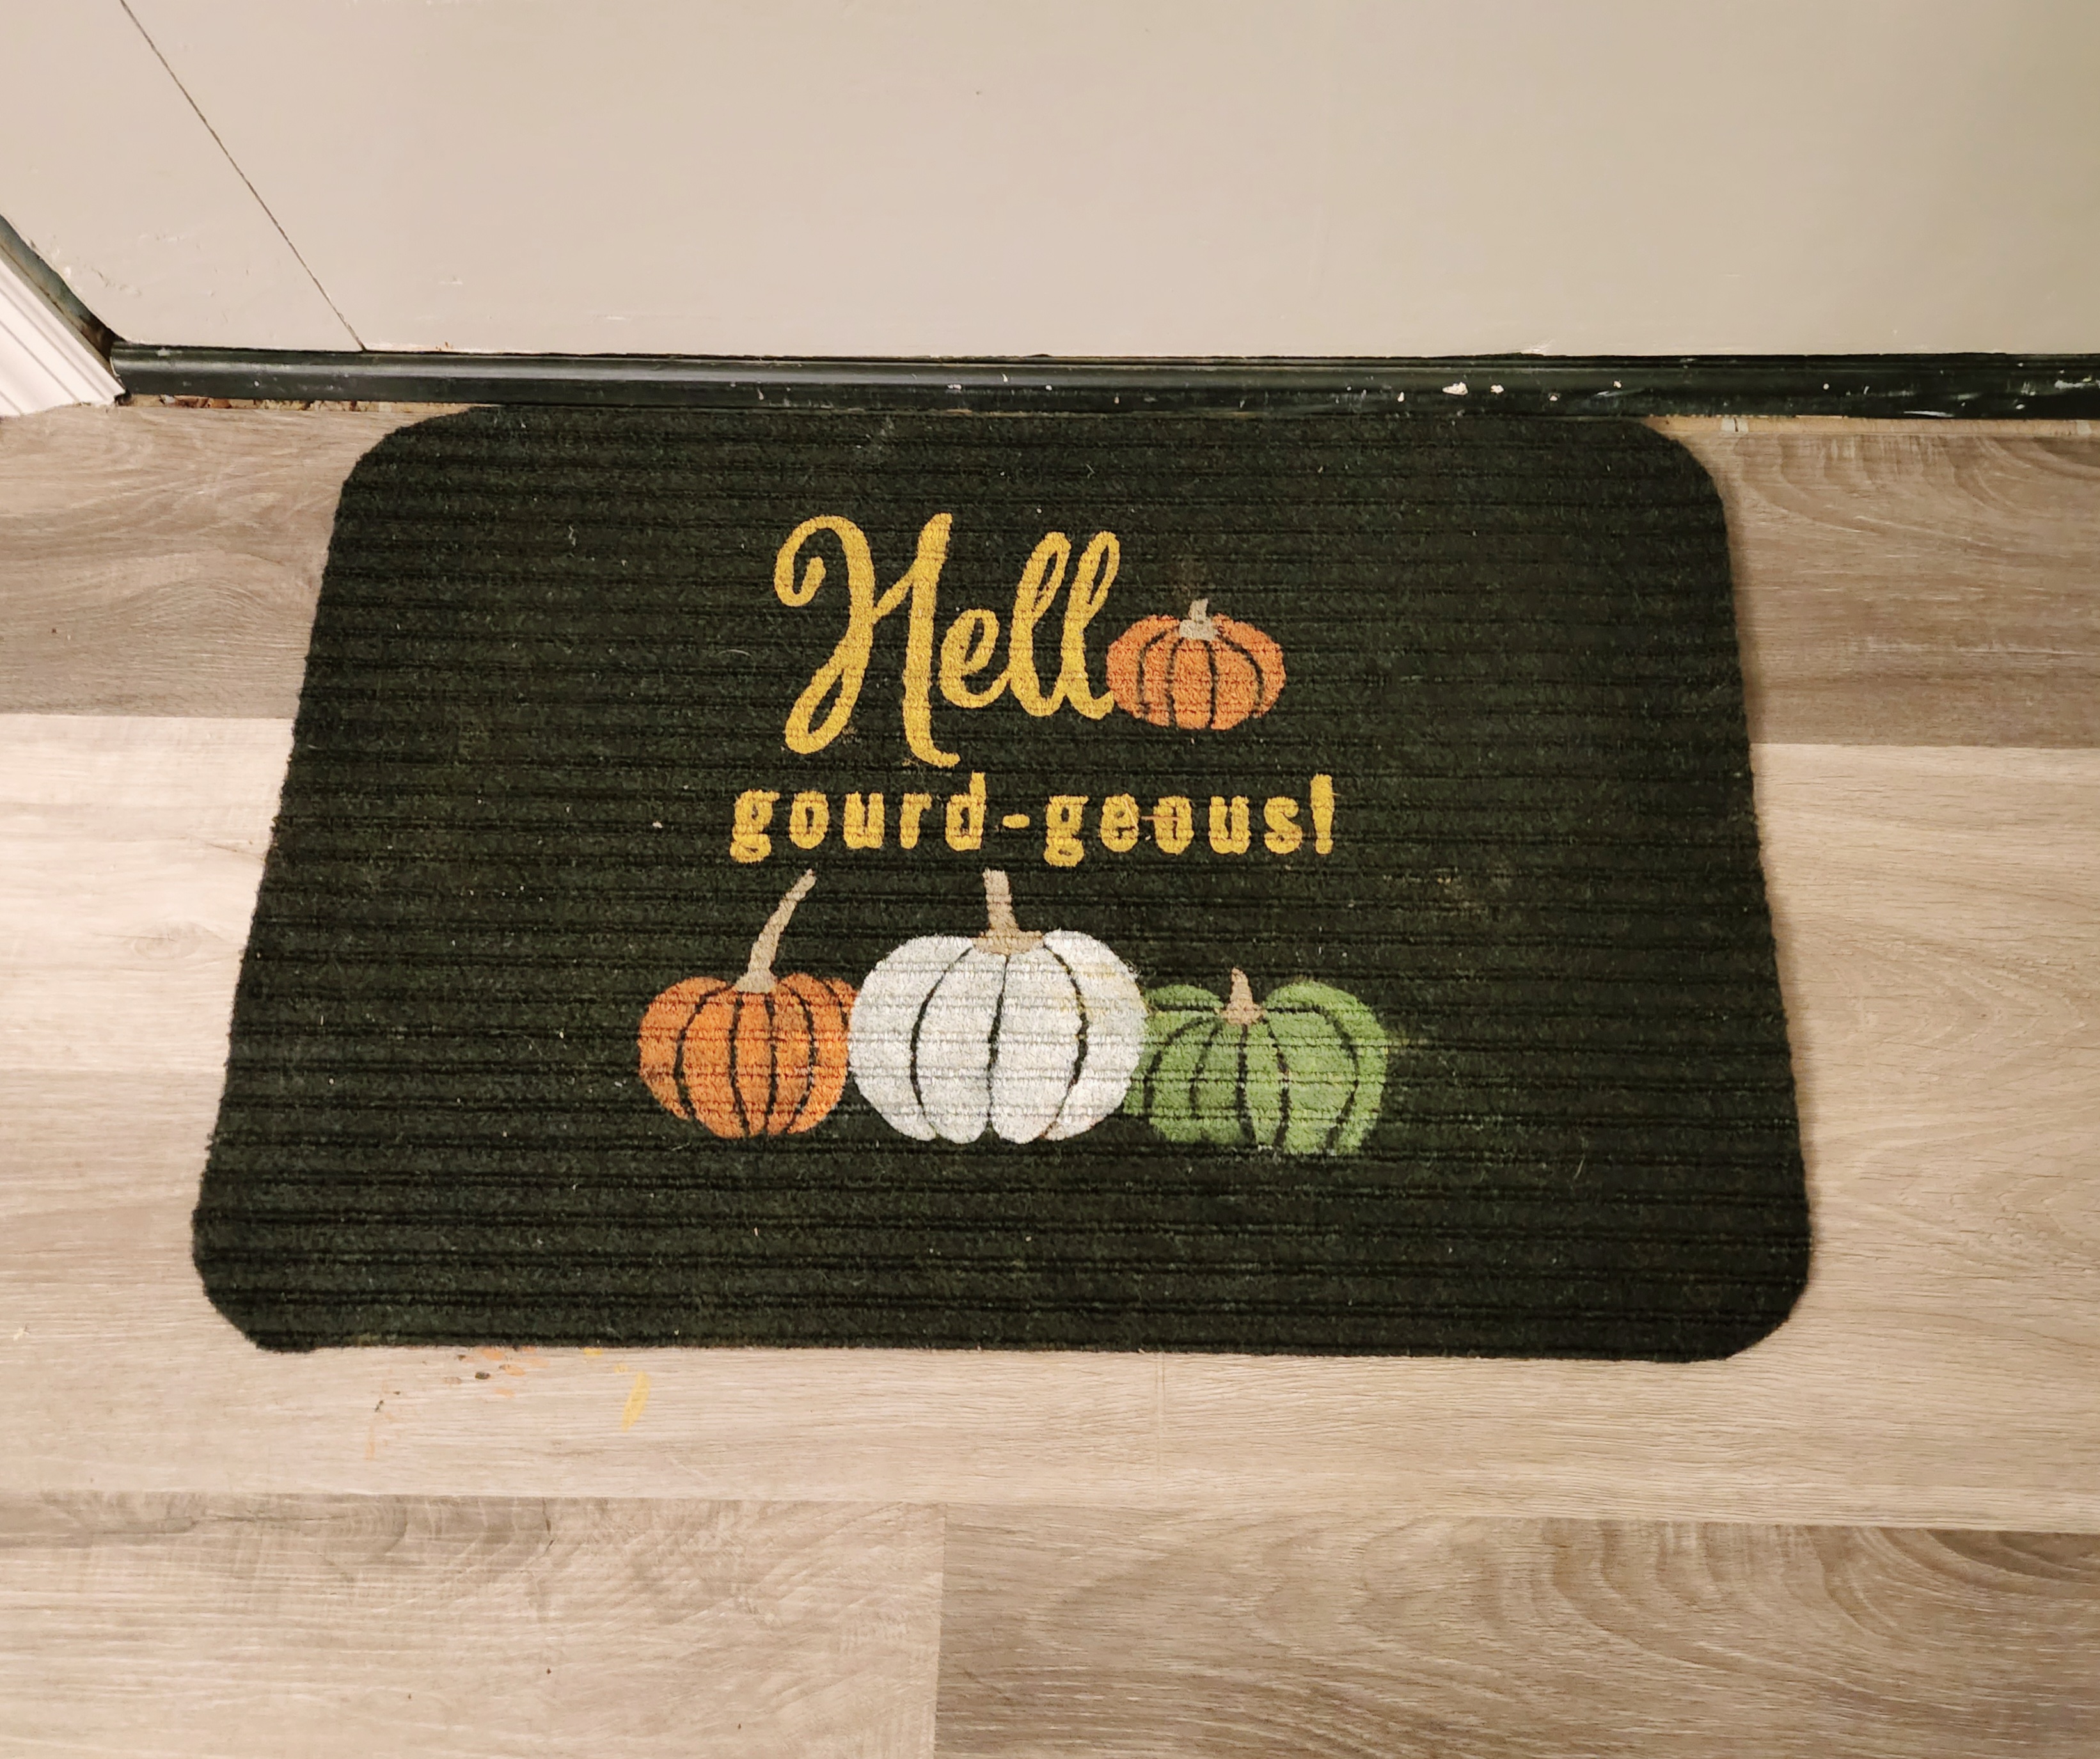
Here is the design painted on the fall doormat.

Place your new autumn welcome mat out and enjoy your hard work!
How’s this for a $1.25 mat?!

I will update this post with new pictures in the morning. By the time I finished my adorable fall doormat the sun was fully down, so these pics were the best I could get. It rained all day, so really it was the best I could get all day!
You can also use the mat inside.
I hope that you enjoyed this tutorial and make will be making your own fall welcome mat soon! This is one project on our Creative Crafty Hop, so keep reading for more!
Remember to pin the image below or share this post with the buttons on the left side of the page so you can find it when you’re ready to start your project! Also, follow me on Pinterest for new ideas added weekly! Be sure that you never miss a great tutorial for decor like wreaths, signs and other home decor, free printables, crafts, and other fun posts! Enter your email address below to be notified of new posts! Use the buttons below to follow me on social media for other great content.

Don’t go yet! There’s more to see!
There’s plenty more to see here on the blog! If you’re looking for something specific, use the search box in the sidebar to look it up. If not, you might enjoy these ideas. Don’t have time to read them all now? That’s ok, just click over to the posts using the pictures and pin them for later. You can also add Life as a LEO Wife to your favorites and check back for new ideas and free printables and SVGs every Wednesday, as well as link parties with tons of shared ideas on Sundays!
Creative Craft Hop
Dollar Tree Fall Pom Pom Wreath
Fall Garland with Dollar Tree Items
Spooky Fun Halloween Decoration
How to Hand Paint Furniture Designs


Love the play on words Niki; such a fun project!!
Thank you!
How cute is this! What a fun and clever idea, it turned out great Niki!!
Thank you!
This turned out so cute. Love how you used the pumpkin for the O, great idea. Thanks for giving us inspiration.
Thank you!
Niki this is adorable! I love all the fall colors and you make it seem super easy to make. Great job and I’m pinning to give it a try too! Thanks for sharing.
Thank you! It was so easy. It did take so long to paint though because you have to go over it at least ten times before the colors pop enough. But that’s just doing the same thing over and over so it’s simple
Cute design, Niki, and I love the colors!
Thank you! It took me a while to figure out what colors I wanted!
Great project! I need to make one for my house too. My current one has faded pineapples from last summer. Thanks for sharing some great inspiration. Pinned!
Thanks! Can’t wait to see yours!
How cute! I love how this turned out! Blessings, Cecilia @My Thrift Store Addiction
Thank you Cecilia!
That turned out nice, pretty colors! Thanks so much for linking up at the Unlimited Link Party 80. Pinned.