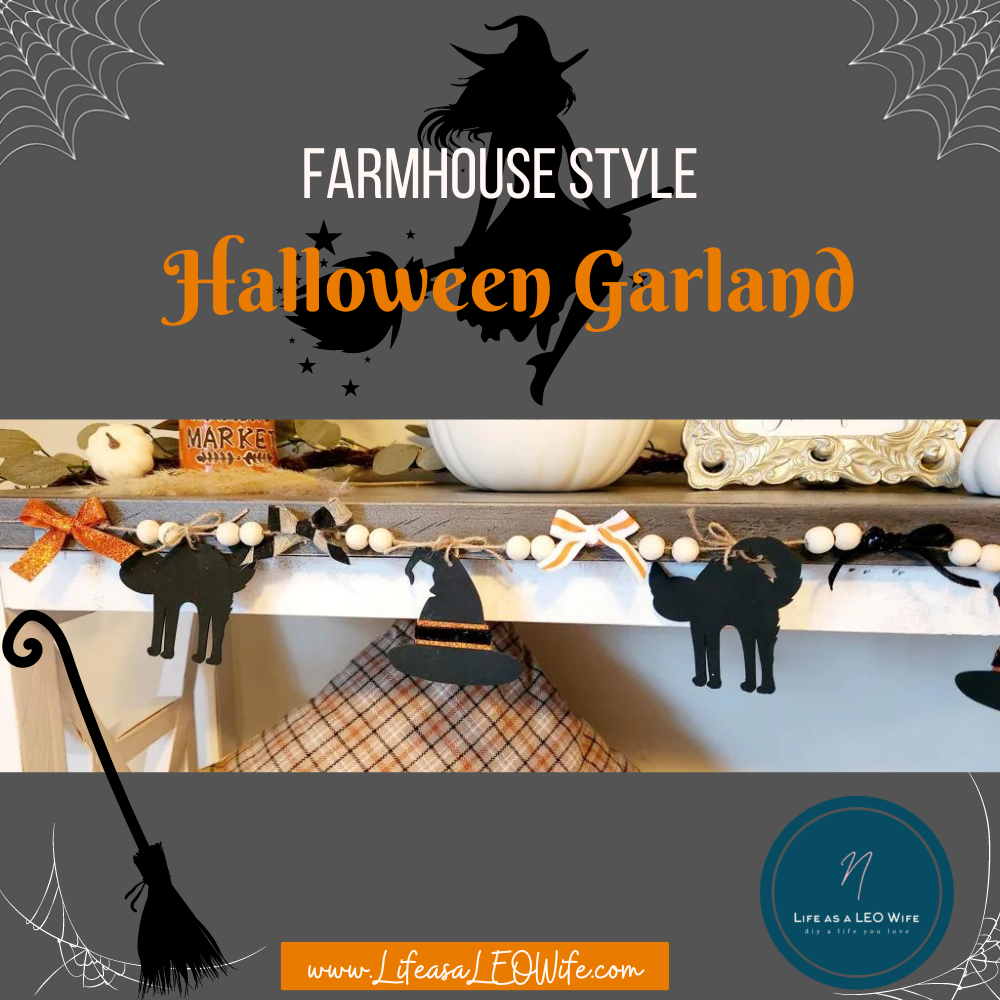
Welcome to the first post of October! Can you believe how fast this year is flying by?! I’ve been busy decorating our home for Halloween, and I felt like my new “mantle” needed a garland. If you missed it we mounted our living room TV and hid our wires behind the wall (you can so do it too!), which allowed me to create a mantle to decorate, our sofa table! Anyway, the need for a garland brought on this farmhouse style Dollar Tree Halloween garland. Let me show you how to make your own!
It’s time for our monthly DIY Blog Hop hosted by Tarah of Grandma’s House DIY. On the first Sunday of each month, I team up with some talented bloggers to bring you a new DIY project. This month our theme is fall.
Disclosure: I am a participant in the Amazon Services LLC Associates Program and the Dollar Tree Affiliate Program, affiliate programs that allow me to link to the products that you can use to make this project quickly and easily. If you purchase any of these products I may receive a very small commission at no cost to you! That commission helps me continue to bring these great decor DIYs, free printables, and all of the other goodies on this site to you. Thanks so much for your support!
Dollar Tree Halloween garland supplies:
- wood cutouts from Dollar Tree- I used cats and witch hats. If you can’t make it to DT, here is a pack of wood cutouts that have witch hats that are 3″ tall and another pack that has smaller cutouts.
- twine
- black acrylic paint– Other colors are pictured, but I only used the black.
- paint brush
- hot glue gun & glue
- wood beads– I only used the 15mm size.
- various 5/8″ ribbon in Halloween colors & patterns- I used orange glitter, black glitter, orange & white striped, & a burlap style ribbon with black glitter stripes. This pack on Amazon is only $7.99 & has 12 different prints that are all 1″ wide. That size should still work well, but if you want thinner ribbon, this pack is 3/8″ thick (the size of my black glitter ribbon) and has 10 rolls witch super cute patterns like orange and black gingham. I’m grabbing them to use on other projects!

Paint the Wood Ornaments
First paint three ornaments from each pack. That will give you a garland of about 6′ included the tails used to hang it. If you want a longer Halloween garland, paint more ornaments. Once the front of the ornaments has dried, turn them over and paint the back as well.

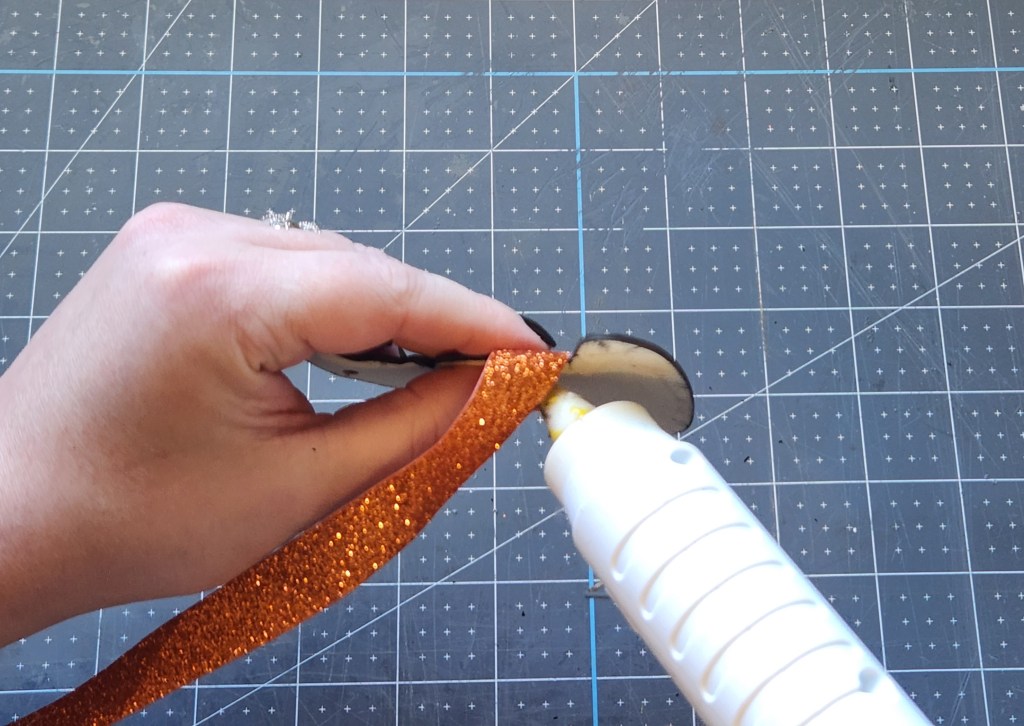
Embellish the Witch Hats
I wanted to break up the all-black ornaments so that my farmhouse Halloween garland would have more color than just that coming from the bows. I am not a talented painter, so I decided to create the bands that are on witches’ hats with ribbon.
Place a bit of hot glue on the side of the hat just above the rim and place the end of the ribbon on it. Wrap the ribbon around the hat and glue the other end of it on the other side. I didn’t cut my ribbon until it was glued in place.
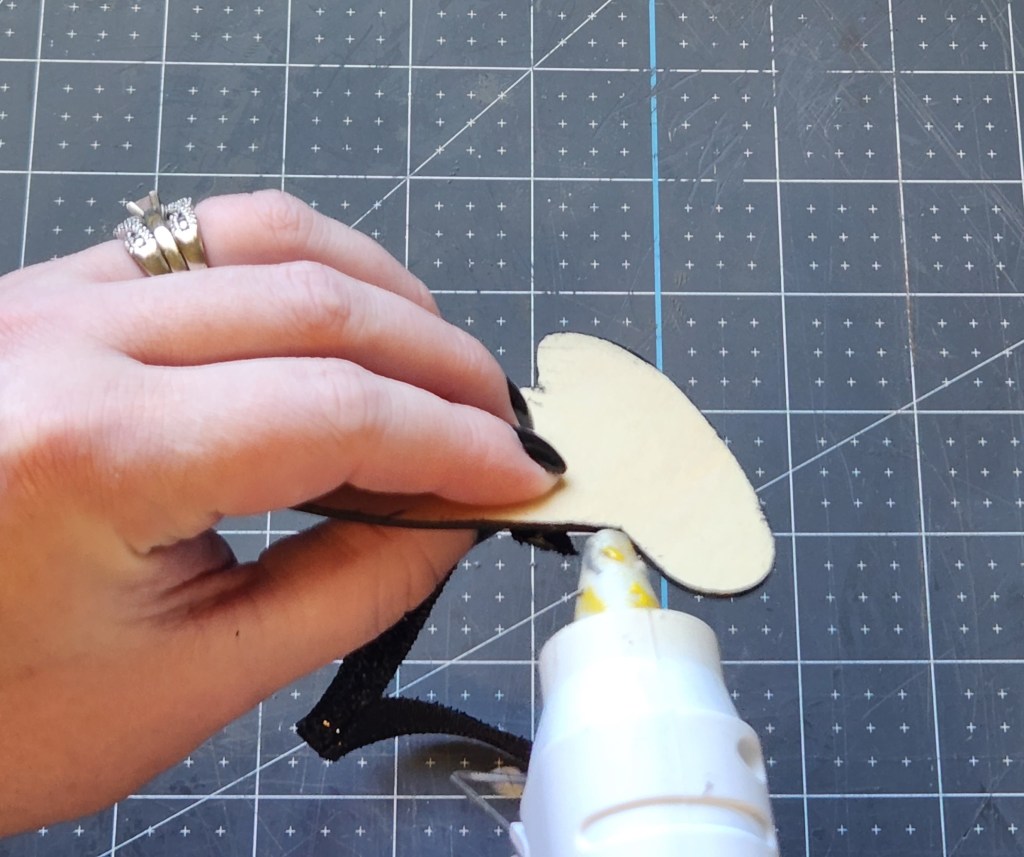


Note that I did glue the ribbon right on the side edge, not on the front. At first, I only painted and added ribbon to one side of the ornaments, but when I strung them on the Halloween garland, they twisted a bit showing the backside. I removed them from the twine and painted the other side. So, in the photos you’ll see that I’m only adding ribbon to one side. Save yourself a lot of time and do both sides at once.
Make Bows to Embellish the Farmhouse Halloween Garland
Next make two small bows with each of your four ribbons. They should be about 2″ across.

Now you will have all of the pieces that you need to complete your Dollar Tree Halloween garland. That was easy, wasn’t it?!

String the Halloween Garland
Cut a 7′ piece of twine. Glue one of your bows about 8-10″ from the end. Ignore the bead that is already on the twine.

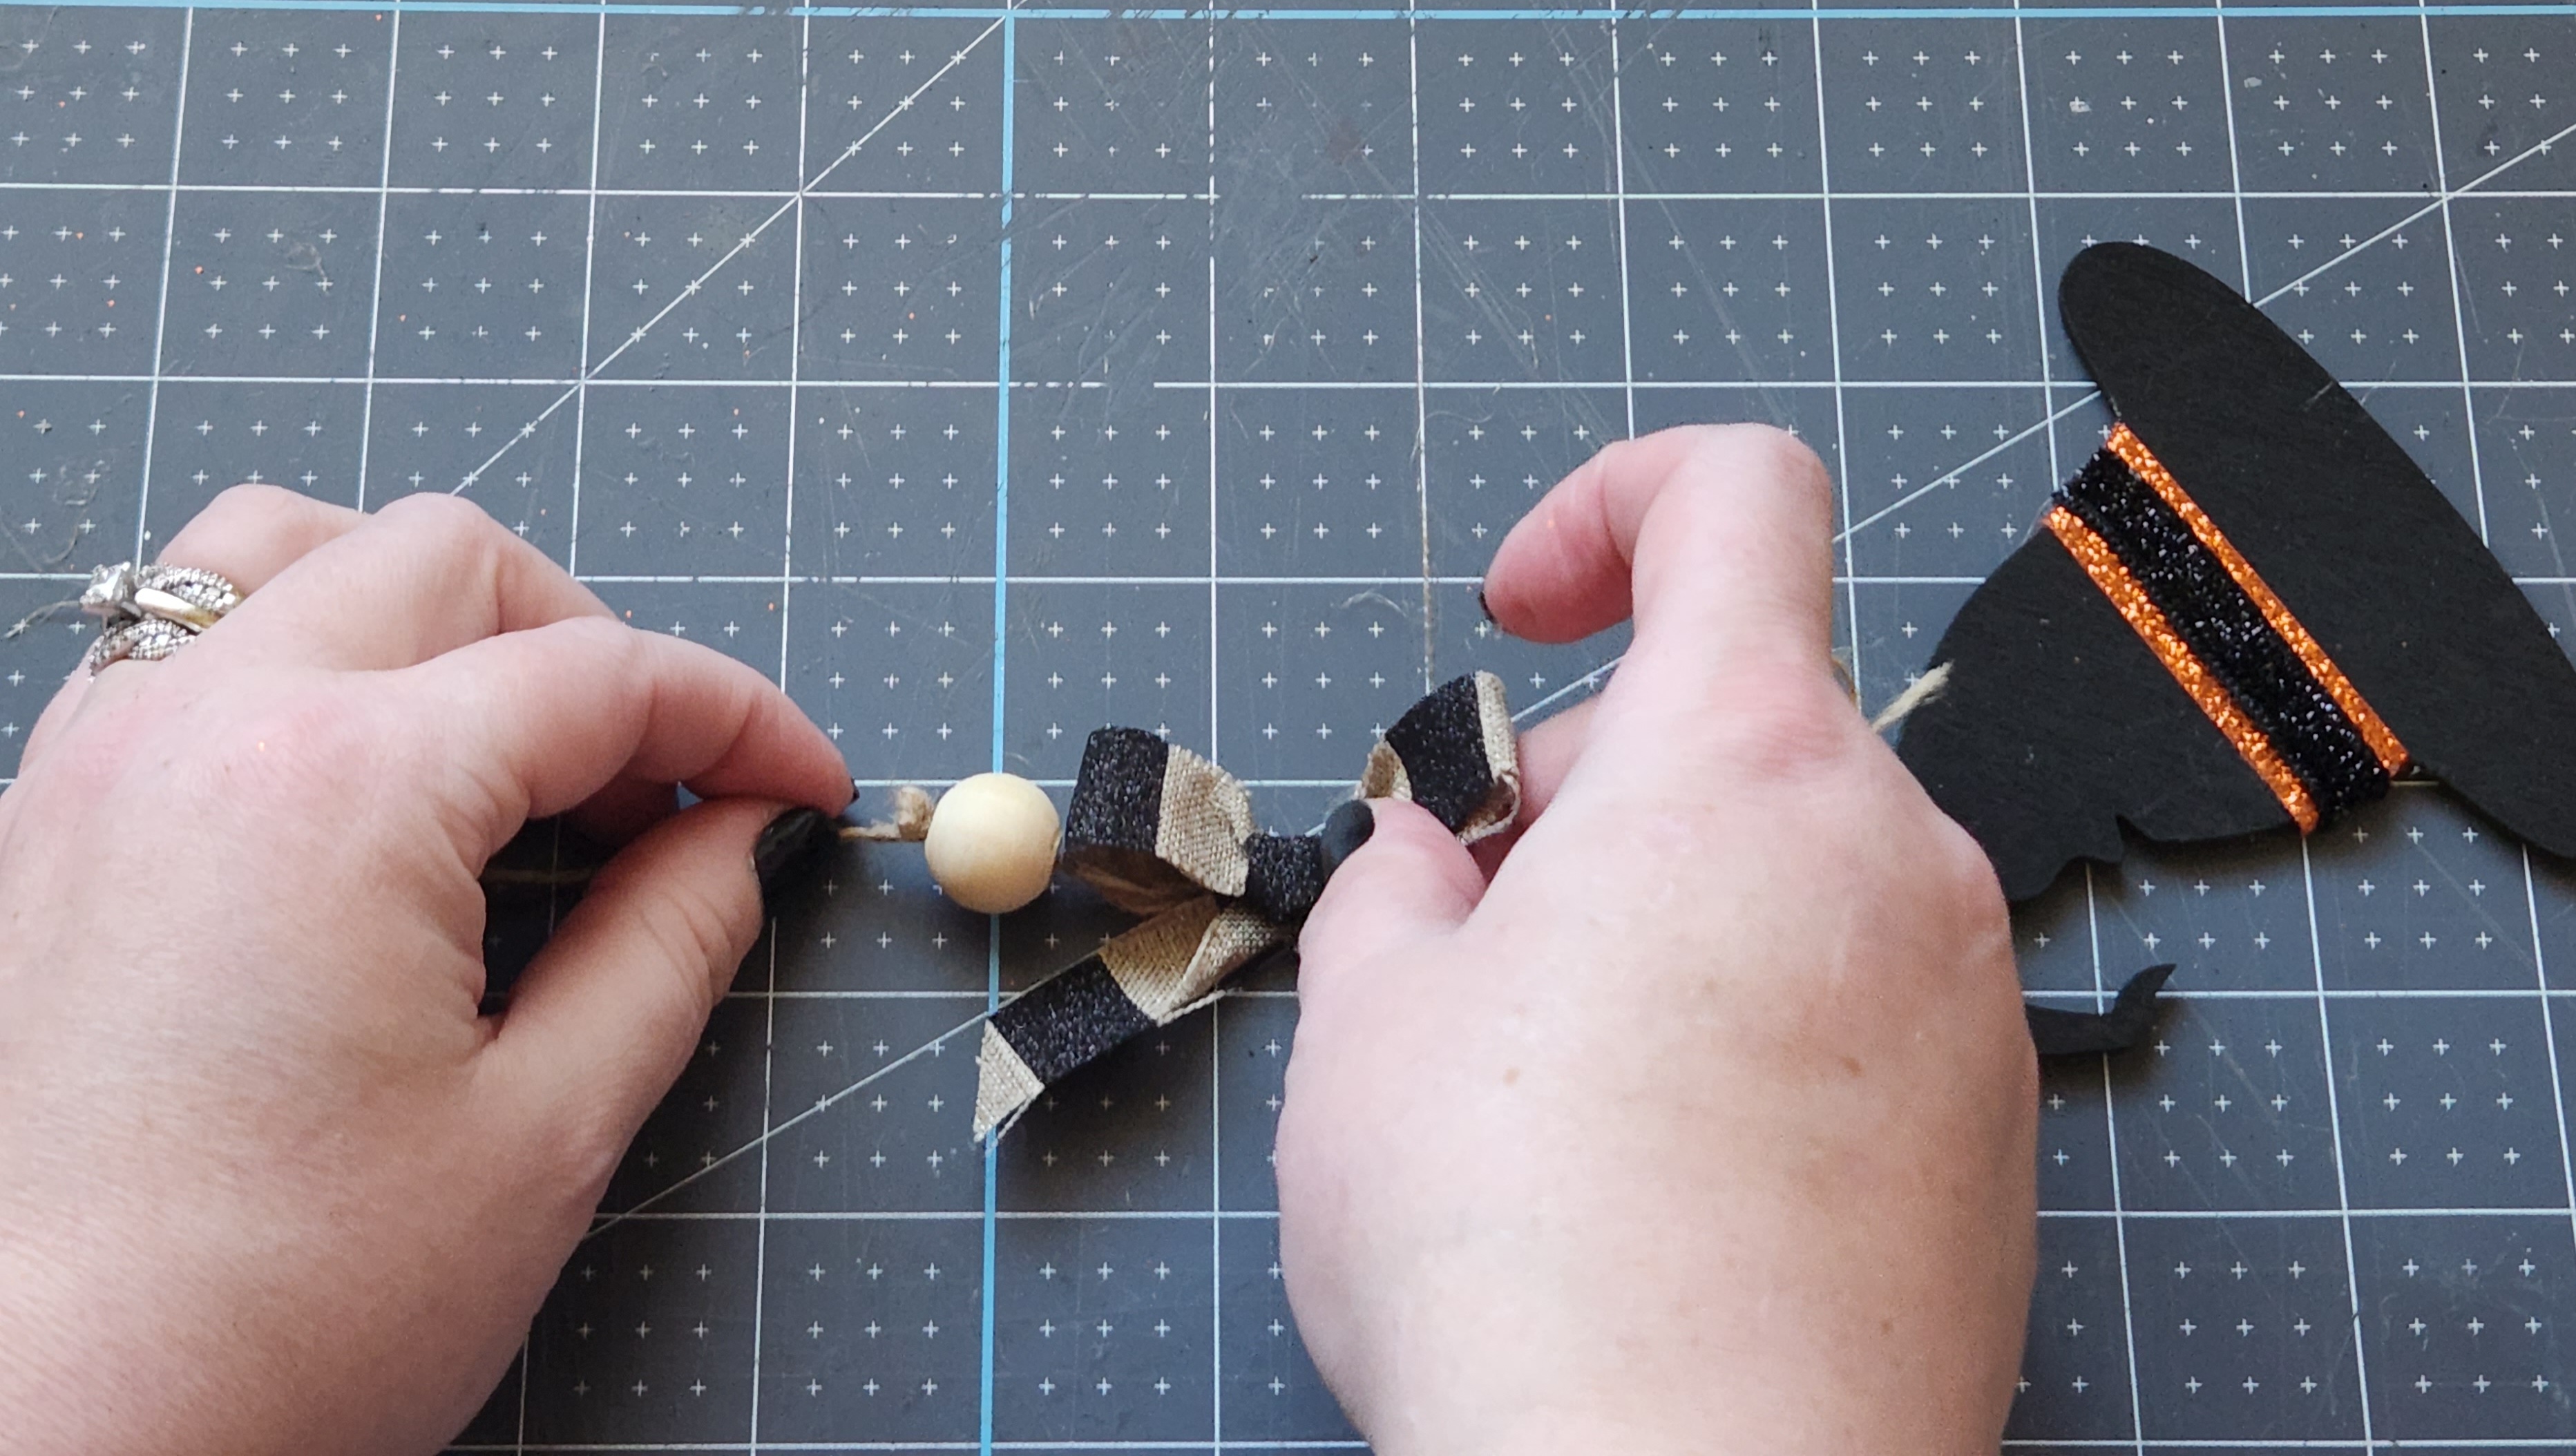
Tie several knots on top of one another just a bit under the bow. That will create a barrier to keep the beads from going under it. If you tie only one not, it will not be big enough to keep everything in place. The beads will go right over the knot, so keep tying knots right on top of each other until it’s big enough to keep everything where you want it on the Halloween garland. You can see one of those knots in the above picture to the left of the wood bead.
Next string two wood beads on the garland. They won’t go under the bow if you tied your knot properly. You could not tie the knots and just fill the garland with beads, but I wanted bows and a different look than the all-bead garlands I keep seeing. I like the breakup of this Dollar Tree garland. It also saves you a lot of money!

Tie another knot very close to the beads. You want the knot to hide somewhat inside the bead. You can add a dot of hot glue onto the knot and slide the bead over it. That will hide the knot and keep the bead in place.
Tie the Ornaments on Twine
The Dollar Tree ornaments come with very thin pieces of twine. I tried to use those to attach them on my DT garland, but they broke off very easy. It’s like the twine just disintegrated. So, my advice is to just start off with your regular twine and save time and heartache lol!
Cut 8″ or so of twine and place it through the hole on the ornaments. Tie it in a cute little bow so that you have about a 1/2″ of space to string the hats and cats (ha!) onto the Halloween garland. If you try to just string them directly onto the garland, they will turn sideways. Attaching them with the twine “hook” will keep them facing outward. Plus, they just look cute!
Continue Stringing the Farmhouse Garland
Place the twine through the hole you created on one of your wood ornaments and bring it to about 1/2″ from the wood beads. Then add some hot glue under the twine bow you tied on the ornament and press it onto the Halloween garland.

Tie another one of the knots the same distance from the ornament as you did from the other side. Next add another two beads, gluing the first over the knot, then tie a knot after the second, gluing it down. Now you’ve completed the first pattern on your Dollar Tree Halloween garland. Add another set of the pattern, this time with the other ornament shape, in my case, a witch hat. Continue in this manner until you have used all of your ornaments. End on a bow, just like you began.
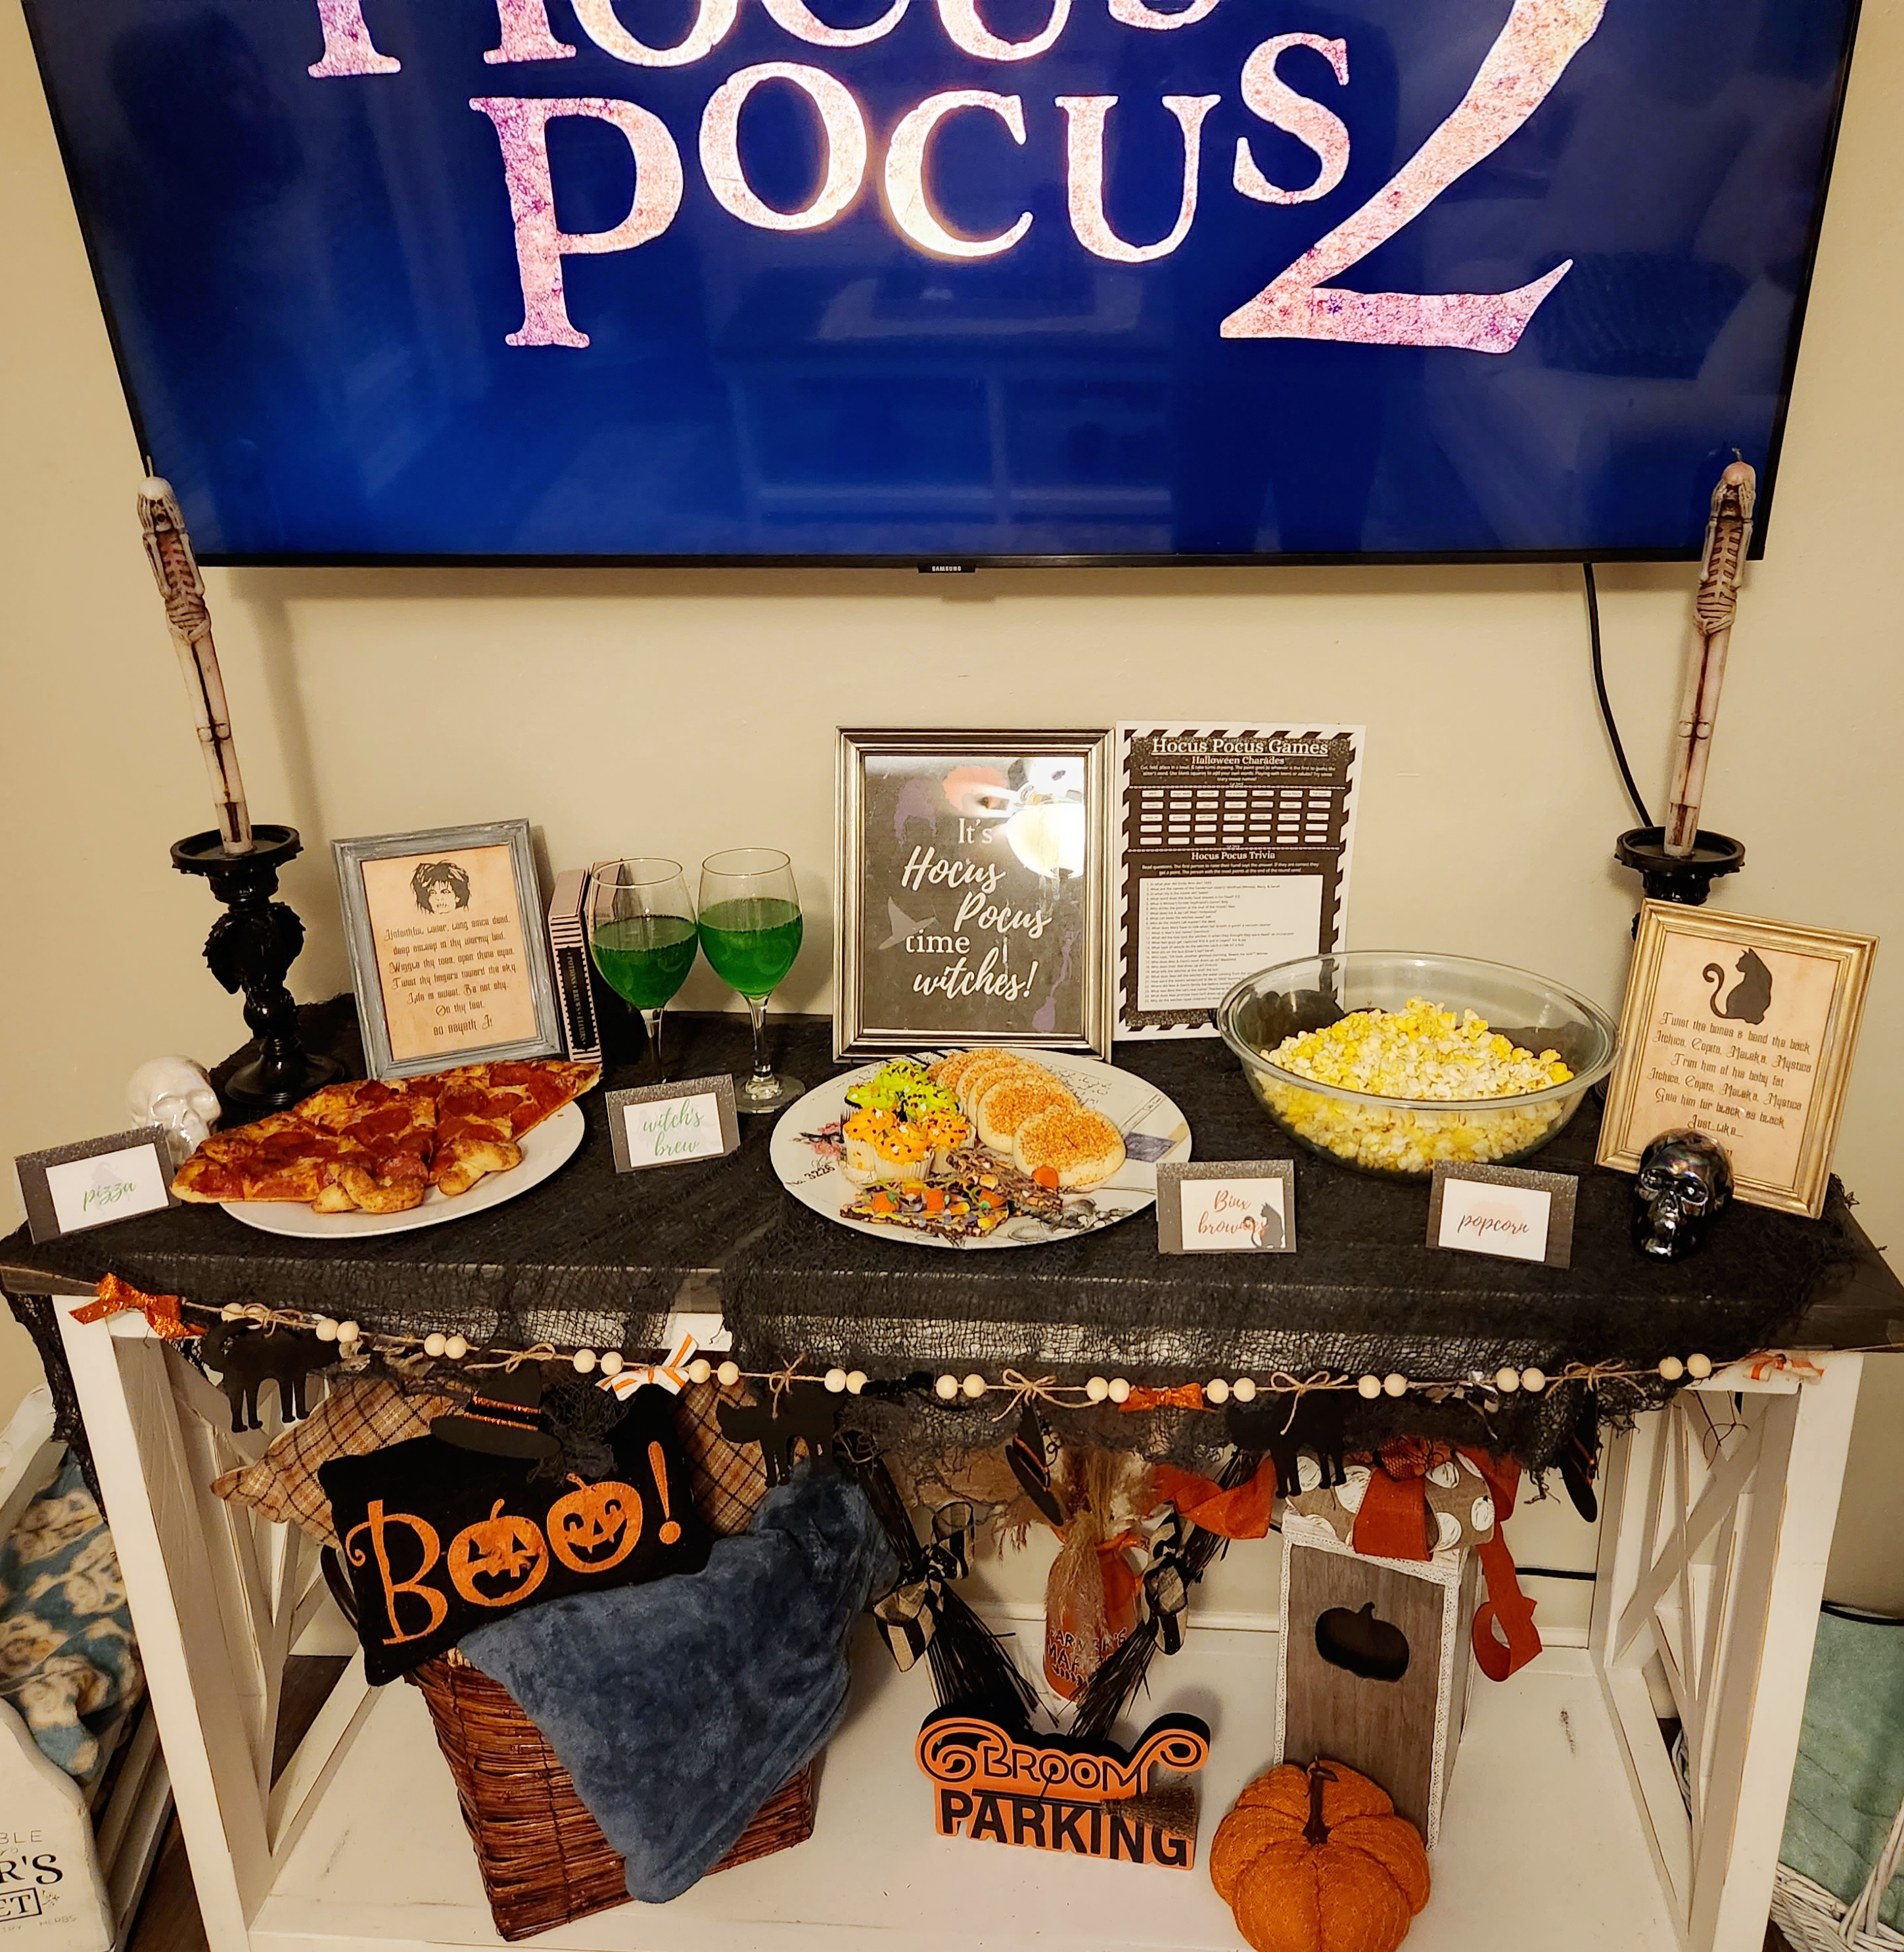
It’s that easy! Here’s a video of the process. I did pause while tying the large knots so that it wouldn’t be 10 hour video lol. I knew you’d get the point seeing me tie one! At the end of the video I hadn’t yet set up my Halloween decorations, but you can see the beginnings of my Halloween spread that I set for our Hocus Pocus 2 movie night. You can get that 14-page free printable set to throw your own epic Halloween family movie night in the next few hours!
Hang your adorable farmhouse style Halloween garland & enjoy the workings of your hands!
I hope that you enjoyed this tutorial! This garland worked perfectly for our witchy movie night and will look great throughout the season. Remember, this is a blog hop, so keep reading to see Tarah’s fall DIY!

Here’s a photo of our Halloween before our snacks were added to the table for our Hocus Pocus family movie night.


We all had a blast with food, drinks, and games while we watched Hocus Pocus 2. It’s a bit hard to see because it was of course nighttime, and the TV kept reflecting the overhead light back at me!
Remember to pin the image below or share this post with the buttons on the left side of the page so you can find it when you’re ready to start your project! Also, follow me on Pinterest for new ideas added weekly! Be sure that you never miss a great tutorial for decor like wreaths, signs and other home decor, free printables, crafts, and other fun posts! Enter your email address below to be notified of new posts! Use the buttons below to follow me on social media for other great content.

On to Our DIY Blog Hop!
Our theme for this month’s party is fall. I know you’re going to love what Tarah has for you this month!
Tarah of Grandma’s House DIY | Motion Sensor Solar Lights – Tackling our Fall Project List

Don’t go yet! There’s more to see!
There’s plenty more to see here on the blog! If you’re looking for something specific, use the search box in the sidebar to look it up. If not, you might enjoy these ideas. Don’t have time to read them all now? That’s ok, just click over to the posts using the pictures and pin them for later. You can also add Life as a LEO Wife to your favorites and check back for new ideas and free printables and SVGs every Wednesday, as well as link parties with tons of shared ideas on Sundays!


Thesea are so cute! What a great idea. And I LOVE your Hocus Pocus party table, too!
Thank you!
Love how this turned out Niky! Its great hopping with you – happy October!
Thank you! You too!
A cute and budget-friendly idea for a halloween garland!
Thank you!
Fabulous garland! I love how you embellished the witches’ hats and added the cute bows in various colors. Pinned to my crafts board.
Thank you for sharing this post at Talent-Sharing Tuesdays Link-Up 37.
Carol
http://www.scribblingboomer.com
Thank you Carol!