Since I have started to get all of my summer decor planned and placed out in our home, I wanted something very nautical, but not shells. I saw many, many DIY nautical buoys on Pinterest, but they were all wood. That’s all well and good, but I don’t have an electric saw to cut some out of wood. Then I had an epiphany, I could use floral foam blocks from Dollar Tree. My hubby was running late while he was supposed to be getting them, so he stopped by Walmart and got the blocks that I used for this project. Today I’ll be showing you how to make nautical buoys of your own less than $4 for a set of three. If you already have paint on hand, you can make them for a little over $1! Let’s get into this!

It’s time for our monthly collab blog hop where a group of bloggers and I link up to bring you creative and beautiful DIYs based on a theme. This month’s challenge, hosted by Beverly from Across the Blvd., was to create a summer craft. Stick around after this tutorial to visit all of the other ladies on the Summer Craft Blog Hop. They have some amazing projects in store for you! At the end of the post I will add the links that will take you directly to their project. These will take you to their blog home page.
Beverly | Across the Blvd
Gail | Purple Hues and Me
T’onna | Sew Crafty Crochet
Marci | Stone Cottage Adventures
Niki | Life as an LEO Wife

Looking for more coastal farmhouse decor DIYs? This post contains 15 affordable, gorgeous coastal decor DIYs that look amazing with your farmhouse style. This coastal farmhouse lantern is stunning, bring seaside serenity into your home for less than $5! It’s a high-end dupe of a piece that costs more than $60! This DIY coastal flag is a beautiful piece that has been featured dozens of times to date across the web by interior decorators, decor magazines, and more. No one will believe that you were able to make this large farmhouse flag for about $10!
Supplies for DIY Nautical Buoys:
- pack of 3 floral foam blocks
- Exacto or utility knife
- Mod Podge
- acrylic paint in the colors you want
- paint brushes or foam brushes
- painter’s tape
- white cotton rope
- hot glue gun & glue


Shape the Floral Foam
Nautical buoys (or at least the ones you see in home decor) are generally rectangles with the tops tapered to the edge. Where I live, on the Gulf with several rivers nearby, the buoys aren’t shaped like that at all, but I digress.
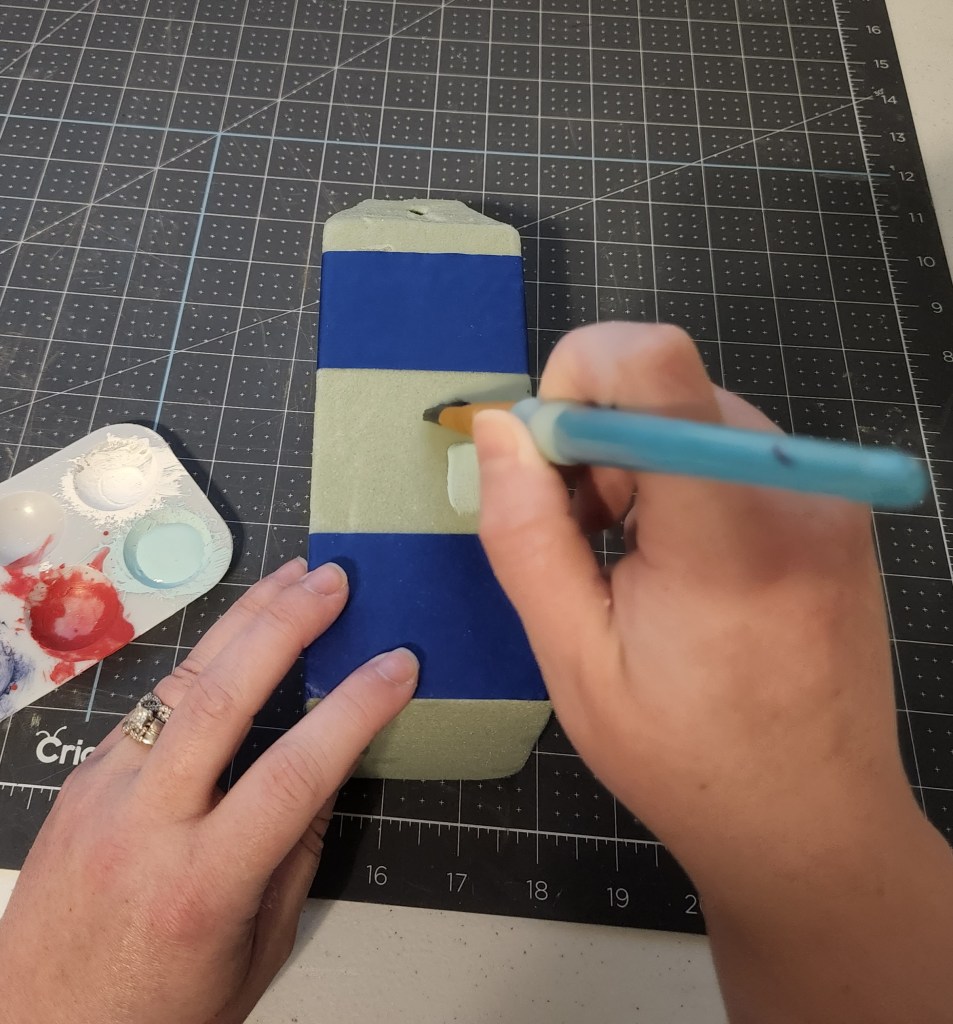
Start shaping your block by laying it on a grid cutting mat or right up against a ruler. Press in slightly with an exacto knife to create a line from the mat up on one side, about 2 ” from the top. Turn it and place a mark in the same place on that side. Continue doing that on the last two sides. I had already started to cut some pieces off in the photos below but wait until you’ve marked the foam so all the sides are even.


Use your utility knife to start shaving off the foam from the top to the line you just marked. Continue around the foam shaving diagonal lines from the top down to the mark. Soon you will have a smaller square top that tapers down to the line you marked.


Once you’re happy with the shape, you need to make a hole for the rope that you’ll add later. Use a wood skewer or some other long, round item to create a hole. Pass it through the top of the buoy through one side and out the other side. Use the skewer to widen the hole a bit, twisting it up and around until you think it is just wide enough to put the end of the rope in.


Here’s a video of the process:
Add Mod Podge to the DIY Nautical Buoy Shaped Foam
As you saw in the video above, you need to cover the foam in Mod Podge. This creates an even surface for the paint to adhere to and keep it from just being soaked into the foam. Some paints kinda “melt” the foam. When the Mod Podge is on, it creates more of a smooth surface, your DIY buoy from just looking like, well, foam! I gave all of mine two coats.


Tape off the Pattern You’d Like
I made simple stripes on my DIY nautical buoys. Using painter’s tape, mark off stripes, or another shape, on the buoys. I made different widths of stripes on all three of mine.


Be sure to let the Mod Podge dry completely before adding the tape! Also use a high-quality painter’s tape. If you don’t it’s very likely that when you remove it patches of Mod Podge, paint, and foam will come off with it. I used Duck Tape Easy Off (or easy release?) Painter’s Tape. I had one tiny piece come off, but it was easily covered with paint, completely unnoticeable. Another tip is to go over the edges of the tape with your finger very well to make sure nothing is able to seep under the tape.
Paint the Nautical Buoys
Once all of your tape is on the foam, you can start painting them. I used navy, white, and robin’s egg blue for my buoys. That matches the coastal farmhouse decor I’m using for the summer. I added one red stipe on one if my buoys to use when I put out my patriotic decor.
Paint in between the pieces of tape. You’ll probably need about two or three coats to completely cover the foam. When you’re painting near the tape, paint only in one direction. That helps to keep the paint from being pushed under the tape with the brush.

Allow the paint to dry then remove the tape. Now you need to place painter’s tape right along the edges of the paint that you just put on. That will keep the new color off of the first stripe.


When the last of your stripes are dry, carefully remove the tape from the buoys. After this you can add numbers or letters. If you’d like to hang them near your front door, it’s a cute place for house numbers. I think I may add a “K” and some numbers. Maybe our birthdays or anniversary dates.
Doesn’t this look great?! I love that the finish looks just like the concrete finish of the shapes (which are mostly round with a tapered top) on top of the buoys down here on the Gulf Coast. The next time I’m out on a boat, I’ll try to remember to take a photo to share with you. I would love to have you follow me on Instagram so that you can see them! Use the buttons in the left sidebar or at the top of the post to follow me. That will also keep you from missing any new posts, free printables, cut files, and more! I’ve started a new segment on Mondays called Must-Have Mondays where I share my favorite Amazon finds of the week. Videos will be coming soon, so I hope to see you there my friends!

Here’s a video of the process:
Add Rope Handles
The final step of making DIY nautical buoys is adding handles to the top. Tie a knot in the end of a white cotton rope or a sisal rope. I used cotton rope from Dollar Tree. Give yourself about 1/4″ or so at the end, past the knot so it can be placed inside the hole in the buoy.

Add a little hot glue and place the extra bit of rope before the knot into one of the holes that you made with the skewer. Add a little hot glue around the edges of the hole and press the knot into it.


Decide how much rope you’d like to have for the handle. I went short with the first one, then long (a little too long) on another, then a little bit longer than the first on the third buoy. Once you know how long you’d like it, add an extra 2.5″ to it, for the knot, then cut it from the rest of the rope.

Tie that end in a knot just like you did with the first side. Place it in the other hole and hot glue it in place.


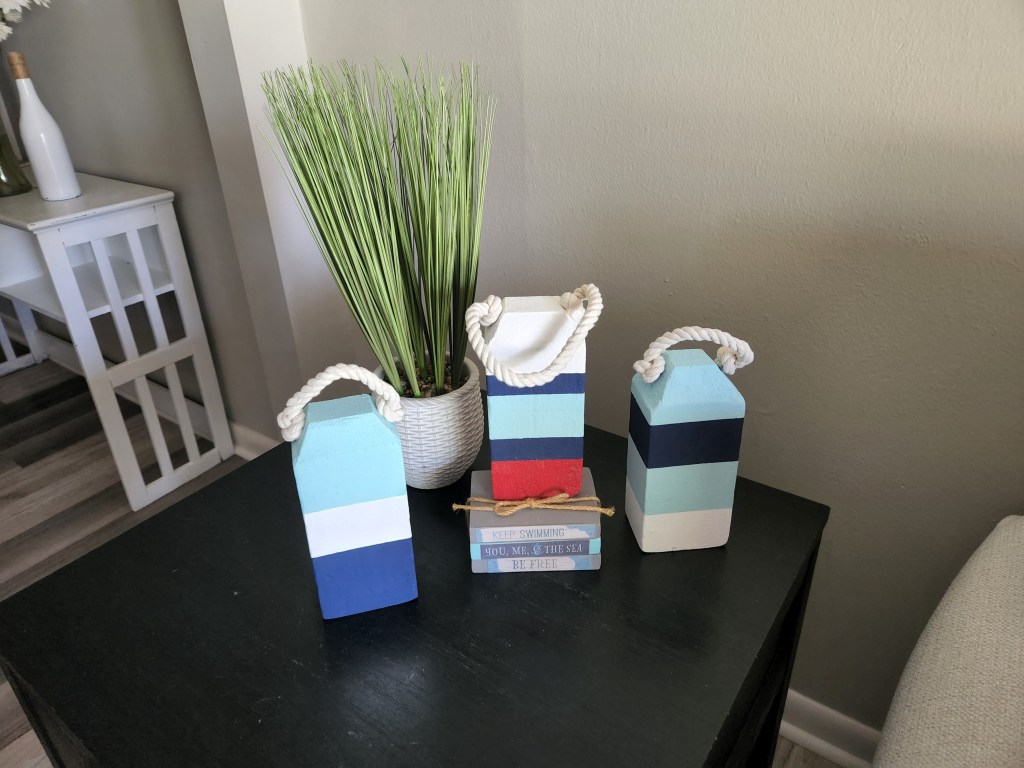
That’s it! Your DIY nautical buoys are ready to display!
I really hope that you have enjoyed this tutorial. I love how my buoys turned out. They go great with my other nautical decor, especially my favorite flag piece! If you’re looking for more coastal farmhouse decor, check out this post filled with 15+ DIY ideas. Remember to keep reading to see the DIYs made by the other super talented ladies on this hop. Here’s how my buoys turned out:


Remember to pin the image below or share this post with the buttons on the left side of the page so you can find it when you’re ready to start your project! Also, follow me on Pinterest for new ideas added weekly! Be sure that you never miss a great tutorial for decor like wreaths, signs and other home decor, free printables, crafts, and other fun posts! Enter your email address below to be notified of new posts! Use the buttons below to follow me on social media for other great content.

Don’t go yet! There’s more to see!
There’s plenty more to see here on the blog! If you’re looking for something specific, use the search box in the sidebar to look it up. If not, you might enjoy these ideas. Don’t have time to read them all now? That’s ok, just click over to the posts using the pictures and pin them for later. You can also add Life as a LEO Wife to your favorites and check back for new ideas and free printables and SVGs every Wednesday, as well as link parties with tons of shared ideas on Sundays!


On to the Summer Craft Blog Hop
I know that you are going to love the crafts that the ladies in today’s hop have come up with! They are all so talented, so make sure to take the time to check them all out!
Beverly from Across the Blvd. | Patriotic Triple Frame Wall Hanging
Gail from Purple Hues & Me | Floral Hoops Decor DIY
Marci from Stone Cottage Adventures | Prepping Our Patio for Hot Summer Nights
T’onna from Sew Crafty Crochet | Reversible Bucket Hat
Follow me on Pinterest for new ideas added weekly!


Wow, Niki! How creative! I never would have thought to use floral foam to make buoys! And, I didn’t know you could paint floral foam, either. I’ve learned so much from your tutorial! Thanks for sharing!
Thank you Gail!
These turned out great, what a brilliant idea to use floral foam! I had no idea you can paint it! So cute!
Thank you! You can’t paint it unless you add the Mod Podge. The paint will eat away at the foam if not. I thought I’d try it and it worked!
This is so clever!!! The navy wife in me loves all things nautical, so I’m really love these diy buoys! Great colors! Pinning! I might have to make my own soon!
Thank you. You should make some. I’d love to see your take on it! Also, thank you for your service as well as your husbands. I think a lot of people forget it’s hard on the whole family. My LEO was on patrol for like 12 years before he moved on to be a detective. I was so relieved with that! So, hug your whole family tonight and tell them so many of us are so, so grateful!!
Genius! This is such an affordable way spiff up summer decor! I love all the colors you chose. pinning for later -Marci @ Stone Cottage Adventures
Thank you! I wanted them to match our coastal theme after the 4th, so I did one with a red stripe and that way I can pack that one up after the 4th and bring it back out for Labor Day.
How creative, love the colors!! Thanks so much for linking up at A Themed Linkup 114 for Coastal Crafts and Décor. Pinned.
We will be featuring you starting Wednesday at the Creative Crafts Linky Party! Pinned and shared!
Creatively, Beth
I’m honored! Thank you!