Welcome everyone! I’m so glad you’re here today because it’s time for our monthly Under $10 on the 10th blog hop. This is the time when I join with some other talented bloggers to bring you a project that you can make for less than $10. This month our theme is Christmas in July and I wanted to make a decor item that I could use now and in December. I have a coastal theme this summer and I live on the beach, so I thought why not make some coastal Christmas decor. I had a ton of seashells thus my Christmas in July coastal seashell Christmas tree was born. You can use these during the summer as well (well, at least I am!). Be sure to stick around after the post so you can check out the wonderful DIYs made by the other ladies on the hop!


If you’re looking for more coastal decor, you might like these ideas:


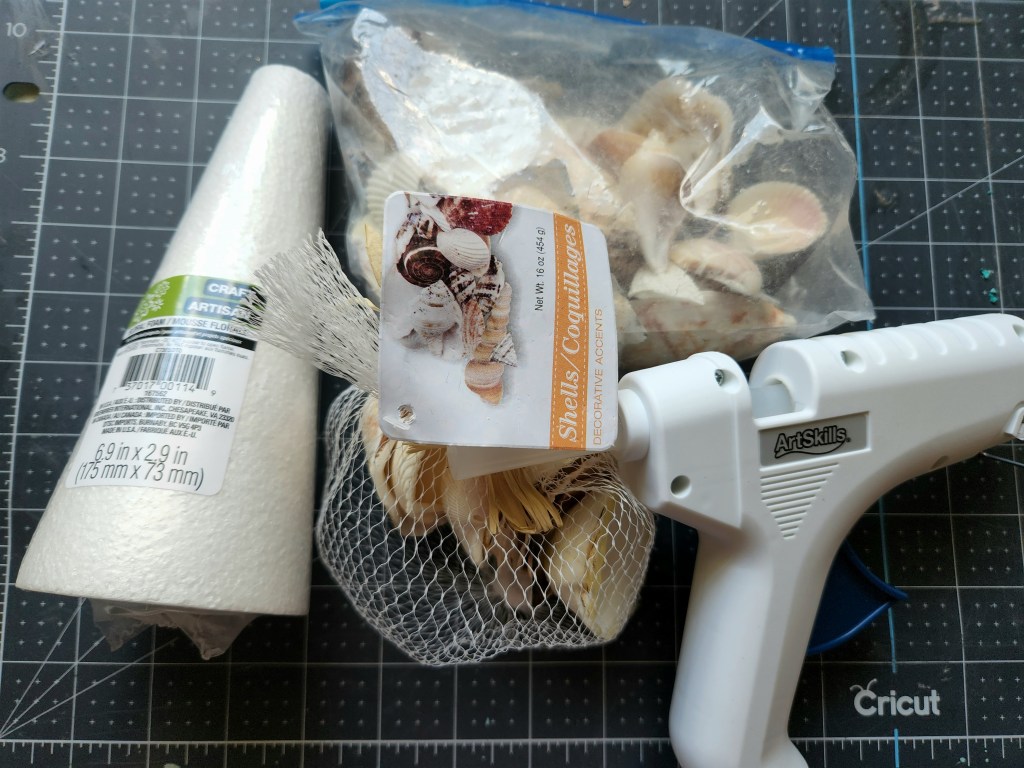
Seashell Christmas Tree Supplies:
- seashells: I had many packs from Dollar Tree that were already open, but I think I used about 4 to 5 packs for 2 trees. I used so many because I needed shells of the same size for each row. Each package of seashells had others of different sizes left in them.
- hot glue gun & glue
- half wood beads

Separate the Shells
In order to make your seashell tree even, you need to separate them by size. You’ll want them to be the same size on each row. It’s just easier to separate them all at once, rather than trying to figure out what size they are as you add them to the tree.

Seashell Christmas Tree #1
I created two different seashell trees. Why? Well, why not lol? Once I made the first one, I just thought, “Oooh, what if I put them on backwards?” So, here’s how you make the first tree.
Glue Seashells on the Styrofoam Cone
Add hot glue to the outer edges of one of your separated seashells. I started with shells that were big, about 2″ tall. Place the shell, face forward, at the bottom of your styrofoam cone.

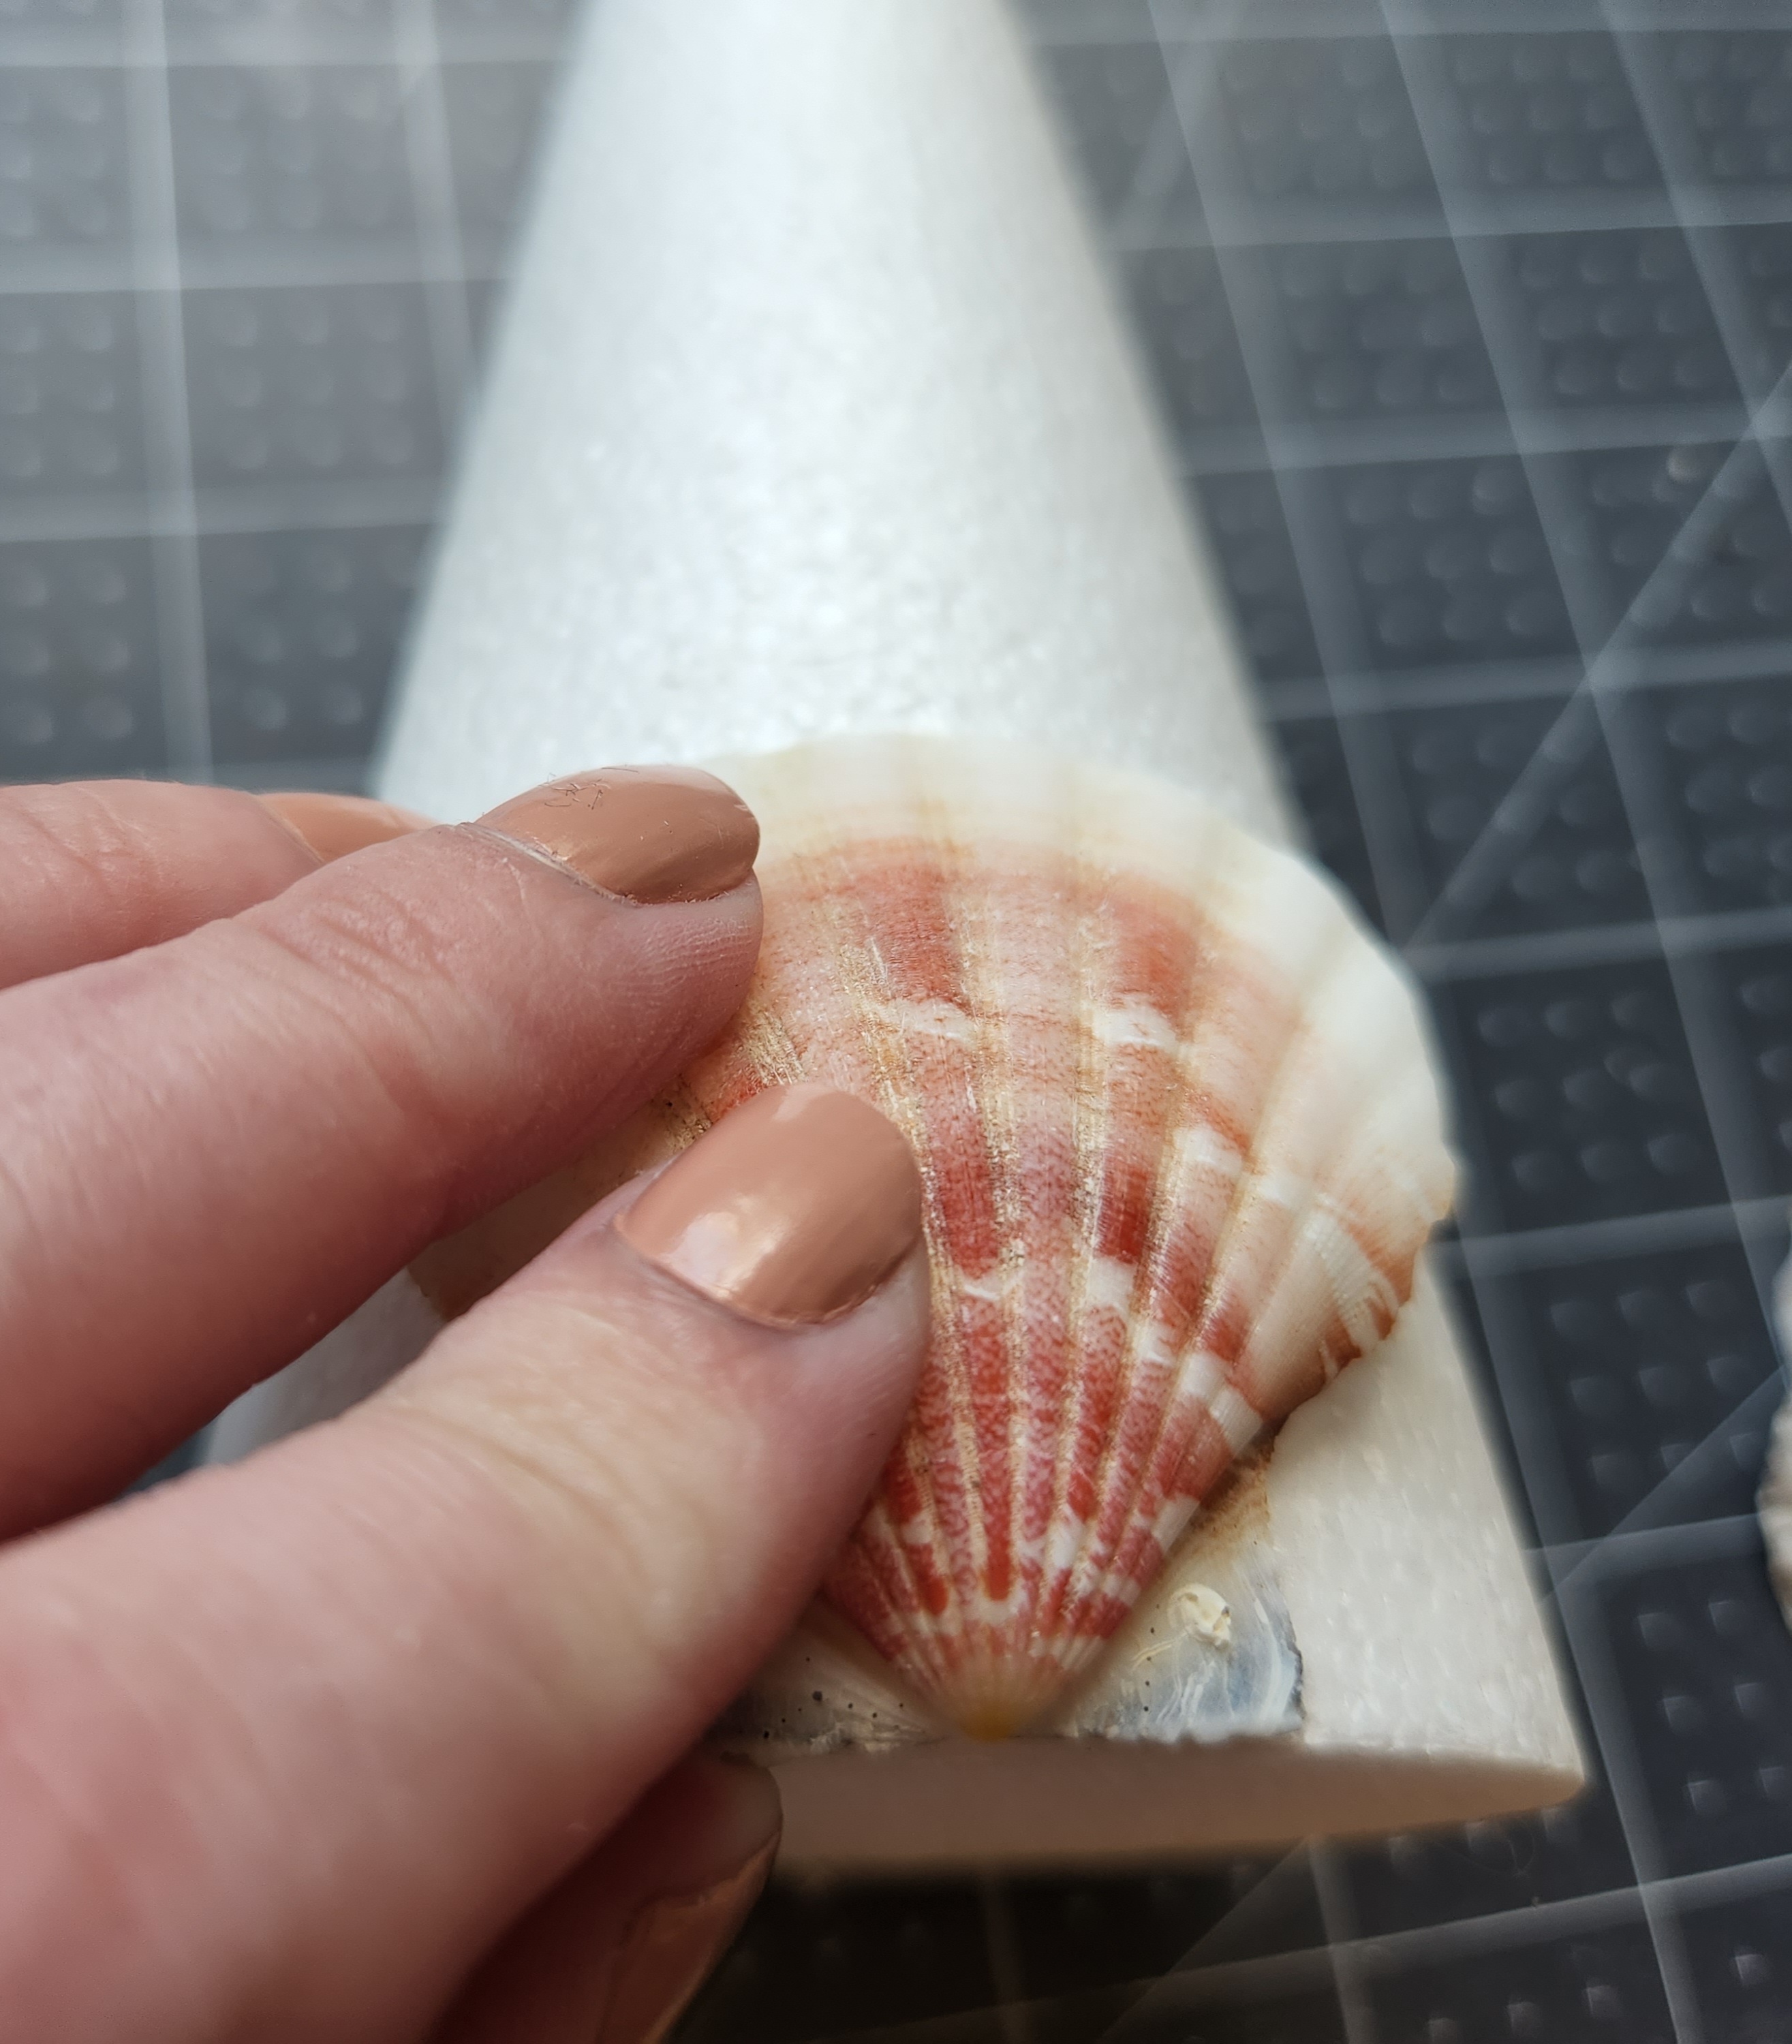
Next add some glue to the back of another shell of the same size and place it on the cone, slightly overlapping on top, so that the bottoms are near to each other.

Continue adding shells to the cone, completing the first row. Once you do, add another row of shells that are the same size. Make your first one overlap the first row right where the dip is between two shells. I used the next size shell on the second row because I didn’t have enough of the bigger ones. (You can see the wood utensils I’m using for tomorrow’s post in the background. Follow me on social media or email so you don’t miss it!)

Keep adding shells until the adding another row would go up above the cone.
Add Wood Beads to the Cone
If you don’t have any half wood beads, you could also use the pearl beads available at Dollar Tree. You could try to arrange your shells so that a final row will fit on the top of the cone.
If you do have half beads, lucky you because it took me forever to find them. Actually, they were an Amazon search away, but I kept waiting for them to come in at my local Dollar Tree or Michael’s but that never happened.
Add hot glue to the back of a 15mm wood bead (or the size of your choice) and place it at the top of your cone. After that, continue adding beads until the cone is covered.


Finally, hot glue a 20mm bead on top of the cone (I had a cone with a flat top).
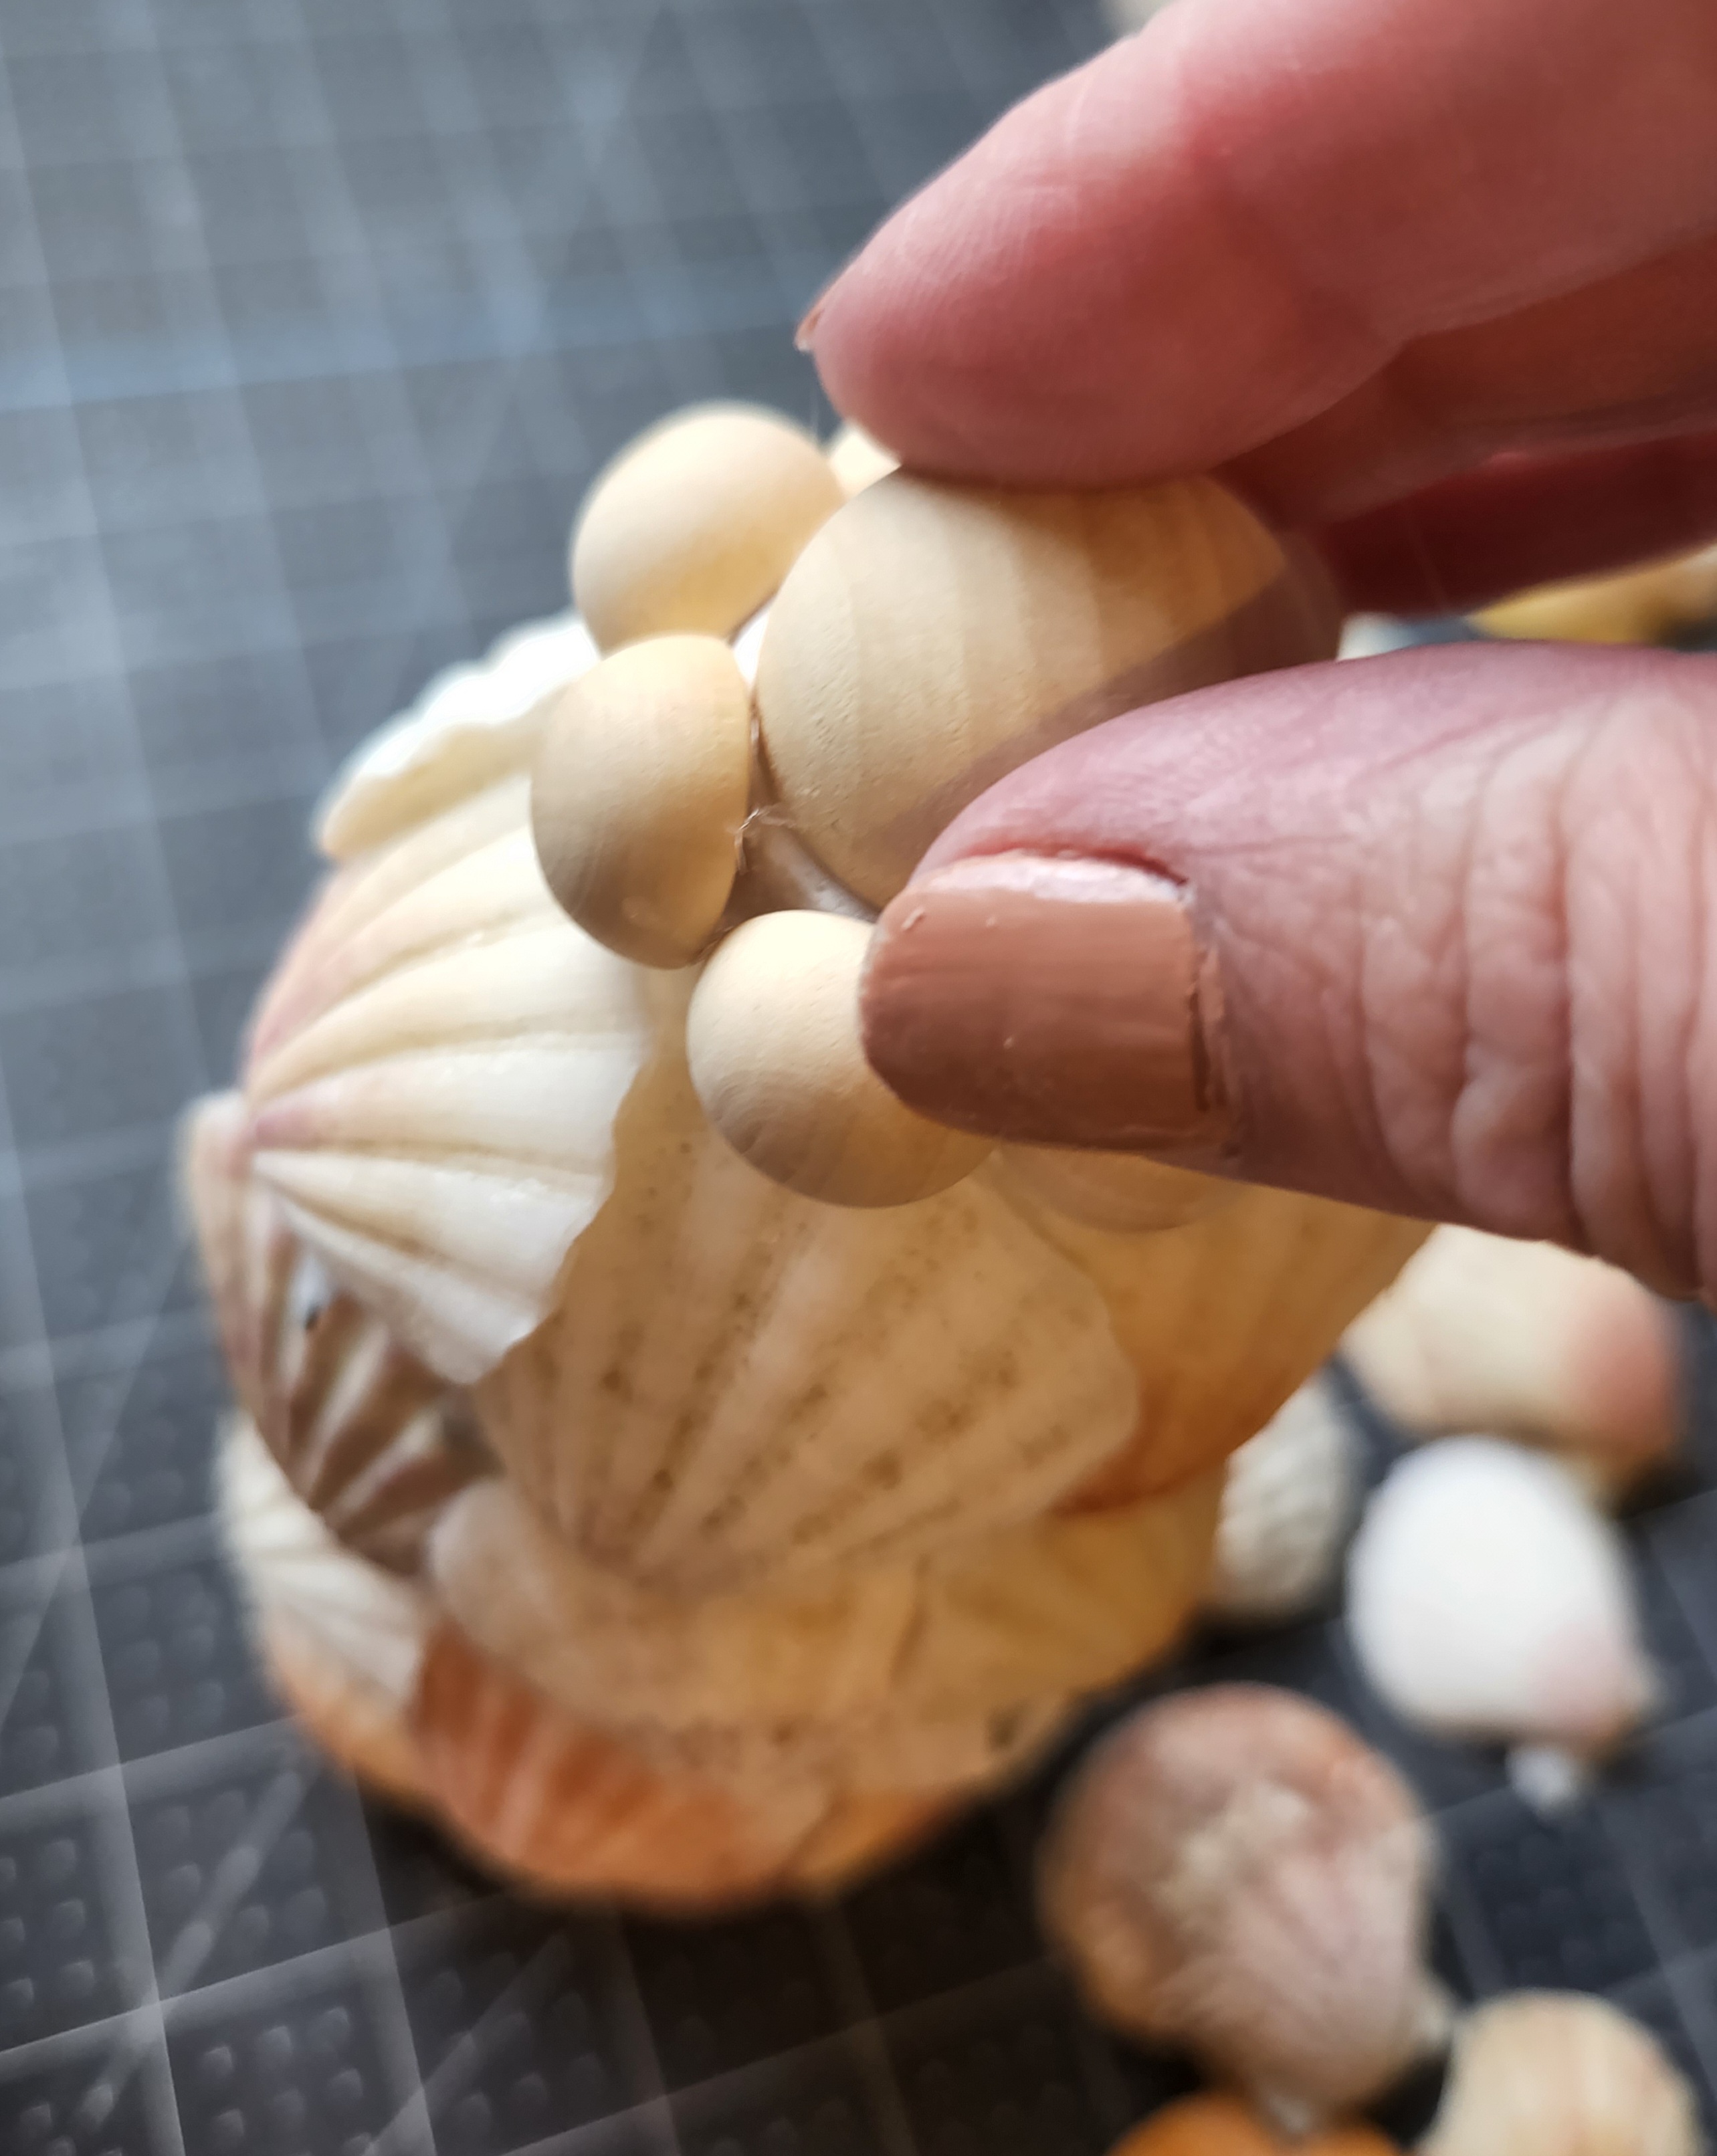
I also went back and added a few wood beads around the tree where I had any large gaps between shells.

Add a Starfish Topper on Top of the Seashell Christmas Tree
My starfish fit perfectly on the top of my cone. I placed hot glue on the inner side of my bottom two legs of the starfish and placed it down on the top, over the 20mm wood bead. That allowed it to sit on top of the seashell Christmas tree just like a regular one.

Now you’ll have this!


Seashell Christmas Tree #2
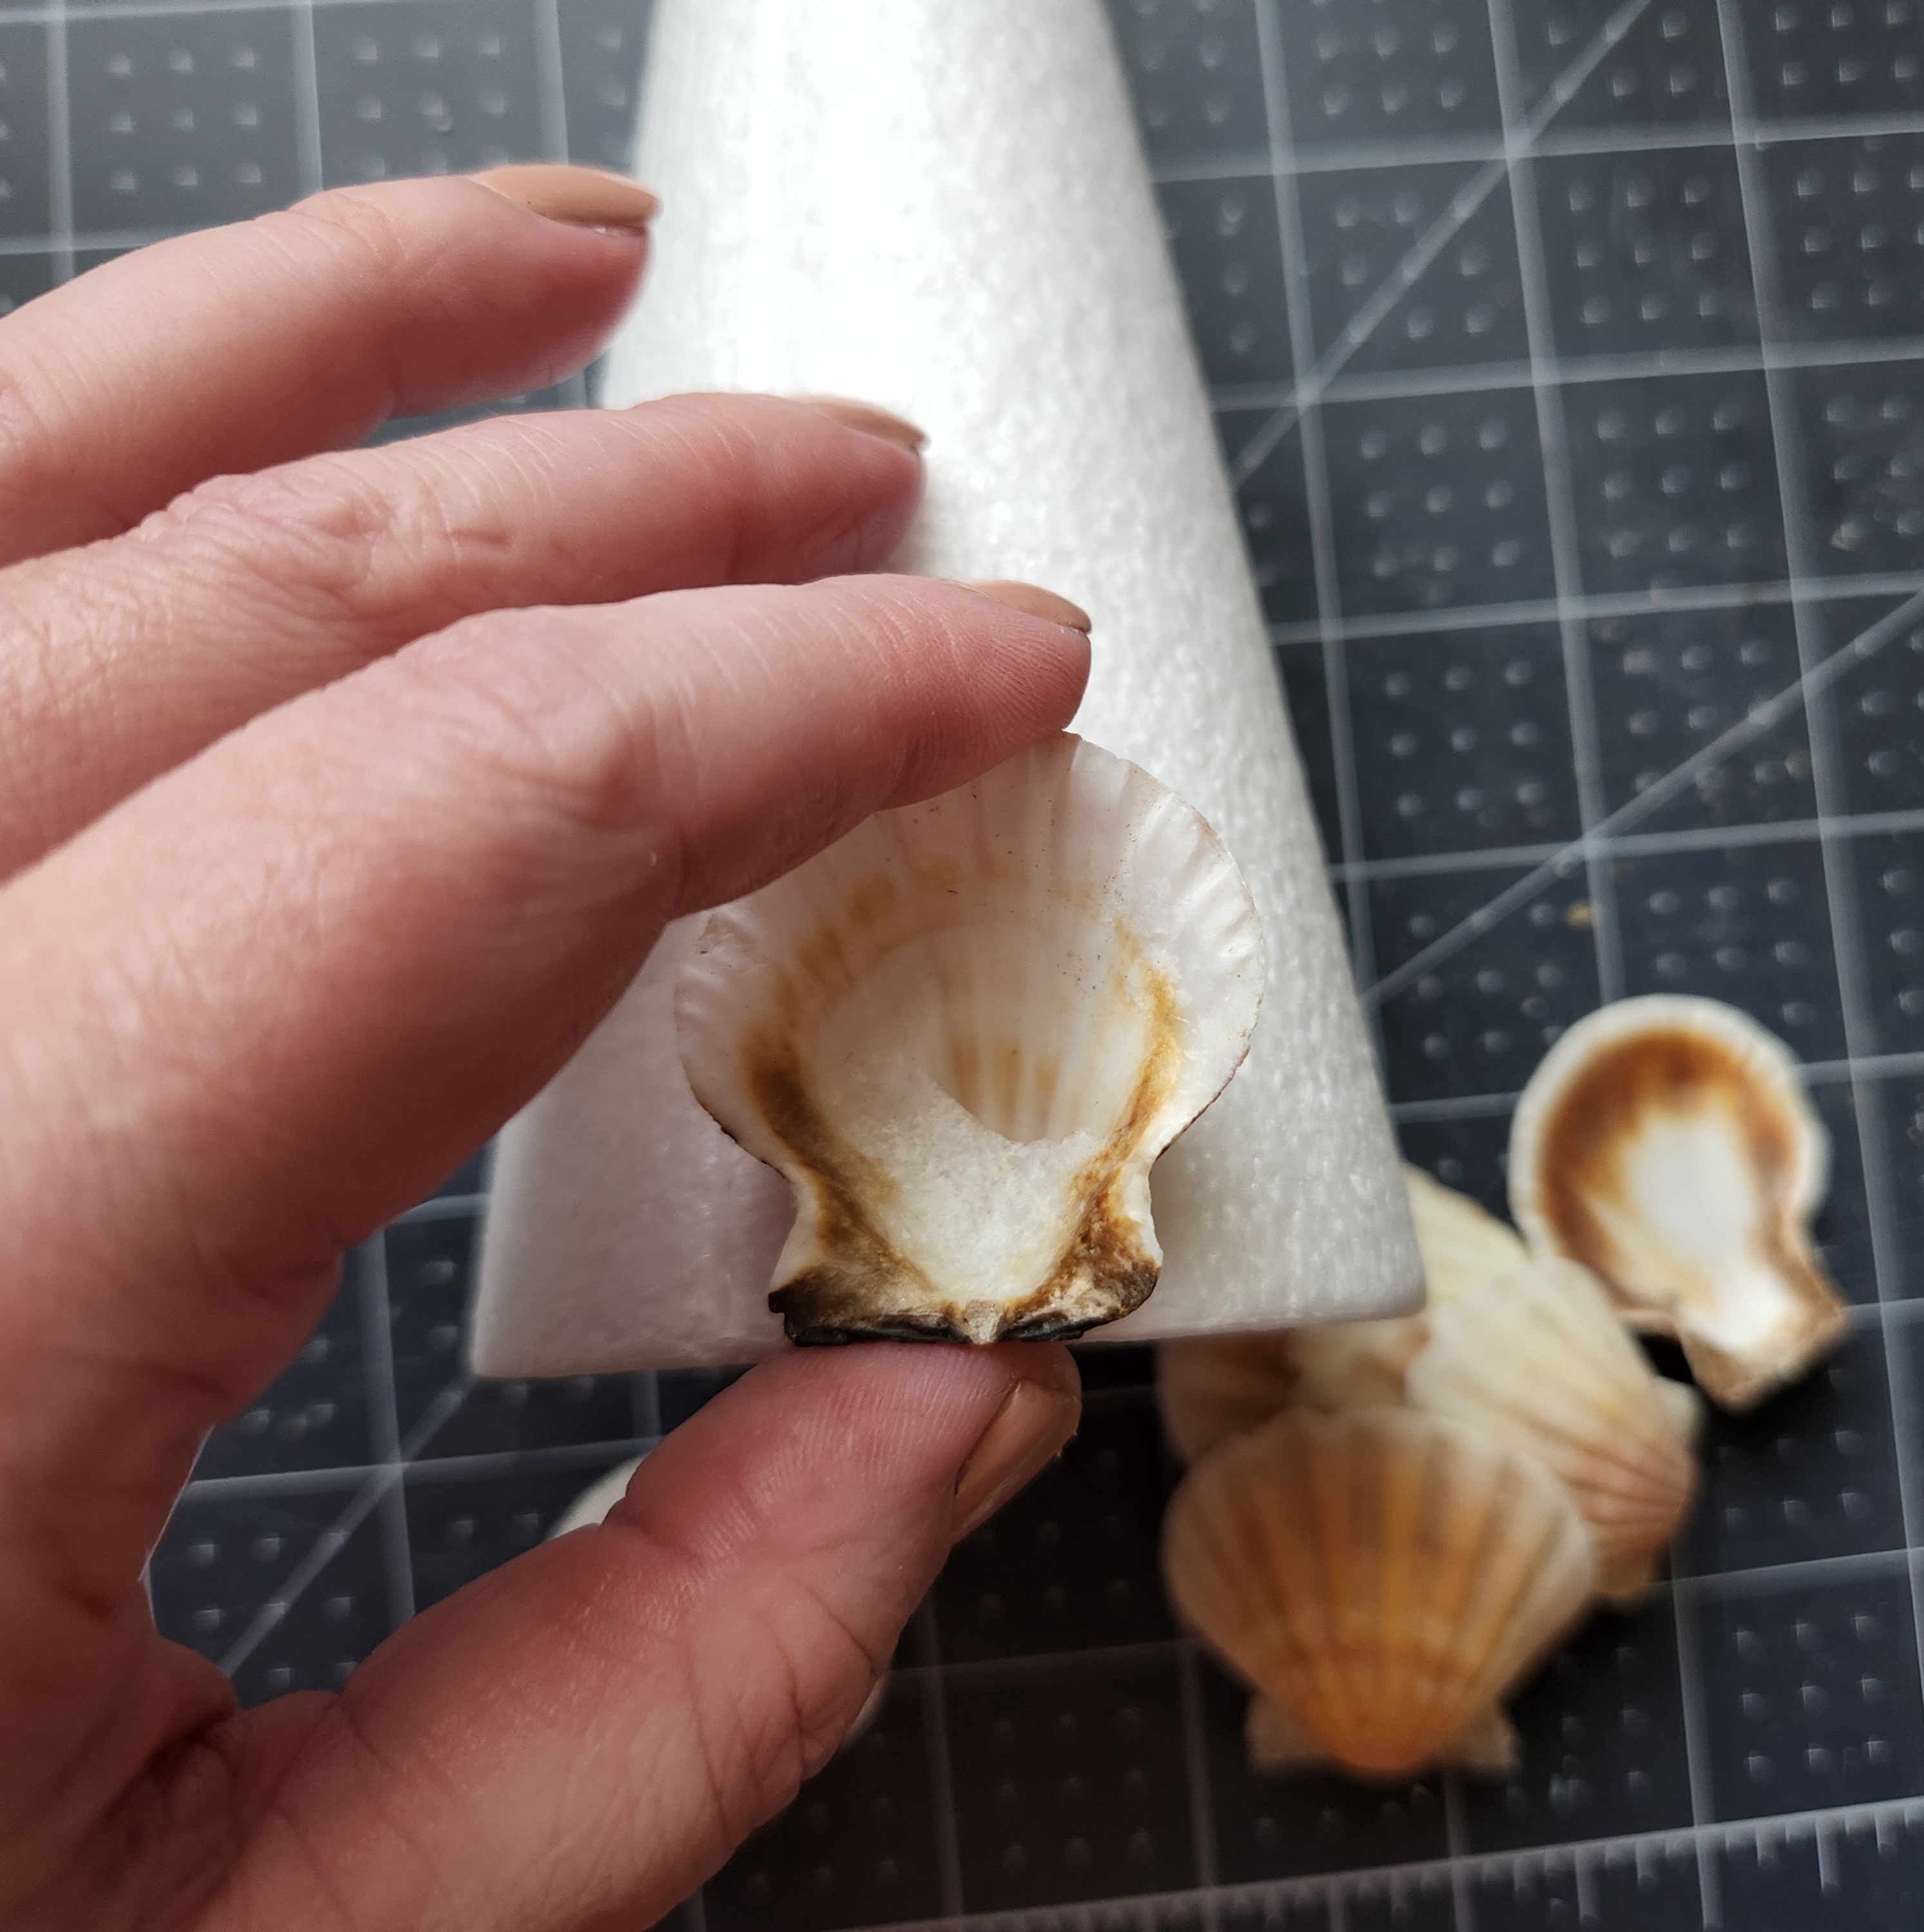
Hot Glue Shells on Backward
For my next tree, I placed my shells on the cone facing backward. Squeeze hot glue on the back of a shell on the curved section.
Next, I added a 15mm wood bead next to the shell. This is optional but it covers the space between the bottom of this shell and the next since the bottoms are thinner than the rest of the shell.

Continue adding shells and beads around the bottom of the cone. Try to be mindful of the space you have left so that you glue the shells on in a way that covers the entire cone without having a large blank section or having everything jumbled up tight.
Once the bottom row is complete, add a second row of seashells on the Christmas tree. The rest of the shells will be glued on at a steeper angle meaning your hot glue will have to be placed above the curve of the shell, closer to the top of it. The reason for this is that the shell needs to hover over the first row where two shells meet.

Keep adding shells and beads until the cone is covered. I placed a row of beads at the top of this cone like I did on the first tree. On the top row I glued beads between the top sections of my shells as well as the ones between the bottom of the shells like I added throughout the rest of the tree.

Add a Starfish Topper to the Christmas Tree
I glued another 20mm bead on top of this tree as well. Finally, I added a starfish topper.

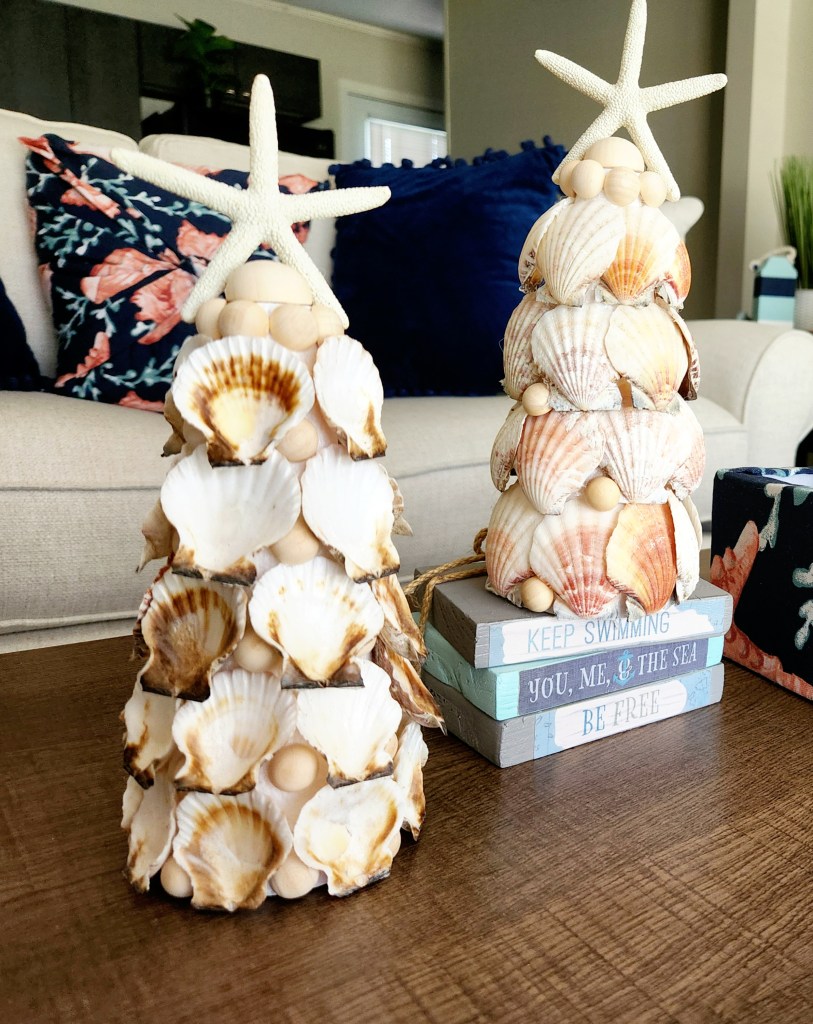
That’s it! Your seashell Christmas trees are ready to display!
I think these trees turned out lovely. There are also so many ways to further customize your trees, like adding twine, paint, pearl beads instead of wood, ribbon, etc. Another cone is just screaming to be experimented on, and I’ll add a photo when it’s complete. I really like these, so I’m going to leave them out with my summer decor. They’ll fit right in with my summer coastal decor. What do you think?


Keep reading so you can check out all of the amazing projects shared by the other ladies of the blog hop! While you’re here, pin and/or share these Christmas posts that you can make when Christmas comes around! You can also use the search box in the sidebar if you have something specific that you’re looking for.


I hope you enjoyed these seashell Christmas tree tutorials! Remember to pin the image below and share on social media using the buttons at the end of the post or on the left side of the screen so you can get back to it when you’re ready to make it. Be sure to follow me on social media and via email so you never miss a great tutorial, free printable, or other amazing posts!

Under $10 on the 10th Blog Hop
I’m sure you can’t wait to see what the other lovely ladies in the hop have cooked up for Christmas in July this month! I know I can’t!
Tammy – Patina & Paint (main blog)
Terrie – Decorating & More with Tip (main blog)
Teresa – Through a Vintage Door (main blog)
Corine – Junk to Gems (main blog)


Oh my , I just love the Christmas tree shells, they turned out so cute. This would be a perfect Christmas gift to give to anyone , especially here on the coast where I live! I think I’ll be trying this out!! Great job..
Teresa!
You must not live too many hours away from me! I live on the coast too. Well, I guess you could live on a different coast. I haven’t slept so I’m delirious haha!
How cute! I love these. They are so pretty and perfectly fit in with the Coastal style. Love how creative you are. Thanks so much for sharing!
Thank you! I’m so thankful the post finally went up lol!
Very cute Niki, I need to make one for my beach house! I love the added beads, and didn’t know you can buy shells at the Dollar store! Thanks~
Thank you! Yes they do! They usually have two or three different kinds.