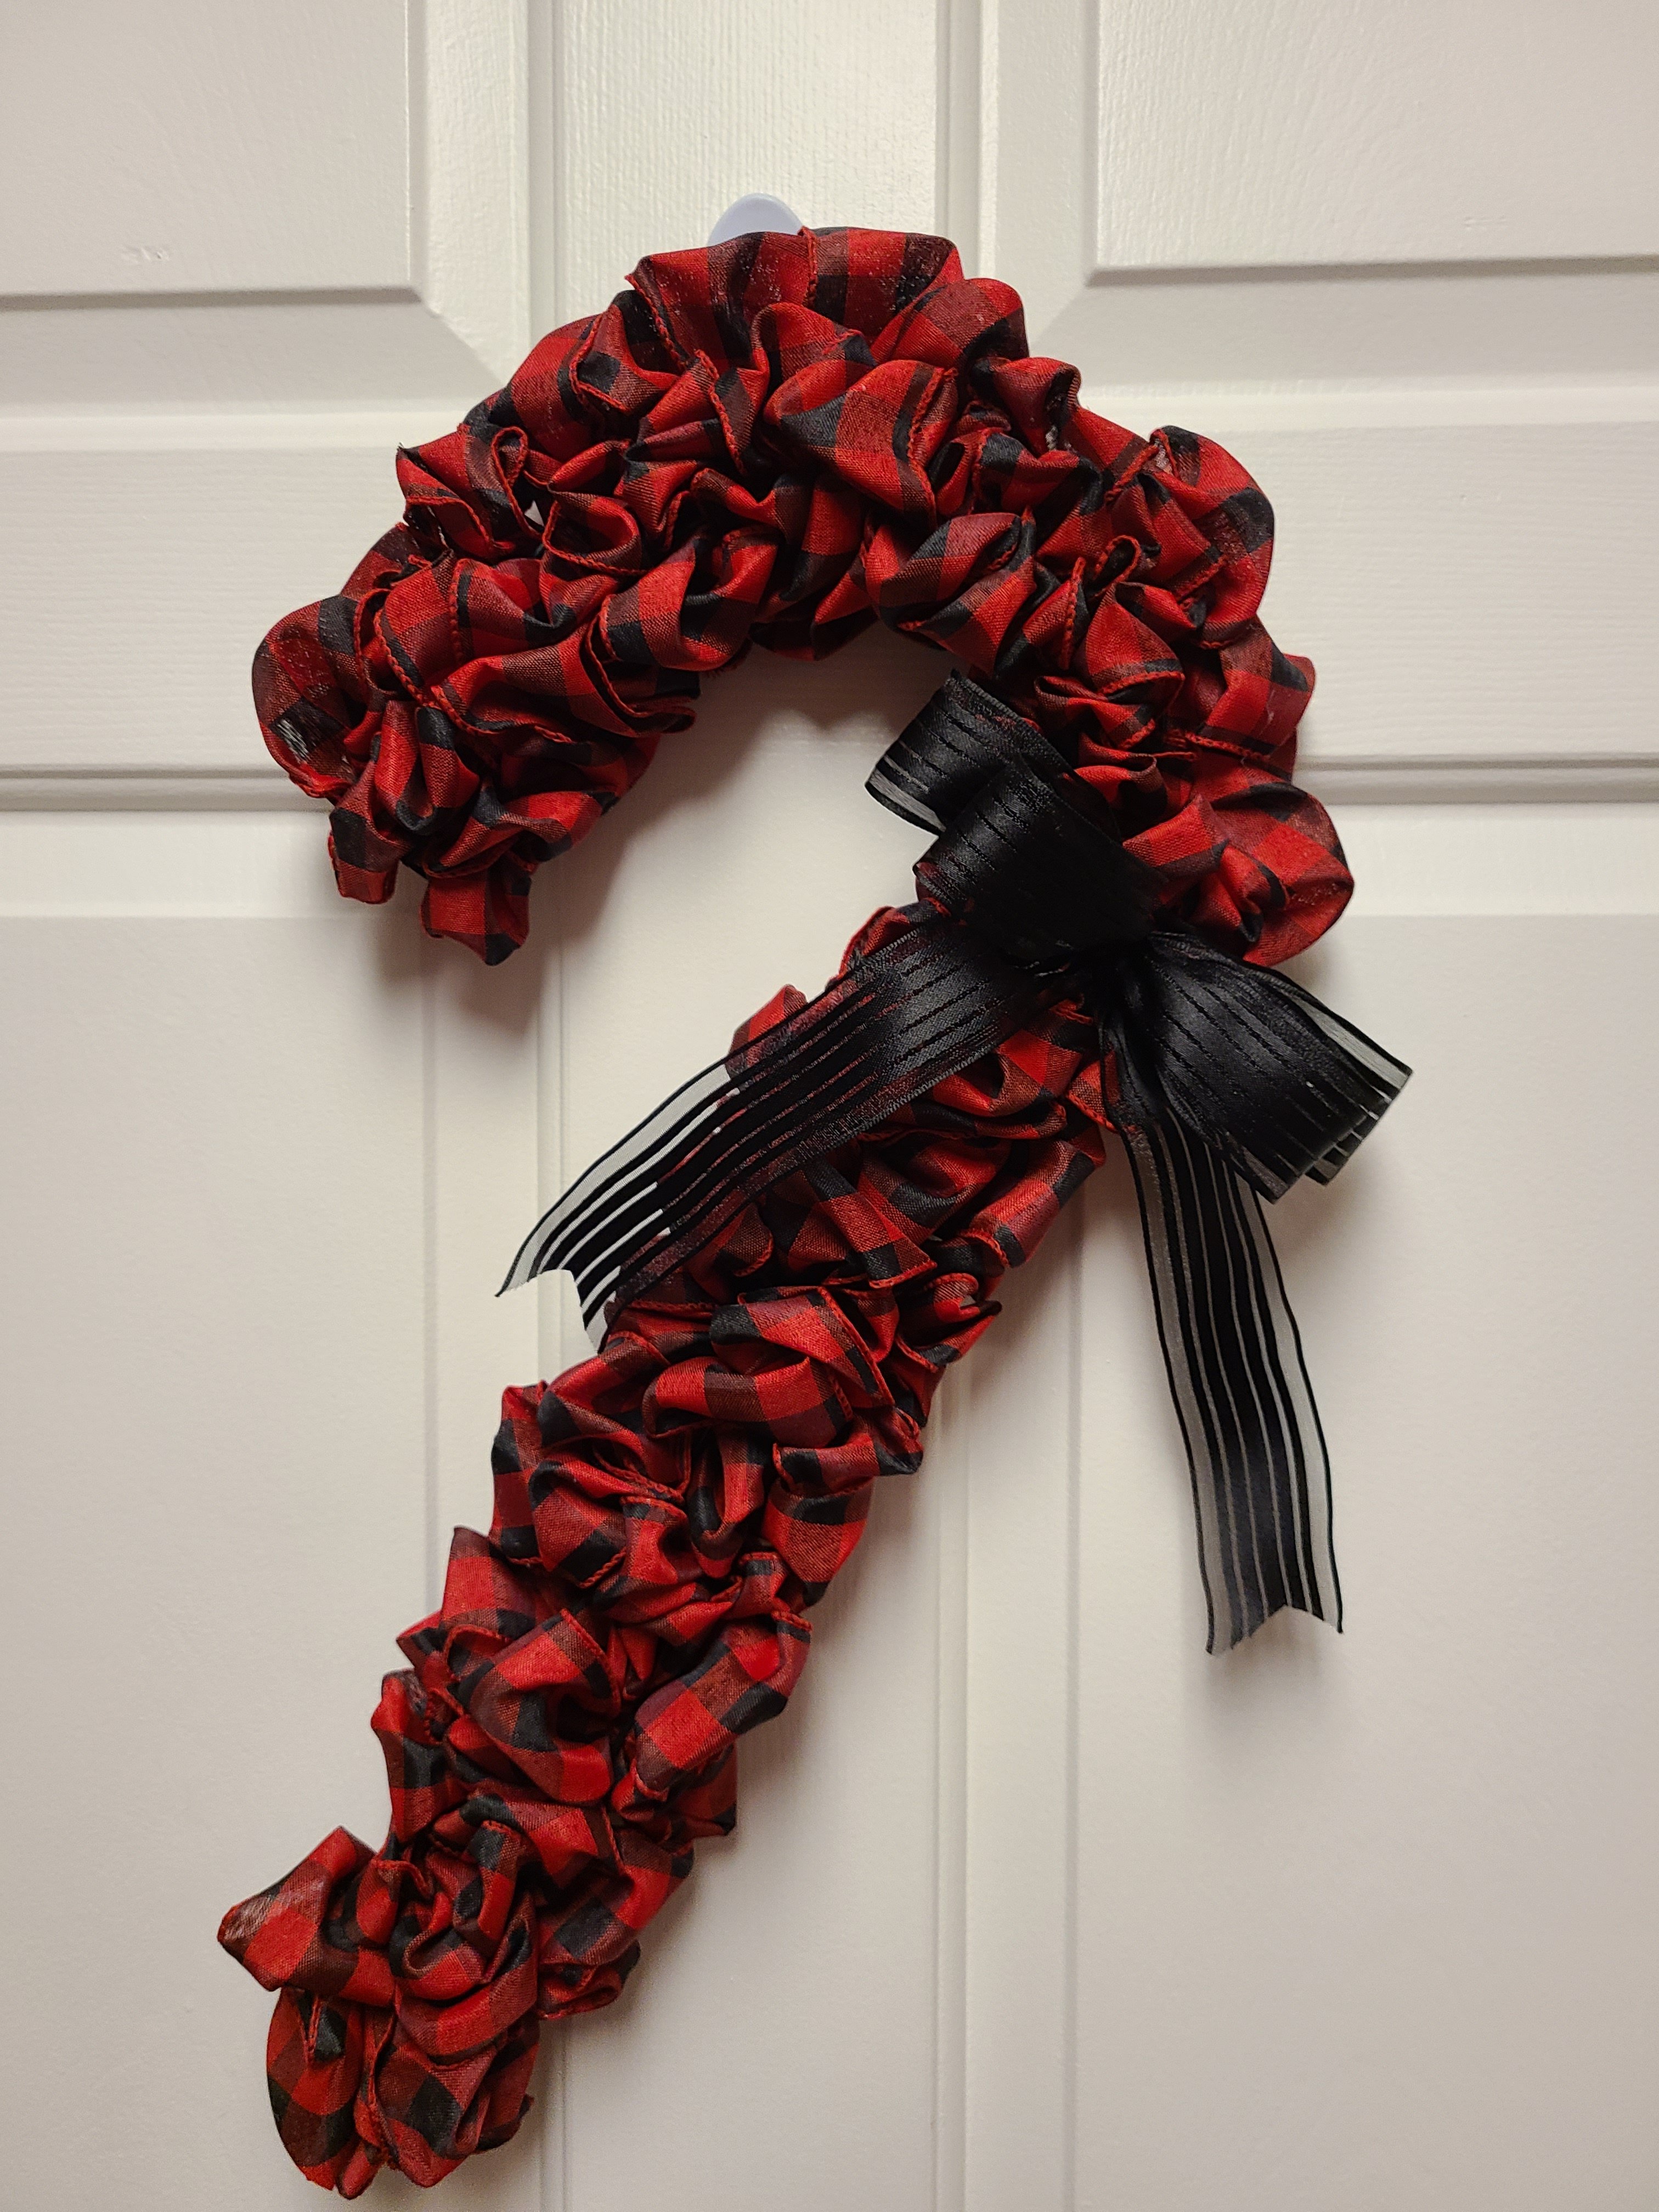
This Christmas candy cane wreath is beautiful! I have a tutorial for you so that you can add one to your Christmas decor to display every year.
For this project you will need:
- candy cane shaped wire wreath form- I got mine from Dollar Tree
- 2.5″ wired ribbon- I used red buffalo check from Micheal’s.
- 1.5″ wired black ribbon
- pipe cleaner
- scissors
- hot glue gun and glue

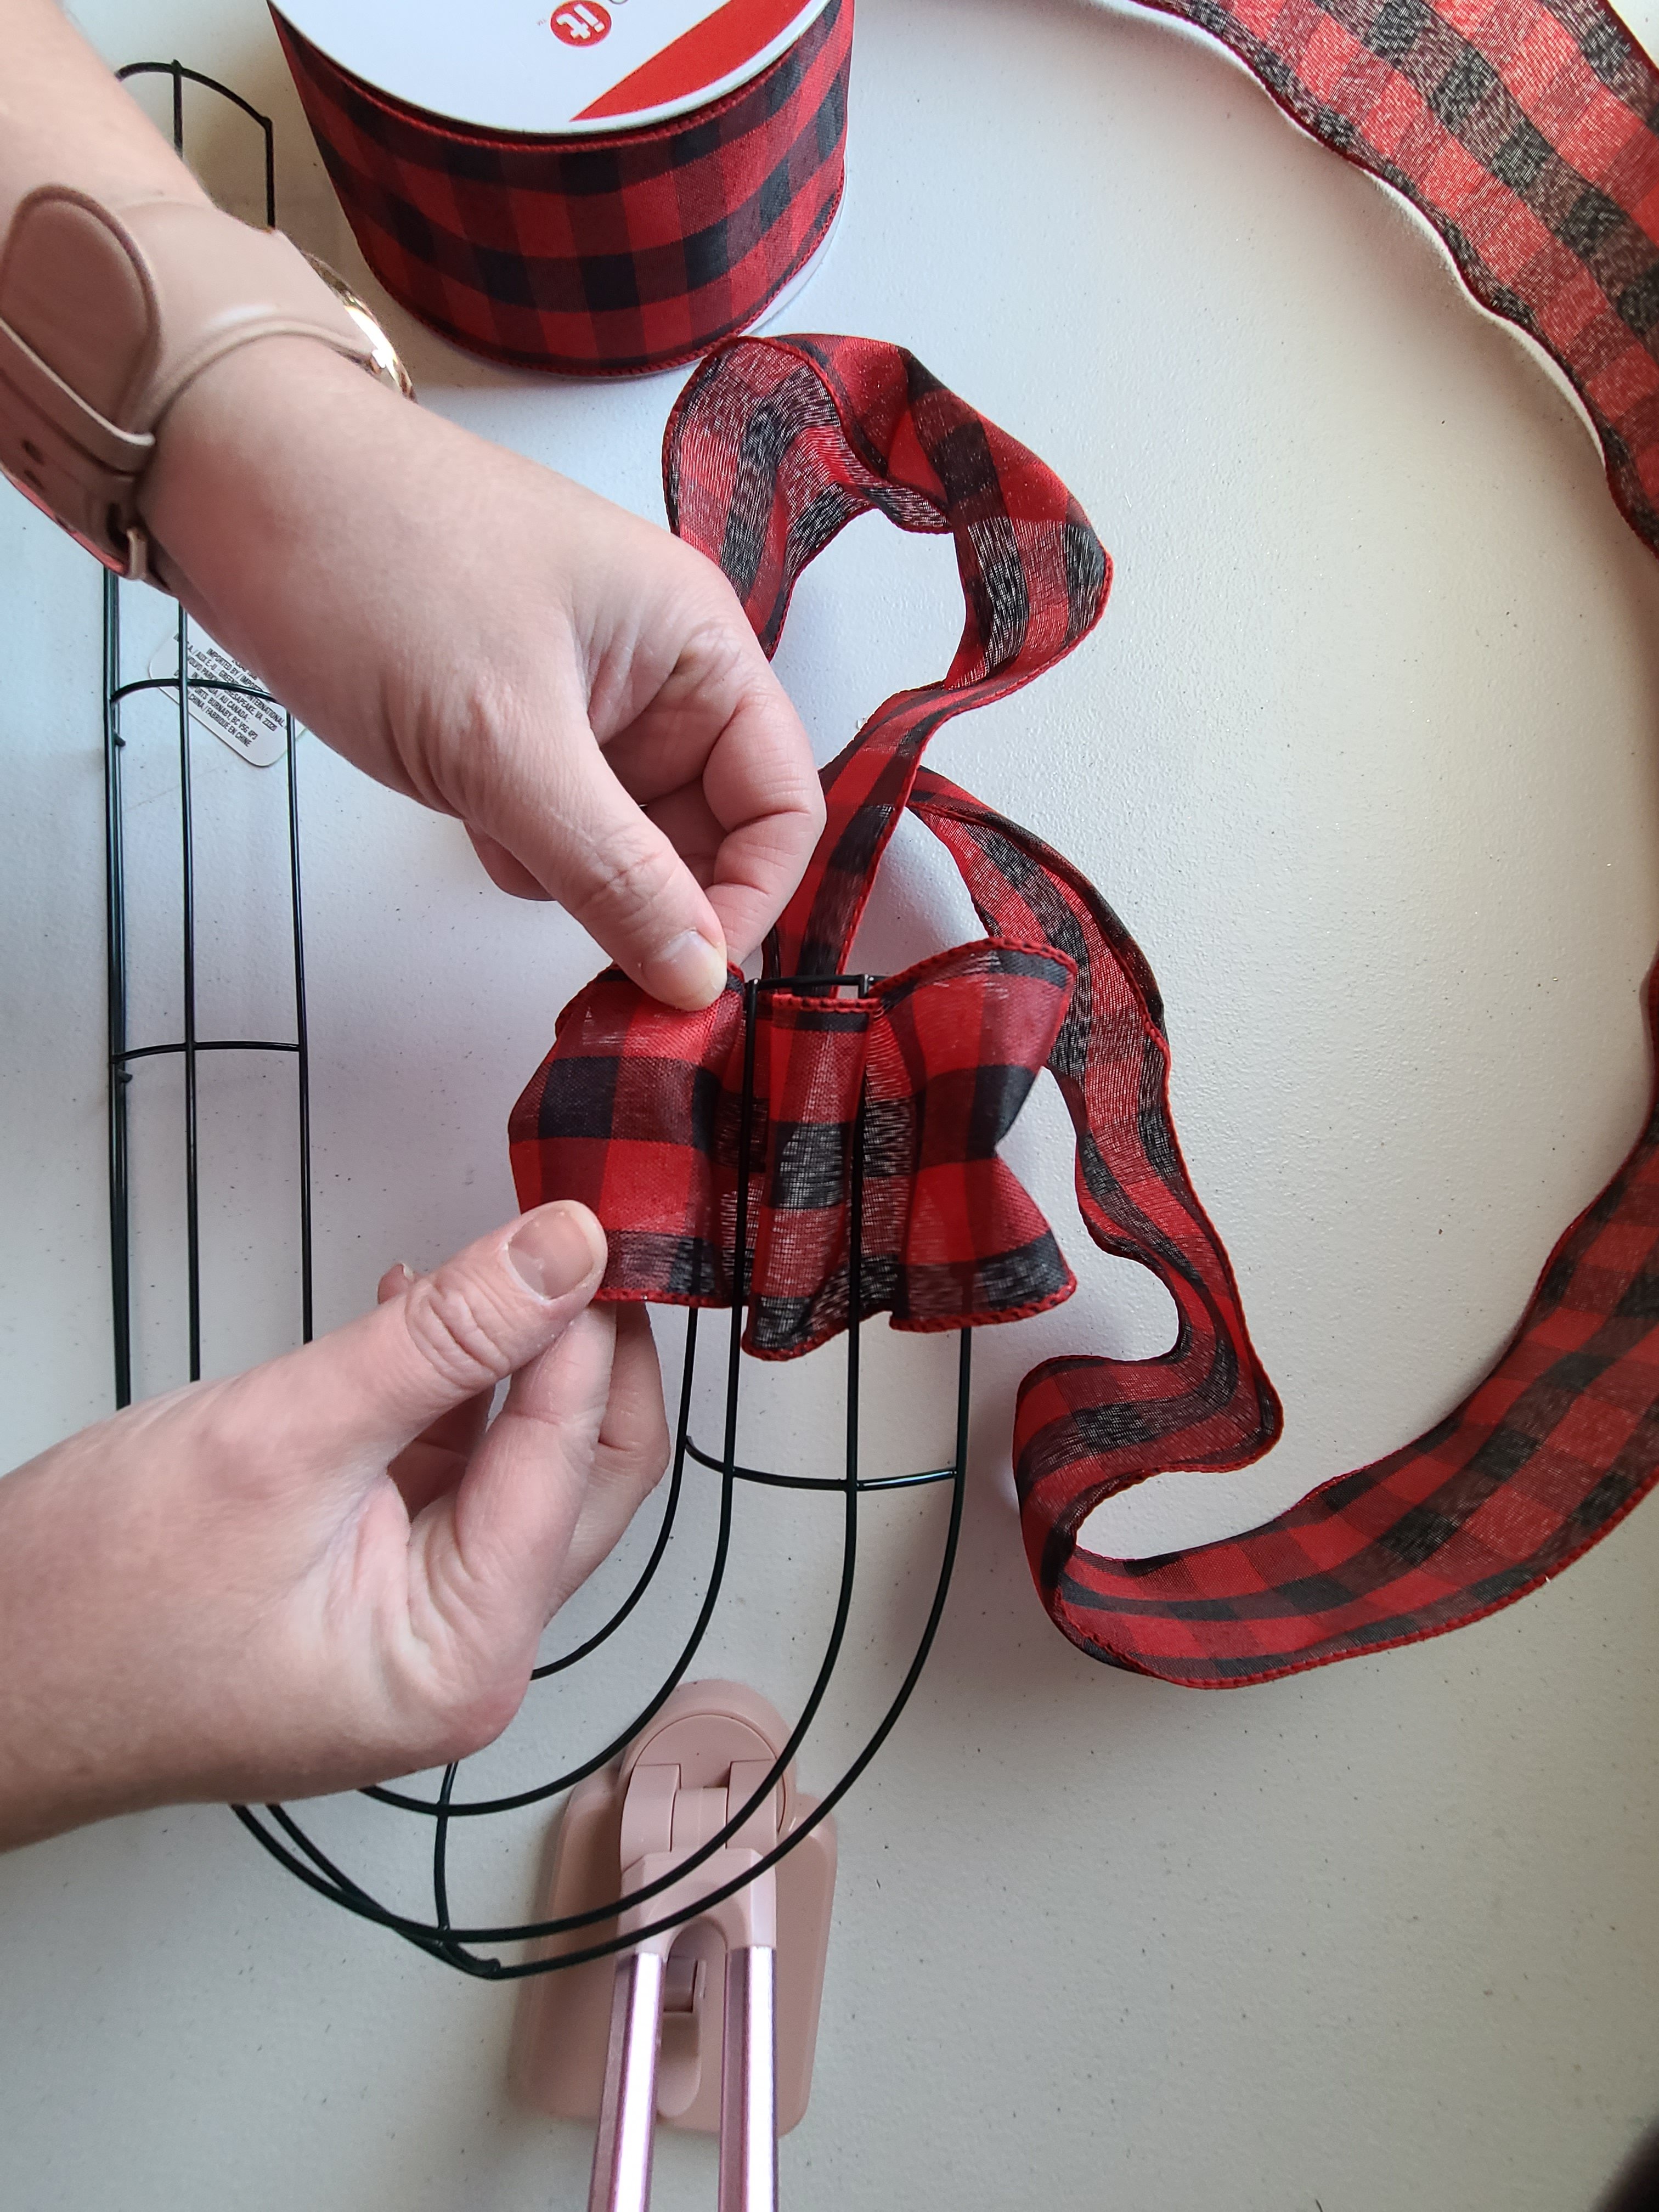
Begin at the end of the hook and wrap the buffalo check ribbon around the outer wire very close to the horizontal bar at the end of the frame. Place some glue on the ribbon and wrap it around the outside wire.

Push the ribbon through the first opening, closest to where you glued the ribbon. Push about 1.5″ of ribbon through the opening. Move to the next opening, and push 1.5″ of ribbon through it, creating a bubble like the first one. Be careful not to allow the “bubbles” to come out when you move to the other slots. It gets easier as you go. Move to the final slot, below the first two, and again push 1.5″ through the opening.


The next part is a bit tricky, but I promise it gets easier. Now you need to push another 1.5″ bubble through the first opening, next to the your first column. Make sure you don’t pull any of your other bubbles out while starting the next section. There will be some ribbon that goes up in a line from the bottom of the first column, to the top of the next. Just slide it to the side, and push it aside and a bit behind and it will be covered with the next group.

I started out by putting three rows in between each section separated by a vertical wire. After the first two sections I realized that it wasn’t fluffy enough to cover all of the wires, so I went to five rows. It’s much easier with more ribbon pushed through because it holds everything together. When I finished I even went back to the first two sections to add two more rows.

Complete filling of the Christmas candy cane wreath
Continue pushing three columns of ribbon bubbles through the sections until you have five columns in the each section of the wreath form all the way to the bottom of the form. At that point cut the ribbon off, leaving enough to hot glue it to back of the wreath. Squeeze a bit of glue on the ribbon, then wrap it around one of the wires on one of the outside wires of the Christmas candy cane wreath.


Make the bow
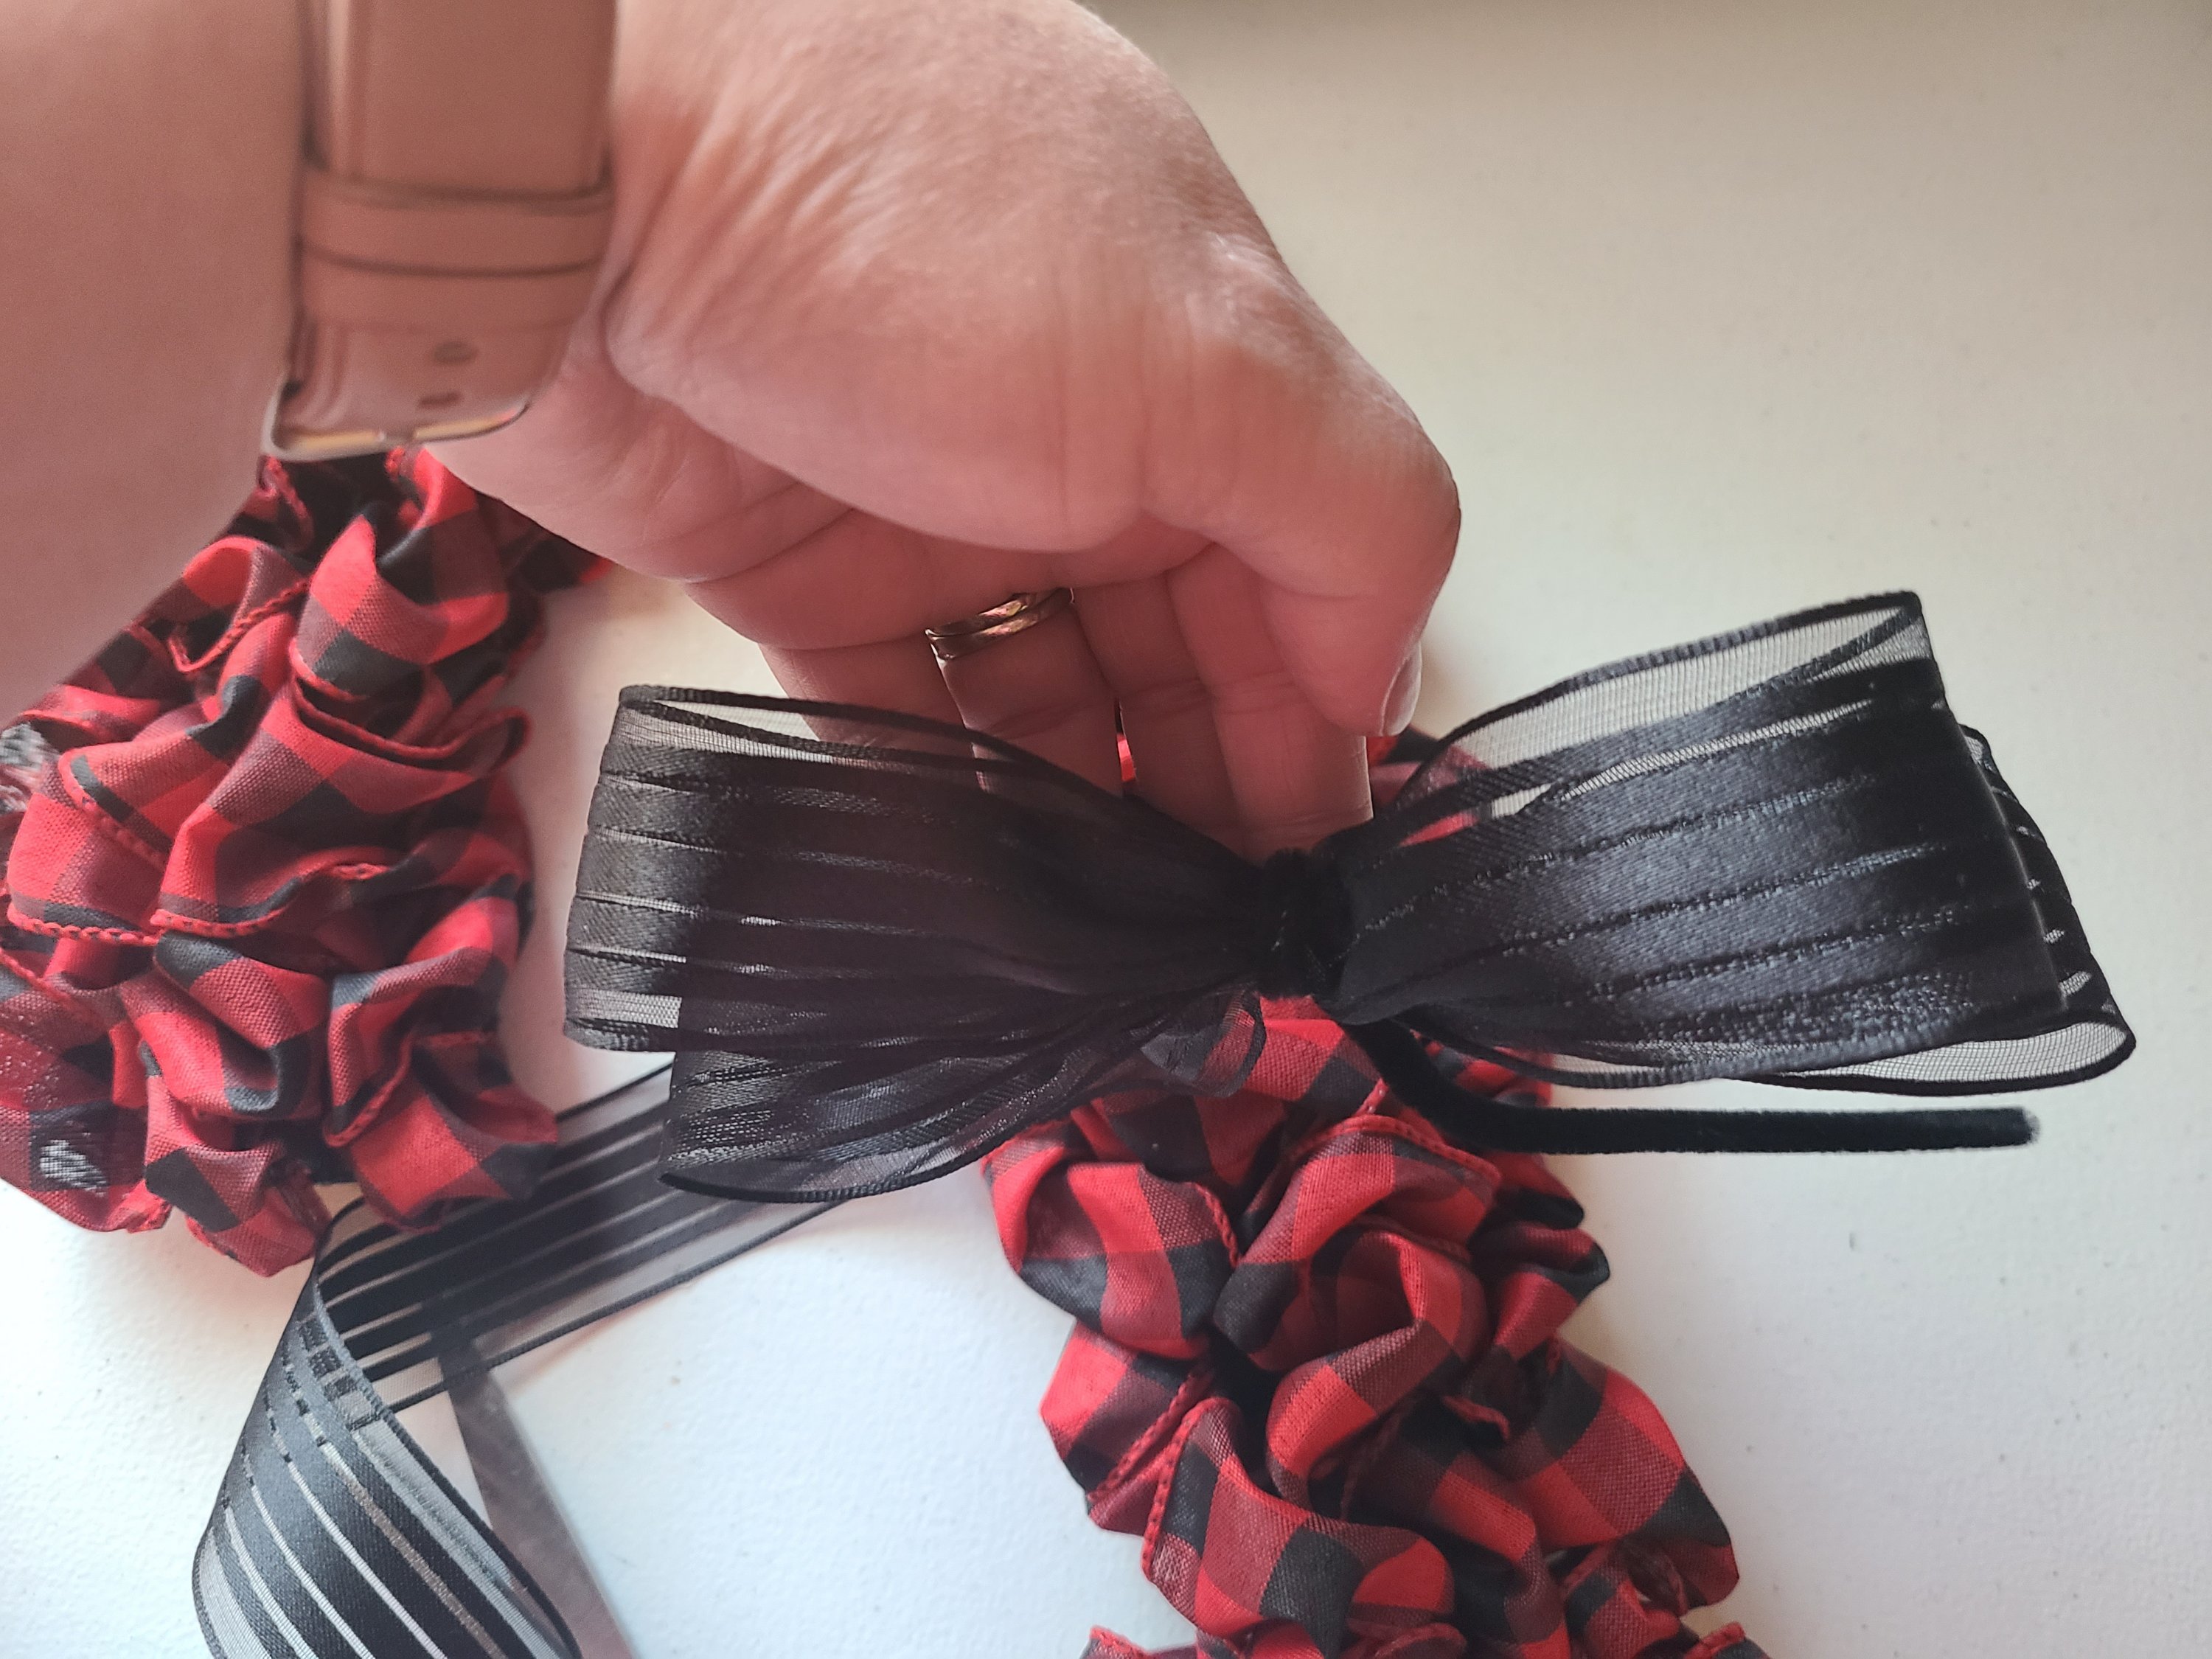
Now you will make your bow from the 1.5″ black wired ribbon. Make a loop of ribbon, then pinch it in the center to hold it. My first two loops are 2.5,” but you can make yours are big or small as you’d like. Create another loop of the same size on the opposite side. Behind those two, make another loop on the first side, that’s a little bigger so it can be seen behind the first one; mine are 3.24″. Pinch it in the center again, then make another loop the same size as the third loop.
Creating the tails of the bow on the Christmas Candy Cane Wreath
Bring the ribbon back to the center and twist a pipe cleaner around it to hold the bow together. Make the twist in the middle of the pipe cleaner because you will use it to place your bow on the wreath later. Next you need to make the tails. Measure 8″ of the ribbon and cut it off. Fold it in the middle; this creates the point where you’ll attach it to the back of the bow. Pinch that fold a bit, open the twist tie (carefully as to not let any of the bow come apart), and put the middle pinched off ribbon tail on the back of the bow, then twist the pipe cleaner back together tightly. Now you will have 4″ tails on each side of your bow.
Choose the place you want your bow on the wreath. I hung mine on the straight part of the candy cane, just below the end of the crook. Using your pipe cleaner, move aside enough of the check ribbon, and twist it around the middle two wires at the back of the wreath. Cut off the excess pipe cleaner.


Finally you need to create something for your wreath to hang on. Twist a piece of the pipe cleaner creating a loop. Depending how you want your wreath to hang will decide where you glue the loop. I wanted mine to hang slightly diagonally, so I held my wreath up like I wanted it to be, which showed me where to put the loop. It’s glued on the back just above the bow, slightly diagonal. If you want yours straight up and down, you’ll glue the loop right in the middle of the curve on the back, second wire from the outside.


Now you can hand your wreath on your wall or your door to enhance your Christmas season! Mine is hanging on our laundry door, which is in our kitchen. Red buffalo check is the theme in that room, and I will be posting our Christmas buffalo check kitchen reveal tonight. So come back soon!
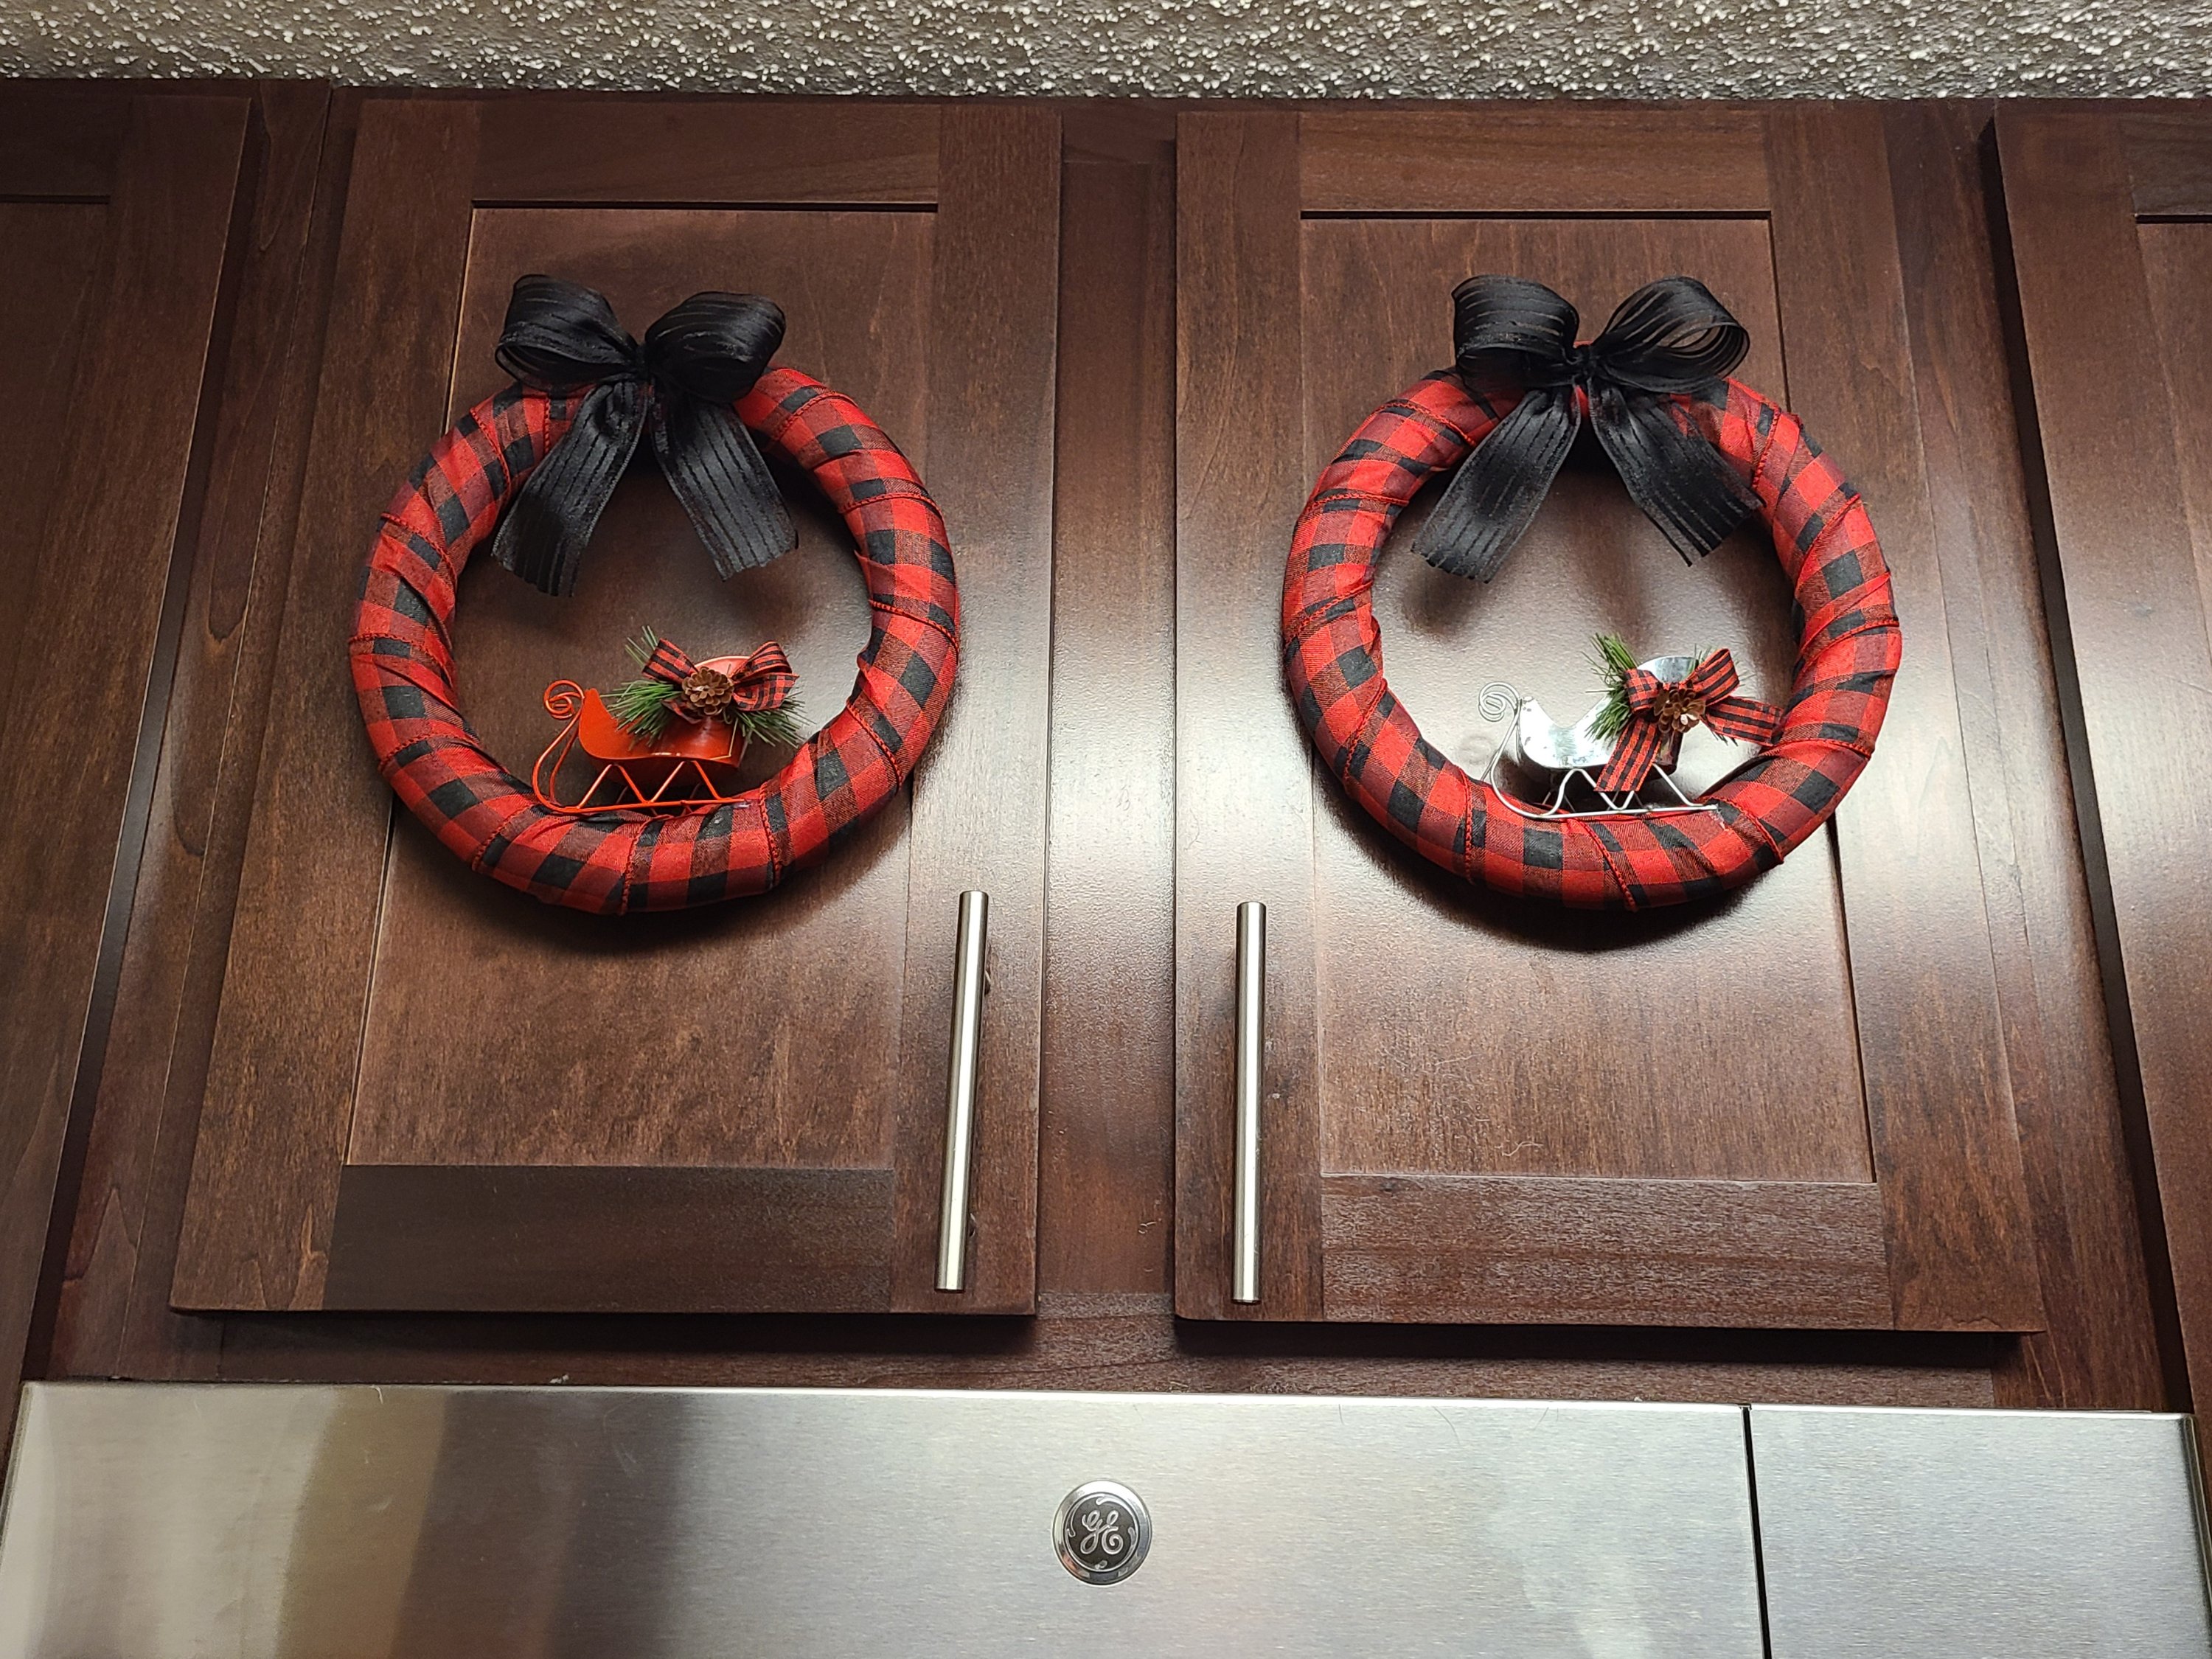
If you like this wreath, check out the tutorial for these matching buffalo check wreaths that are on my cabinet doors.
Remember that I’ll be posting each day right up to Christmas day. I would love for you to see the fantastic things I have coming up for you, my wonderful readers!
Leave a comment and let us see your wreaths in the comment section below.
I would love for you to share this post, and any others that you like, on your social media accounts. Please follow Life as a LEO Wife on Facebook, Instagram, Pinterest, Twitter, Parler, and MeWe.

Happiness is Homemade #547
Join us for Happiness is Homemade Link Party where you can share & be inspired by blog posts from bloggers around the world. You’ll find recipes, DIYs, crafts, home decor, fashion, gardening, & so much more!
Happiness is Homemade #546
Join us for Happiness is Homemade Link Party where you can share & be inspired by blog posts from bloggers around the world. You’ll find recipes, DIYs, crafts, home decor, fashion, gardening, & so much more!

8Happiness is Homemade #545
Join us for Happiness is Homemade Link Party where you can share & be inspired by blog posts from bloggers around the world. You’ll find recipes, DIYs, crafts, home decor, fashion, gardening, & so much more!

Happiness is Homemade #540
Join us for Happiness is Homemade Link Party where you can share & be inspired by blog posts from bloggers around the world. You’ll find recipes, DIYs, crafts, home decor, fashion, gardening, & so much more!

Happiness is Homemade #535
Join us for Happiness is Homemade Link Party where you can share & be inspired by blog posts from bloggers around the world. You’ll find recipes, DIYs, crafts, home decor, fashion, gardening, & so much more!

Happiness is Homemade #534
Join us for Happiness is Homemade Link Party where you can share & be inspired by blog posts from bloggers around the world. You’ll find recipes, DIYs, crafts, home decor, fashion, gardening, & so much more!

I love the candy cane wreath.