
Earlier this week I shared a tutorial for making a Christmas JOY sign with Dollar Tree fabric. I just love the farmhouse truck pattern on it! It goes perfectly with my red and black buffalo check Christmas decor. While I was at the Dollar Tree I also picked up a few fat quarters of black and white buffalo check fabric too. Scrolling through Pinterest I saw some adorable fabric Christmas trees for sale on Etsy, and they were $39 for a set of three. Ummm, no thank you. I know it’s a lot of work for the creator, but I just can’t spend that amount on something I can make for way less. I don’t have a sewing machine, so I decided to make a no sew version of the fabric Christmas tree. You can make a set of 10 or more for $2!
(Update: I got a sewing machine this past summer, so I hope to create a few trees using it this year, and I’ll create a tutorial for those of you who want to use your own machine. Be sure to follow me on social media and subscribe by entering your email address at the bottom of the post or in the sidebar to get updates whenever I add new posts!)
Looking for more farmhouse Christmas decor ideas? You might like this burlap style candy cane wreath, these small buffalo check wreaths to use on cabinets, chair backs, and other small areas, and this showstopping Christmas card or photo holder. I use it to display family Christmas photos and photos with Santa from over the years so that we’re able to enjoy our family’s growth over the years every single Christmas.
Supplies needed for fabric Christmas trees:
- Christmas print fabric- I used two fat quarters from Dollar Tree. One print is black and white buffalo check and the other is black with red farmhouse trucks and Christmas trees.
- Tacky Glue or liquid fabric glue
- E6000
- hot glue gun
- scissors
- ruler
- a piece of paper
- pencil
- thick stick for the trunk- My trunks are just over 1.25″ thick.
- wood slice- I got mine free from Lowe’s. They cut trunks off the Christmas trees, and they will give them to you free. Grab some branches with the greenery still on for other projects while you’re there.
- saw and sandpaper for the trunk if needed


Create a Tree Pattern
My initial plan was to make Christmas trees with foam board (I will give you a quick run down on how to do that later). I drew the trees out on the board, and they were always crooked; one side always sloped more than the other. Once I made one foam board tree, I decided to do stuffed fabric trees, but I didn’t want crooked trees. I figured out I needed to make a pattern to solve this.
Get a regular piece of white paper. Fold it in half length-wise.
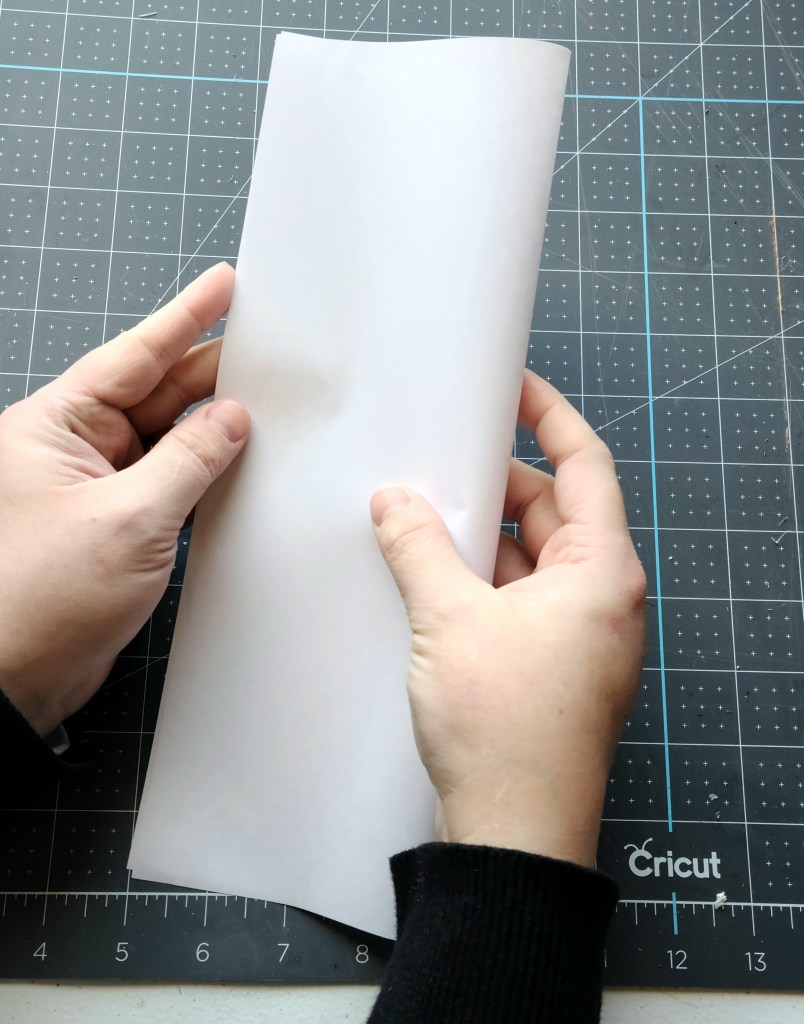
I have a grid cutting mat that has angles on it, so I used it to make a 30° and a 60° angled triangle. You don’t have to have one of these however. Lay your ruler at an angle that you like across the paper, starting at the folded corner. I have my paper open here, but you can just leave it folded. You can see that my ruler is on the 60° on each side of the paper. Draw a line with your pencil along the ruler.

You can see my line below. After this I folded my paper back. I don’t really know why I unfolded it. I was having some kinda moment I guess, ha!

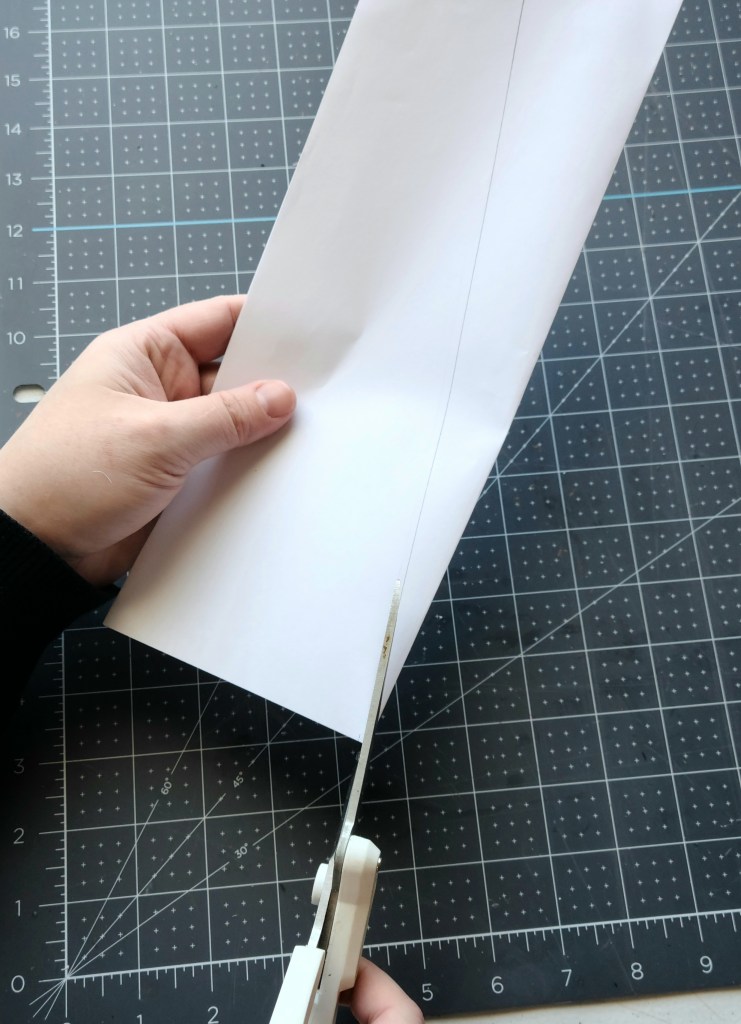
Cut the paper along the line. When you unfold it you’ll have a triangle. Both of my triangles are about 10.75″ tall. You can cut yours shorter by cutting straight across at the bottom.
Cut a Fabric Christmas Tree
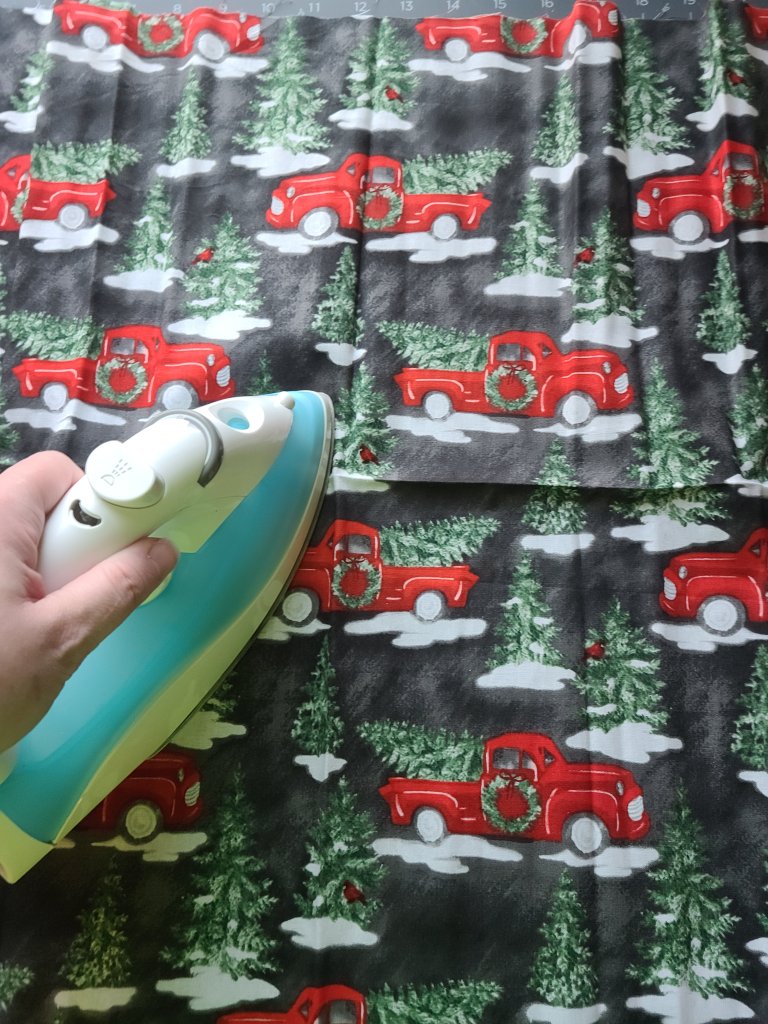
The fabric will have creases where it’s been folded at the store for a long time. Go ahead and iron those out.
Fold the fabric in a way that you can cut two triangles at once. Another option is to cut each triangle separately. That will save fabric. You can kinda fit them together in a way you can’t when you fold. It is faster to fold and cut two at once. So just choose if you want to make more trees from one piece of fabric, or if you’d like to make them faster. I actually did both. I had more black and white buffalo check fabric than I did the truck, so I cut separate triangles on the truck and folded the buffalo check.
Place the paper triangle on the fabric. Use pins and pin the paper to the fabric to keep it from moving. I didn’t have any pins, but I did have sewing needles from a kit, so I used those. You can see in this picture that I have the fabric folded here to cut both sides of the fabric Christmas tree at once.


Cut around the paper triangle.


Then unpin the paper from the fabric. Keep it for making more fabric Christmas trees.

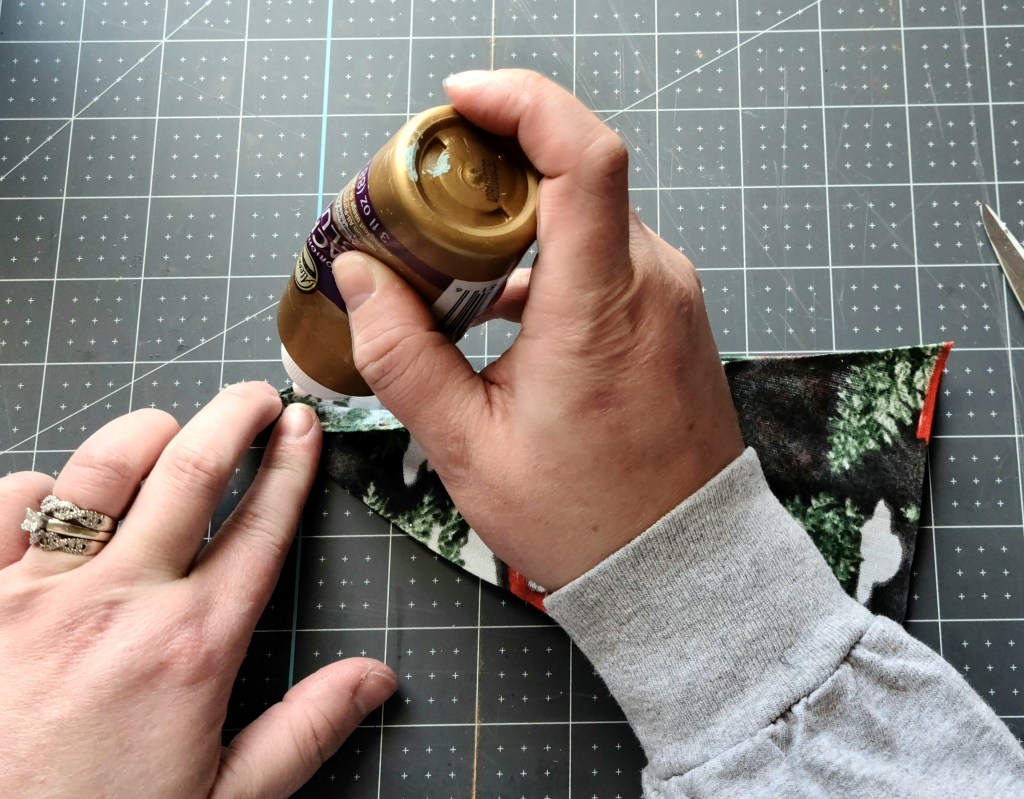
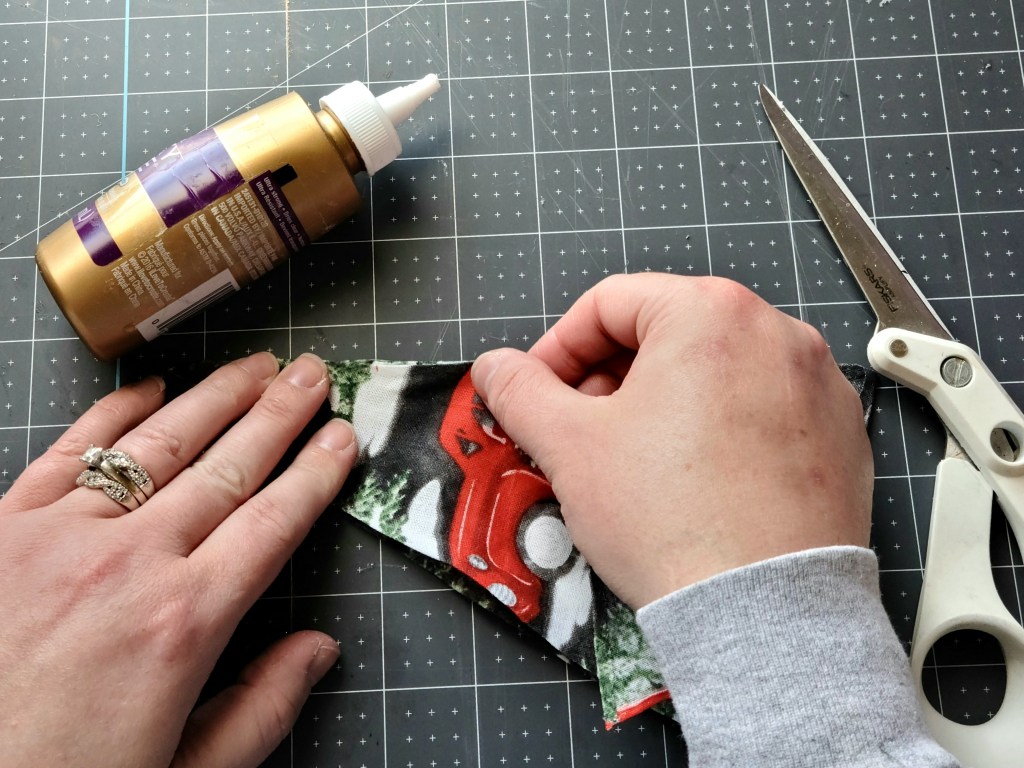
“Hem” the Fabric
To make a straight edge and keep the fabric from fraying you need to create a “hem.” I did this by using Tacky Glue, but they also sell liquid hem (or a name along those lines). The Tacky Glue you can get at Dollar Tree. You can sew it if you’re into that lol.
Start at the top of one of the triangles and add a few inches of glue in a thin strip along the very edge.

Fold the edge in as you go along the strip of glue. I used a tool with a pointed edge that’s used for clay. It was easier than using my fingers.

Continue along one side, adding glue, then folding in just a bit of fabric. Once that side is finished, “hem” the other side. In this pic you can see that I’m finishing the second side.

Now finish the hemming on this triangle by doing the bottom. Add glue along the bottom then fold it up. If the fabric extends past the sides of the edges, just cut it off once you’ve finished hemming. Some of my triangles required me to do this, some didn’t. It just depends on how much fabric you fold in.

Once the first piece of fabric is finished, hem the other. Try to make sure you keep the hems about the same size so that the fabric pieces stay about the same size. It is ok one is a little bit bigger, but just a smidge. If your triangles are bent in a little more in spots, just tug on that section a little and they’ll pop right out and be even.

Attach the Triangles
Now that both of the triangles are hemmed it’s time to put your fabric Christmas tree together. Add a bit of hot glue at the hemmed tip of one of the triangles. Then lay the second triangle on top of it and hold it down for a second as the glue dries.

Continue adding glue down one edge just like you did while hemming. Press the other triangle edge on top, allowing the glue to dry for a minute. Glue until you’re about 3/4 of the way to the bottom.
Now glue the other side until both sides are evenly glued, 3/4 of the way down.

Stuff the Fabric Christmas Tree
It’s time to stuff the tree. I used cotton balls to keep this a truly Dollar Tree project. You can use polyfil if you have it around or if you want to buy it. Take a cotton ball and pull it apart. Most brands will kind of unroll then you can gently tug it apart to fluff it. Do this with ten or so cotton balls. You will probably need more, but how many will depend on the size of your tree.

Pull the fabric apart so the tree is open.

Start putting cotton balls in the tree and use something long like a pencil to push the balls into the tip of the tree.

The end of your tree will look like this.

Continue putting the pulled apart cotton balls into the tree, pushing them around to even them out.

Fill the tree until it’s nice and full. You want it to be packed pretty tight, but not so much that you bust the seams. Make it full enough that it can stand on it’s own. You can check this by putting the stick in while holding it to see if the tree will remain upright.

Insert the Fabric Christmas Tree’s Trunk
I used thick sticks from my yard for the trunks of my trees. It’s about about 1.25″ thick, and since it was so thick, I had to use a saw to cut pieces of them off to use. For my small tree I used 2″ pieces, and for the large ones I used 3″ pieces. If you have to, just saw them off of a long branch. You don’t want to use a thick that’s hollow and breaks off easily because they won’t look great and they may have bugs in them.

Sand the end that will sit on the wood slice so that it’s smooth and will attach well.

Put E6000 or other glue one end of the stick, all around the outside edge.


Place the stick inside the tree in the middle. You’ll probably want to put about 1/2″ inside the tree, depending on the size. Press the fabric on the top and bottom onto the stick. If need be, you can squeeze hot glue on the trunk or the fabric to make sure it stays in place. Now with the Tacky Glue start at the trunk and squeeze a thin line along the bottom edge of the bottom piece of fabric, starting at the trunk and going all the way to the edge.

Press the top piece of fabric down around the trunk and on top of the glue on the bottom piece. Then repeat, gluing on the other side of the trunk.


Glue the Trunk To the Wood Slice
When the trunk and the bottom seam of the fabric Christmas tree is dried in, you can place the trunk on the wood slice. Squeeze E6000 on the end of the trunk. The good thing about E6000 is it’s self-leveling so if your stick is a little uneven it will still sit flat.

Since the tree will need to sit straight up, you’ll need to add some hot glue to it to hold it up while the E6000 hardens. Squeeze a bit of hot glue on top of the E6000.

Press the tree onto the wood slice and hold it for a moment while the hot glue dries. Wipe off any excess glue with a paper towel.

Your fabric Christmas tree is finished!
How adorable is this little guy?! Keep going until you have yourself a little tree forest. For now I have three stuffed trees and one foamboard tree. Here are a few shots of my trees and the JOY sign.

Remember to pin the image below or share this post with the buttons on the left side of the page so you can find it when you’re ready to start your project! Also, follow me on Pinterest for new ideas added weekly! Be sure that you never miss a great tutorial for decor like wreaths, signs and other home decor, free printables, crafts, and other fun posts! Enter your email address below to be notified of new posts! Use the buttons below to follow me on social media for other great content.


Follow me on Pinterest for new ideas added weekly!


3 thoughts on “Fabric Christmas Tree: a No Sew Tutorial”