The other night I went down to the Dollar Tree that’s closest to my house. They had boxes and boxes of Christmas stuff, but it was literally in boxes. Not much was on the shelves yet, but I did see these wood words. I’ve used a couple in the past and decided to pick them up while they were in stock. With the horrible shipping conditions I don’t want to take any chances that they won’t have things later. I wasn’t sure what I’d do with it at first, but today I had an idea to create a kind of 3-D sign with it. Let me share this Dollar Tree Christmas sign tutorial with you! I know that you’re going to want one of your own.

To make a Dollar Tree Christmas sign you need:
- 2′ sign
- wood Christmas word- I noticed “peace” and “merry” when I was in the store, but they may have others.
- acrylic or spray paint & paint brush
- 2.5″ ribbon- I used a metallic blush pink and a gold wired ribbon as well as a 1.5″ wired white.
- pipe cleaner
- scissors
- hot glue gun & glue
- faux greenery or other stems- I used a white sequin & sparkle stem & a gold glitter branchy stem. I believe I got these for 97 cents last year at Walmart, but I did see some similar ones at Dollar Tree.

Paint the 2′ Sign
For the base of my sign I used a 2′ sign from Dollar Tree that I bought during Valentine’s Day. One side is flat and the other has grooves that make it look like wood. The grooves were off on this sign for some reason. They aren’t even, like one section is really skinny and another is really wide. Due to this I used the flat side, but you can choose to do either side.
At Christmas every year I decorate our guest bathroom in a “Silver Bells” type theme (like the song). I have a silver and white snowflake shower curtain with matching rugs, I add ornaments to the rings that hold the curtain to the rod, a snowflake and blue bow garland on the mirror, some vases with blue ornaments inside and blue bows, and a small faux tree with the same ornaments and snowflakes. I have yet to do my master bathroom, and I thought that this year would be the perfect time to make Christmas decor for it. Since I don’t want to spend money on a new curtain and rugs during this economy, I am going to decorate it using my current colors which are pink, white, and gold. So I painted the long sign with metallic pink spray paint. You can use acrylic paint for this as well.
Paint the Wood Word
The wood “peace” sign has a twine string for hanging it but you won’t need that. Go ahead and cut it off. The “A” in the word is shaped like a Christmas tree with a star at the top. Use gold paint or another color of your choice and paint it. I used spray paint for it because I was out of gold acrylic paint.

Next paint the rest of the word. You won’t have to paint the back, but you do need to paint the sides, top, bottom, and inside the letters.
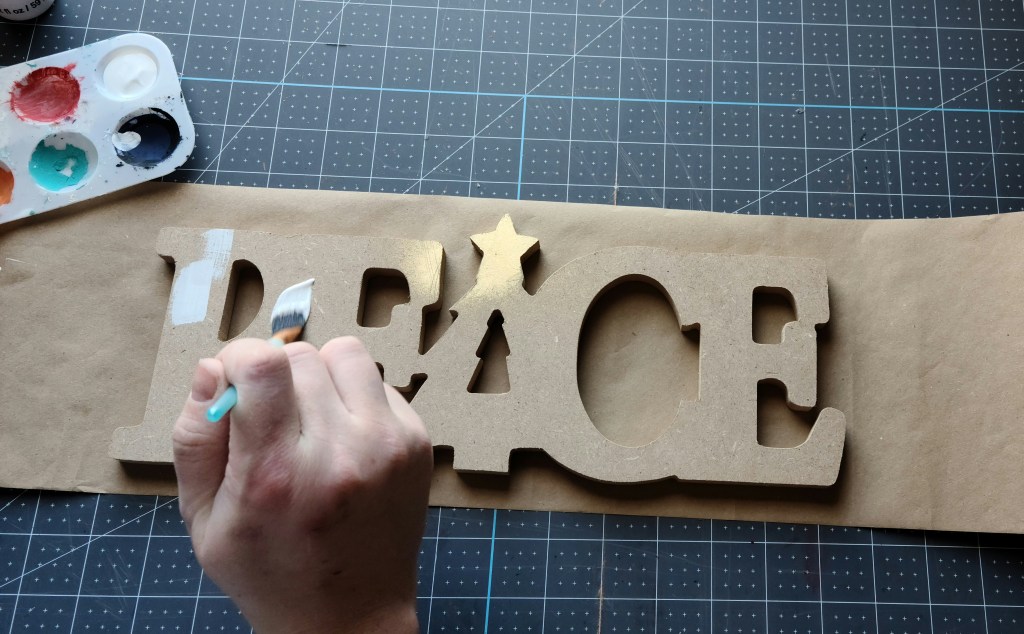
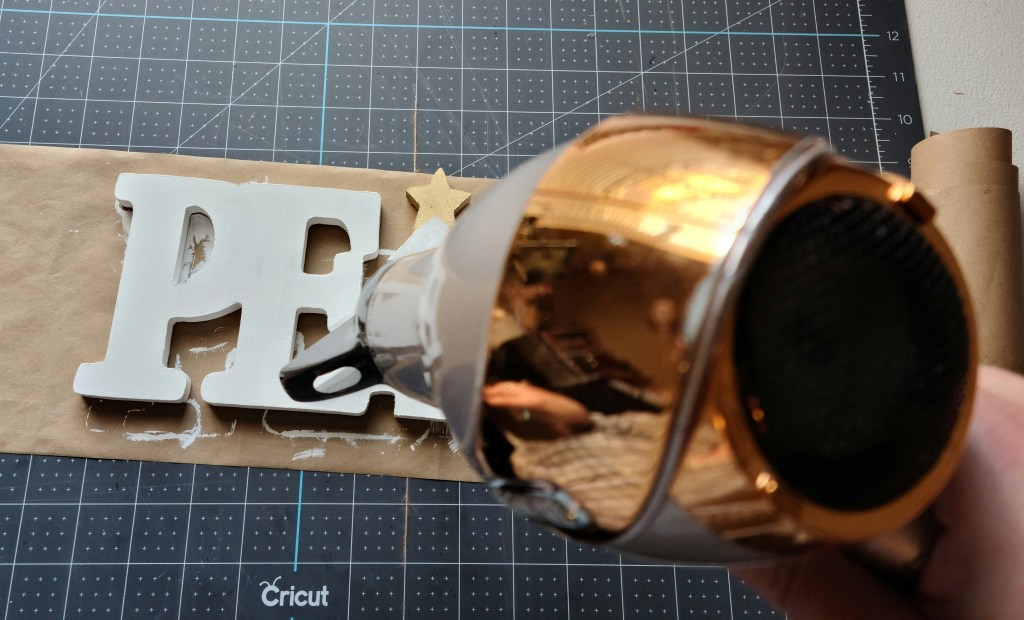
If you’re using a light color, you will probably need at least three coats. I think I did four, but I’m not positive. You can use a blow dryer to speed up the drying process in between coats.
This is what you will have when you’re done.

Add Ribbon to the End of the Dollar Tree Christmas Sign
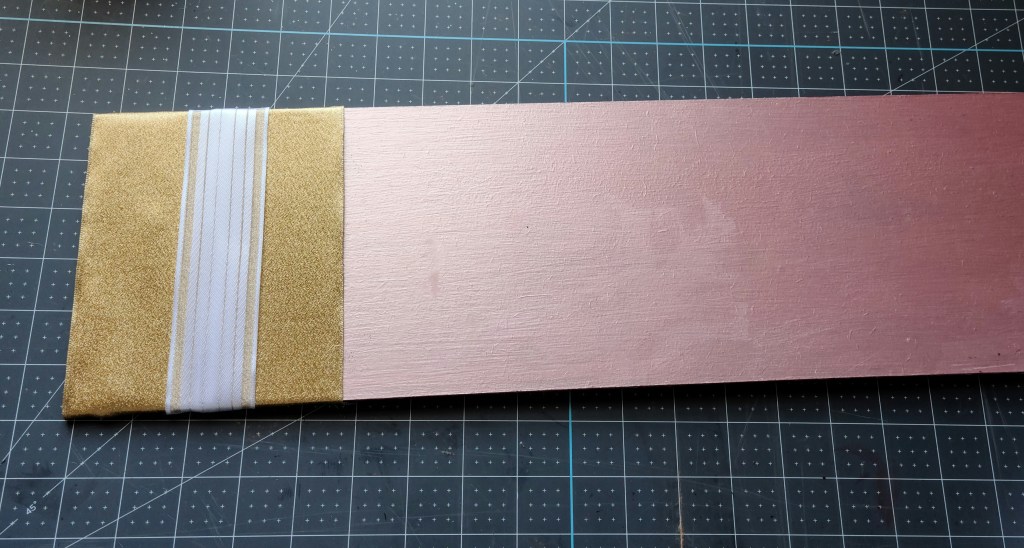
While your “peace” is drying you can add the ribbon to the end of the sign. I used gold to bring out the gold accents on the star and in my bathroom. I had some left-over 2.5″ gold wired ribbon from Michael’s, but Dollar Tree does have some this time of year. Since I had my blog logo on the end of this particular sign I needed to cover it. I had to add two pieces to cover it all. You can add one if you’d like, but I think it looks best with two rows of ribbon.
Lay your ribbon out and turn your sign over on top of it. Make sure that the ribbon is lined up flush with the left edge of the sign. Add a strip of hot glue on the bottom edge and press the ribbon on top of it. I like to use these hot pink rubber covers on my fingertips to be able to safely push anything on top of hot glue. I’ve been getting way too many blisters lately. They come in a three pack from Dollar Tree.

Now you can see how much ribbon you need to reach around the sign and can cut off any excess. Stretch the ribbon taunt, add glue along the top edge, and press the ribbon on it. Repeat the process with a second piece of ribbon. Just glue it right next to the first. You can allow them to lap over each other a little if you’d like.

I decided that I wanted to hide the place where to two gold ribbons met, so I added a white 1.5″ ribbon over them. I just cut the length I needed and placed the middle of the ribbon right over the overlap of the two gold ones.
Glue on the Wood “Peace”
Once the word is dry you can glue it on the sign. I just used hot glue, and it has held so far. If it falls I may add some E6000, but for now I’m out of it so hot glue will have to do. Squeeze hot glue along the back of the word (and other glue if desired).

Put the word in the center of the sign toward the end. The “e” on mine is 2″ from the end of the Dollar Tree Christmas sign.

Add a Bow & Greenery
To embellish this Christmas decoration you can use faux Christmas branches, real tree greenery, faux flowers, or glittery stems. I used what I call faux glittery stems (I don’t know what else to call them lol). Last Christmas I bought some white branches with sequins and other large glitter pieces and some gold ones from Walmart for 97 cents. They are a lot cuter than the ones from Dollar Tree, but you can find some cute glittery ones from there too. They’re just a different from the ones from Walmart.
Cut pieces off of your chosen embellishments and arrange them on top of each other until you’re happy with what you have. Glue them together so they stay that way. I cut off short pieces of my gold branch and glued three of them in a fan-like manner.

Next I glued three of the white branches on top of those.

Then I added glue to the back of the little arrangement and placed it about .75″ from the bottom of the sign in the middle of the ribbons. You’ll want to center your arrangement, but leave room for a bow to go on top.


Create a simple two loop bow that’s as wide or just a little wider than the ribbons you have on the sign. My bow is a few inches wider than my ribbons because I already had it in my scrap ribbon stash. I didn’t have anymore of this pink metallic ribbon, so I had to use that bow. It looks great though. Add some hot glue on the back of the bow, and place the center of it on the center of your embellishments.


You’re Dollar Tree Christmas sign is now complete!
Can you believe how easy this is?! I love it, and I can’t wait for Christmas to get here so I can hang my new decoration. I know I’ll be making more pink and gold Christmas decor for my master bathroom over the next few weeks. Most of it will probably be Dollar Tree DIYs because, well, who wants to spend a lot of money on decorations at Christmas. Especially now. Make sure that you don’t miss a cute tutorial or a free Christmas (or other) printable by following me via email. Enter your email address below, and you’ll get an email when I add a new post so you’re never left out!
Find out when I add new tutorials, free printables, & other great posts!
Here are a few shots of my Dollar Tree Christmas sign. It’s dark in my craft room right now, so the colors don’t show up as good as they actually look. They are metallic pink, gold, and of course white.


Here’s a short video shot.
More DIY Christmas Decor & Printables
If you like beautiful Christmas decor tutorials, you might like these:


There are more Christmas DIY tutorials here on the blog, so I’d love for you to stick around and check them out. If you like this tutorial, make sure you pin it so you have it when you’re ready to make your own sign. You can also share it using the buttons at the bottom of the post. That way you have it on your social media profile and you can share it with your friends and family so they can make their own! That’s two for one! I would love for you to use the buttons in the sidebar to follow me on social media. You’ll see when I add new posts, and you can interact with me, which I’d love for you to do. Make sure you tag me when you make your sign. I love seeing your creative talents. If you want to see more Christmas DIYs and decor, follow me on Pinterest. I add new projects weekly.
If you’re one of my blogger friends, come by each week on Sundays, Mondays, and Thursdays to share your family friendly posts on my three link parties. Happiness is Homemade is open from Sundays thru Thursdays, Traffic Jam Weekend opens Thursdays at 5pm CST thru Sundays, and You’re the Star Blog Hop is open month long and new feature posts go live on Mondays. If you’re not a blogger, make sure to check those parties out for great recipes, crafts, home and seasonal decor, fashion, family, gardening, and much more!


Love what you did with this sign.
Thank you!
Thank you again for another awesome post at our Senior Salon Pit Stop.
Pinned to Senior Salon Pit Stop InLinkz Linkup Shares board and tweeted @EsmeSalon #SeniorSalonPitStop
Thank you Esme! Love visiting and sharing with you!
So glad to have you participate weekly