Designing Devotion Edition: Gifts from the Wise Men
Over the past few weeks I’ve been planning and making new Christmas decor. I’m decorating my master bathroom using the color scheme that’s already in there, blush pink, gold, and white. With one wall of my bathroom covered by the 2′ “peace” sign and the counter decorated with the mini Christmas tree with the DIY Christmas ornaments, all I needed was something to hang on the wall next to the mirror. I decided to try my hand at a DIY Christmas ornament wreath. I made it with 3 packs of ornaments from Dollar Tree and a wire hanger, which means you can make one of these for $3 plus ribbon!


To make a Christmas ornament wreath you need:
- ornaments- a 7, 12, & 18 pack
- wire clothes hanger (You want one that isn’t flimsy.)
- hot glue gun
- 3-4 zip ties
- 2.5″ wired ribbon (or your size choice)
- floral wire or pipe cleaner
- wire cutters
- pliers (You may or may not need them.)

Create the Wreath Form
You need a nice, thick wire hanger for this project. If you try to use a flimsy one, it will bend in and you’ll end up with one of those “nailed it!” wreaths. First you need to unwrap the ends from each other. You can use wire cutters or pliers to help unwrap them.
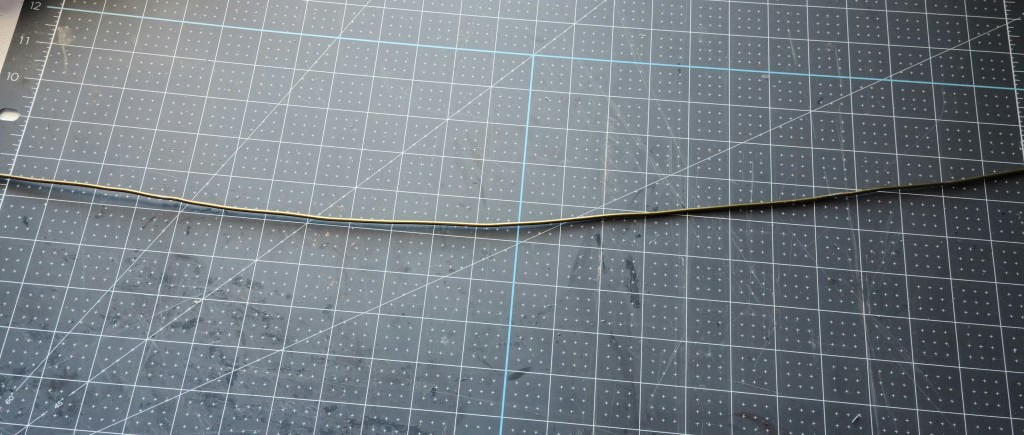
Now straighten the hanger. It’s easiest to form the hanger into a more perfect circle when it’s straight first. Make sure to get any bends flattened out. Again, you can use pliers if needed. This is what you’ll end up with. I cut the hooked end of my hanger off to make my wreath the size that I needed. It’s difficult, but you can use wire cutters to cut off unneeded length.
Now begin to mold the wire into a circle. You can use your knee to kinda work it into a circle. Make sure to keep it as round as you can so you don’t end up with the “nailed it!” wreath, lol.

Keep working until you have a round wreath form.

You can see that one side is a little bent in above. I used my pliers and knee to make it a perfect circle.

A Few Tips
It is easier if all of your ornaments are out of the packages and ready to go as you string them. I dumped all of mine on my desk next to me. If you cut off the hook part of your wire, you will have a much easier time sliding the ornaments on the side that’s straight and not spiraled. Make sure that you can lay the wreath flat. You don’t want any ornaments on the back because that is where it will need to lay flat against the wall. Now that I’ve given you these tips, let’s get to making a wreath!
Add the Christmas Ornaments
Slide an ornament onto the wire and push it to the spiral end. I started with a large ornament. In this picture you see a medium one, but after I got a few ornaments on I took them off and started with a large one.

Now slide a small ornament on and push it against the other one. Turn them to fit them together in the best way.

Next place a medium ornament on and move it around like you did with the second. You want everything to be nice and filled in, but again, make sure it lays flat on the back.

Add Hot Glue & Keep Adding Ornaments
Now add a small, medium, then another small ornament. At this point you can start to see how this is done. Add ornaments in size and color patterns that look good. Slide everything to the opposite end. To keep everything in the right spot, you’ll now start hot gluing some together. Make real sure you’re adding glue in the right place! You don’t want glue showing, and if you have to pull the ornaments apart they can break or the color will be pulled off. I placed a dot of hot glue on my first small ornament to attach it to the large pink one.

Hold the two ornaments together while the glue dries. Glitter ornaments take a little longer to adhere properly, so if you’re gluing one of them, hold it just a little longer than usual.

You don’t have to add glue to every ornament, but it does help a lot. Continue adding and filling in your wreath in this manner until it’s full.


As you add ornaments, make sure to try to move the wire into as much of a circle as you can, and have the two ends of the hanger as close together as possible. . If you don’t, when you get to the point where you will attach the two ends of the wire together, it can pull the ornaments apart. Trust me that is absolutely no fun. It ruined my wreath twice. You want the wire in as close to the finished position as it can be when you glue the ornaments together.
Close the Christmas Ornament Wreath
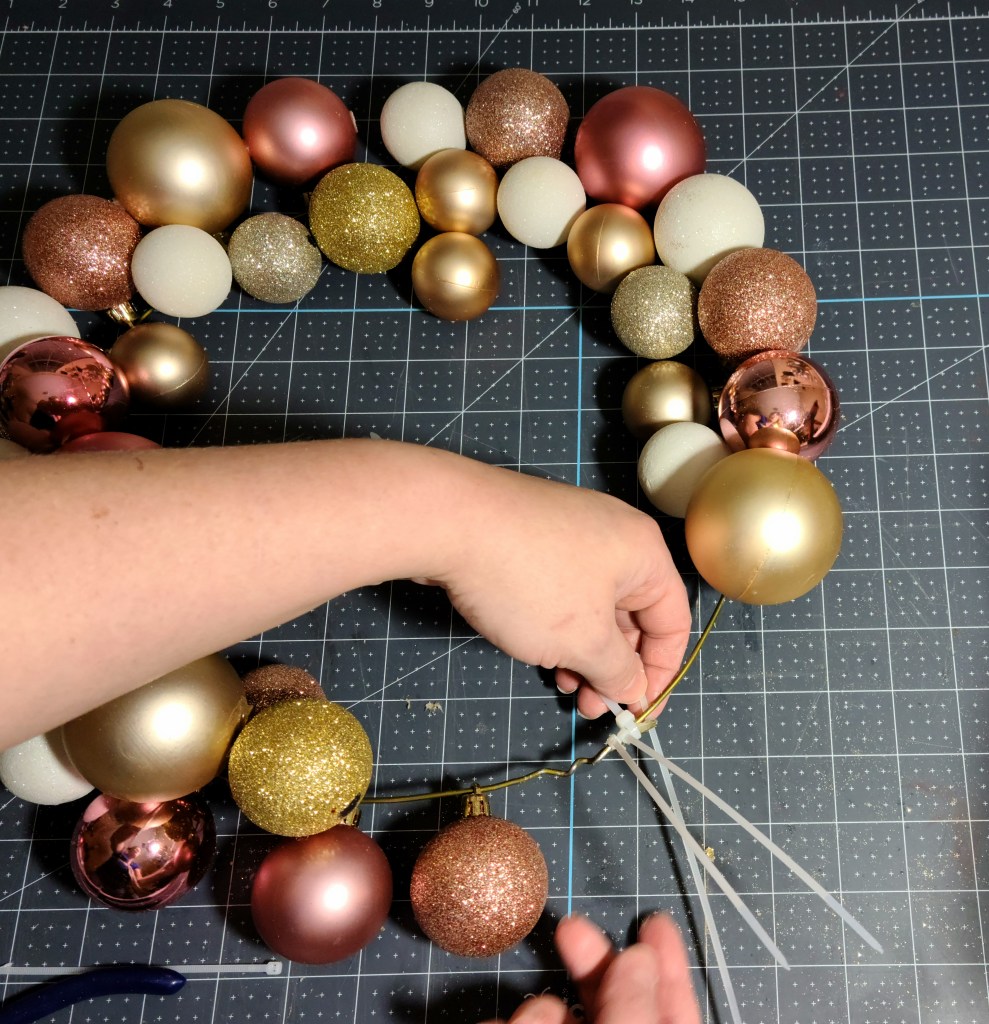
When your Christmas ornament wreath is full, it’s time to attach the two ends of the wire. Place a zip tie around one end of it. Pull it until it’s just wide enough to put the other end through. If you have someone else who can help you, this will be so much easier. I was alone, so I had to try to figure it out a way to make it work alone.

Slide the other end into the zip tie so that the ends overlap a few inches. Try to hold the two wires close. Add hot glue between the two ends.

Now pull the zip tie closed. Since one zip tie probably won’t hold the wires together permanently, especially with a thick wire hanger, add a few more zip ties. If you don’t, the wire may slip out from the one tie, and that will throw ornaments everywhere and you will be ticked beyond measure. Trust me!!

I added four ties across the overlap of the wires.
Cut the excess off zip ties.

When the wreath is secure this is what you will have.

Make & Add a Bow to the Christmas Ornament Wreath
In order to make the wreath look finished, you need to add a bow. I made a nine loop bow that you can learn to make with this tutorial. If you need a super easy to make bow, check out the tutorial for the easiest bow you could ever make.

Secure the bow with a long piece of floral wire or a pipe cleaner. I used a pipe cleaner from Dollar Tree that’s got garland-type strands covering it. I cut all of those off before securing my bow with it.

Use the extra wire to wrap the bow around the wire hanger to cover the zip ties and empty space. I also folded the pipe cleaner around to make a loop to hang the wreath up with. You can use another piece of wire to make a separate loop hanger if you’d like.

Your Christmas ornament wreath is ready to hang!
How gorgeous is this wreath?! I’m in love with all of the decor I made for my master bathroom this year! One year I’ll have enough blush and gold decor to do the living or dining room! Here are a few pictures of my wreath.


Devotion: Jesus & the Wise Men
With this wreath’s gold, sparkly Christmas ornaments, what better scripture to go with it than Matthew 2:11 ESV? “And going into the house, they saw the child with Mary his mother, and they fell down and worshiped him. Then, opening their treasures, they offered him gifts, gold and frankincense and myrrh.”

Christmas is such a wonderful time of year. It offers a time of peace, love, and joy because of the birth of our Lord and Savior Jesus Christ. The wise men who came from the East were waiting and watching for the signs in the heavens (like we should be doing now for His return) that would announce the arrival of the Messiah. They sought out Jesus to offer Him gifts. They traveled many, many months, possibly years to reach Him to give him presents. Have you ever thought about why they did that? Let me tell you one reason.
Joseph, Jesus’ stepfather, wasn’t a wealthy man. God knew that King Herod would begin killing baby boys to try to kill the coming King. God knew that He was going to warn Joseph through an angel to go to Egypt until it was safe to return. This was also to fulfill an Old Testament prophesy about bringing His Son out of Egypt. How was Joseph supposed to pick up and move himself, Mary, and a baby (or toddler), quickly, in one night, to a far away land that they did not know? God sent the wise men with gifts that were worth enough to move the family and sustain them for a few years until it was safe to return to Nazareth.
This Christmas look for ways that you can help others. Open your heart and listen to God when He prompts you to do something. You never know if He’s having you do something that can do more good than you could ever imagine.
Tweet
God works in ways that we never see coming and through people we would never think He would. This Christmas look for ways that you can help others. Open your heart and listen to God when He prompts you to do something. You never know if He’s having you do something that can do more good than you could ever imagine.
More Christmas!
I hope that you enjoyed this tutorial and that you’ll make a Christmas ornament wreath of your own. I would love for you to share this post using the buttons at the end of this post and pin it for when you’re ready to make it. There’s nothing worse than finding the perfect project only to lose the tutorial when you have all of your supplies! When you make your wreath, tag me on social media. I would love to share your project with my followers! You can use the buttons in the sidebar to follow me.
There are a lot more seasonal decor ideas here on the blog, so I’d love for you to stick around and check them out! Here are a few decor tutorials.


I have a lot more Christmas DIYs and free printables coming. Make sure you don’t miss those by entering your email address below. You’ll get an email when I add a new tutorial, free printable, or other great post. I’ll never send any spam. You can also see when I add new posts by following me on social media.
Get new content delivered directly to your inbox.
Join me on Pinterest for new ideas added weekly!


Lovely! I made ours about 30n years ago and it’s getting a bit tired and broken (as in bits are falling off or rotting with age so it’s getting patchy. This might be a good one to replace ti with!
Thank you! I tried making one years ago, but I used a hanger that was way too thin and it drooped. I finally decided to try again, and I’m glad I did.
I always love a good dollar store project! Featuring when my party opens.
Thank you! I do too!