I get so tired of straightening my Christmas tree skirt. I probably do it a hundred times each Christmas. It’s maddening. I was making some outdoor Christmas decorations, a few lighted gift boxes, and I had a lot of the backings for picture frames left. I didn’t want them to go to waste, so I decided to make them into a DIY Christmas tree collar.
This is a two-for-one project, and it’s so easy. I made lighted Christmas gift boxes with the frames, and the collar with the left-overs! Make sure you don’t miss this Sunday’s post when I show you how to make those gift boxes. Enter your email address below so you get an email when I add new tutorials, free printables, and other great posts. You can also follow me on social media using the buttons in the sidebar so you can keep up with what’s going on here on the blog.
Get new content delivered directly to your inbox.
Supplies for a DIY Christmas tree collar:
- 5-8 11×14 picture frame cardboard backings
- wrapping paper
- scissors and tape
- masking tape


Wrap the Inserts
You really won’t believe how quick and easy this DIY is. It should take you less than 30 minutes! Remove the backing from an 11×14 picture frame. All you need is the back that has the hanger on it and keeps the picture inside the frame. Put the frame aside for another project.

Lay the backing on the wrapping paper with the flat side down. You want the metal parts that you can hang a picture from to be on that back side so that they don’t show. You want the front to be flat. Sometimes you can pull them out easily, sometimes it rips the cardboard. I left mine in.

Wrap it like a normal gift with all of the tape and seams on the back side.


The front will look like this.

Continue wrapping inserts until you have five to eight of them, depending on how big your Christmas tree stand is. My tree is 7.5,’ and the stand is about 20″ wide. I used five inserts, but six would give me more room from the stand to the frames. I didn’t want a lot of room because I’ll be adding presents today.
Connect the Frames
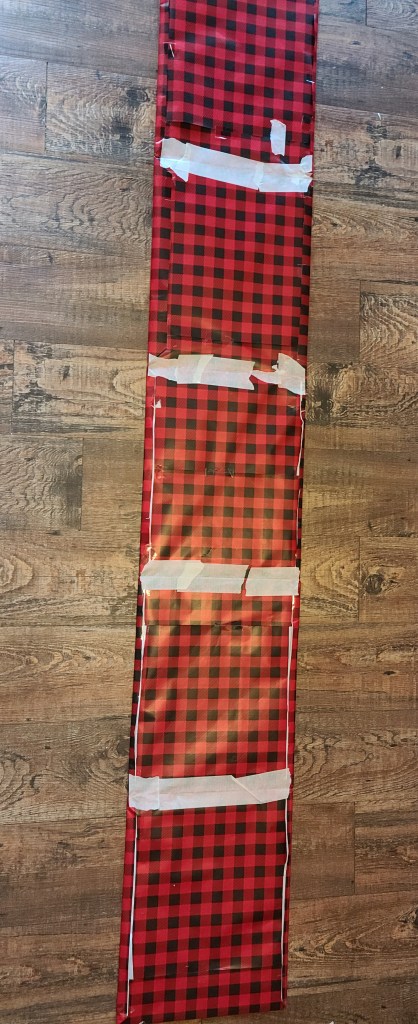
Once you have the right number of frames wrapped, lay them end to end. I laid mine with the 14″ side horizontal. If you have a particularly large tall tree stand, you can lay the 11″ sides horizontal so that the 14″ goes up and down and covers more. The bottom of my branches are about 13″ off the ground, so an 11″ tall tree call is fine.
Push them all the way together so there is no gap. Put masking tape along the seams where two frames meet. At first I added two pieces of tape on each side as pictured below.

When I set the frames up I saw a little light through, so I started adding tape across the entire seam. Tape each seam all the way across, but keep all of the tape on the back. Don’t add it to the sides. It doesn’t have to be a nice clean seam since you won’t see it. You can see that my masking tape would not tear straight, lol. I didn’t feel like finding my scissors, but it’s okay because you won’t see the backs at all.
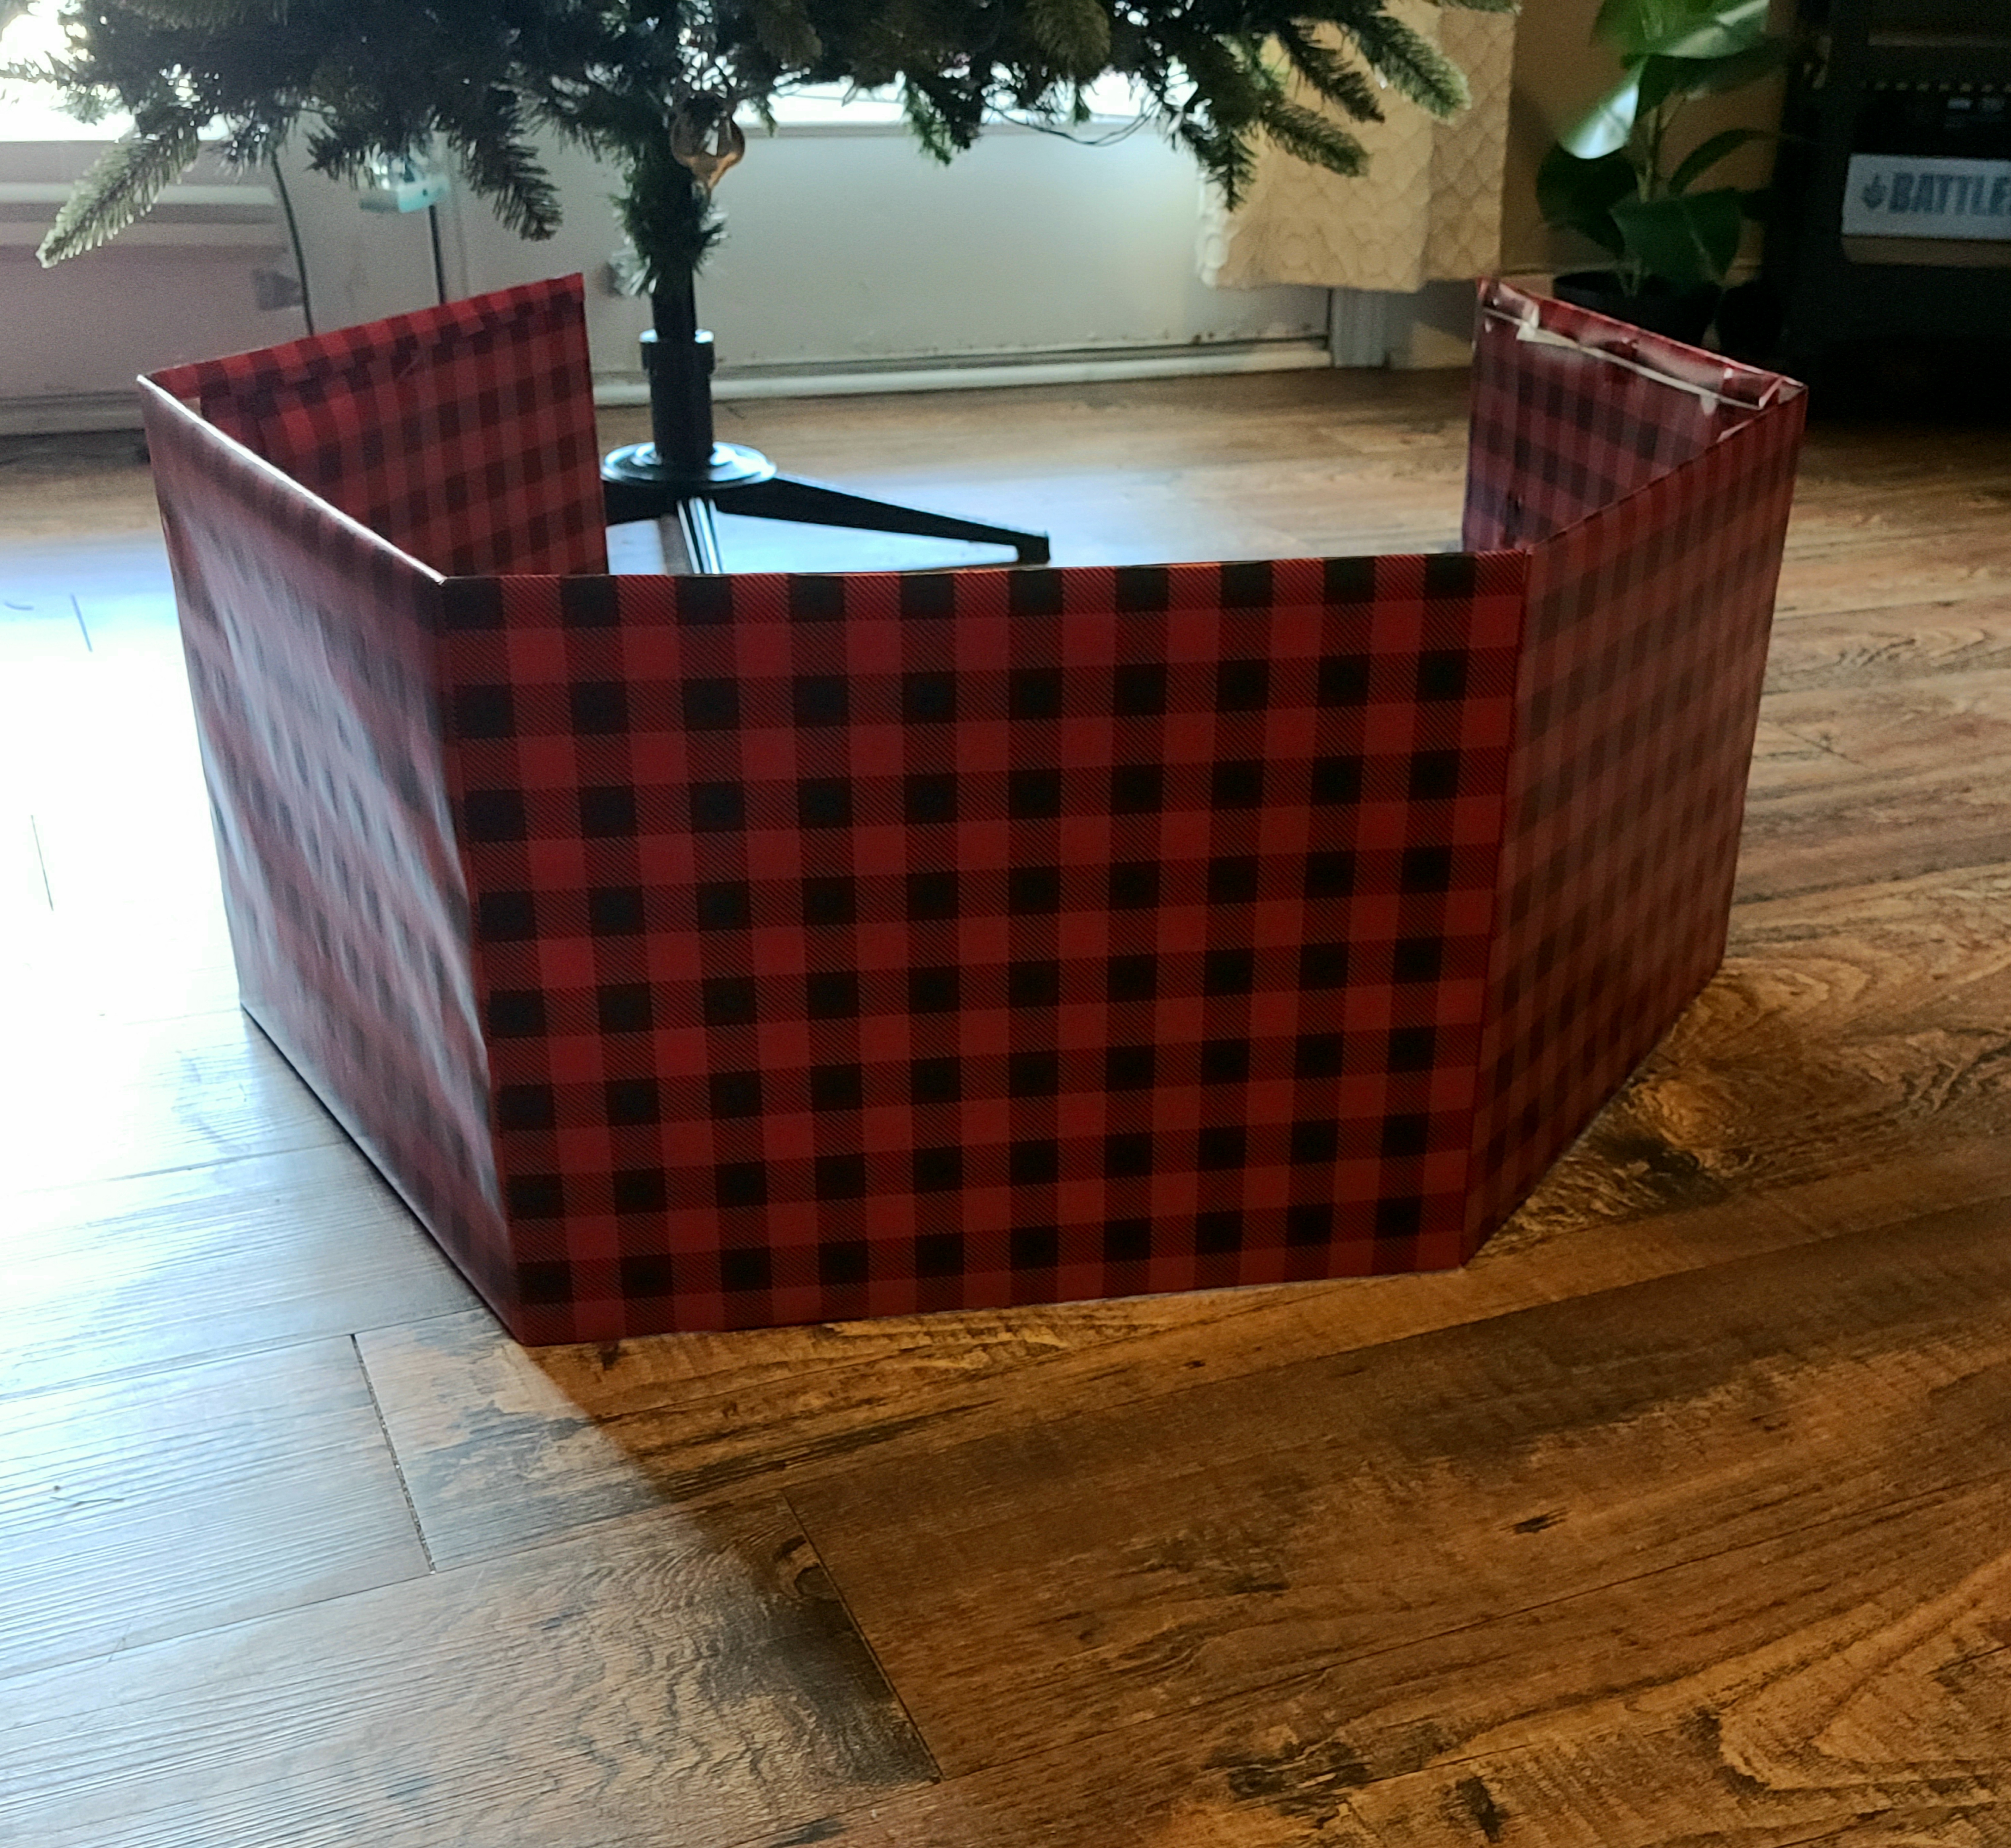
All you have to do now is sit them up and sit them around your Christmas tree stand.
Your DIY Christmas tree collar is ready to set up!
Can you believe it’s that easy? Just sit the cardboard up and fold the pieces in until the tree stand is covered. You don’t have to tape the two ends together. It will stand on its own, then you can take it down after Christmas and fold it flat to store!

Here’s my collar around our tree.
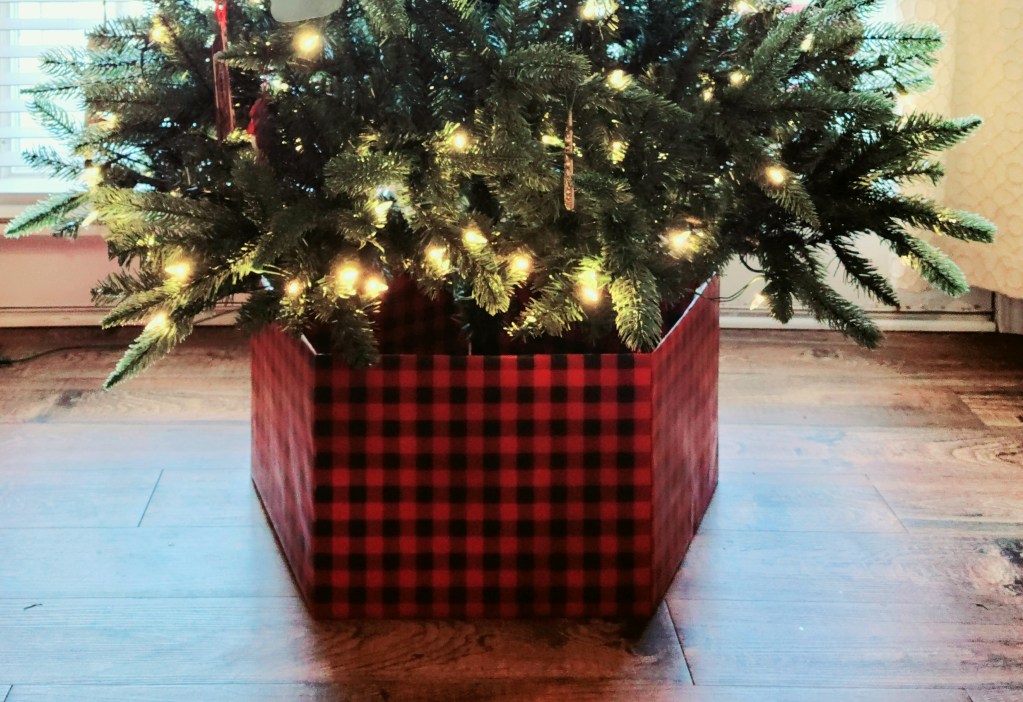
I hope that you enjoyed this tutorial! I really couldn’t believe making my tree collar was that easy. Several different methods were tried before this, and I had just about given up when I thought of this! Make sure to pin and share this so you can get back to it when you’re ready to make your DIY Christmas tree collar. You can use the buttons at the end of this post to share it on social media.
More Christmas Decor & Printables
Here are a few more tutorials and printables you might like.


Niki,
What a great idea!! Love it!!
Hugs
Deb
Thank you!
You never cease to amaze me my friend! What a great idea and such a pretty end result! I could stare at those picture frames for days and never come up with such a great project. Thanks so much for the inspiration you always give us all! Pinned!
Aww, you’re so sweet Denise! Thank you! It did take me days and two failed tree collars to think to use those haha!