It’s the first Sunday of the month which means it’s time for our monthly DIY Blog Hop. This month’s theme is an outdoor project so make sure you read to the end of the post to check out the great projects made by the other ladies in the hop. It’s Christmas time so I wanted to create a project perfect for your porch or to put in your yard. Of course you know I wanted to make this a DIY that is very affordable, especially since it’s Christmas. Keeping all of that in mind, I created this DIY lighted gift box using Dollar Tree picture frames.

This past week I shared a tutorial for making a DIY Christmas tree collar using the cardboard backing inserts from those frames. A two-for-one project!
Supplies for an outdoor DIY lighted gift box:
- 4 11×14 picture frames
- hot glue
- E6000 or zip ties
- 12″ deco mesh
- white spray paint or color of your choice
- 2.5″ wired ribbon- I also used a 1.5″ wired ribbon.
- pipe cleaners or floral wire
- Christmas lights- I used a 20 light strand from Dollar Tree. You can use a larger strand or a battery operated pack. The 20 light strand works fine, but having a longer cord would be very helpful. I’ll probably change them out for a larger strand at some point.

Prep the Frames
You will start your project by attaching the frames together. There are two ways you can put them together, either with them laying them length-wise and gluing the 14″ sides together. Secondly, you can sit them up taller and glue the 11″ sides together. I am making several DIY lighted gift boxes, so I made two shorter but wider, gluing the 14″ sides together, and the last box will be skinner and taller. That one will go on top of the gift box stack.
First you need to remove the tabs that hold the cardboard and the glass in the frame. Use pliers and wiggle the tab back and forth while slightly pulling and they’ll pop right out. It’s easiest to remove them while they’re still laying flat against the cardboard. In the picture below, I’ve accidentally moved the tab up a little. That makes it harder to remove. If you turn the frame so the tabs you’re removing are right across from you, you can grip the tab and pull it straight back towards you. Easy-peasy.

Remove everything from the frame, the glass and the backing.

If you have deco mesh in the color that you want your gift boxes to be, you can paint the frames with spray paint or acrylic paint to match the mesh now. I did this both ways. I had red deco mesh, so on my first box I painted the frames red. The downside to doing that is that the hot glue showed through a little more because on the one I spray painted, the paint covered the glue. You can go back with the acrylic paint later and try to cover the glue, it just doesn’t look as good.


Attach the Frames to Form the DIY Lighted Gift Box
Lay one of the frames facedown. Add a strip of E6000 along one of the 14″ sides of the frame. If you don’t have E6000 on hand you can use zip ties. Just using hot glue alone will make them really delicate. So if you use zip ties, add the hot glue, press the frame on it, then add a zip tie on each end of the frame.
Squeeze some hot glue on top of the E6000. Move quickly so it doesn’t dry.

Place another picture frame on top of the glue. You want the front of the frame facing you with the flat side going on top of the glue. Make sure to line the ends up.

Turn the frames so that you have easy access to the other 14″ side. Apply the E6000 to that side. Then squeeze hot glue on top of that.


Line another frame up with it and press it on top of the glue. Hold it a few seconds while it dries.

Now it’s time to add the final frame. You just need to repeat the previous steps. Add hot glue to one of the perpendicular frames along the 14″ side, and hot glue on top of that. Lay the last frame on top of the glue. Again make sure to line it up so it sits on the other one evenly. Press it down and wipe off any excess glue.


Lift up the unglued side of the last frame and squeeze some E6000 under there. Press the frame back down. You can add hot glue, but because it was holding up really well with every other spot glued, I didn’t need it.

Your frame is now complete. Here is what you should have.
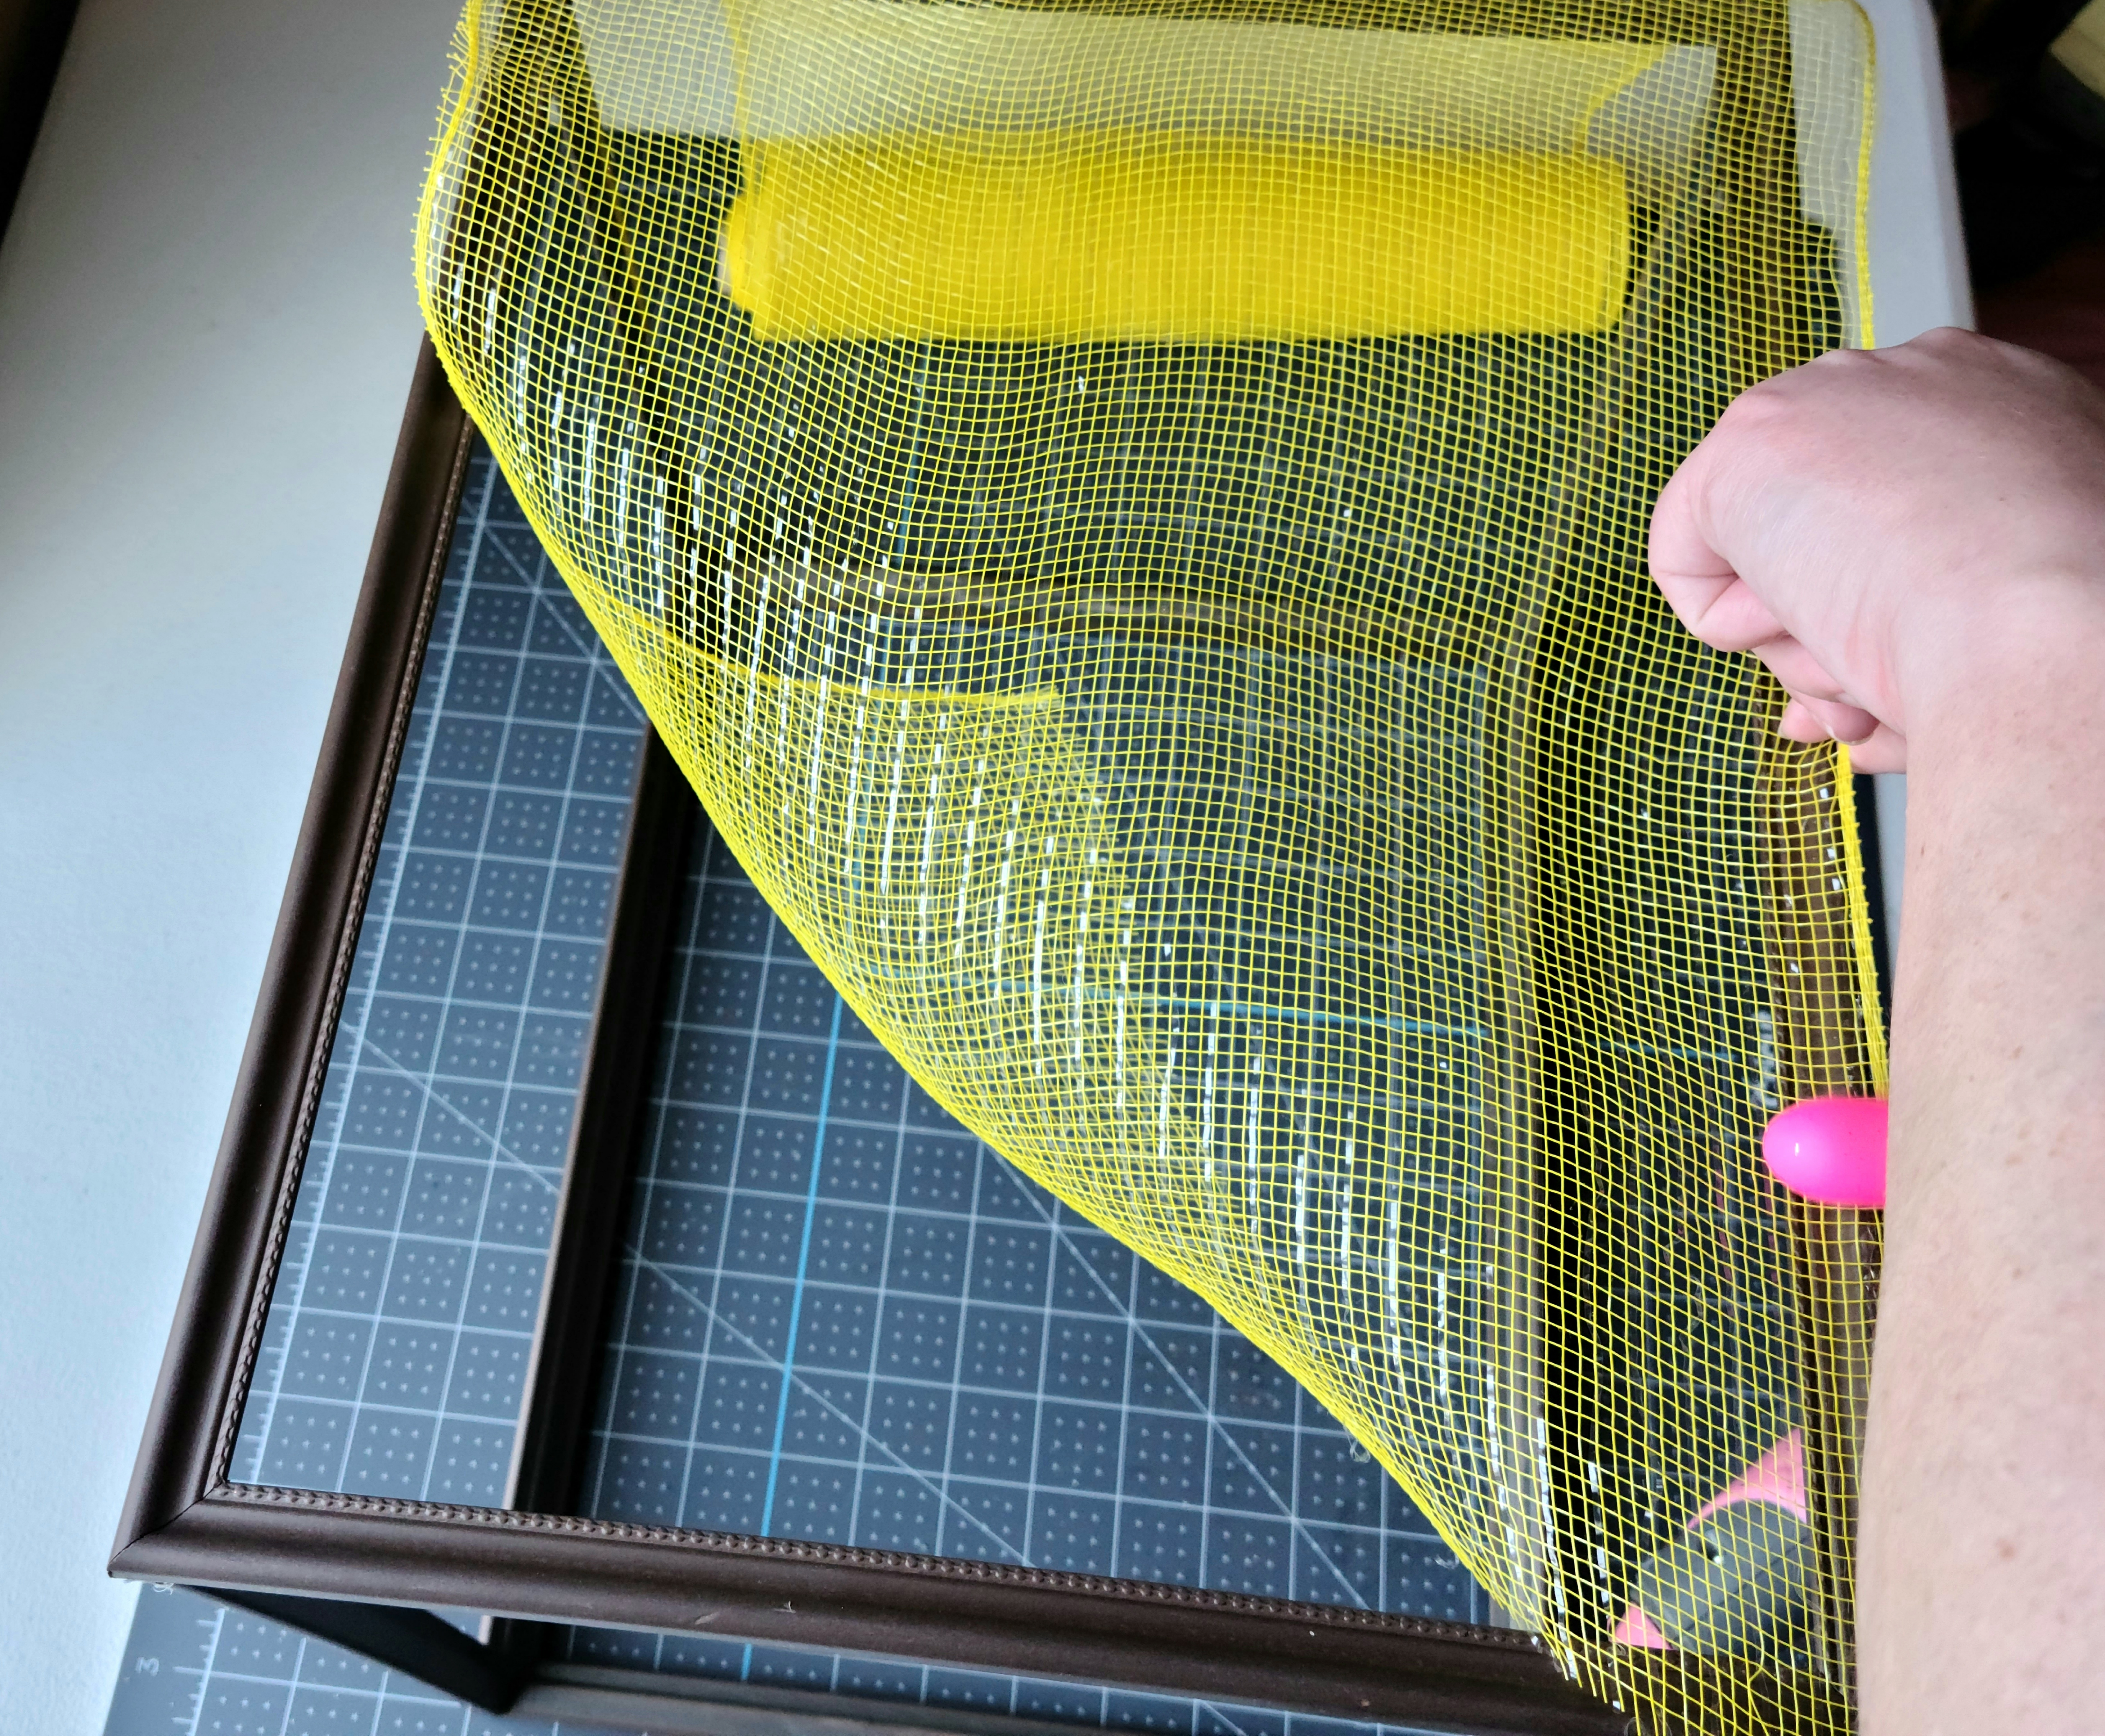
Add Deco Mesh to the Gift Box
Glue the Mesh to Side One
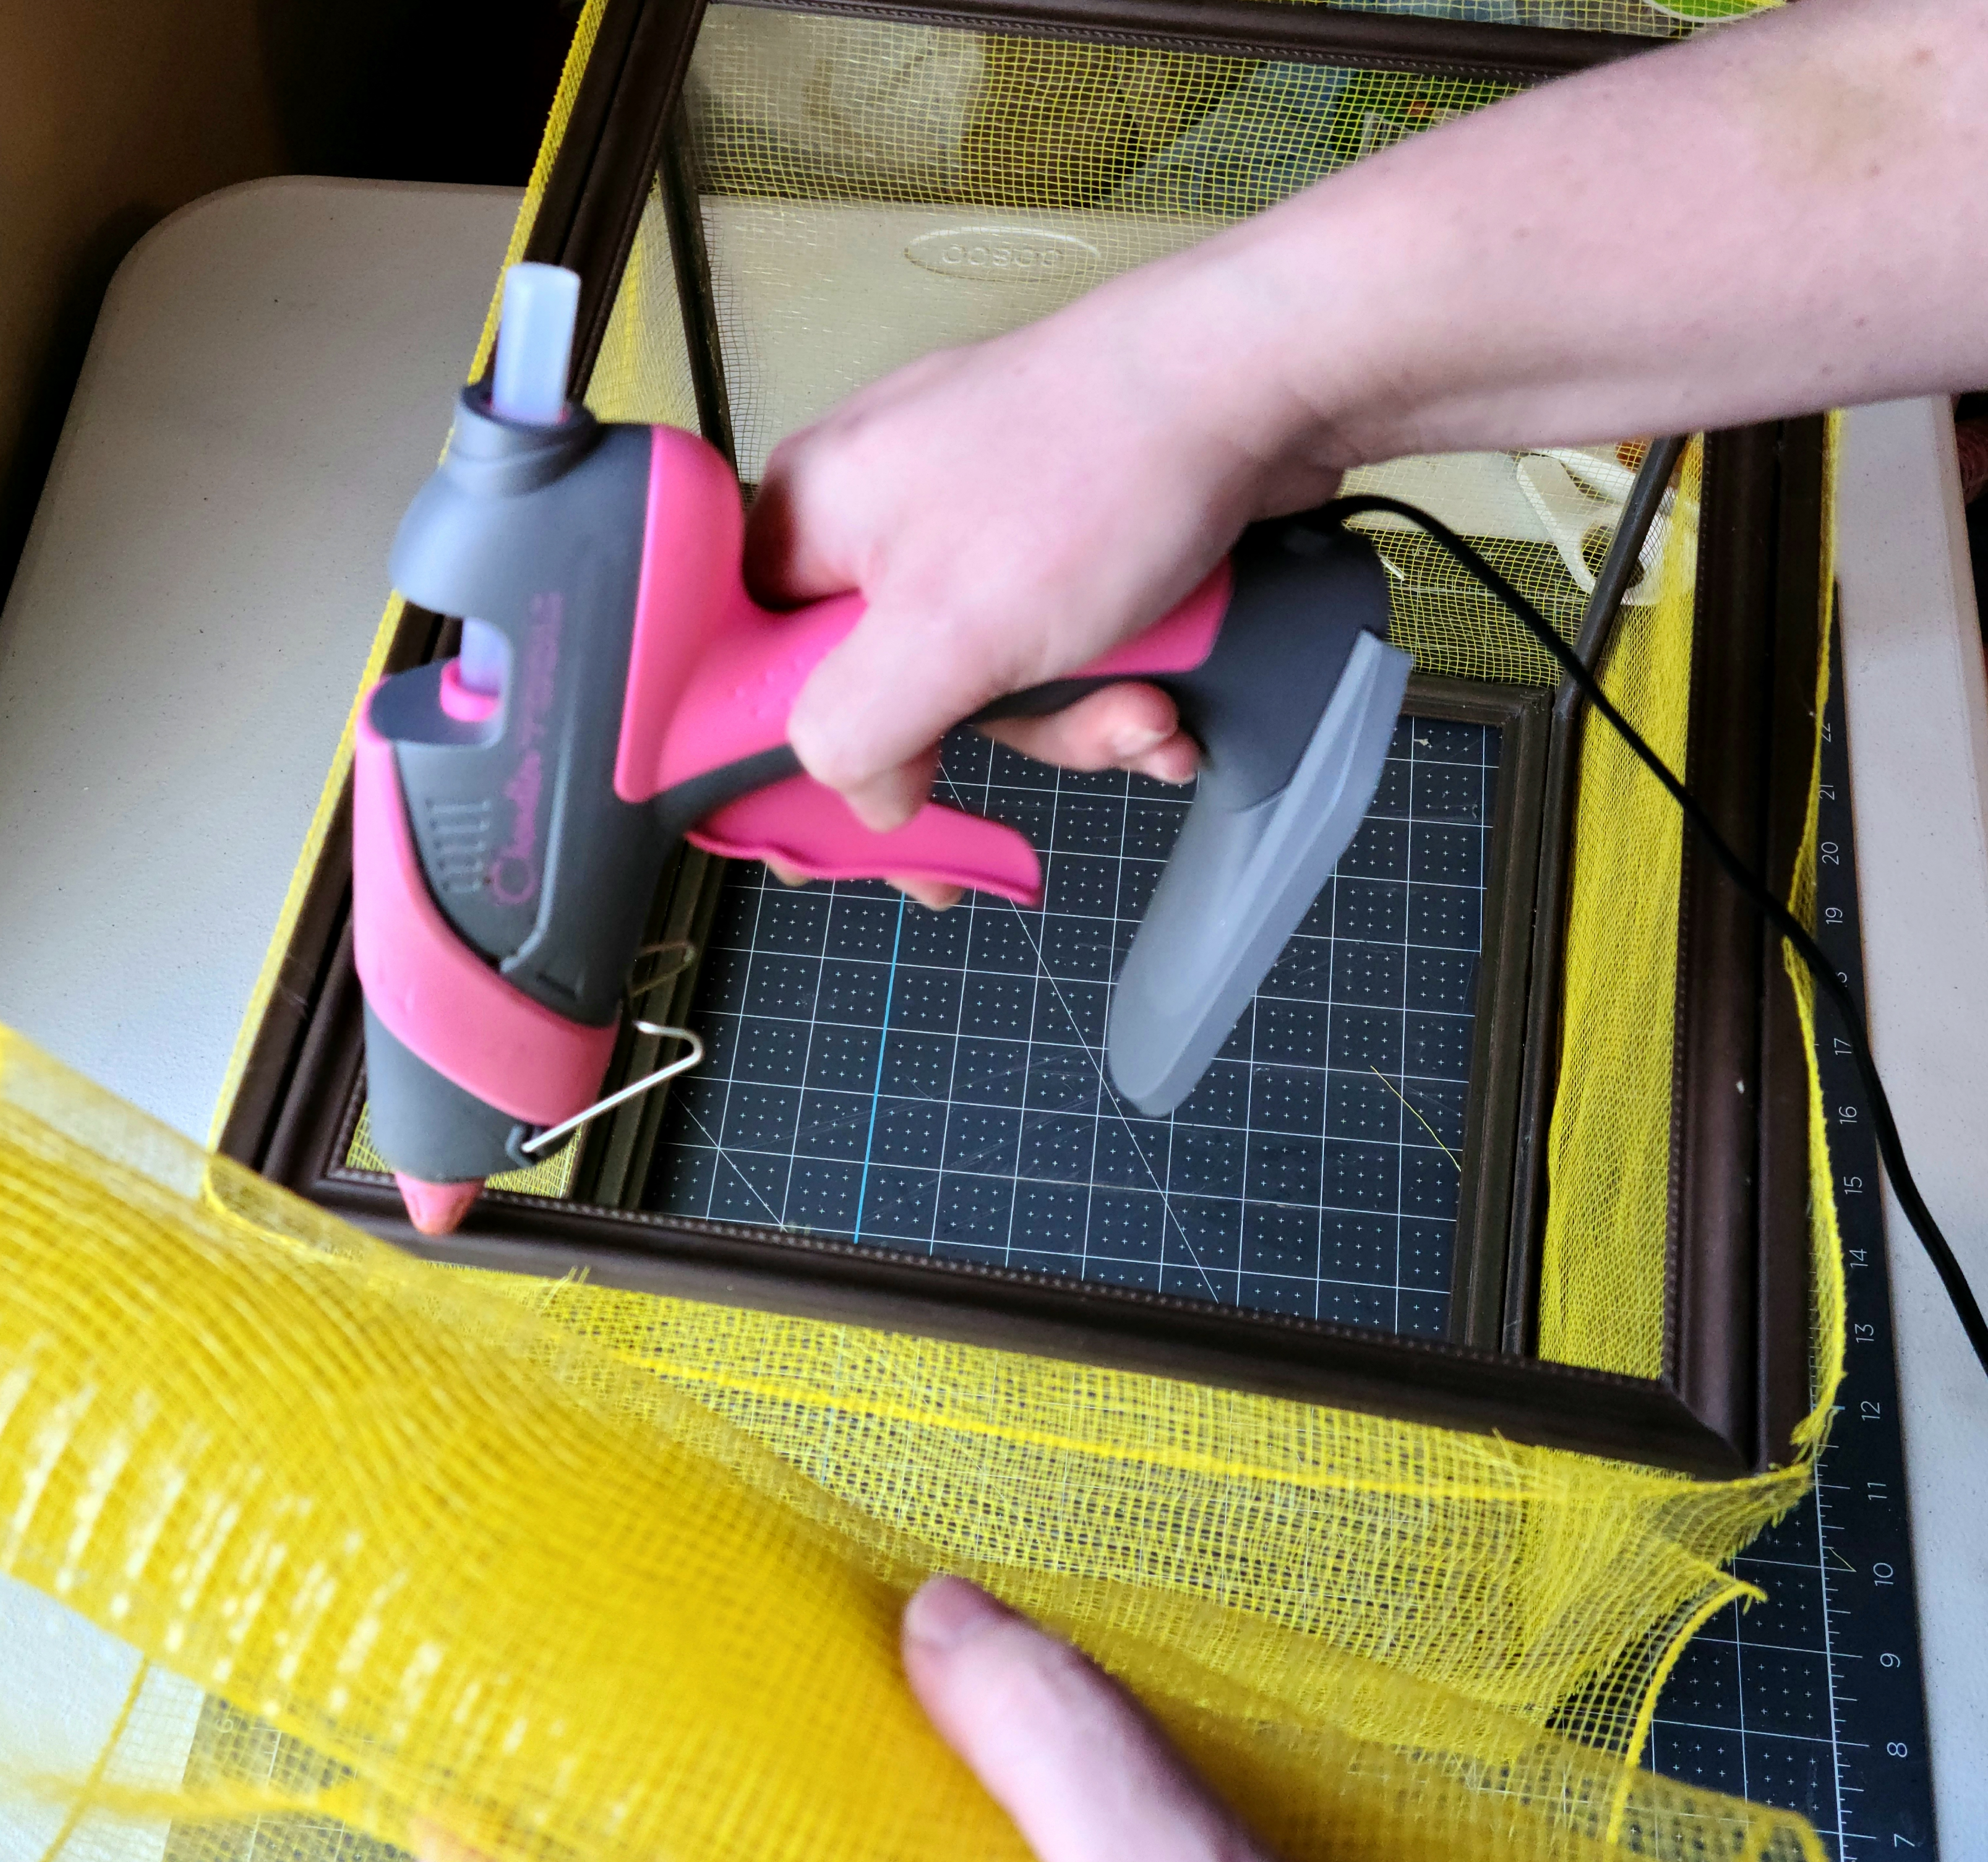
Now it’s time to add the deco mesh to the frame. Roll it out over the top of the box and let it fall down the side. Center the mesh on the frame. You’ll have a small amount hanging over the sides of the frame, so try to make sure you have the same amount on each side. Squeeze a line of hot glue along the top corner of the frame, then press the mesh on to it. I didn’t do the entire length at once because the glue would start to dry before I could press the mesh to all of it. I started with the top corner that was closest to me.


Lift the side of the mesh (on the side closest to you) and add a line of hot glue to the frame. Continue squeezing glue and pressing the mesh onto it until it’s glued along that 14″ side.


Now move on to gluing the 11″ side where the start of the mesh is. In my case it was on my left side. Do just as you did on the first side. Lift the mesh a little, add, glue, and press the mesh back down. I use a rubber fingertip cover and it makes this part so much easier. Next glue the other 11″ side on that frame. Just lift the roll up and glue under it.


I left the final, outer side unglued to slide the top piece of mesh in.
Glue the Other Three Sides
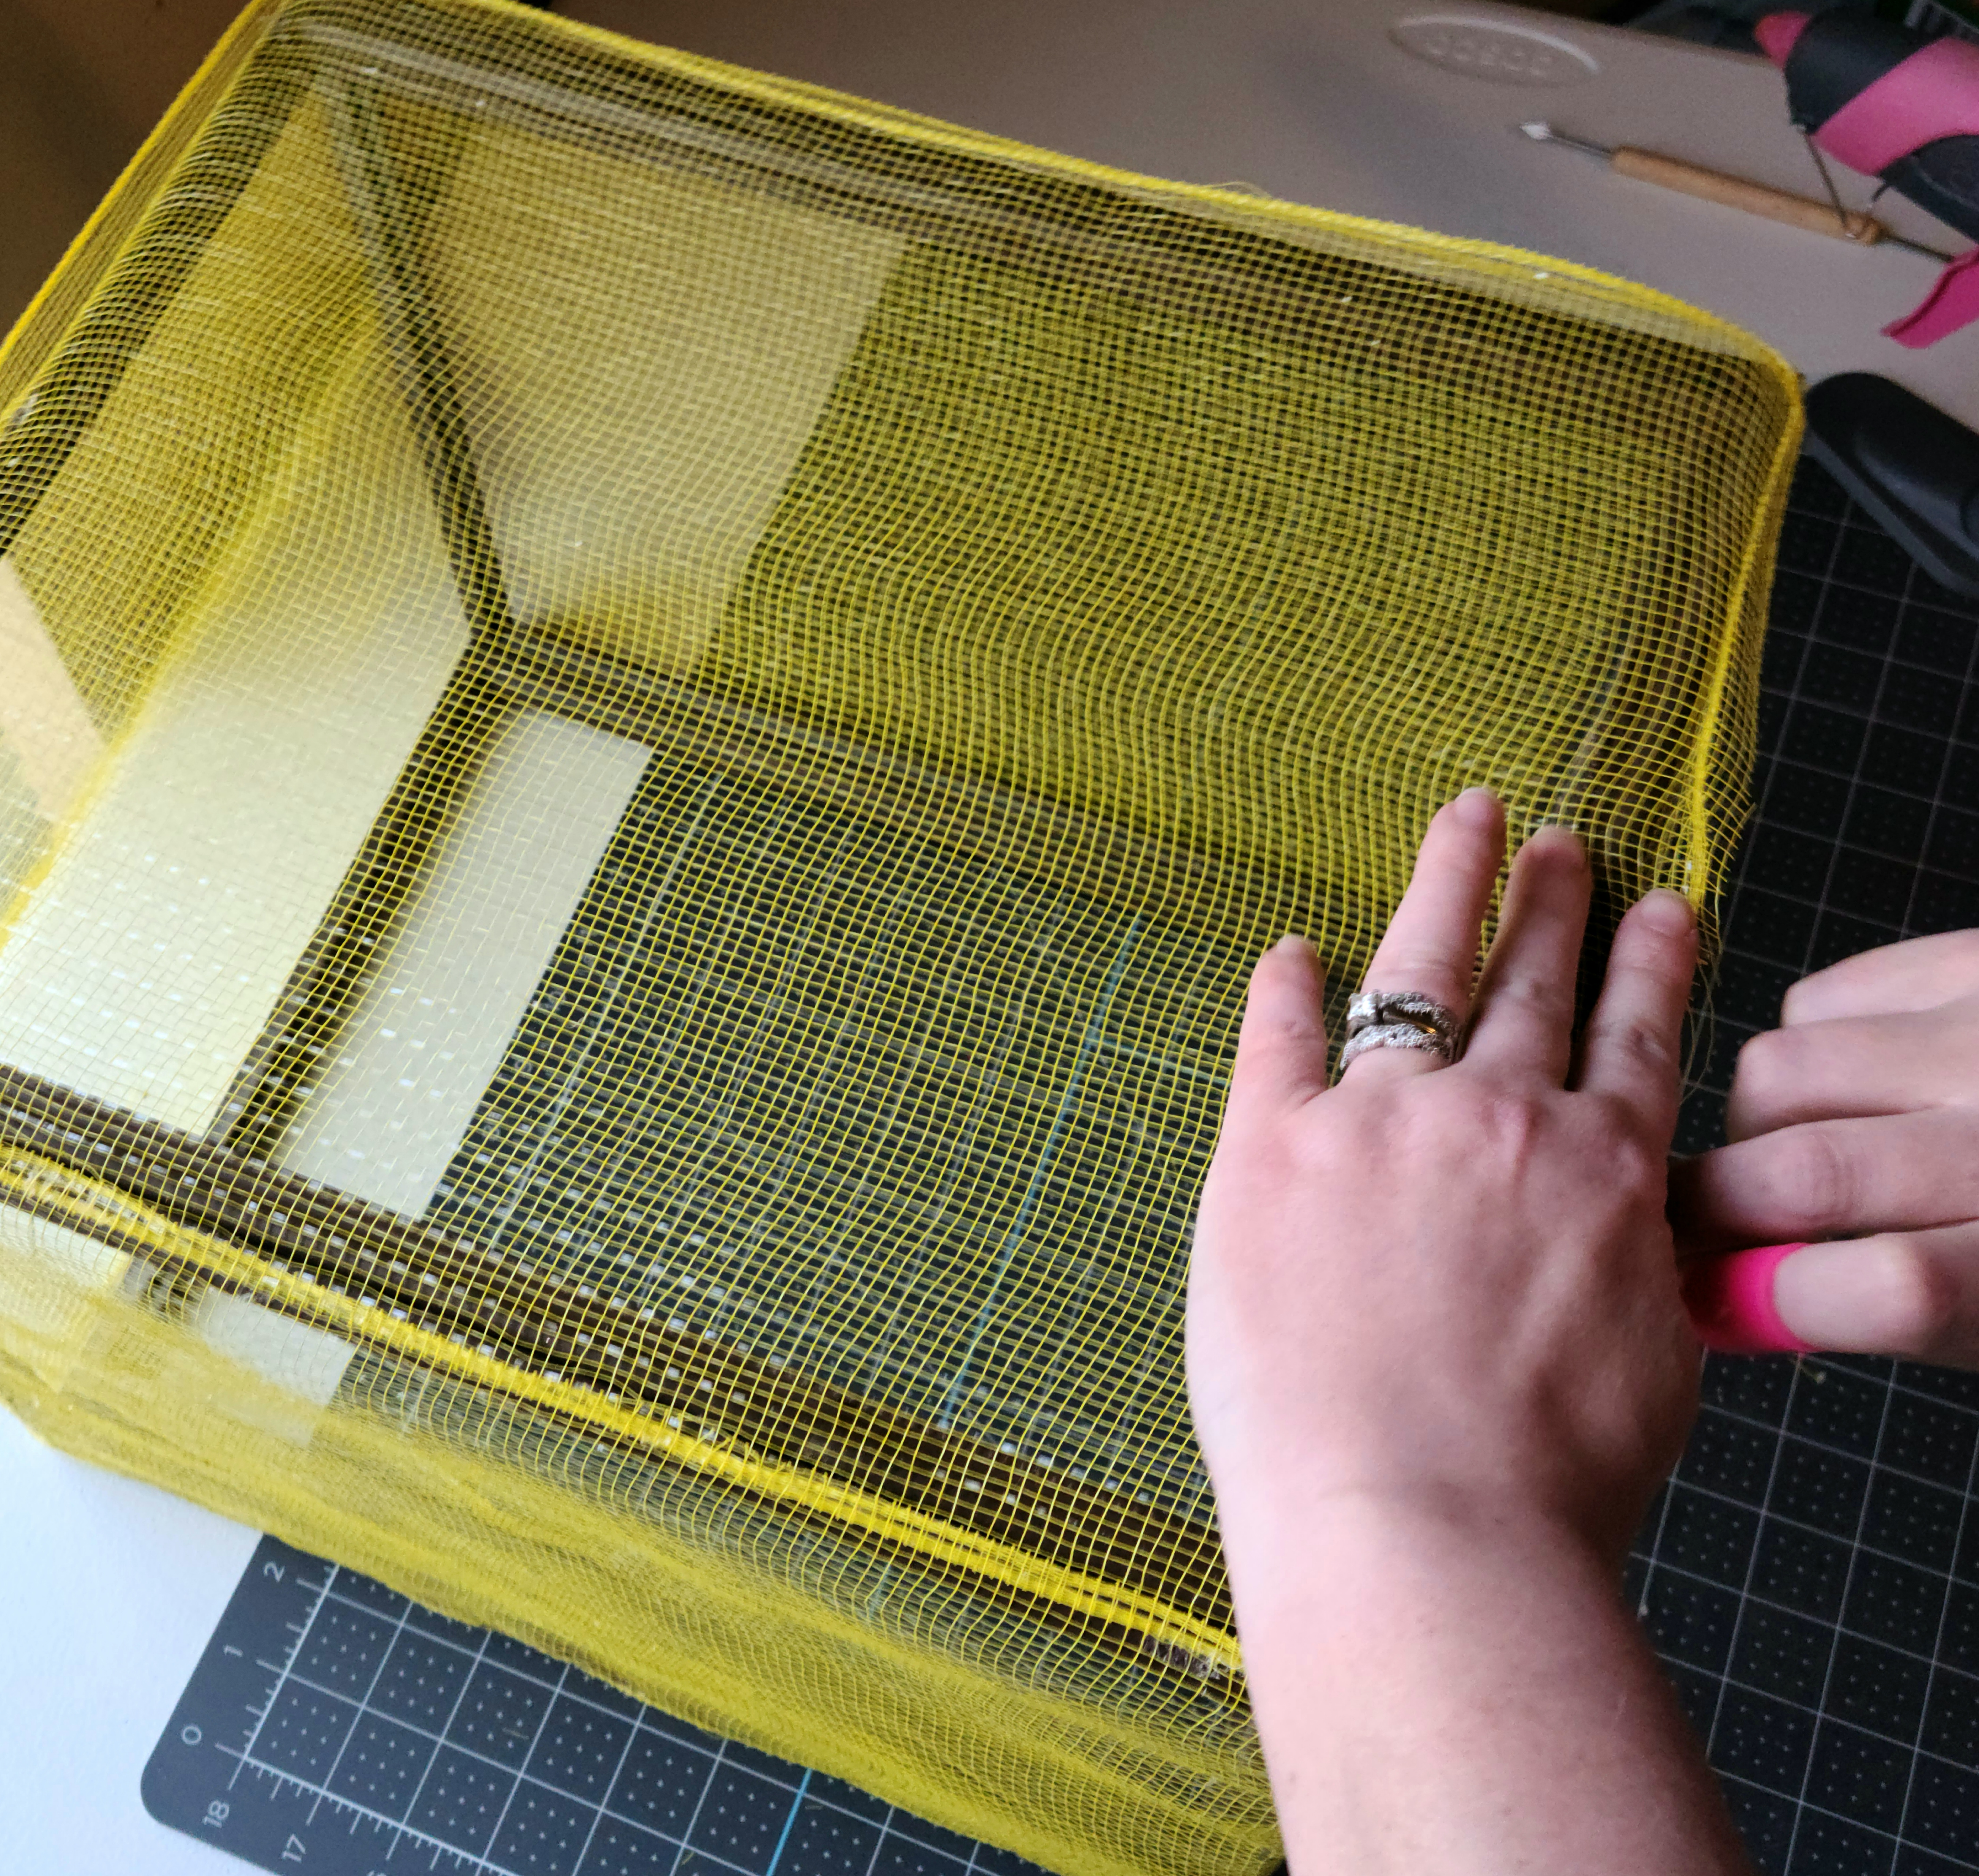
Next turn the box to the left so that the deco mesh roll that rolled down the side is covering the now-top-side. Pull the mesh tight at the end and glue the 14″ side of the frame that’s closest to you. Leave the same outer side unglued as you did on the first one. I didn’t glue the 11″ side that I pulled the mesh over first since it’s glued to the side of the first frame.
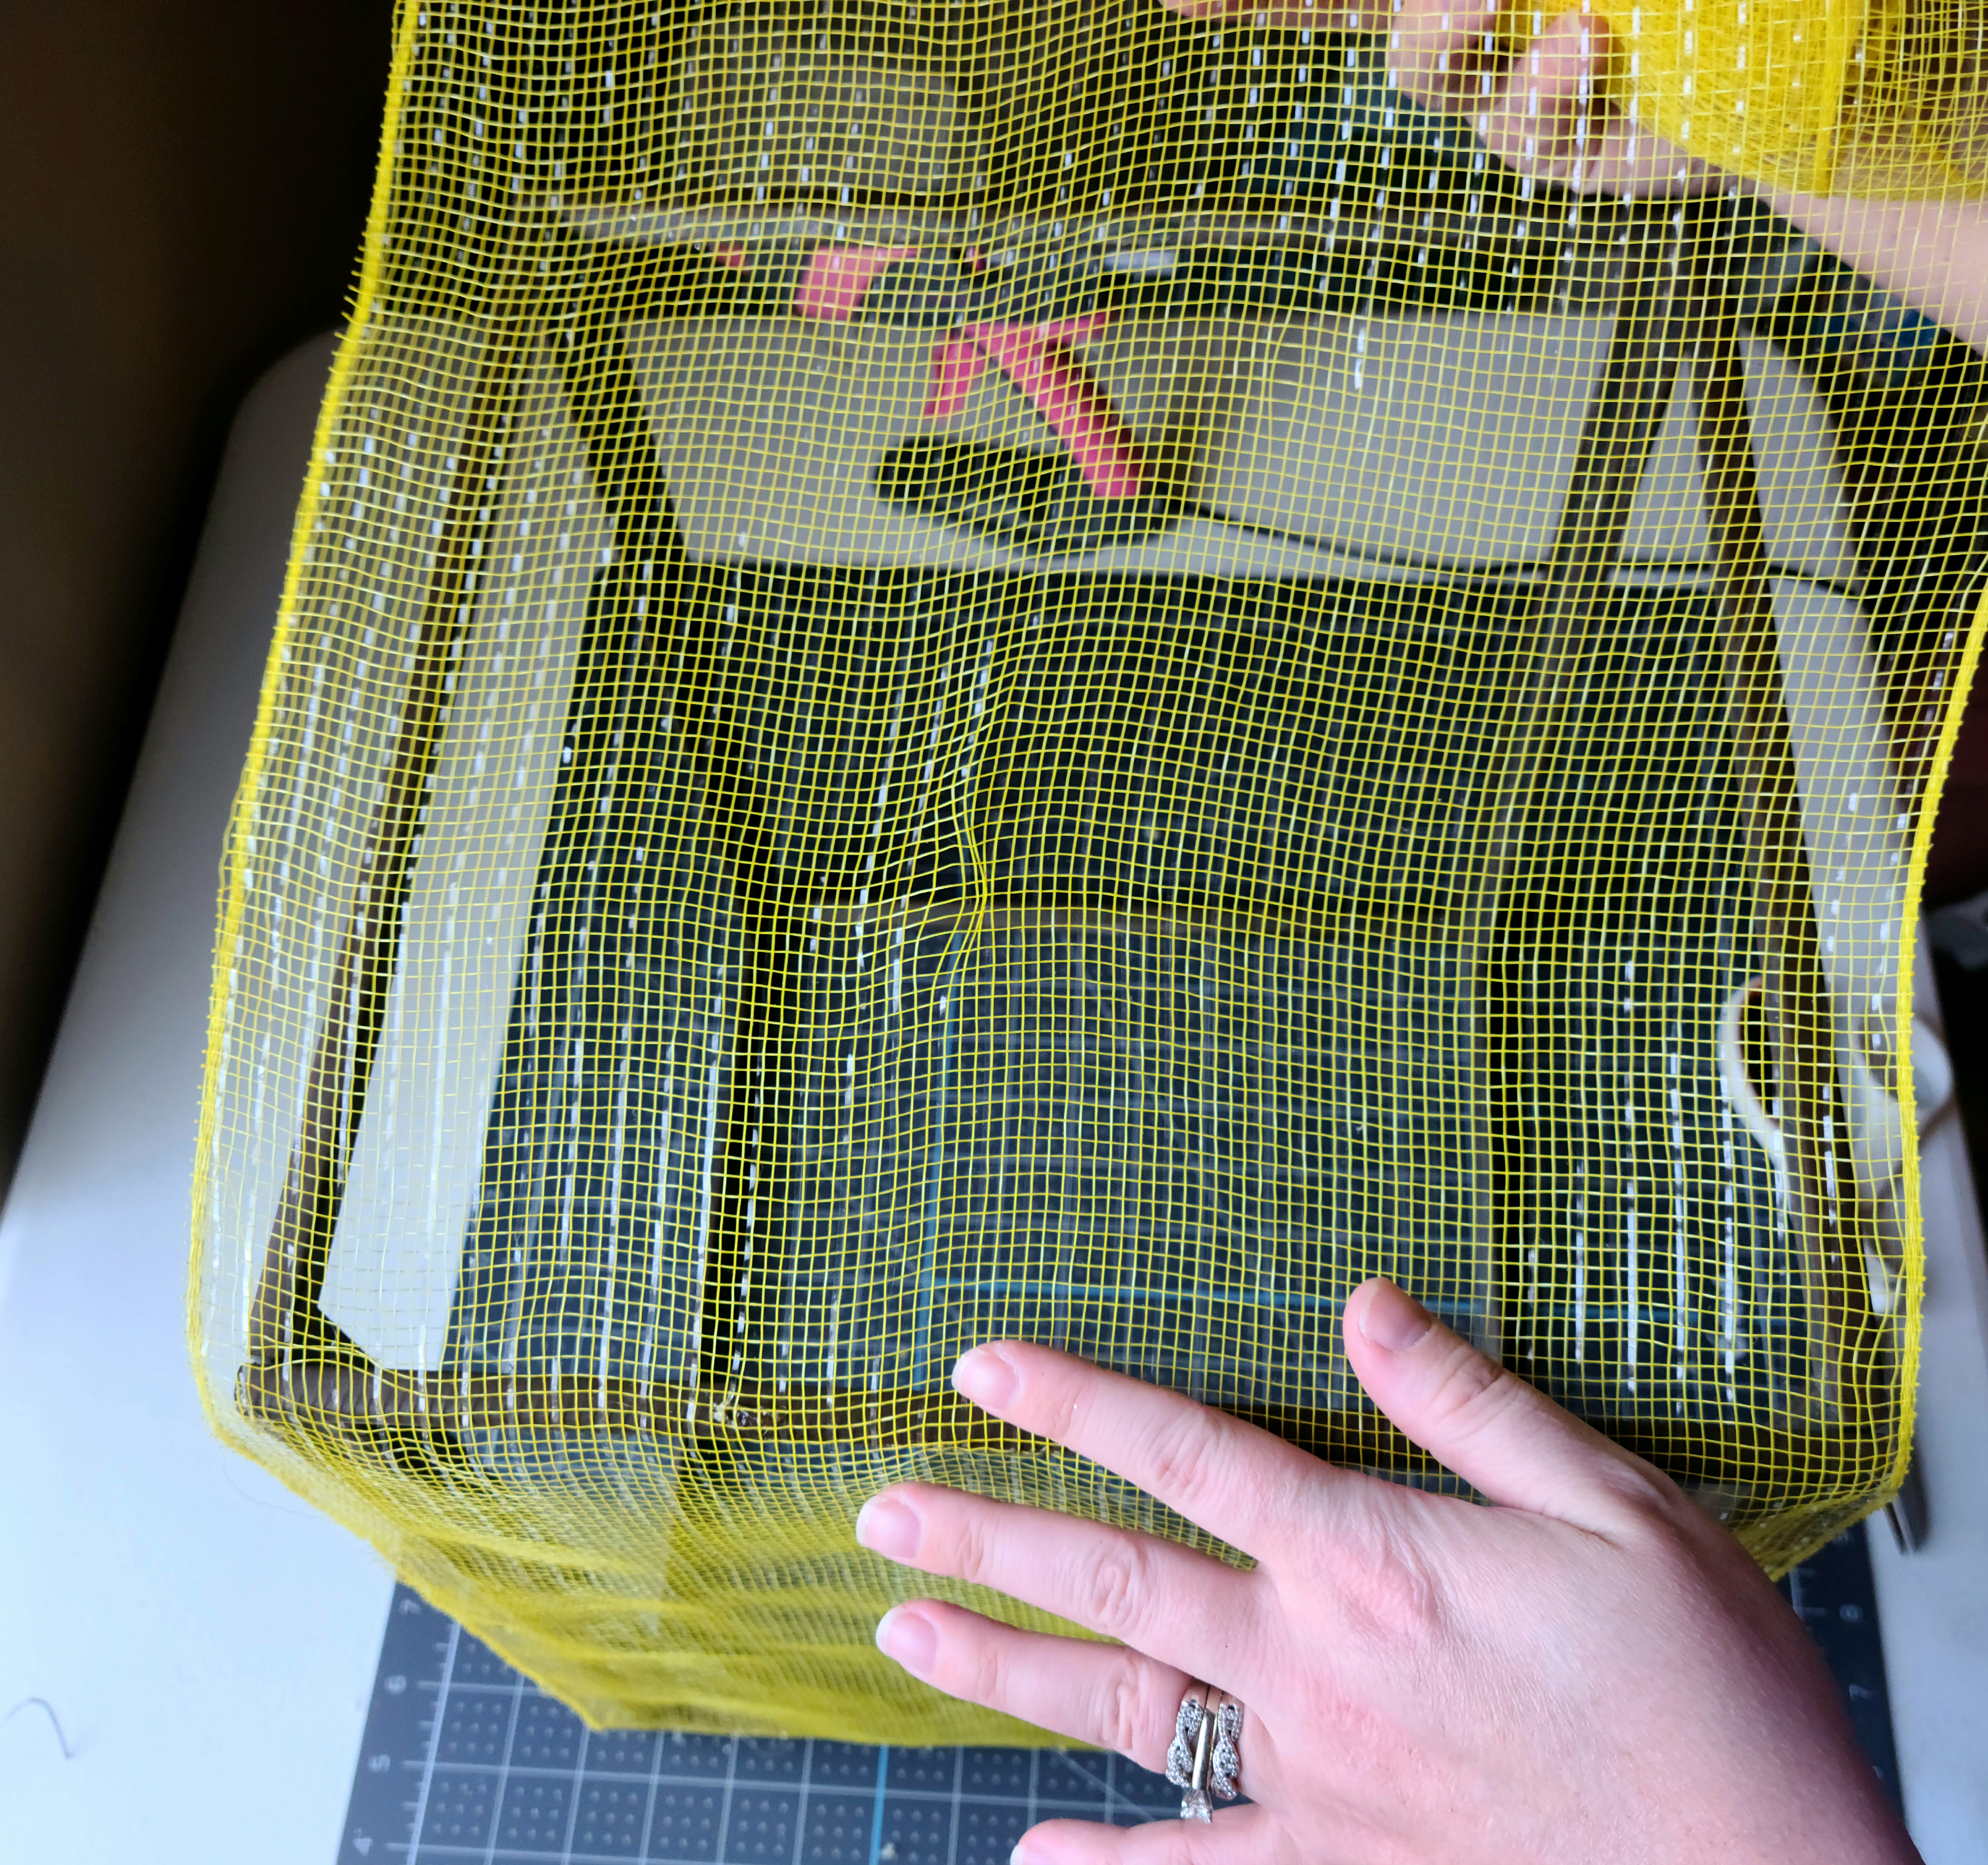


Continue pulling the mesh tight and gluing it on the other two sides until you get back to where you started. Glue the mesh on top of the 11″ side that you first glued in the beginning. Cut off the excess. Make sure to keep the outer sides (the same side) unglued on each frame.


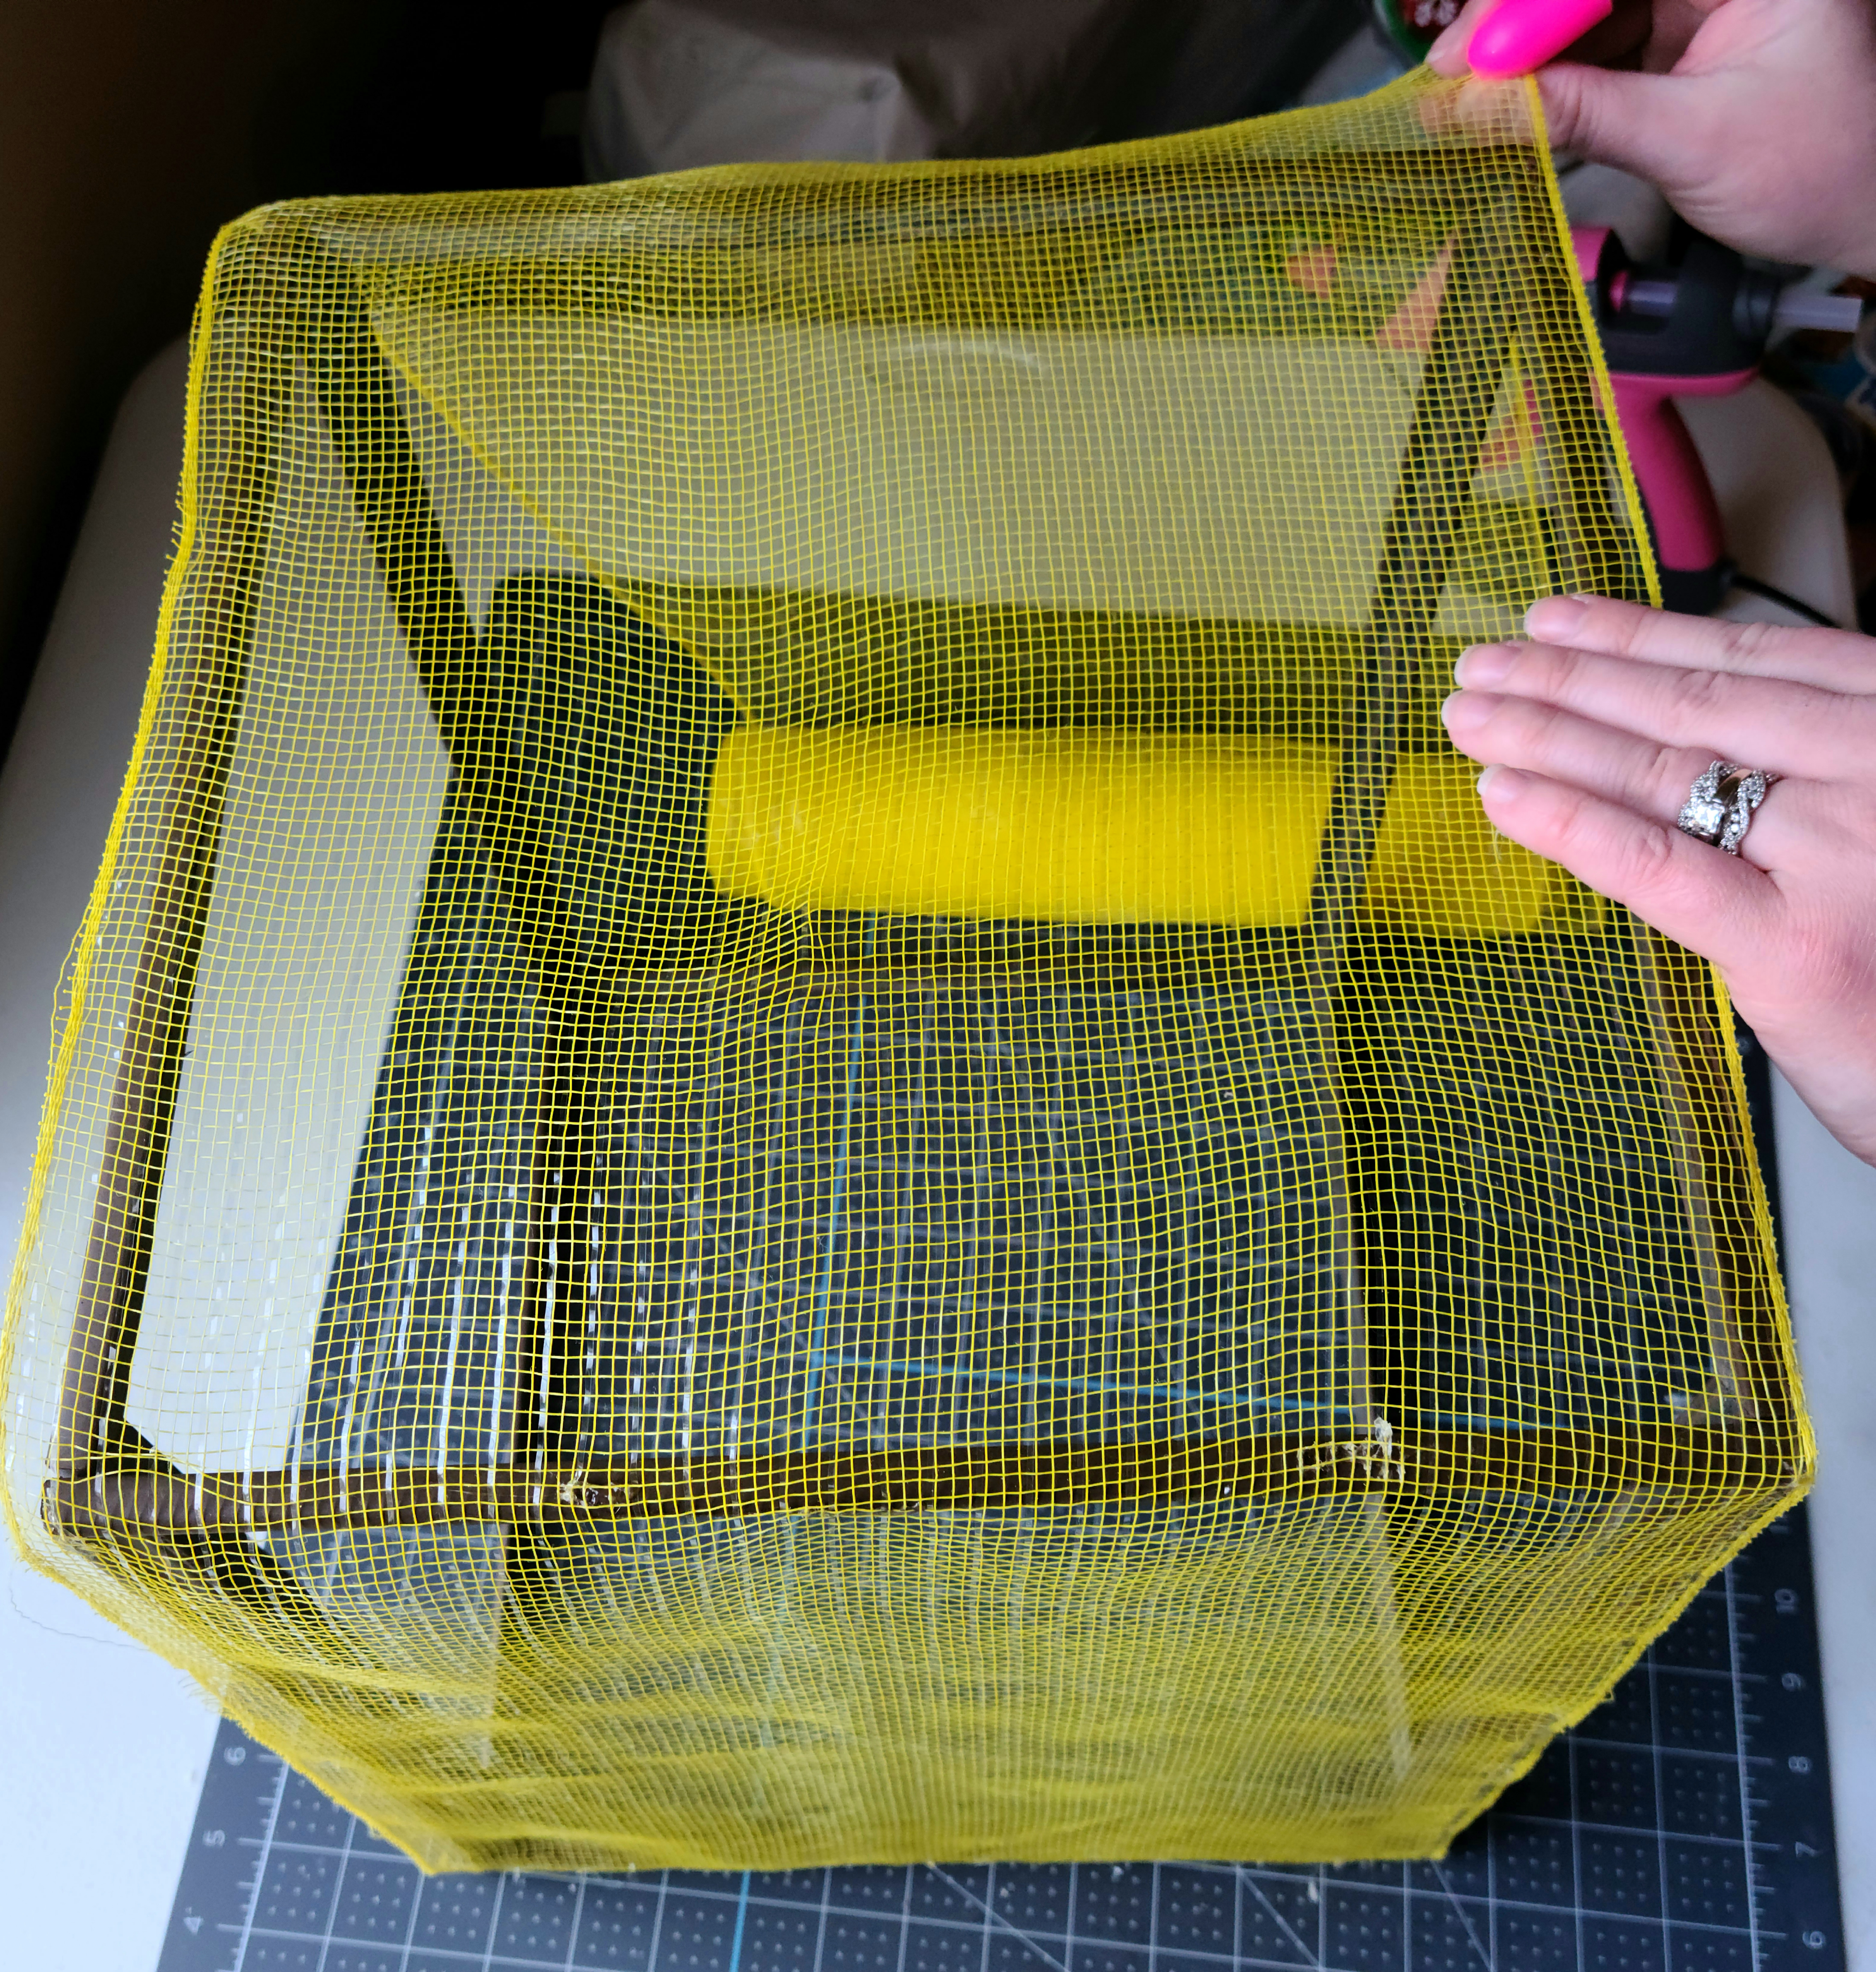
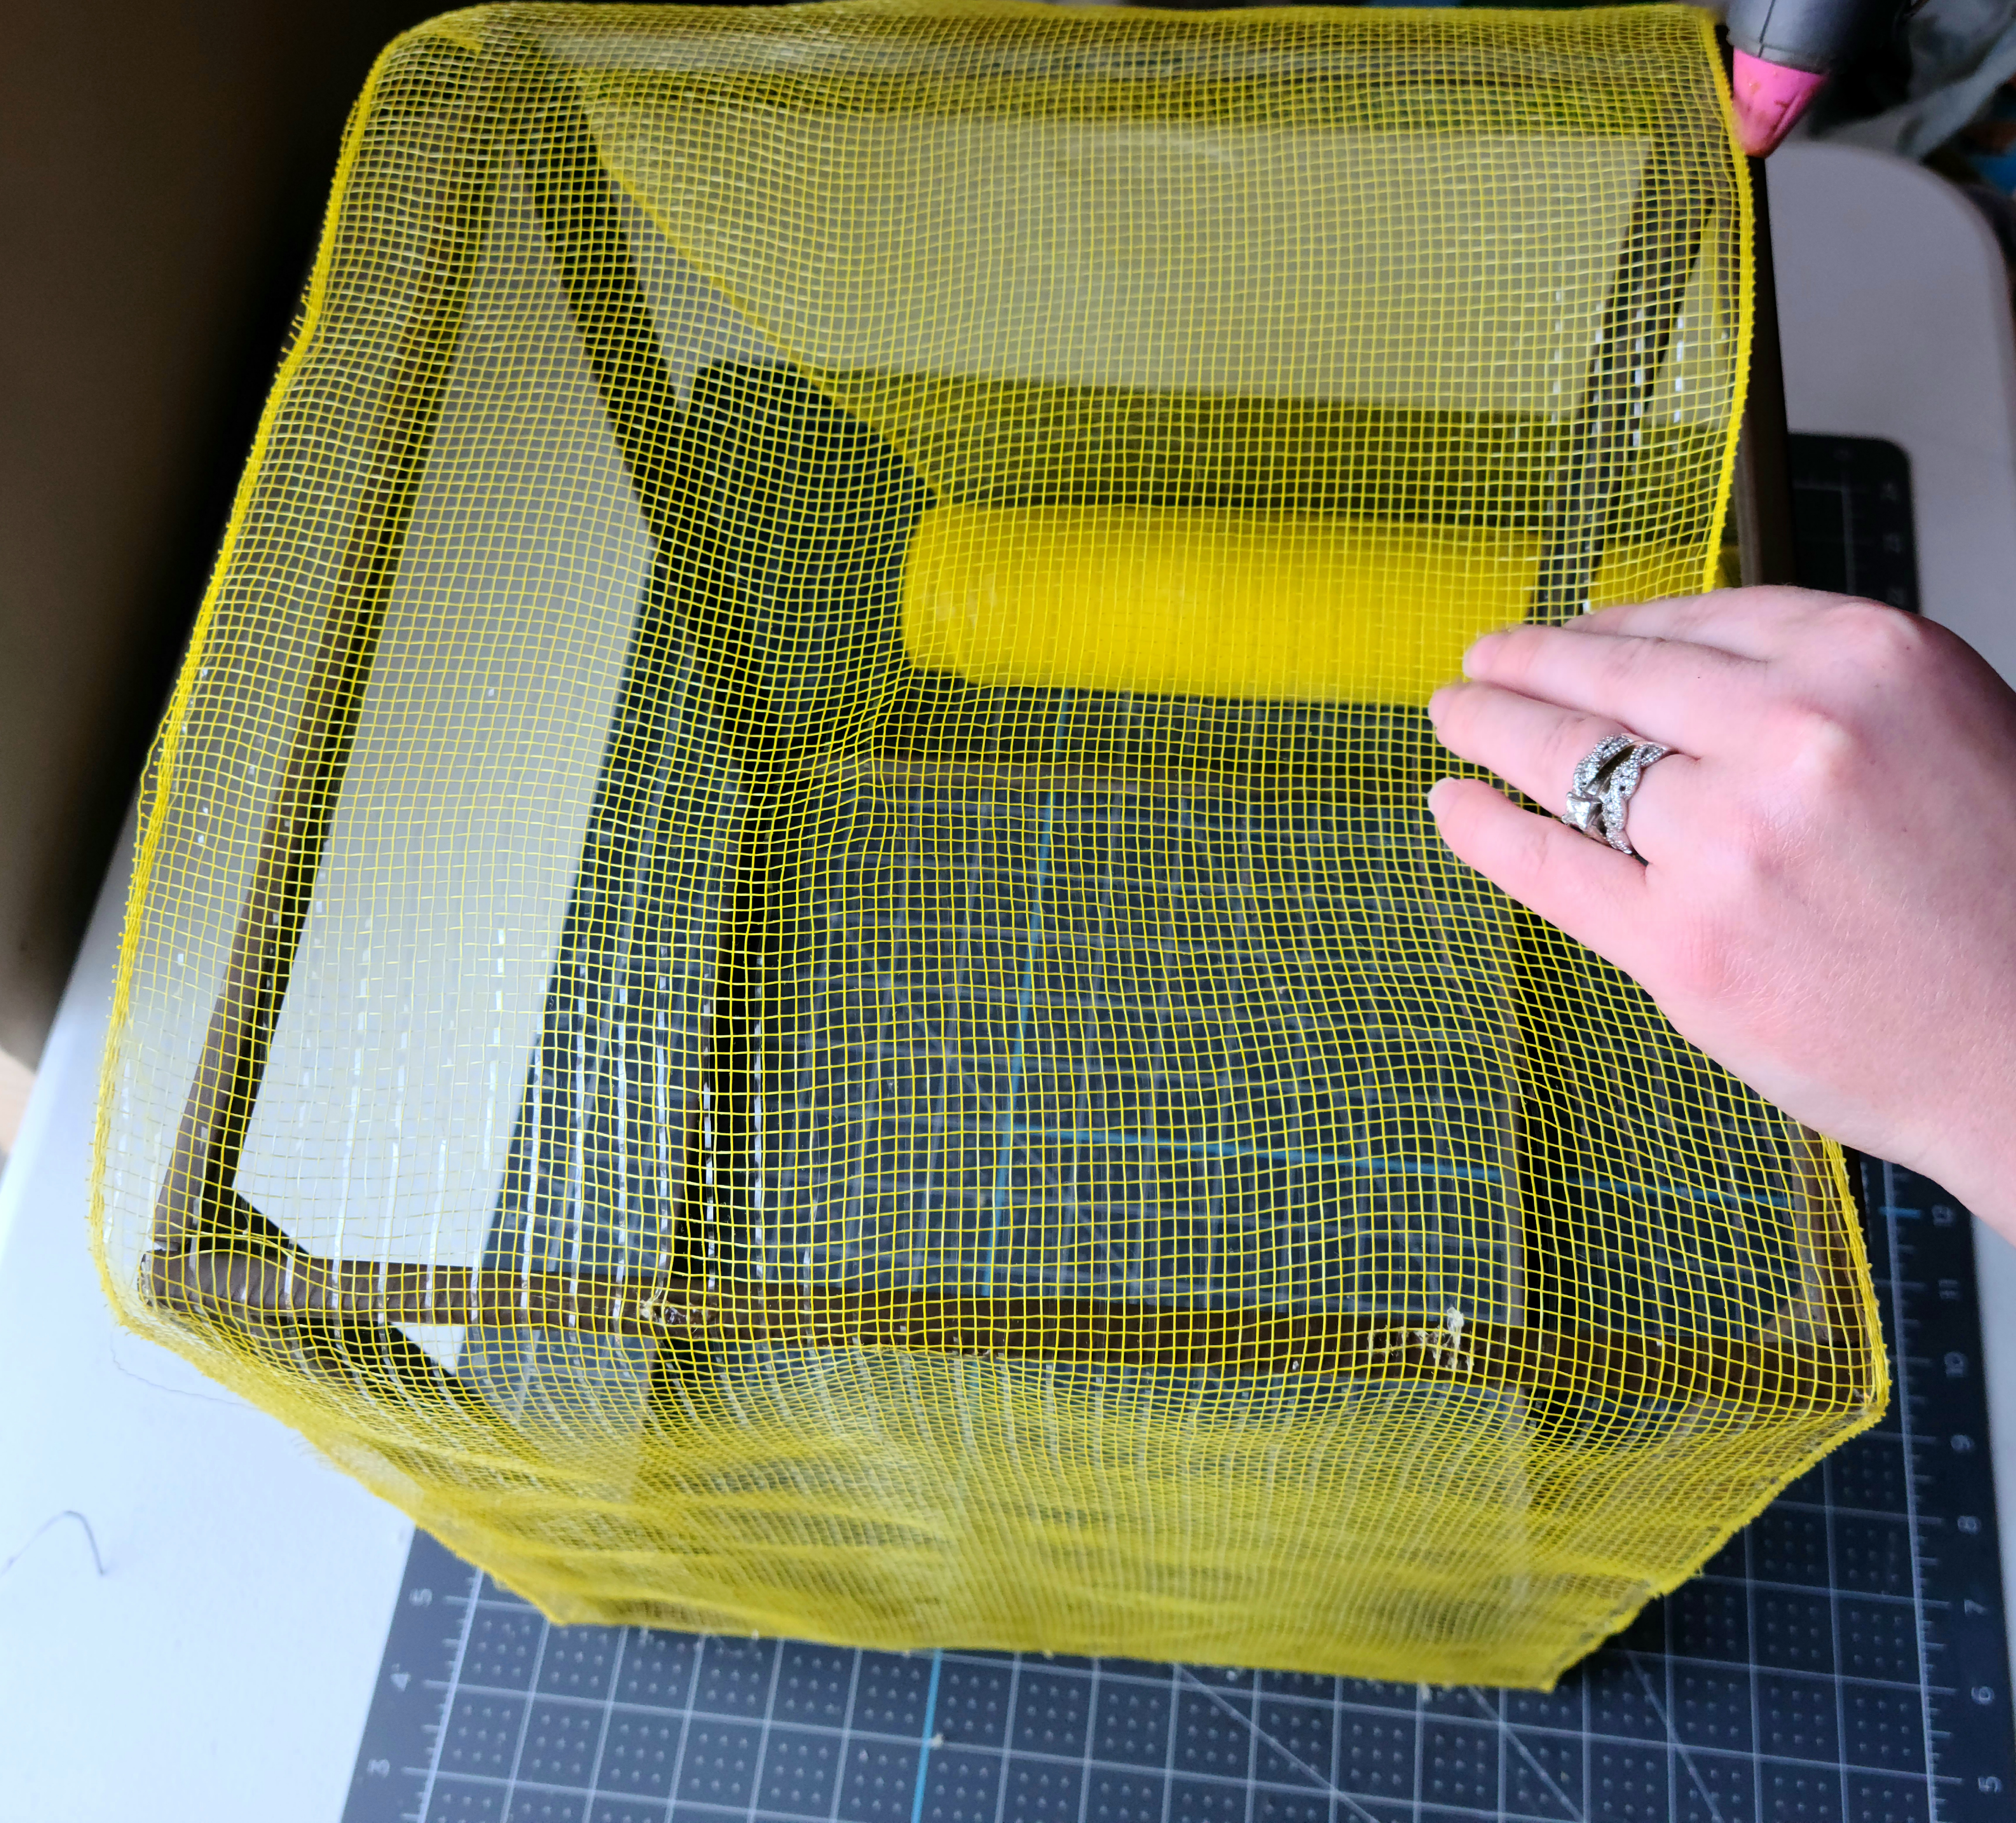
Add Mesh to the Top
In order to keep the box looking nice and neat, you need to cut the mesh and tuck it under the extra that is hanging over each side. You’ll be tucking the mesh under the sides that you left unglued. Tuck the end of the mesh roll under one of the 11″ sides and roll some out.


Pull the mesh back, leaving the end still tucked inside, and add hot glue to the frame. Press the mesh down on to the glue.
Roll the mesh out and cut it to the correct size to cover the top. Tuck all of the sides under the mesh covering the outside of the frame. Don’t worry about glue yet.
Squeeze hot glue on top of the mesh that you just added and tucked in, then press the extra mesh that hung over the sides of the rest of the box frame on top of the glue.


Paint the DIY Lighted Gift Box
If you didn’t paint the frames or don’t have the color deco mesh you’d like your box to be, you’ll need to spray paint it. I used white for mine. Start by spray painting the inside. Make sure to try to turn it a bit to cover the edges of the frames inside.


Next spray paint the outside of the box. I used three coats, a whole can of spray paint. It took the whole can because a lot of the paint went through the holes, so it took a lot of spraying to cover the whole surface.


Add Ribbon
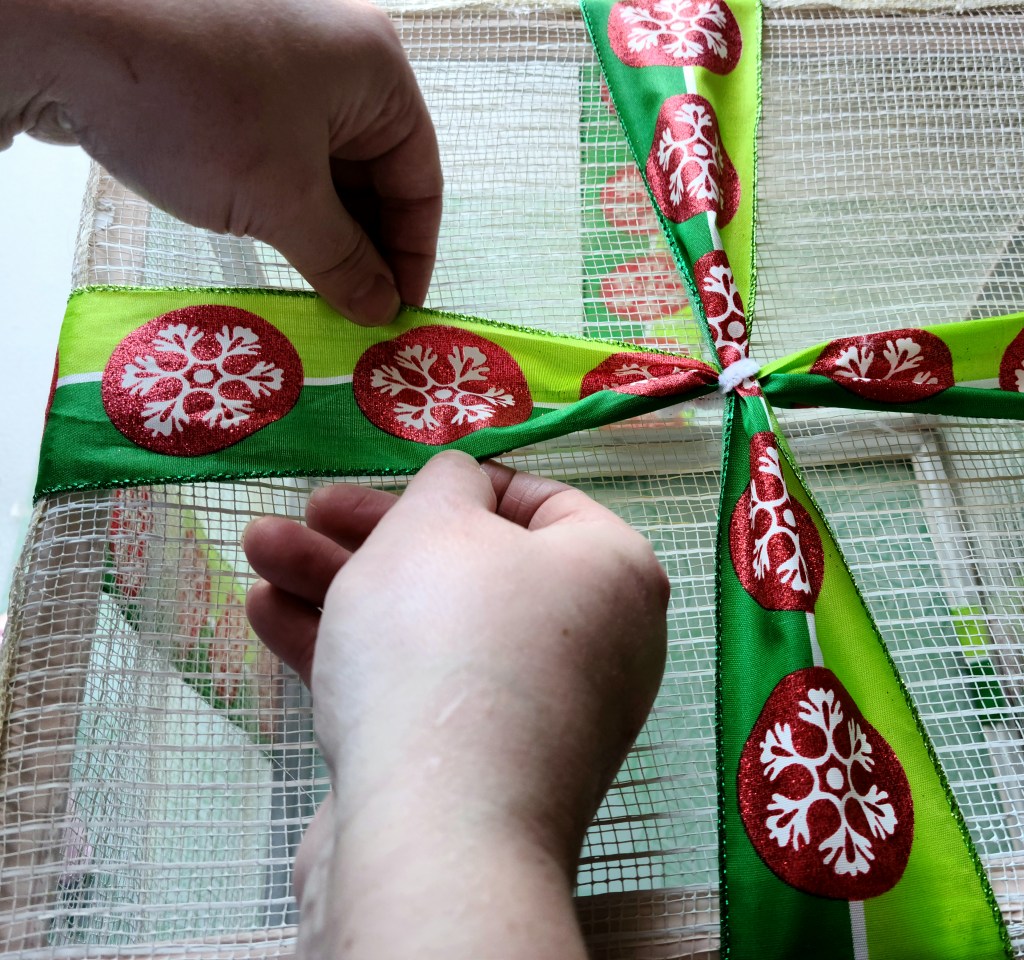
The next step is to add ribbon to the box like you would on an actual gift box. Turn the box so that the open side is facing you. Add a strip of hot glue as wide as the ribbon on the bottom of the frame in the middle of the box. Place the ribbon on the glue and press it down for a bit.

Bring the ribbon up and around the top of the box and down to the other side. Once you’ve measured the ribbon and have the amount you need, cut off the excess. Place hot glue directly across from the first spot and press the ribbon down on top of it.


Now glue on another piece of ribbon running the opposite way, crossing over the first in the middle of the top of the box. Glue it on just like the first.

In order to make the top look a little fancier, you need to attach the two ribbons where they overlap. This is optional, but I think it looks really cute. Cut a piece of floral wire or pipe cleaner (I used white pipe cleaner) about 2-3″ long. Pinch the two ribbons in the middle then place the pinches on top of each other. Wrap the pipe cleaner around the ribbons, trying to keep the twist of the pipe cleaner under them.

Straighten out the two ribbons.
Place Lights in the DIY Lighted Gift Box
I did this a little backwards. I added the lights after I added my bow, so my bow got a little smooshed. You should definitely put the lights in first! Cut two pipe cleaners in half or three pieces of floral wire about 3.5″ long. You are now going to attach the 20 light strand in three places. Put the base of the first light at the bottom of one of the frames near the corner. Pass one of the pieces of wire through the bottom corner of deco mesh from the outside, just above the picture frame, wrap it around the wire of the lights and around the frame. That will secure the light strand to the frame.

Run the strand from the corner, across the box diagonally, and to the middle of the ribbon. It will be in kinda a half “v.” Bend the wire into a “U” shape and pass it through deco mesh from the outside in, behind the ribbon. Twist it closed over the light wire. In the picture I put it next to the ribbon, but I ended up moving it behind the ribbon after I took this picture.

Run the light stand back to the end where you started. Attach it to the corner directly across from where you attached the start of the strand.


When you’re finished it will look like this.

Add a Bow
I used two ribbons to make my bow. The same 2.5″ wired green and a red ribbon I used before and a coordinating 1.5″ wired ribbon. If you need a bow tutorial, you can use this super easy bow tutorial to make a beautiful loopy bow that’s so easy a child can do it, or this tutorial for making a loopy bow with different sized loops. When you make your bow, make sure you leave enough wire when you secure it to attach it to the box.
For my box, I made a bow with six loops and 6″ tails and then a large regular two loop bow and glued them together. On the six looped bow that I made I left the loops out wide, with a more flat center. I added a bit of hot glue to the middle.
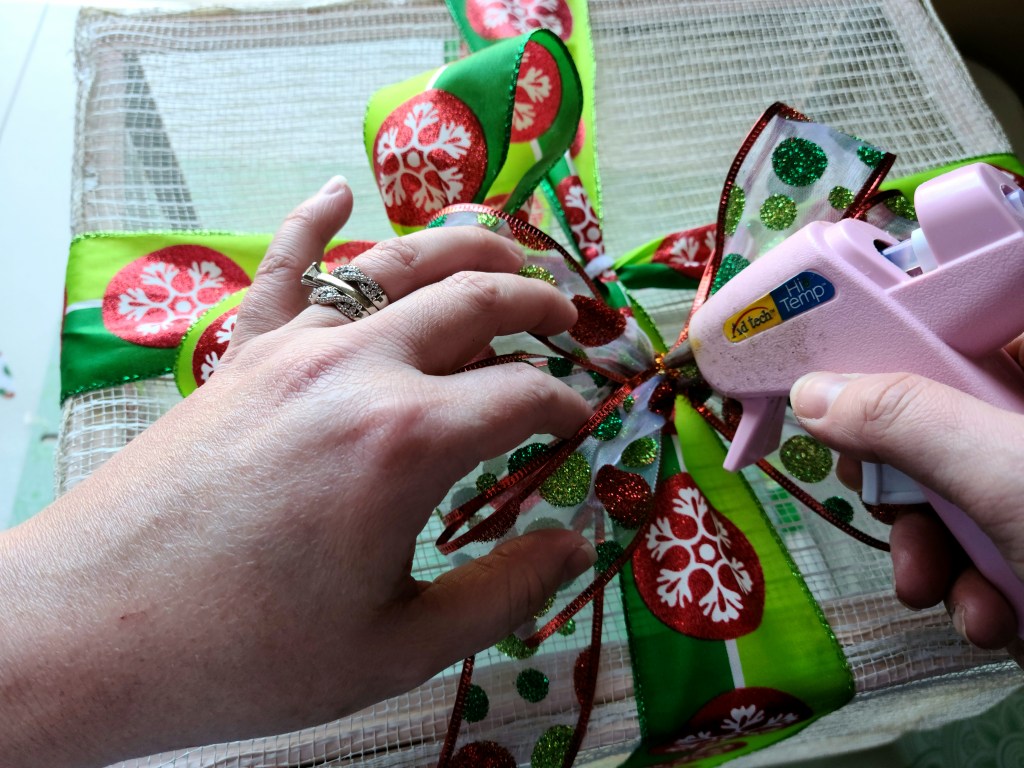
Then I put the regular two loop bow on the hot glue. I used a 1.4″ red ribbon to cover the pipe cleaner that held the bow together. When you have your bow made, fluff up the loops and spread them out evenly.
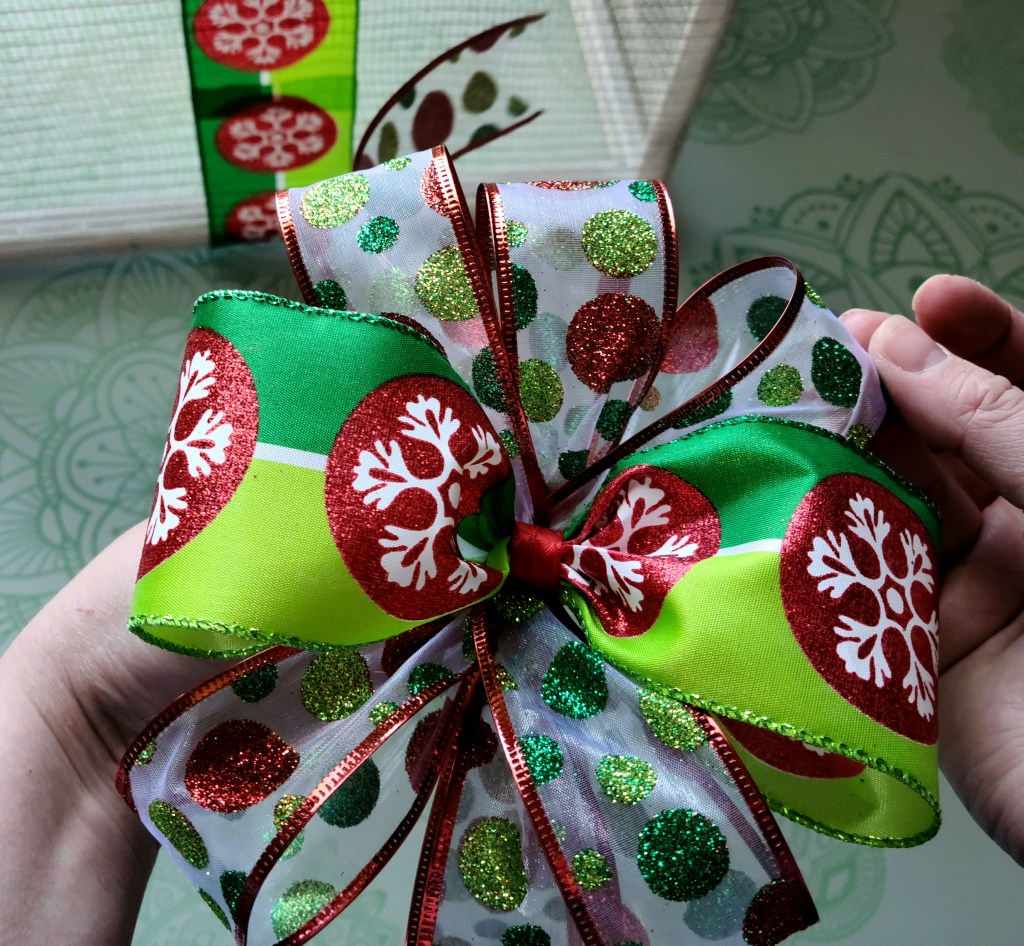
Use the wire that you have on the back of the bow and twist it around the section of ribbon that you secured together in the middle of the box.


That’s it!
Your DIY lighted gift box is ready to plug in!
I’ve made two boxes so far, and I plan to make one more. Then I’ll stack them on top of each other for our Christmas porch decor. Here’s a few pictures of my first completed box. You can see my red one, but this was taken before I added the lights to it.


I’ll update these pictures when I get my third box made and I get them on our balcony. I would love for you to share yours with me on social media when you make it! You can follow me on social media using the buttons in the sidebar, then tag me in the picture. I hope you enjoyed this tutorial. If you have friends and family who love to DIY, you can share this post on social media using the buttons at the bottom of the post.
I have some Christmas family movie night printables for games, decor, food, and more coming up this week! They will all be themed around a Christmas movie that you and your family can enjoy together. It’s such a fun family tradition, and our kids look forward to picking out the movie and knowing mom is going to go all out cooking, decorating, and coming up with fun games for the night. Don’t miss those free printables and all of the ideas for Christmas family movie night! Enter your email address below and you’ll get an email when I add new tutorials, free printables, and other great posts so you won’t miss a thing! Following me on social media is also a great way to keep up with what’s going on there.
Get notified about new content right in your inbox!
More Christmas!
Here are a few more decor DIYs, free printables, and fun family ideas you might like to try this Christmas. Keep reading for the DIY blog hop!


On to the DIY Blog Hop!
I’m so happy to be joining these lovely ladies for another DIY blog hop! Make sure to stop by their blogs to see their amazing projects and tutorials! We’re missing a few ladies this hop due to the busy holiday season, but they’ll be back next month. Not to worry though, we have wonderful DIYs from Tarah at Grandma’s House DIY and Amy at Health, Home, and Heart! Head over to see the great projects they have for you!
This month’s theme: Outdoor Project

Tarah from Grandma’s House DIY – Plywood, Walls and Siding our Garage Addition

Amy from Health, Home, and Heart – Easy Christmas Porch Decor
If you’re one of my blogger friends or if you like to find great recipes, home decor, fashion ideas, gardening and other family-friendly ideas, check out my three weekly link parties. Happiness is Homemade runs from Sundays thru Thursdays, You’re the Star Blog Hop is open all month with weekly features posted on Mondays, and Traffic Jam Weekend runs from Thursdays at 5pm CST thru Sundays. Make sure you enter your email address above or in the sidebar to get an email reminder to come in and check it out!
Follow me on Pinterest to get new ideas weekly!


What a fun idea, Niki! It’s so creative! I’m not sure I ever would have thought of it, but it turned out great. The Christmas lights are so twinkly and festive. Thanks so much for sharing your tutorial!
Thank you Amy! I wanted to have all 3 ready, but the time just got away from me!
What a great idea! I love how the lights and bows stand out so much against the box you created! Its great hopping with you!
Thanks! You too!
How pretty and unique! Thanks so much for linking up at A Themed Linkup 87 for All Things Christmas. Pinned and/or shared!
Thanks Dee!
CONGRATS! Your post is FEATURED at A Themed Linkup 88 for Christmas Trees and Light Displays from the previous linkup for All Things Christmas.
Yay! Thanks Dee!