Welcome! This month I’ve joined another group of lovely ladies (some you’ve seen around here, and some new faces, how exciting?!) for our Monthly Challenge Blog Hop, hosted by Beverly from Across the Blvd. This month was the Dollar Store Craft Challenge. Y’all have no clue how hard it was to squeeze this project in and get the post up while moving! Literally, while moving. AT&T couldn’t even get our internet hooked up, so praise God for our iPad hotspot. For this month’s challenge I decided to try a woven rope wreath, and I love the way it turned out! In this post I’m going to show you how you can make your own for about $3.75 with lots of supplies left over.

Stick around after the post to check out the other craft challenges by these ladies on the hop:
Beverly | Across the Blvd
Gail | Purple Hues and Me
Allyson | Southern Sunflowers
Marci | Stone Cottage Adventures
T’onna | Sew Crafty Crochet
Niki | Life as an LEO Wife
Terri | Our Good Life
Woven Rope Wreath Supplies:
- white cotton rope- I used the thicker rope that comes with 6.4 ft of rope, but the thinner 11 ft will work. You’ll only use about 1/3 of the rope, so if you have some leftover from another project, perfect!
- 12″ or 14″ wire wreath form
- hot glue gun & glue
- scissors
- faux flowers
- rope- I used 1/2″ pink satin ribbon to keep this an all Dollar Tree project.
- piece of a pipe cleaner of floral wire to make a hanger
- wire cutters (optional)

If you’re looking for other rope tutorials, you might like this braided rope wreath, this spring bunny rope tray, coastal rope tray, nautical placemats, nautical rope coasters, and these bunny rope placemats.
Unravel the Rope
You can’t weave the full rope through the wires of the wreath form and get complete coverage. So, you need to unravel the rope. Cut the tape at the ends of the rope that holds the three strands together.

Now choose one of the three strands to use and unravel it from the other two. Just hold it and turn the rope in the opposite direction of the weave.

Next, you need to unravel the single strand into smaller pieces. Break the strand that you’ve unraveled into 3-4 even pieces, depending on how thin you want your woven rope wreath stands to be. If some of the strings come out a bit, don’t worry. You can twist it back together as you weave it onto the form or trim stragglers off once the wreath is complete.
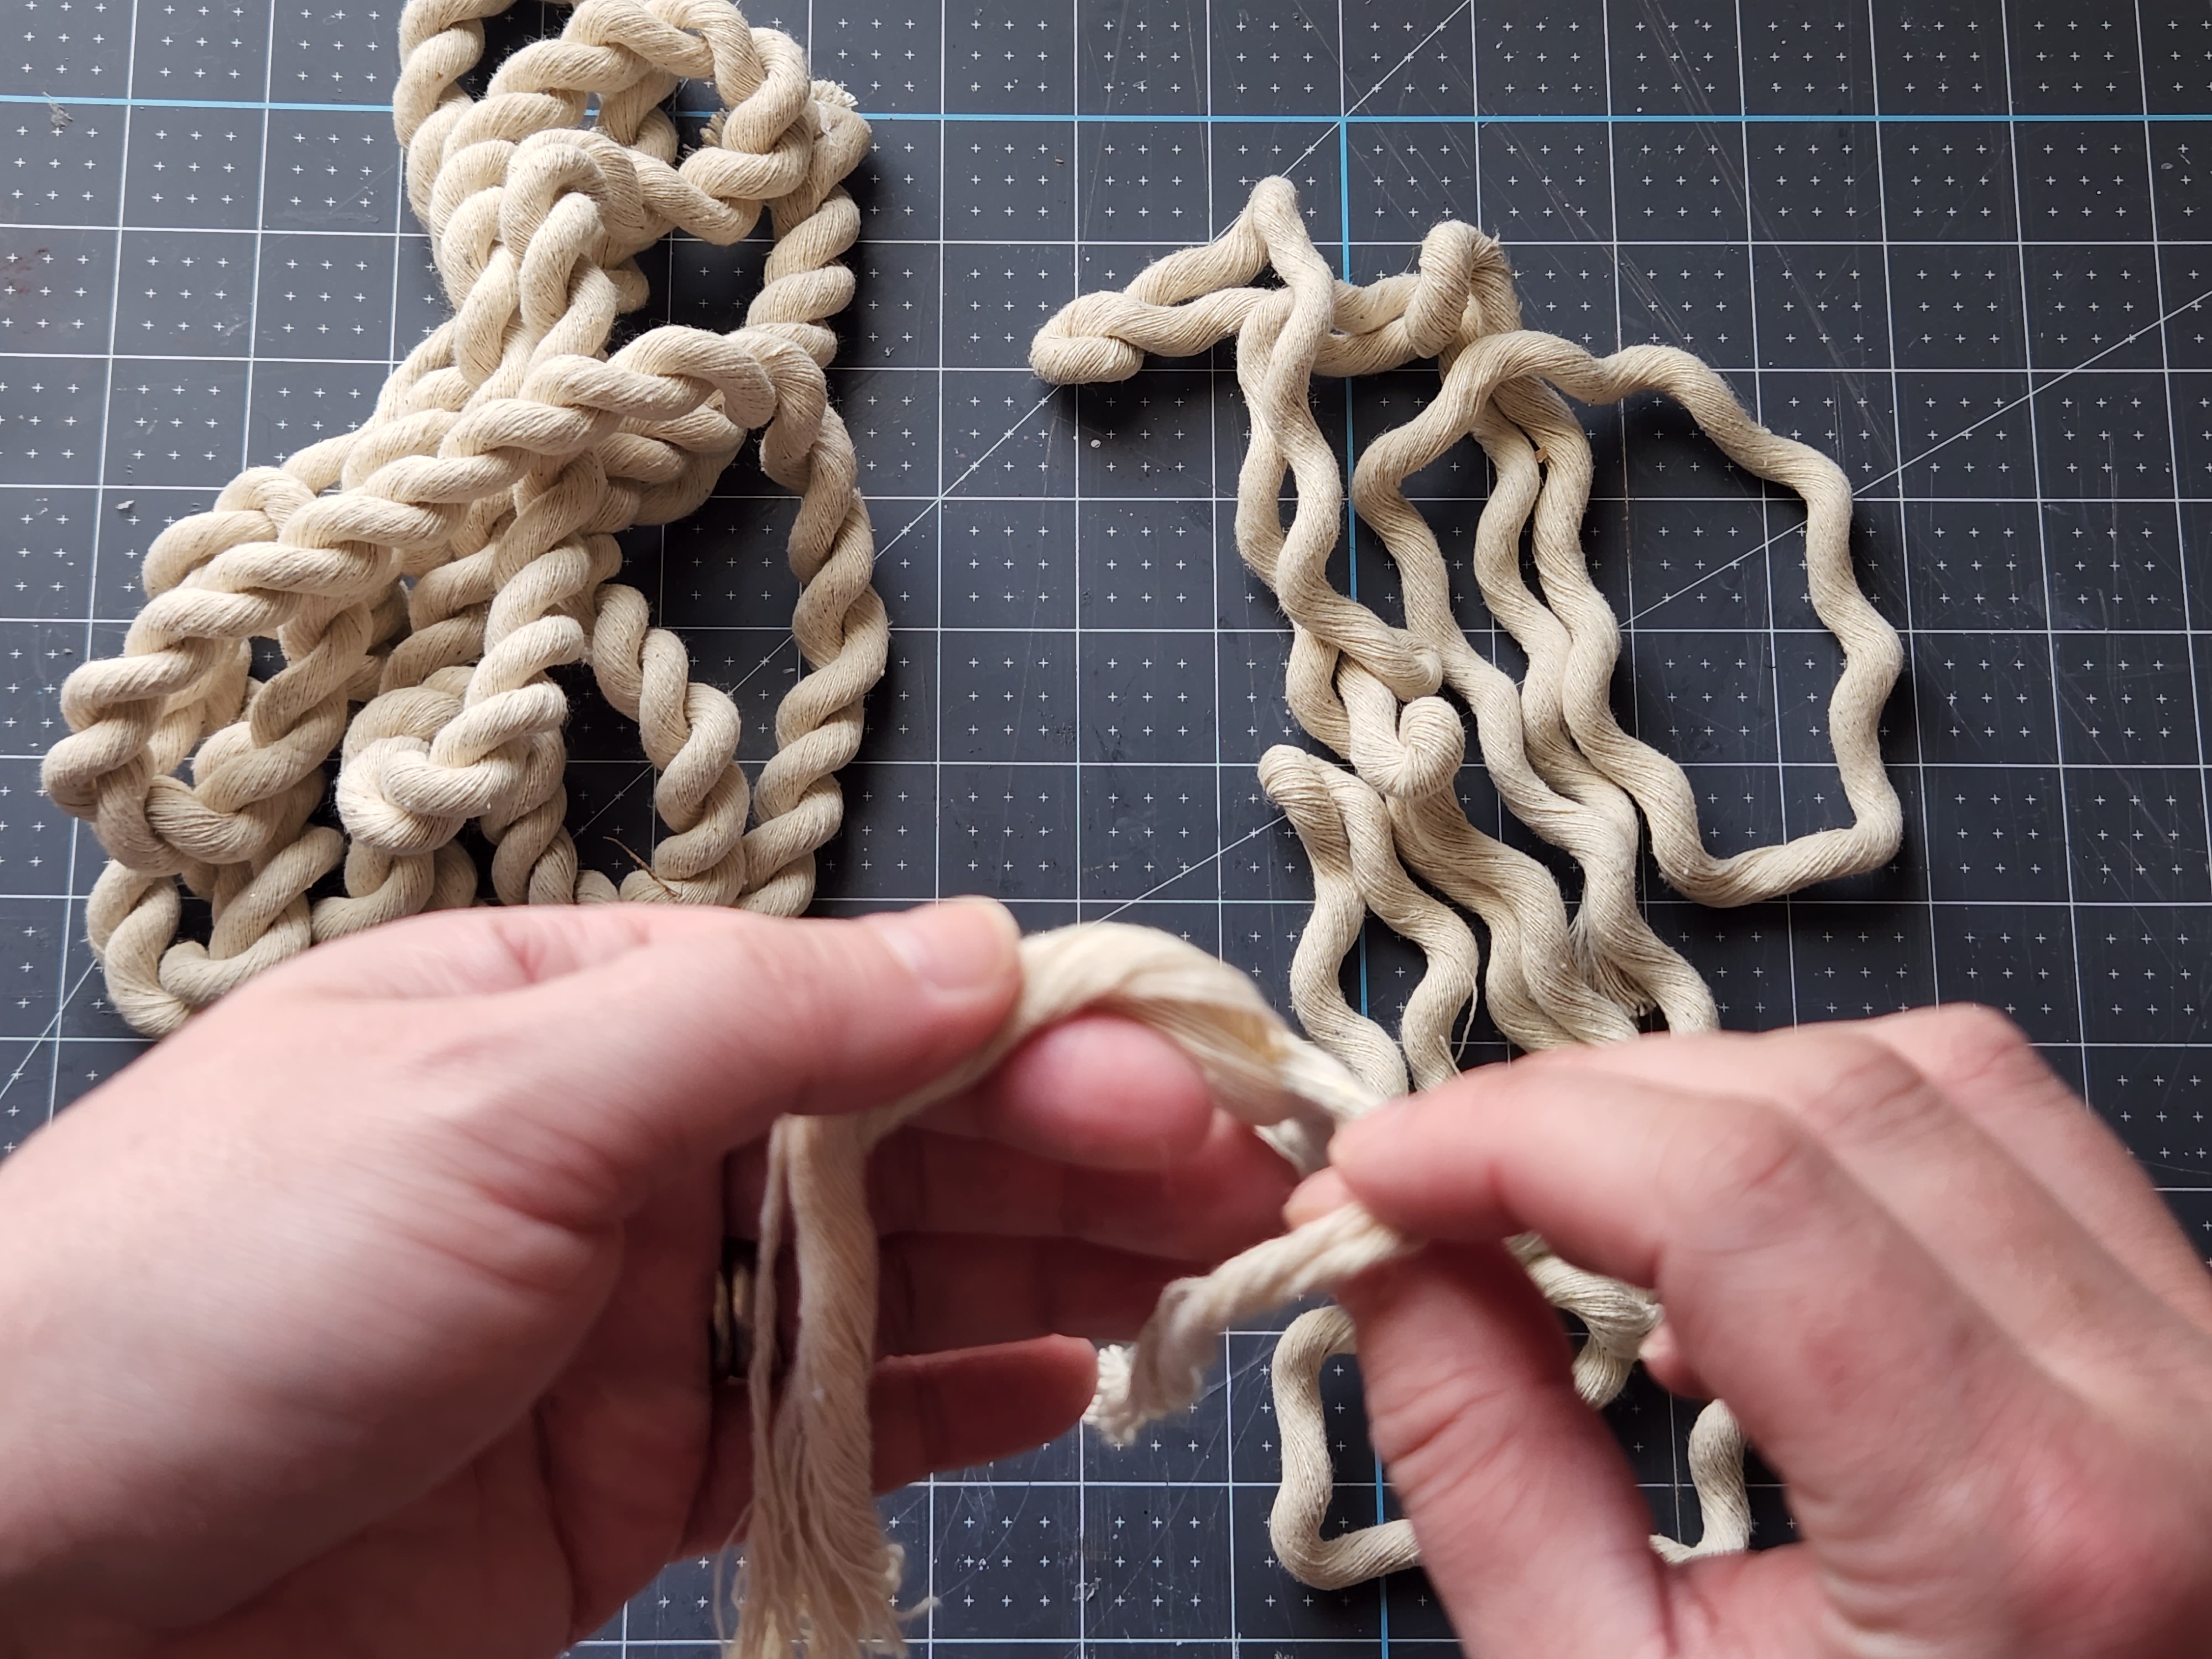
I broke mine into three even stands, but I think if I make a new wreath, I’ll go with four equal strands. In this picture I’m separating the larger strand into the final two.

If you’re having a difficult time separating your rope, or if you’re unsure how to do it, I created a video of me unraveling one of the large strands into smaller sections.
Before you move on to weaving the strands onto the woven rope wreath, you need to make sure they won’t unravel. Add a bit of tape around both ends of the ropes. I like to cut the tape in half so that you don’t have a lot of tape showing on the wreath.

Cut off Wreath Form Crossbars
This part is optional, but I feel like it made my wreath look a lot better. I started my wreath with the crossbars still attached. I had a difficult time covering them, and those sections looked a lot different from the rest of the wreath because they were higher, and I had to use hot glue to cover the bars.
SO- after I covered two of those bars, I decided that those crossbars had to go. Obviously you need one or two to hold the wreath together before you start to weave the wreath together. I left the two I had already covered (they were next to each other) on the form, but cut the rest off. Use wire cutters and cut the bars from in between each wire. Then snip the outside and inside crossbars from the wires they’re connected to, then slip the hooked crossbars off by opening them a bit wider. If I started my wreath all over again, I might leave one cross bar on where I could cover it with flowers. You could also leave two, one where you’ll place the flowers and one where you’ll place the bow and hanger.

Add the Rope to the Wreath
Place a bit of hot glue on the back of the outer wire on the wreath form.

Place one of the rope strands on the glue.

Turn the wreath form back over. Now you can begin weaving the rope in between the wires. Wrap the rope over the outer wire, then push the strand between the outer and second wires.

Now take the rope behind the second wire and push it through the slot between the second and third wires. You can twist the rope together at any time if you don’t like how much the individual strings are separating. In the video a little farther down in the post you’ll see me do that a few times.

Next bring the rope over the third wire and then push it between the third and inner wires.

Finally bring the rope behind the inner wire then bring it back over the front of that wire.

Start the Next Row of Rope
Next push the rope through the inner and third wires and take it behind the third wire. On this pass, you’re going to weave the rope opposite of how you wove the first line. You’ll go behind the third wire, over the second wire, and behind the outer wire. You’ll continue like this around the entire wreath.

Pull the rope from behind the third wire and between the third and second wires.

Take the rope over the second wire then push it through the second and outer wires. Then take the rope behind then over the outer wire.

Check out this video to see the weaving process in action.
Add a New Strand of Rope
I’m not sure how long each strand of your rope will last if you’re using a full-length, new package of rope. I was using about a third of a full-length rope, so each of my strands covered a little over one section between crossbars. You want the rope to end when you cover the inner wire. When you’re almost finished with the first rope and you don’t think you’ll make in back to that bottom, inner wire, cut the rope where it will wrap around the back of the inner wire. Place a piece of tape around the rope to keep it from unraveling, then hot glue that taped section to the back of the inner wire (it can extend a little bit above that inner wire).
In the photo below you’ll see that I glued it to the second wire after ending my first rope, but later I realized it was easier to tape the rope, glue it to the inner wire, then cut off the excess rope so that a minimum amount of tape is showing. Again, if the taped rope extends just a little above the wire, it won’t be a huge deal.

Glue a new strand on top of the taped end of rope you just glued to the inner wire. You’ll want the tape on the new strand to be glued on top of the tape from the first strand. Continue weaving the pattern that you’re already on.


Here’s a video of how to start and continue a new strand of rope.
Continue weaving the rope through the wreath form.
Continue weaving the rope through the wreath form and adding new strands as needed until your wreath is completely covered. I must admit that it took me hours to complete this wreath. It’s been a while since I spent so much time on a wreath!

Add Faux Flowers to the Woven Rope Wreath
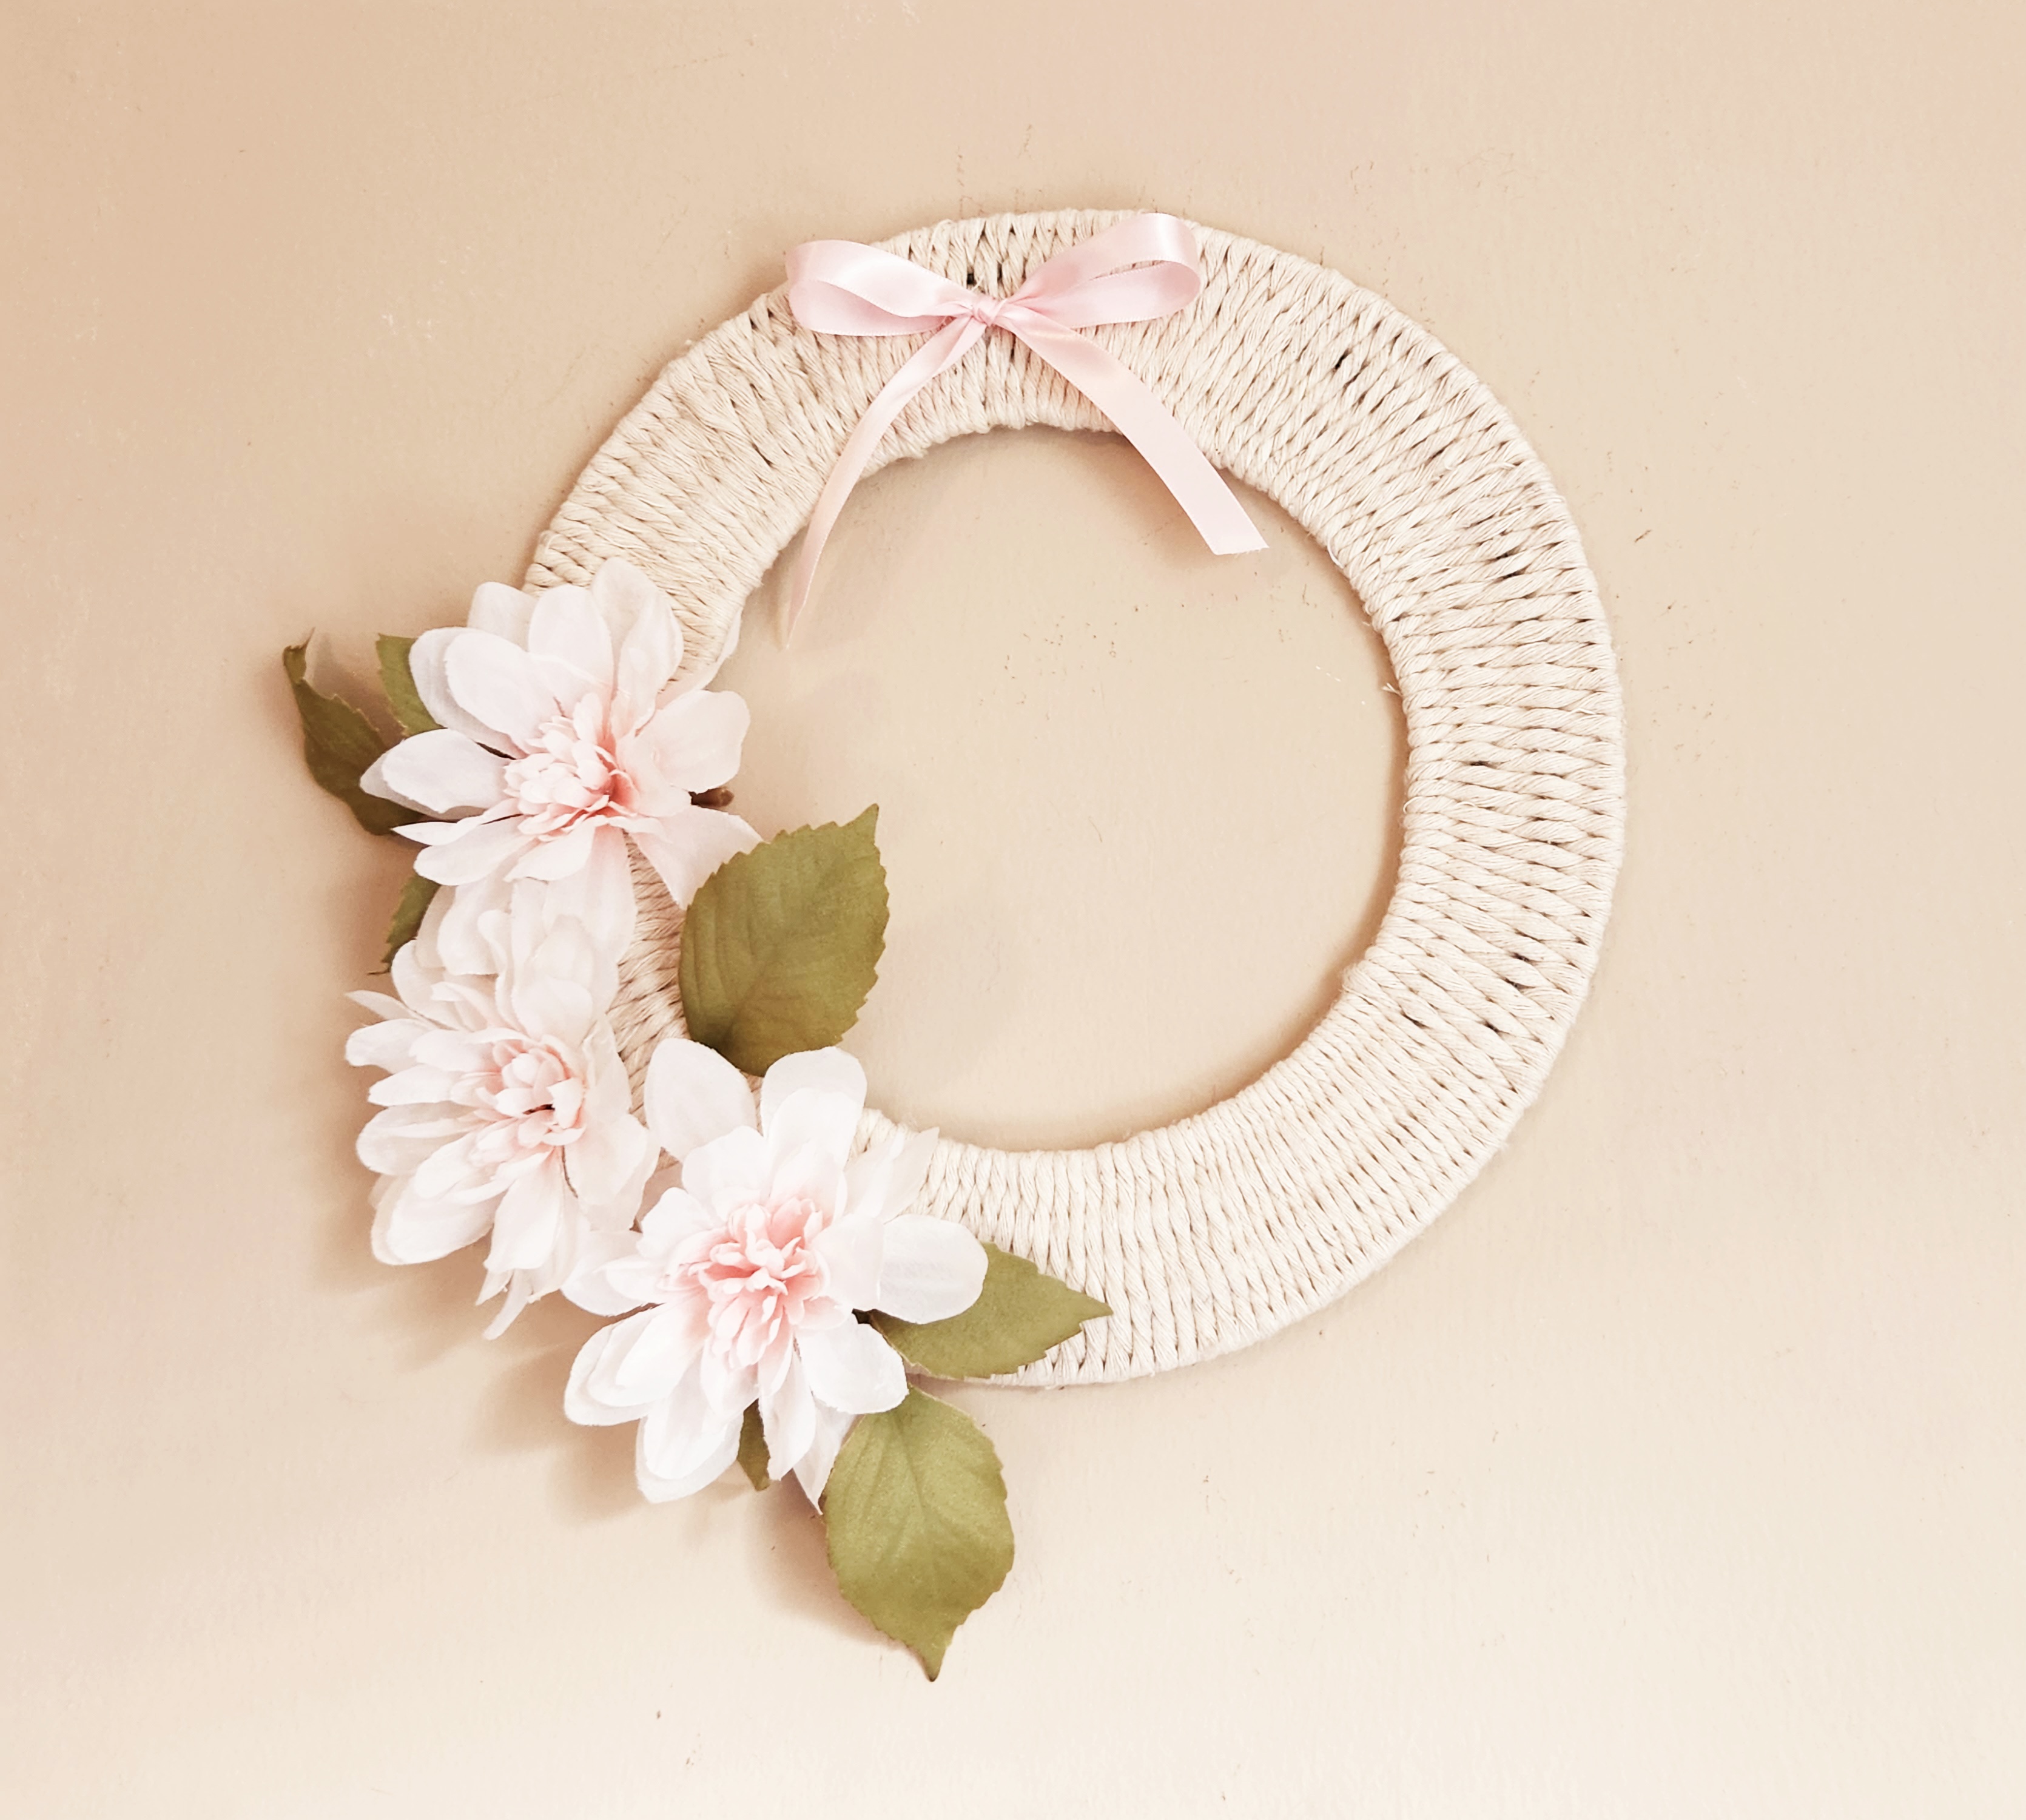
I chose to add three pink Dollar Tree flowers (I think they were dahlias) to the left bottom corner of my wreath. If you’d like to be able to change out the flowers and other embellishments for the season, don’t hot glue them to the rope. Use wire cutters or scissors and cut the stems where they branch off from the main stem. You could cut them as short as 2″ if you don’t think you’ll use the flowers later. I never know when I’m going to repurpose my supplies, so I leave the stems as long as I can just in case I need them later.
I placed my flowers along the bottom left side to cover those two crossbars. Place the stem of one flower through the woven rope toward the inner edge, then turn the wreath over to tuck and weave the stem in so that it stays in place. I added a second flower toward the outside edge of the wreath, covering the second crossbar section, hiding it. Finally add a third flower in between the other two, so that it’s spaced and filled in evenly.


Add a Bow and a Hanger
The last embellishment that you will add is a simple bow. You can add a more complex loopy bow if you’d like, but I stuck with a simple one because I didn’t have a wired ribbon from Dollar Tree on hand. I wanted you to be able to make this wreath extremely inexpensively and with items exclusively from DT. Since we were in the middle of moving, I was working out of boxes and couldn’t find my tripod so I didn’t get a picture of me making adding the bow.
I tied a simple two loop bow (like a shoelace) and inserted a pipe cleaner through the middle in the back. Push pipe cleaner through the rope at the tope center of the wreath, and twist it closed just like I did in the picture below where I was working on my farmhouse style hand crocheted chunky knit wreath. You can cut the excess pipe cleaner off if you’d like.

Cut a 2.5″ piece of wire or pipe cleaner to create a hanger for the wreath. Bend the wire in half, then twist the two ends together. That will leave you with a loop. You can hot glue it to the back of the wreath, right where the bow is attached, or twist the wire around a piece of the rope.

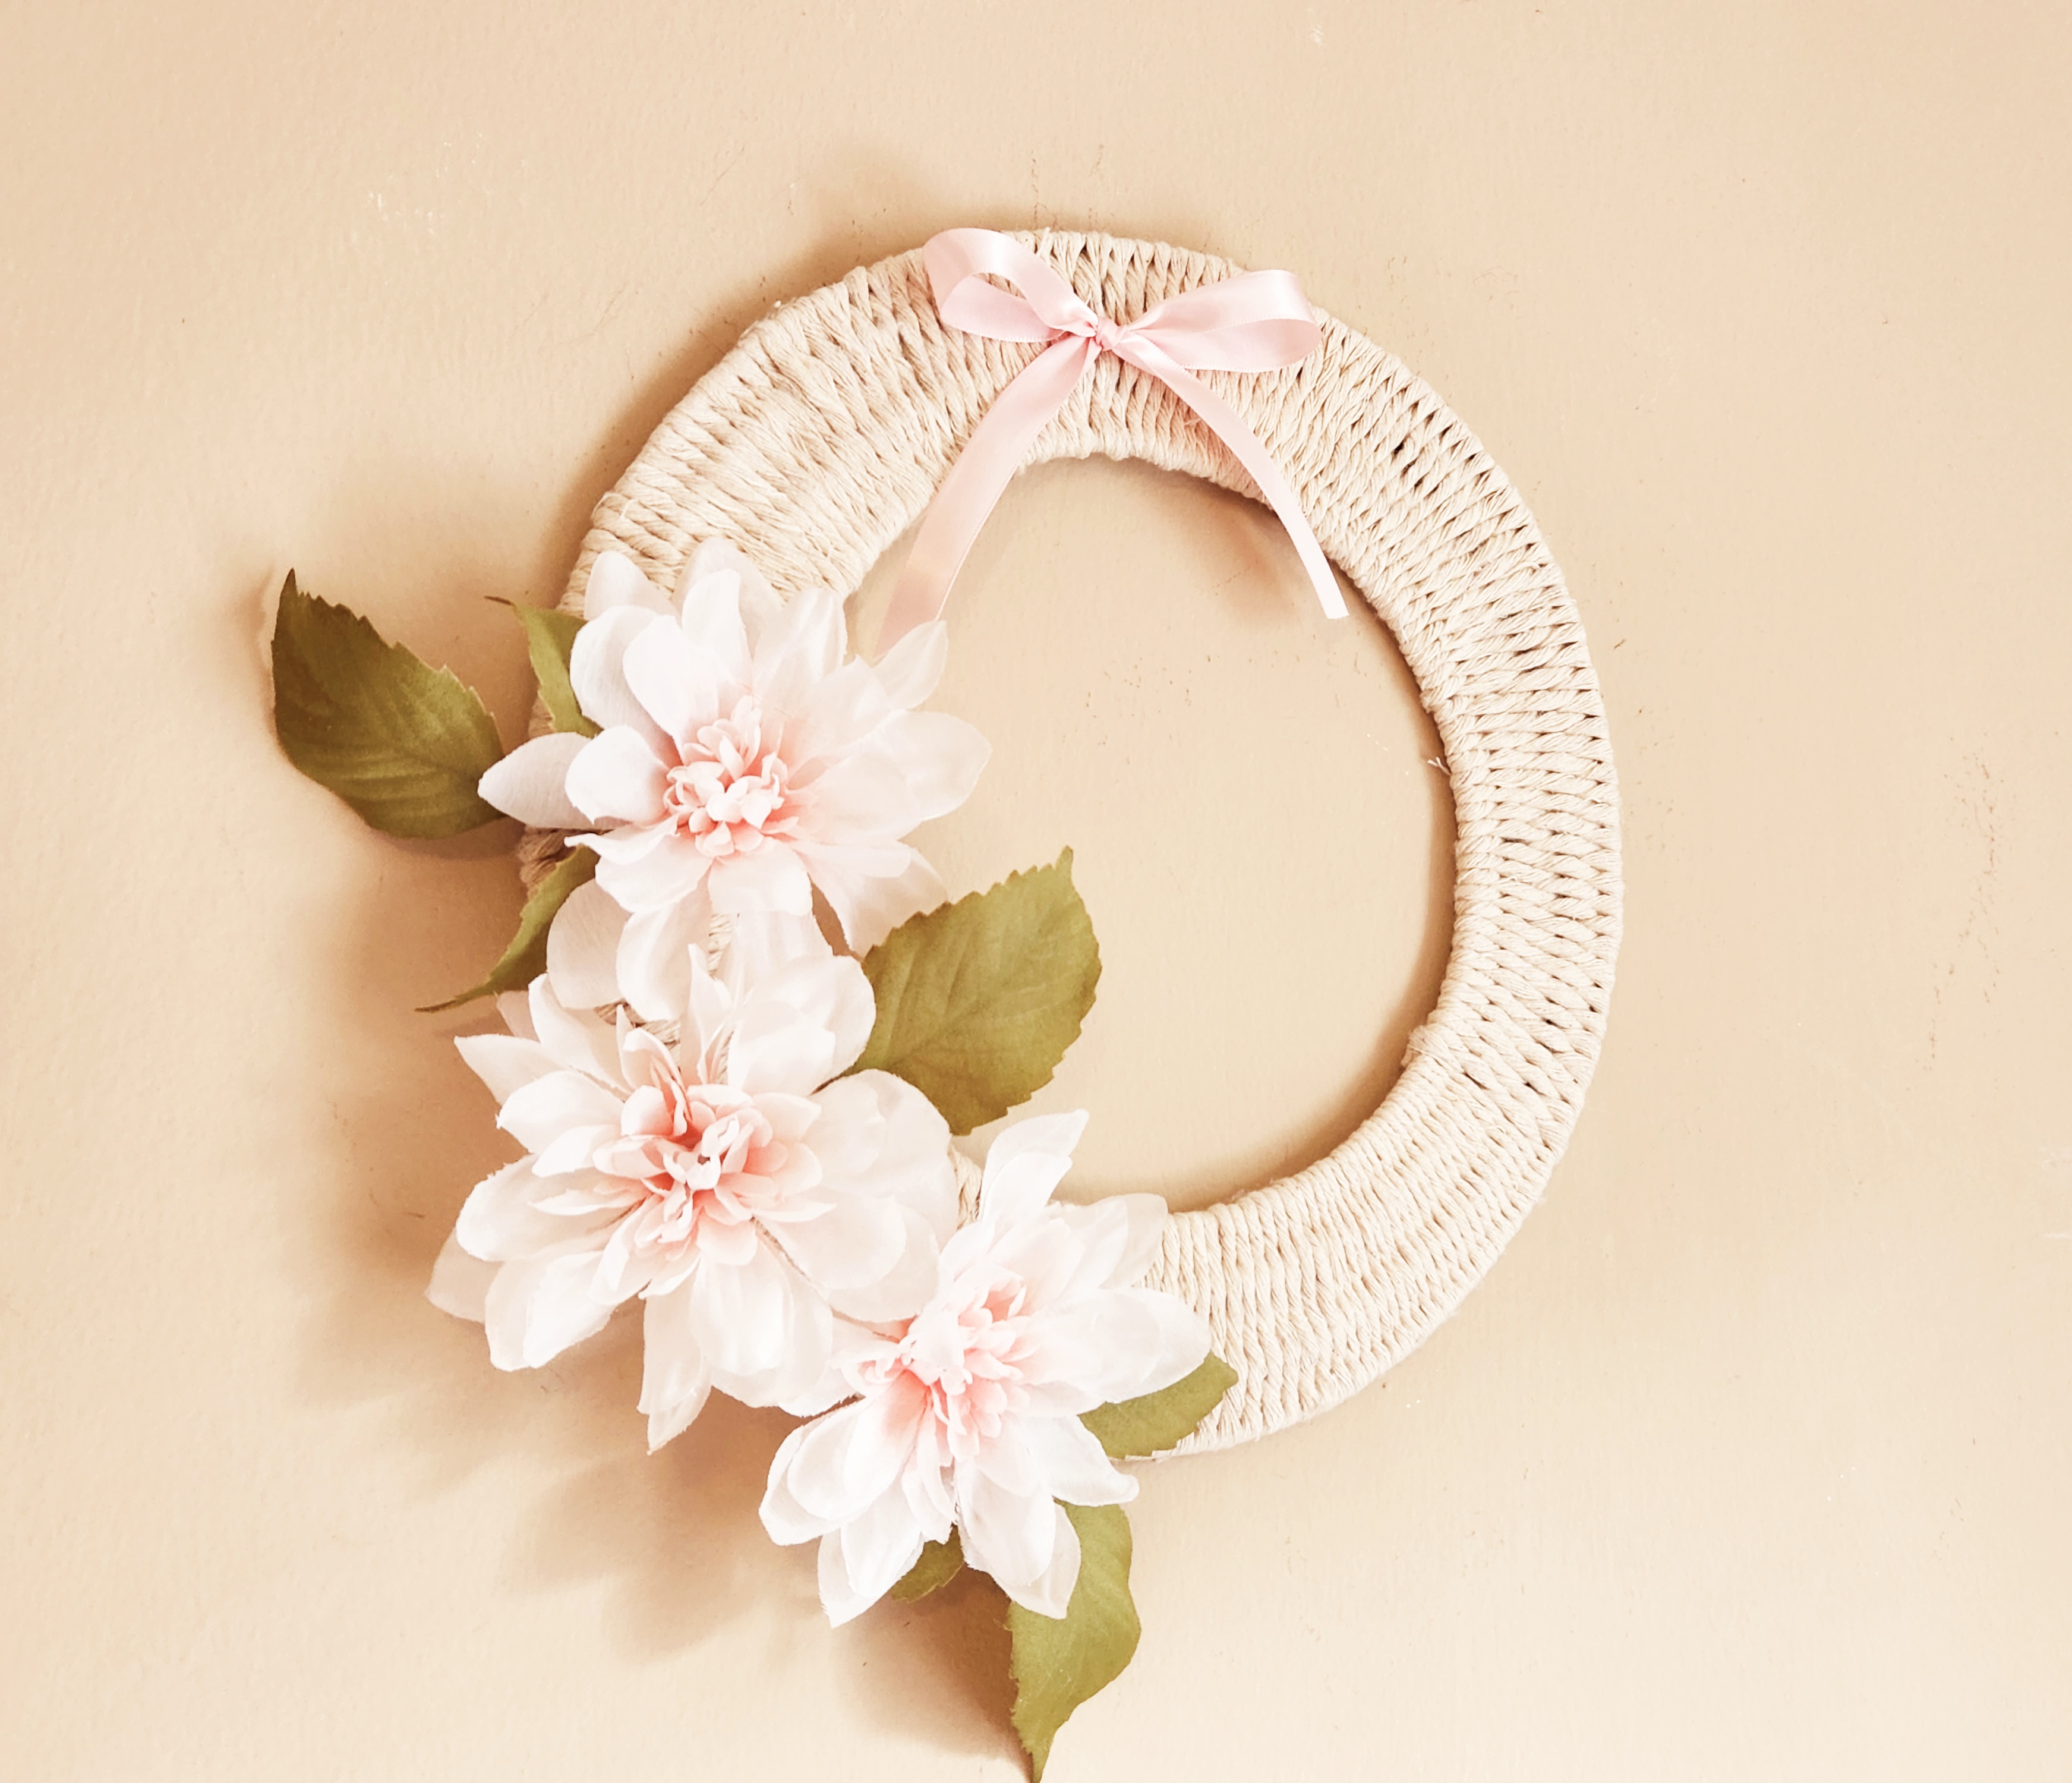
Your woven rope wreath is ready to display!
That’s it! Can you believe that you can get all of the supplies for this wreath for about $4 and still have items left over for another project?! I guess that would make this wreath less than $2 if you use the items for other DIYs. This is a beautiful and inexpensive piece of home decor which is perfect for these difficult economic times. Here’s how my wreath turned out.

Remember to pin the image below or share this post with the buttons on the left side of the page so you can find it when you’re ready to start your project! Also, follow me on Pinterest for new ideas added weekly! Be sure that you never miss a great tutorial for decor like wreaths, signs and other home decor, free printables, crafts, and other fun posts! Enter your email address below to be notified of new posts! Use the buttons below to follow me on social media for other great content.

Don’t go yet! There’s more to see!
There’s plenty more to see here on the blog! If you’re looking for something specific, use the search box in the sidebar to look it up. If not, you might enjoy these ideas. Don’t have time to read them all now? That’s ok, just click over to the posts using the pictures and pin them for later. You can also add Life as a LEO Wife to your favorites and check back for new ideas and free printables and SVGs every Wednesday, as well as link parties with tons of shared ideas on Sundays!


If you’re one of my blogger friends, make sure you head over and link up on Happiness is Homemade Link Party (Sundays thru Thursdays) and Crafty Creators Link Party (Thursdays at 6am CST thru Mondays at 11:59pm).
On to Our Dollar Store Craft Challenge!

I know that you are going to love the crafts that the ladies in today’s hop have come up with! They are all so talented, so make sure to take the time to check them all out!
Beverly from Across the Blvd. | Dollar Tree Coastal Drink Tray DIY
Gail from Purple Hues & Me | Dollar Store Butterfly Hanger DIY
Allyson from Southern Sunflowers | Dollar Tree Canvas Idea Using Stickers
Marci from Stone Cottage Adventures | Gussied Up Hand Towels
T’onna from Sew Crafty Crochet | Black & White Bohasaurus
Terri from Our Good Life | Dollar Tree DIY Garden Greenhouse
Follow me on Pinterest for new ideas added weekly!


Very nice woven ripe idea. Beautiful design. Good job work
Thank you!
Most welcome!
Your woven rope wreath is so cool and beautiful, Niki! I never would have thought to unravel the rope to cover the wired frame. Genius idea!
Thank you! I laughed and thought, “Great minds think alike,” when I saw you had unraveled your rope to cover your butterfly’s body. Unraveling my rope & weaving it took hours & hours, but I feel like it’s worth it.
I love the texture of your woven rope wreath! Thank you for the tip about unwinding the rope. Great idea! pinning -Marci @ Stone Cottage Adventures
Thank you Marci! I think unwinding was the hardest part lol!
This wreath is so lovely! It has a very light and airy vibe, and I love it! I love the weaved rope, and the light pink flowers are the perfect embellishment!
Thank you! I think I’ll hang it on our back door near the patio furniture (when it comes in lol) since it has that same light, airy feel.
Wow Niki, I would have never thought to unravel the rope! The wreath turned out so pretty! Great and clever creation!
Jenna
Thank you Jenna!
I totally love the look of this wreath. I am glad you showed so many steps to make this, I would need each and every one of them.
Thank you! If it didn’t take me so long to weave that sucker I would make one for every room lol!
Your woven wreath is so pretty! The dahlias look great on it, too. I wish I had thought about unwinding rope for one of my projects as it looked a bit heavy on my handle…duh…now I know better lol. Pinned to my wreath board.
Thank you! I should’ve unwound the thinner rope from Dollar Tree. That’s a note for my next wreath lol!
So cute Niki! You come up with the best ideas! Pinned!
Thank you!
You’re so creative! Love your wreath! Very pretty!
Thank you Donna!
Your wreath is lovely, Niki. What a great idea to unravel the rope and then weave it around the wreath form. Happy to have you joining us for the blog hop!
Thanks Beverly! I’m so happy to be joining all of you talented ladies!