
A few days ago, I made an adorable bunny shaped rope tray and shared the tutorial for it during our Under $10 on the 10th Blog Hop. Last year I made nautical rope trays followed by rope placemats, so I thought why stop with just the tray this time? A few other bloggers in the hop also mentioned they would be cute as placemats as well, so that just solidified my decision. The tutorial for a rope bunny placemat is just a little bit different, so today I’m sharing it.
This year I added to my rope bunny collection with adorable farmhouse style coasters. Be sure to pin all of the tutorials to make the matching tray, placemats, and coasters!
Easter Rope Bunny Placemat Supplies:
- 3 packs of cotton rope from Dollar Tree (the 6.4ft pack, not the 11.1ft) You need 3 packs for every placemat.
- 1 pack of the 11.1ft white cotton rope
- scissors
- hot glue gun & glue
- pipe cleaners or thick floral wire
- fat quarter of your choice of fabric for bunny ears- I used pink with white bunnies from DT.
- fabric or ribbon scraps for a bow

Form the Rope Placemat
You’ll make the body of the placemat just like I did in the rope bunny tray.

I started my tray outside the stover eye cover, which you can do in this as well. You’ll have to glue the placemat to the board when you start the second rope, or you can start it on the cardboard from the beginning. I started it off of the cardboard only because mine wasn’t exactly perfectly round so there was no real center to start at lol. If you’re tracing a perfect circle from a charger, you can start the mat right at the center of your cardboard or foam board.
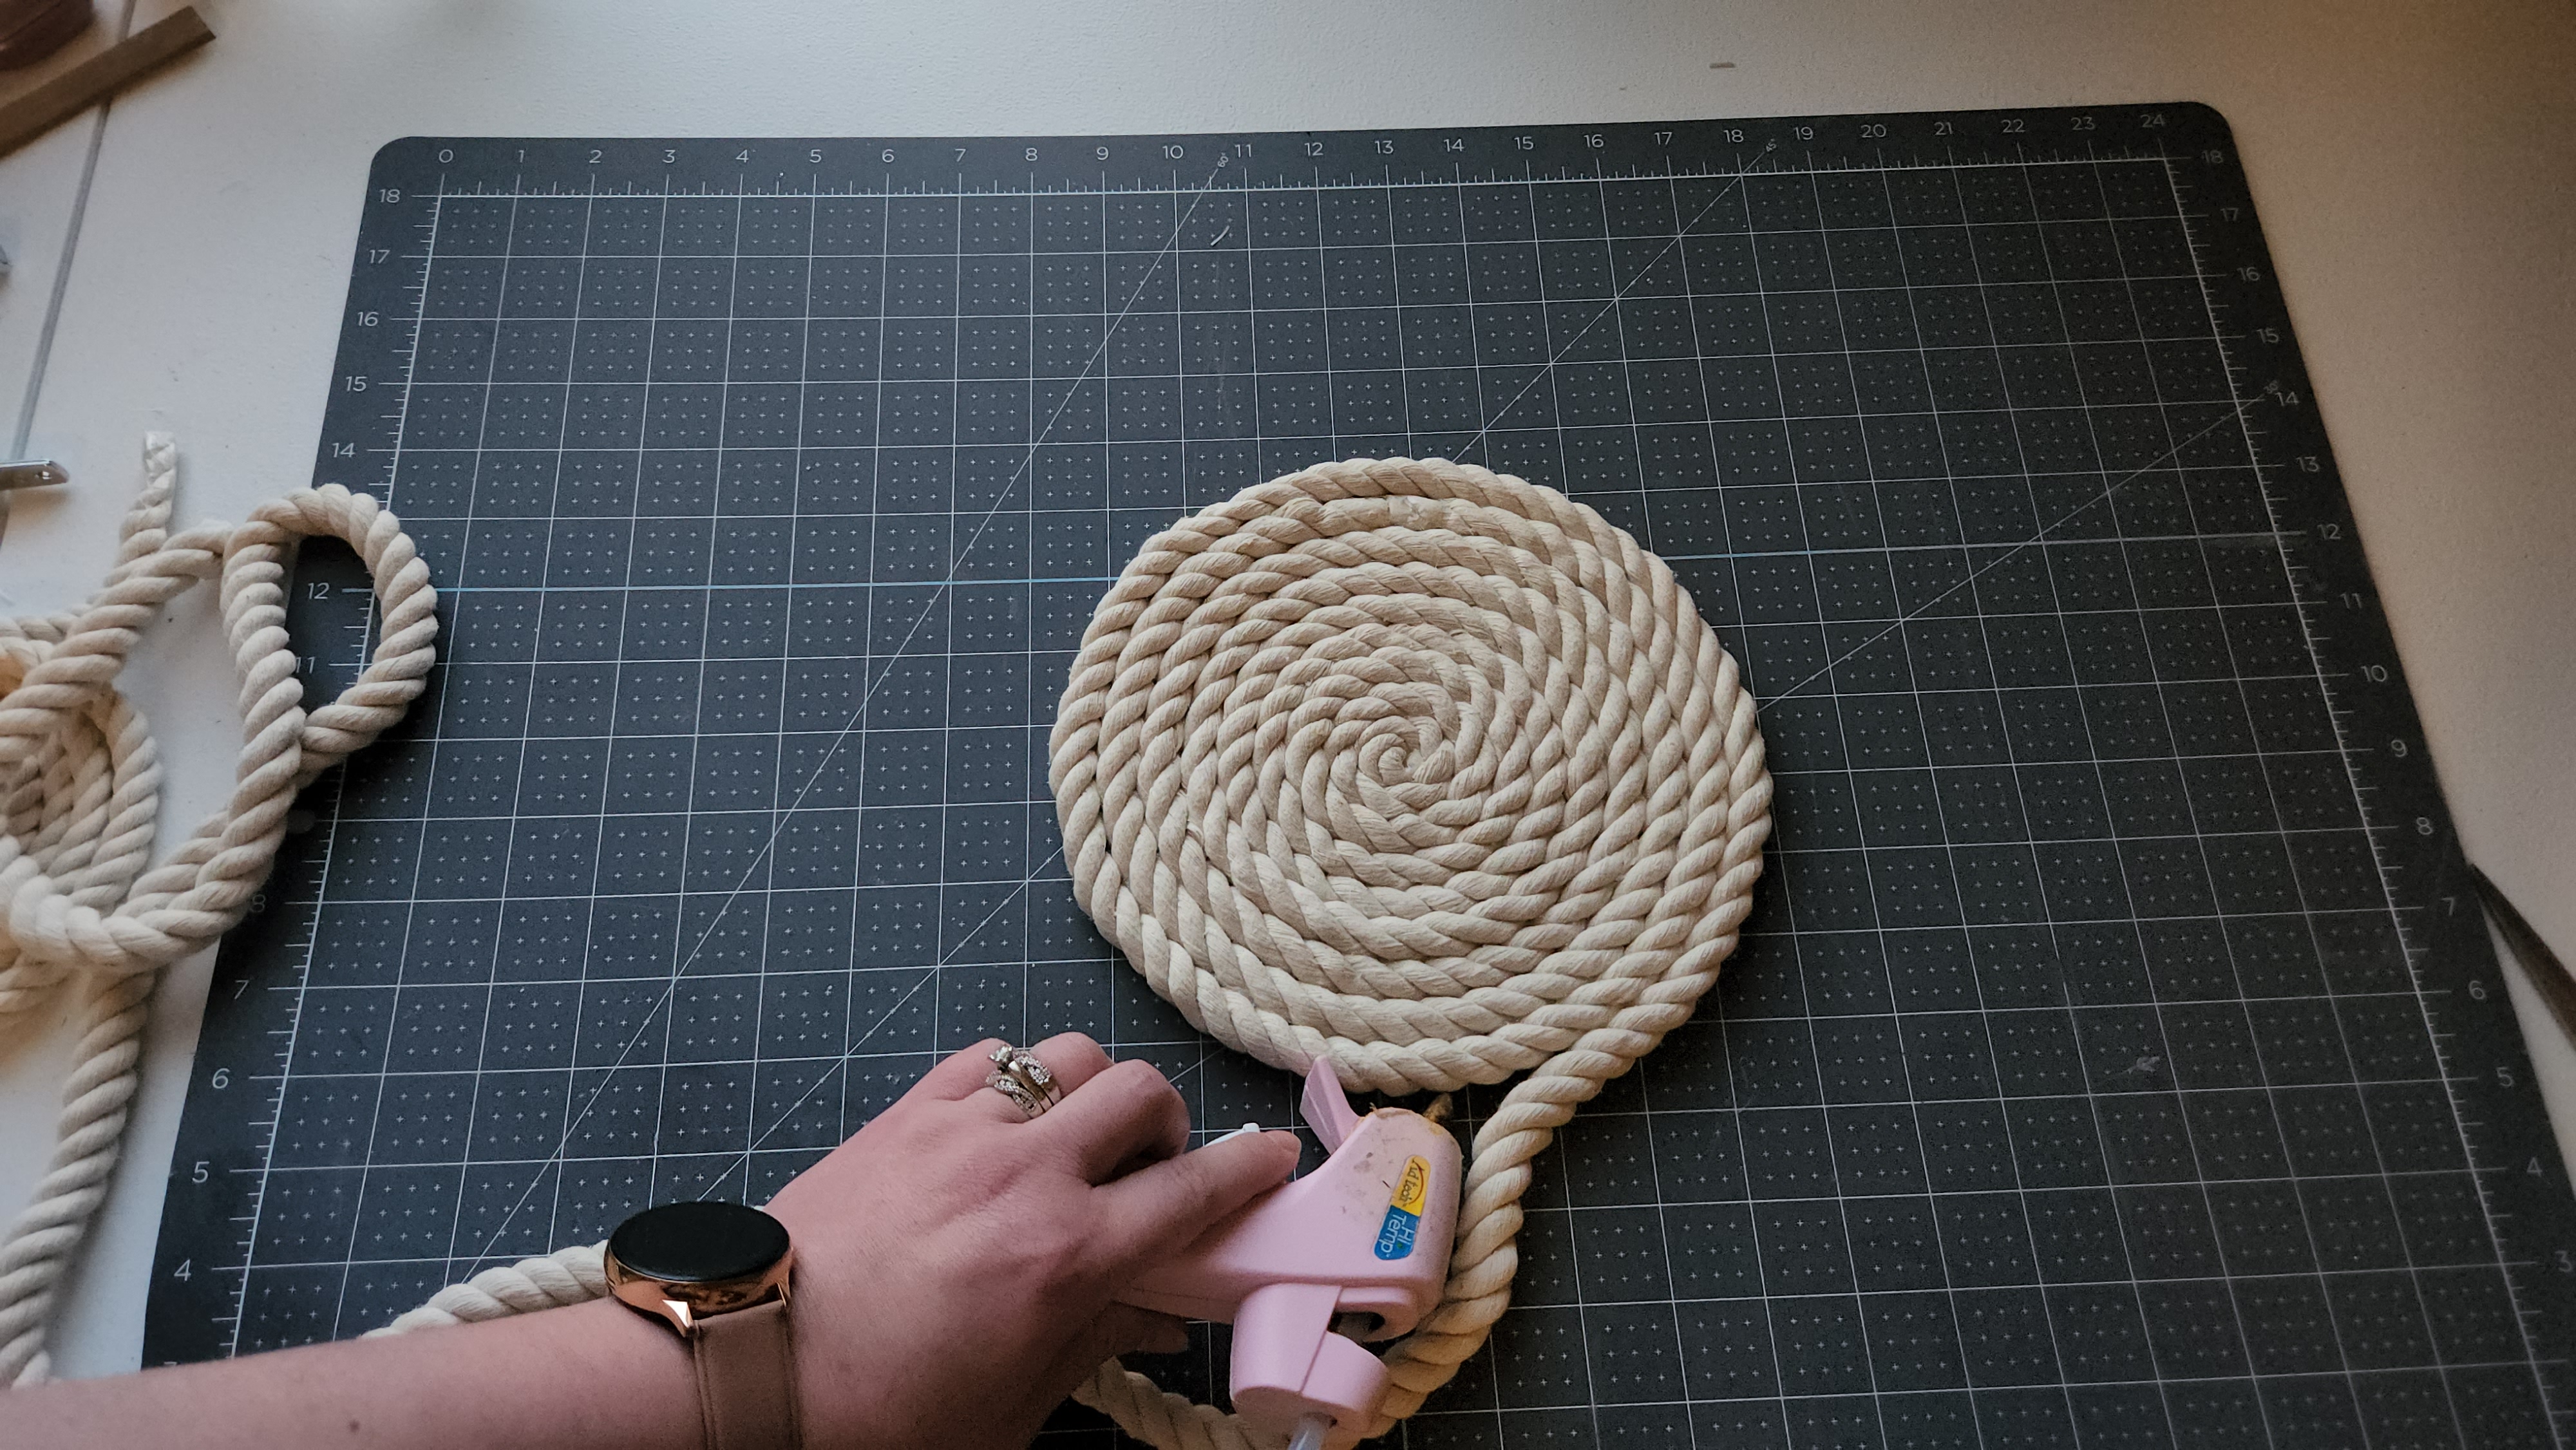
Place hot glue on the tape part of one end of the rope and begin to roll it in on itself like a flat ball.

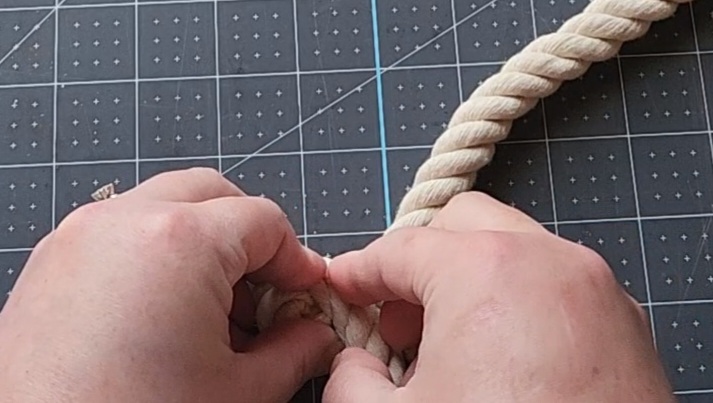
Add hot glue to the outside of the rope circle that’s forming and continue rolling it until all three ropes are on. With three ropes, it is a little smaller than a DT charger, but plenty big enough to show under a dinner plate. If you’d like it the size of a charger (there isn’t a huge difference in size), you’ll need a fourth pack of rope. You can just trim off any excess foam board if you’re happy with the three rope size. When you run out of rope, just add the next rope. For a more detailed explanation of that, see the rope tray tutorial.


Make a Base
Since white cotton rope is very flimsy, you’ll need a base for the placemat. In my rope bunny tray, I used a stove eye cover since it’s made to hold something. This doesn’t need to have any depth, so the base can be flat. I traced around a $1 charger that I used in last year’s Easter tablescape onto a piece of foam board. I ran out of that, so I also used cardboard. Both items worked perfectly. I trimmed the boards a little bit smaller than the charger so that I could glue the ears under the rope without making the placemat sit up higher on one side.
You don’t need the board to be perfect. I flattened out a cardboard box that was missing some sections where handles were, and my foam board was far from perfect. The foam board had been used for a bunch of Christmas trees, so there wasn’t enough left for a full circle. So don’t feel like you have to run out and buy a new piece of foam board or cardboard. If you’ve got a box that something came in, that’s perfect. As long as the center 3 to 4″ are solidly held up for the most part, you’re golden. I didn’t get a picture of me tracing the circles on the boards, but this is the back of my placemats.

Make Bunny Ears
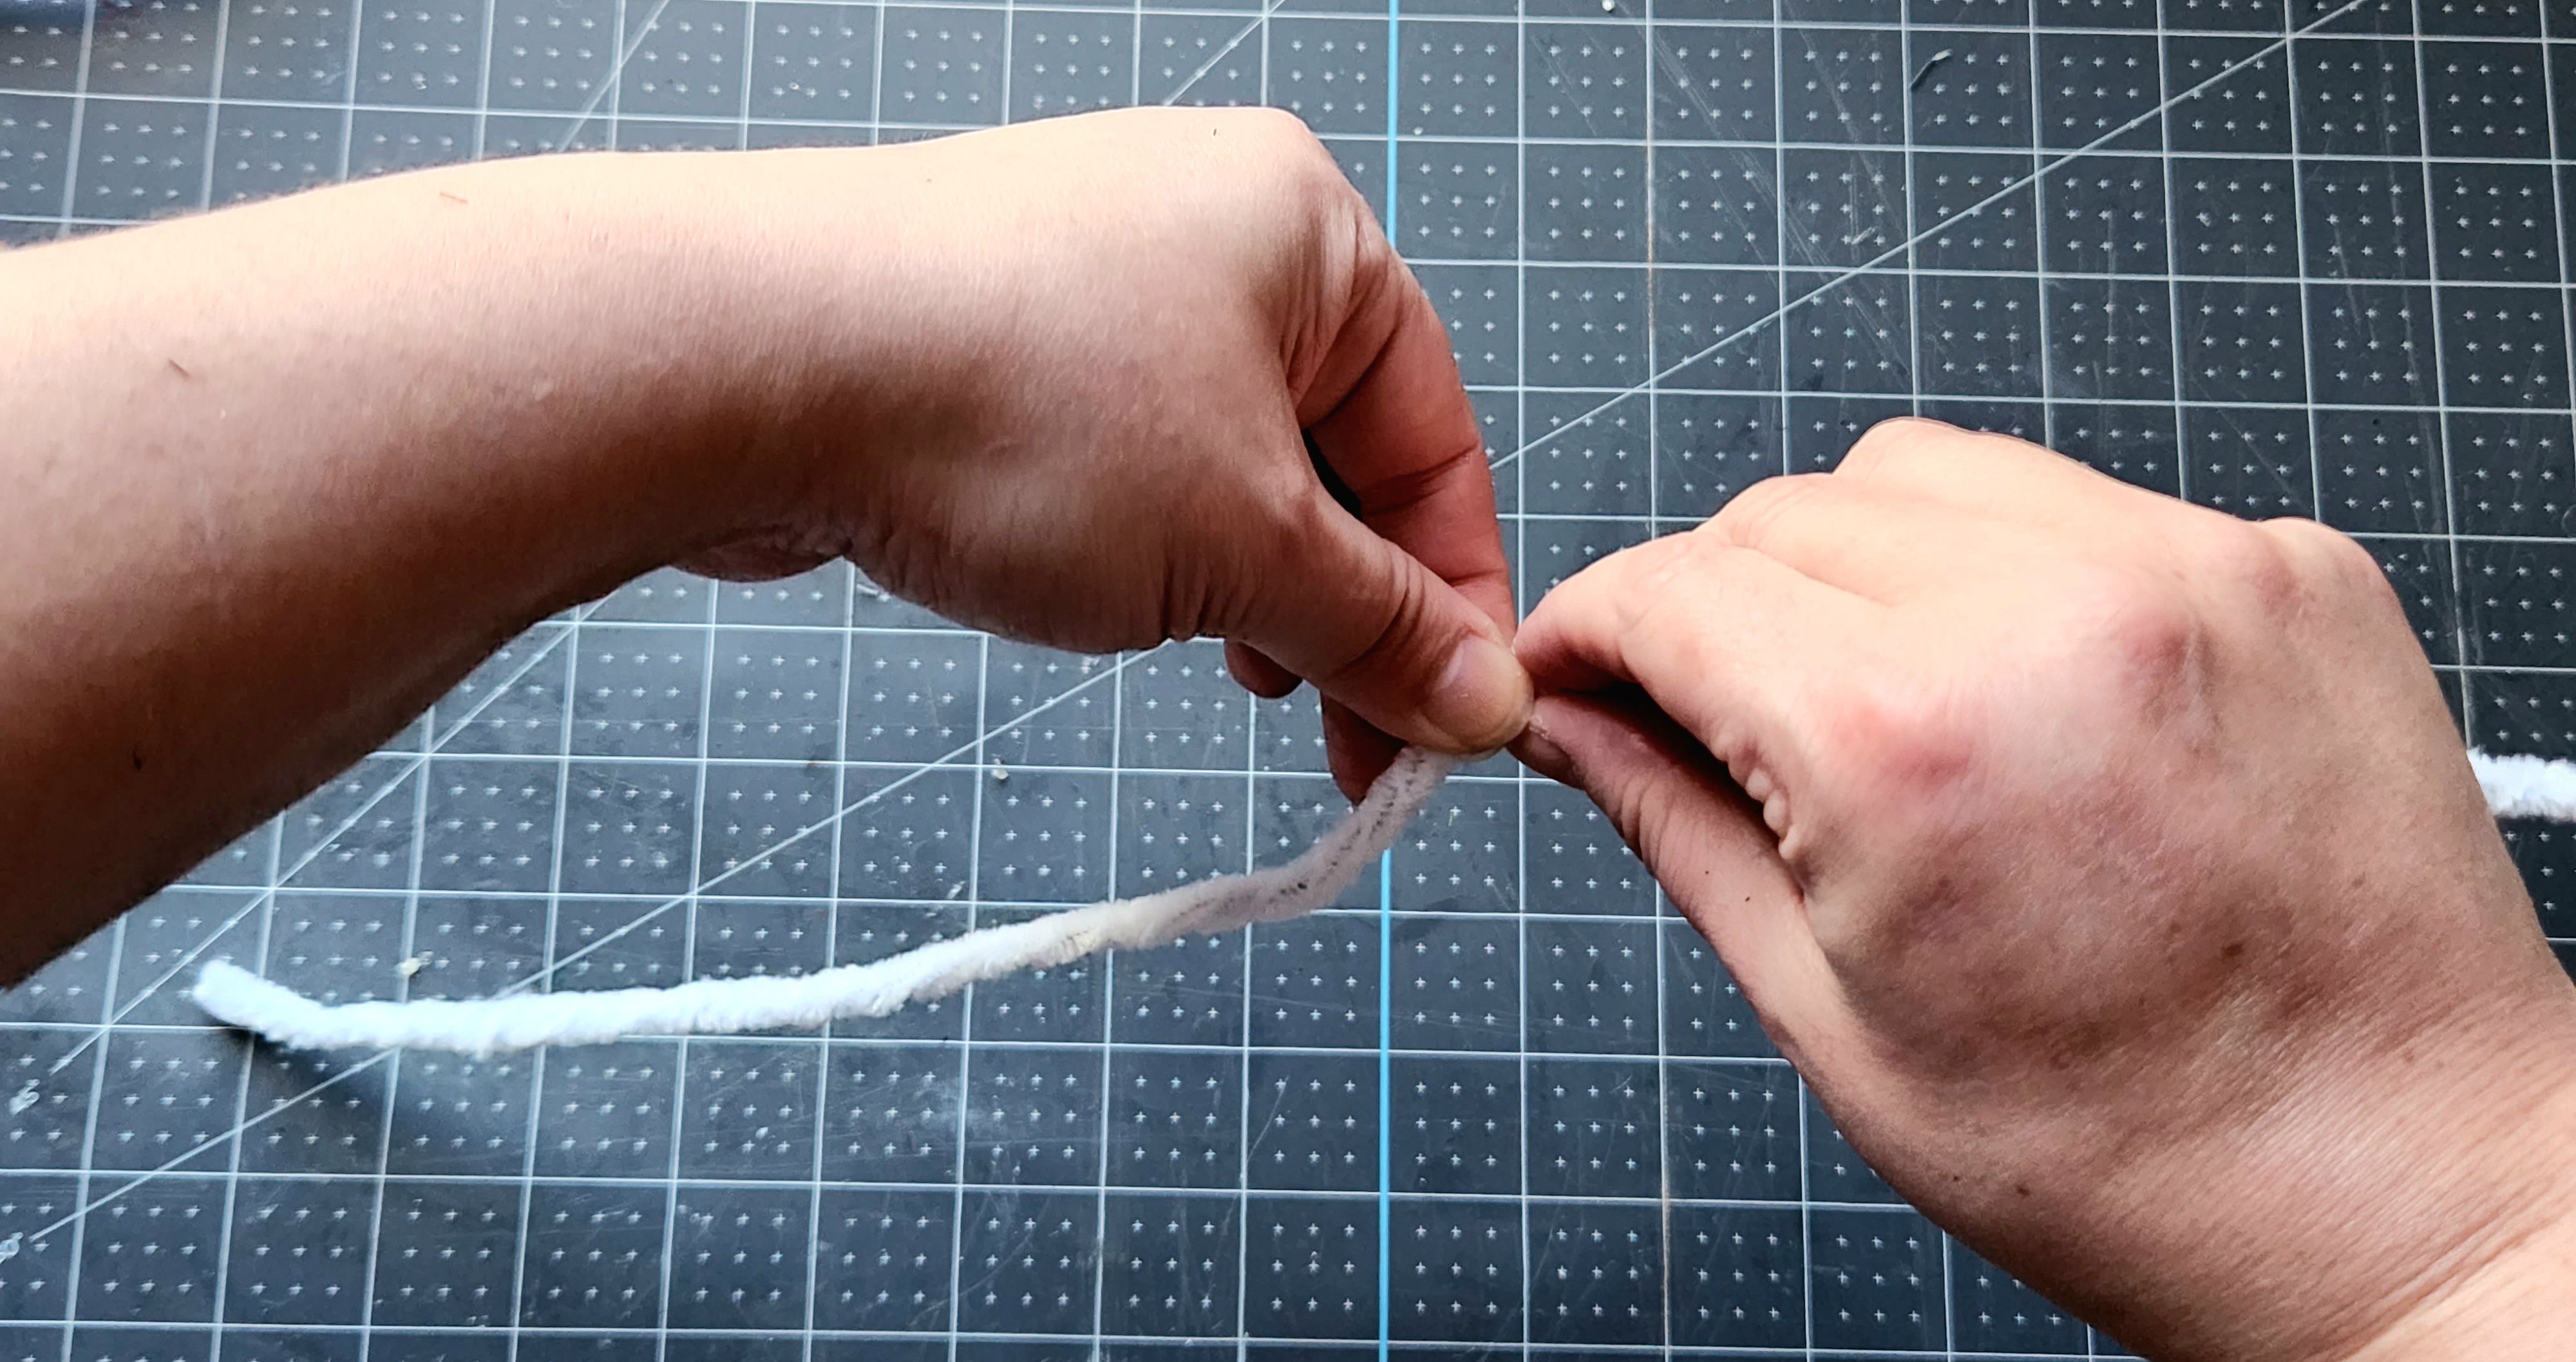
In my rope bunny tray, I used thick wires from a witch hat wreath brim to make ears. Those are very, very heavy and I didn’t have more for these placemats, so I had to come up with alternative ears for these guys. I attempted to use a wire coat hanger, but I didn’t have any wire cutters that were strong enough to cut them so that was a no-go. Finally, I turned to pipe cleaners.
Since pipe cleaners are thin, I twisted two together to make them a little stronger. Simply line them up and twist them together. You’ll twist two sets together for each ear (8 total pipe cleaners for one rope bunny placemat).


When you have two sets of twisted pipe cleaners, twist the end of one to the end of the other to form a long pipe cleaner.
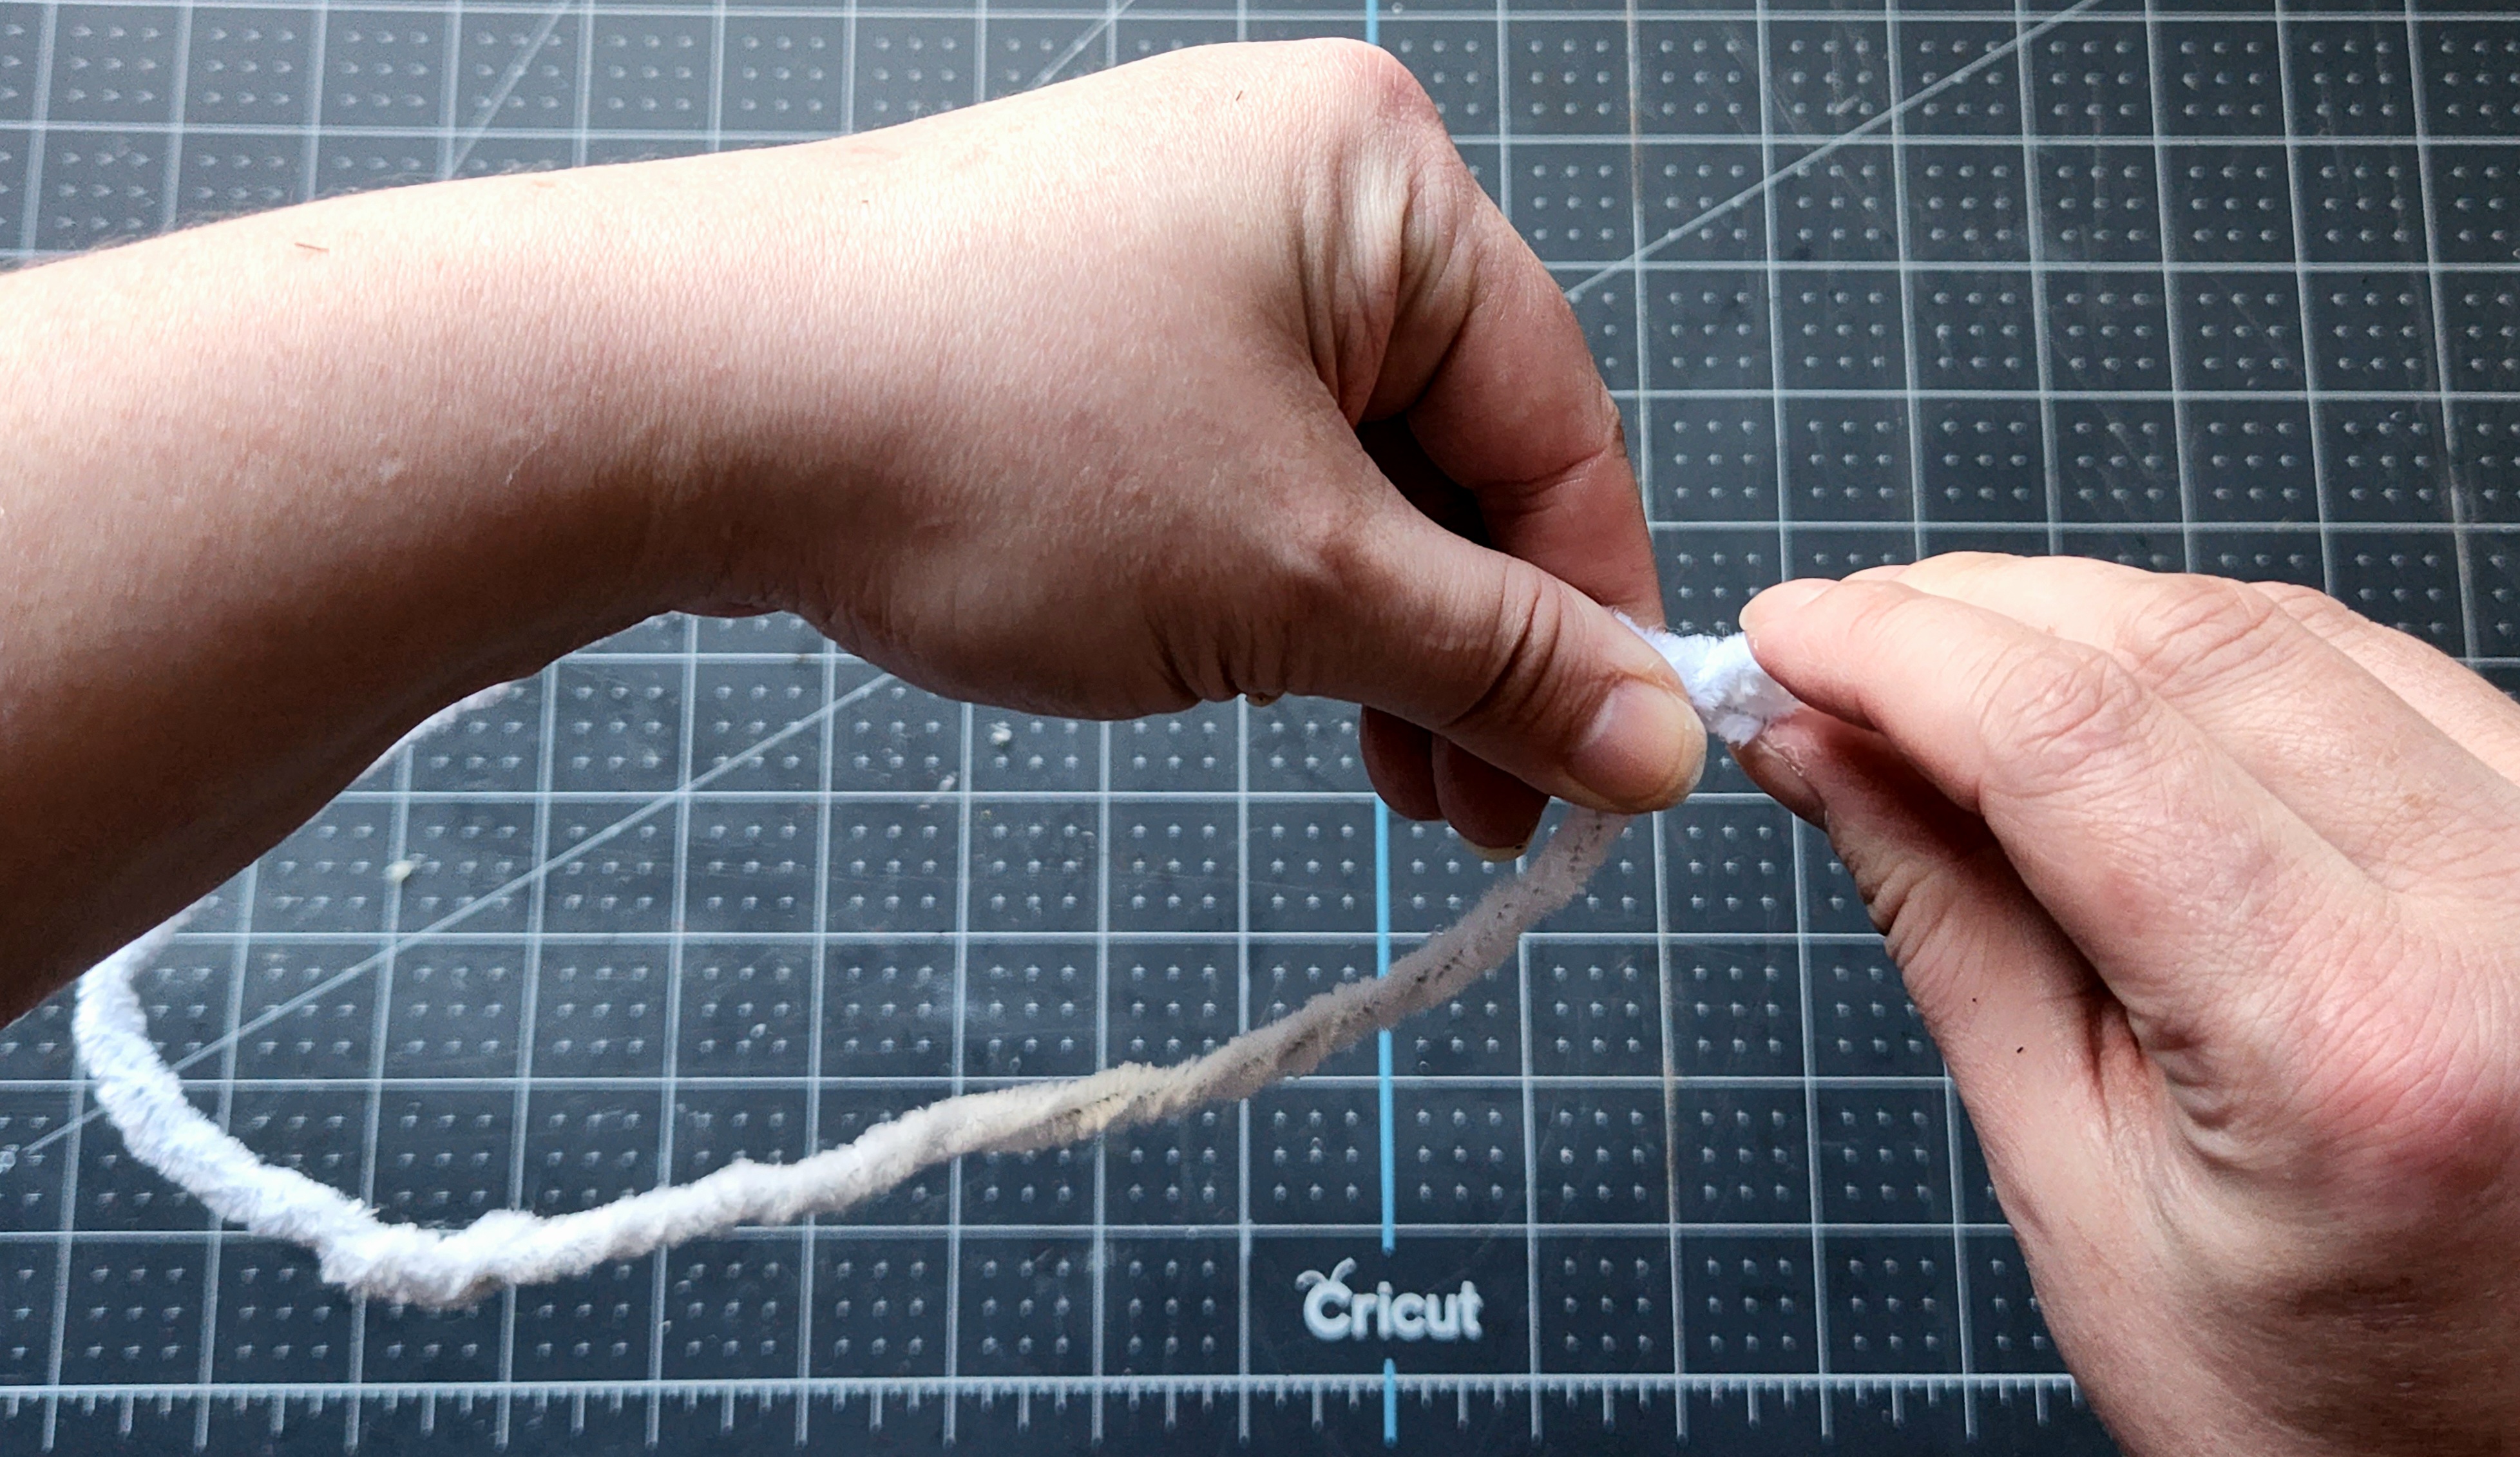
I wanted my ears to be about 8.5″ long once formed, so I bent them into a U shape, brought the ends together a bit, then trimmed off the excess pipe cleaner that sticks out past the 8.5″ point.

Next, twist the two ends together to keep that U or V shape for now.
Manipulate the rest of the pipe cleaner to form an ear shape that you like.

Repeat these steps to make a second ear.
Cover the Bunny Ear with Fabric
Lay the pipe cleaner ear on the back of your fabric. (Iron it beforehand if need be.) Cut around the pipe cleaner, leaving enough fabric around the edges to glue to the back.

Wrap the fabric around the back of the ear and hot glue it in place.


Next, add the smaller rope from the 11.1 ft cotton rope to the outside of the ear. Place hot glue on the end of the rope and glue it on the bottom of the ear. You’ll want to start the rope on the end of the ear where the ends of the pipe cleaners are twisted together.
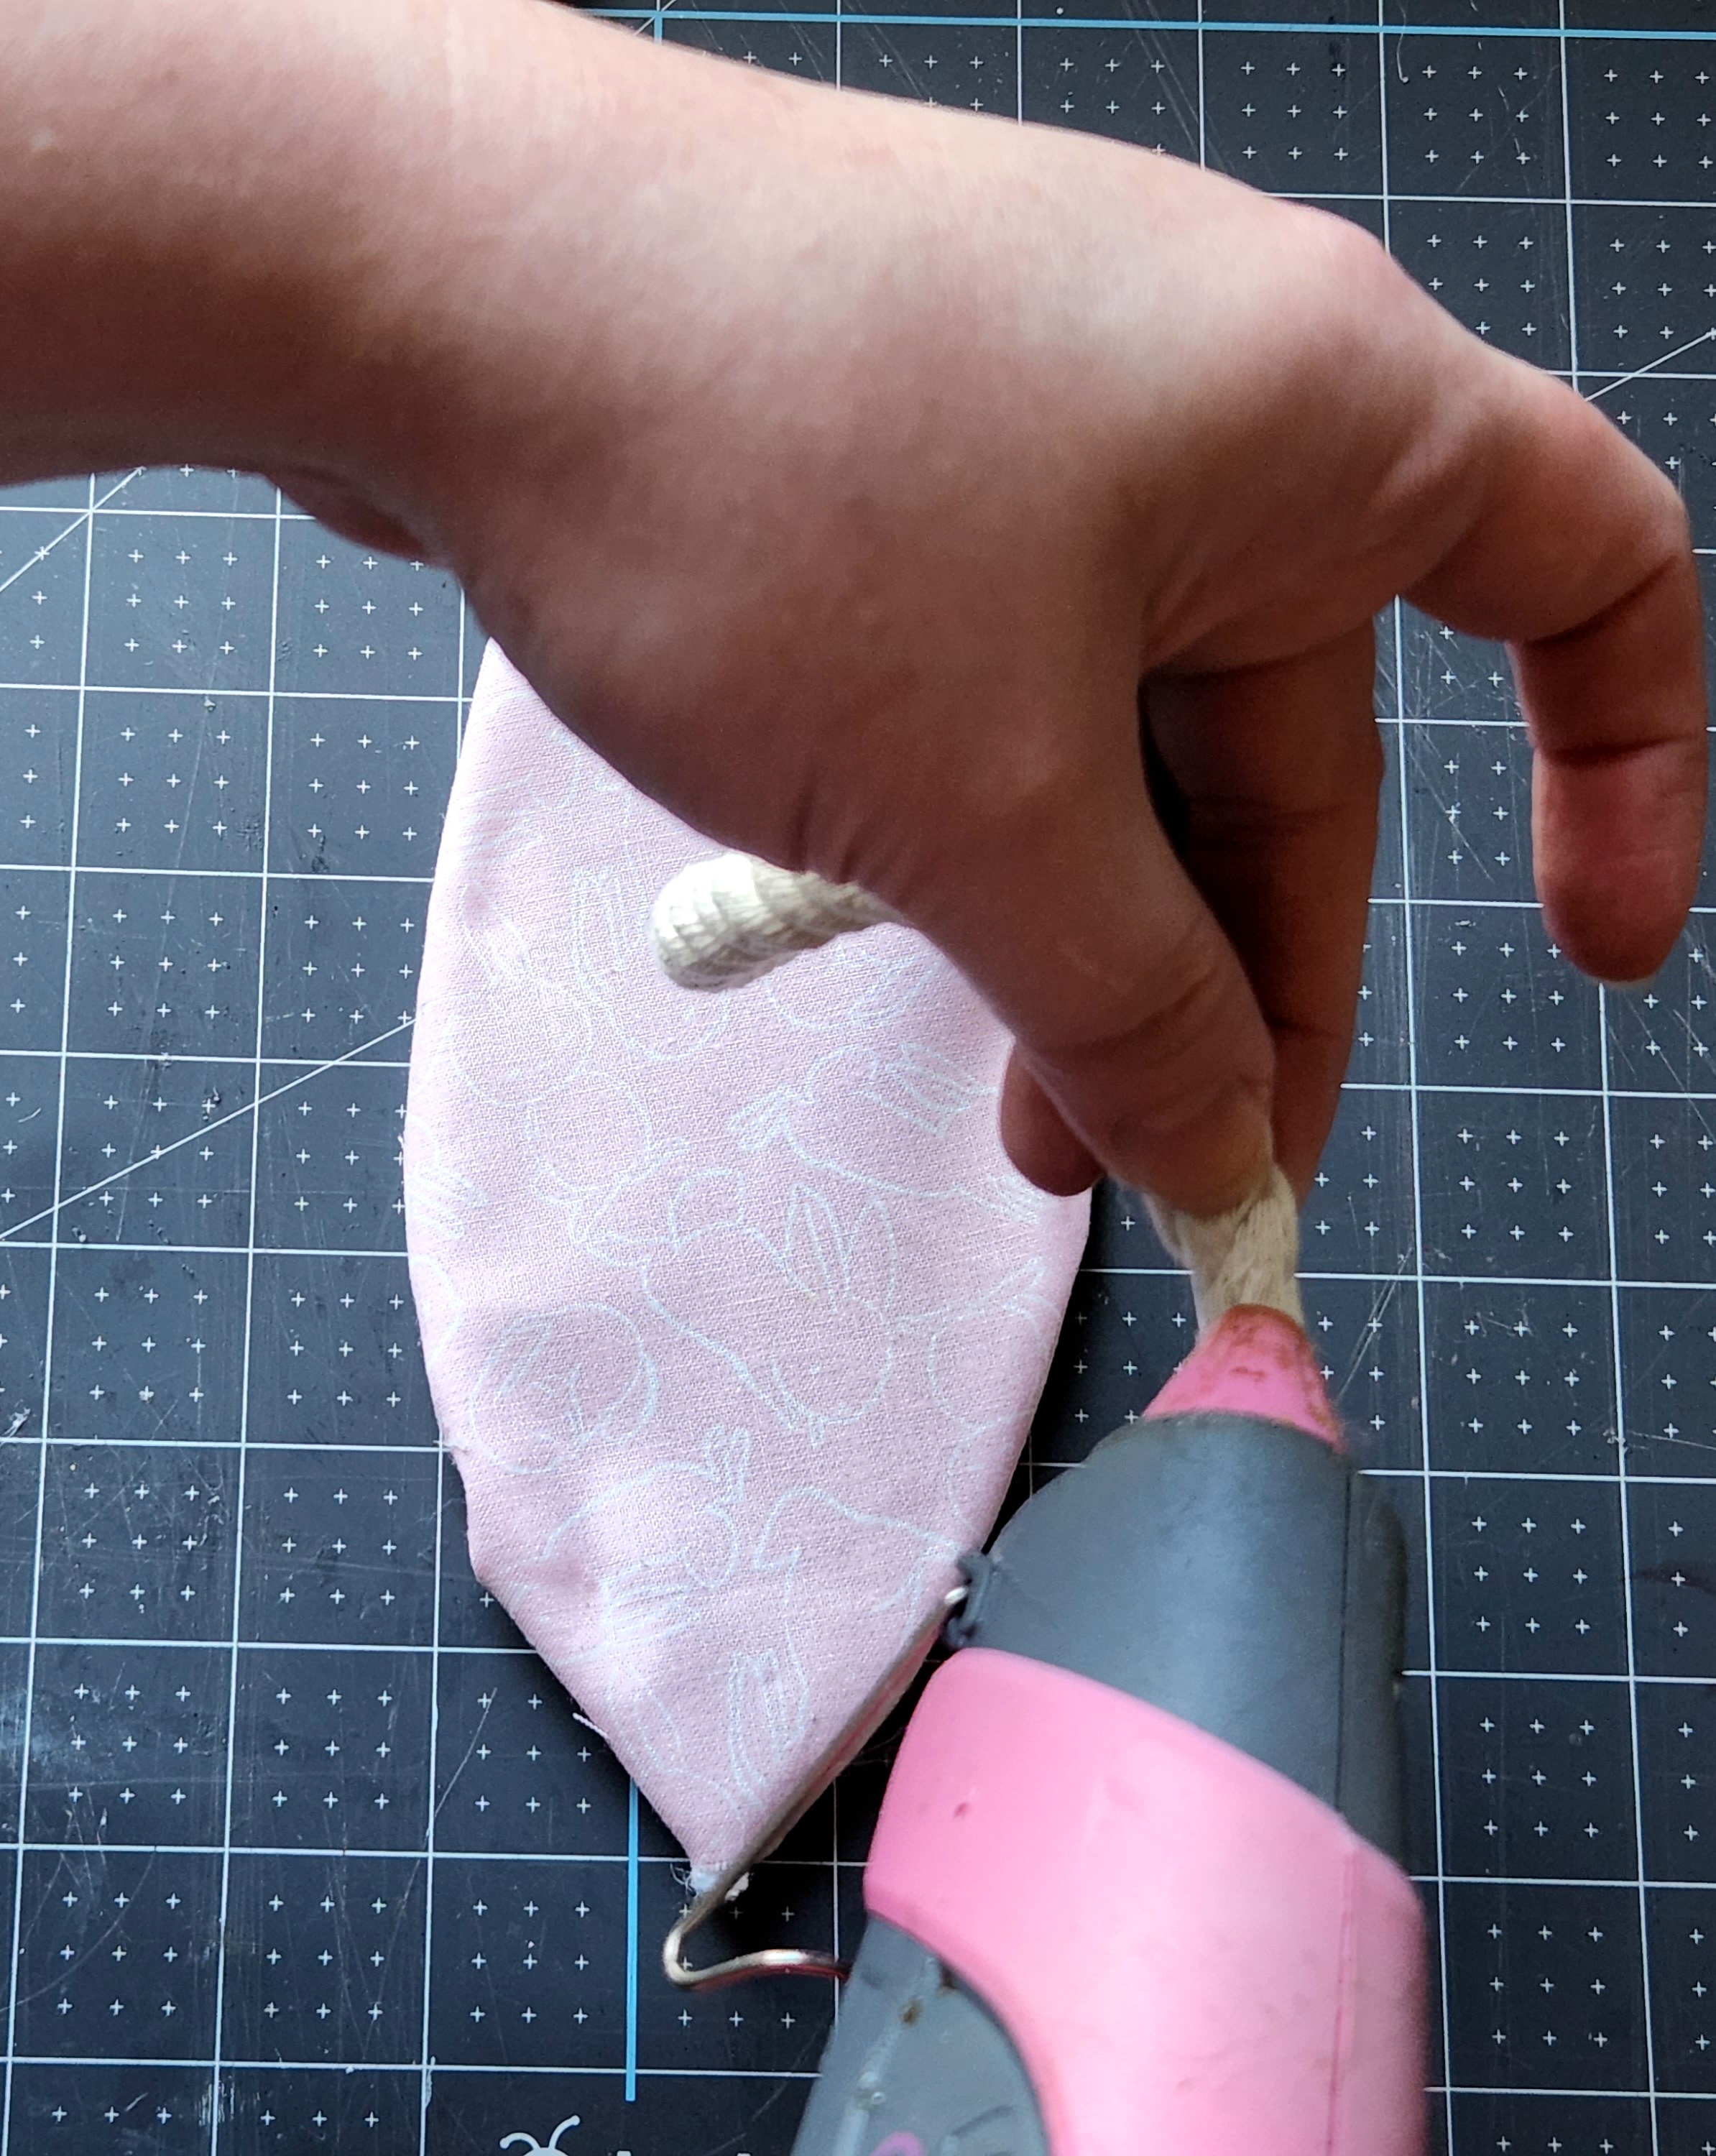

Add hot glue to the edge of the ear and cover the outside of it with rope.


Before you glue the last little bit in place, wrap a piece of tape around the rope where you will cut it free from the rest. Try to place it where you’ll be able to cut the taped part in half, so you don’t have to tape the other end once you glue this one on the ear. Then cut the excess rope off.

Glue that end to the bunny ear.

Cover the second ear with fabric and rope in the same way.
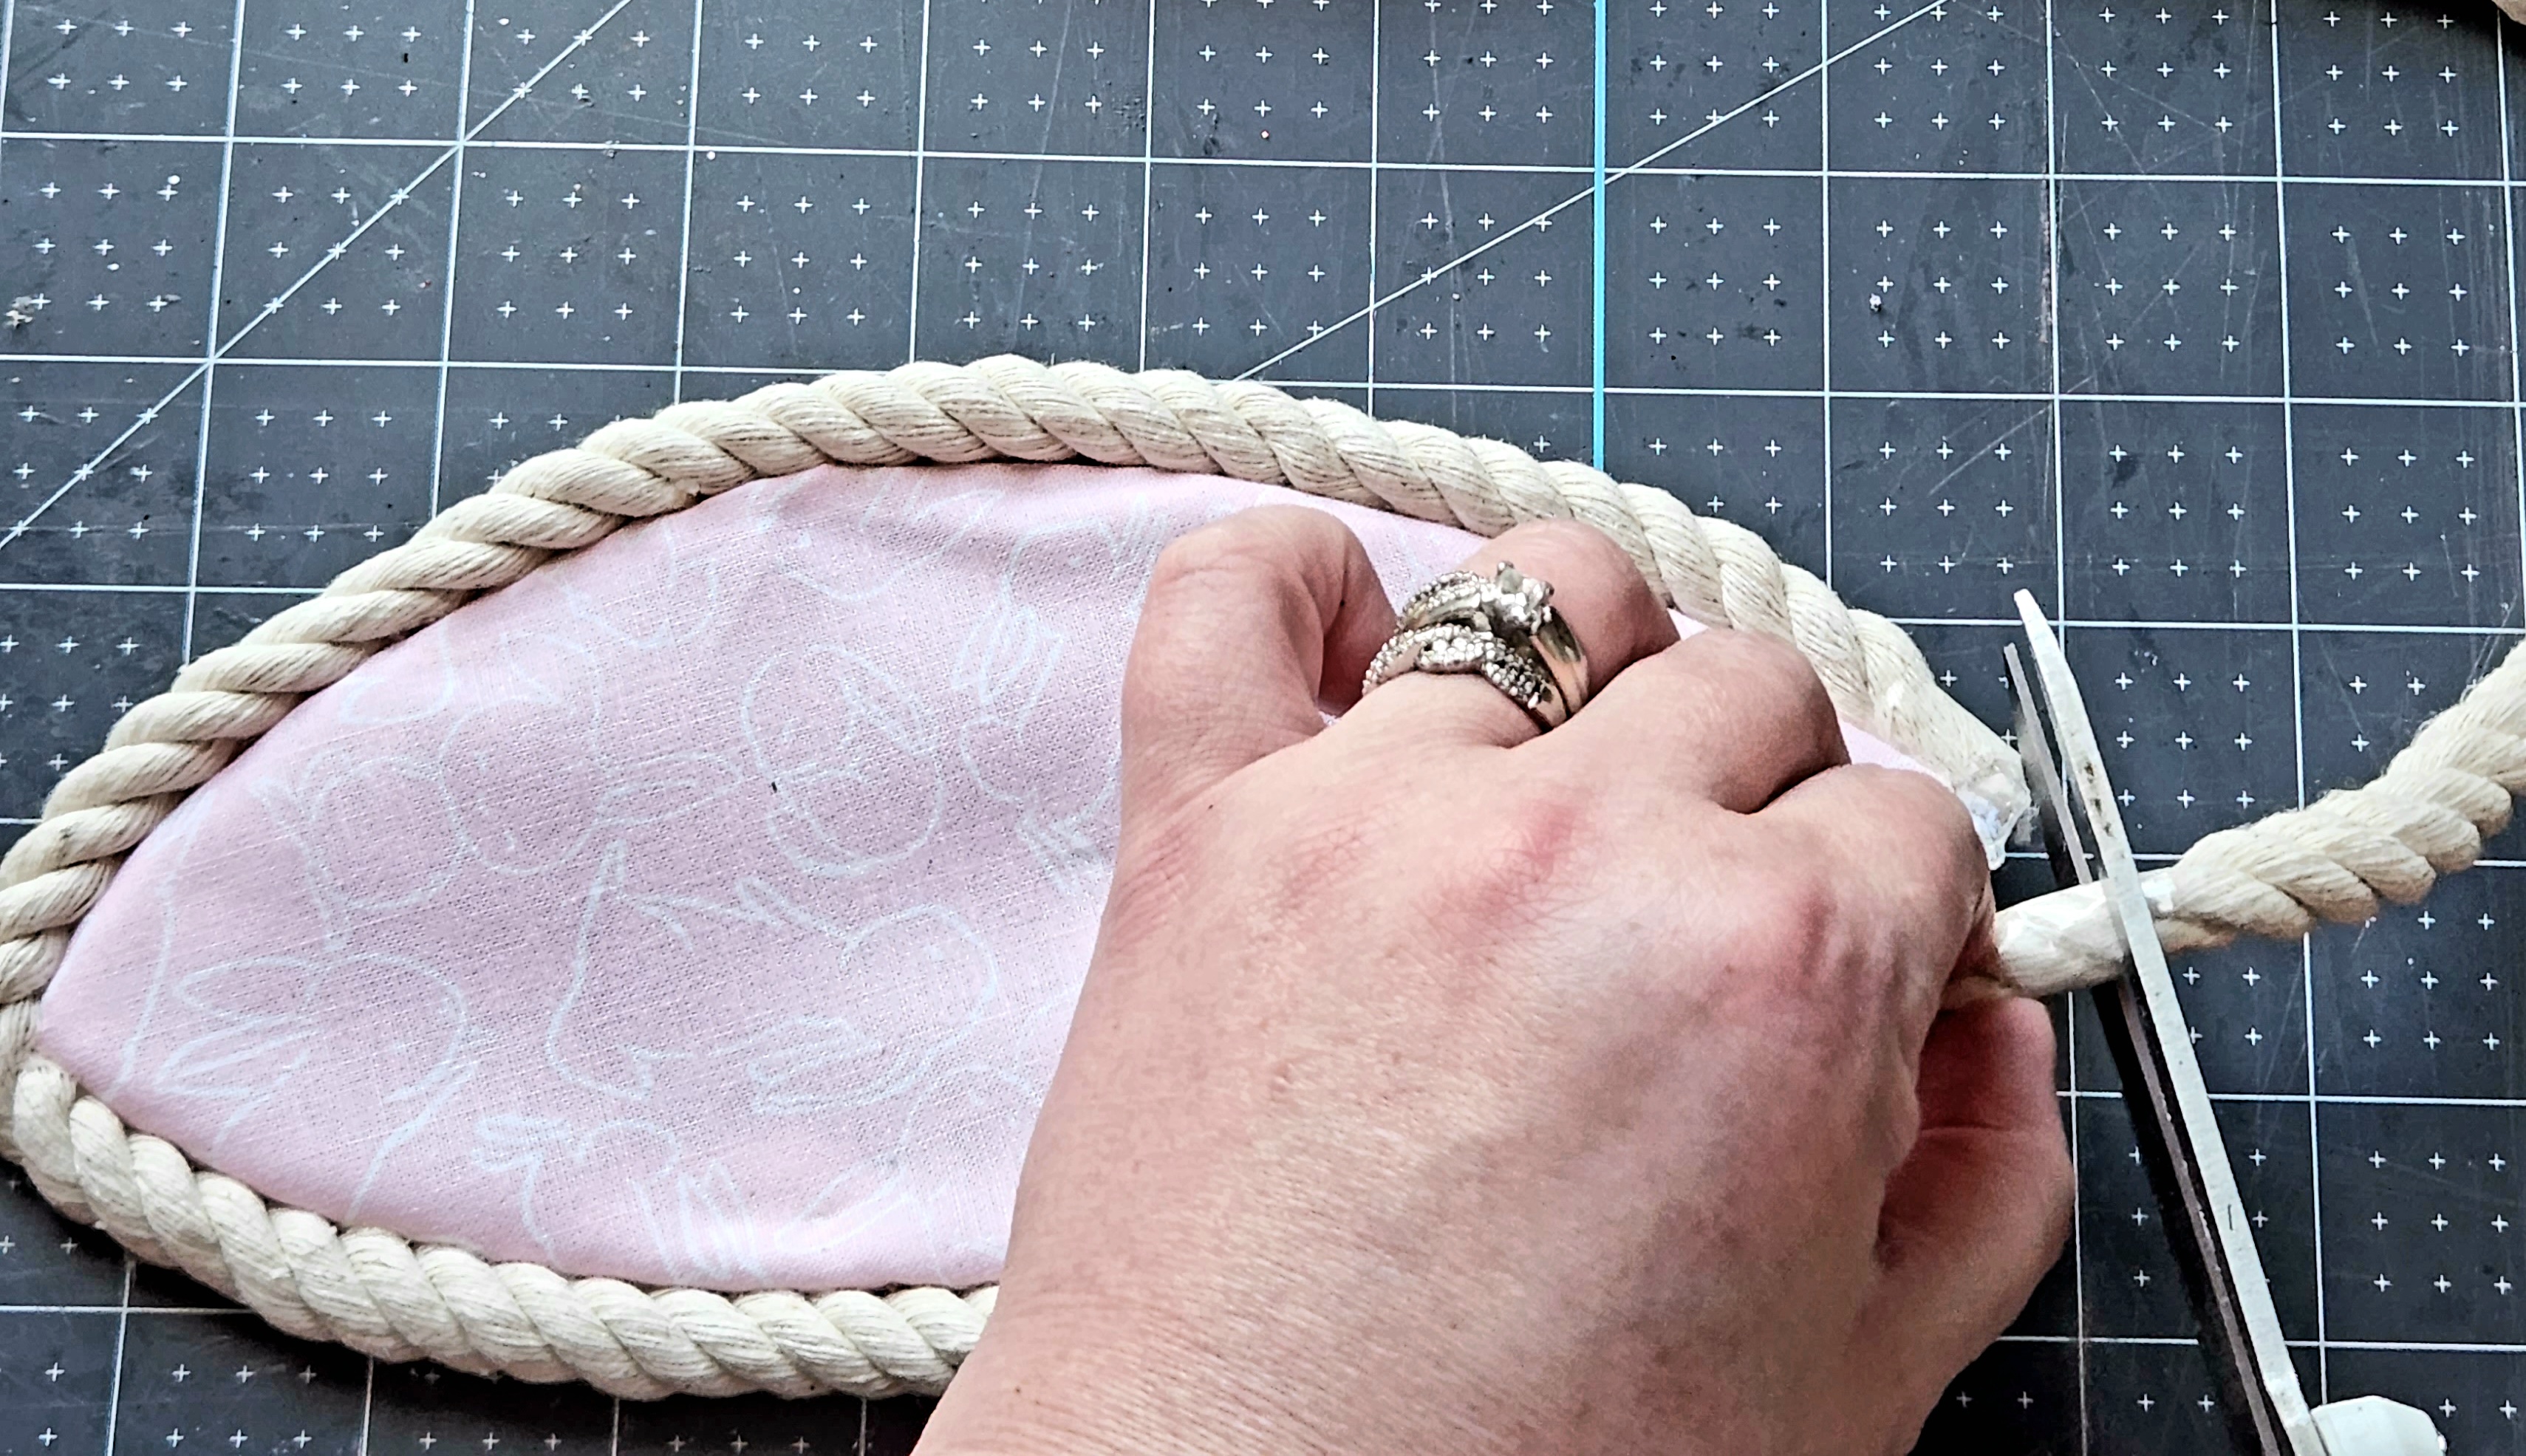
Attach the Bunny Ears to the Placemat
Now that both ears and made and covered, you can attach them to the rope placemat. I placed them evenly on either side of the spot where the rope ended. That way I could cover the uneven spot with a bow, but you can add them anywhere. I did trim a little more of the cardboard away from the edge on the back of the placemat. That allowed space for the ears, and they didn’t make it uneven.

Add hot glue to the end of one of the bunny’s ears.

Place the glued end to the top edge of the back of the rope placemat.

Repeat for the other ear, gluing it about 3.5″ from the other.


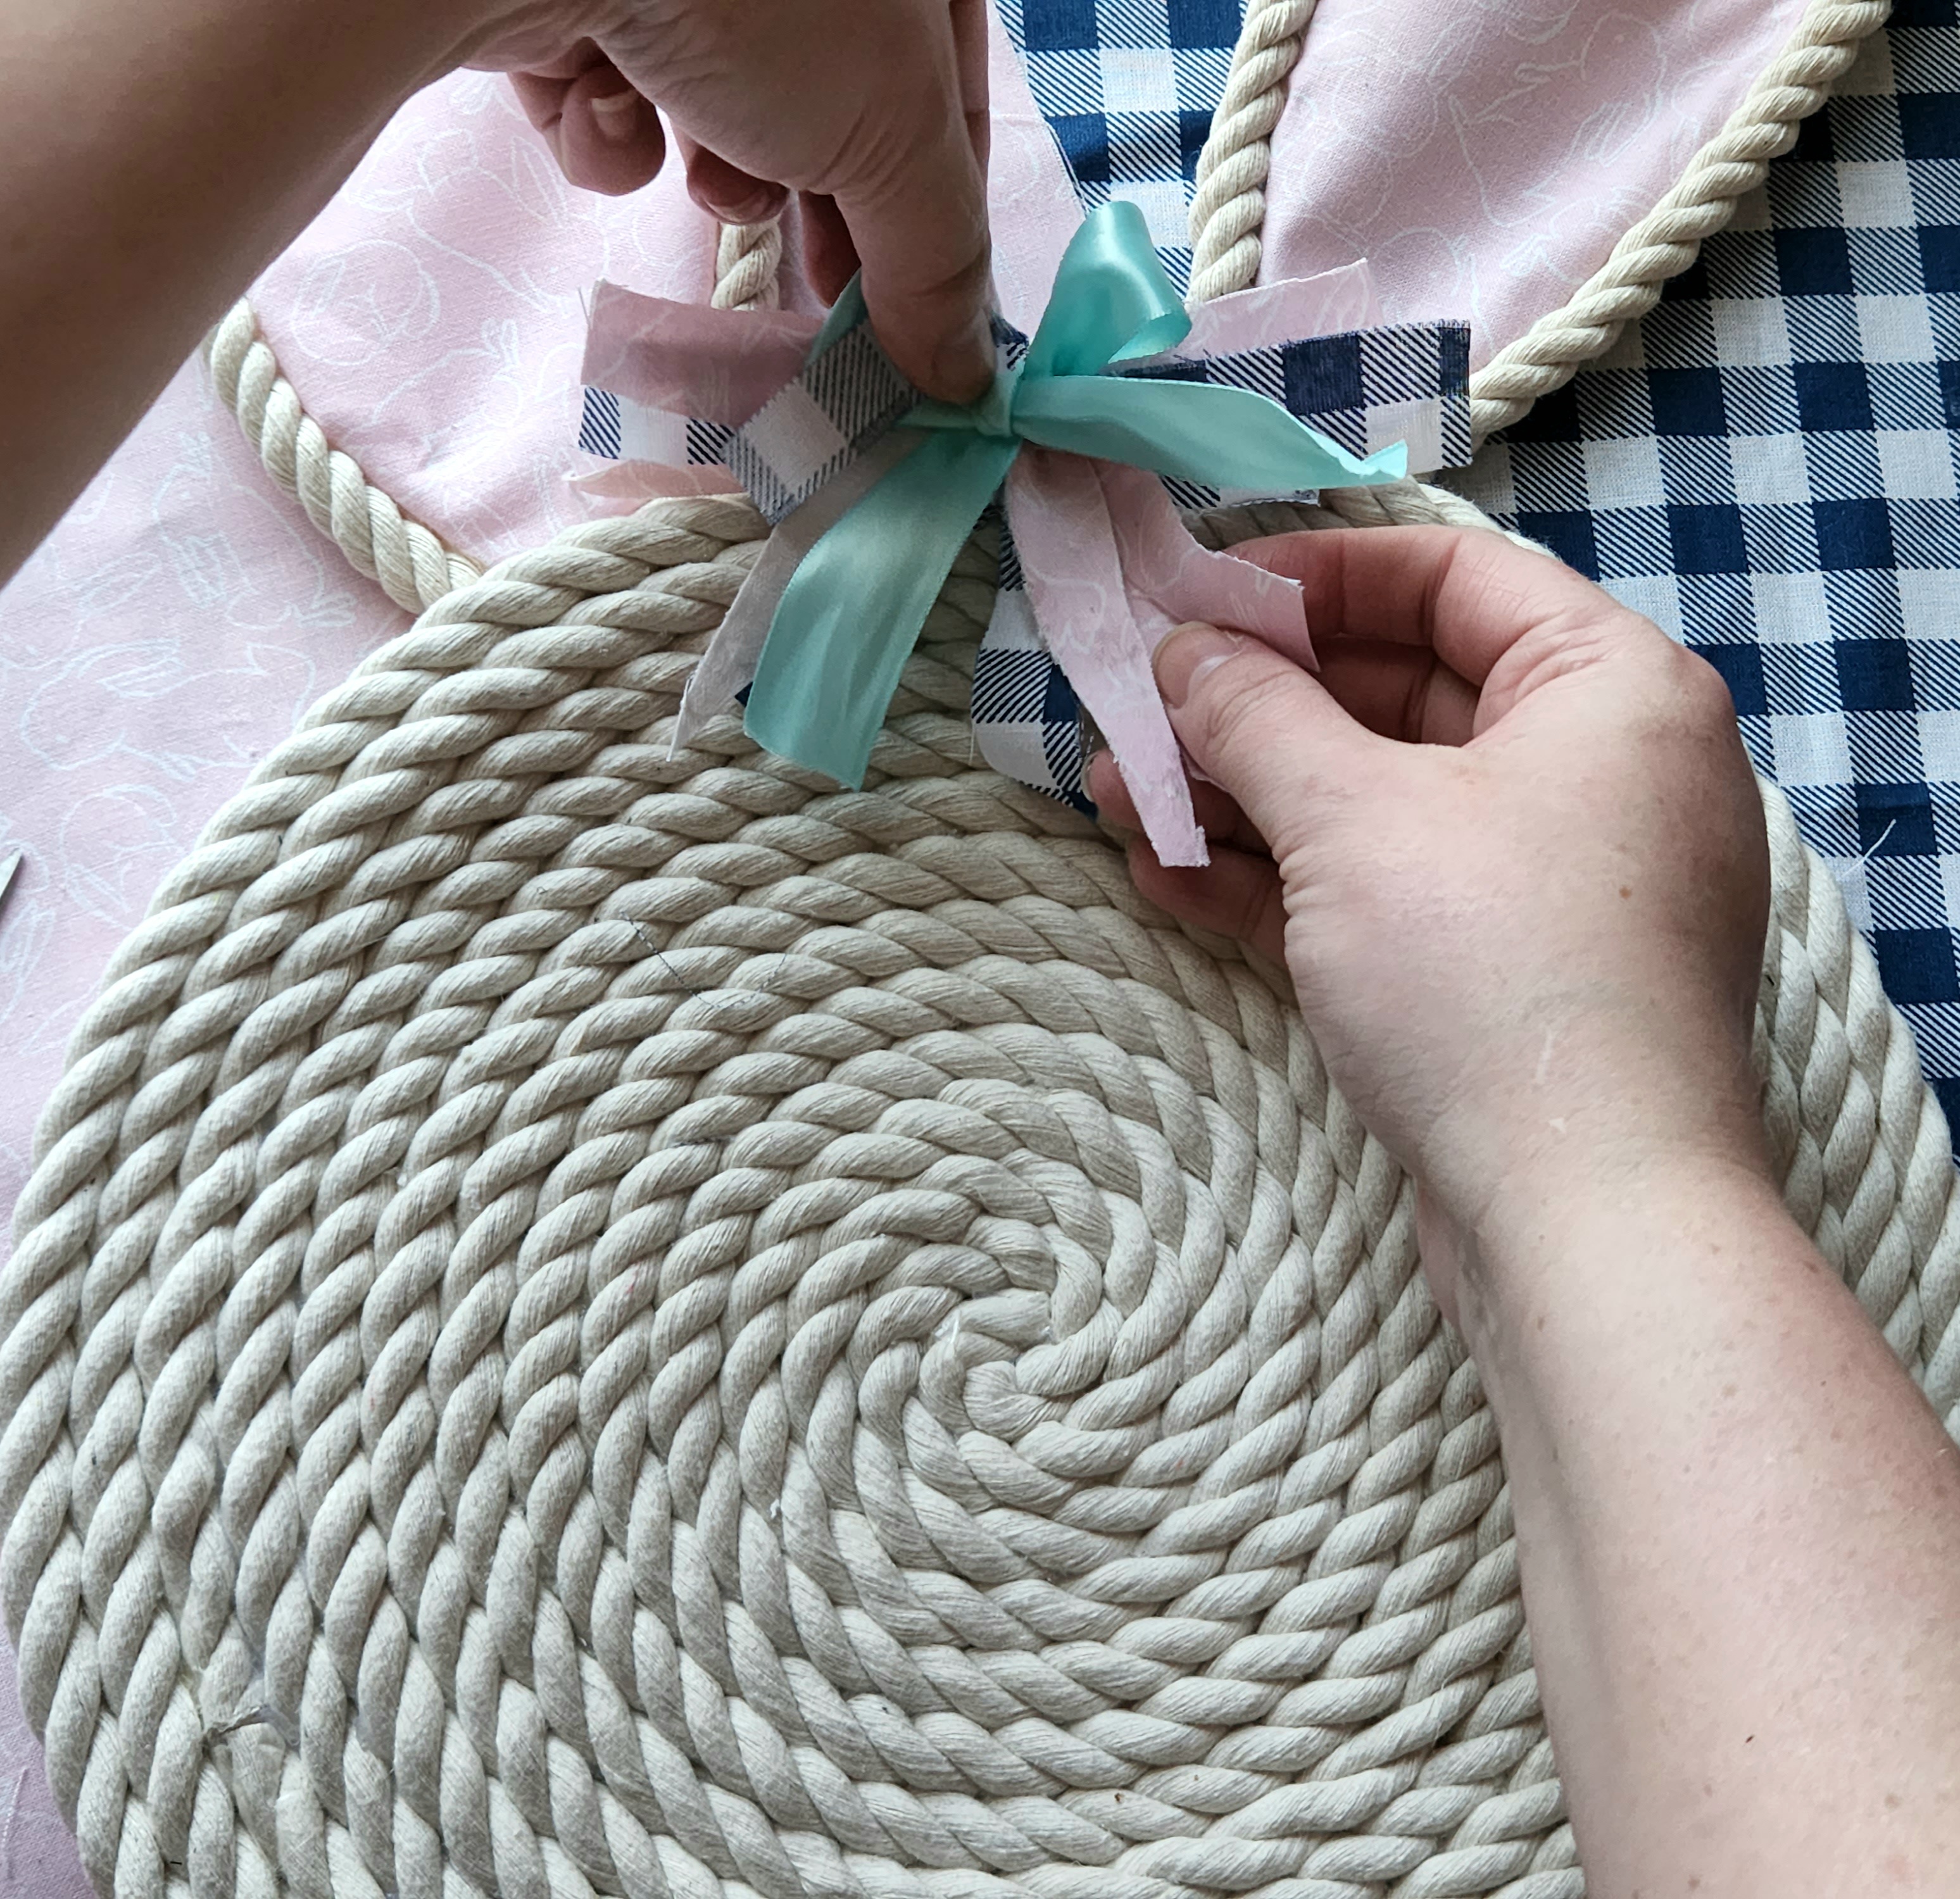
Make & Add a Bow
Just as I did for the bunny tray, I chose to make a messy rag bow with a small two loop bow on top. You can check out the tutorial for the tray to see the step-by-step explanation. It’s easy. You cut strips of fabric or ribbon and crisscross them over each other, then attach them with wire. The two-loop bow was made with 1/2″ ribbon and glued on top.


Place a bit of hot glue (I used a tiny amount in case I wanted to remove it) on the back. Then put it over the area where the end of the rope is on the placemat.
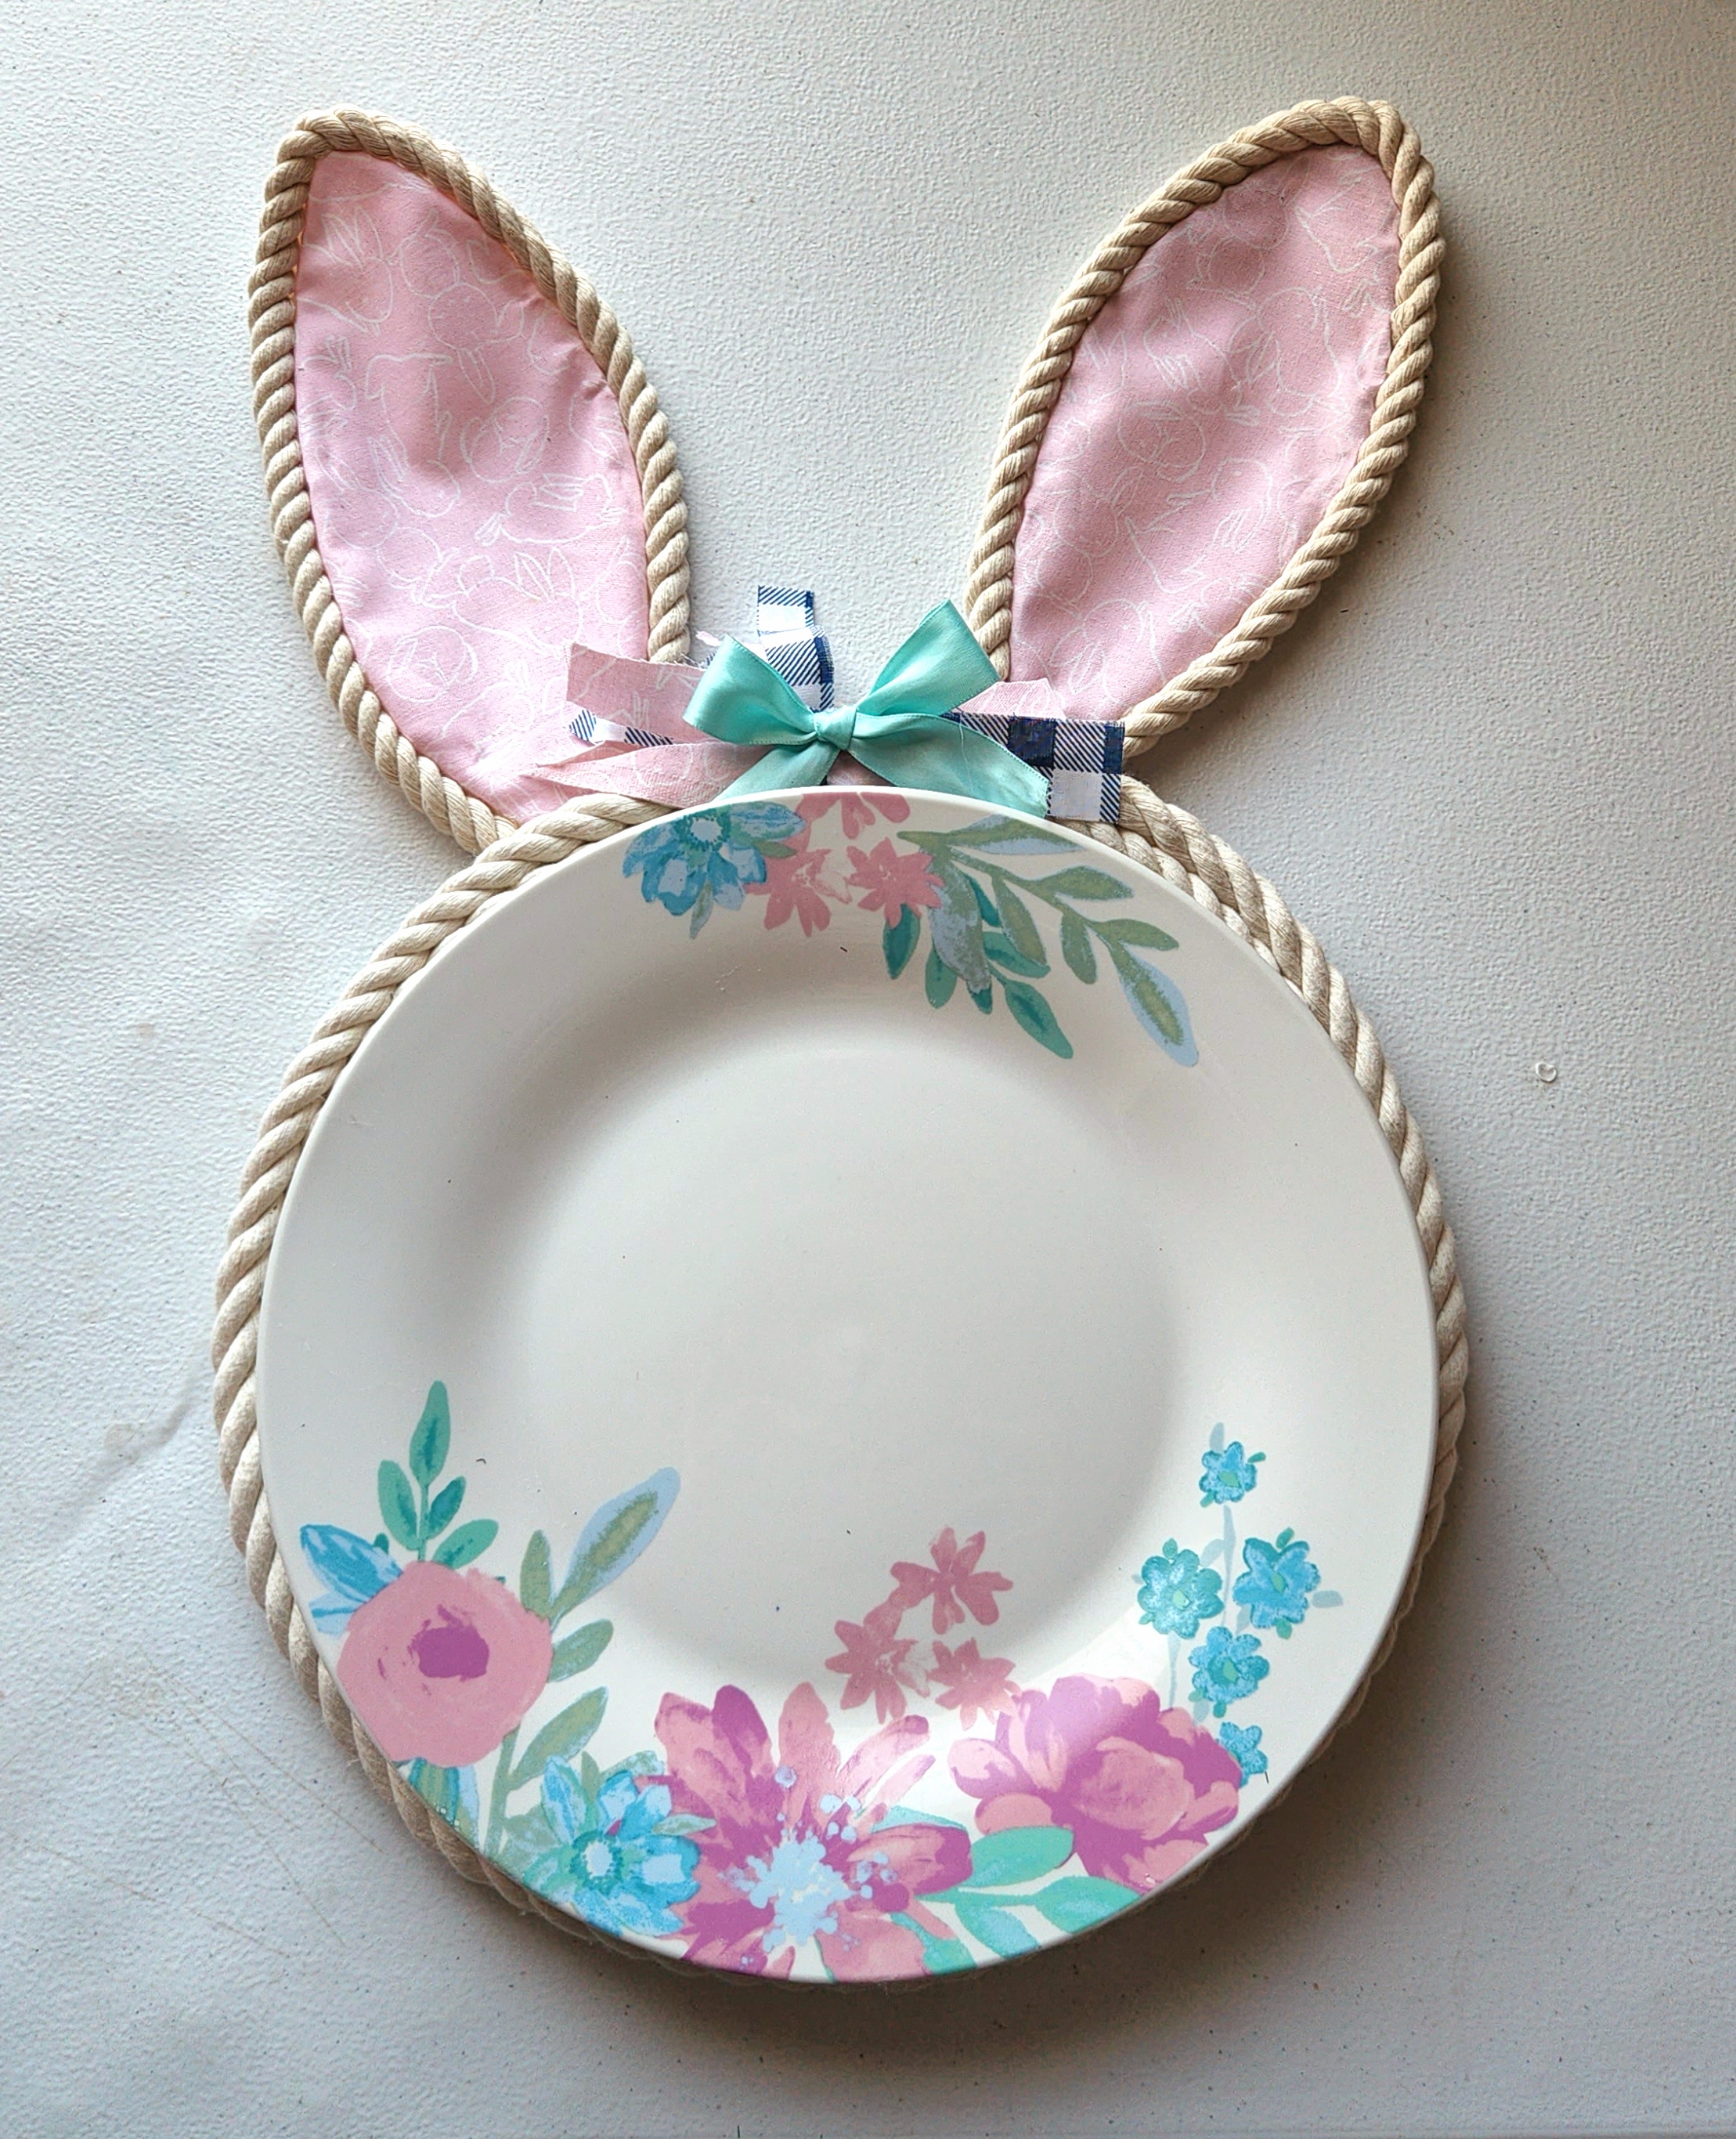
Your rope bunny placemat is ready to go!
That’s pretty easy, isn’t it? Now just make a few more, one for each place setting at your table. I will be setting a table for four. I’m just about finished with them all, but I’ve got a few ears to cover still. When I’m finished, I’ll be sharing the tablescape with another tutorial. You’ll definitely want to see that on Saturday! Here’s my placemat and a sneak peak of one of my plates.

I hope that you enjoyed this tutorial and that you make your own placemats! If you do, I’d love for you to tag me on social media. You can follow me using the buttons at the top or on the sidebar, and that’s also a great way to keep up with what’s going on here on the blog. Remember to pin or share this post so you can get back to it. The buttons to share are at the bottom of the post. Follow me on Pinterest for new ideas added weekly!
Stick around because there are lots of great ideas here on the blog! If you’re looking for something specific, you can use the search box in the sidebar. If not, you might enjoy these posts:


You are certainly all set for Easter with all your clever crafts, these placemats are my favorite, just adorable!! Happy Easter Niki!
Jenna
Thank you!
Such a super cute project! I love how those floral plates look sitting on top of the placemats! So festive! Hope you had a Happy Easter, Donna
Thank you! Happy Easter to you as well!