
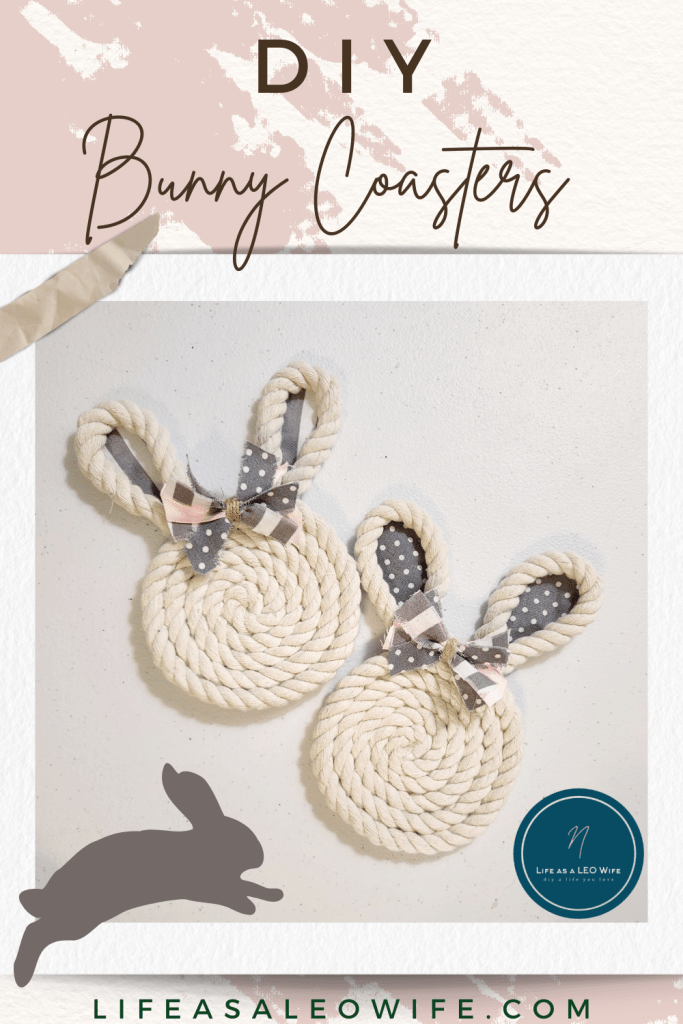
This year is flying by, and spring is already on the way! Can you believe that? That means it’s time to start making and collecting your new spring decor. I like to add a few new pieces each year, but with the state of today’s economy that can be difficult. Today I’m sharing farmhouse style bunny coasters that are functional and double as decorations for spring and Easter. You can even place them on tiered trays or sit them in vignettes. They are made with Dollar Tree rope and fabric. It only cost me $4 for a set of four! Let me show you how to make them.
Supplies for Bunny Coasters:
- white cotton rope– I’ve linked to 55 yards of macrame cord from Amazon that is perfect for the bunny coasters and trays. You could make a 4-piece coaster set, then have plenty left over to make my bunny placemats and this adorable bunny rope tray. I two packs of 11.1ft white cotton rope from Dollar Tree. You can make two (almost 3) bunny coasters with each pack of rope. You’ll have plenty left over from the first pack to make bunny ears for two more coasters as well. They also have thicker white rope that’s 6.4ft per package. Be sure to go over and pin the trays and placemats to make later. They make a cute set!
- fabric for the bunny ears- I used gray and white fabric from Walmart, but this is a great pack of pre-cut squares of fabric in multiple colors and patterns. On the bunny placemats and tray I used a pink fabric with white bunnies on it from Dollar Tree, but I couldn’t find it this year for the coasters. I love the gray fabric because it looks great with farmhouse decor.
- hot glue gun & glue
- transparent tape
- ribbon (optional)- I used pink 1/2″ ribbon.
- twine
Disclosure: I am a participant in the Amazon Services LLC Associates Program and the Dollar Tree Affiliate Program, affiliate programs that allow me to link to the products that you can use to make this project quickly and easily. If you purchase any of these products I may receive a very small commission at no cost to you! That commission helps me continue to bring these great decor DIYs, free printables, and all of the other goodies on this site to you. Thanks so much for your support!
Shop this post:


Make the base of the bunny coaster.
These bunny coasters are very easy to make. You can make one in about 20 minutes. After you’ve made one, the rest go a little bit faster because you know what you’re doing.
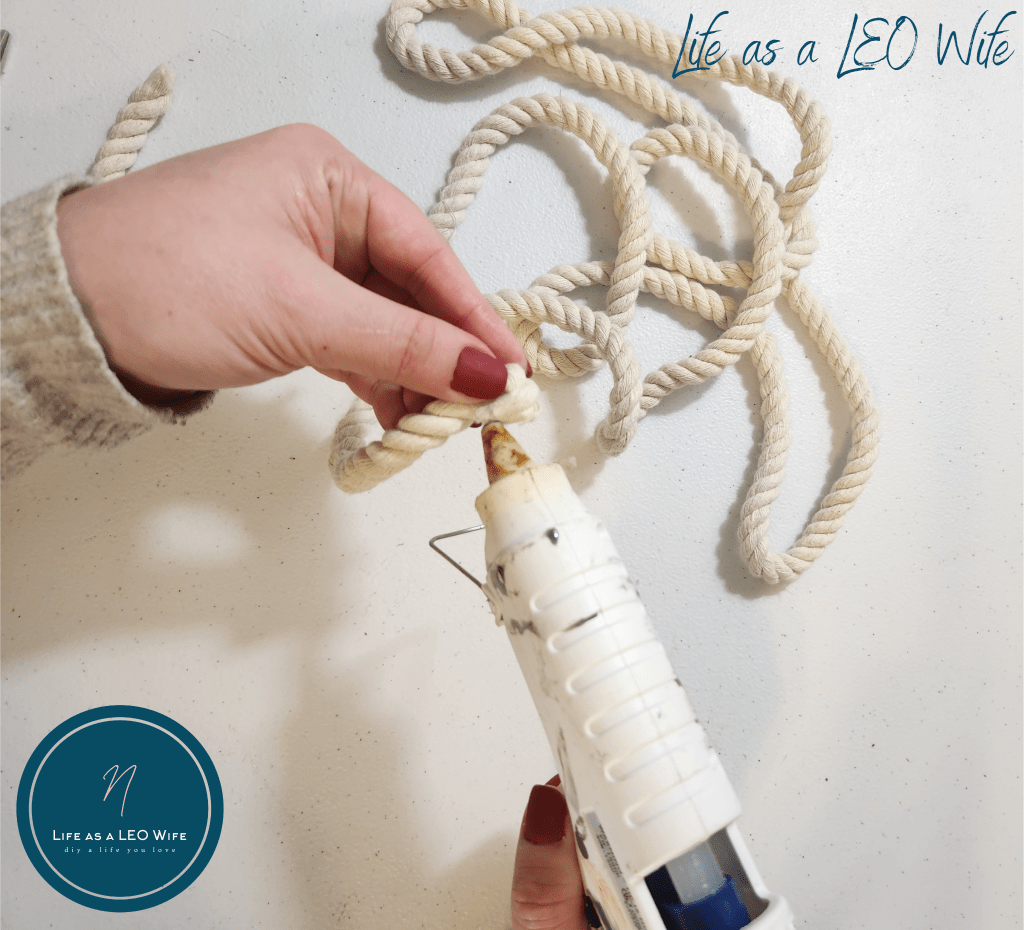
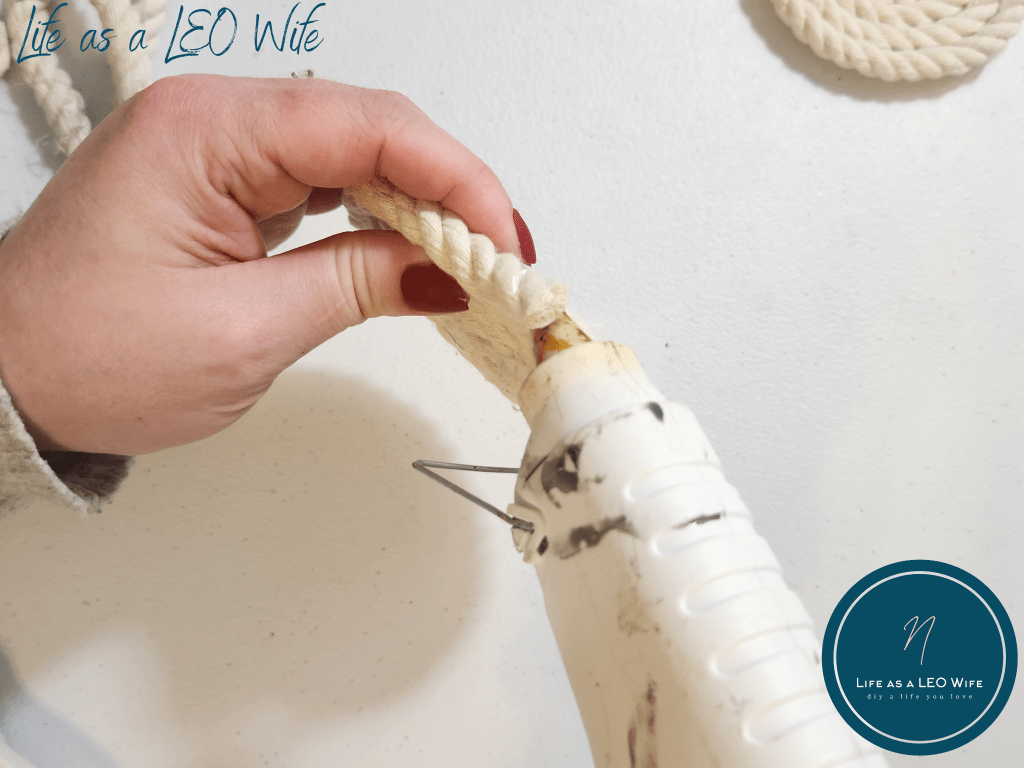
Add hot glue to the end of the white cotton rope.

Roll the rope in on itself, creating a flat ball. Squeeze more glue onto the outside of the rope and continue rolling the coaster into a ball.
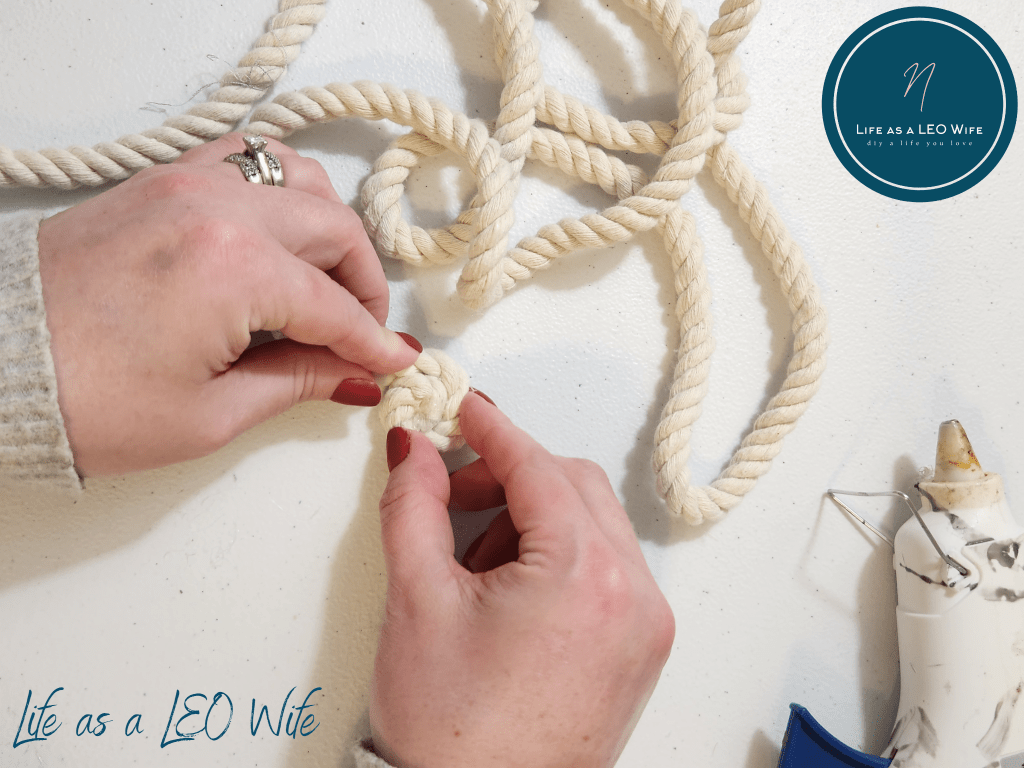
Continue gluing and rolling until your coaster is at least 4″ wide. That will be wide enough to hold a canned drink in a koozie and a large tumbler.

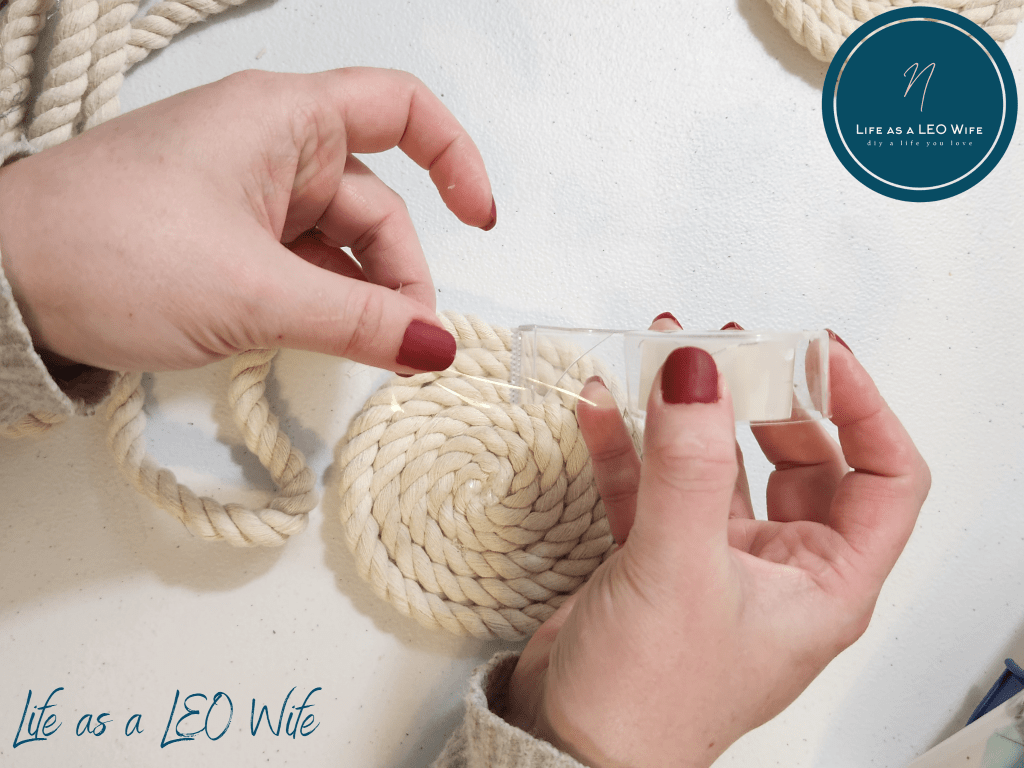
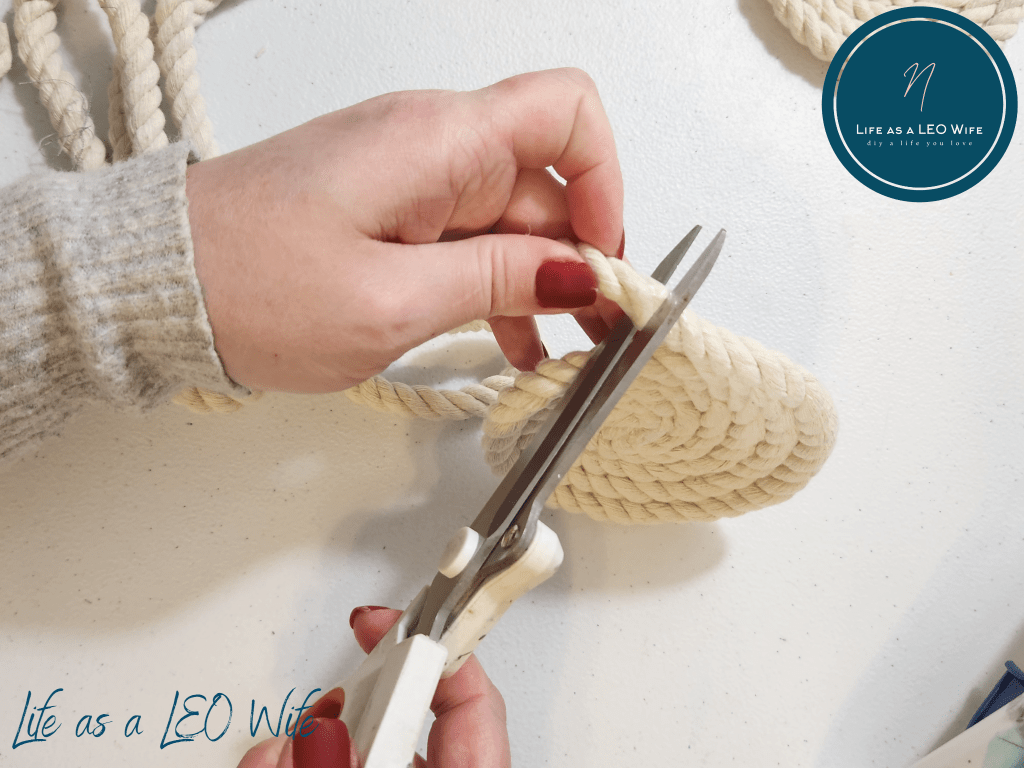
Add a piece of tape to the rope. This will keep it from unraveling when you cut it. Then cut the rope and glue it in place.

Make bunny ears.
Cut a piece of rope about 7.5″ long. You can hold the rope up to the coaster to make sure the ear will be as long as you’d like it before you cut the rope. Add tape to the end of the rope so it doesn’t unravel. Try to place as small a piece as you can so that you can glue the bunny ear as close to the edge of the coaster as you can. That can be done before or after you make the cut.

Use the piece of rope that you cut to cut another piece the same length. Tape both ends of this piece of rope as well.

Squeeze hot glue to the taped section at the end of one piece of rope, then place the other end on it, creating a looped ear shape.


Add glue to the back of the bunny ear, all around.

Place the bunny ear on a piece of fabric and press it down to make sure it’s adhered. Then cut the excess fabric from around the rope.


Repeat the process with the second piece of rope so that you end up with two ears to attach to the bunny coasters.
Attach the ears to the bunny coaster.
Squeeze hot glue to the end of one of the rope ears, on the taped sections, and place it on the back of the coaster, about 1/4″ from the end of the rope. Glue it as close to the edge of the coaster as possible so that it still sits flat for your drink.


Glue the second bunny ear to the back of the coaster, just under an inch from the first one. I didn’t get a picture of this step, but you can see it in the video tutorial if needed.
Make a fabric scrap bow.
For my bow I used strips of the gray and white striped and the polka dot fabrics as well as a 1/2″ pink ribbon. Cut two 2.5″ strips of each fabric and two pieces of the ribbon. You can use the ribbon as a guide to cut the width of the fabric.


Pull on strings on the fabric strips to create the distressed farmhouse look. If you find a string that runs horizontally, it will create the fray across that side of the fabric.

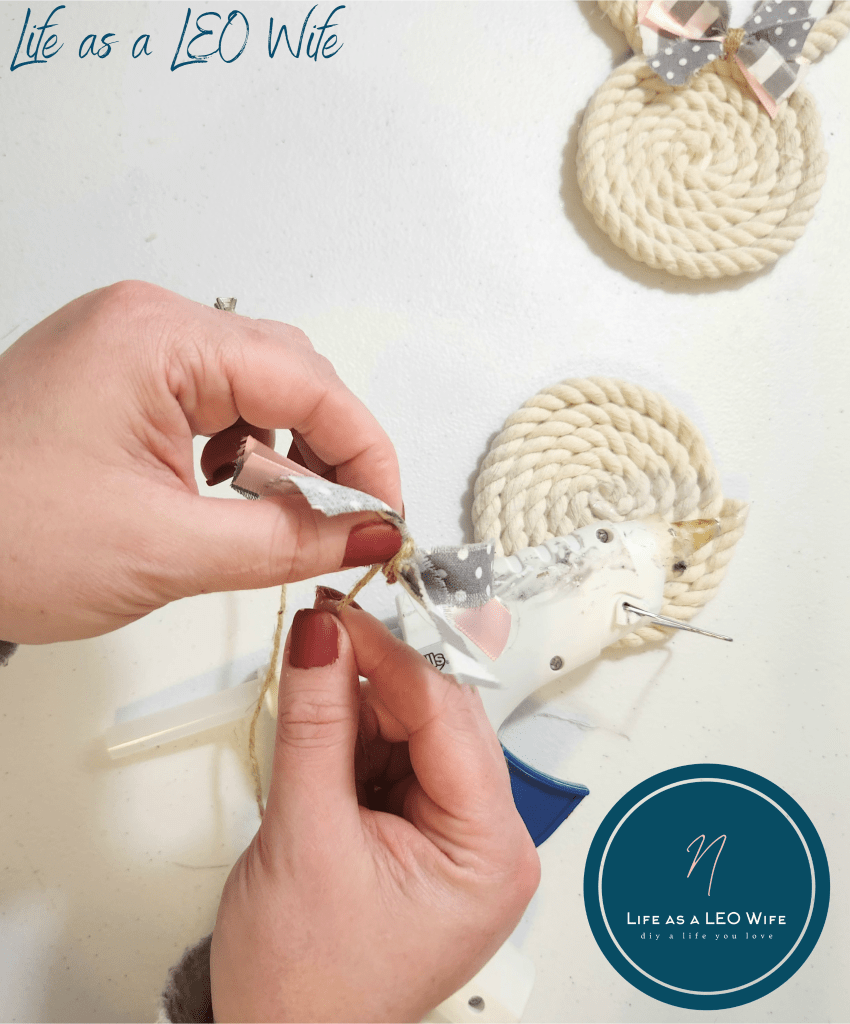
Crisscross the strips over each other. I placed them face-up so you could see how I laid the patterns out, but place yours face down on top of a piece of twine. That way you don’t have to try to carefully pick up the fabric and flip them over on the twine in a second step and accidentally mess them up.

Tie the twine tightly around the middle of the crisscrossed strips.

Next, I wrapped the twine around my bow a few more times to create a thicker look. I then hot glued the end of the twine in place on the back of the bow. This step is optional.
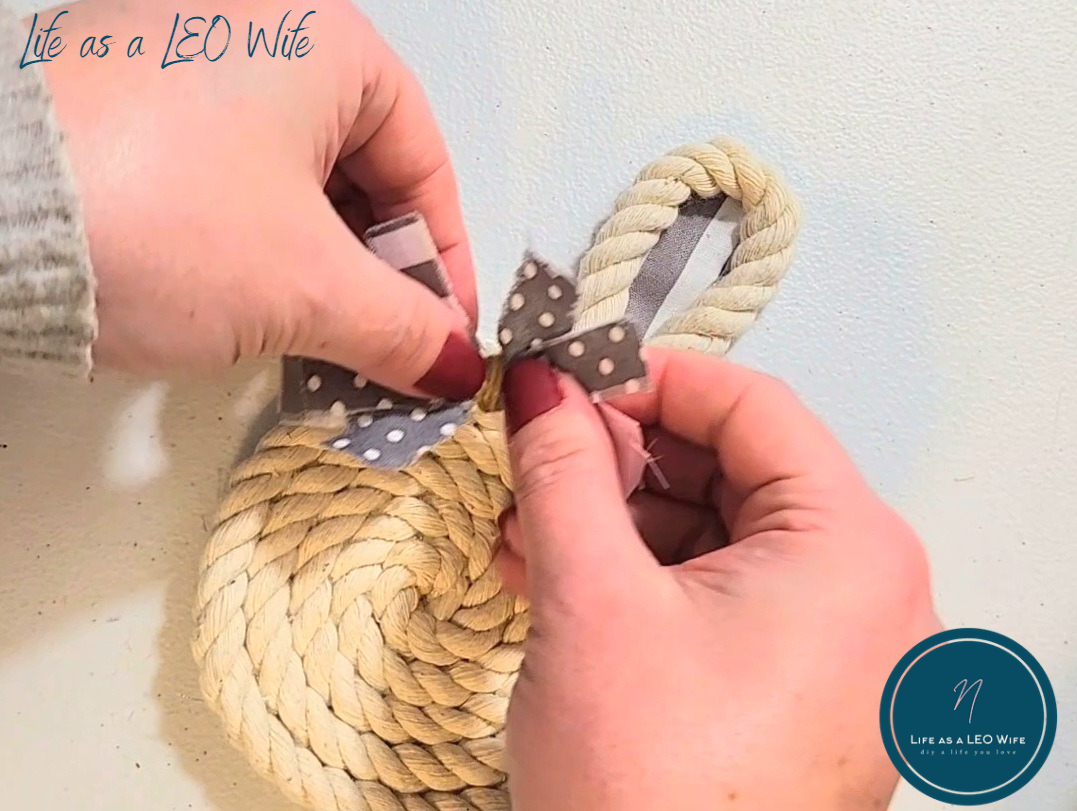
Finally, glue the bow to the top of the bunny coaster, between the ears. That will cover the part of the coasters that show the end of the rope.

That’s it! Your first of your bunny coasters is finished! Now repeat the process to make as many coasters as you’d like. I made a set of four since that’s the size of our family. I may make more if we plan a get together for more people, but at the moment we only need four. Whenever we’re not using them as coasters, I am sitting them out as decor: in vignettes, tiered trays, etc.
Video Tutorial for Bunny Coasters
Now just enjoy your set of bunny coasters and admire your handy work!
I think these are so cute, and I can’t wait to get the spring decor out of storage to match them up with the bunny rope tray. They will look so good together. I think I’ll place the coasters next to the tray in some sort of vignette. We’ll see what I can come up with a few weeks!

Here’s how it looks with a drink on it. I made sure that the ears were close to the edge so that the drink would sit flat.
Y’all, I have a coke addiction, as you can see from this picture. I didn’t even have to leave my craft room to get a drink for it! It’s terrible for me, I know! I’ve got to cut back on them. I asked my husband what he was going to give up for Lent. We’re not Catholic, but Protestant (Baptist) so we don’t really have to give up anything, but the Lord likes to know that we love Him and are willing to give up something in worship and dedication to Him. My husband said, “Nothing. We don’t have to give up anything… do we?” I told him no, but I was going to give up coke. He just laughed at me and said, “Yeah, right!” He’s right; I can’t do it completely! I’ve got to think of something else that I can fast from!

Remember to pin the image below or share this post with the buttons on the left side of the page so you can find it when you’re ready to start your project! Also, follow me on Pinterest for new ideas added weekly! Be sure that you never miss a great tutorial for decor like wreaths, signs and other home decor, free printables, crafts, and other fun posts! Enter your email address below to be notified of new posts! Use the buttons below to follow me on social media for other great content.
Don’t go yet! There’s more to see!
There’s plenty more to see here on the blog! If you’re looking for something specific, use the search box in the sidebar to look it up. If not, you might enjoy these ideas. Don’t have time to read them all now? That’s ok, just click over to the posts using the pictures and pin them for later. You can also add Life as a LEO Wife to your favorites and check back for new ideas and free printables and SVGs every Wednesday, as well as link parties with tons of shared ideas on Sundays!


These are so cute, and great tutorial! Thanks Niki!
Thank you!
beautiful! thank you for sharing the tutorial 🙂
Thank you!
I’m confused about the size of the rope for the ears. In the written instructions, it says to cut a 7.5″ piece of rope, however, in your video you said to cut the rope 4″.
Sorry! A 7.5″ piece will work better. I think I just repeated 4″ b/c that’s how wide the coaster was. It must’ve been stuck in my head!