Hello my friends! Welcome back to the blog, and if you’re a new reader, I’m so glad you found me. As you may know, we are buying a new house. We were supposed to close and move in April 29, but the renovators ran behind schedule, pushing our closing until this Friday. SOOO, we are living out of boxes which makes creating and blogging incredibly hard. I did manage to come up with a beautiful farmhouse hand crocheted chunky yarn wreath that I’m in love with! Today I’m going to share the tutorial for creating one of your own. This is a gorgeous wreath that you can change up a bit to use year-round. As I packed up our home, I realized how important using the same wreaths all year is, because I’m going to have to carry about 30 to our new home!

If you’re looking for a tutorial on how to make a braided chunky yarn wreath, here you go!
The end of the school year is here, so that means it’s time to let your child’s teacher know how thankful you are for her helping your child grow this year. This post shares a free printable gift tag stating just that along with a tutorial for aging a galvanized flowerpot from Dollar Tree and a large paper flower. Pop in a packet of flower seeds and you have the perfect thank you for a job well done! Another option is this monogrammed door hanger or a free printable gift tag for soap (you have to take a look at its adorableness!). Coming up on Tuesday, I have another cute gift idea for summer along with a free printable gift tag, so make sure you follow me on social media or via email (all buttons in the sidebar).
Hand Crocheted Chunky Yarn Wreath Supplies:
- chunky yarn- I used an incredibly affordable cream skein ($6.88) from Walmart made by Mainstays.
- wire wreath form- I used a 14″ form from Dollar Tree.
- ribbon for a bow- I used a 2.5″ wired ribbon from Michael’s.
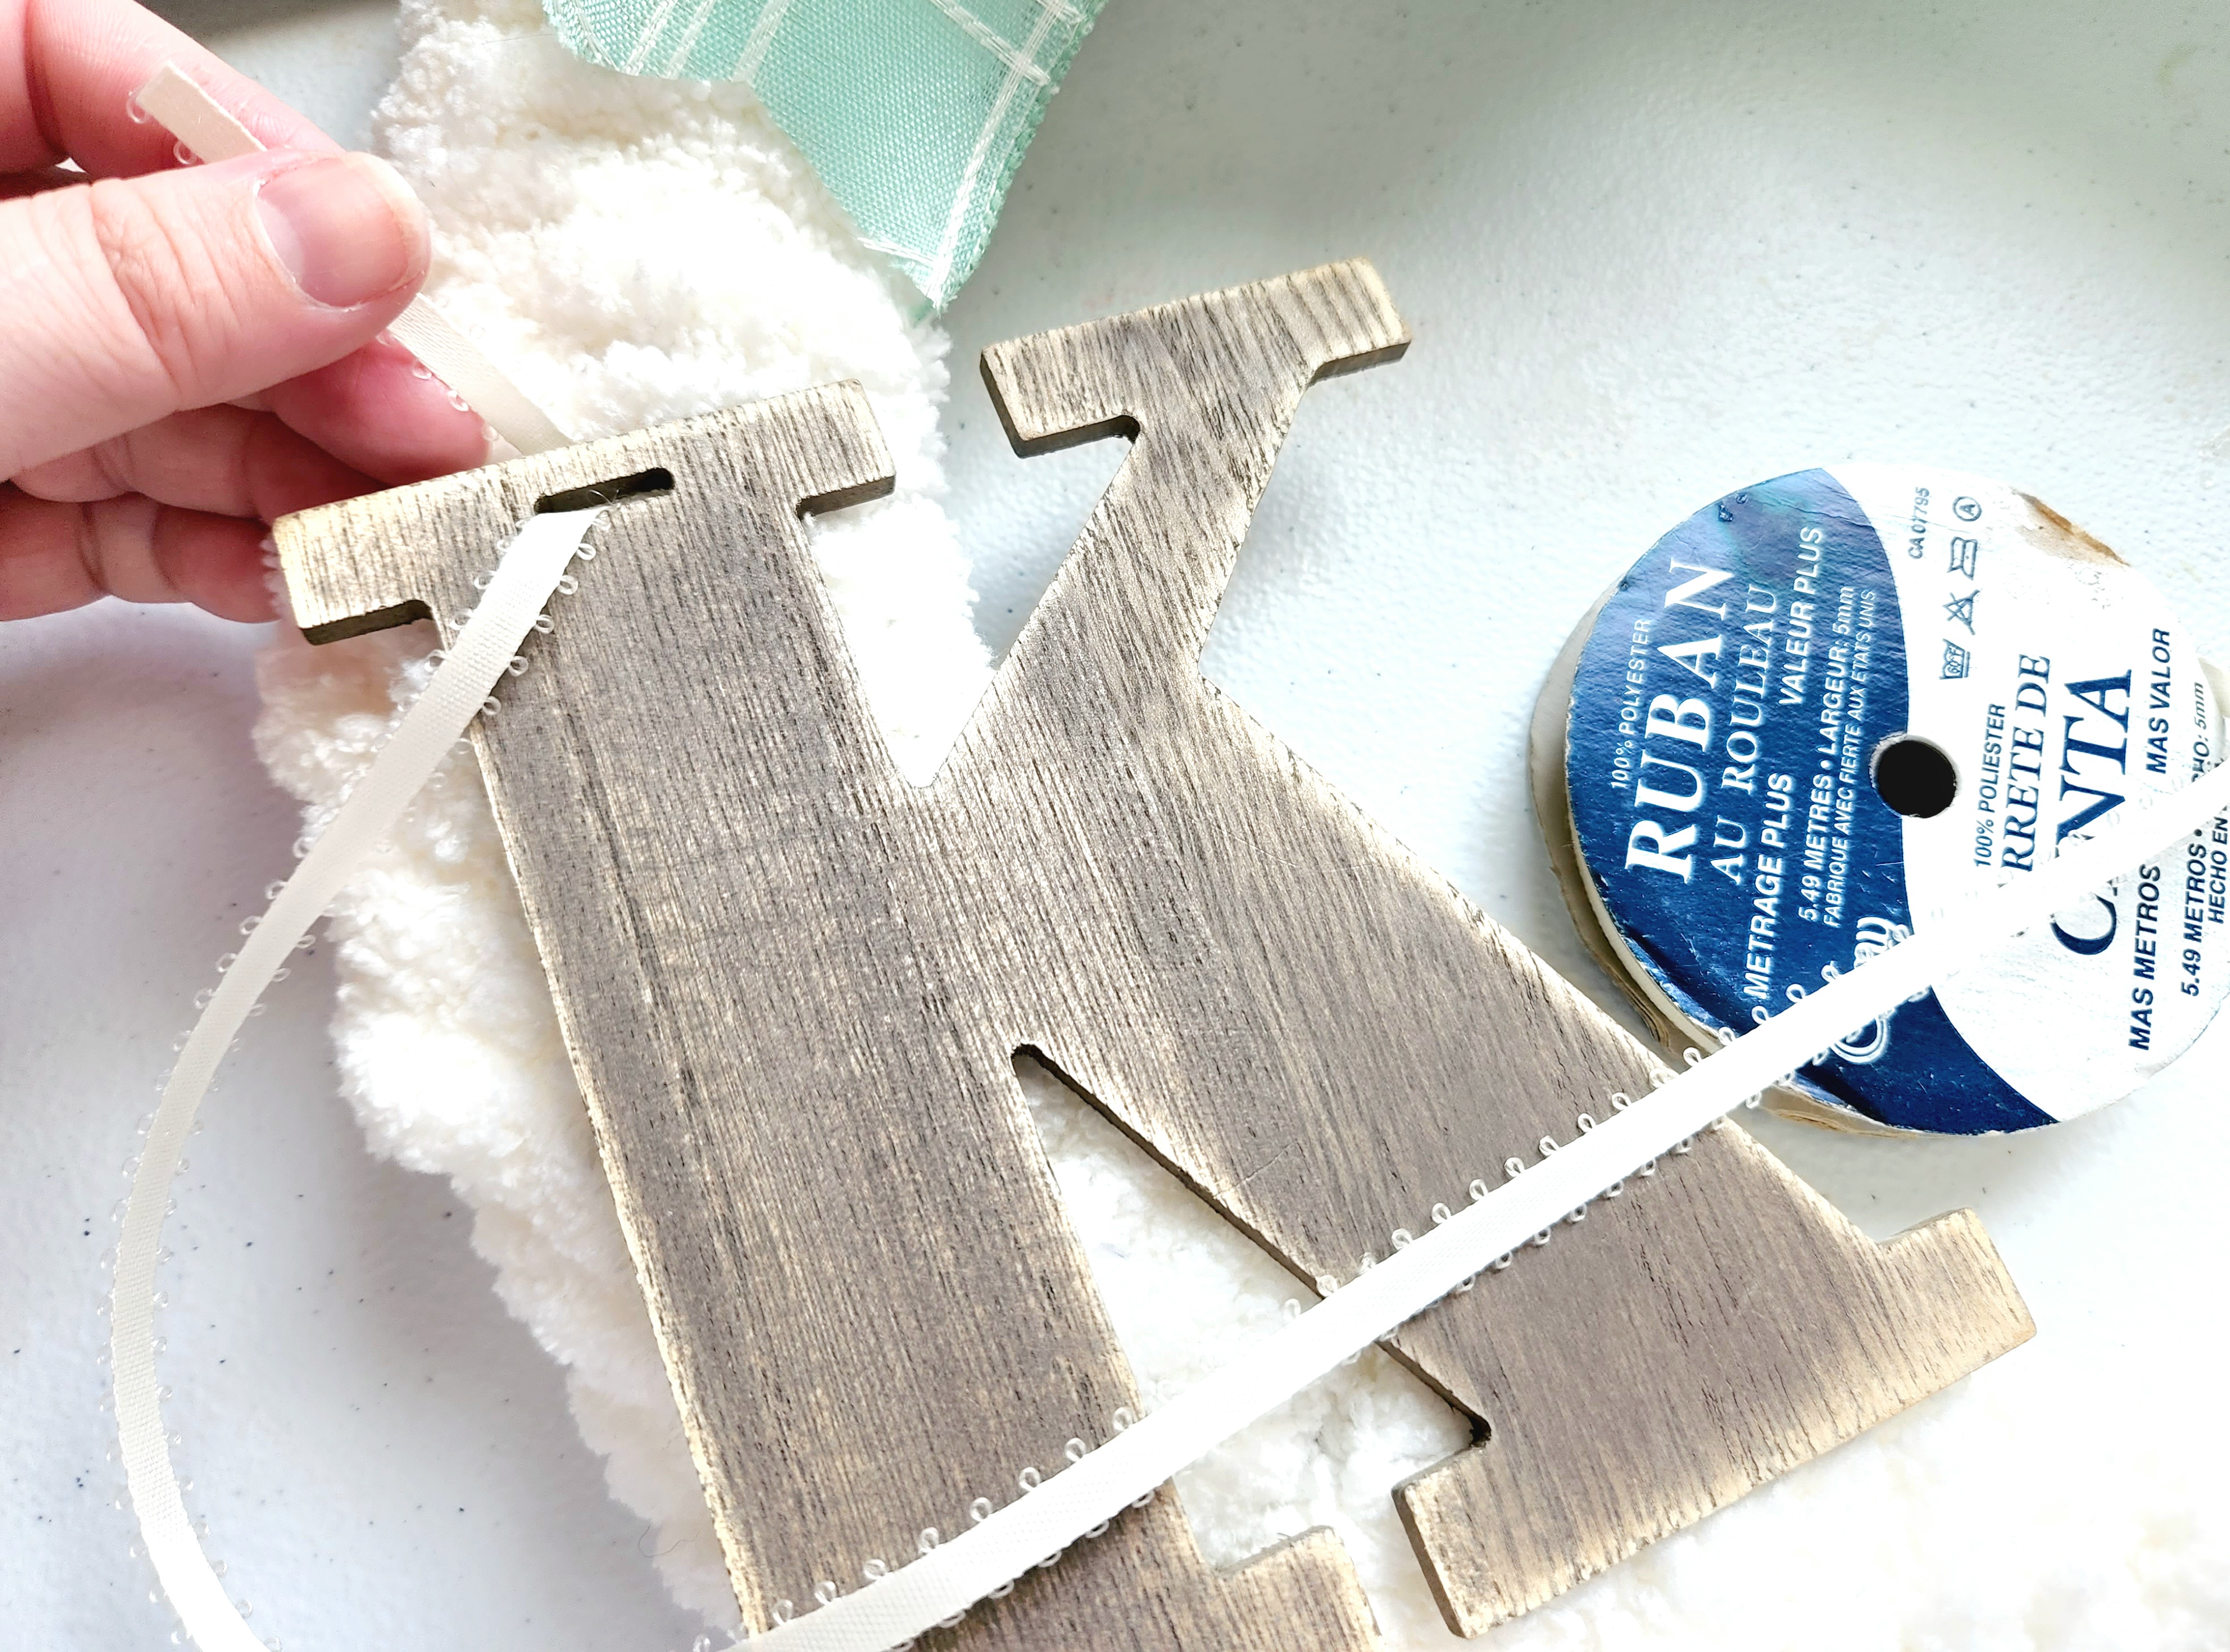
- wood initial- I found mine in the Target Dollar Spot during Christmas a few years ago, but any will work. You’ll want one at least 4.5″. Mine is 5″ tall.
- twine or thin ribbon to hang the initial- I used 1/4″ cream satin.
- pipe cleaners or floral wire

Begin Crocheting on the Wreath Form

This hand crocheted chunky yarn wreath is so easy! First place the end of the yarn on the back of the wreath form, right behind the outer ring. Wrap it from the back and up around the front. I didn’t have an issue with holding the yarn in place until I began the chain, but if you do, you can add some hot glue to the back of the wreath form to glue it in place. Another option is to tie it around the second wire on the back, but that may be a little harder to hide.

Bring the yarn up higher than the outer wire, making a hole about as wide as your finger.

Hold that hole that you just created above the outer wire with your finger, then wrap the yarn around the form again. When you get back to the hold where your finger is, push a bit of yarn through, creating another hole or “ring.” This is called a single chain when crocheting.

Here is a video of how to start hand crocheting on the wreath form. Forgive the slowness & me bumping the camera as I was trying to work with my arms wrapped around the tripod and camera. I was also figuring it out as I went lol!

If you like the look of this wreath, I think that you will love this hand-woven rope wreath, this round door hanger (with several free SVGs and printables to use on the wreath or other decor), and this DIY bike wheel wreath. Be sure to head over to those posts and pin them so that you can find them when you’re ready to make your next wreath. There’s no reason to spend hundreds on wreaths when you can make them on your own for less than a quarter of the price. Saving money is so important right now for most of us! Now- back to the tutorial.
Continue Wrapping & Crocheting
Now that you have your chaining started, it’s pretty easy going from here. Wrap the yarn from the ring around the front of the wreath form, through the middle, and up the back to the ring. Create another single chain by pulling another ring of yarn through the current one just like you did in the previous step.


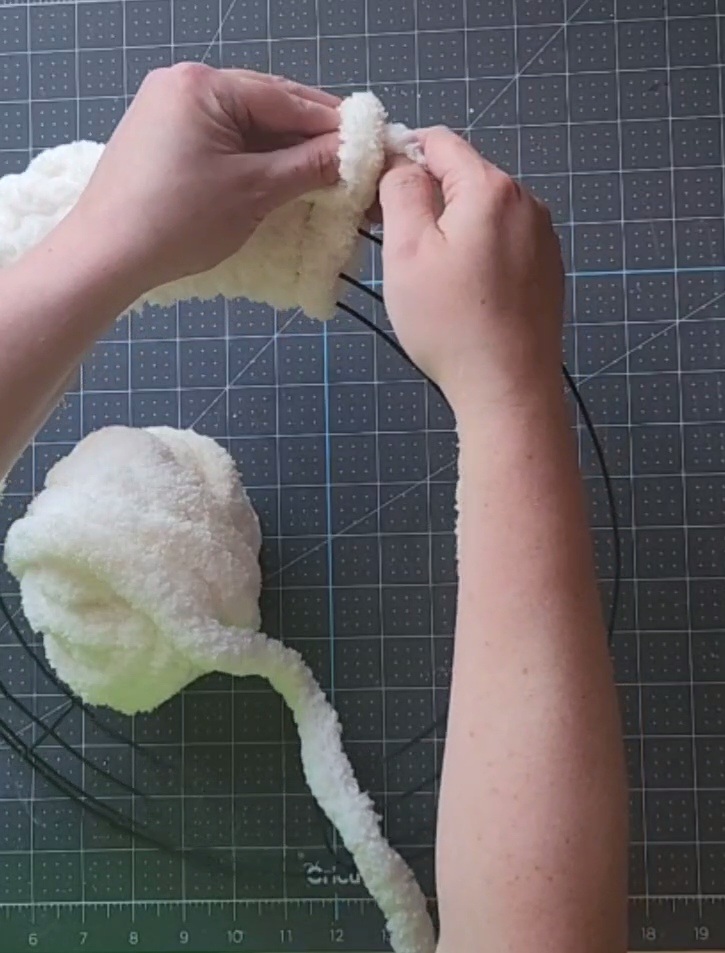
When I first began my wreath, I was alternating between wrapping the yarn around the front, up the back, and through the chain, then down the back and up the front on the next round. After a while I ended up removing the yarn and only wrapping the yarn around the front and up the back then doing a single chain above the outer ring. I did this because I could see a very slight difference in the look of the chain. You can alternate or only wrap the yarn in one direction. This is up to you. In this video, I was alternating.
Continue wrapping the wreath form and single chaining the chunky yarn around the outer ring of the form. In this video I was wrapping the yarn in only one direction, down the front and around the back.
Keep wrapping and chaining until your entire wreath form is covered in chunky yarn.
Complete the Hand Crocheted Section of the Chunk Yarn Wreath
Once the wreath is completely covered, create one last chain. Cut the yarn about 2-3″ away from the chain, then pull the yarn all the way through the “ring” created by the chain, tightening it down to the form.


Tuck the excess yarn into the back of the wreath. You can weave it between the front and back sections on the form.

Turn the wreath over, fluff the yarn, and cover any parts of the wreath form that are showing.

This is what your wreath will look like before adding any embellishments. Please forgive the lighting as the sun had set on me. Aghhh!

Embellish the Wreath
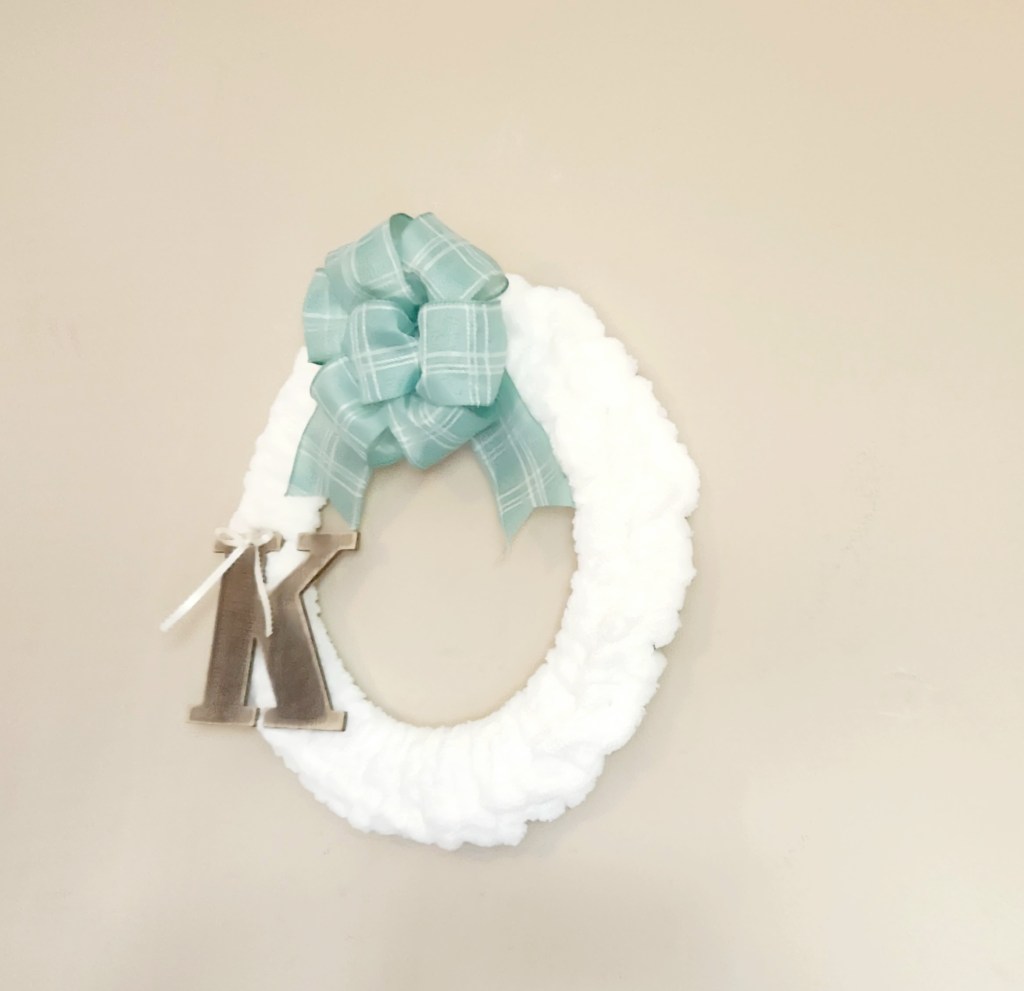
Add a Bow
To complete your perfect farmhouse chunky yarn wreath, you’ll need a beautiful bow. I created a seven loop bow with this easy bow tutorial. If you have a hard time holding on to lots of loops on one long piece of ribbon, check out this super easy bow tutorial. In it I show you how you can create a loopy bow with separate pieces of ribbon. It’s so easy that my husband and ten-year-old son can do it! Be sure to go to those posts and pin or share them so that you can get back to them when you need to make a beautiful bow. Secure your ribbon in the center with a full or half of a pipe cleaner or 4-5″ piece of floral wire.

Place the bow at the top of the wreath by pushing each side of the pipe cleaner through the yarn. I placed one side through the middle of the form, skipped two rows of yarn, then passed the other end through the middle again. Twist the wire closed around the two rows of yarn in the back. By using a pipe cleaner to attach the bow, you’re able to change it out and use it year-round. It’s like having a beautiful new wreath for every season, but you’re saving hundreds of dollars by updating the same wreath!

Add an Initial
Finally, add your initial. The one that I used on my wreath is perfect for farmhouse decor. It’s about 5″ tall, and I found it a few years ago in the Target Dollar Spot for $1 (I think). It had a black and gold ribbon hanger, so that needed to go. I remove it and passed a 1/4″ cream-colored ribbon through the oblong slot cut in the letter for the hanger. Since the hole was on the left, I placed the letter toward the bottom left corner. Slide the yarn away from the center a little and wrap the ribbon around the wire of the form and tie it on at about the 9 o’clock position.


If you don’t have an initial with a hole to put a ribbon through to hang it, you can hot glue a pipe cleaner or wire to the back, then attach it like you did the bow. You can see how I did this with a wood mason jar on my burlap carrot wreath.

Your hand crocheted chunky yarn wreath is ready to hang!
That’s it. Your wreath is complete. Wasn’t that easy? This wreath will take you about an hour or two to finish. That makes it cute, easy, fast, and so affordable. That’s why I have dubbed this the perfect farmhouse wreath! Here is my beautiful wreath:

I hope that you enjoyed this tutorial and you’re able to make a beautiful wreath with it! You always put adorable spins on my projects that I love to see. If you make your own wreath, I would love for you to tag me in a photo on social media! You can use the buttons in the sidebar or below to follow me. That will also allow you to see new projects, link parties, and free printables when I add them. Remember to share this post using the buttons at the bottom of the pager and pin the image below so that you can get back to it when you’re ready to make your wreath!

If you want to make sure you never miss a new post, enter your email address below. You’ll get an email when I add a new idea, so they never get lost in your social media feed!
Follow me on Pinterest for new ideas added weekly!
There’s More!
There are many more great ideas here on the blog, so I hope you’ll stick around and check them out. If you’re looking for something specific, you can use the search box in the sidebar. If not, you might like the ideas below (The great things about many of these posts is that they can be made with items from Dollar Tree or with items you already have at home!):


Beautiful decorated. Very nice idea 👍.
Thank you!
Love it – thanks for sharing with us! I’ll be featuring you this week when the next to Grandma’s house we go link party starts.
Thanks Tarah!
This is lovely, that fluffy yarn is divine!
Thank you! And the yarn was so inexpensive!