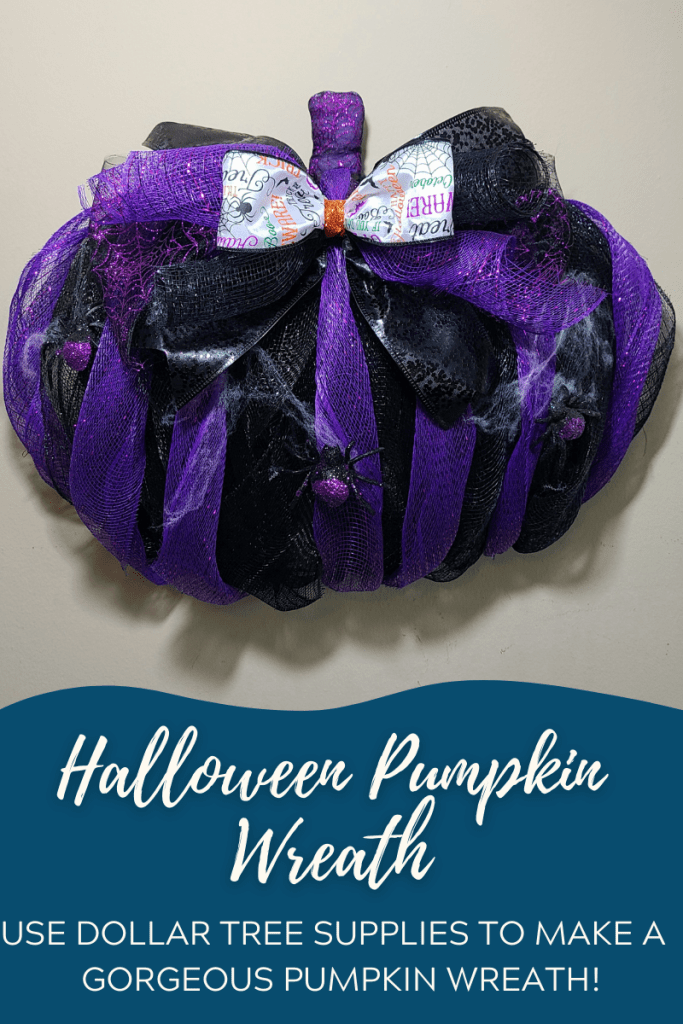
There are less than ten days until October! It’s time to get all of your Halloween decor made and ready to put out in your home. Over the past week or two I’ve made a few more pieces to add to my collection. Two of those pieces are a spiral deco mesh black and purple witch hat wreath and a matching pumpkin wreath. I’ve seen splatter screen pumpkins for years, but most of them are for fall and Thanksgiving. So this week I decided to make one with Dollar Tree screens and a black table runner. Here is the tutorial for a Halloween splatter screen pumpkin.

To make a Halloween splatter screen pumpkin you need (from Dollar Tree unless noted*):
- 3 splatter screens- I used 3 without handles, but if I had to by them again I’d get two with handles, one without.
- 2.5″ wired ribbon- I used 2 to make a bow. One from DT, one from Michael’s that I’ve had for years. You can just use one if you’d like.
- black fabric table runner
- faux flowers- I used two purple and one black.
- faux stems or greenery- I used gold, purple, and black.
- scissors
- hot glue gun & glue
- gold paint* & paint brush (optional)
- zip tie or pipe cleaner
- popsicle sticks or other item for stem (if you have handle-less screens)
- thin rope* or twine

Cut the Fabric
The table runners from Dollar Tree are sewed into triangles on each end. They need to be removed before you can cut the fabric to place on the spatter screens. Carefully pull a little on the tip on the back of the runner until the seams are visible. Use the tips of the scissors to cut the threads until you’ve completely removed the seams.

If you’d like to get the maximum use out of your fabric, iron out the wrinkles created by the seams and where the runner was folded and hung in the store. If you don’t really feel like it, you can place the splatter screens between the folds. At first I didn’t iron mine, but when I realized how much would be wasted, I went ahead and did that.
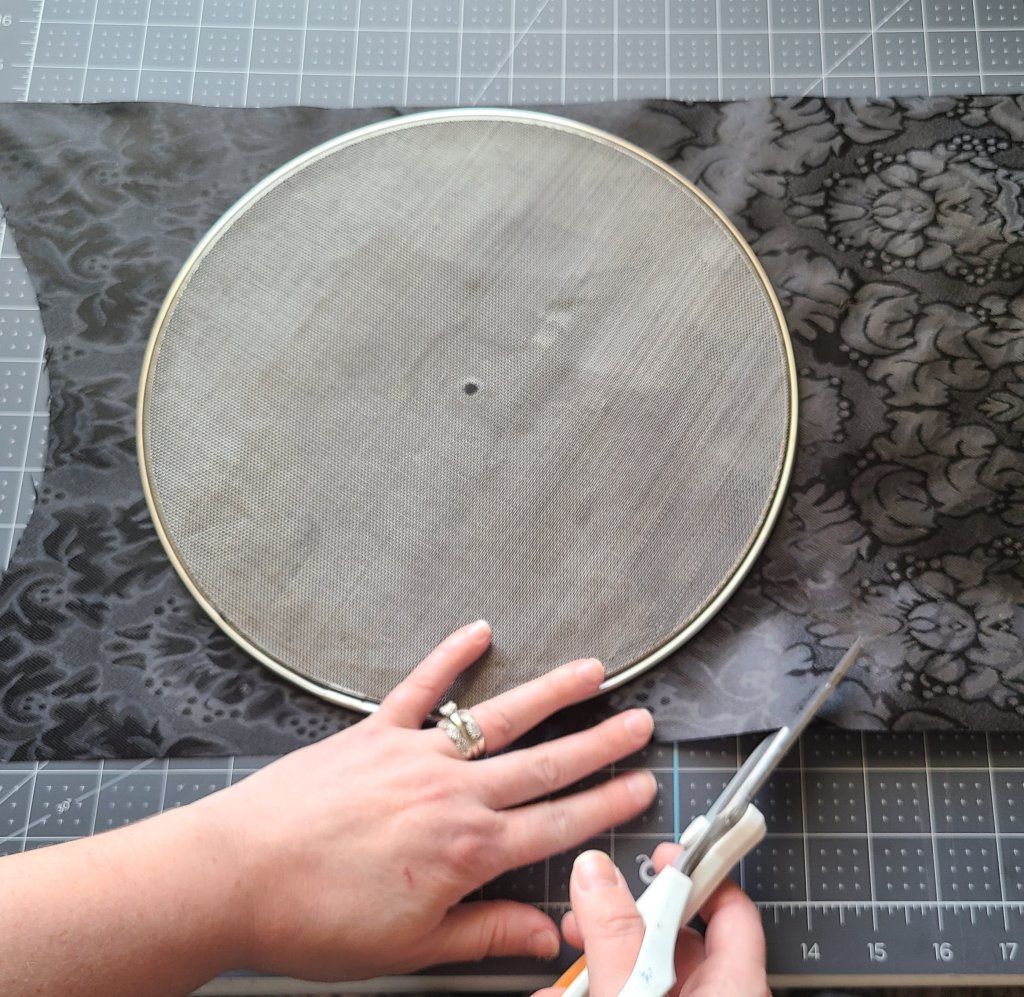
Make sure that the table runner is facedown, and lay the splatter screen, also facedown, on top of it. Place it in the middle height-wise. It looks a tight fit, but you’ll have plenty when you hot glue it on. Leave about 3″ on the sides, then cut around the screen in a circle.

Glue Fabric on the Screen
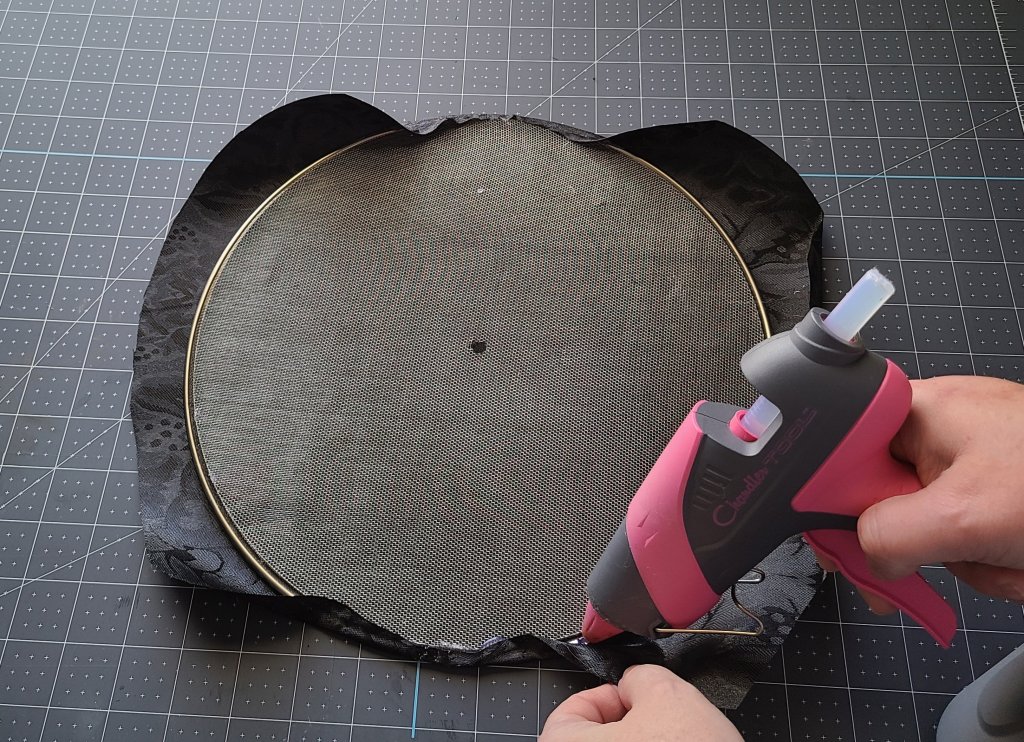
Place a strip of hot glue on the bottom of the metal edge of the splatter screen.

Next quickly and carefully fold the bottom of the fabric over the edge of the splatter screen and press it onto the hot glue. Hold it for a moment while the glue dries and the fabric is adhered to it.

Continue along the wire of the splatter screen adding glue and folding the fabric over on top of it, until the splatter screen is covered with it. Pull the fabric taunt as you go.
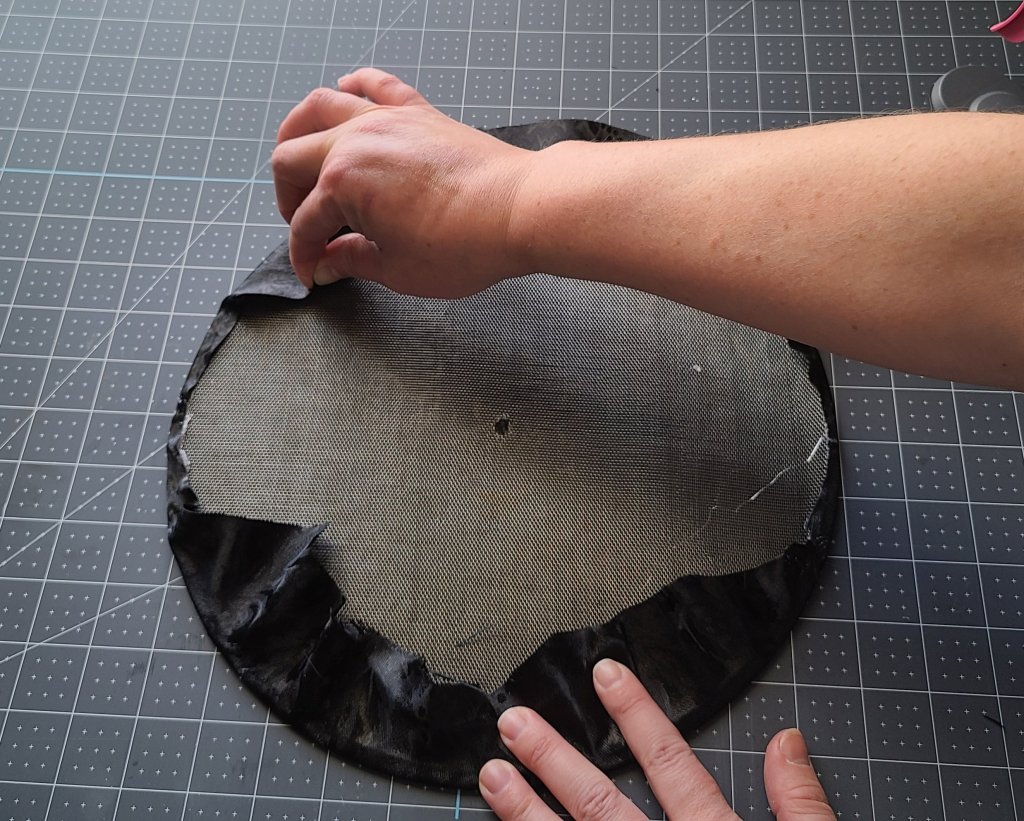


Do this with the other two splatter screens as well.
Combine the Three into One Halloween Splatter Screen Pumpkin
Now that all three of the splatter screens are covered, it’s time to create the pumpkin. Lay one of the screens on top of another, both face up, one overlapping the other about 3.5.” They should be even at the bottom. Lift one and hot glue on the edge of the bottom screen where the other will lay on it. Place the second one on top of the glue, and hold it down for a minute while it dries. These two are the base of the Halloween splatter screen pumpkin.


Next glue the third screen on top of the base. Add hot glue to the outer rim on both sides, then place it in the center of the first two screens. I am placing it kind of low, and not even height-wise, with the first two in the picture below. Don’t do that. This was a mistake. I had to pull it up and center it, but I didn’t get a picture while gluing it the second time. If you glue it lower, it won’t be able to stand. Make them all pretty even at the bottom.


Add a Stem
Since I only found screens without handles, I had to create a stem. If you bought a screen with a handle you can just go ahead and wrap the handle with twine, rope, or ribbon following the instructions under the heading “wrap it.”
Create a Fake “Stem”
There are many different things that you can use to make a stem for the pumpkin: multiple sticks, a large stick (then you don’t have to wrap it), bbq skewers, paint stirrers, popsicle sticks, etc. I used a handful of popsicle sticks. If you’re using more than one item to make a stem, you will need to secure them together. Make sure they are even in your hand, then secure them with a pipe cleaner or piece of floral wire. You could use a zip tie, but it’s harder to hide the bump it will create.

Wrap It
Again, there are many things you can use to wrap the stem. I used a tiny rope, 3mm wide, from Michael’s. It was part of a grab bag that I got for $2.50 (two for $5!) at Christmas last year. Side note- if you ever find grab bags there, get them! I got hundreds of dollars worth of fall Halloween stuff. It was amazing! I check for them every single time I go there!
Place a dot of hot glue at the base of the stem and place the twine or rope on it.


Wrap the rope up the stem, until it’s covered. When you get to the top, begin creating a circle on it. If you’re unsure how to do this, you can check out my tutorial for creating a nautical rope tray. When you get to the middle, cut extra rope off, place a dot of hot glue in the center, and tuck the end of the rope in.


Attach the Stem to the Halloween Splatter Screen Pumpkin
Once the stem is finished, glue it to the pumpkin. Turn the attached screens upside down and add a good amount of glue to the center, right above where the bottom two screens meet.

Place the stem on top of the glue and hold it down for a bit while the glue hardens.

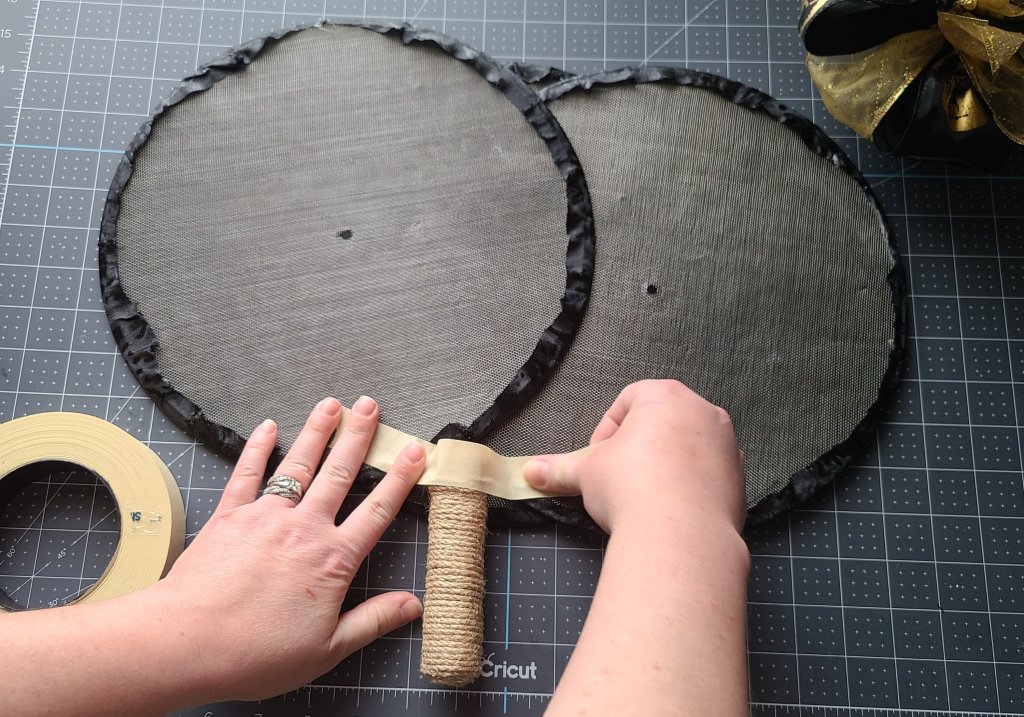
This part of the project is optional, but it may help you. Since my pumpkin stem was bulky, I felt like I needed to reinforce the glue. Take a long piece of packaging or masking tape and place it on one side of the screen, across the stem, and on to the other screen.
Add a Bow
For this project I made a very, very easy bow. I will make a tutorial for that soon. Until then, here is a tutorial for making a bow for wreaths and other home decor. I used two 2.5″ wired ribbons for the bow.
Use a zip tie or pipe cleaner to attach the bow to the stem. My bow is pretty full, so I decided to turn my bow a little bit to the side when I put it on. That way my stem could be seen a little more. Cut any excess piece of the zip tie off.


Add Flowers & Greenery
Finally to finish the pumpkin, add the flowers and other stems you’d like to use. For the purpose of this tutorial, I’m going to tell you how to add everything in terms of what I used.
Start with the black rose, and glue it in the bottom center of the pumpkin. Glue the two purple roses on either side of the back one. Then add a gold, purple, and black glitter stem on each side of the roses. You can either trim the stems a little with wire cutters, or glue them under the roses a little. You will have six total on the pumpkin.


I felt like my roses needed something, and the black needed to be broken up a little. I wanted to bring some gold into them so they matched the bow and the stems more, so I used a little paint brush and added a tiny amount of gold to the tips of the roses.

Your Halloween splatter screen pumpkin is complete!
I am pleased with my little pumpkin! It will be going kitchen this Halloween, since I’ll be doing a purple and black witch theme for it. I’m thinking on the stove when it’s not being used maybe. I’ll share some pics when I get it decorated.


I hope you enjoyed this tutorial! Make sure you pin or share it so that you can come back to it when you’re ready to make your pumpkin. You can use the buttons at the bottom of the post to do that. If you love DIY home and seasonal decor follow me on social media using the buttons in the sidebar. Also tag me when you make your own because I love seeing your creations! I have a lot of decor boards on Pinterest, so I’d love for you to follow me. I think you’ll find some things you want to make.
Don’t miss out on a great tutorial, free printable, or other post by following me via email. Enter your email address below and you’ll get an email when I upload a new post.
More Decor
If you like Halloween decor you may like these posts: a burlap witch hat wreath, upcycle a Dollar Tree sign, a quick and easy cauldron centerpiece, this elegant hoop wreath, and this scarf pumpkin wreath.


I also have a lot of fall and Thanksgiving decor so stick around and check it all out!
If you are one of my blogger friends, share all of your family-friendly posts with us on our three link parties, Happiness is Homemade, You’re the Star Blog Hop, and Traffic Jam Weekend. You can widen your audience and get a chance to be featured on the next week’s party! If you love fashion, home and seasonal decor, recipes, gardening, crafts, family ideas and more, you need to check out these weekly parties!


Oh, looks nice, love that black fabric!! Thanks so much for linking up at A Themed Linkup 74 for Pumpkin Crafts and Décor. Pinned!
Can you believe it’s from Dollar Tree?! Thanks for visiting!
That’s amazing, huh?
CONGRATS! Your post is FEATURED at A Themed Linkup 75 for Handcrafted Jewelry from my previous linkup for Pumpkin Crafts and Décor!
I’m honored! Thanks Dee!