
Shiplap seems to be all the rage right now. I’m not sure I’m quite ready to go for a full wall of it quite yet, so I thought I’d try it out on a smaller scale. As I was attempting to come up with a project for today’s post, I decided that it would be a good day for a shiplap tryout. Today I’ll be sharing my foray into a DIY shiplap sign using a Dollar Tree canvas. I absolutely love the way it turned out, so you may be seeing a wall of it in our new house one day soon!
Dollar Tree Canvas DIY Shiplap Supplies:
- 4×6 stretched canvas
- 7 large popsicle sticks to create a faux shiplap sign
- wood glue
- hot glue gun & glue
- wood stain or paint & water for faux stain
- acrylic paint
- paint brush &/or paper towels
- greenery
- twine
- or picture and a small clothespin

Remove Canvas
Turn the canvas over and remove all of the staples. Use a small flathead screwdriver or similar tool and pry the staples up. It’s very simple. If you need to see a tutorial on that, you can check out my reverse canvas tutorial. Once the staples are out, remove the canvas from the wood frame.

The wood of the Dollar Tree canvas frames can be extremely rough. Use sandpaper to smooth it out. If there are deep holes in the wood, you can fix that with lightweight spackle, also from Dollar Tree. I didn’t need to do this with this piece, but you can see a project where I did need to do this, and how to do it, in my “how to make a stencil with a Cricut” tutorial. (You might want to check out that post even if you do know how to spackle a wood frame as I’ve given you a free SVG and a free printable that says, “Not lucky, just blessed,” with an adorable shamrock. Head over and pin it so that you have it for next St. Patrick’s Day and to use for a step-by-step tutorial for Cricut users to create DIY stencils.)


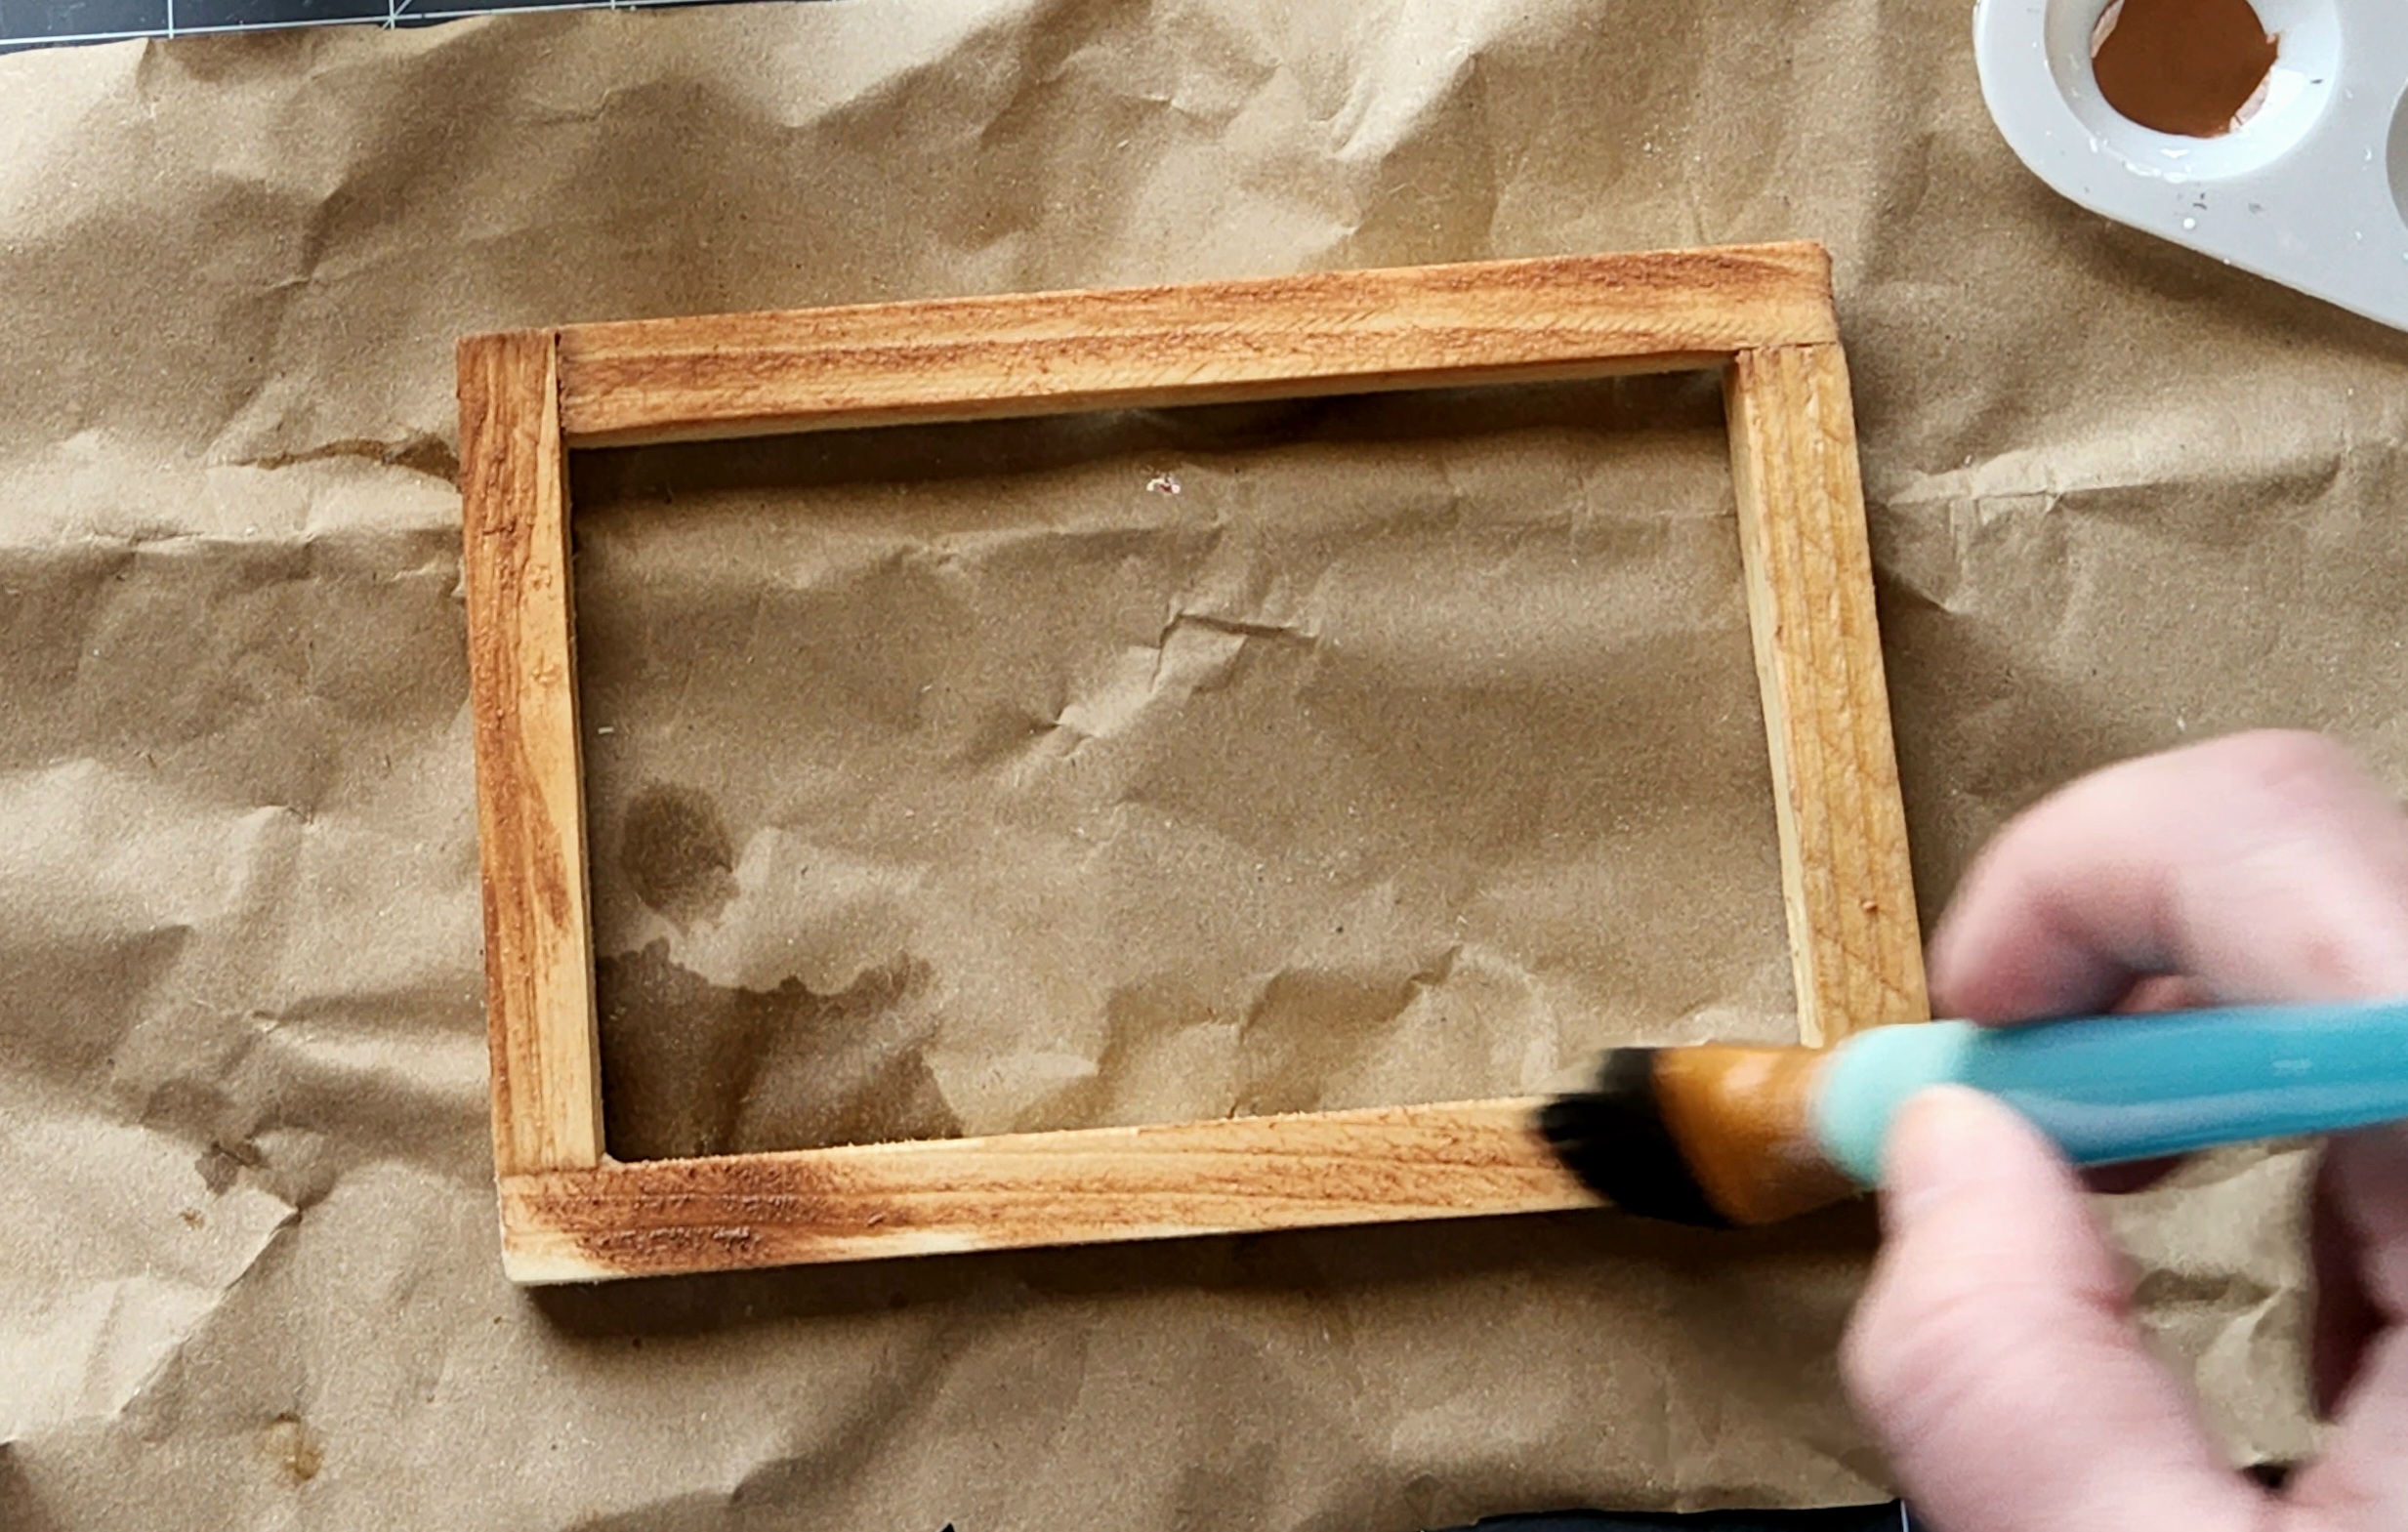
Paint or Stain the Frame
With the canvas removed and the frame prepped, you can now paint or stain the wood. I wanted mine to keep a wood look since the faux shiplap would be white. I didn’t have any wood stain on hand while I was making this, so I did a faux stain on the frame just as I did with my DIY tea towel ladder and Dollar Tree crate shelf. I’m going to give a short tutorial on faux staining here, but if you need more detailed instruction, check out either of these tutorials.
You can use a paper towel (I like to use automotive towels for craft projects) or a paint brush for this. When I first began to faux stain wood, I thought I had to use a towel to apply the paint, but after several projects, I realized a paint brush would work fine. If you use a paper towel, you can add more paint at a time, and a paint brush will add thinner layers.
Squeeze a small amount of brown paint to a palette. I use small plastic ones from Dollar Tree, and they’re perfect. Drip water from a paint brush into the paint, then dip the wet brush into the paint. Brush it onto all sides of the wood frame.

You can water down other colors like black, tan, gray, or white and add them until you’re happy with the look. For this piece, I added brown, a little black, and a tad of white. The color will dry and look a little bit different from when it’s wet.

Create a DIY Shiplap Base for the Dollar Tree Wood Frame
Option 1
There are two ways that you can add the popsicle sticks to the wood frame of the Dollar Tree canvas. I tried this option first. I ended up removing the popsicle sticks because they were unlevel in the end. However, you might like the handmade and imperfect look of this option so I’m including it.
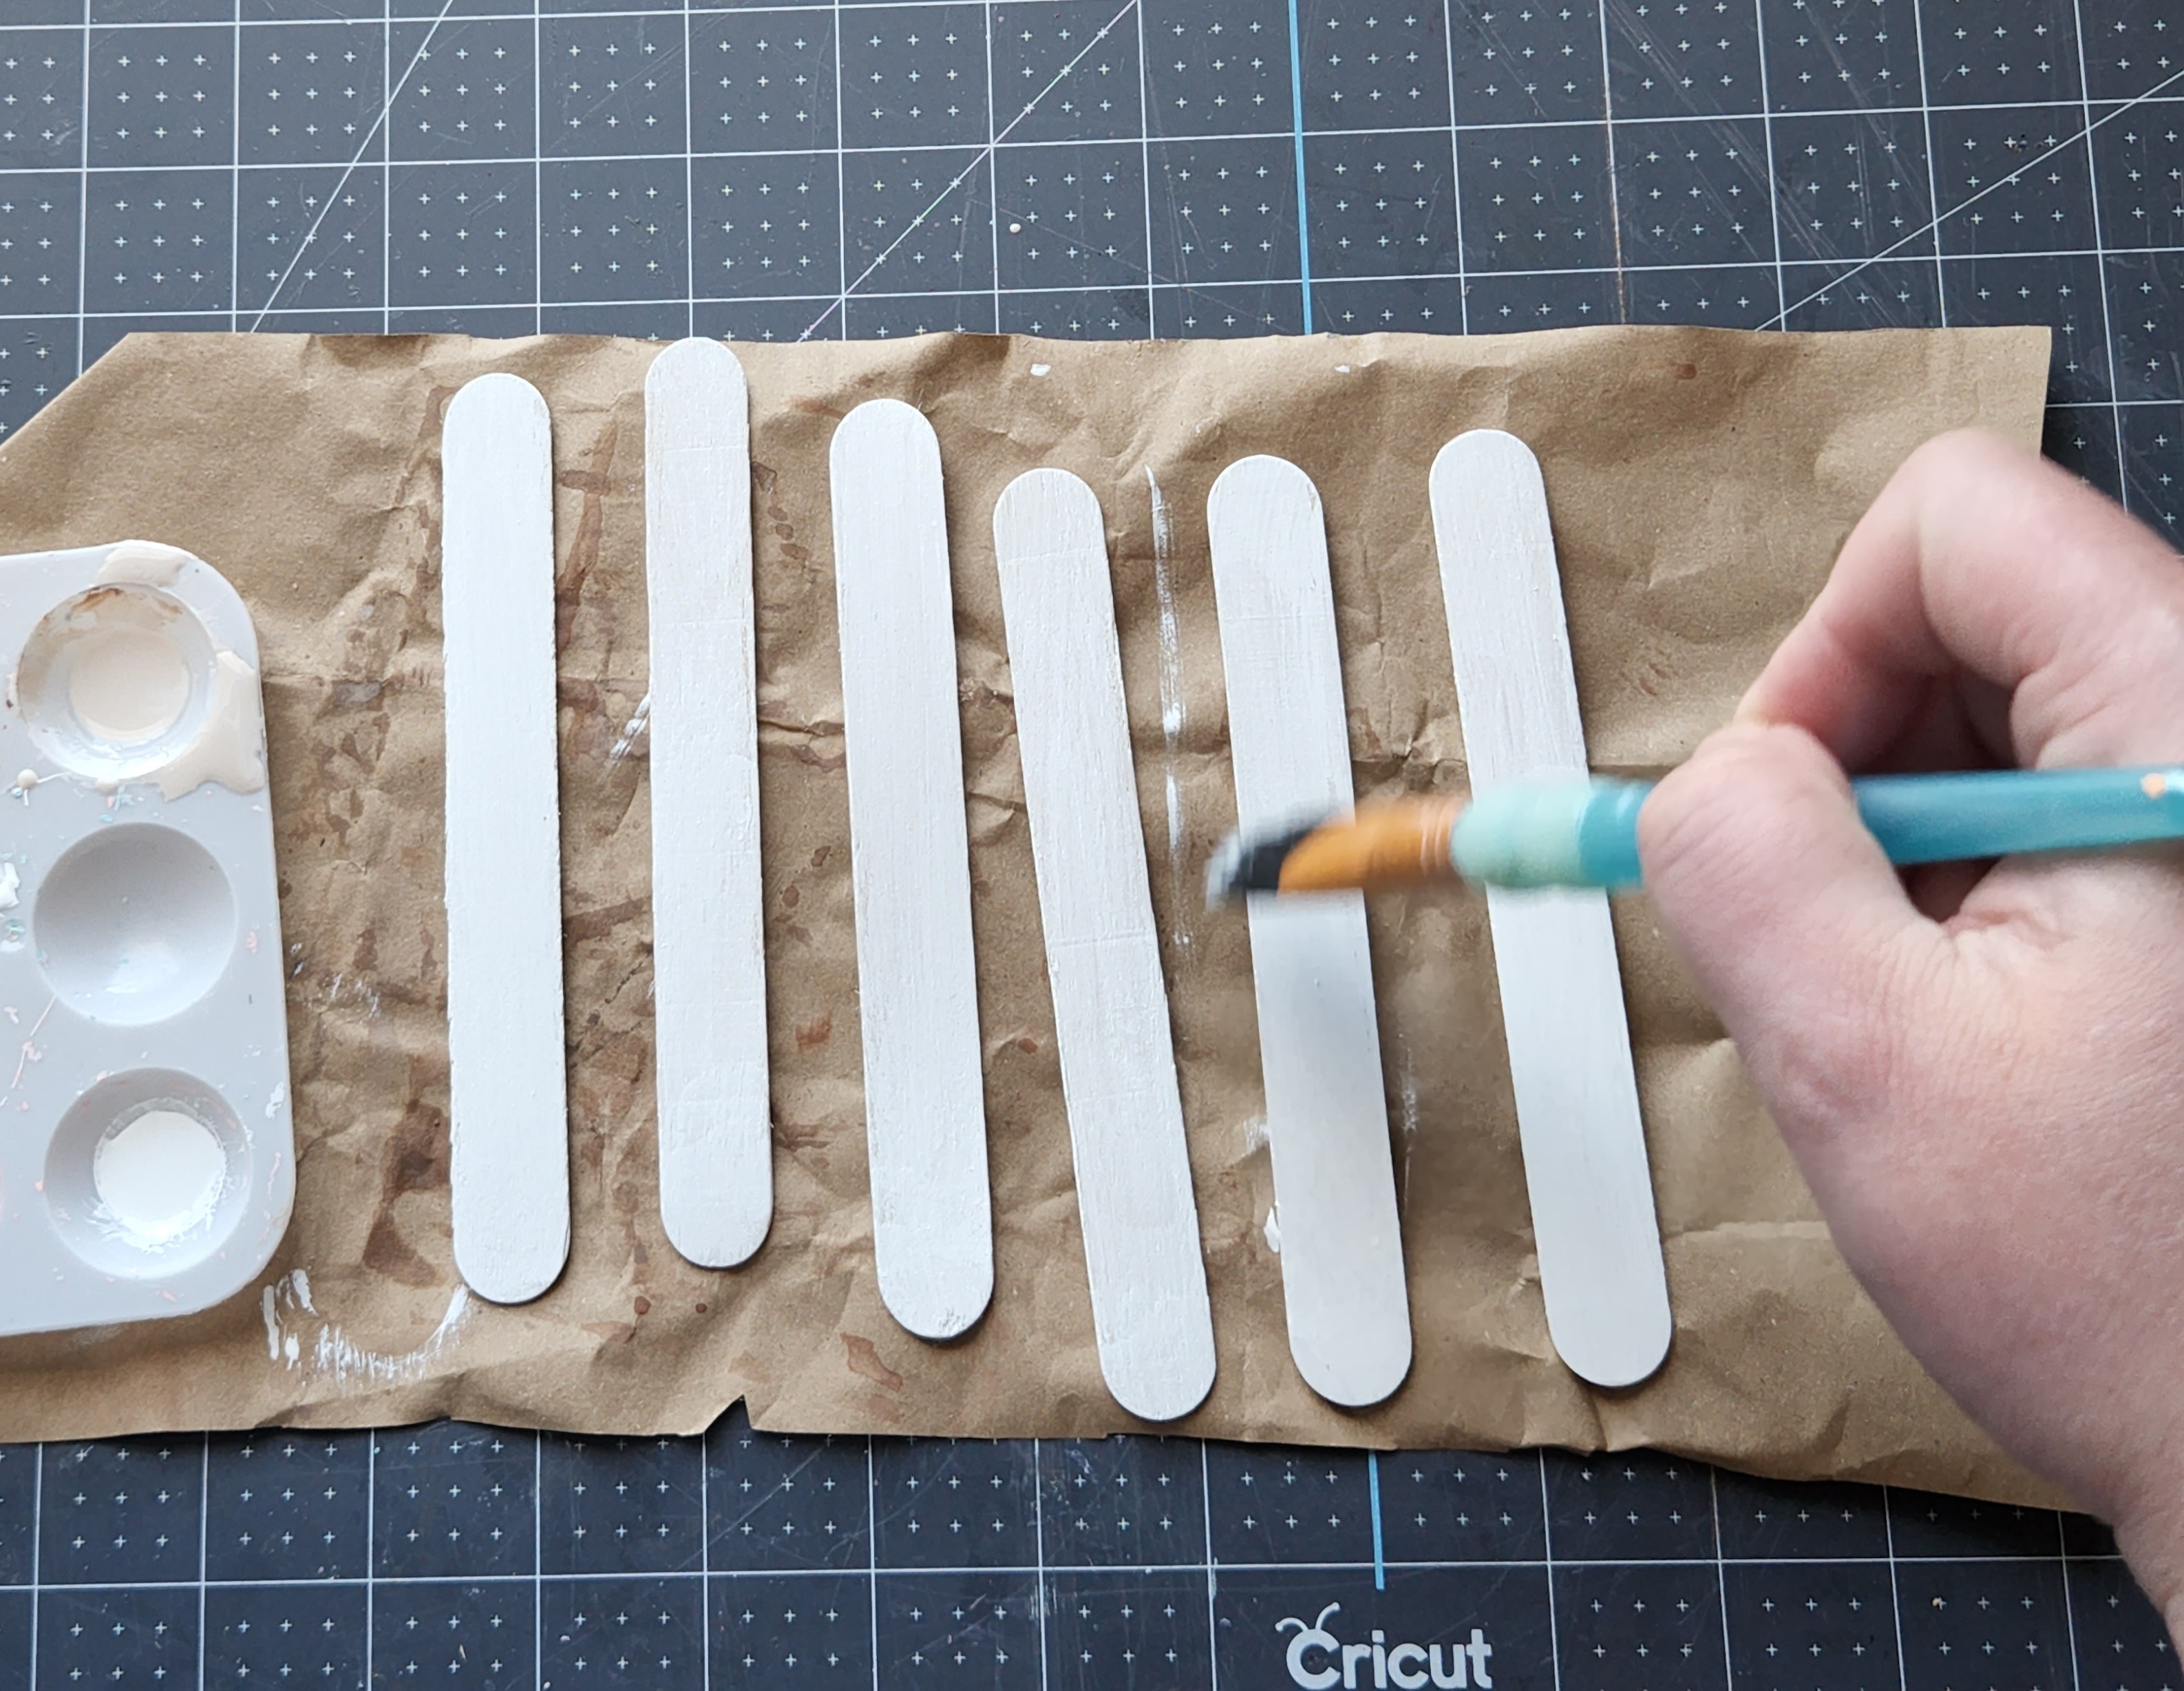
Lay out five of the large popsicle sticks (they come in a pack of 60 at Dollar Tree). Paint them white or stain them with wood stain or faux stain them just as you did with the frame, just in a different color.
Once the sticks are dry, you can glue them onto the frame. Turn the frame upside down and add hot glue to both sides of the opening at the top.

Place a popsicle stick on top of the hot glue.
Continue adding hot glue and painted popsicle sticks until the opening is covered. Note that my sticks were the perfect length for the frame, but if yours hang over the edge and show from the front, you can easily trim them with scissors or a utility knife.

When the entire open area of the frame is covered, you will have this:

You’ll notice that the popsicle sticks are uneven. I don’t know if that’s only because they’re Dollar Tree craft sticks, but I doubt it. You can’t really tell that they’re uneven until they are glued in. If you like that look, you can skip to the next step. If you’d rather have a more even base, proceed with option 2.
Option 2
Glue the Base Together
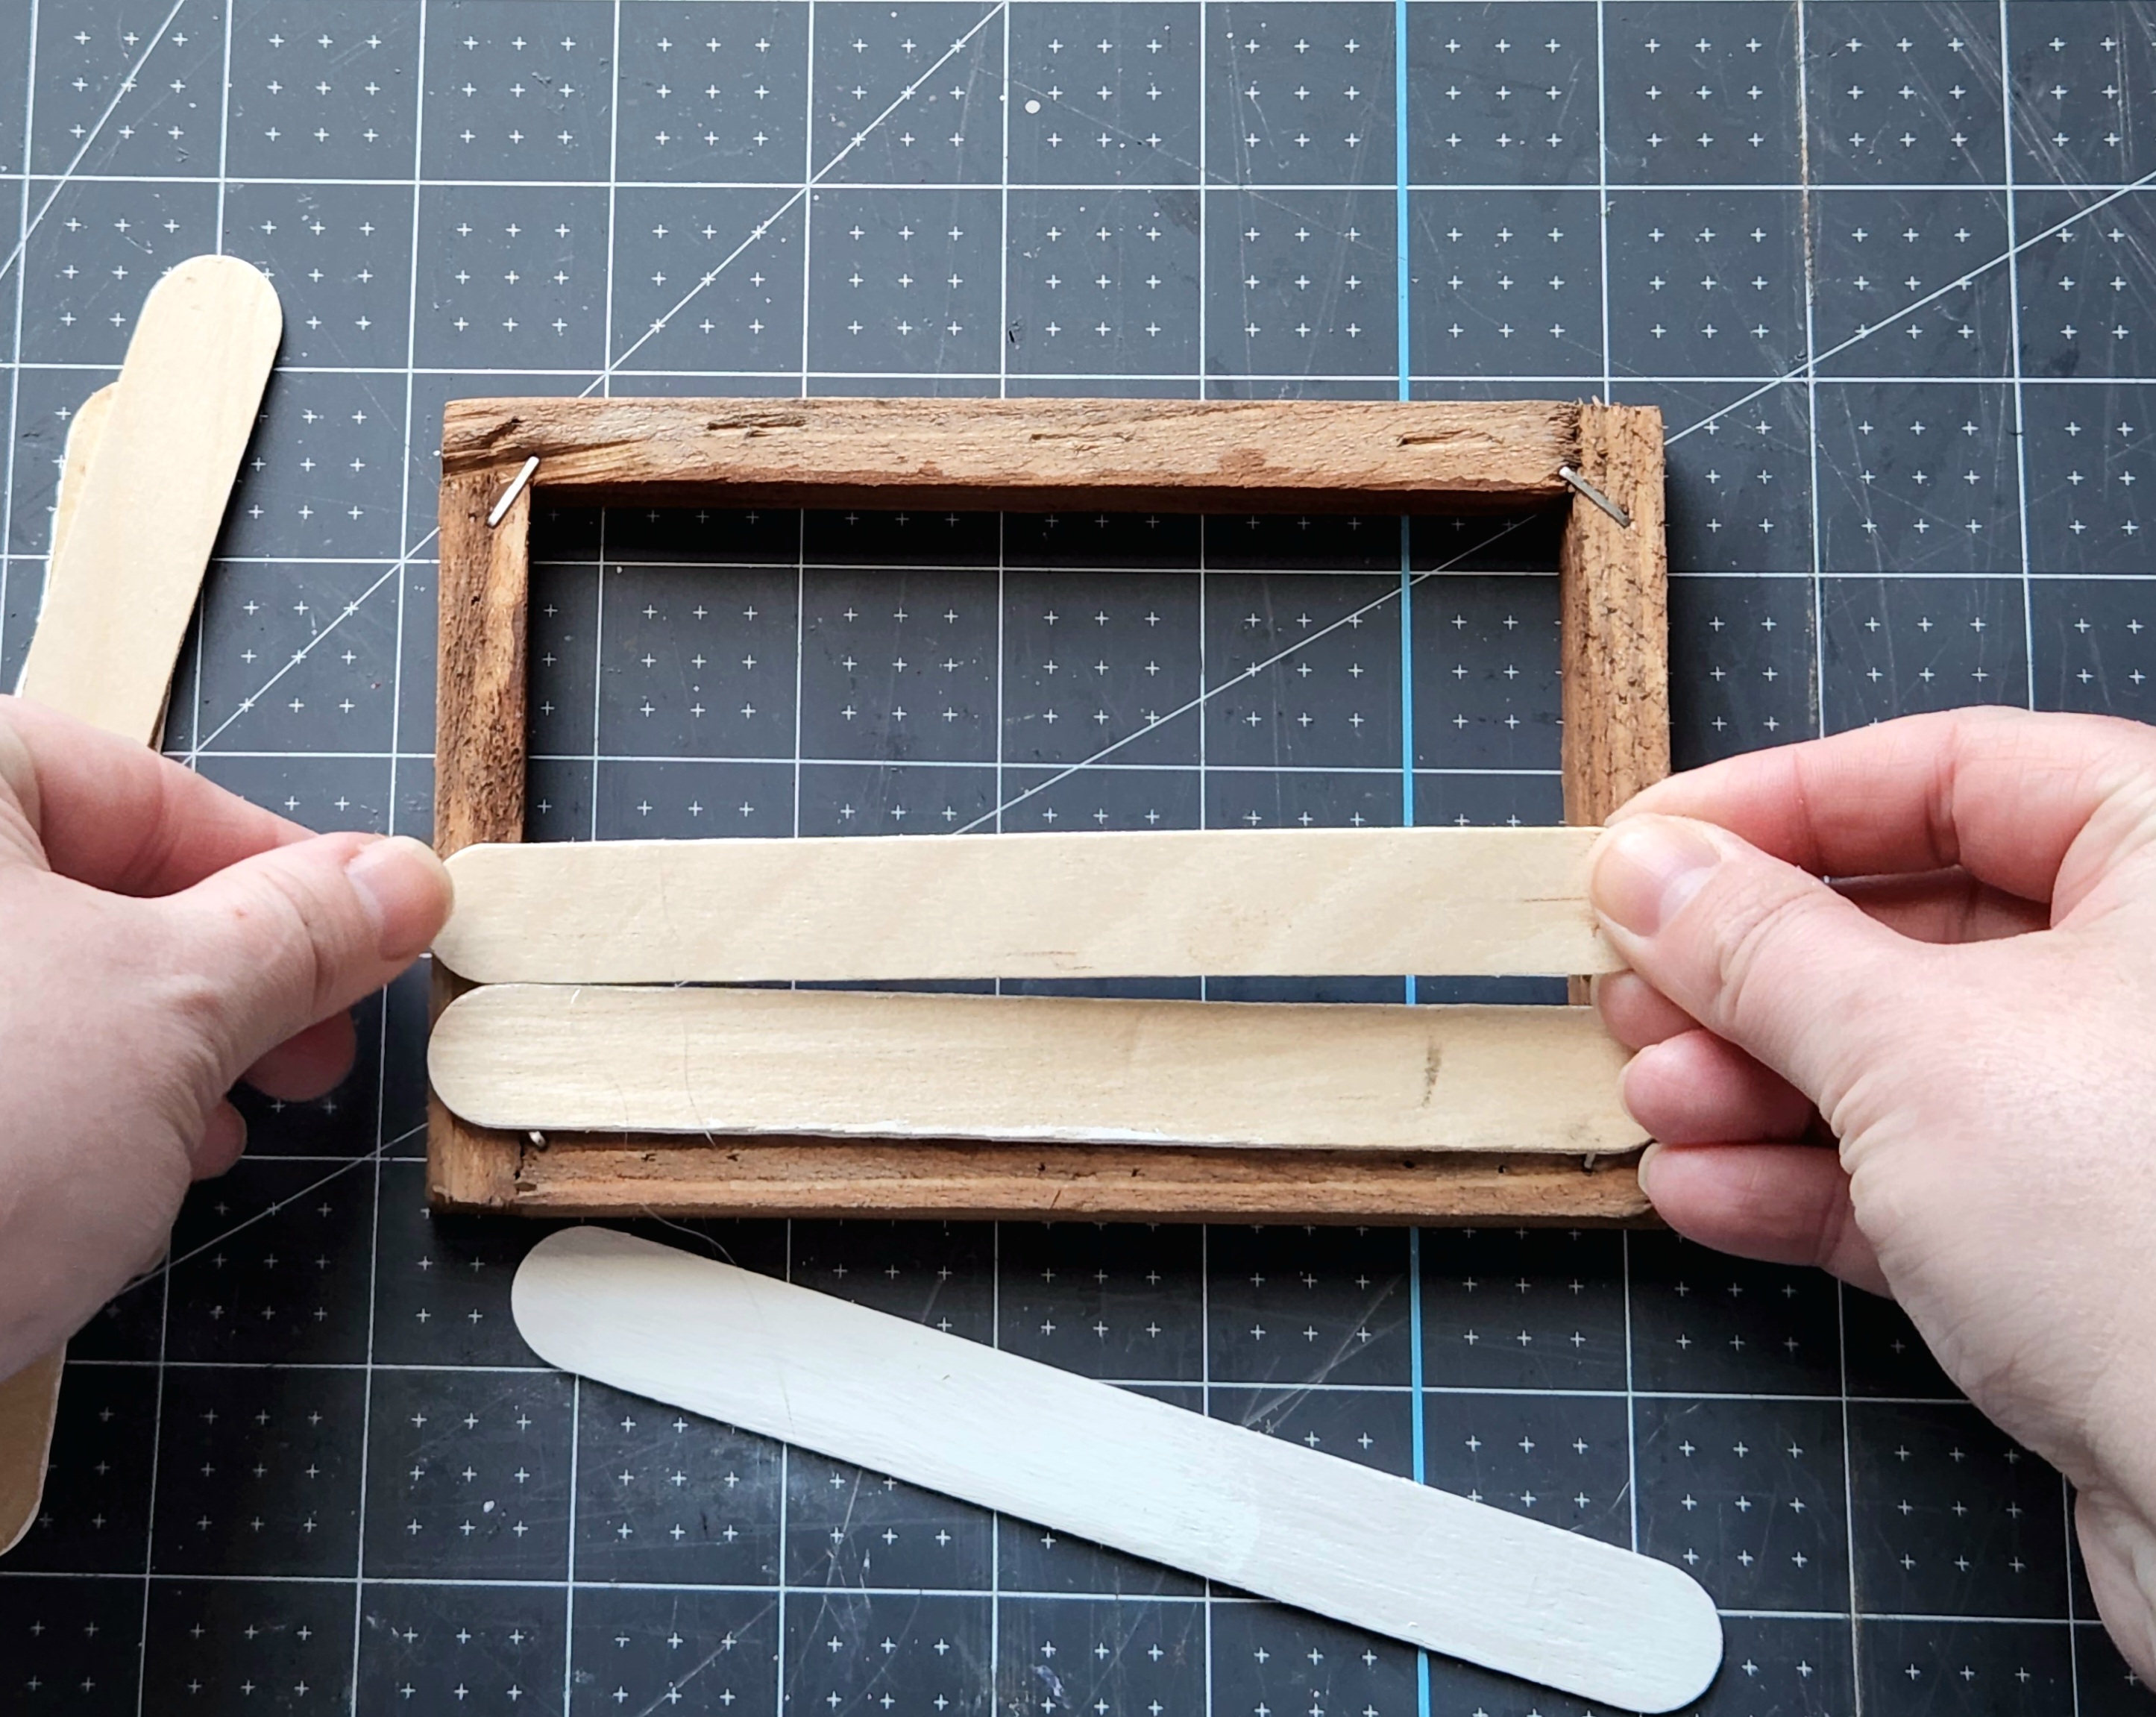
Creating the shiplap base with this option takes a few more steps, but I feel like it’s worth it. You’ll need seven popsicle sticks for this.
Squeeze some wood or craft glue along the long edge of a popsicle stick.

Place it against the long edge of another popsicle stick and hold them firmly together for a bit until the glue holds well. Continue adding sticks until you have five of them glued together, creating a DIY shiplap base for the Dollar Tree canvas. Wipe off any excess glue that oozes between them with a paper towel.

Since I had held the sticks together for several minutes, the glue seeped between the sticks and was dried on the back looking kind of sloppy because I hadn’t been able to wipe off the excess with a paper towel. I didn’t want that to show on the front, so I flipped it over for the next step so the nicer side would show. If both of your sides look the same, you don’t have to worry about carefully turning the base of popsicle sticks over for the next step.
Squeeze wood glue on another popsicle stick and place it diagonally across the base. I had a popsicle stick that I had already cut the ends off of for another project that I used for this step. You may or may not need to shorten yours depending on the angle you place the stick at. If it hangs over the side, just cut a bit off with scissors or a utility knife.


Next, you need to add another diagonal popsicle stick to the back. Cut the center of a popsicle stick out (about 1/2″) so that you can glue one side to either side of the first diagonal stick. Then glue each side of that popsicle stick on either side of the one you just glued on. These diagonal popsicle sticks will help hold the base flat and together securely.


Paint the “Shiplap”
If you have excess glue that has dried on the front of the popsicle base, sand it off using sandpaper. Once it’s smooth, paint or stain the popsicle sticks.

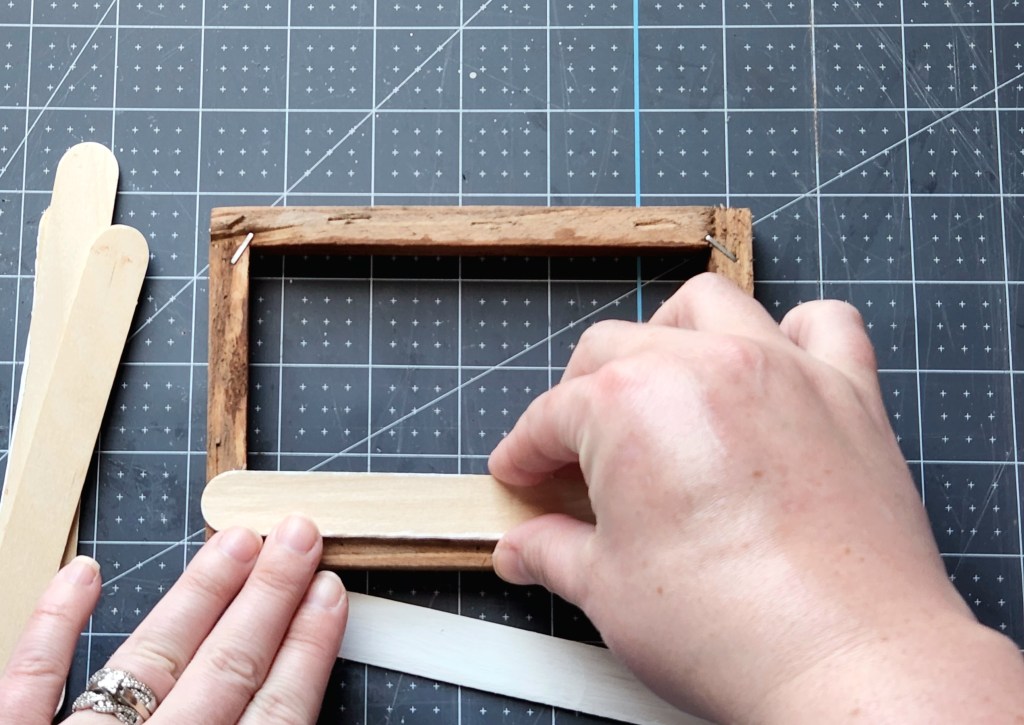
Glue the “Shiplap” into the Frame
I wanted a bit of an aged look for my Dollar Tree canvas DIY decor piece, so I lightly sanded the white paint once it was dry.

Add hot glue around the opening on the back of the wood frame and press the shiplap sign base onto it.

Add Embellishments to the Dollar Tree Canvas’ Wood Frame
I chose to add a lavender flower to embellish my shiplap sign. You could use any flower, greenery, or even a picture. If you’d like to add a photo, hot glue a tiny clothes pin to the top center of the popsicle sticks. That will allow you to change it out whenever you’d like.
I held my lavender in the frame to determine how short I needed to trim the stem, then cut it to fit with wire cutters.

To cover the cut mark on the stem, hot glue twine on the it, then wrap it around the end.


Tie a bow of twine around the end. I left the ends of the twine long until I glued it in the frame so that I could determine how long I wanted tails with it in there.

Add hot glue to the end of the lavender (where the twine is) and place it at the top center of the “shiplap” in the frame.


Finally, cut the ends of the twine bow off so that you have tails the length that you like.

Display your perfect farmhouse decor piece!
That’s it! Your Dollar Tree canvas turned DIY shiplap farmhouse frame is ready to grace its place of honor. I love the way mine turned out! You can place it on a shelf, hang it, use it in a vignette or on a tiered tray, the options are endless. You can use a larger canvas and cut the round ends off of the popsicle sticks, then glue them together to use in the bigger frame.

I hope that you enjoyed this tutorial! I’m so glad that I finally got it uploaded as I had some technical issues with the hosting company. That was stressful lol! Remember to pin or share this tutorial using the buttons at the end of the post so that you can get back to it when you’re ready to make your own.

I’ve got some upcoming beautiful spring decor tutorials, DIY Mother’s Day gift ideas, and free printables, so make sure you don’t miss them by following me on social media using the buttons in the sidebar. If you make your own shiplap frame, I’d love for you to tag me in the photo so I can see the spin you put on the piece to make it your own! Enter your email address below so that you get an email when I add a new post, that way new ideas don’t get lost in your social media feed.
You might like these ideas!
There are plenty more great ideas here on the blog, so stick around and check them out. If you’re looking for something specific, you can use the search box in the sidebar. If not, you might like these ideas:


Don’t forget to link up your latest posts and find great inspiration for your next DIY, craft, recipe, decor idea, and more on Happiness is Homemade and Craft Creators Link Party! Find the latest edition of each party on my Link Parties page. Also, follow me on Pinterest for new ideas added weekly!


2 thoughts on “DIY Spring Shiplap Decor Using a Dollar Tree Canvas”