Spring is on its way! There are several places in my home where I hang seasonal wreaths, two of those are in my living room. As I was planning my spring decor, I realized I didn’t have a really pretty wreath to hang for the entire season. Today is our Sustainable Pinterest Challenge and the theme for this month is floral. Thinking about that, the perfect wreath clicked in my head- a floral bike wheel wreath! So in this post I will be sharing how I made mine so that you can make one of your very own.


Our Sustainable Pinterest Challenge is a monthly link party where I join some very talented bloggers and we create projects based on that month’s theme and some pins that inspire us. The pin that inspired this wreath is one of my own. You may remember my fall floral hoop wreath. Be sure to visit the other blogs on the hop at the end of the post to see some amazing floral projects!

You could make this wreath with real flowers, but using faux flowers is way more sustainable. You won’t be cutting flowers and greenery, killing them. One additional note – cut your faux flower stems as long as you can. That allows you to use them over and over again in multiple projects. I’ve used these same garlands and flowers in more than ten projects. Talk about sustainable!
Supplies needed for a floral bike wheel wreath:
- bike wheel wreath form (Dollar Tree)
- spray paint (optional)- I used Krylon metallic copper.
- greenery garland (I used one from Hobby Lobby that my mom actually got about 19 years ago (wow!) and one from Michael’s from a grab bag full of stuff for $2.50!)
- faux flowers of your choice (I used white dahlias and pink and purple peonies.)
- floral wire or pipe cleaners (Wire would be best, but I had pipe cleaners from Dollar Tree with tinsel type things on the wire, so I cut the tinsel off so that I only had wire left.)
- wire cutters


Spray Paint the Wreath Form
Spray painting your wreath form is optional. The form I bought from Dollar Tree was black, but I wanted a brighter color. I used copper as an accent color for fall, and I loved it. So, I used Krylon metallic copper and spray painted my form. One coat of that paint easily covered the black. If you can, let the wreath form dry overnight. I started working with mine after 3 hours of drying, and some came off on my fingers when I was trying to hang it. Major bummer!

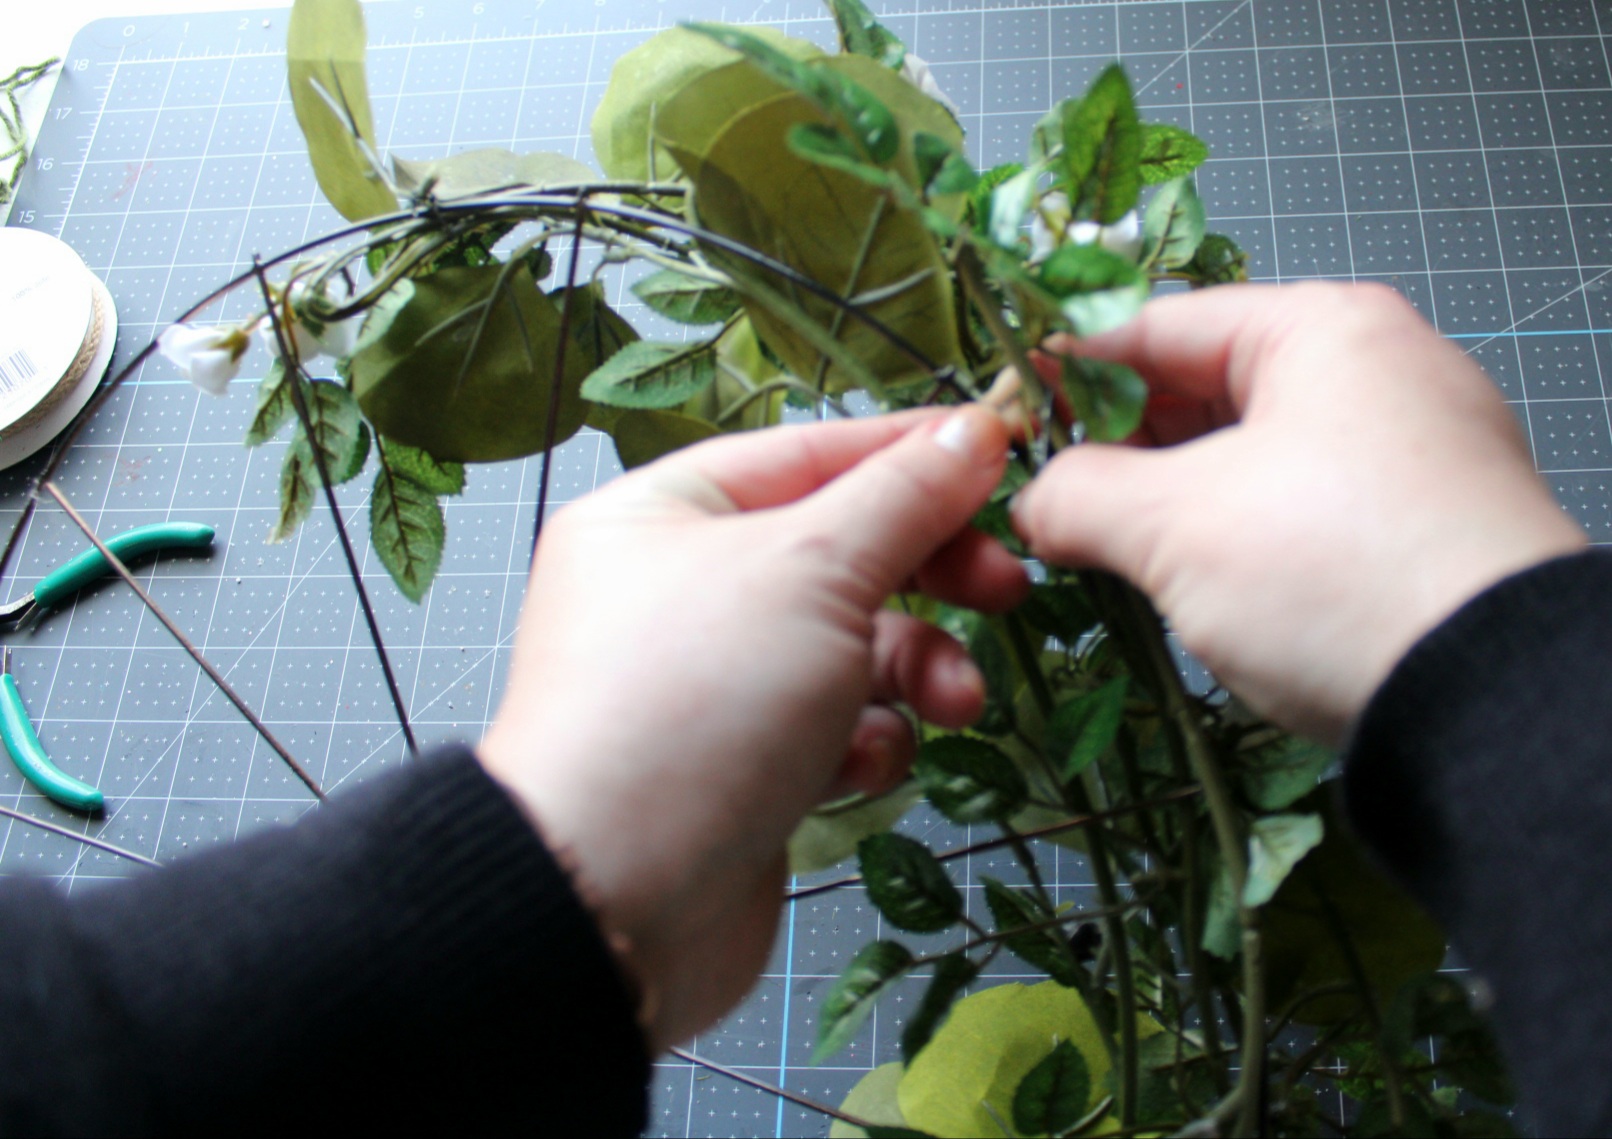
Attach the Greenery
Once the wreath form is dry, you can begin adding your garlands of greenery. You can use other greenery stems, but I’ve found that garlands work well on wreaths because they cover more area easier. First you need to decide how much of your wreath you’d like covered with flowers. I chose to cover about 55% of mine, extending just a bit past 12 and 6 o’clock. Go ahead and cut some pieces of your wire so they’re ready to go. I used about 3-4″ pieces.

Lay your garland on the wreath, moving it around until you’re happy with the look. With a garland you will probably need to fold it and double it back on itself. That is why it’s so easy to cover a lot of the wreath with garland.

Use your wire to wrap attach the garland or greenery to the wreath in various points. With my first garland, I placed wire in three places, at the top, bottom, and in the middle of it.

Lay the next garland on top of the one you just attached. My second garland was only a half of one because I had already used a section of it on another project. Arrange the greenery the way you’d like, then attach it to the form with wire.
Once it’s on, move the greenery around, mixing the two garlands together so they look like one cohesive piece.

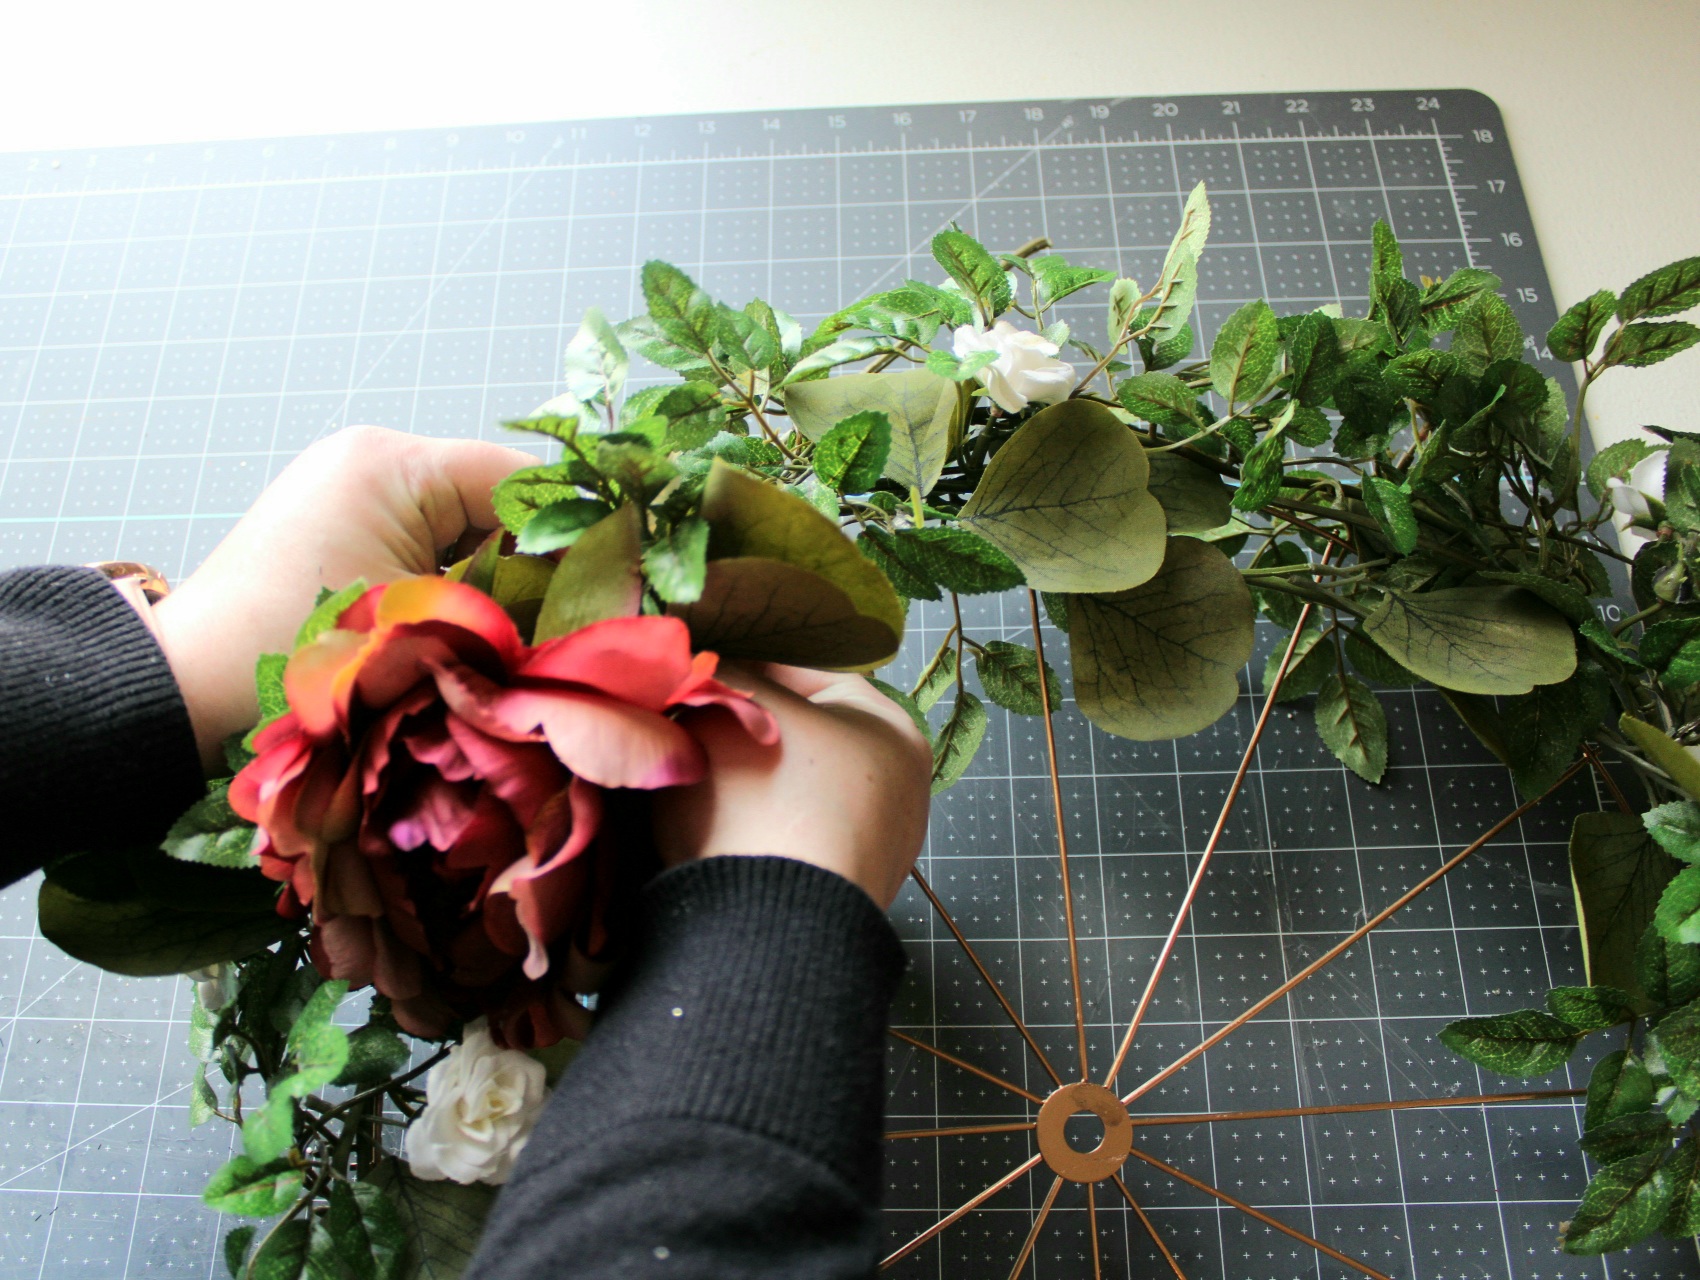
Add Flowers to the Bike Wheel Wreath
Now that your greenery is exactly where you want it, you can begin to add the flowers. It’s easiest if you start at the top of the wreath, adding flowers there first, then continue to the bottom.
Use the wire cutters and cut the flower you want to use from the bunch. The length of stem you will cut will depend on where you’re placing it. You obviously don’t want to leave the stem long enough that it would extend past the greenery. I left the leaves on my stems to add to the greenery. Use more wire to attach the flower to the wreath. My first flower is about 2.5″ from the edge of the greenery at the top of the wreath.
Since I used two different colors on my wreath, I alternated adding one purple, one white, all the way down. Continue adding flowers with wire to the wreath form until you’re happy with the look. I added three purple flowers and two white to my wreath.

This is a close up of a section of my wreath, showing the alternating colors.

Move the flowers and greenery as needed until you’re happy with the positioning.

That’s it! Your floral bike wheel wreath is ready to hang!
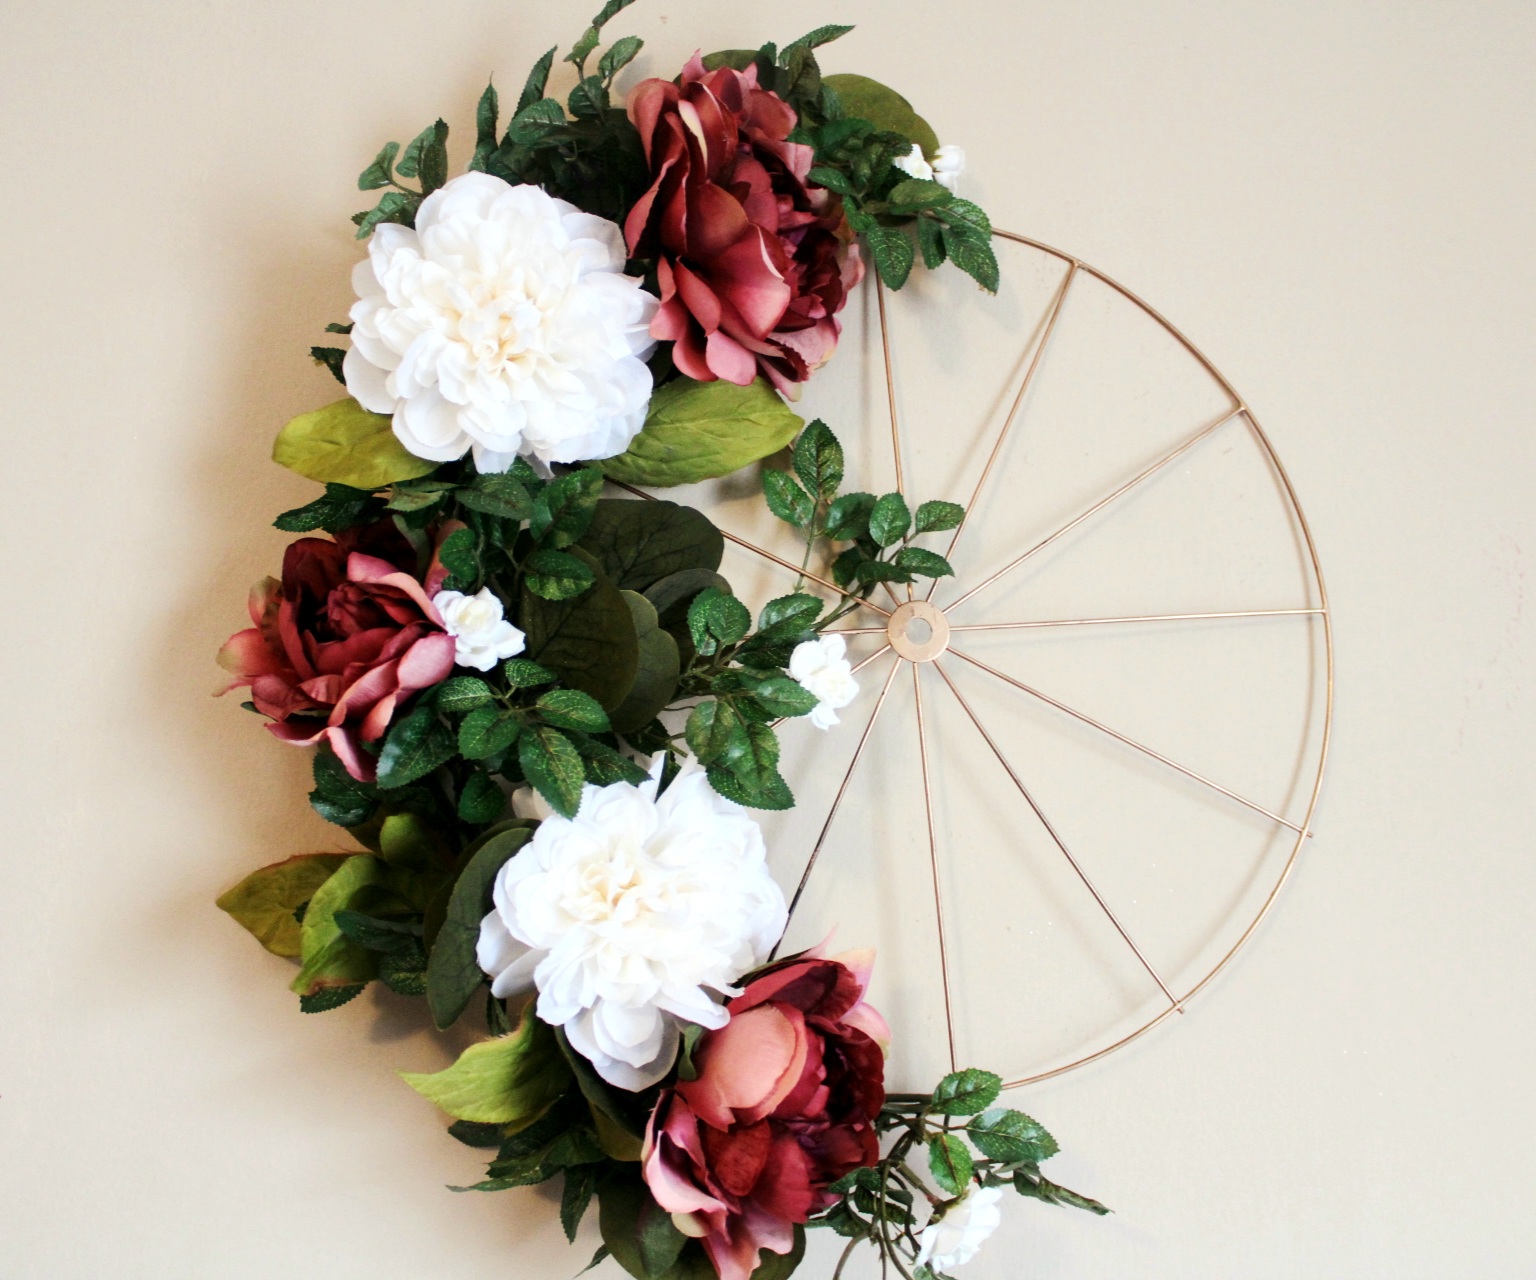
It’s that easy. It took me about an hour to make my wreath once the paint was dry. I think using garlands are a huge part of the reason that it was so quick and easy to make. I really hope you enjoyed this tutorial and that you will make your own wreath. I’d love for you to follow me on social media using the buttons in the sidebar and tag me in a photo of your wreath! I will be moving my wreath to its special spot soon, but until then here are a few photos of my wreath:


Remember to pin the image below or share this post with the buttons on the left side of the page so you can find it when you’re ready to start your project! Also, follow me on Pinterest for new ideas added weekly! Be sure that you never miss a great tutorial for decor like wreaths, signs and other home decor, free printables, crafts, and other fun posts! Enter your email address below to be notified of new posts! Use the buttons below to follow me on social media for other great content.

Before you leave, check out all of my St. Patrick’s Day tutorials and free printables! If you’re looking for something specific, you can use the search box in the sidebar to find it.


On to the Link Up!

Click on the name of the blog to head to their main blog page and on the name of the project to head straight to the project itself!
Julie from Sum of Their Stories | Floral Bag Upcycle w/ Upholstery Fabric Samples
Terri Steffes from Terri Steffes | Watercolor Floral Bookmarks
Ann from Apple Street Cottage | Denim Flowers – 2 Ways
T’onna from Sew Crafty Crochet | Crochet Flower Facial Scrubbies
Julie from Treasures Made from Yarn | Crochet Flowers
Allyson from Southern Sunflowers | DIY Door Hanger Craft Idea
Mel from Decor Craft Design | DIY Painted Upcycled Mug
Donna from Modern on Monticello | Wine Box Flower Arrangement


I love this! I cannot believe that that is a bike wheel. What a clever way to use one!
Thank you!
Very pretty, Niki. Love the bike wheel base!
Thank you!
You did a fabulous job in creating your lovely spring wreath, Niki! I had no idea you used one of those bike wheel wreath frames from the Dollar Tree. I picked one up and put it back cause I didn’t like how cheap it looked – pardon me for saying that, but by painting it like you did, really enhanced the look and took the design to a whole new level! Now thanks to you, I’ll go back and get one or two – if there’re any left!
Thanks Gail. I was suspicious about it at first too lol. I thought I’d just see what I could do with it. I should’ve bought more!
Beautiful wreath!! I’m loving the copper paint you chose to use for your wreath. I didn’t realize Dollar Tree had these bike wheel forms. They’re perfect for pretty wreaths like yours.
Thanks Allyson. I was surprised to find the wreath form. I snatched it up!
This wreath is really pretty! I love that you painted it copper, and the flowers are lovely. I need to check my Dollar Tree to see if they have the bike wheel wreath form, too.
Thank you!
Niki,
Thanks so much for all your visits!! I have been busy lately, trying to change over decor from Winter/Valentine’s Day…So I have been too lax with responding to comments…I have to try to be better about that…I am looking at going to a new church as a new start, a fresh start…There will be people that from our old parish and new ones too…I am so sorry to hear about your sweet fur baby…I went through having to put 2 of my fur babies to sleep when they got ill and I can not do it again which is why we never got another dog..So having the grand pups is just fine even though if something happened to one of them, we would be heart broken….Prayers to guide you through making a decision about what to do about your sweet fur baby..I hope you are having a good week!! Stay safe, healthy and happy!!
Hugs,
Debbie
Aww, thank you Debbie. Love visiting you!
Your wheel wreath turned out cute! I may have to try this.
Thank you! You should. It makes a big statement on the wall for spring and Easter. It’s not too expensive either.
That is just so pretty! What a shame about the paint coming off on your hands, you can’t see where so I guess it was an easy fix – patience is a virtue but when we want to get on with our crafting it’s hard to wait! Faux flowers are so versatile and if we use them over and over again in different ways they do become a good choice environmentally.
Thanks Julie. I can see that spot glaring at me from the pictures. It’s like the more I look the bigger it gets, ha! You know how that goes with crafting. You can see it, other people can’t… until you point it out lol.
Absolutely gorgeous Niki! I could have looked at that bike wheel all day and never have come up with this idea! Thanks so much for sharing. Have a wonderful weekend ahead.
You’re so sweet Denise, but I’ve seen your house. You are so talented, so I’m sure you could’ve come up with something better. I love your beaded spring wreath!
Wow, that turned out beautiful! My dollar store hasn’t gotten them yet. I’m hoping they do soon. Thank you so much for the inspo!
Thank you!
So different and so cute!
Jenna
Thank you! I like the way it turned out, minus the fingerprint lol!