Welcome! Today is our monthly Creative Craft Hop, so if you’re coming over from Modern on Monticello, I’m so glad you wondered over here! Weren’t Donna’s garden signs adorable?! This is a blog hop hosted by Sara over at Birdz of a Feather. Stick around after the post to check out all of the fantastic posts shared by many other talented bloggers, including Patina and Paint’s adorable easy Easter basket tags which is next on the hp! As my contribution to the hop, I will be sharing a tutorial on how to make a beautiful burlap cross wreath. With Easter coming up, this is the perfect wreath to adorn or door or wall. I plan to leave mine up after Easter and change the flower and bow to fit the season and/or holiday. Let’s get started!


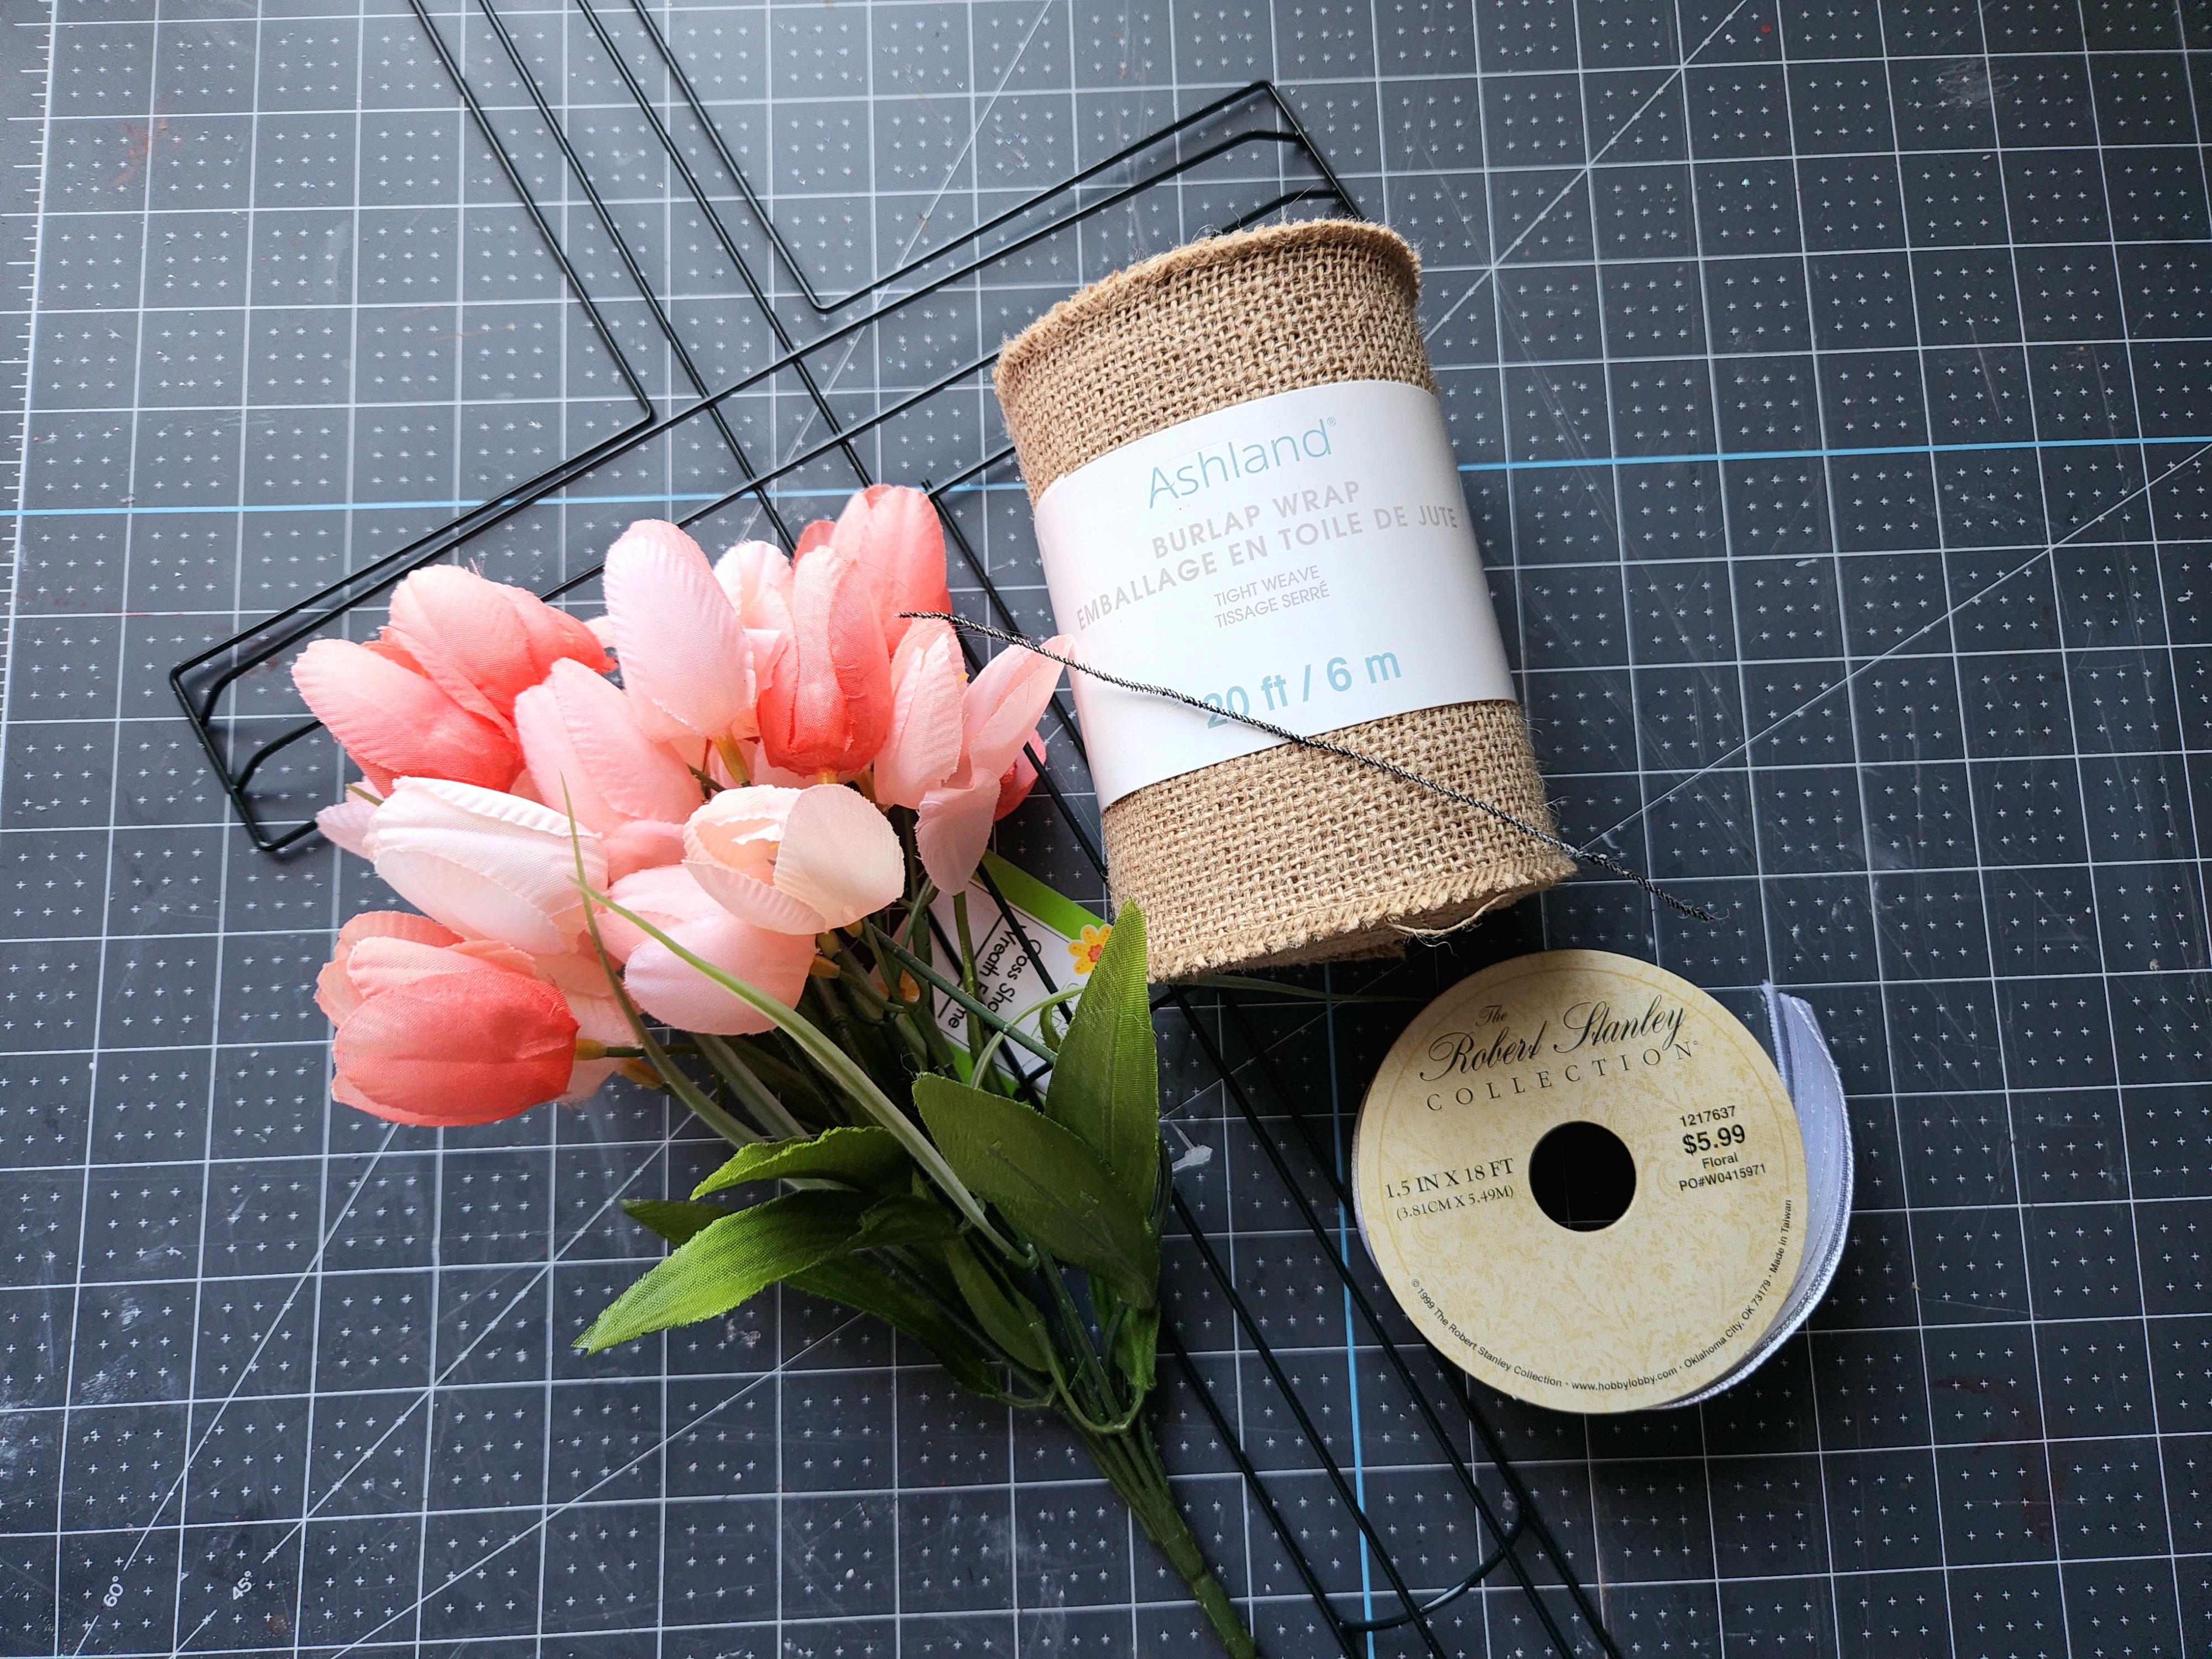
Supplies for Burlap Cross Wreath:
- wire cross wreath form- I got mine from Dollar Tree.
- burlap- I used a little over 1 roll of 20ft.
- ribbon for bow- I used 1.5″ wired white ribbon.
- floral wire or pipe cleaner for bow
- faux floral or greenery

Fill the First & Second Section from the Bottom
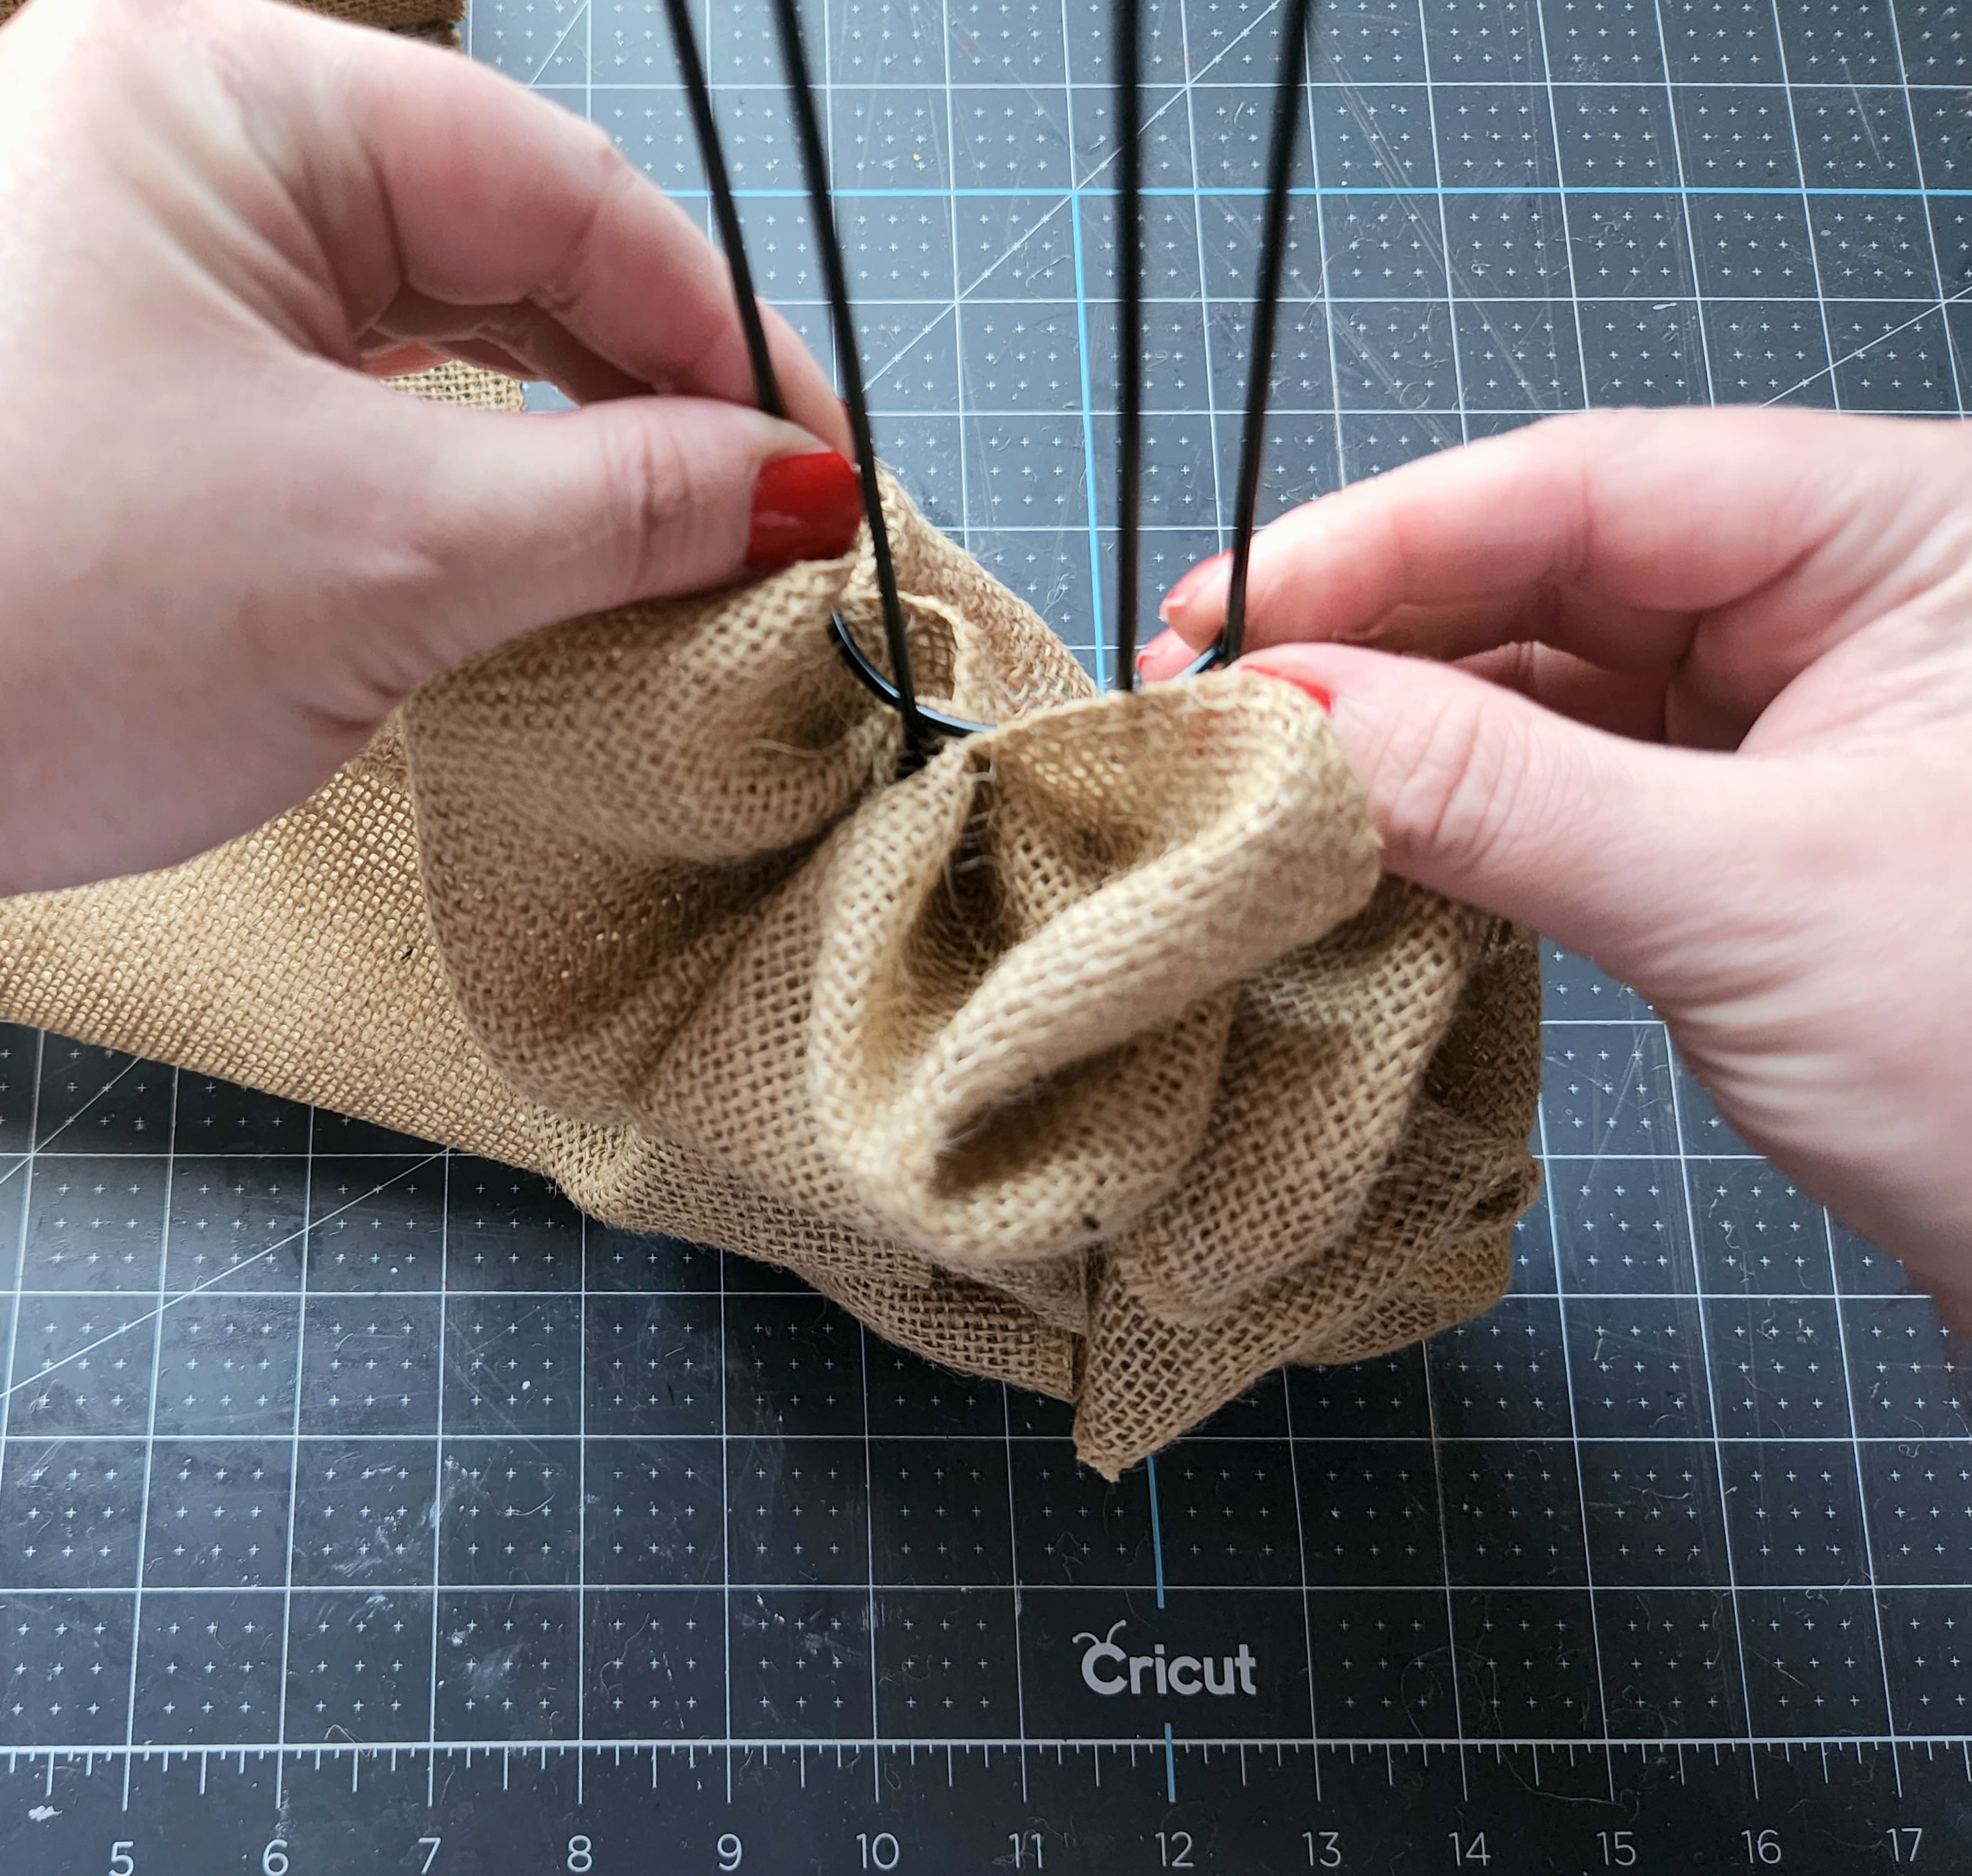
The wire wreath form has three vertical slots throughout the length with sections created by crossbars. Slide a “bubble” of burlap through one of the outside slots at the bottom. It should stick up from the form about 4-5″. I didn’t tie my burlap to any of the wires because I can hold them in until it’s tight enough to hold itself in. If you have issues with that, you can place a line of hot glue on a wire or tie the burlap to one of the wires.

Slide another bubble through the middle slot.

Finally, complete this row by pushing another bubble through the last slot.

Push that row of bubbles down to make room for more rows and to form a true “bubble.”

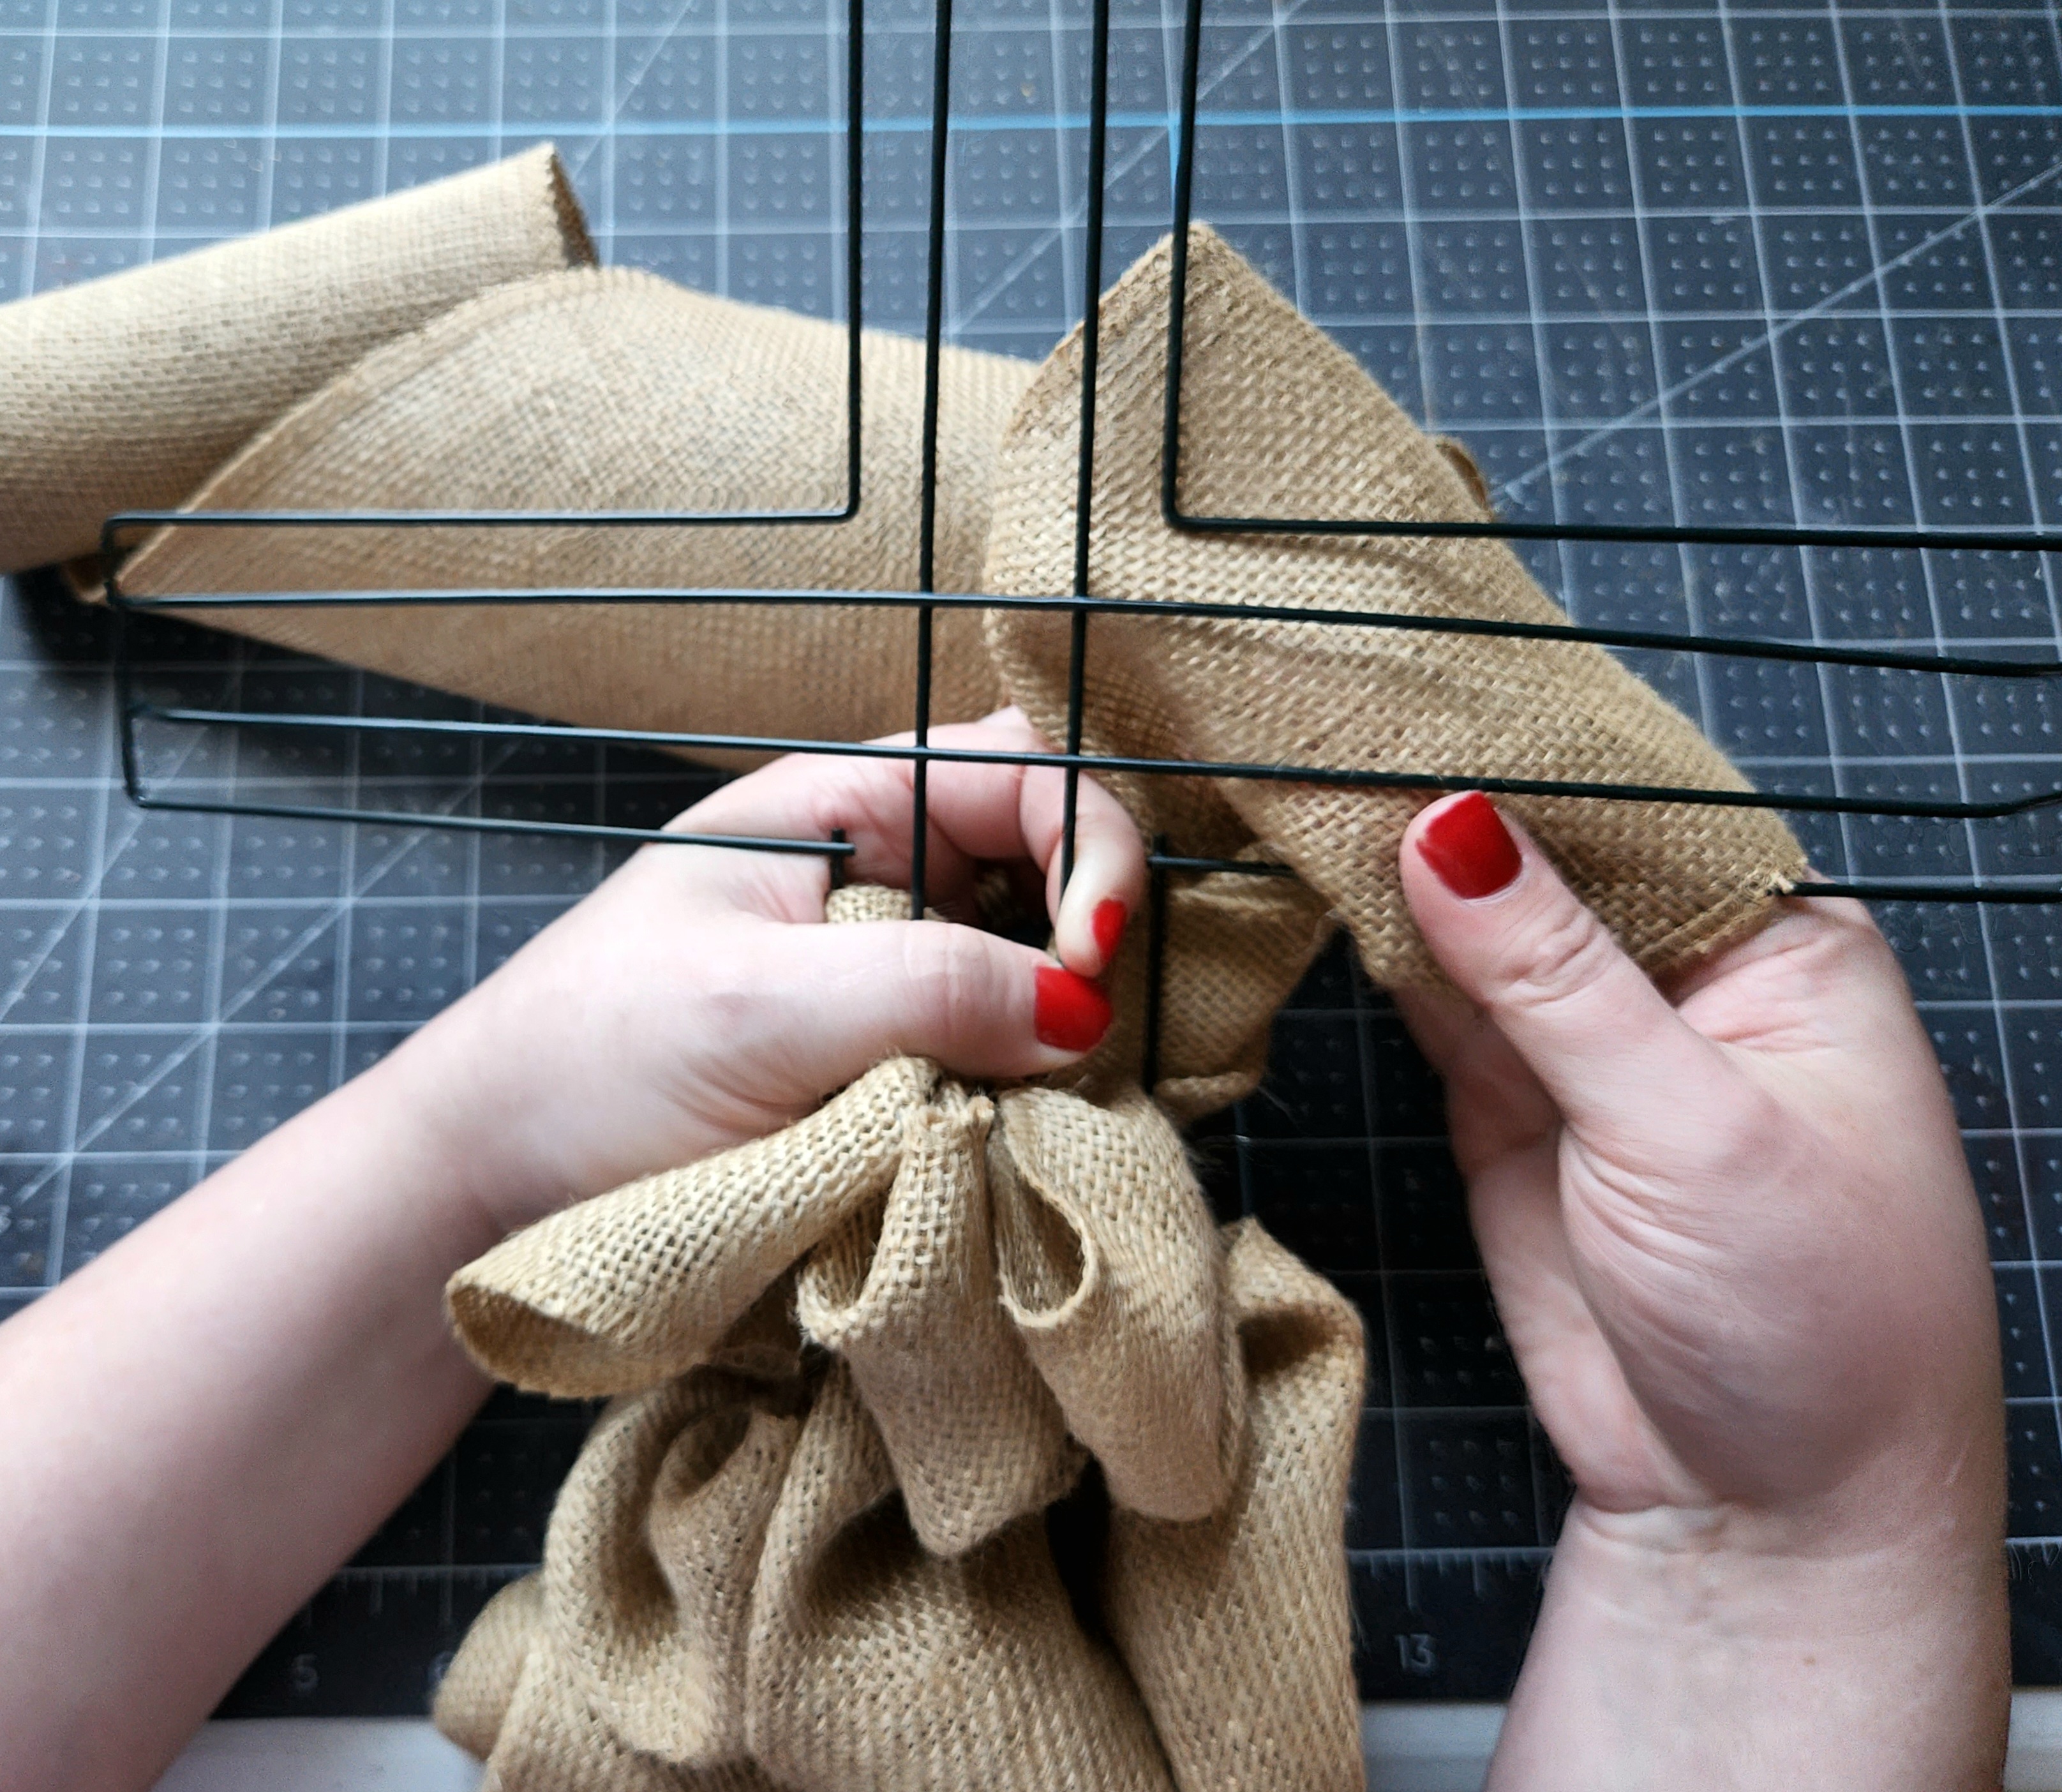
Now, begin a second row. Hold the first row in place with a few fingers and use your other hand to slide a bubble above the one you just placed in the last slot.

Continue adding rows of burlap in rows of three. Push the burlap down when you begin a new row. I fit 3 rows in between each cross bar in the first and second sections.


Begin Filling the Third Section
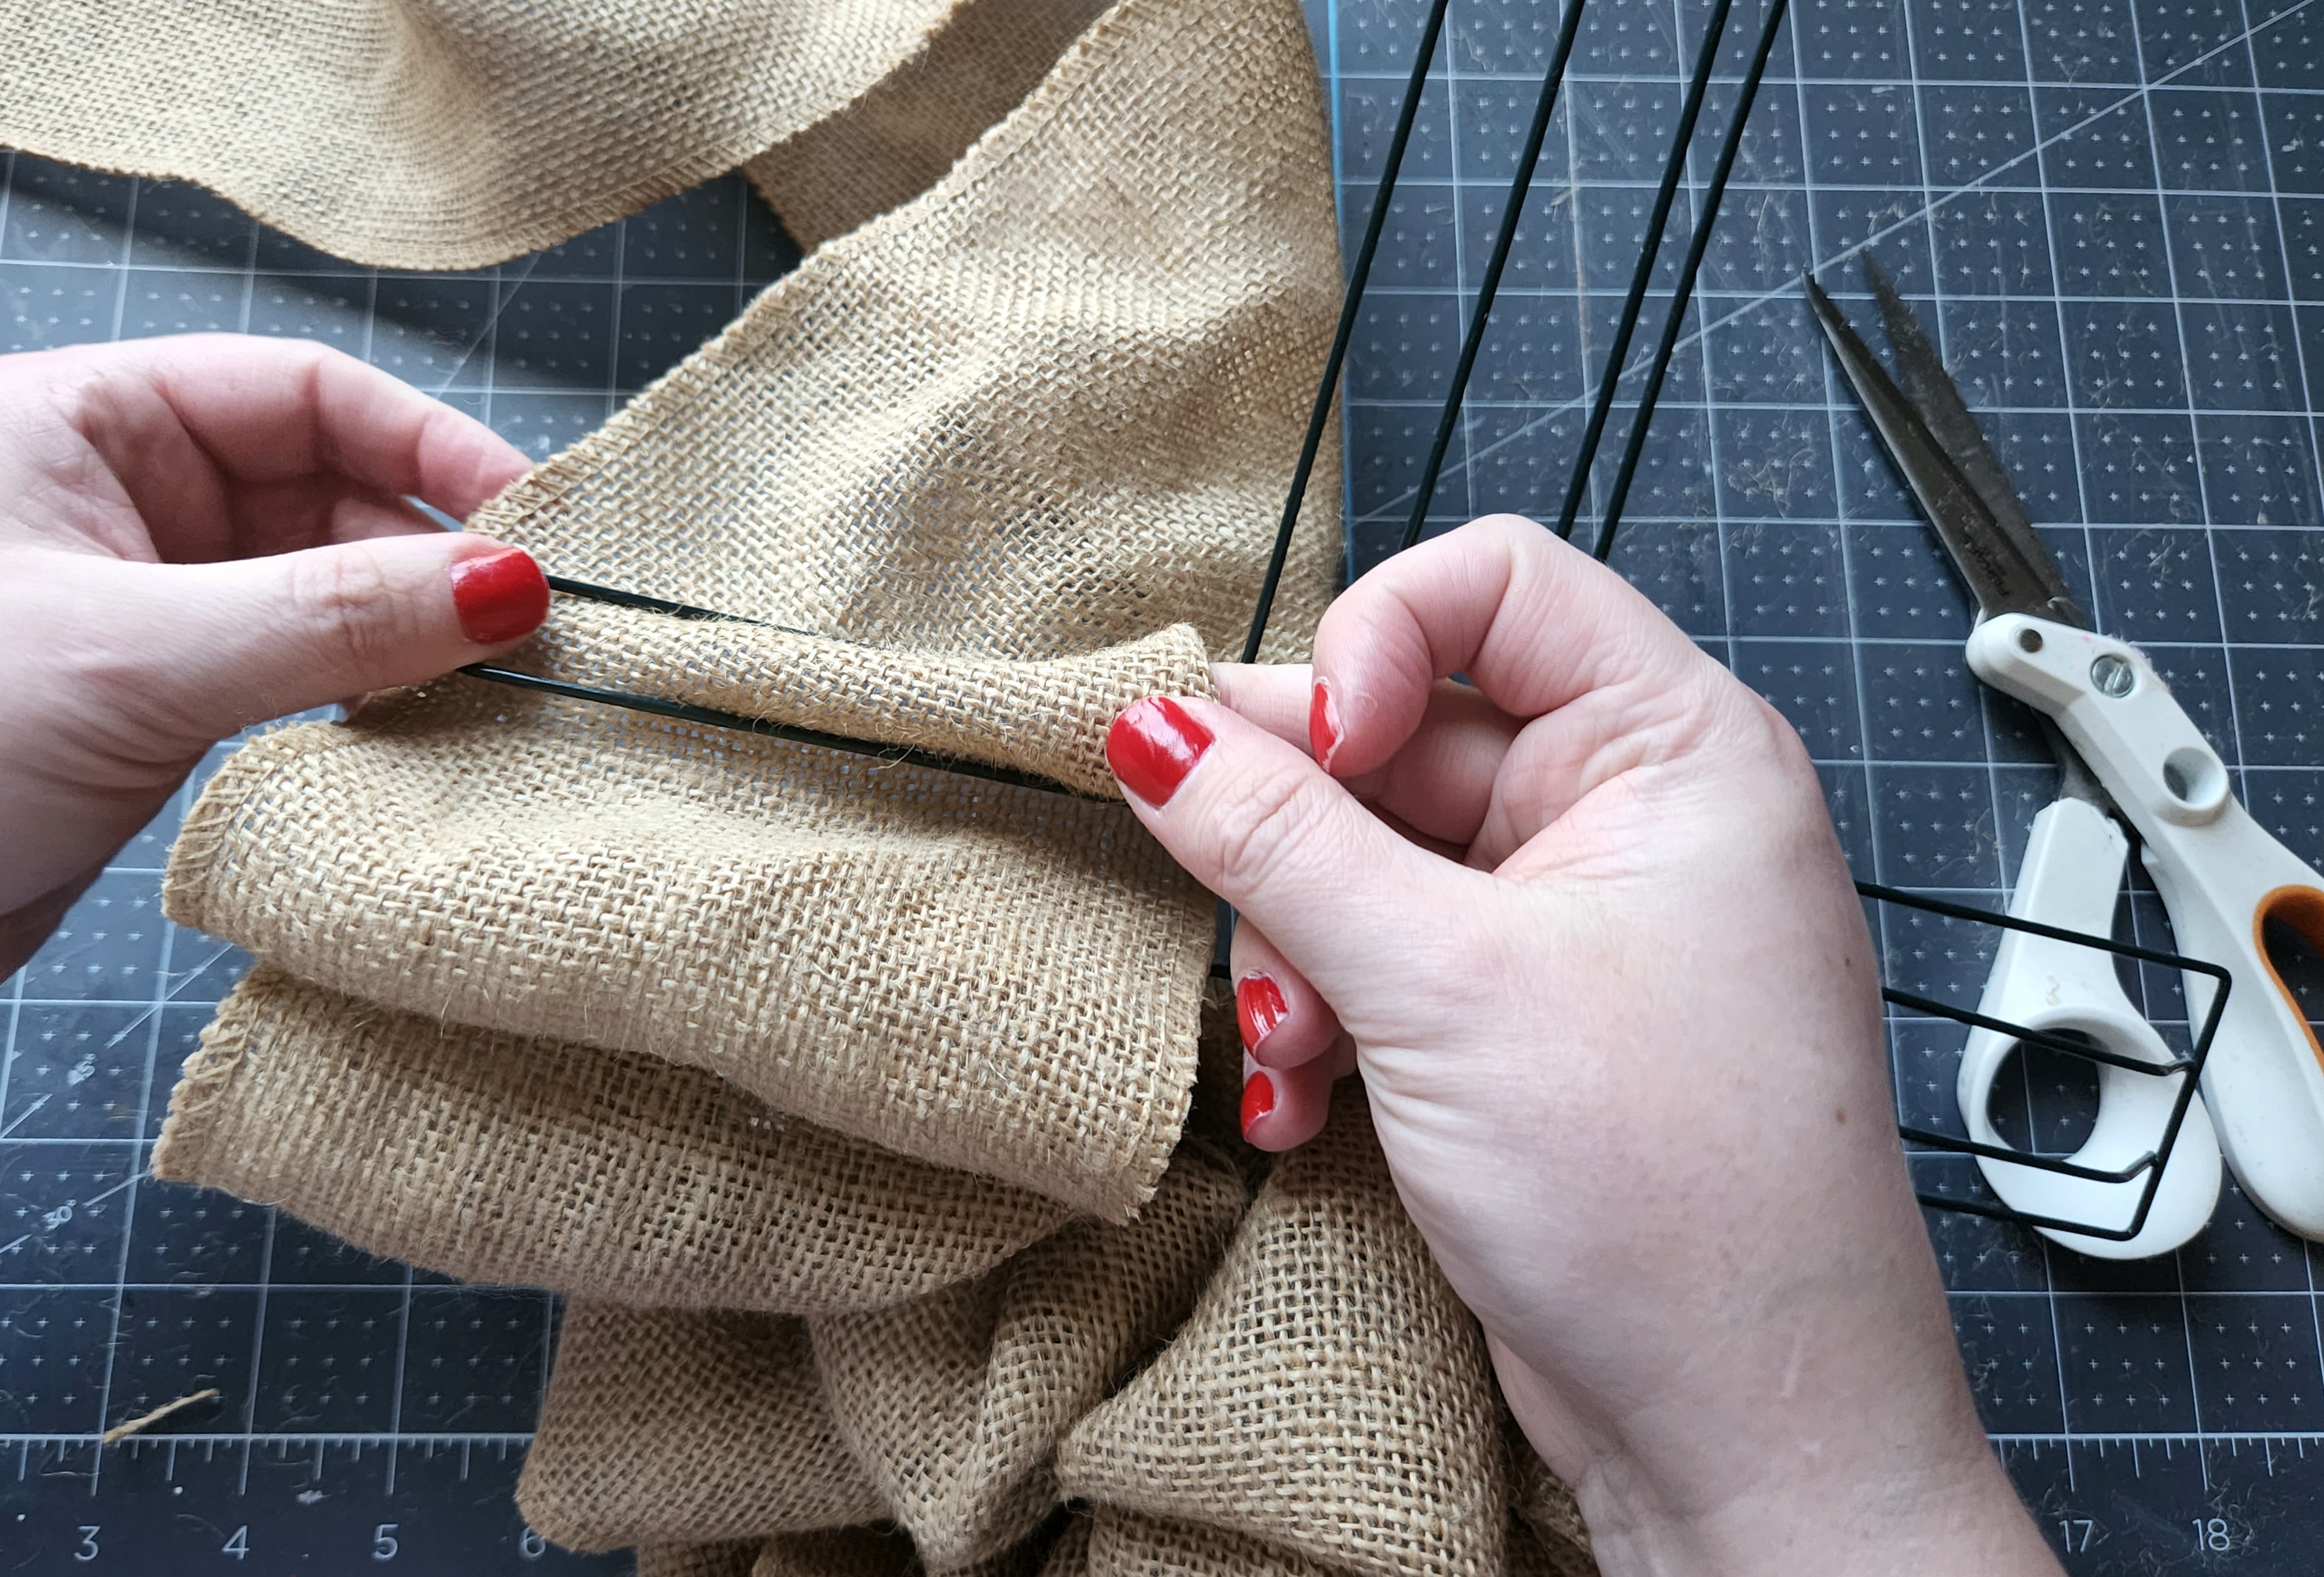
Fill the third section of the cross wreath just as you did with the others. Add burlap, pushing down the bubbles when you begin a new row. This section I filled with about 7 rows before I reached the cross branching off to the sides. Cut the burlap about 5″ from the back of the wreath form. I didn’t tie this piece off, I just tucked it in the back of the wreath.


Fill the Left Cross Section of the Wreath
Start on the left side of the cross section and begin filling the slots just as you’ve been doing. However, instead of stacking them from side to side, you’ll place the bubbles in from bottom to top, then top to bottom on the next row. Place a “bubble” in the bottom slot, then the middle, finally the top.
Push that section to the left and continue adding rows until you reach the middle. Do not continue going to the right side. Stop at the middle.

Continue to the Top of the Cross Wreath Form
Now begin your trek to the top. Add burlap bubbles to the middle slot and the outer left slot. Then push them down before adding another row.


Continue adding bubbles to the outer left and middle slots all the way to the top of the form. I ran out of burlap right about here. When you do, just begin a new roll just like you did at the beginning. Tuck the ends into the back. Again, if you have a hard time holding on to the bubbles, you can tie it on to the form.
Head Back Down to the Cross Section
Finally, fill the outer right slot, heading down instead of up. Push a bubble through the right slot at the very top of the form.

Add bubbles, pushing them up against each other as you add the next one. Once you get back to the horizontal cross section, begin adding burlap vertically just as you did on the left side. Add a bubble in the top slot, the middle, followed by the bottom.

Push them together and add more rows until you reach the edge of the wreath form. I think I fit about 5 rows from the middle to the edge on the left horizontal side as well as this right side. Cut off the excess burlap and tuck the end into the back of the burlap cross wreath.

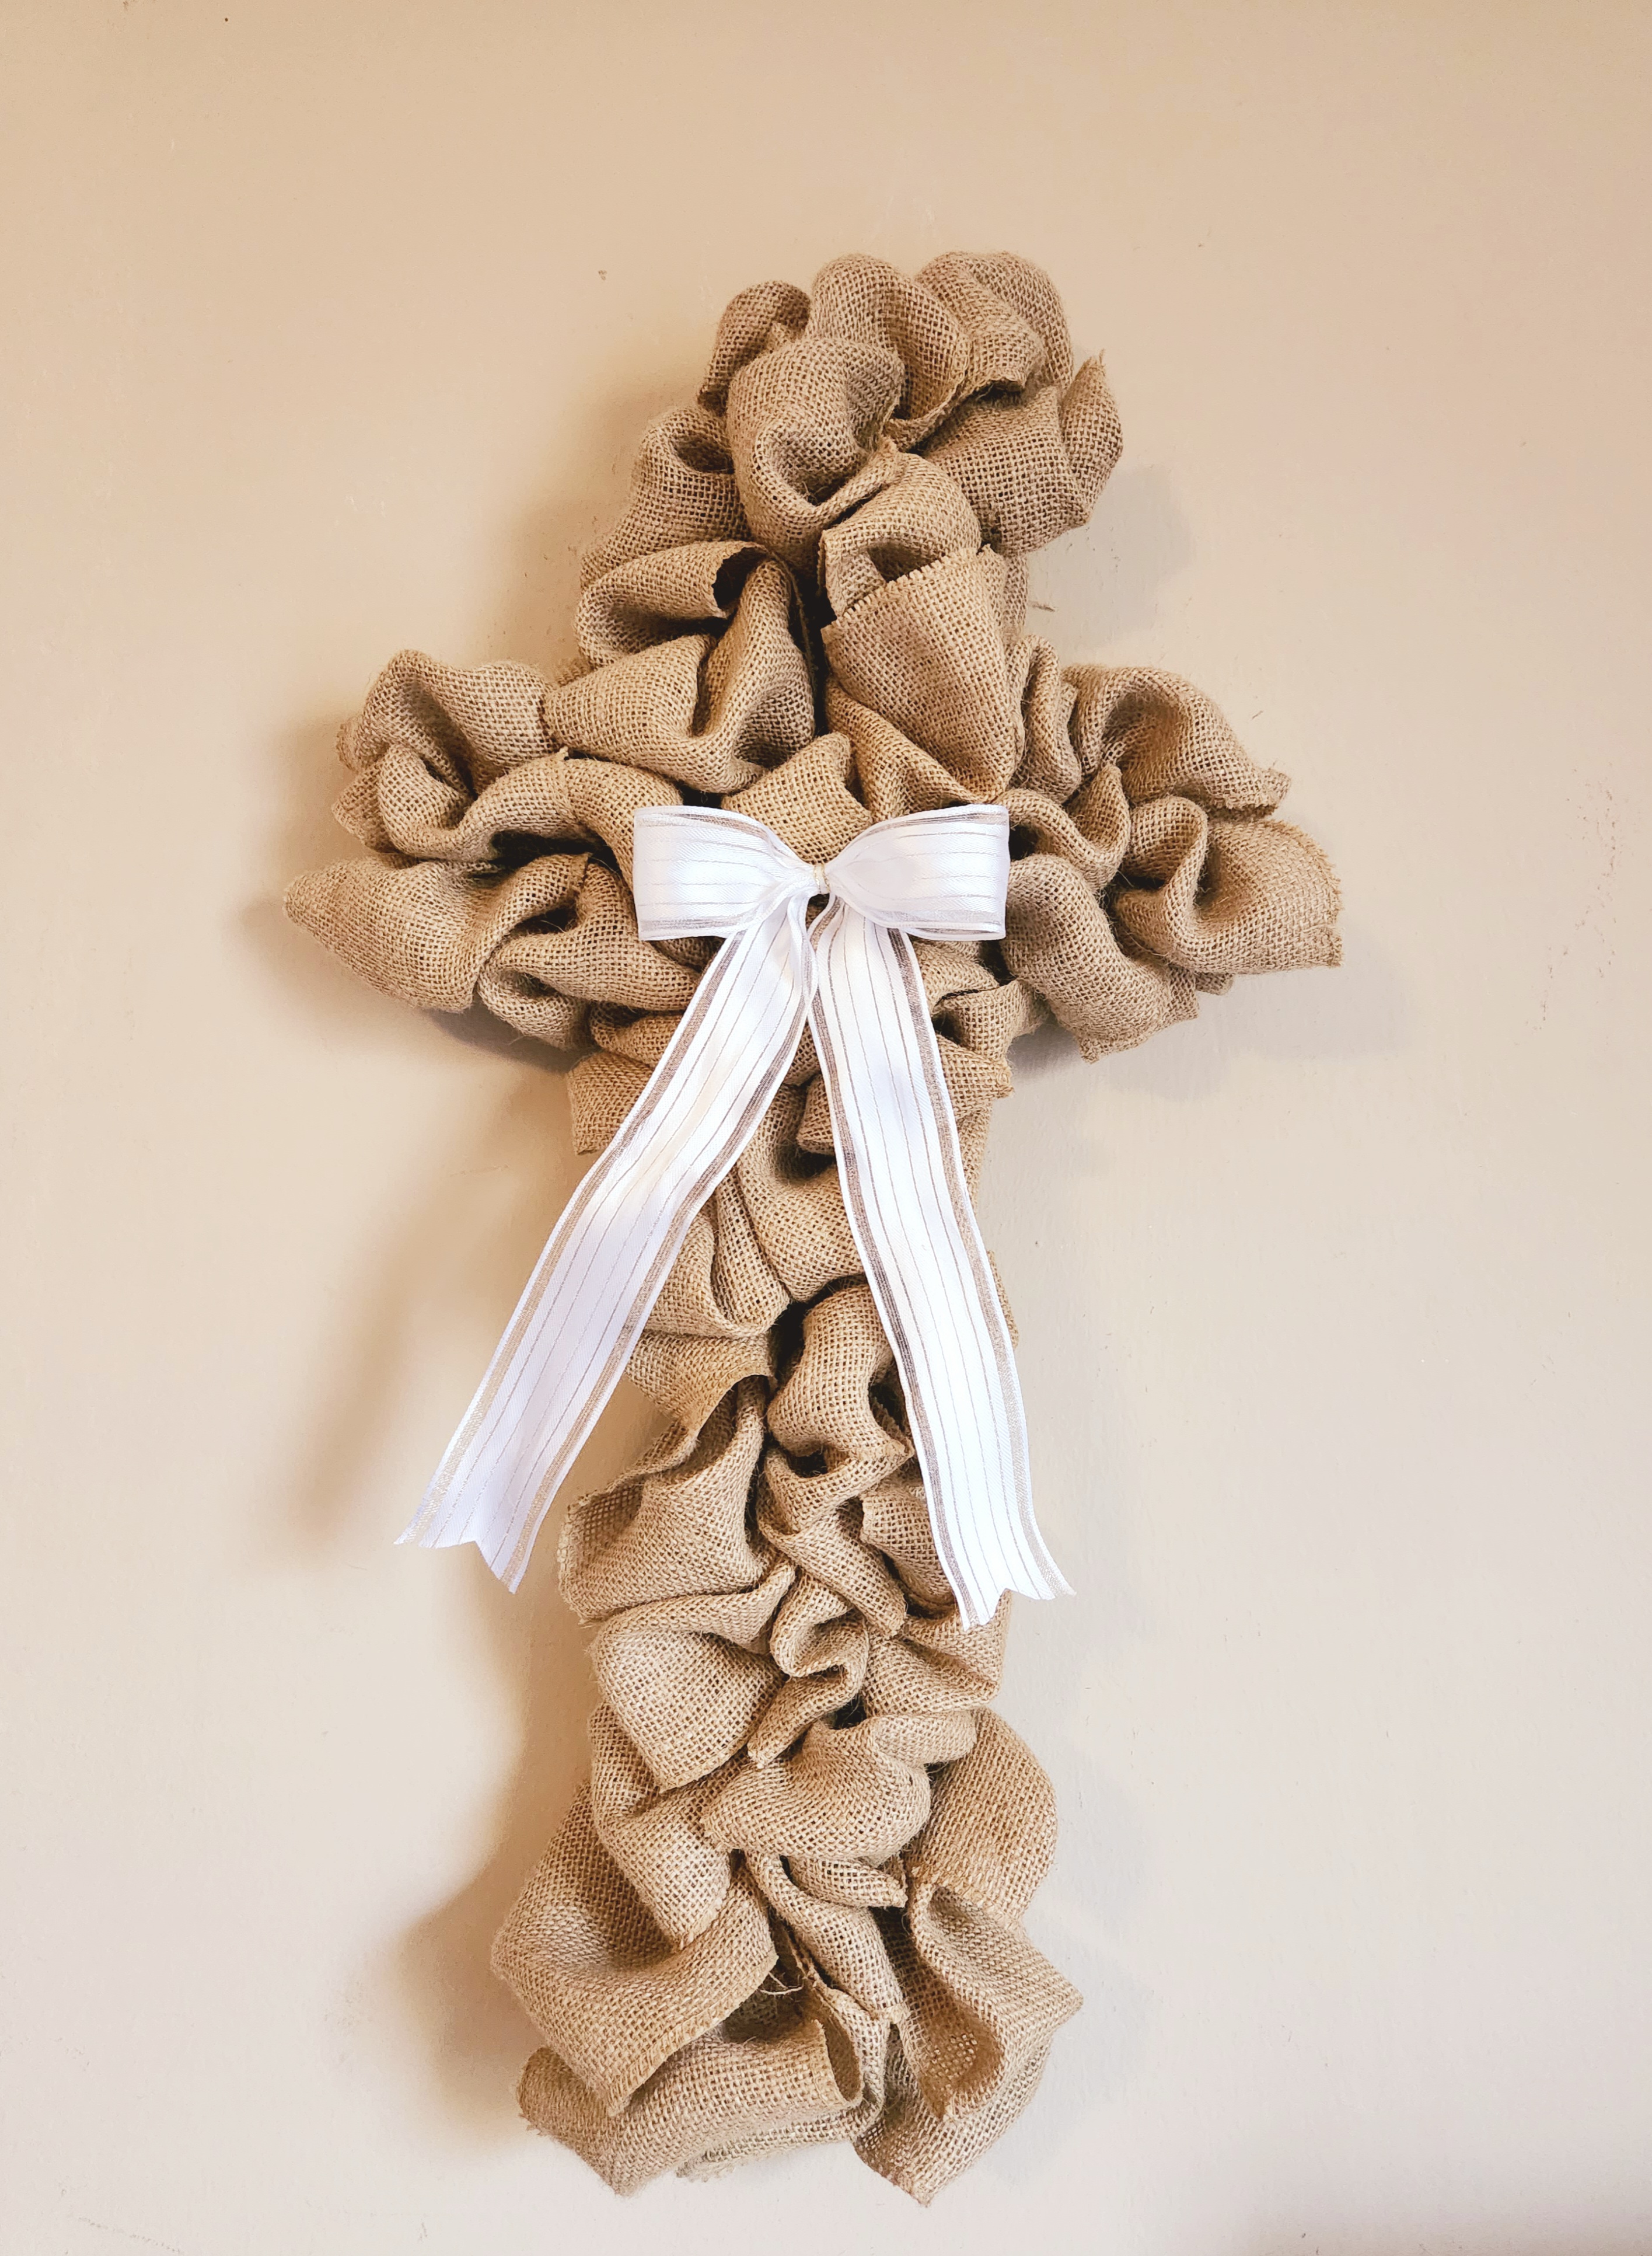
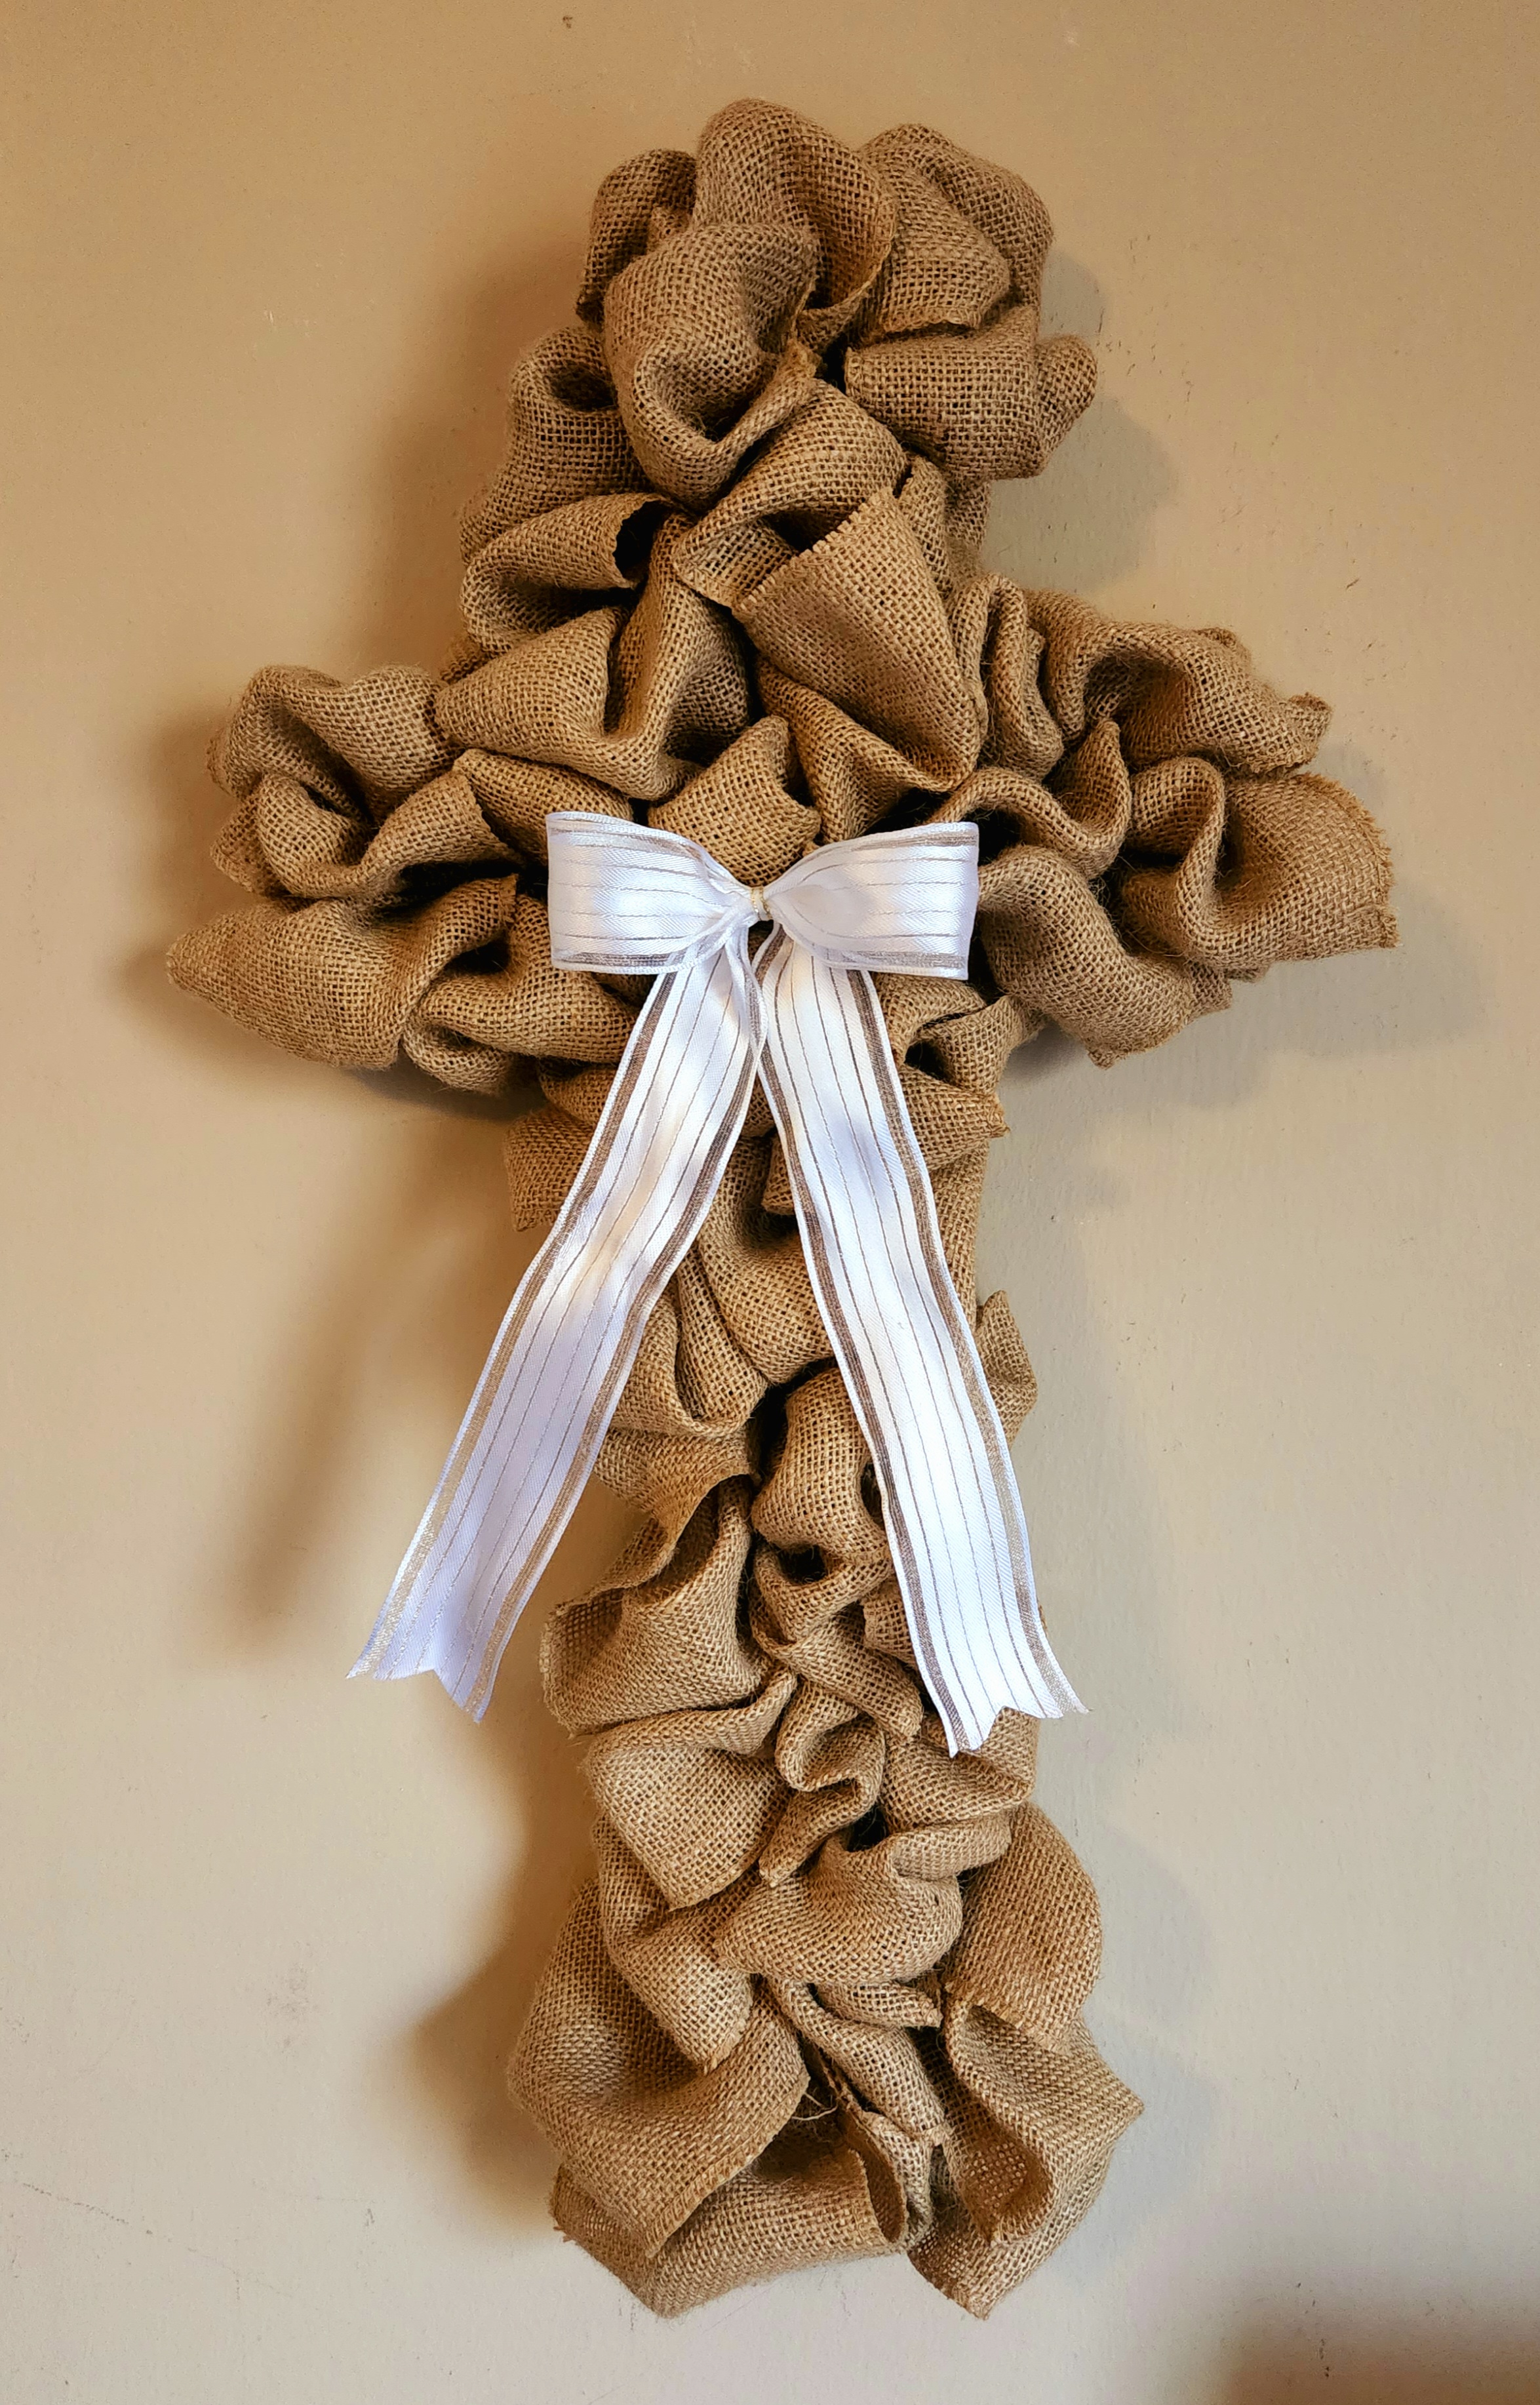
Embellish the Cross Wreath
I made a simple two loop bow with 6″ tails on it. I made the loops too wide at first (which you will see in these first few pictures), but I eventually made them a little smaller. Secure the center of your bow with floral wire or a pipe cleaner. Keep the wire long so that you can use it to secure the bow to the wreath. I first used a piece of thin rope to hide my wire, but I replaced it with white and gold 1/8″ ribbon when I remade it.


Use the wire to attach the bow to your wreath form. I placed mine in the middle of the wreath.

Here is what you’ll have with just the bow on the wreath.
Finally, add your flowers and/or greenery above the bow on the burlap cross wreath. At first I used one piece I removed from a tulip bunch which had three flowers connected to one stem. I tucked it above the bow held in place with the bow’s wire.


I wanted something a little different, so decided to use two of those pieces from the tulip bunch on the sides of the bow. One was tucked on the left side and one on the right side. I love the way they kind of frame the bow.
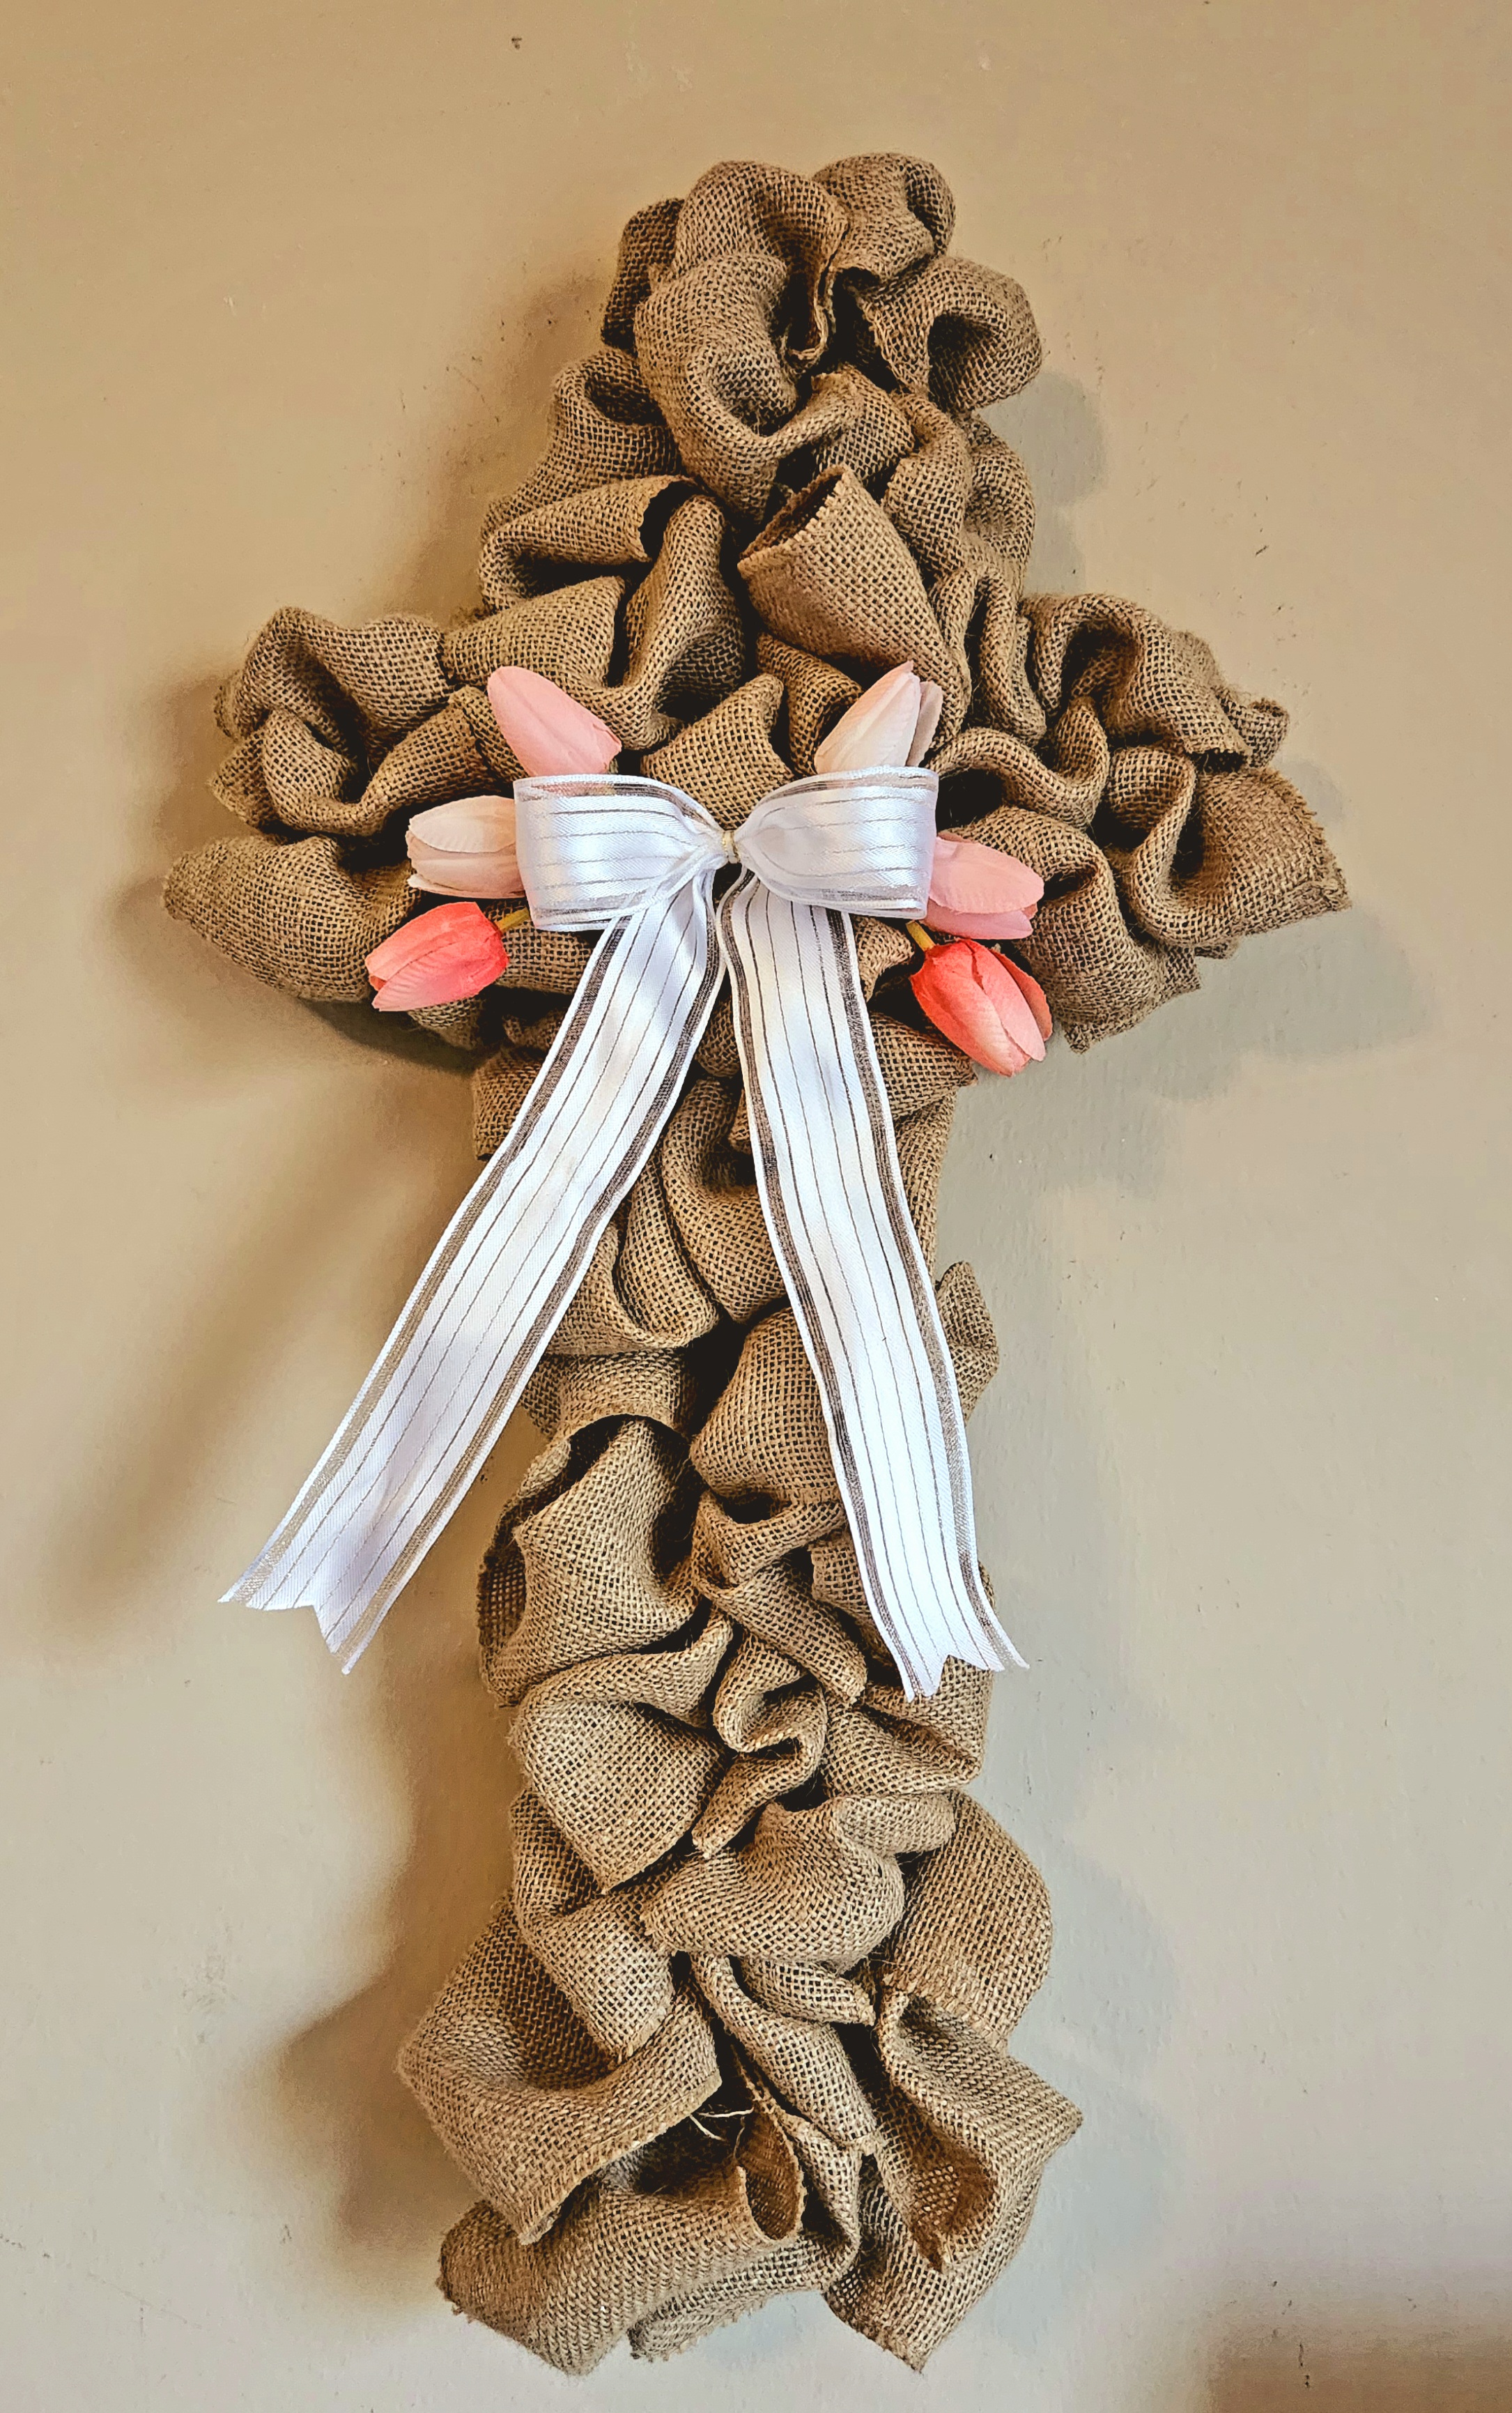
That’s it! Now you can hang your gorgeous burlap cross wreath!
I ended up taking out my tulips, replacing them with the same flowers that I used in my spring floral hoop wreath. They will both hang in my living room, so I wanted them to match. Here are a few photos of the different ways I dressed it up.


Here it is with my purple/pink flower hanging on my gallery wall. By the way, you can get the spring wall art surrounding it for free! This is one of two sets of free printables available in my free spring printables post.


Remember to pin the image below or share this post with the buttons on the left side of the page so you can find it when you’re ready to start your project! Also, follow me on Pinterest for new ideas added weekly! Be sure that you never miss a great tutorial for decor like wreaths, signs and other home decor, free printables, crafts, and other fun posts! Enter your email address below to be notified of new posts! Use the buttons below to follow me on social media for other great content.

On to the Creative Craft Hop!

Next up on the blog hop is Tammy from Patina and Paint! She’s sharing a tutorial for creating an easy Easter basket tag. Spring is only a month away, so that’s a post you don’t want to miss. After visiting her, make sure to check out the posts from these amazing ladies! (Their main blog is linked to their name with their project linked to its name, which is always the way I set up my blog hops links.)
Tammy from Patina & Paint | Easy Easter Basket Tags
Cecilia from My Thrift Store Addiction | Floral Cross Upcycle
Jenna from The Painted Apron | Floral Ice Cream Cones
Terrie from Decorate & More with Tip | Sweetest Change to a Bird Cage
Sara from Birdz of a Feather | Acrylic Pour Painting
Gail from Purple Hues & Me | Woven Ribbon Wall Basket
Donna from Modern on Monticello | Adorable Garden Signs
Thank you for visiting us today. I hope you’ve found several of your next DIY projects! Be sure to pin this post and any others you like so you can get back to them when you’re ready to get crafty.
If you enjoyed this post, you might like these:


Niki how pretty! I’ve seen the cross forms before but could never figure out what to do with them. This is perfect! Now my mind is spinning with the possibilities. Thanks so much for sharing.
Thank you! I figured if I could fill an open pumpkin with burlap that certainly I could fill the small spaces in the cross. This one was so much easier!
Your cross is beautiful Niki and looks amazing on your gallery wall! The floral embellishments really complete it! Great tutorial too; so easy to follow.
Thank you! I am already trying to think of ways to embellish it for summer lol!
The cross turned out adorable. Your tutorial is so easy to follow, thanks for sharing. Happy Spring!
Thank you! Happy hopping!
Your burlap cross wreath certainly turned out pretty, Niki! Perfect for Easter and Spring! It’s a lovely addition to your home decor and I love that you can change it for just about any season or occasion!
Thanks Gail! I love the way it turned out.
Very cute Niki, and it looks like a fast and easy craft… I love the way you added tulips with the bow, so springy, but I like it with the single purple bloom too! Happy crafting!
Jenna
Thank you! It was pretty quick & easy. Once you get going, it’s a lot easier.
We both shared crosses! 😉 Love your use of burlap on the cross form! Blessings, Cecilia @My Thrift Store Addiction
I know! Great minds, right?!
I haven’t made a burlap wreath in a while so I am glad you shared your technique on how to create the loops for a cross shaped wreath form. It turned out so pretty and will look good for any season as you change out the decorative pieces. Pinned for inspiration. Thanks for sharing it.
Thank you Donna!
Beautiful Niki! I love that you added the tulips for a springy look too. Your tutorials are always so easy to follow and that is always so appreciated. Pinned!
Thank you Denise! You’re always so sweet!