Welcome to the blog today. I’m so glad that you’re here to learn how you can customize just about any fabric with paint and a stencil. Just think of all the things you can make: t-shirts, purses and other bags, baby onesies and blankets, towels, I could go on and on! Today I’m going to show you how you can use acrylic paint and a stencil to make anything you’d like. I’m using a stencil on a tea towel, and I’m also sharing the SVG file I’m using with you for FREE! So even if you know how to do this, stick around and get your free Easter design.

Supplies needed to paint on fabric:
- acrylic paint- I used black Craft Smart paint from Michael’s. It was only $0.89 when I got it.
- fabric paint medium- I used Martha Stewart Crafts Tintable Fabric Medium which was about $7.
- stir stick or something similar to mix
- stencil or
- vinyl, scissors, & transfer tape to make a stencil
- foam brush
- optional: fabric Mod Podge & paint brush


Create Stencil to Paint on Fabric
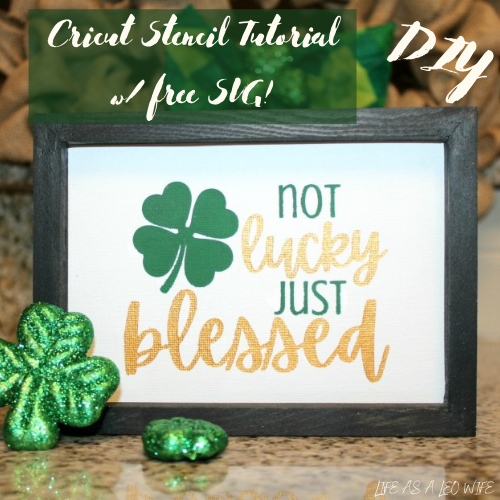
If you need a full tutorial on how to make a stencil with a Cricut, check out my full, step-by-step tutorial here. I go into detail on how to make one with vinyl and how to use it. If you already know how to do that, you may still want to check it out to get a free SVG file. It says, “We’re not lucky, just blessed,” with other designs which I used on a St. Patrick’s Day sign. For this project, I’m making a no sew DIY tea towel (full instructions for that here w/ another free SVG file!) with an Easter design. You can download that design below.

For Personal Use Only
As with all of my designs, please do not sell, use on items to sell, or share them. If you’d like to use them on items to sell, please contact me for permission. I’d love for you to share them with your loved ones by sharing this post on social media using the buttons at the end of the post or direct them straight here to the blog. Thanks for helping me keep these printables and designs free for you!
When you download the file, my logo will not be overlaid on it and the background will be transparent. It was originally made as a 10×10 image, but that will change when you upload it to Design Space or other software. Change it to the size you need in the app. If you’d like me to make the file available as a PNG, let me know in the comments. That would allow you to use this design as a free printable.
Transfer Stencil to Fabric
Once your vinyl is cut and reverse weeded (see previous tutorial on creating a stencil), cut a piece of transfer or contact paper to fit it. I use contact paper from Dollar Tree and have been able to use the same roll for years. One day I’ll put together a list of ways to save money on using your Cricut.

Place the transfer paper on top of the vinyl. Next, go over the contact paper with a credit card or scraper to adhere it to the stencil, then remove the vinyl’s backing.


Place the stencil evenly and straight on the fabric where you’d like the design to be. Trace over the design with a scraper (and your fingers if need be) to get the vinyl to stick to the fabric. Make sure to pay extra attention to the inside of letters like o’s where there are small pieces of vinyl separate from the larger piece.


Remove the contact paper, then go press the vinyl down a little more to make sure it’s secure.


Mix Paint & Medium
Read the back of your fabric medium to make sure the proportions I’m about to give you are correct for your brand. I’m using a Martha Stewart brand which has 2 to 1 paint to medium proportions. Add two parts paint to a container.


Now add one part fabric medium (half the amount of paint) on top of the acrylic paint.
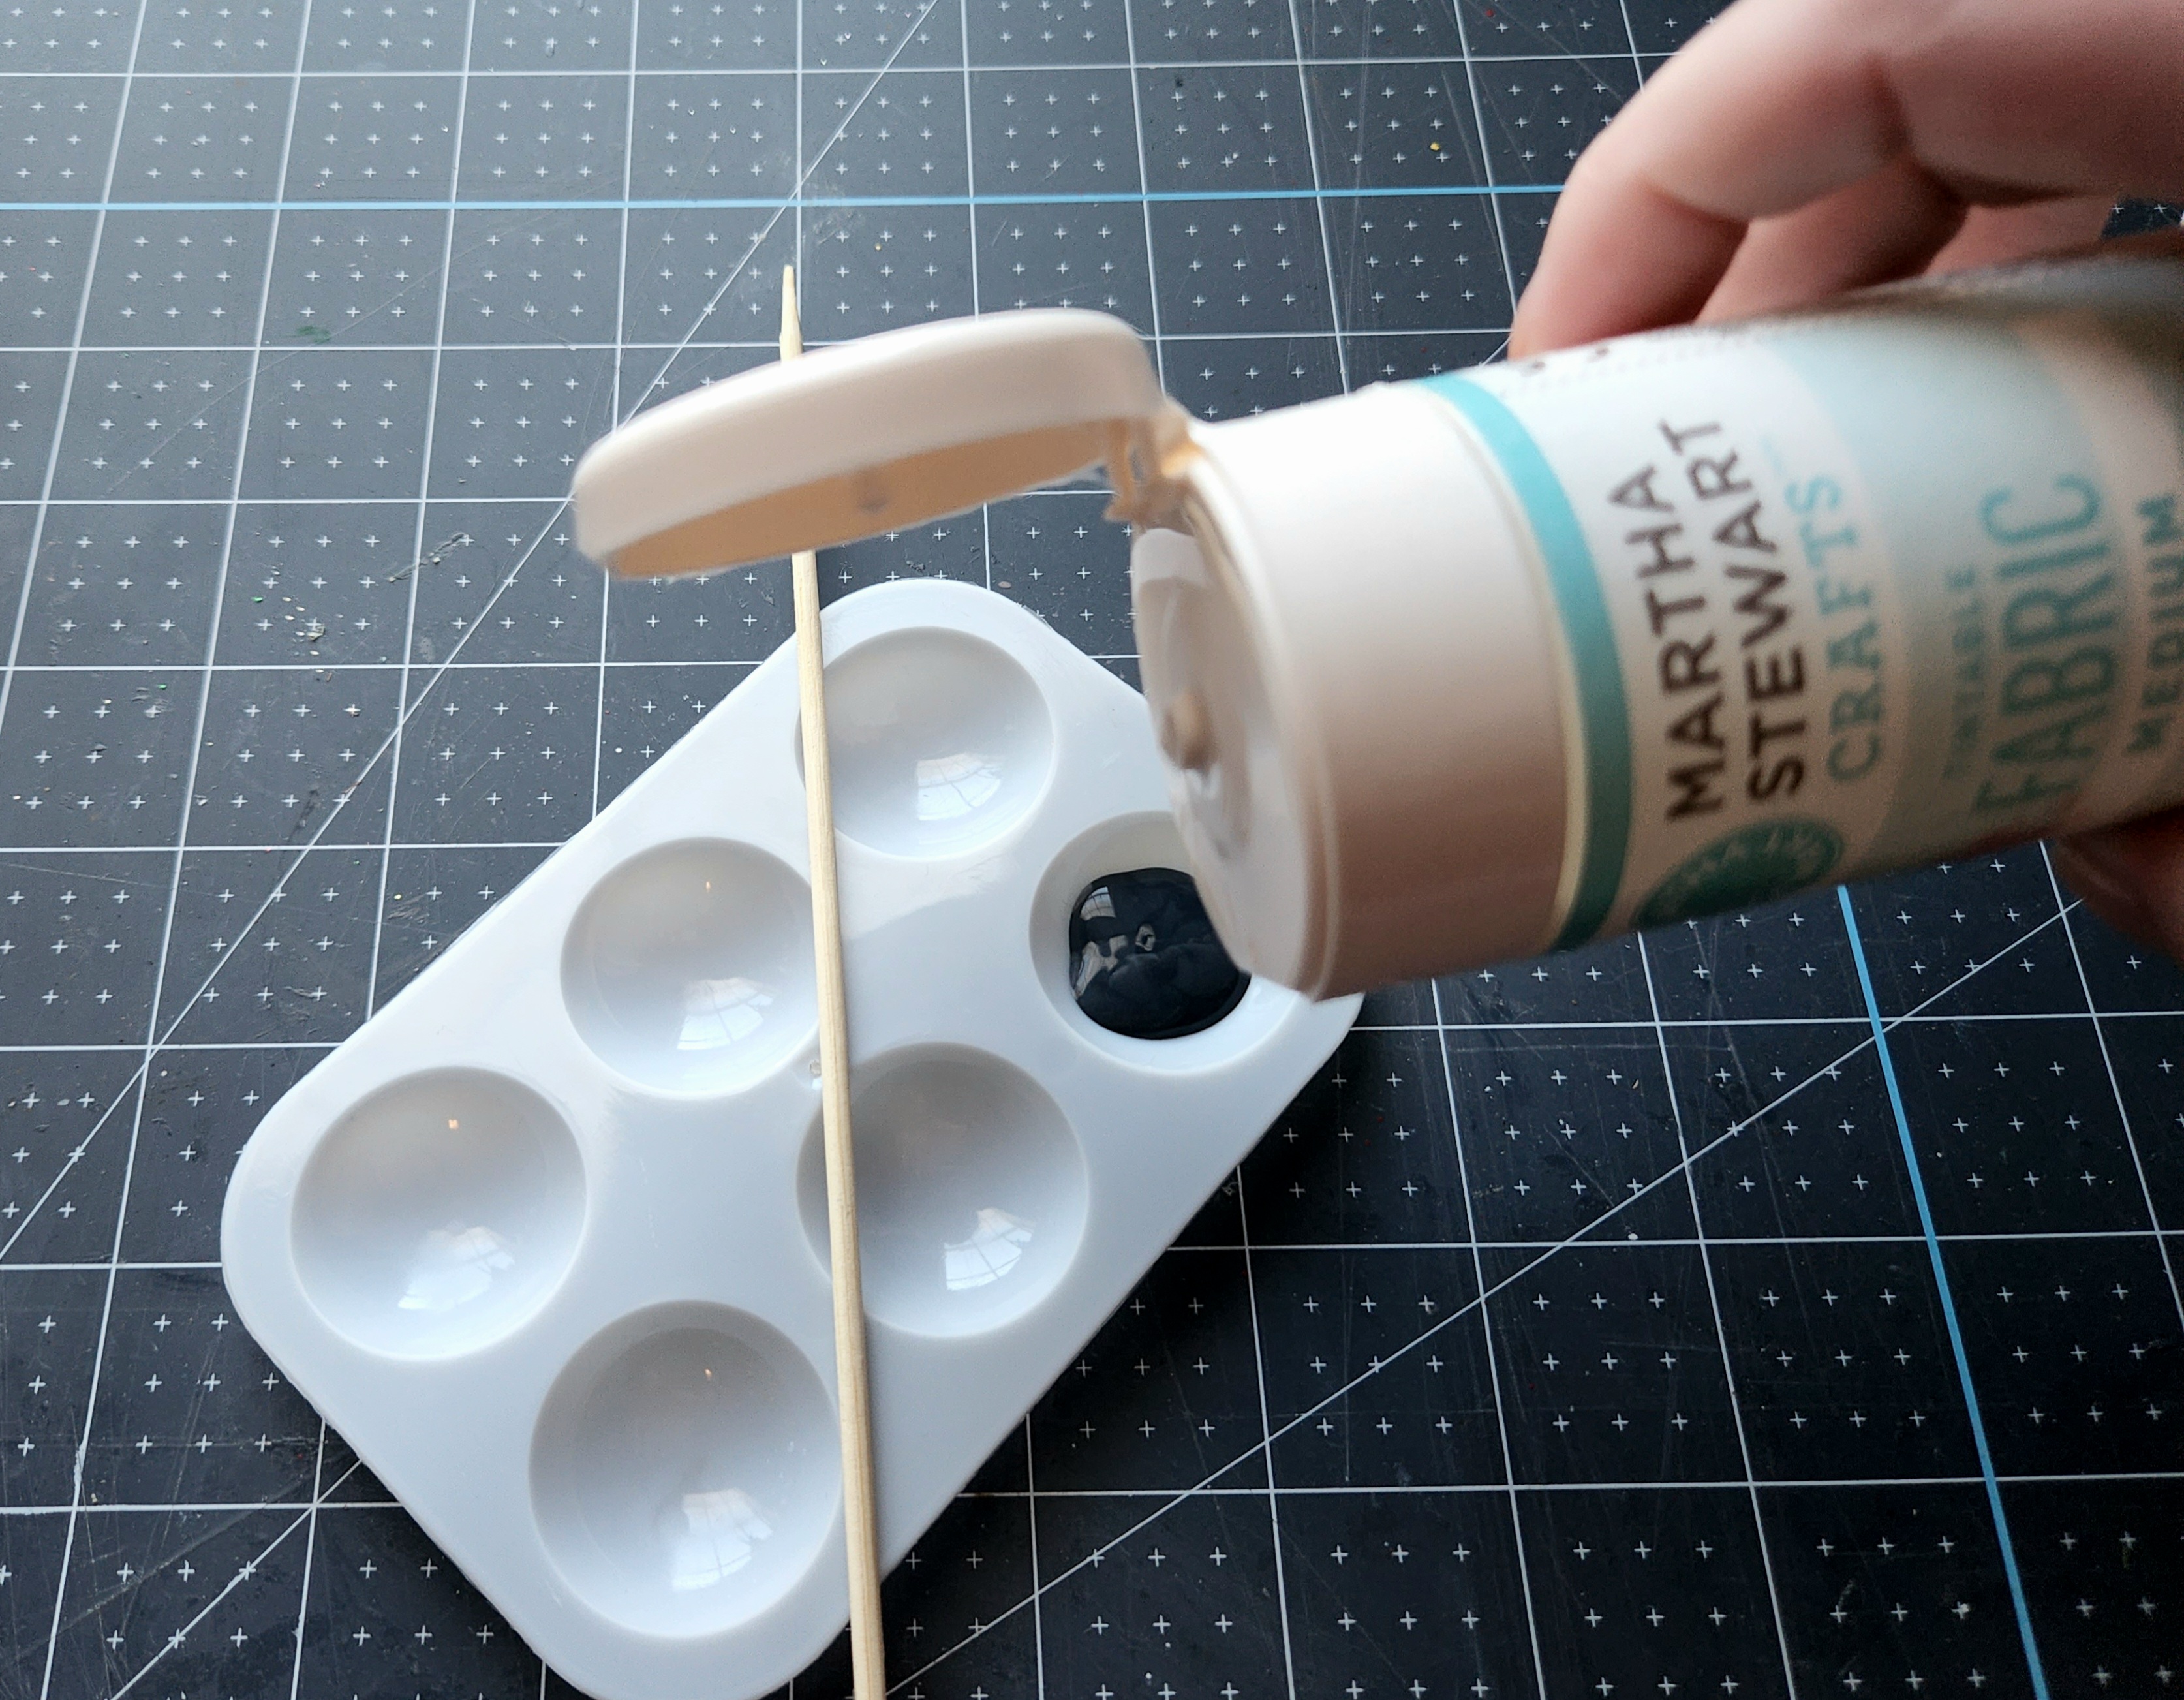

Use the stick to mix the paint and fabric medium. Be sure to mix the two together thoroughly.


Seal the Edges with Mod Podge (optional)
If you have some fabric Mod Podge, you can seal the very edges of the stencil with it. That can help prevent bleeding if you have a fabric that is known to bleed. I used matte Mod Podge on some of my edges and I do not recommend that at all! It was hard to cover and still looks a bit different from the rest of the design. My fabric had no issues with bleeding under the stencil without Mod Podge. Use a tiny paint brush and add the Mod Podge to the edges inside the stencil where the fabric meets the vinyl. Allow it to dry completely before moving to the next step.

*Note- when my fabric dried fully, there were no noticeable differences in the surfaces, where there was Mod Podge and where there wasn’t. I was writing this post as the paint dried, so that’s why I added the bit about it above. I still wouldn’t recommend using the regular kind unless you’re desperate and you know the paint will bleed and can’t get the fabric kind. Just in case.
Paint on Fabric
Iron your fabric and place a towel under it. If you’re using a shirt or something with multiple layers, place a towel or piece of cardboard (which gives you a more sturdy surface) between the layers. Dip your sponge into the paint. If you have more than one color, work with one at a time (obviously, Niki!). For this design I used one color to make this a super easy tutorial, but you could even use more than one color with this SVG.

Make sure the sponge doesn’t have an excess amount of paint, then dab it over the stencil. Dab it straight up and down to avoid displacing the stencil and pushing paint underneath the edges.

Allow the paint to dry in between coats. You can use a blow dryer to shorten dry time if you’re in a hurry. I used three coats on white fabric with black acrylic paint.

Allow the design to dry completely! That’s very important because if you remove the stencil too early, the paint can transfer and/or bleed onto the fabric outside the area you want it. When it is dry, carefully remove the main part of the stencil.


Now remove the small pieces of vinyl that were inside the design, like inside the e’s and o’s. I use a pick from Dollar Tree to do this, then when it’s loose, I can grab it with my fingers if needed.


That’s It!
Isn’t that easy?! Now you can customize anything that’s fabric. It’s a great technique to use when you don’t have heat transfer vinyl in the color you need or something you can’t apply heat to. Acrylic paint is also a lot cheaper than HTV. Here’s how my Easter tea towel turned out. I made the tea towel ladder using Dollar Tree wood. You can get that tutorial here.


I hope that you enjoyed this tutorial. I’d love to see what you make with this tutorial or this free SVG, so follow me on social media using the buttons in the sidebar and tag me in your photos! You can also see what’s happening on the blog that way. I have some free spring printables, SVGs, and some great tutorials upcoming, including a really cool project with Dollar Tree crates. Make sure you don’t miss them by entering your email address below. You’ll get an email when I add new posts, including link parties so you never forget to link up!
There are plenty of more tutorials, printables, and other great posts here on the blog! Before you leave, poke around and see what you find! You can use the search box in the sidebar or check out some of these posts:


Follow me on Pinterest for more ideas added weekly! If you’re a blogger, make sure you link up on Happiness is Homemade and Crafty Creators each week. If you’re not, check out those link parties, found on my Link Parties page, for tons of DIYs, recipes, fashion, family ideas, and so much more shared by bloggers from around the world every week!


3 thoughts on “How to Customize Fabric with Paint!”