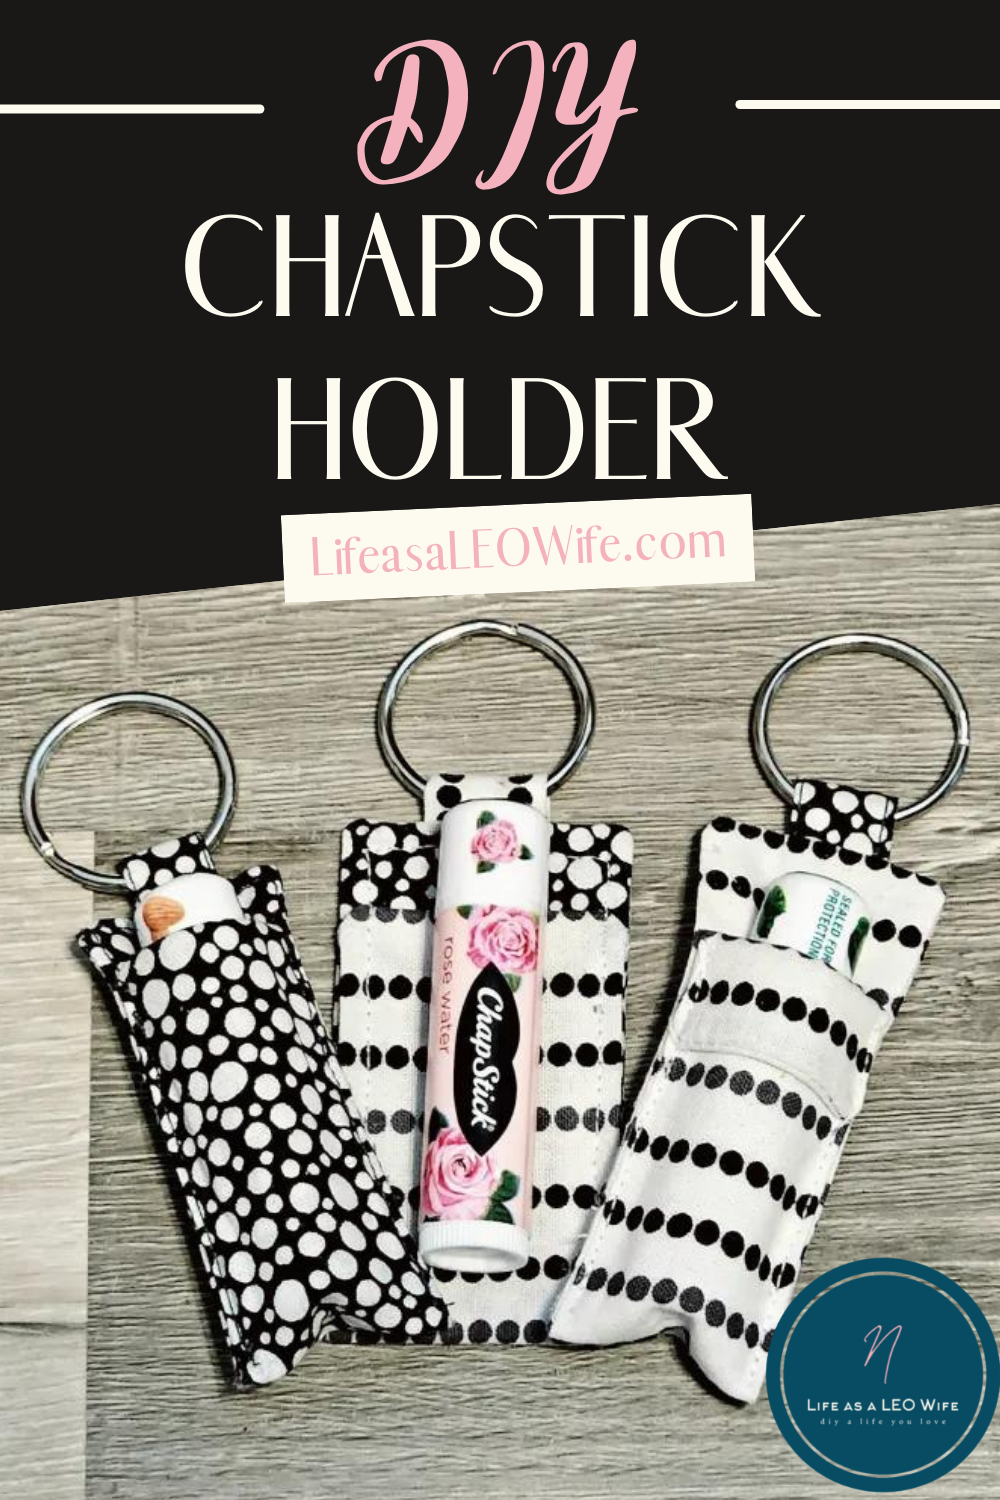
Hello everyone! So glad you’re visiting today because I’ve got another easy sewing project to share with you, a DIY chapstick keychain holder. If you’re a new to sewing like I am (this is literally my second project!), then this is something that even you can do. The benefit of me being new is that hopefully I can give this tutorial to you in language that you understand and answer questions that I know I had! This is a fantastic gift idea for teachers, neighbors, friends, and to use as stocking stuffers. If your church makes gifts for Mother’s Day this is an easy project that you can crank out en masse and quickly! I’ve made four in the past day and a half as a newbie. They’re going to my son’s teachers as back to school gifts.

This is the day that the Lord has made; let us rejoice & be glad in it!
Psalm 118:24
I made these key-shaped gift tags that are perfect to add to your chapstick holders if you’d like to use them as teachers’ gifts! Of course they are free to print! If you’re looking for other teacher gift ideas, you might like this hand soap idea with free gift tags, beach gift set with free tags (great for anyone!), flowerpot gift idea with free gift tag, and back to school gift supply basket with tags.
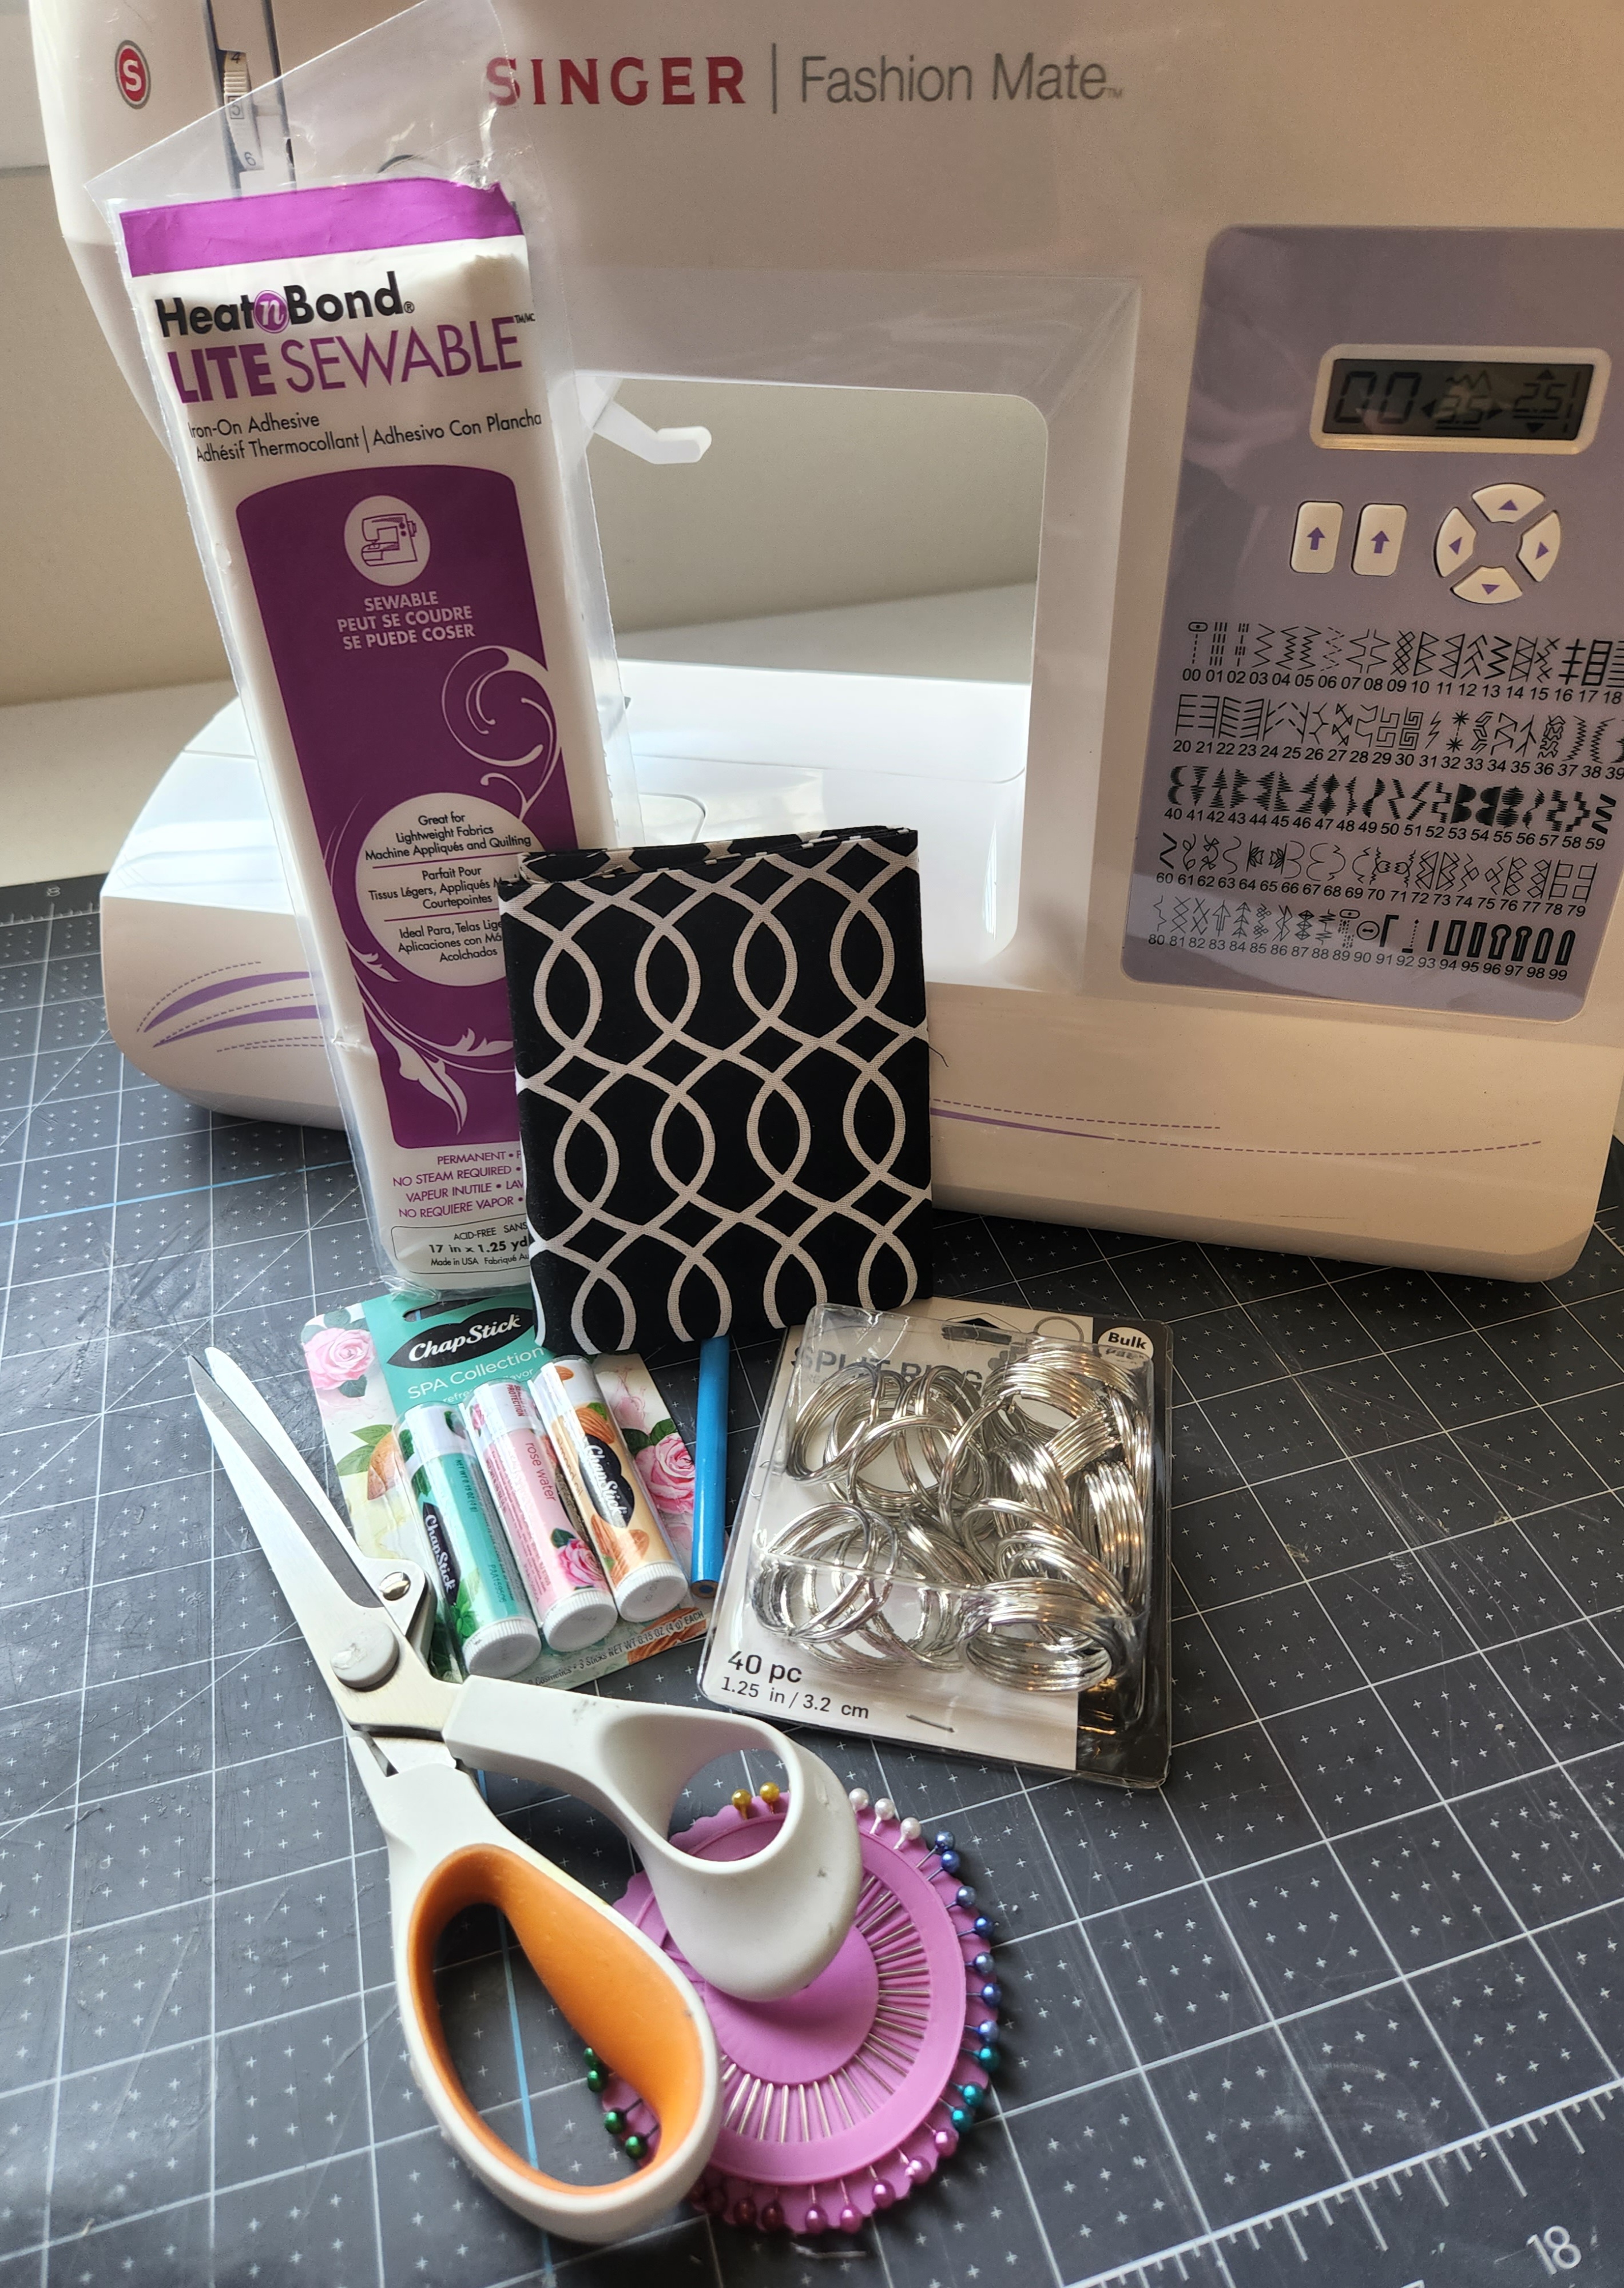
Supplies for a DIY Chapstick holder:
- lip balm in a tube
- fabric- two 6½ “x2⅜” pieces and one 1½ “x2” piece
- matching thread
- key ring
- scissors
- fabric pen
- pins
- sewing machine or hand sewing supplies
- ruler
- iron-on fusible interfacing (optional, but it really helps)
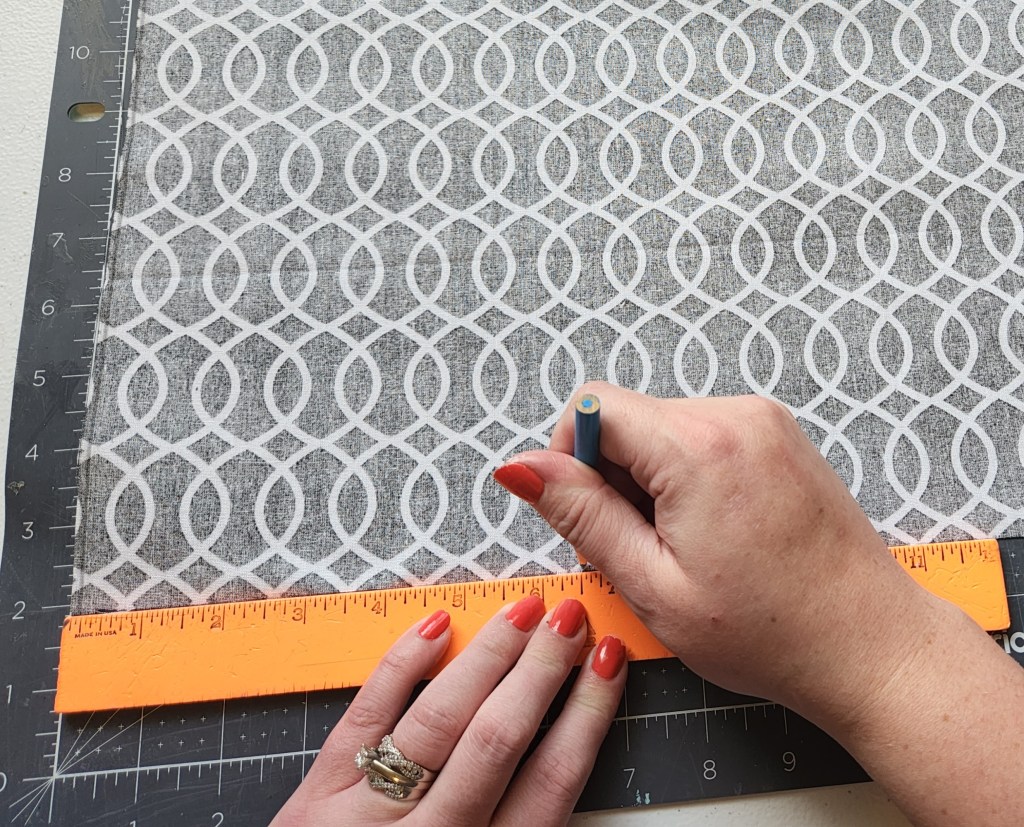
Cut the Fabric for the Lip Balm Holder
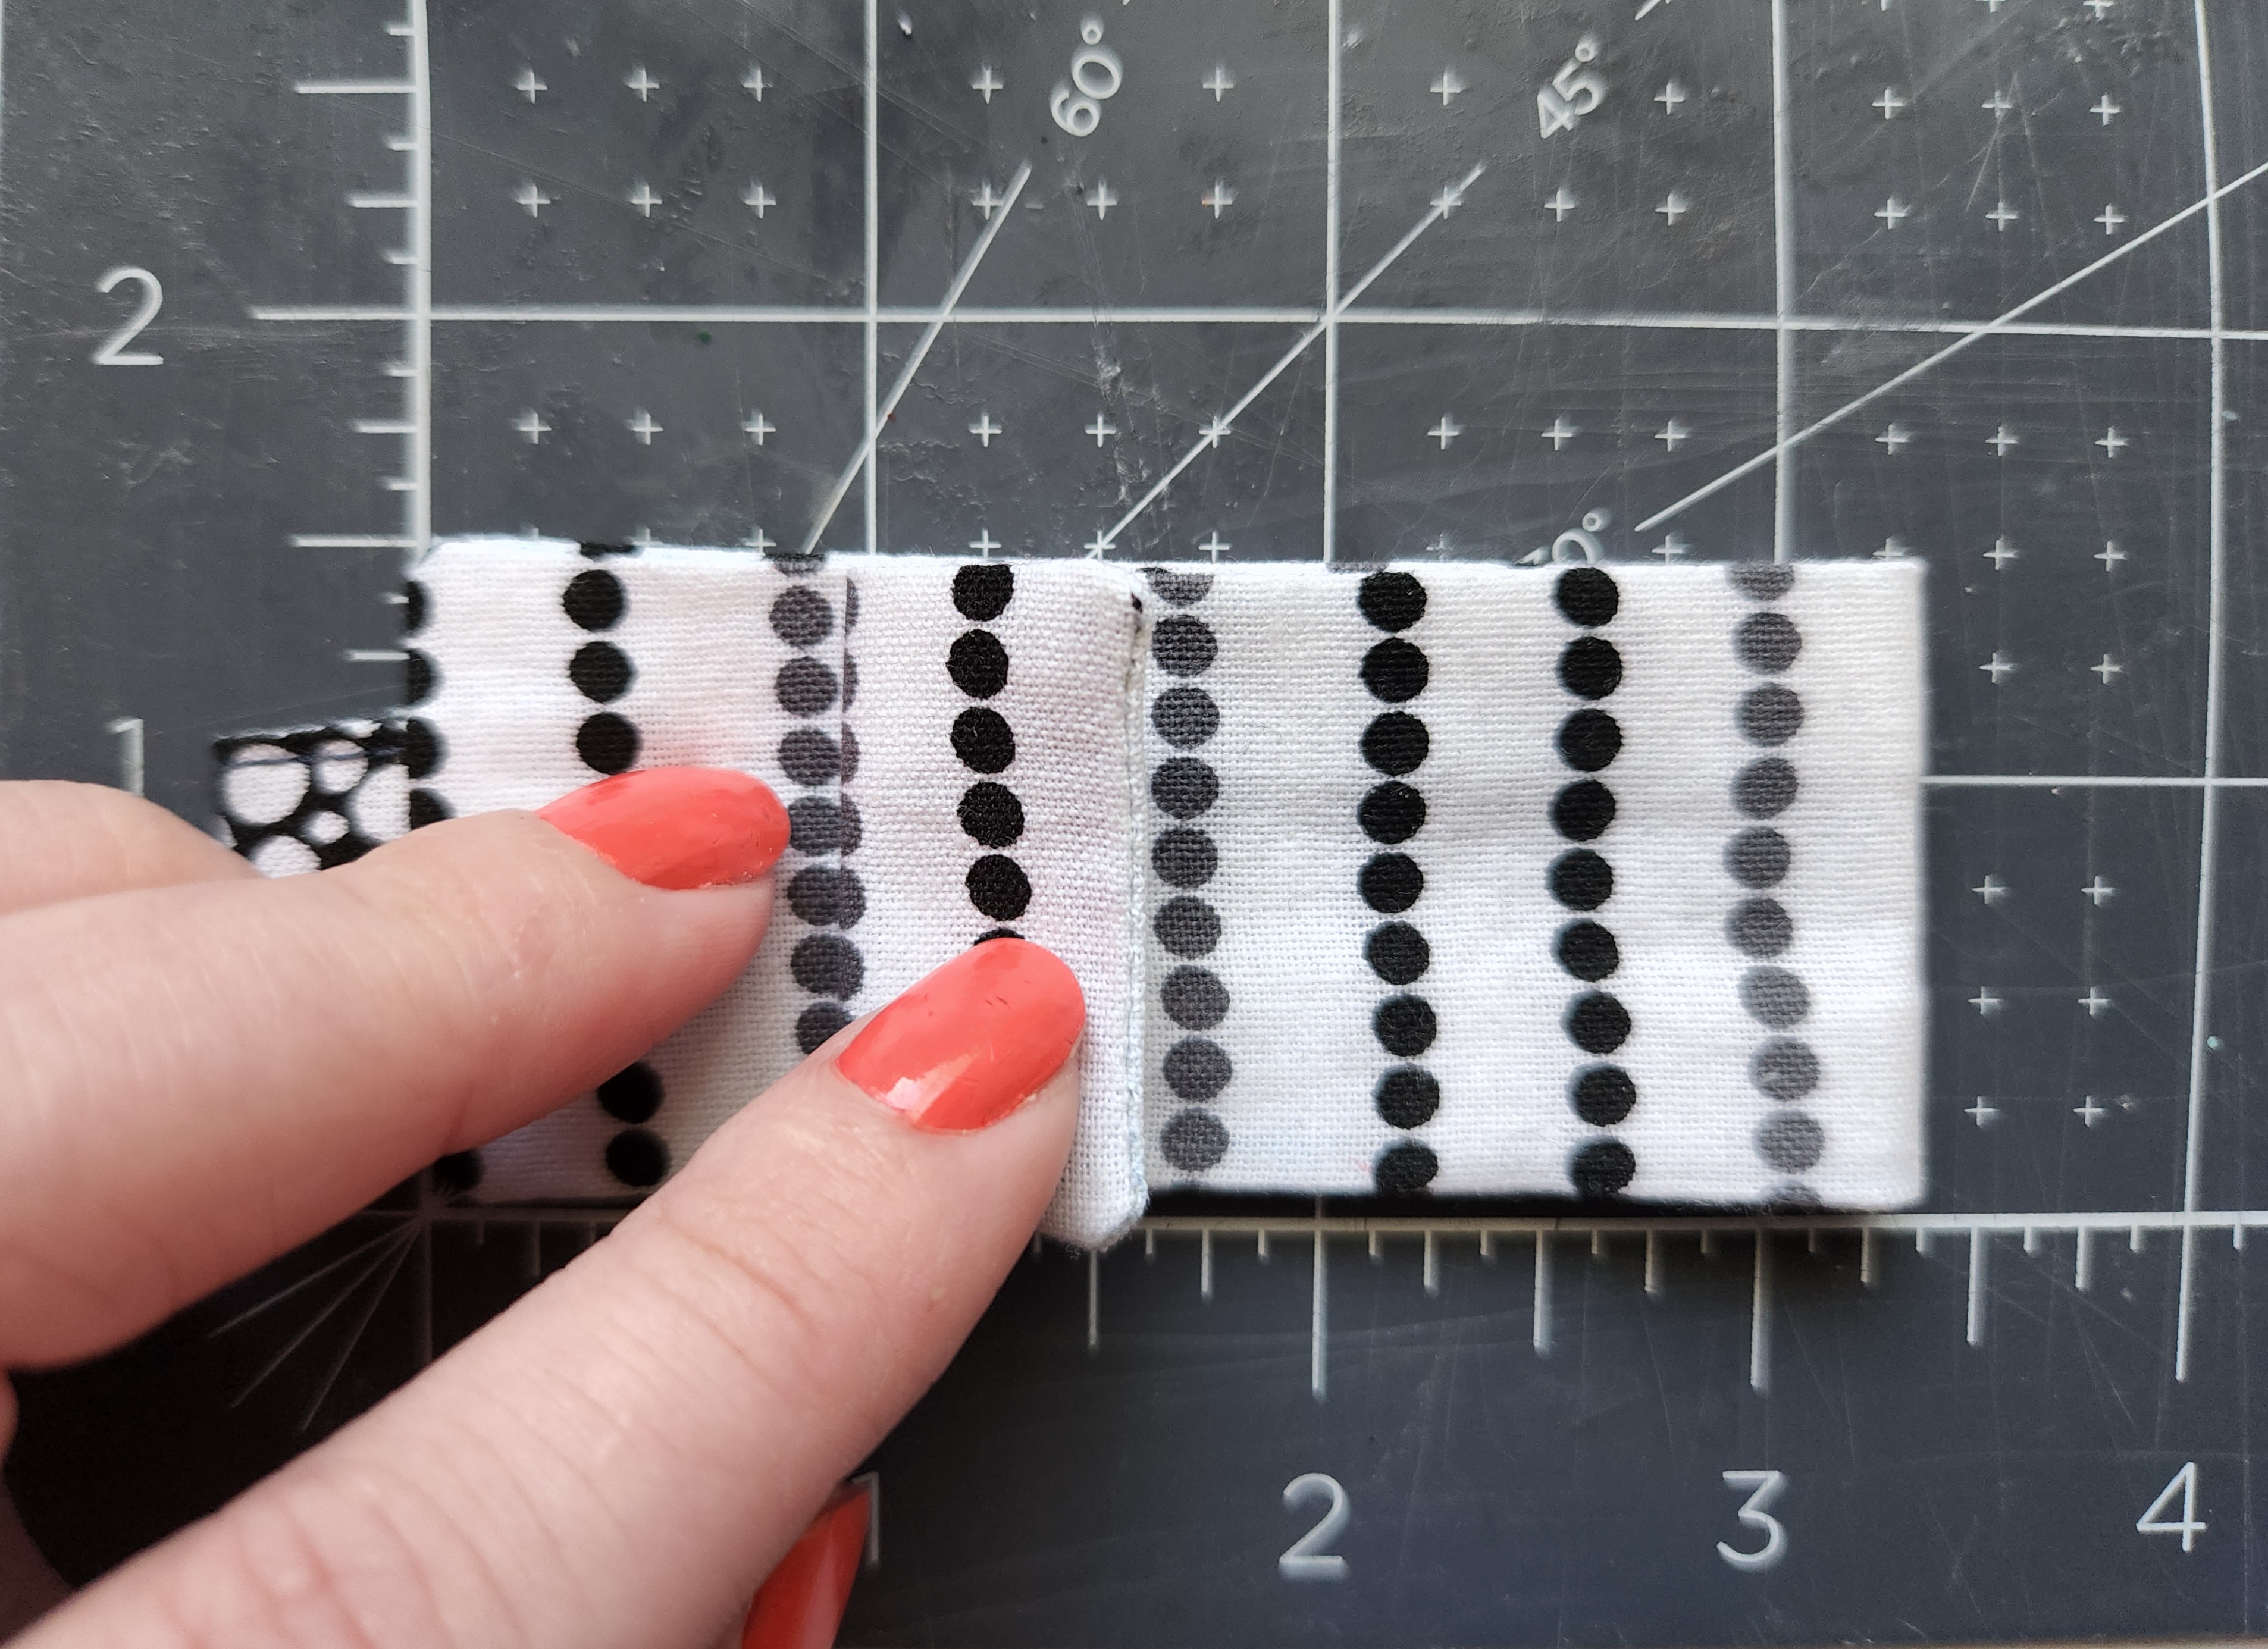
Iron your fabric, don’t skip this! Use your ruler and mark the fabric to 6½” by 2⅜”. If you’re like me and didn’t use many 8ths in your regular crafting, the second line on your ruler (and past every number) is ⅛”. The lines that are the third longest are the eights, with the ¼” mark being 2⁄8″ and 3⁄4″ being 6⁄8″(obviously, but it might help someone because some tutorial use those numbers specifically).
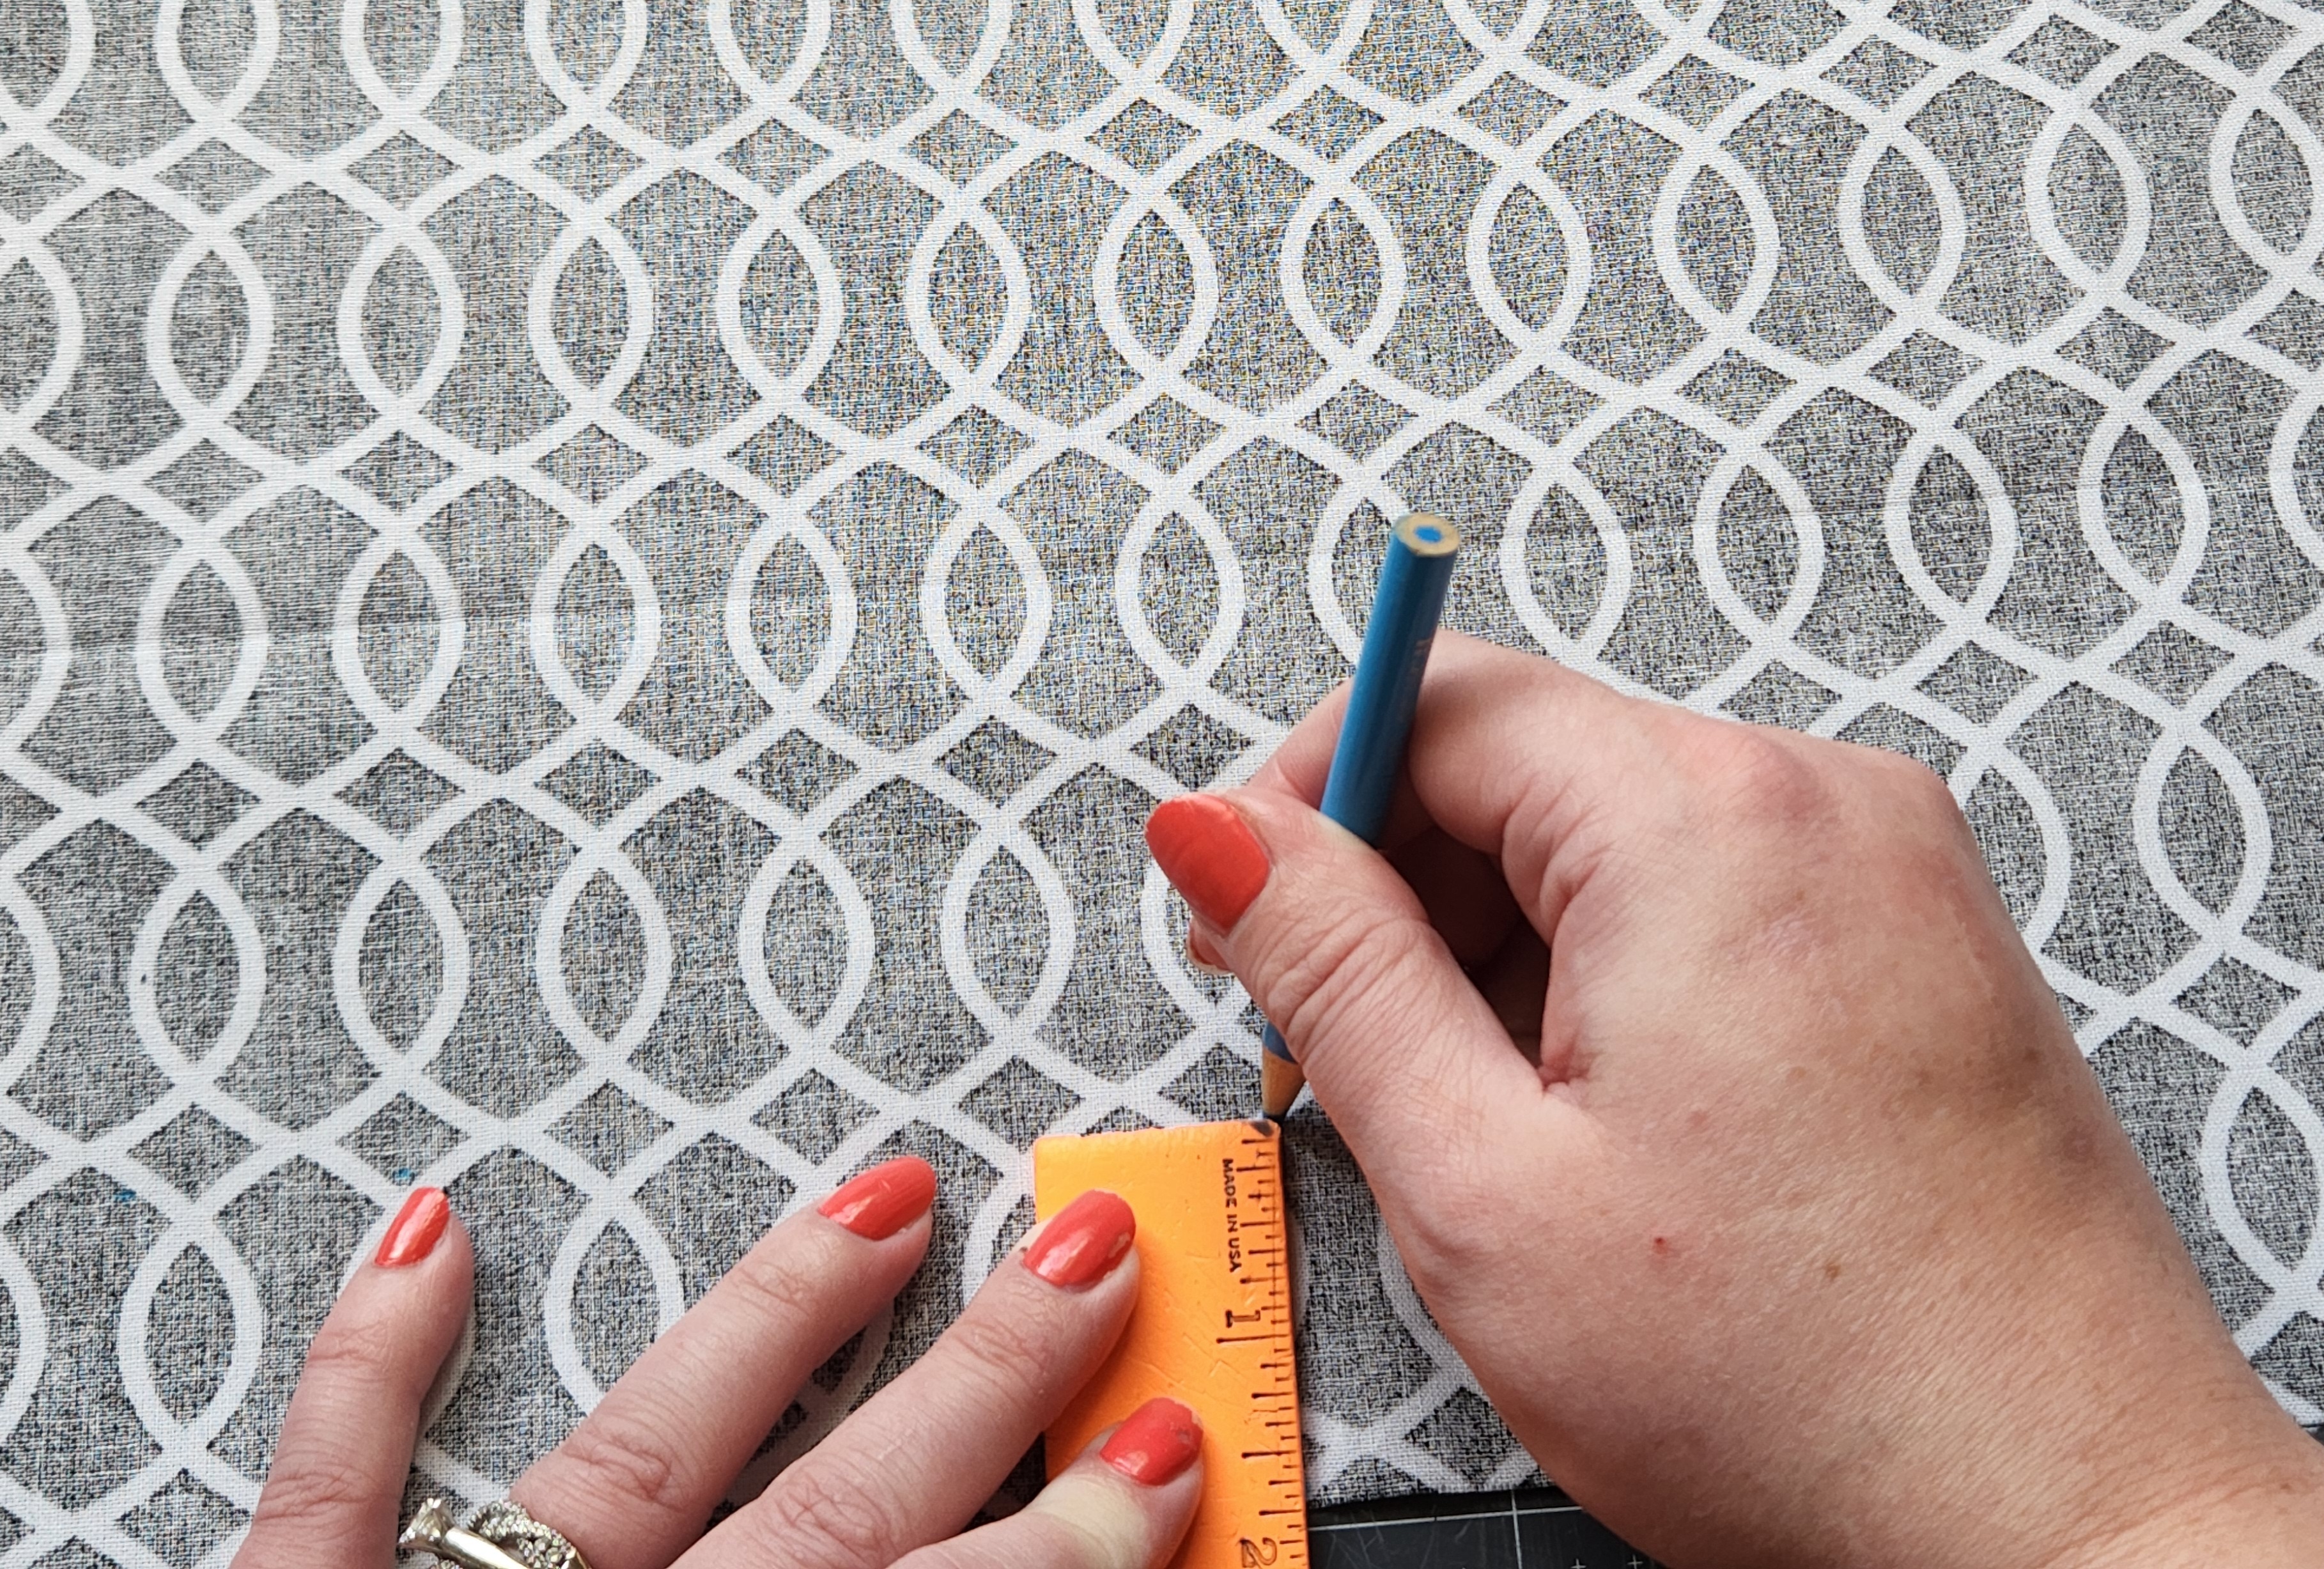
Measure and mark the fabric for the chapstick holder’s keychain tab, 1.5″x2″. I didn’t get a picture of this, but it’s just like you did above. If you have a grid mat you won’t even need to mark the fabric since it’s so small.
Fold the fabric over so that you can cut two of the rectangles at once, making sure the marked fabric is on top and visible. You can pin the fabric in place if you need to. Cut the fabric out.
Cut & Iron-on the Fusible Interfacing
Fusible interfacing is used to stiffen the fabric so that it holds up better. It keeps it from crumbling in and bunching up in your purse. It keeps it stiffer on the keychain so the chapstick stays in place better. It’s optional, but I recommend it. I made one without it and it was definitely not the same!
The first chapstick holder that I made was incredibly hard to keep straight at the seams. For some reason the fusible interfacing caused the fabric to shift as I sewed, and it lifted and slid way out of place. I ripped the seams and tried many, many times. So, I cut the interfacing so that it would only be in the center and not where the seams were going to be. Cut a piece to 5½”x1⅜”.

Read the instructions on the package and iron the piece onto the back (wrong side) center of one of the long pieces of fabric. Try to make sure you have enough space to allow for ⅜” seams. You don’t want to have to sew over large sections of it.
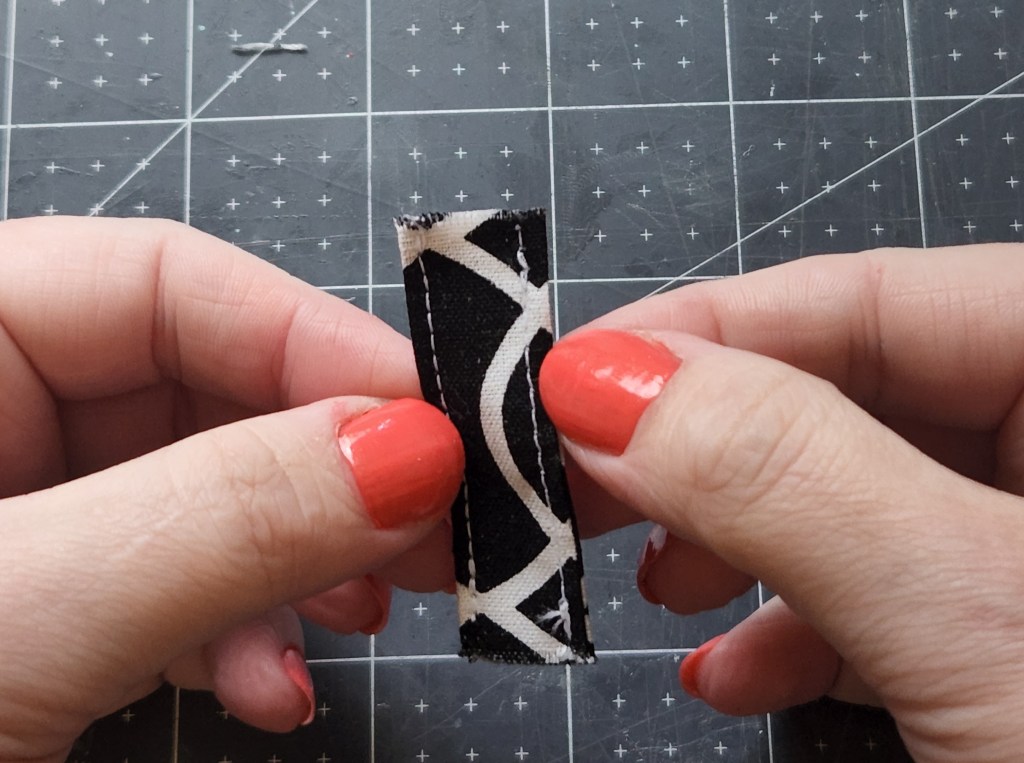
Sew the Keychain Tab
Fold your 1½x2″ piece of fabric in half and crease it well with your fingernail. Open it and fold each side to the middle crease. Now fold it in half again with the raw edges on the inside.

Now sew each of the long sides closed. This is the most difficult part for a newbie sewer, so good news! We get it out of the way early on in the project! Place the small tab under the foot, lining up the needle with the edge of the fabric.
If you can’t tell exactly where it is, it might help to lower the needle and line up the edge of a piece of masking tape on the metal plate where the needle comes down. That way you’ll be able to tell right where it comes down and ensure the needle will be on the fabric. It will kind of help you keep the seam straight because you can judge where the needle will be on the fabric as it is fed through. You could also mark another line on the masking tape and keep the fabric going along that line.
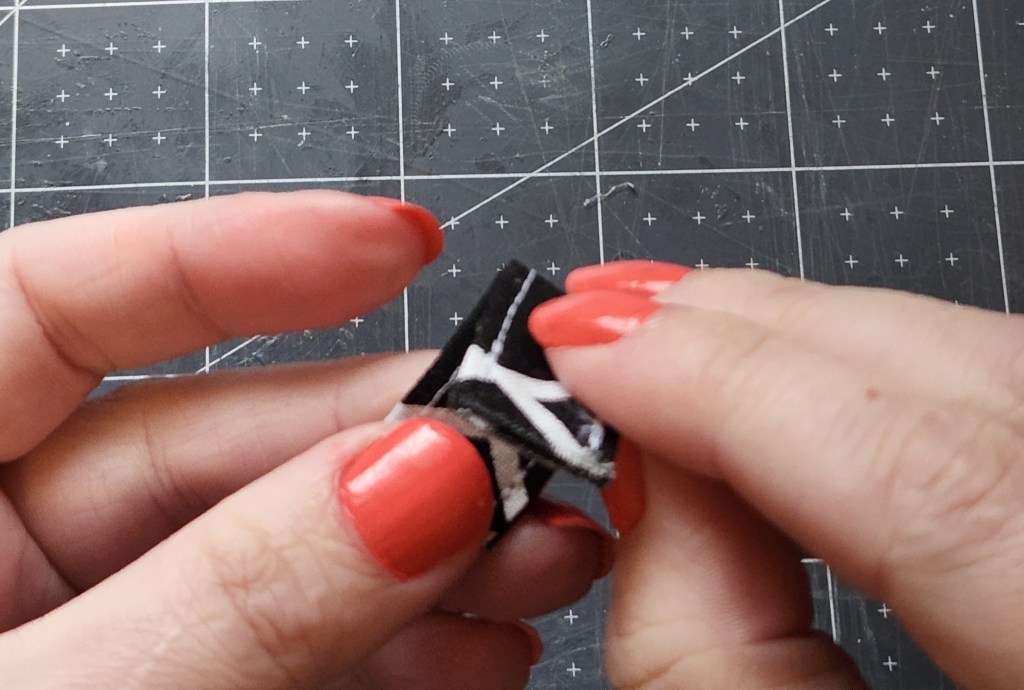
Once sewn, fold the tab in half.
Mark the Seams
The instructions for the first DIY chapstick holder I made called for edge sewing the whole thing basically. That was a wreck since I couldn’t keep the fabric going straight because it didn’t reach any of the machine’s seam allowance markings. The corners I kept sewing were horrible. When I went to bed, as if on que, my mind started to race. I kept thinking of way to fix the corner issue and the keep seam lines from being crooked. So, I figured out a way to fix this and created my own “non-sewer tutorial” lol. I enlarged the fabric and marked out the seams and the corners.
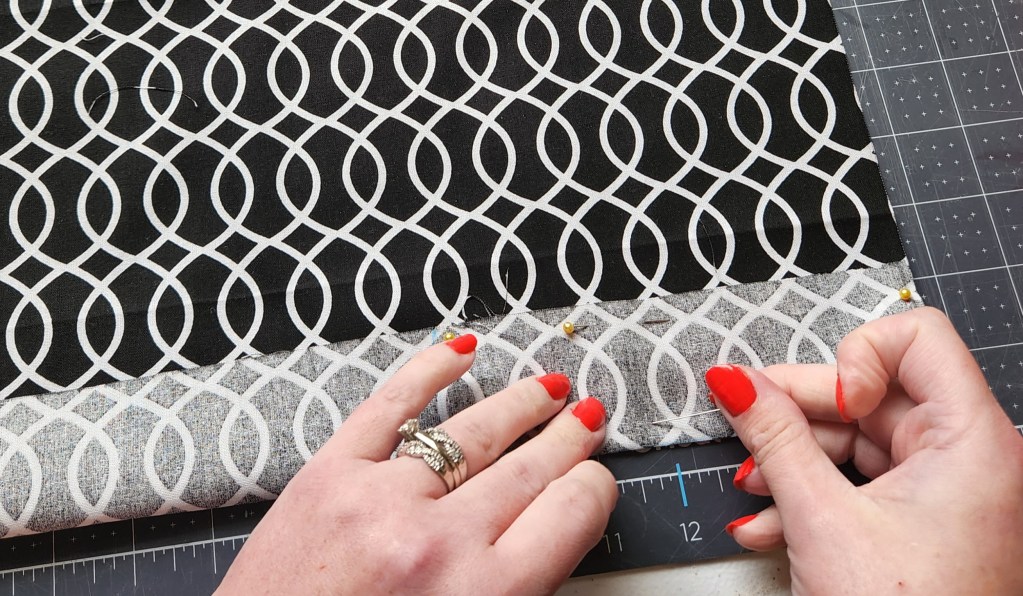
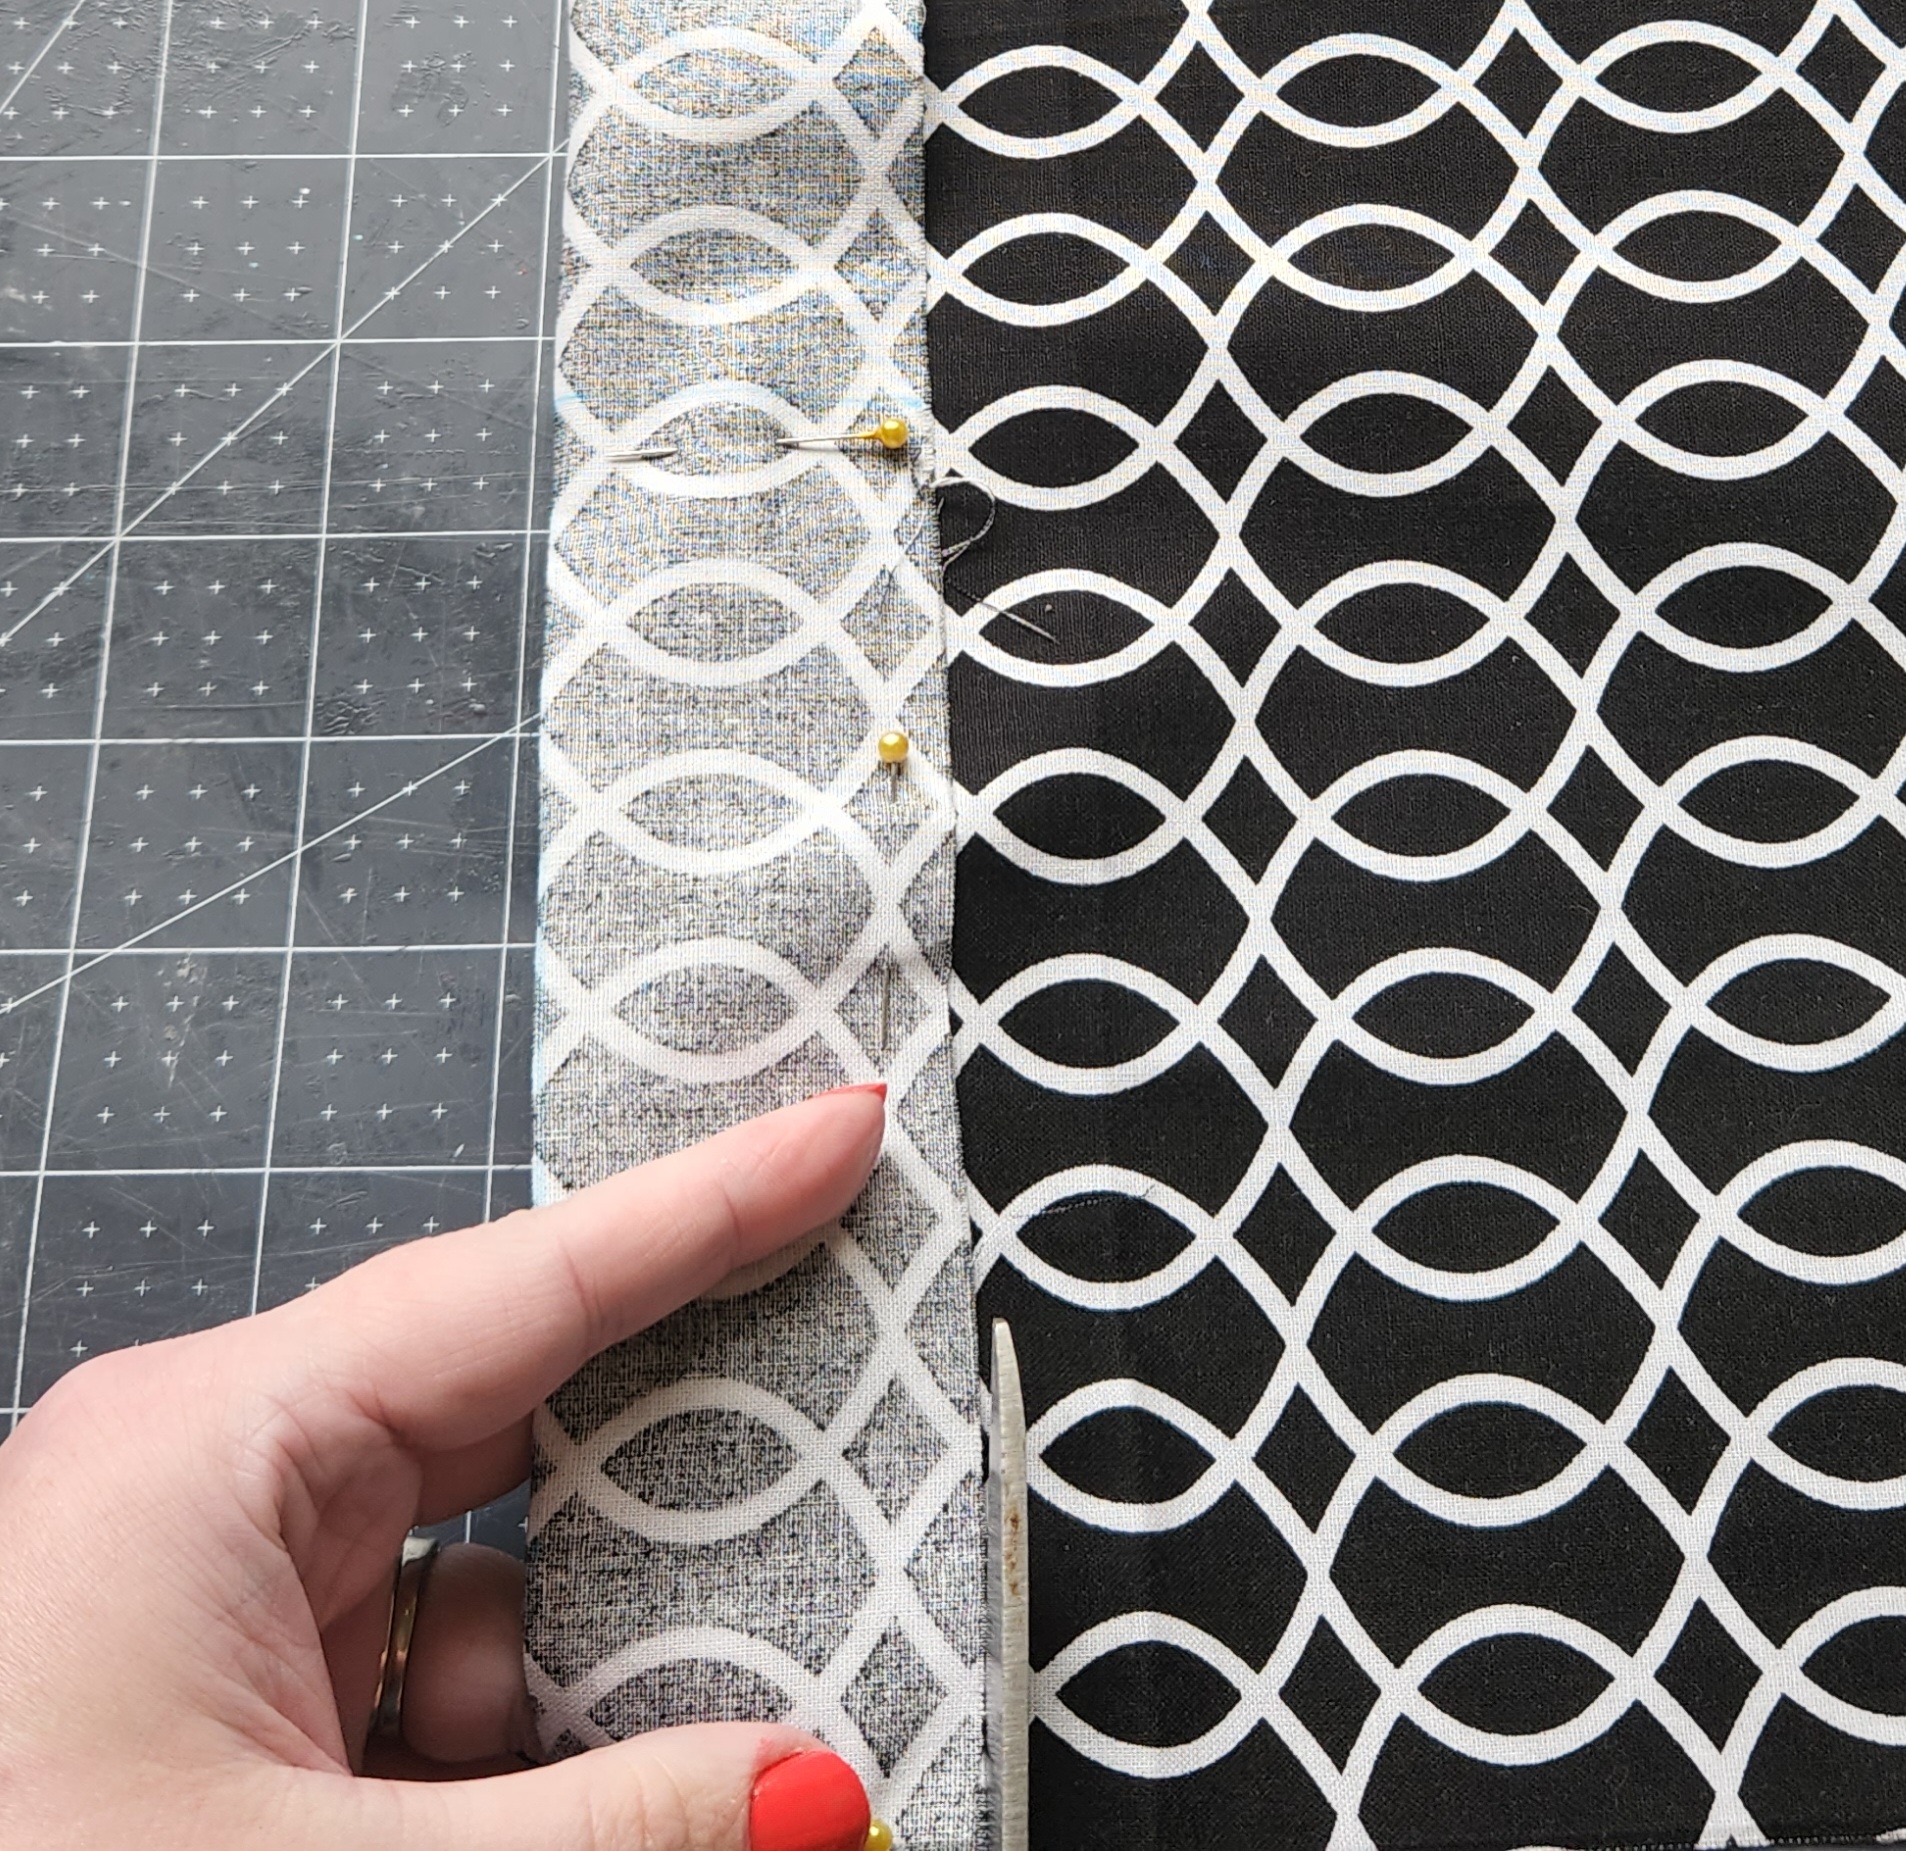
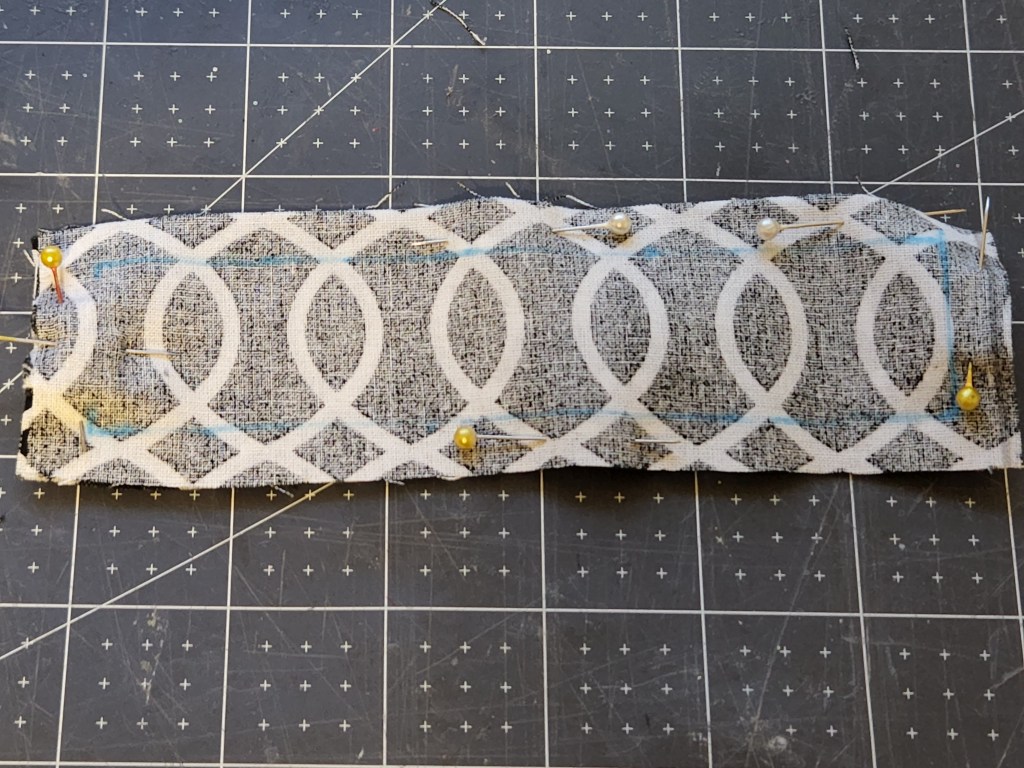
Use a ruler and mark ⅜” all the way around one of the long pieces. I made marks at the top and bottom, then connected them so that I had along rectangle on the fabric where I would place all the seams. This helps you make your corners perfect even though you’re a new seamstress! In the photo I’ve already pinned the two pieces of fabric together but don’t do that yet. It’s easier to mark without them!
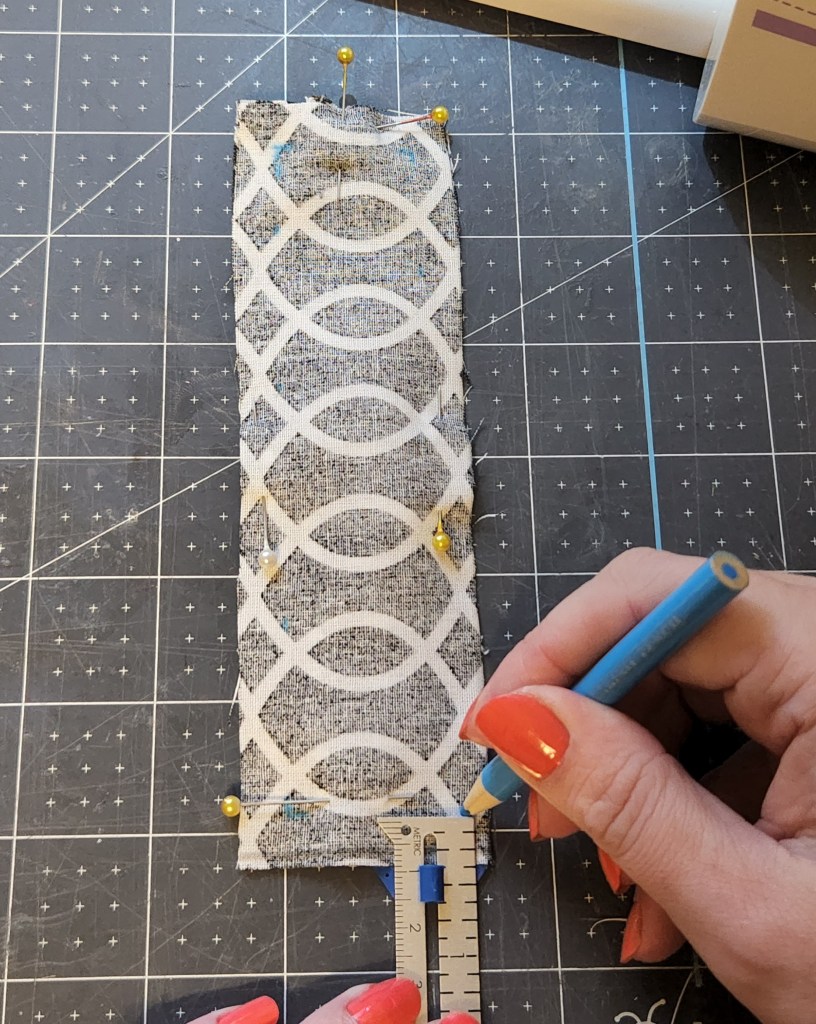
You may want to mark a gap of about 1.5″ on one side with little dashes. The right side is best if you’re right-handed. You’ll need to leave that gap open, unsewn, to turn the fabric right side out again.
Pin the Pieces of the DIY Chapstick Holder Together
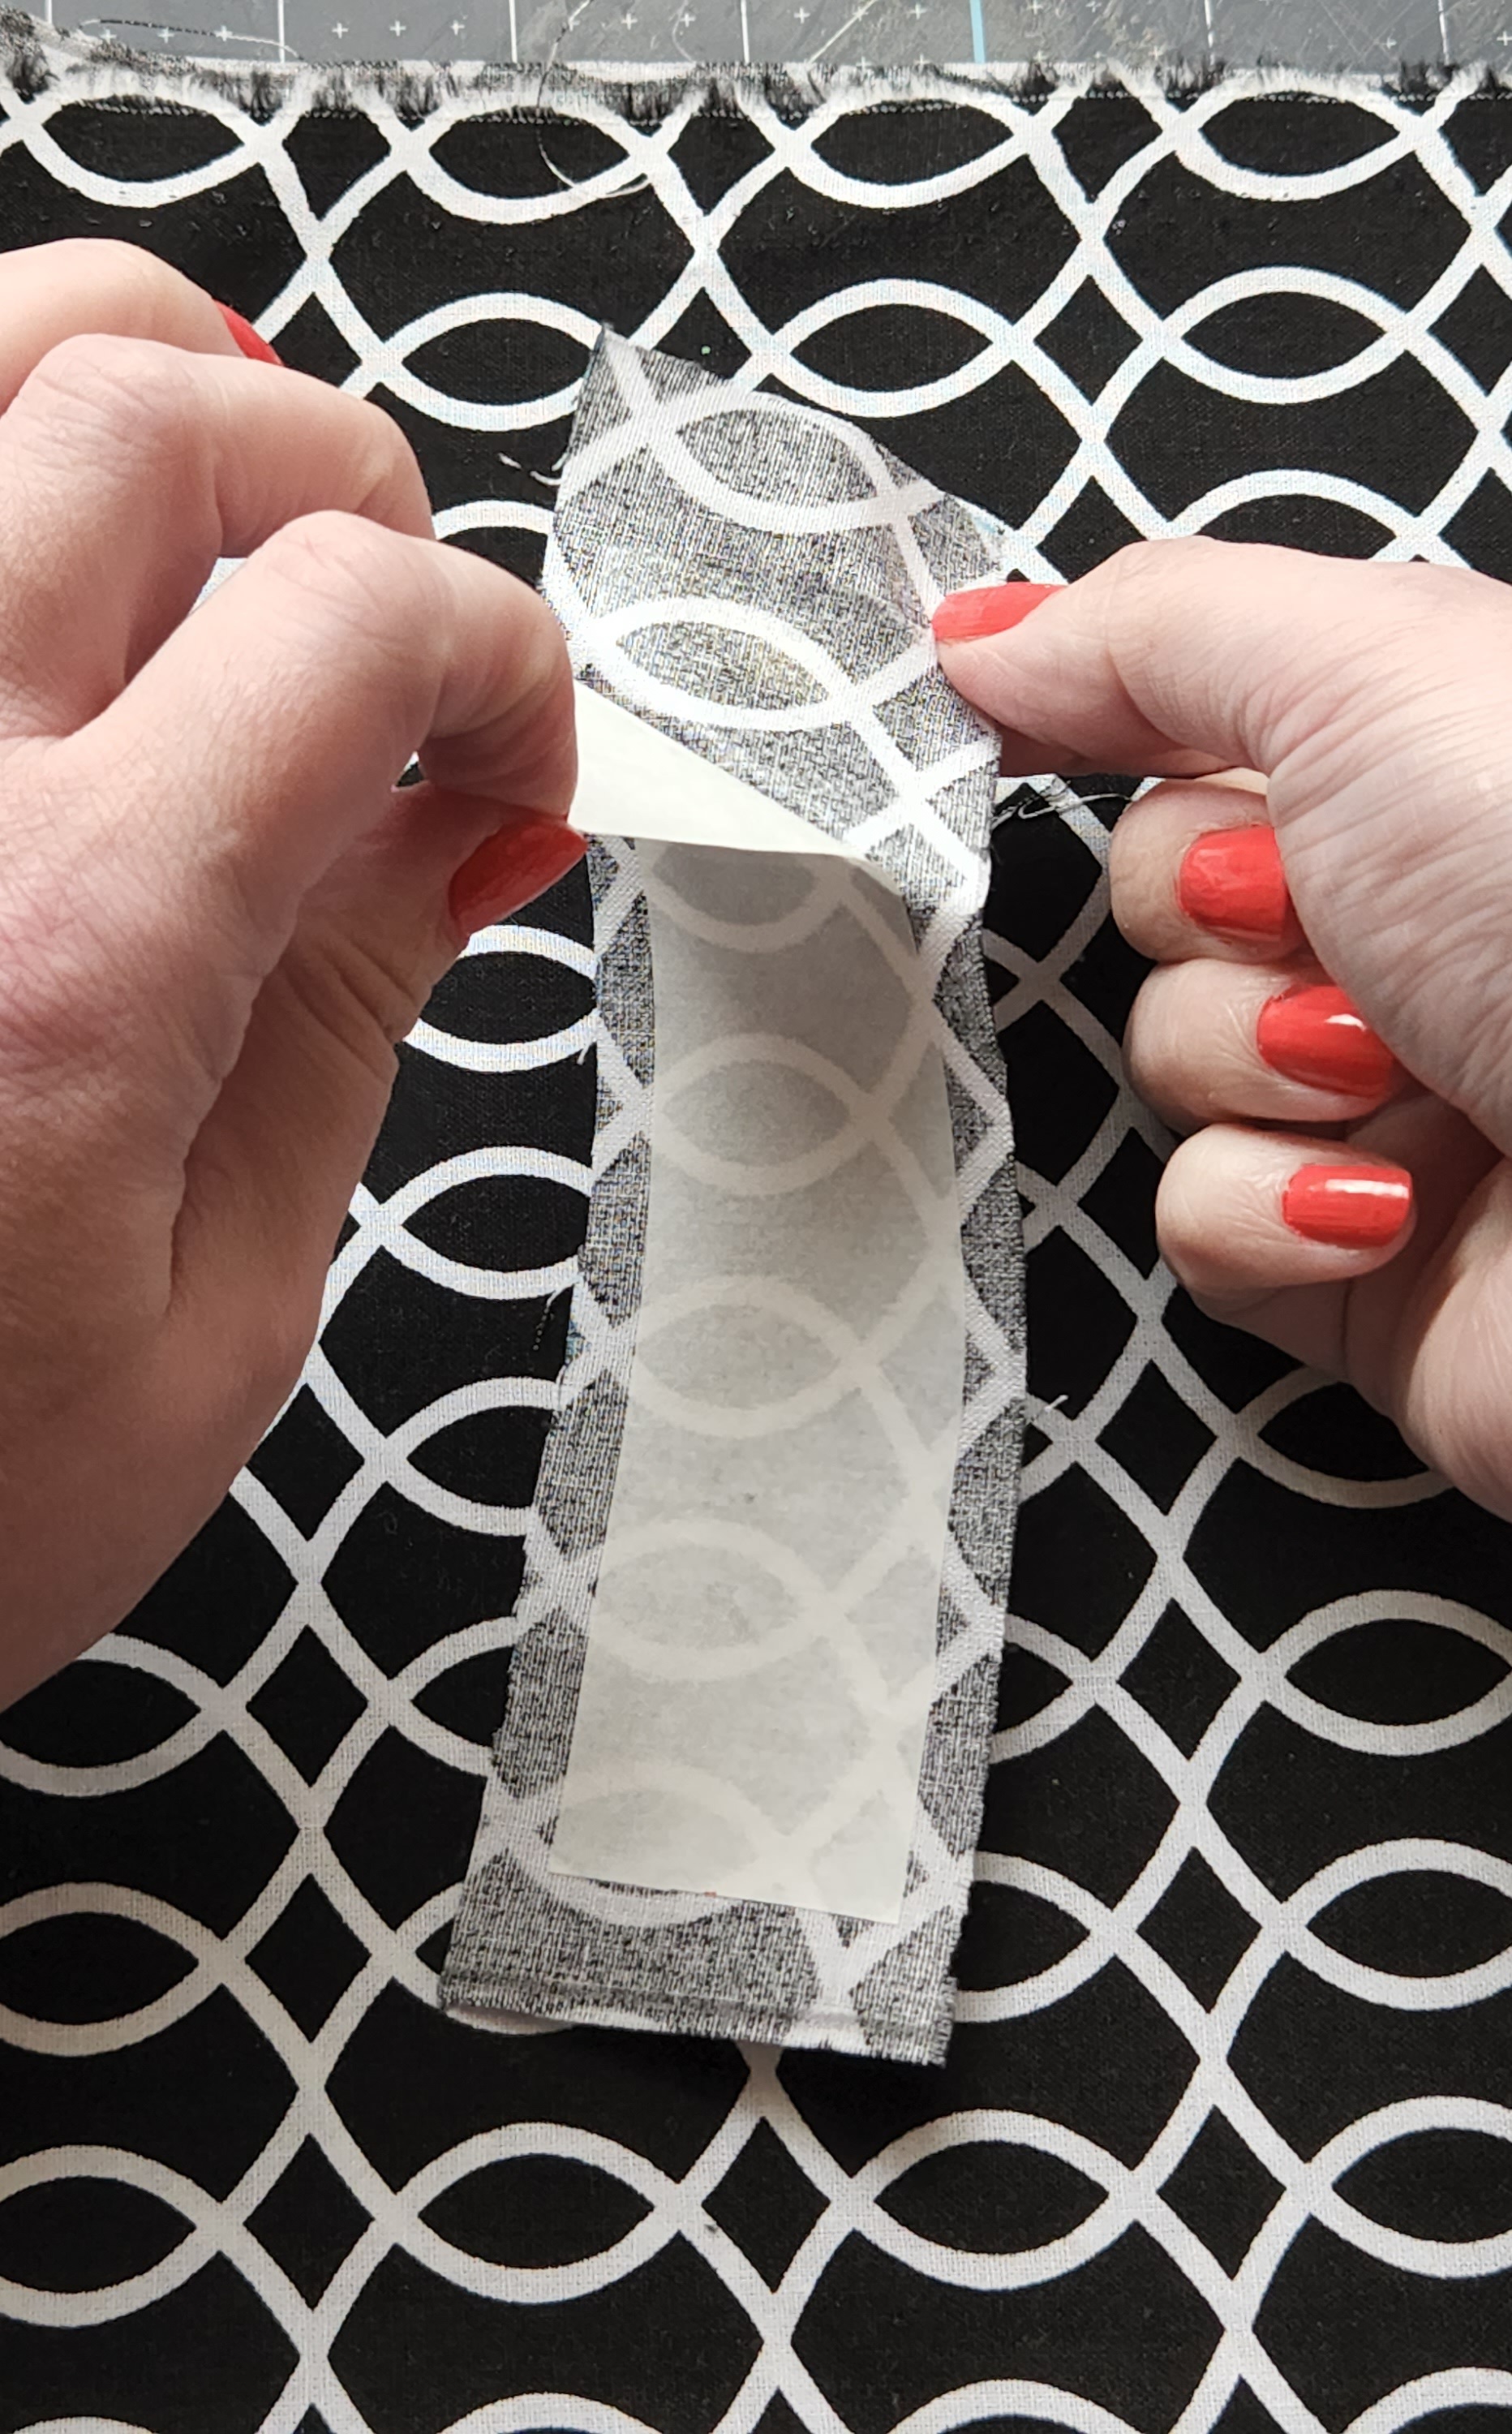
Pin the tab you sewed to the back center of the piece of fabric that you marked. Center it with the raw edges facing up and sticking above the top of the long fabric by just a smidge.
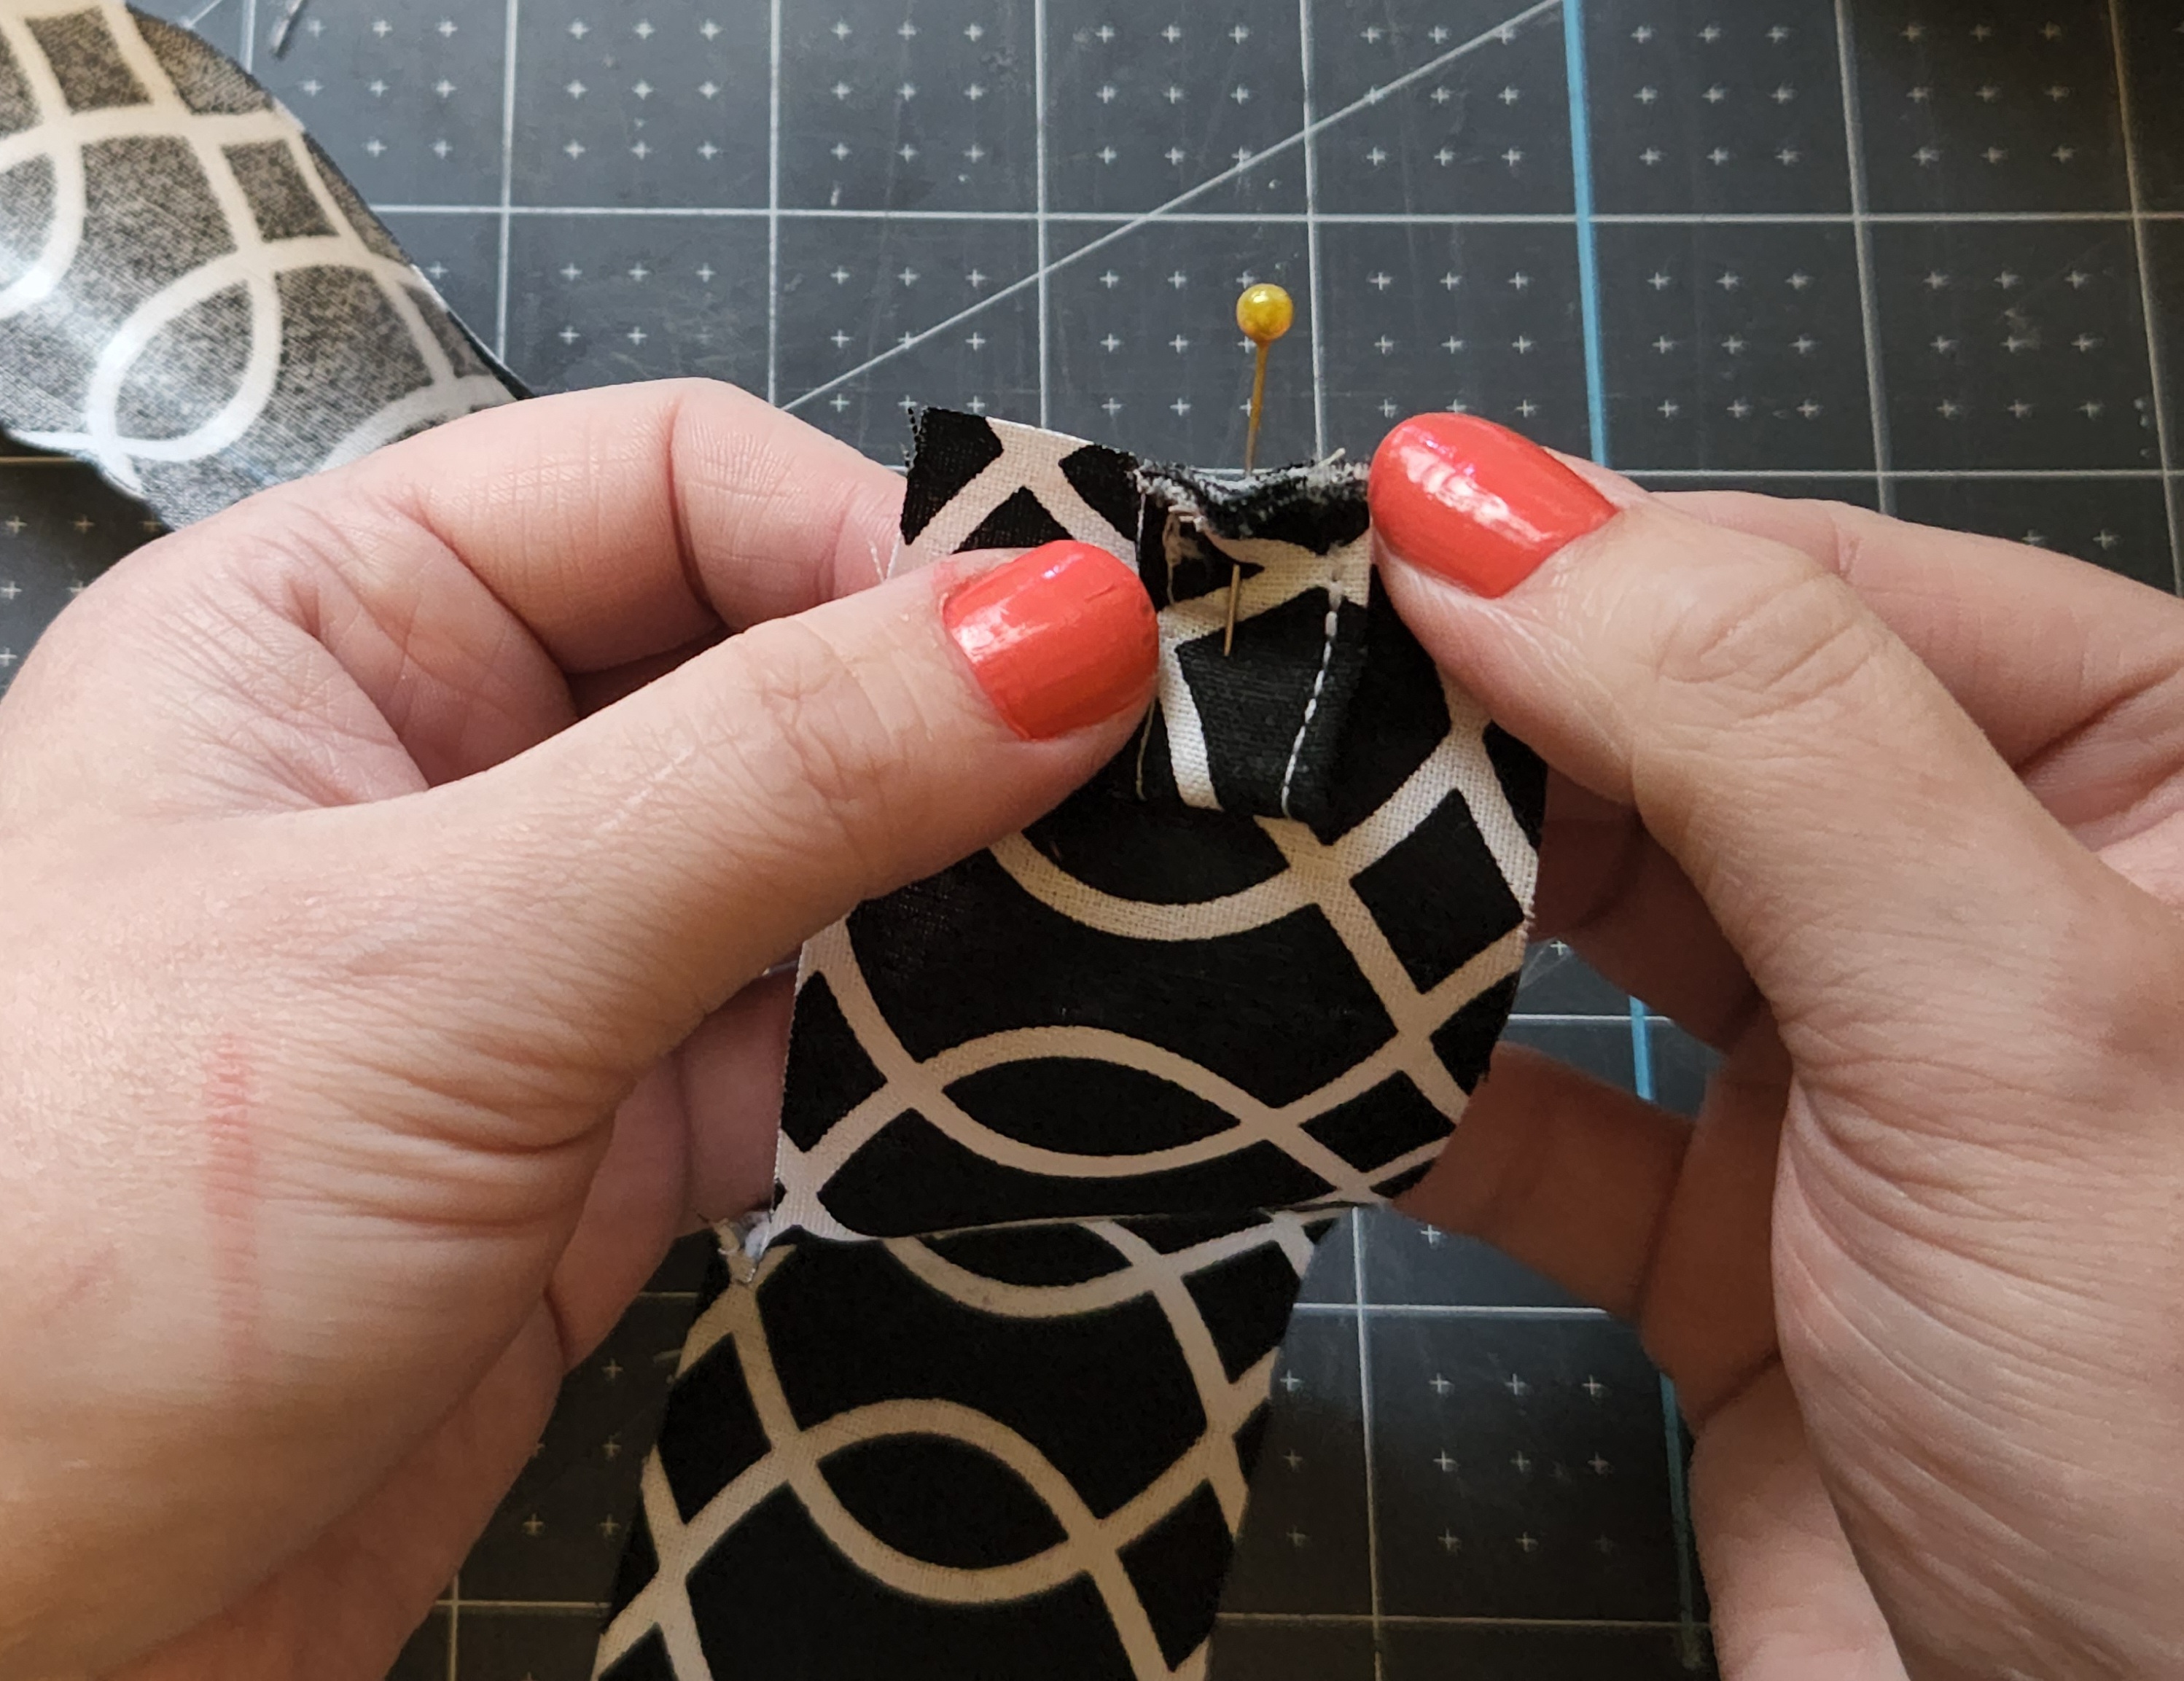
Next, pin the fabric to the other piece evenly with the right sides facing each other and wrong sides out. I marked the place that I wanted to leave open for turning, but you can’t see the pencil marks that well. I placed the two white pin heads facing each other to further mark where to skip sewing.
Time to sew!
Sew the fabric along the lines you marked. Start at the top edge of the mark that you made where you want to skip sewing. Place your fabric in the machine and lower the presser foot. You want your pencil lines to be showing in the “V” of the presser foot.
Place a few stitches, then backstitch to keep the seam from unraveling. Sew up and have your last stitch stop at the upper right corner. Lift the presser foot carefully turn the fabric, keeping the thread tight and straight. Lower the presser foot and sew the top closed. Be careful as you sew over the tab. Don’t dislodge it. Keeping the pin in place helped me to do that. Hold it down tightly with your hand as well if you can, just don’t sew your hand. Backstitch over it a few stitches since it will be pulled at on the keyring. Keep going to the next corner. Pay close attention to the corners so that you stay on the lines you drew.
Continue sewing around the lines until you reach the other line you drew to stop sewing at. Backstitch a few times, then go forward again to keep the seam in place. Lift the presser foot and remove the DIY chapstick holder from the machine. All done with the sewing the main part!!
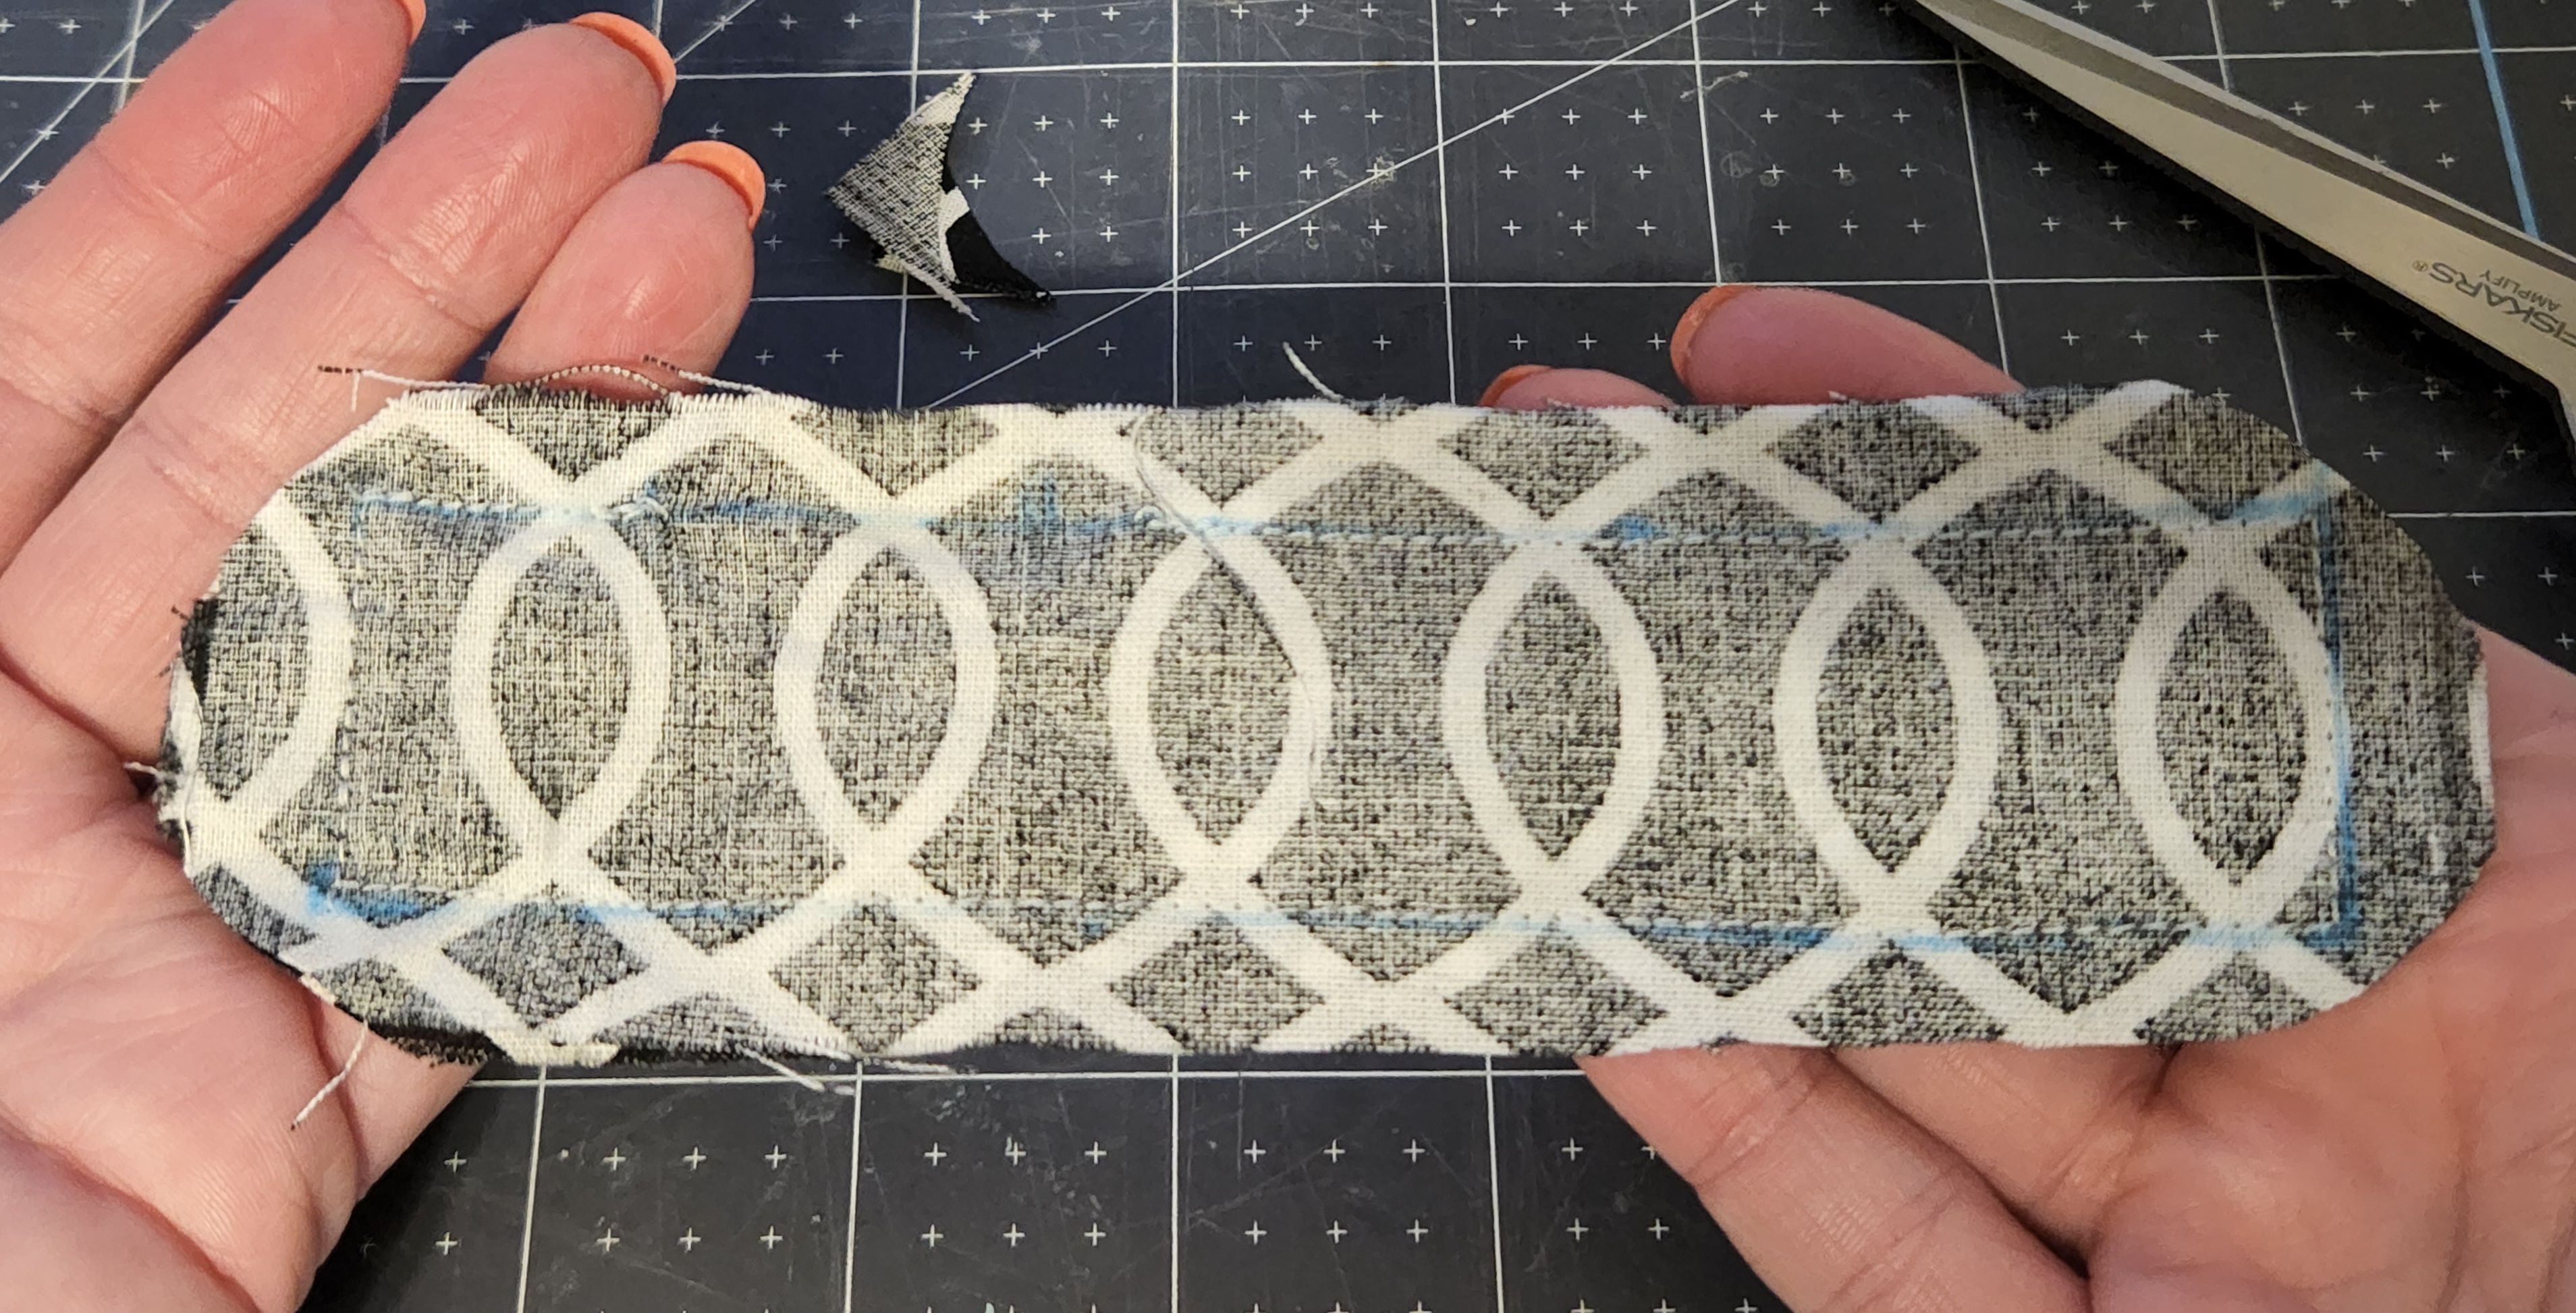
Clip the Corners & Trim the Edges
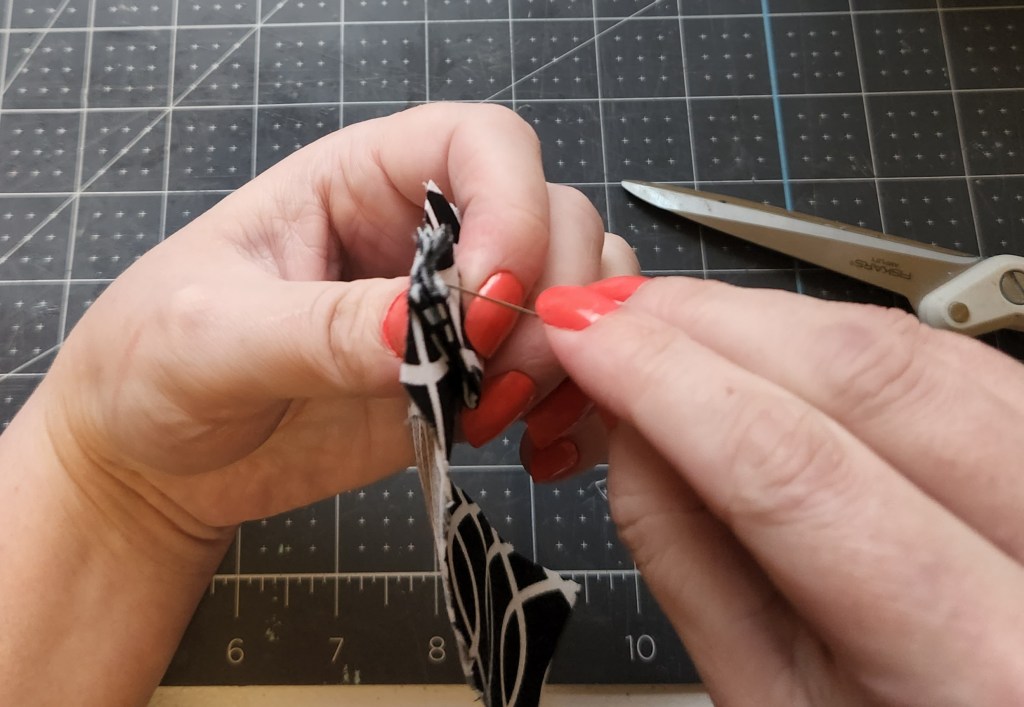
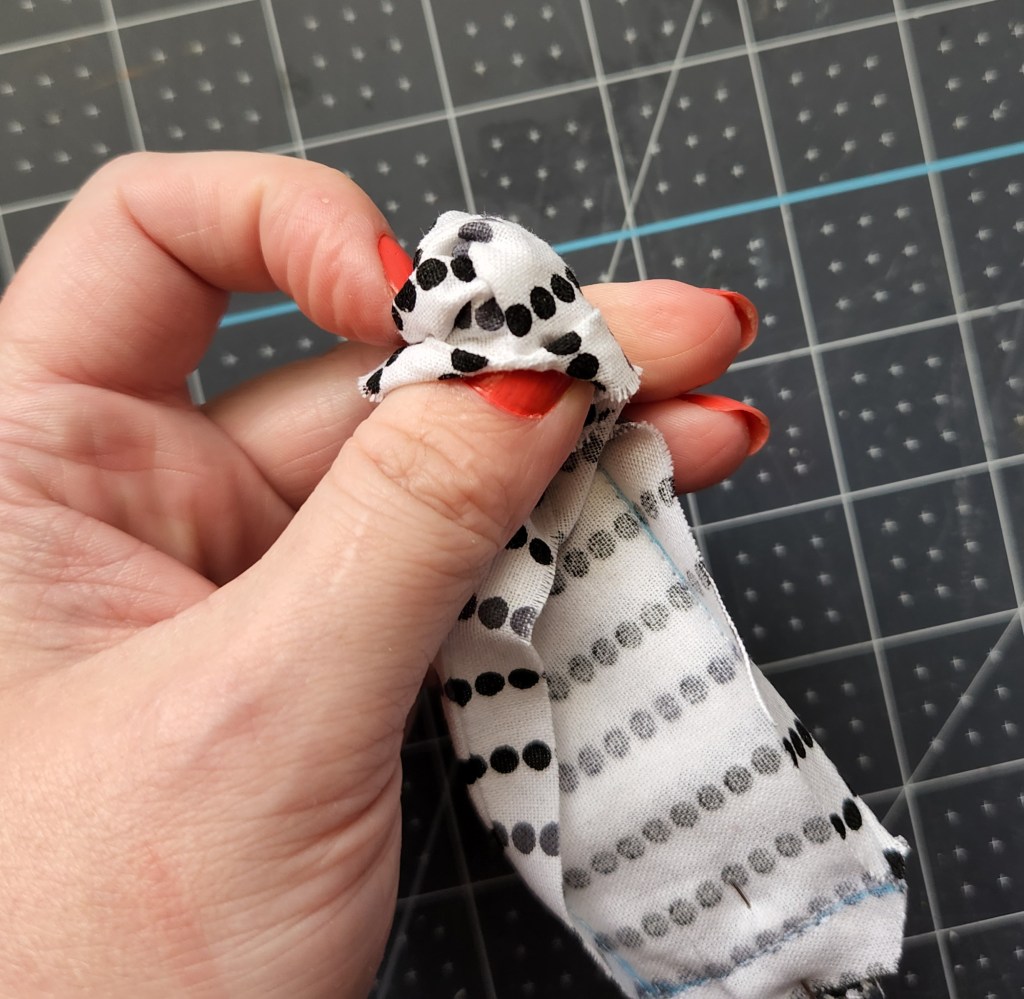
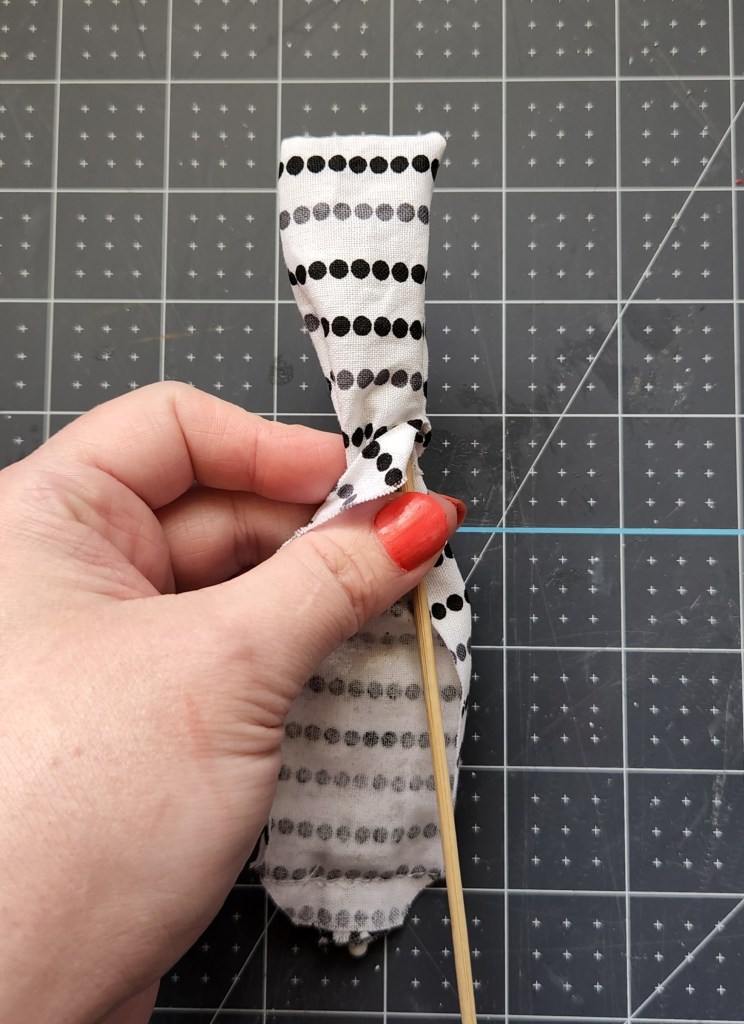
Flip your fabric right side out to see if you’re happy with the placement of the tab and with the straightness of the seams. I used a BBQ skewer to help me turn it since it’s so long and thin. If it’s not even, no shame. Just flip in inside out again, pin the fabric together, and rip the seams out. If you re-pin the fabric before you remove the seams, you don’t have to try to make the tab straight or line up the edges again.
If by some miracle everything is right on the first shot, flip the lip balm case inside out again. Round off the corners and trim off excess fabric so that the case isn’t too bulky.
Fold each side of the seams back to the main portion of the case and press them in place. That makes the seams look crisp and the end product look more finished. I didn’t get a photo of me ironing the seams on this project, but I did on my DIY drawstring bag, so hopefully shows you what I mean. Once it’s pressed, flip the finished chapstick holder right side out.
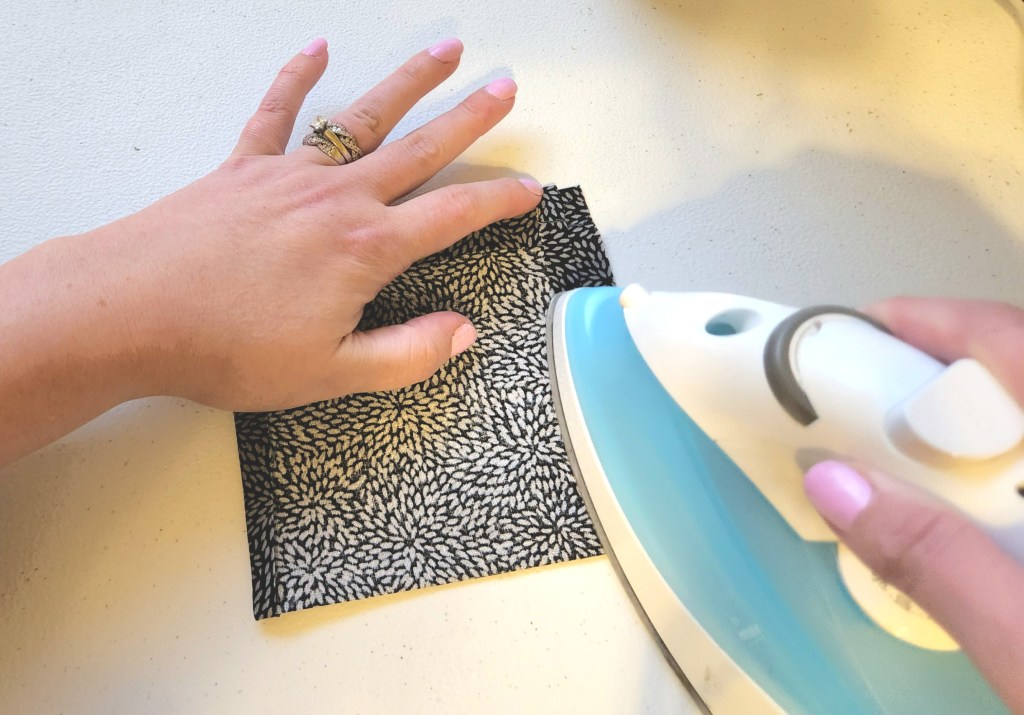
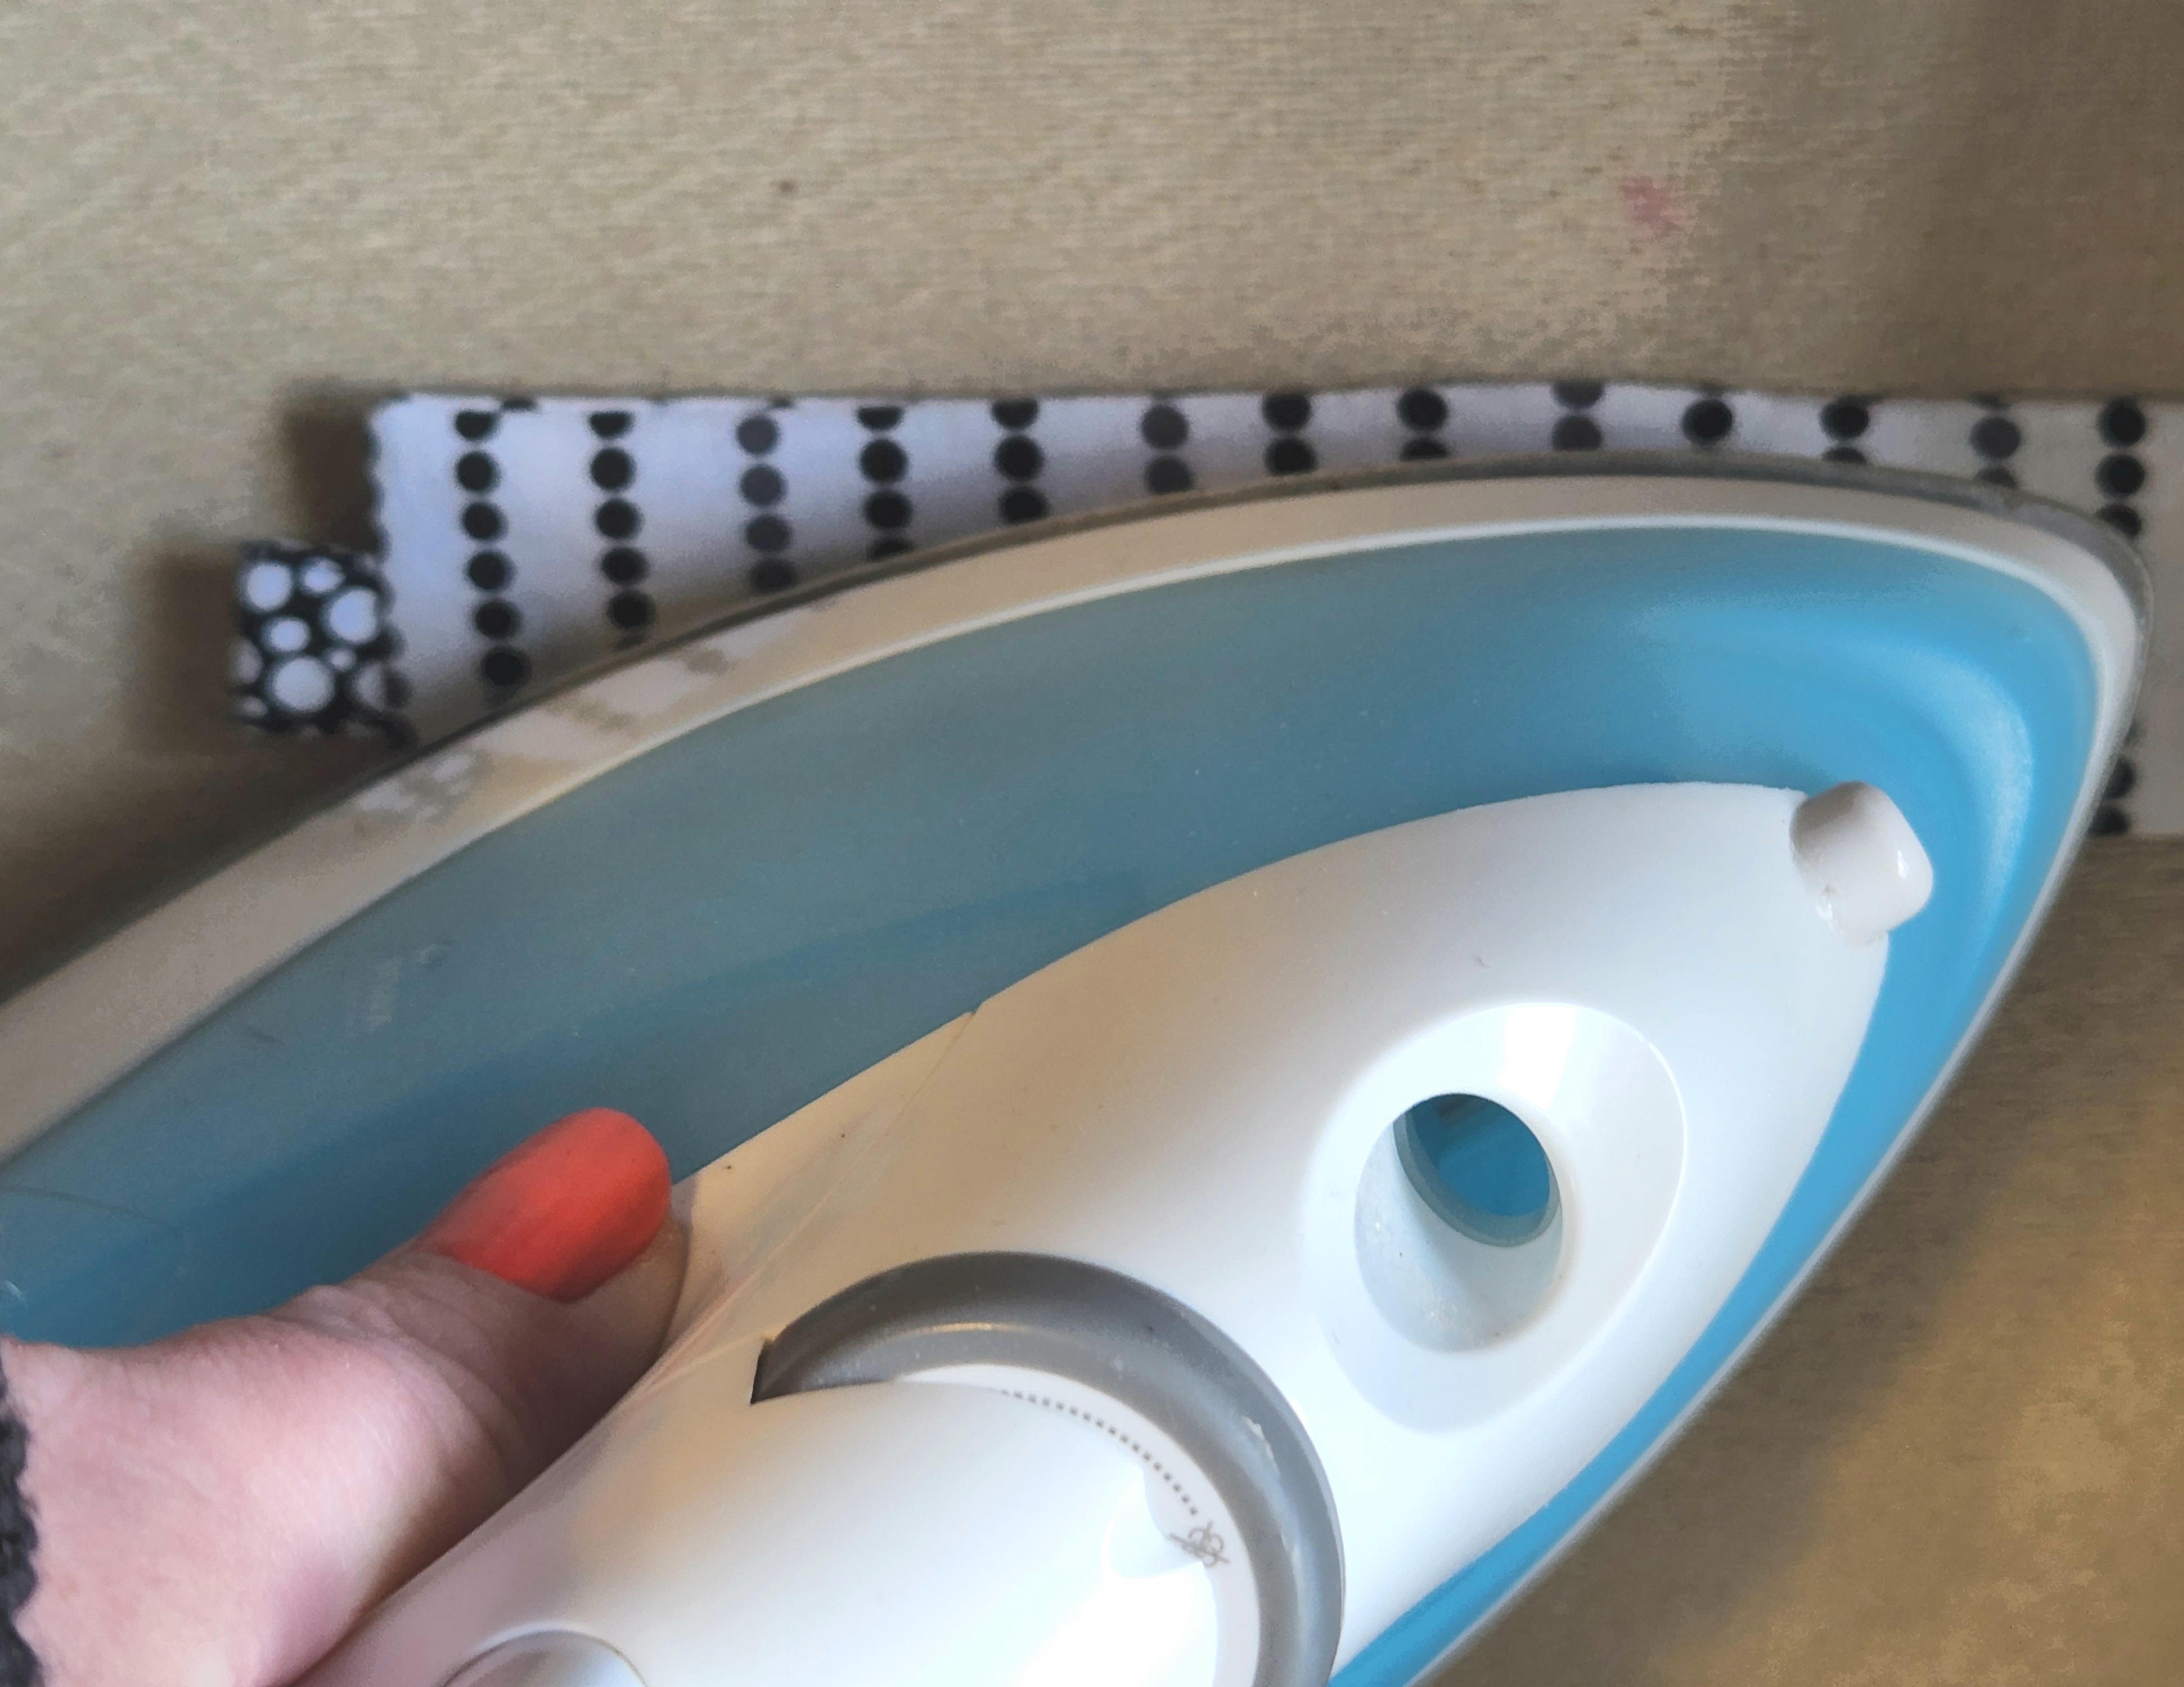
Iron it so the edges are neat.
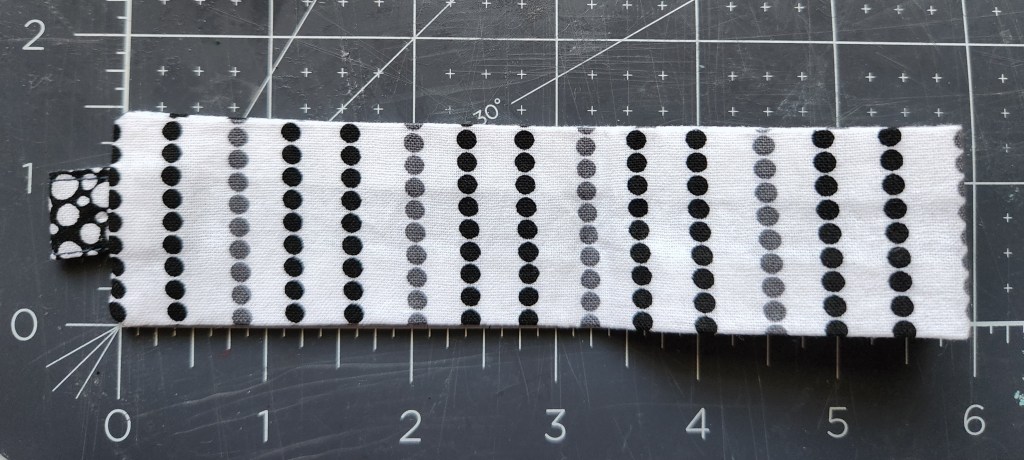
Sew the Chapstick Pocket
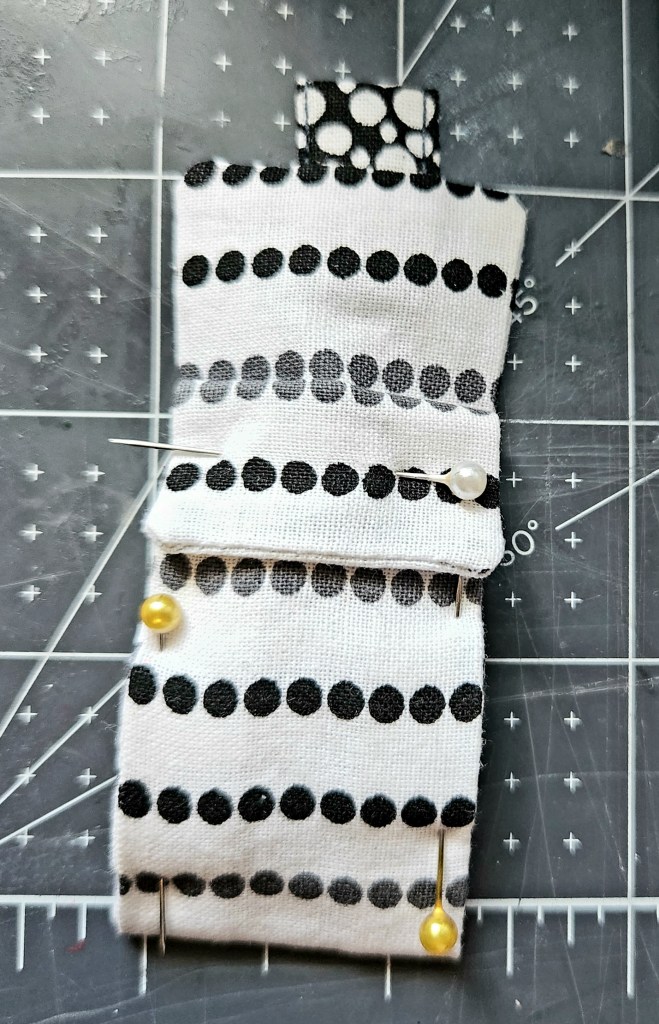
Fold up 2¼” of fabric from the bottom. Iron it in place to form a nice crease. The entire thing should now be about 3¼” long. The piece you folded up will not be as long as mine. I cut my initial pieces of fabric to 7¼” in length so it was a bit too long. Instead of remaking it (again) I folded another piece down on the pocket. That gave me a little “decorative edge.”
If you like the extra decorative edge, you can cut your fabric to 7¼ or cut fold a smaller portion of fabric down on your correctly folded pocket. It is a bit harder to sew through three layers and they want to shift during the process. You have to concentrate to keep it all in place lol. Here’s some photos of what I did.
Iron your pocket, then pin it in place. You won’t have to have the third pin if you cut your fabric shorter than I did.
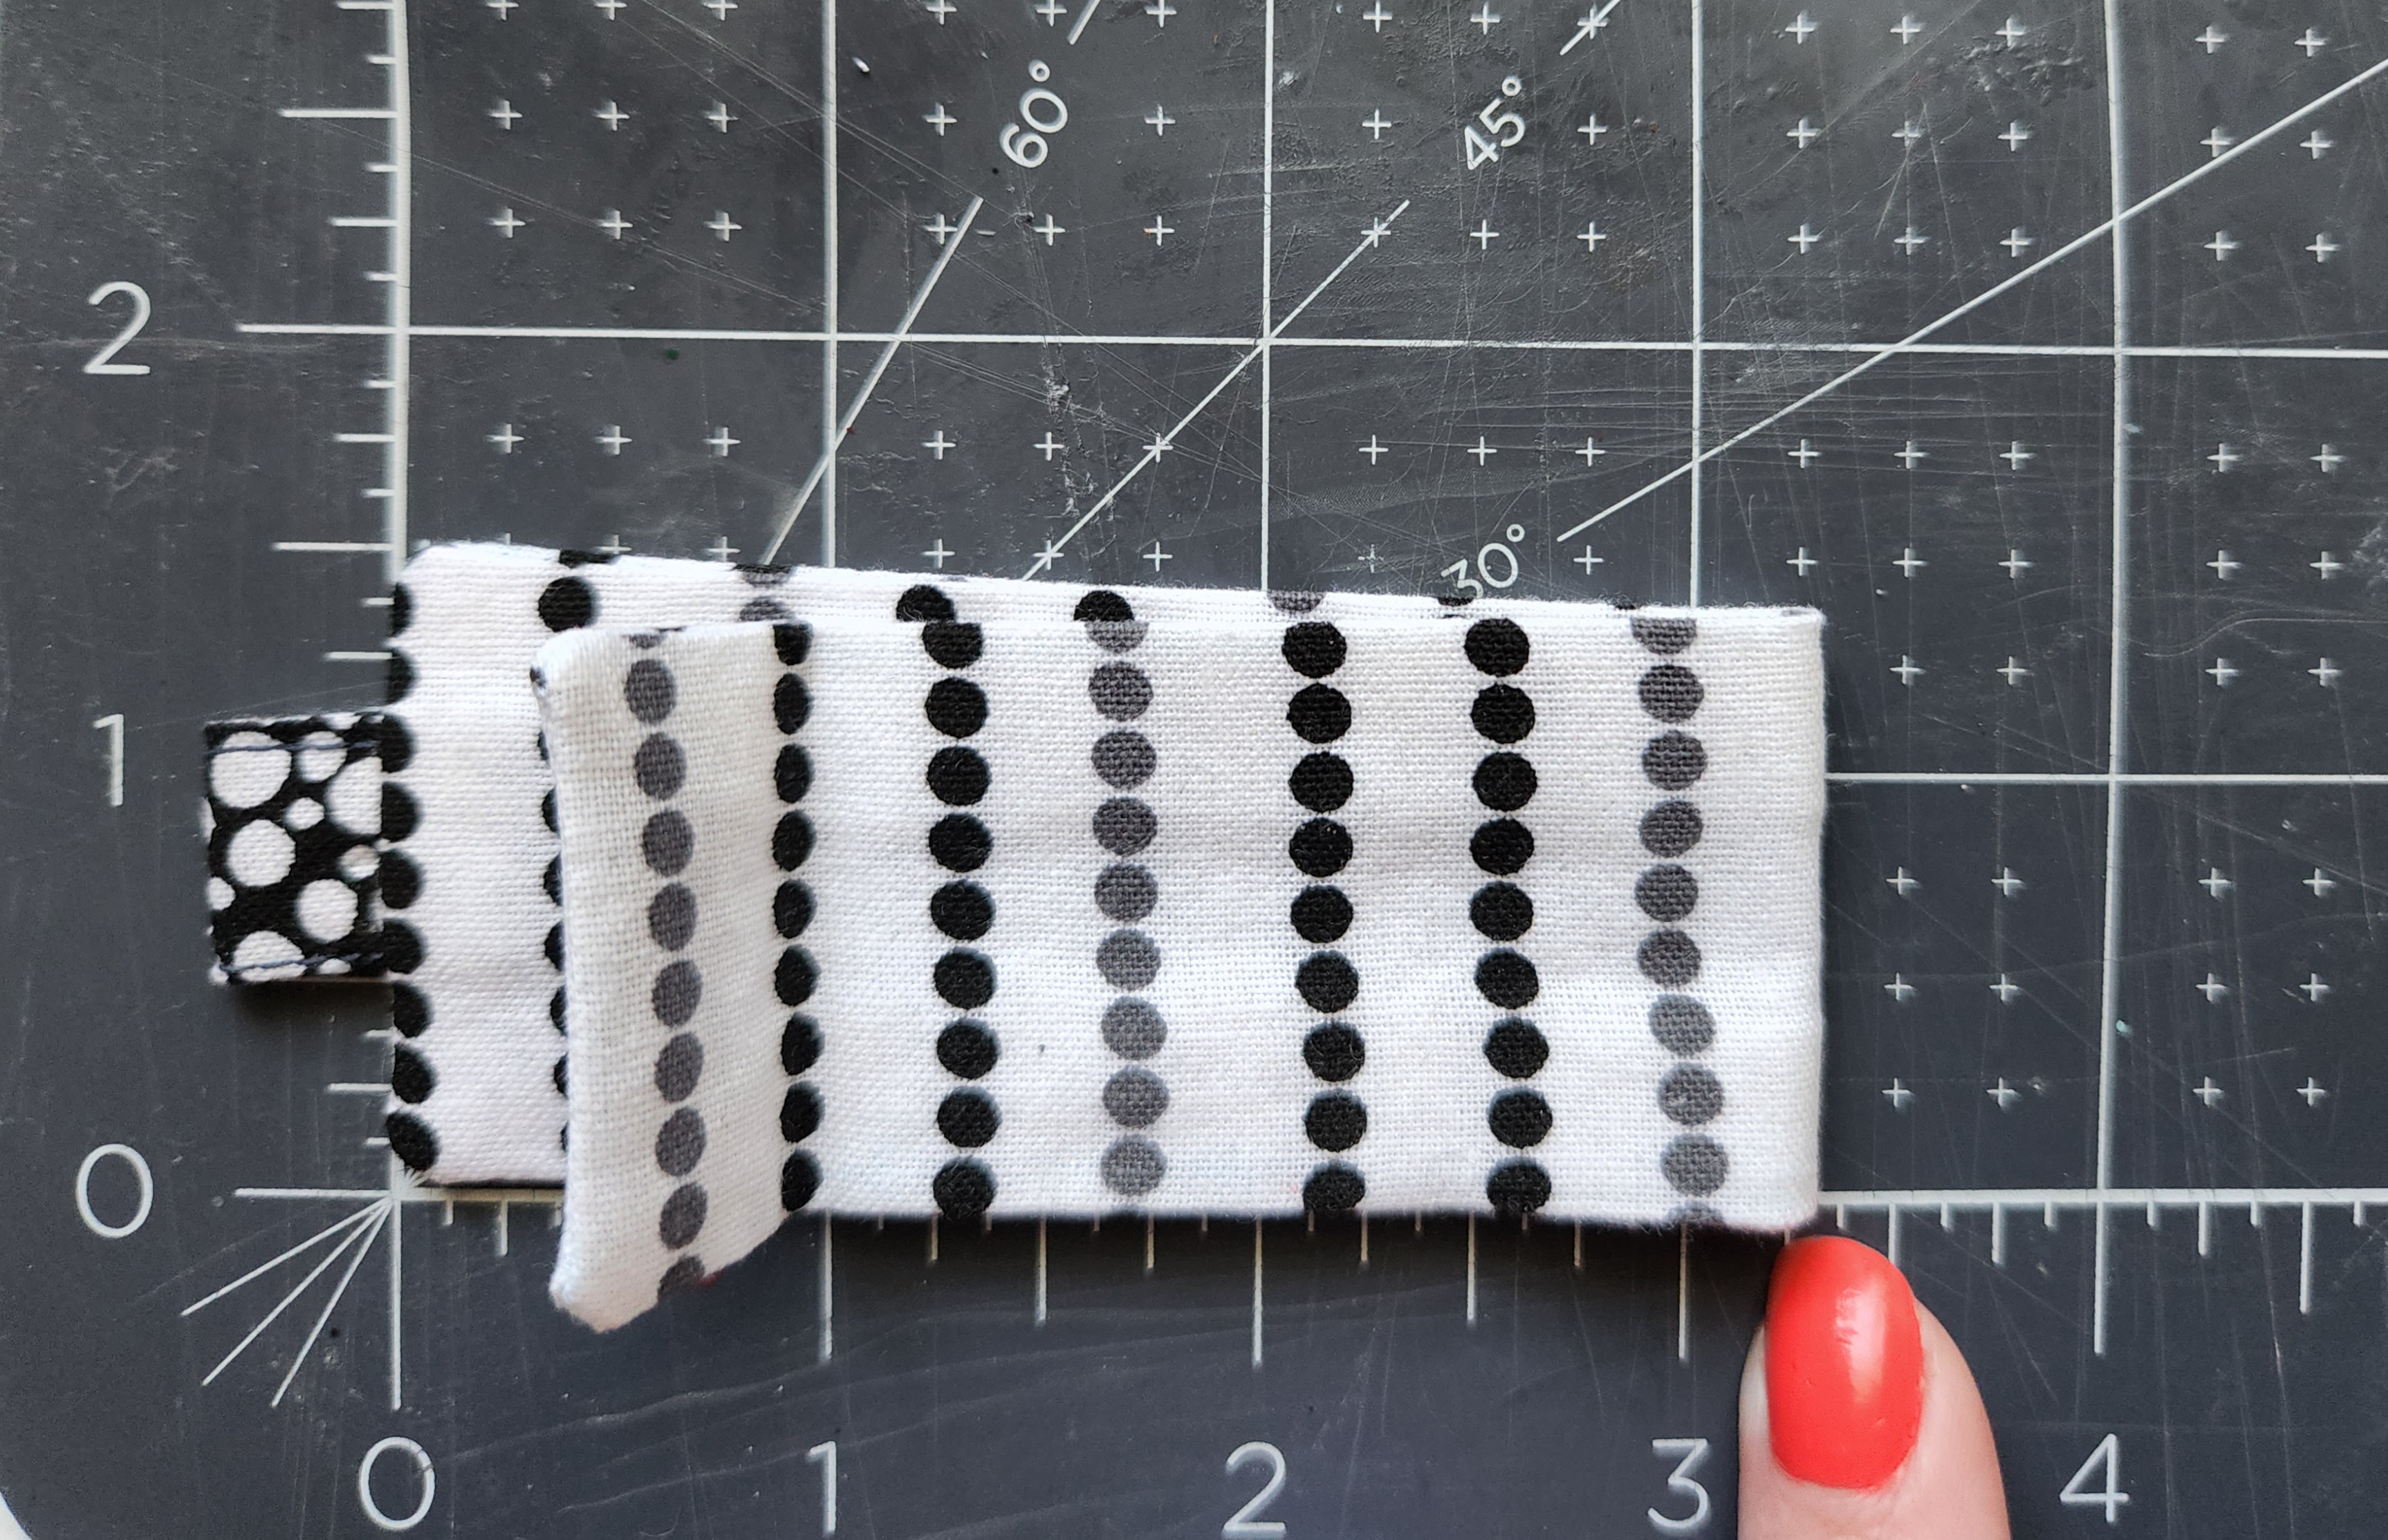
Finally, you can either just sew the sides of the pockets or sew a topstitch all the way around (just not the bottom edge). I just sewed the sides because it was hard to sew my little “decorative edge.” That kept making my seam come out of line just after the pocket. Instead of seam ripping a hundred times, I just sewed the necessary parts. If you want to do a topstitch and you’re new to sewing, you can use the masking tape on the plate method to keep your seam lined up on the edge of the DIY chapstick holder.
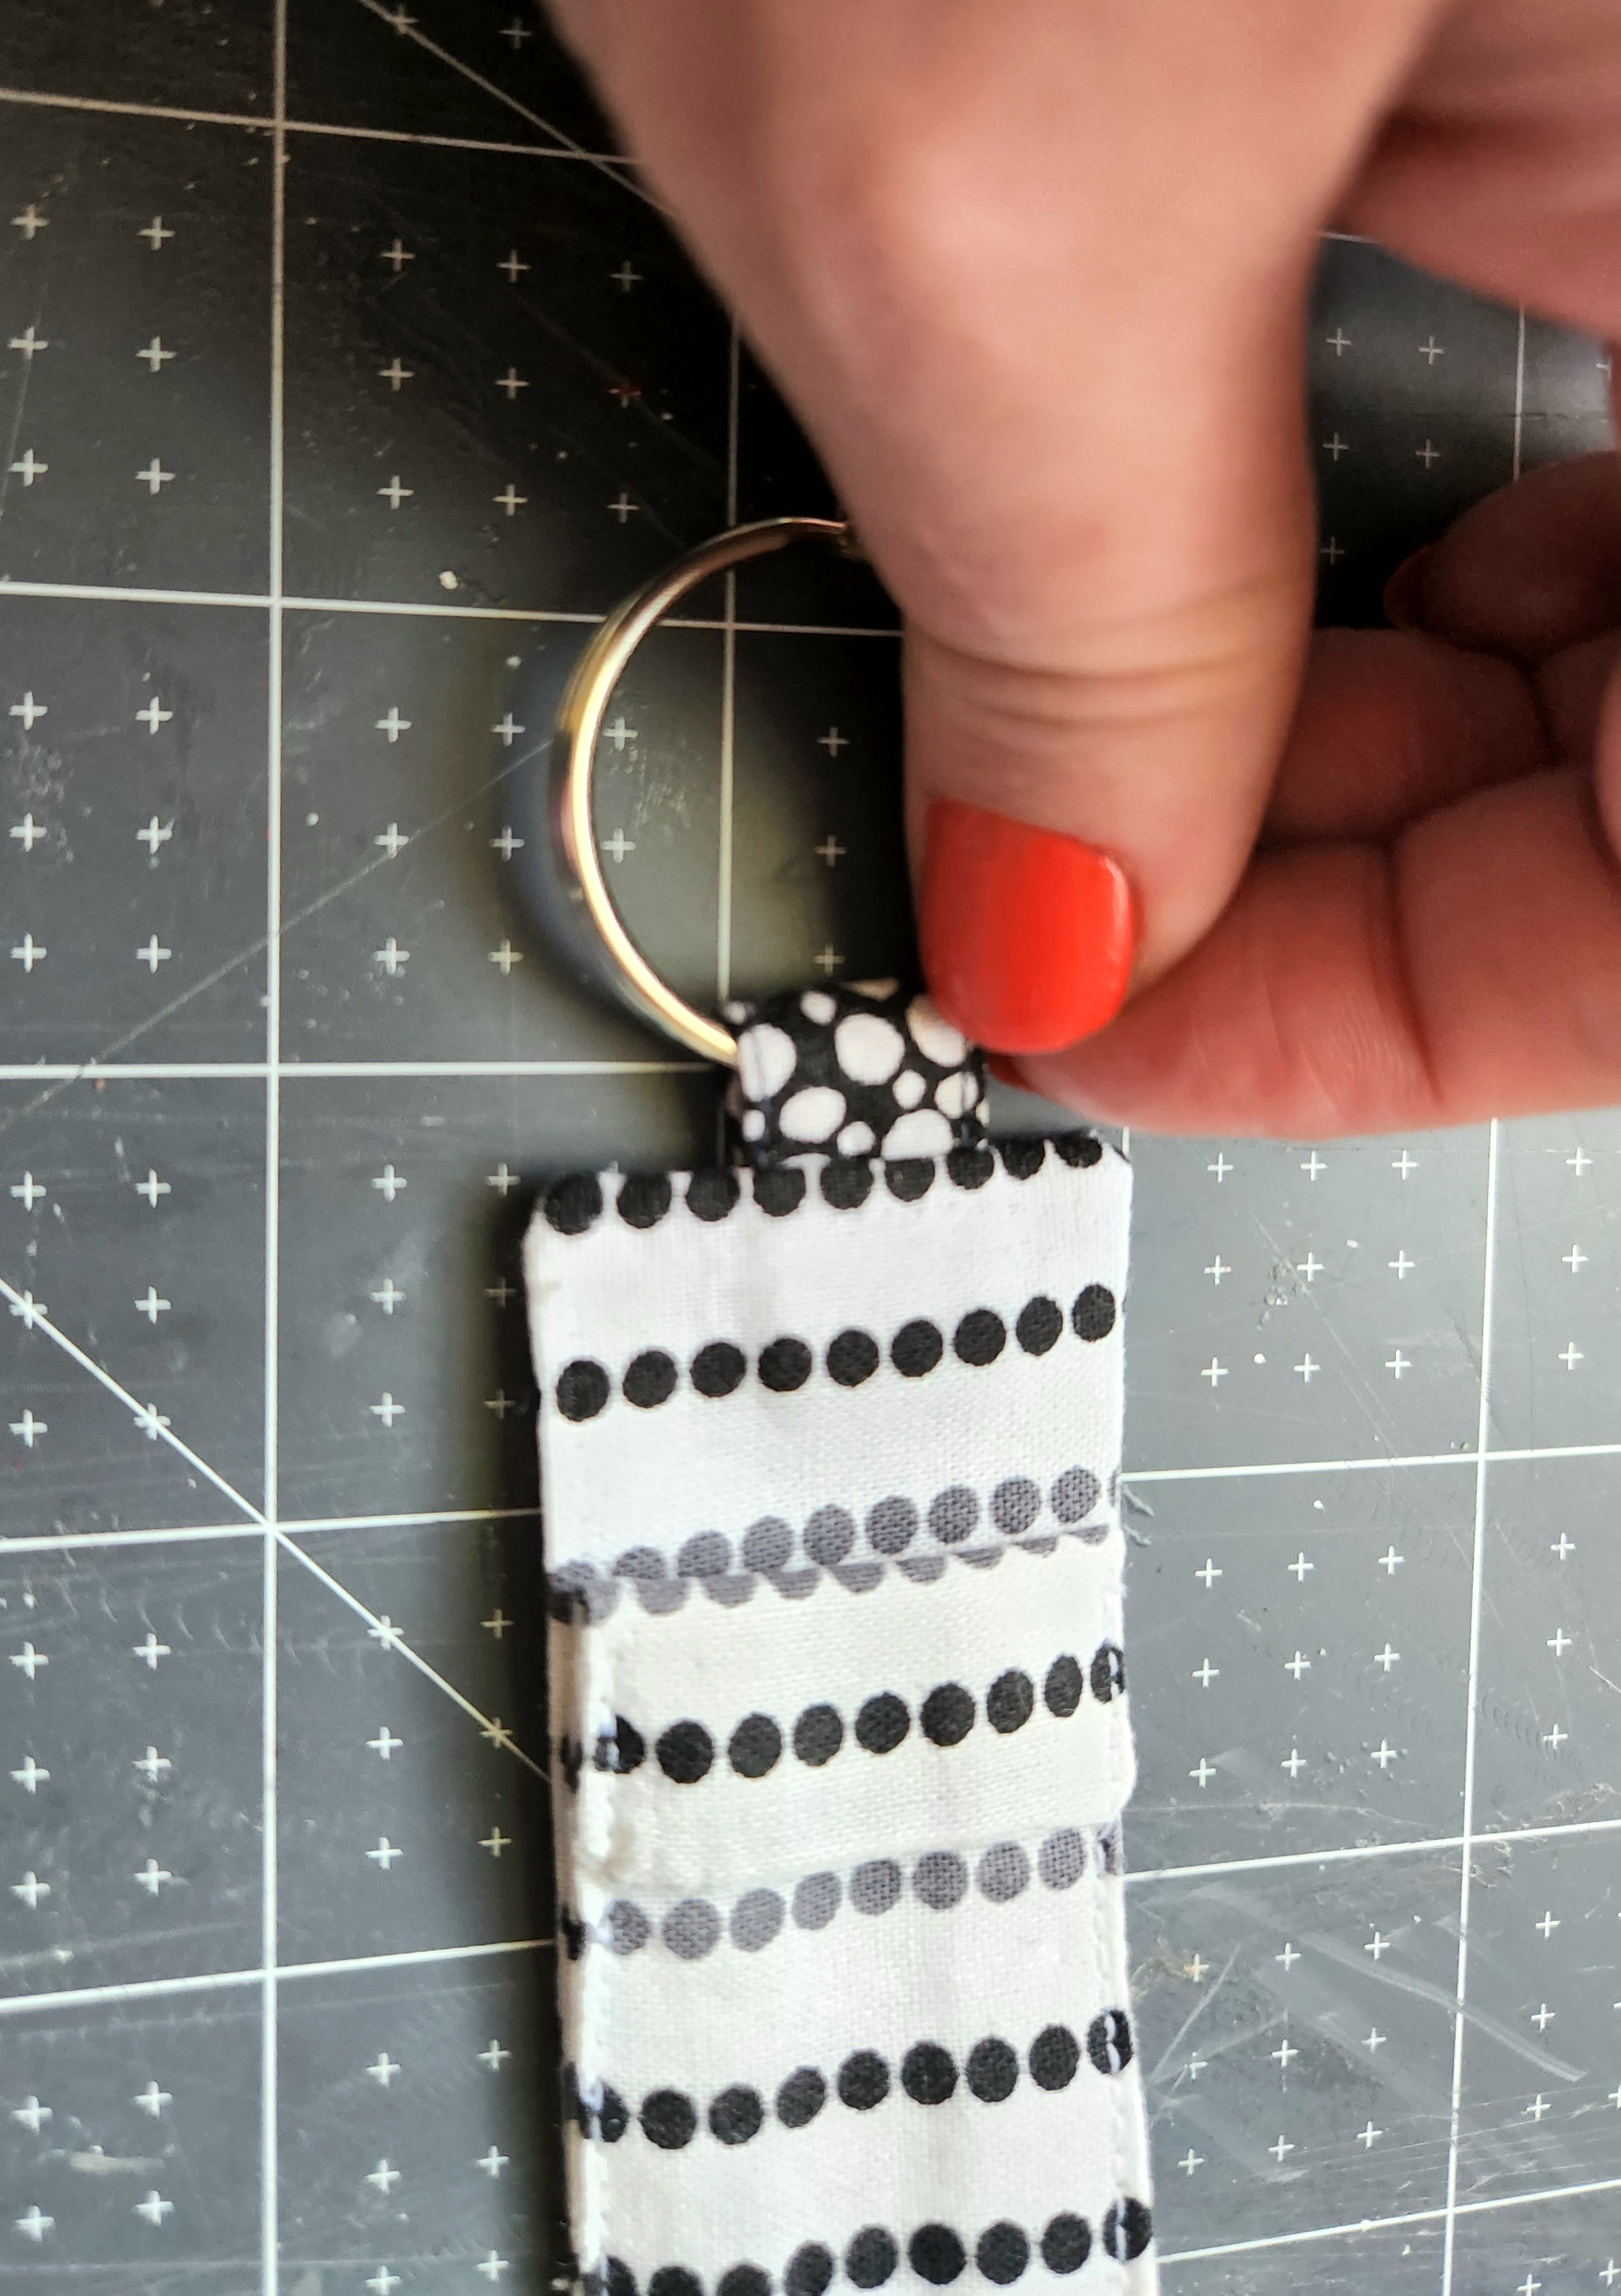
Add a keyring to the pull tab and your lip balm case is complete!
That’s all folks!
Wasn’t that a simple project for those who are new to sewing? These DIY chapstick holders are great gifts for friends, family, to put in stockings, on top of gifts as gift tags, and like I mentioned before, as teacher gifts! You could add initials or names to them using HTV and put them on your child’s backpack. Adding clips instead of keyrings is a great option as well. You can clip them to the hardware of your purse so you’re not searching the depths of the sea looking for your lip balm! I’m going to make a case for my Vaseline lip therapy tins, and I’ll share that with you soon. It’s the absolute only lip balm I use. I mean it’s beyond amazing, giving you the smoothest lips ever! Here’s how my chapstick holders turned out:


Remember to pin the image below or share this post with the buttons on the left side of the page so you can find it when you’re ready to start your project! Also, follow me on Pinterest for new ideas added weekly! Be sure that you never miss a great tutorial for decor like wreaths, signs and other home decor, free printables, crafts, and other fun posts! Enter your email address below to be notified of new posts! Use the buttons below to follow me on social media for other great content.
Don’t go yet! There’s more to see!
There’s plenty more to see here on the blog! If you’re looking for something specific, use the search box in the sidebar to look it up. If not, you might enjoy these ideas. Don’t have time to read them all now? That’s ok, just click over to the posts using the pictures and pin them for later. You can also add Life as a LEO Wife to your favorites and check back for new ideas and free printables and SVGs every Wednesday, as well as link parties with tons of shared ideas on Sundays!


Thanks so much for featuring my chapstick holder keychains!