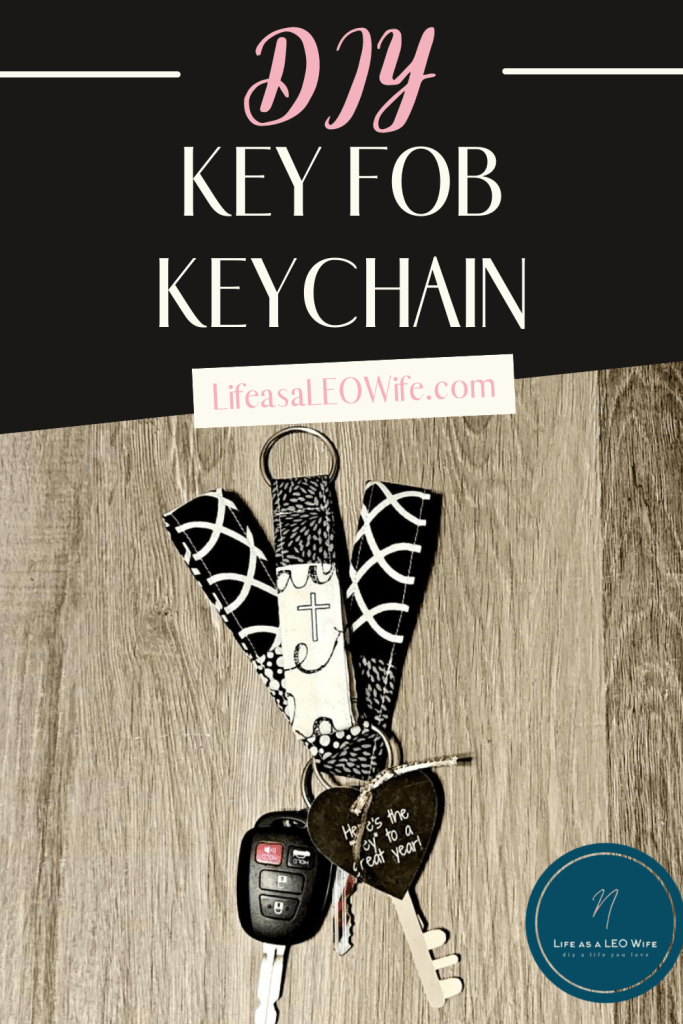
Hey friends! I’m back with another easy sewing tutorial today. Making this key fob keychain is so, so easy, and it’s a perfect gift idea. Remember the lip balm keychains I shared last week? I’m giving them and these fabric fob’s to my son’s teachers, as well as to his enrichment teachers (i.e. music, art, etc.) as little back to school gifts. I’m on a sewing kick with my new machine I guess, ha! But I’m telling you, they’re so easy to crank out, and since they’re only my third sewing project, I can guarantee they’re easy enough for beginning seamstresses!

Fabric Key Fob Keychain Supplies:
- one 3″x6.5″ piece of fabric
- one 3″x4.5″ piece of fabric in a coordinating color or design
- key ring
- 1″x10″ piece of stiff felt
- scissors or rotary cutter
- iron
- pins & other basic sewing supplies

Cut Fabric
First iron the fabric for the keychain. Measure and cut one piece of fabric to 3″x6.5″ and the coordinating fabric to 3″x4.5.” I’ve seen many tutorials for keyrings and most of them call for some type of interfacing. I tried iron-on like I used in my lip balm keychain, and it didn’t really give me the desired effect. I read about felt interfacing, and thought I’d try out regular felt. Worked like a charm! Not the really thin felt though, the thicker pieces that cost just a little bit more than the normal craft felt. If you have felt interfacing you can use it, but I thought I’d just throw that tid bit in there. Cut a 1″x10″ piece of the felt you like.

Attach the Pieces of Fabric
Line up the two 3″ pieces of fabric with the right sides facing each other and the wrong sides out.

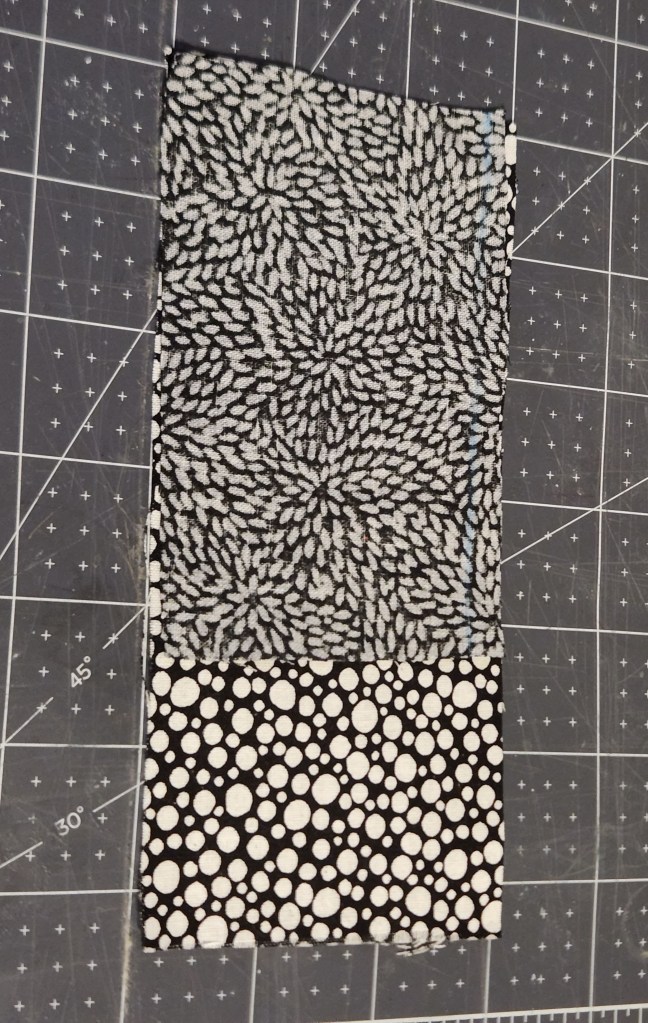
Sew the two pieces together with 1/4″ seam. Press the seam when finished.

Fold the Fabric
Fold the fabric in half along the length and iron the fold.

Then place the felt on the bottom half of fabric up against the fold.

Fold the bottom edge of the fabric over the felt and iron it place.
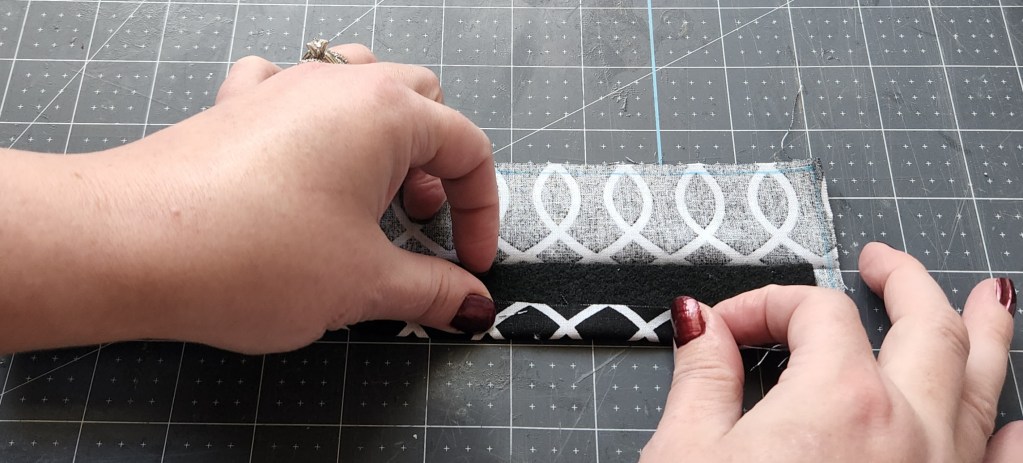
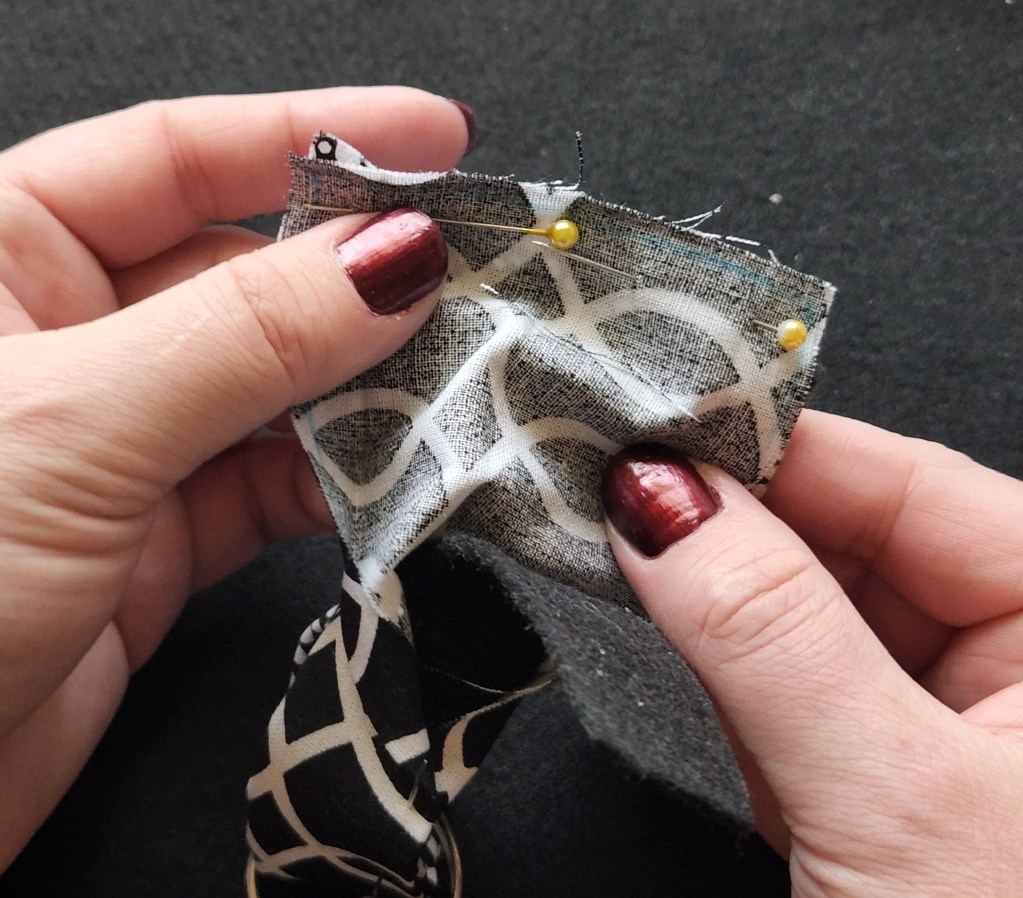
Bring the top half down to meet the newly formed edge and fold the top side’s edge in to meet it. Hopefully taking pictures from several angles helps show you what I mean.

Pin everything in place.
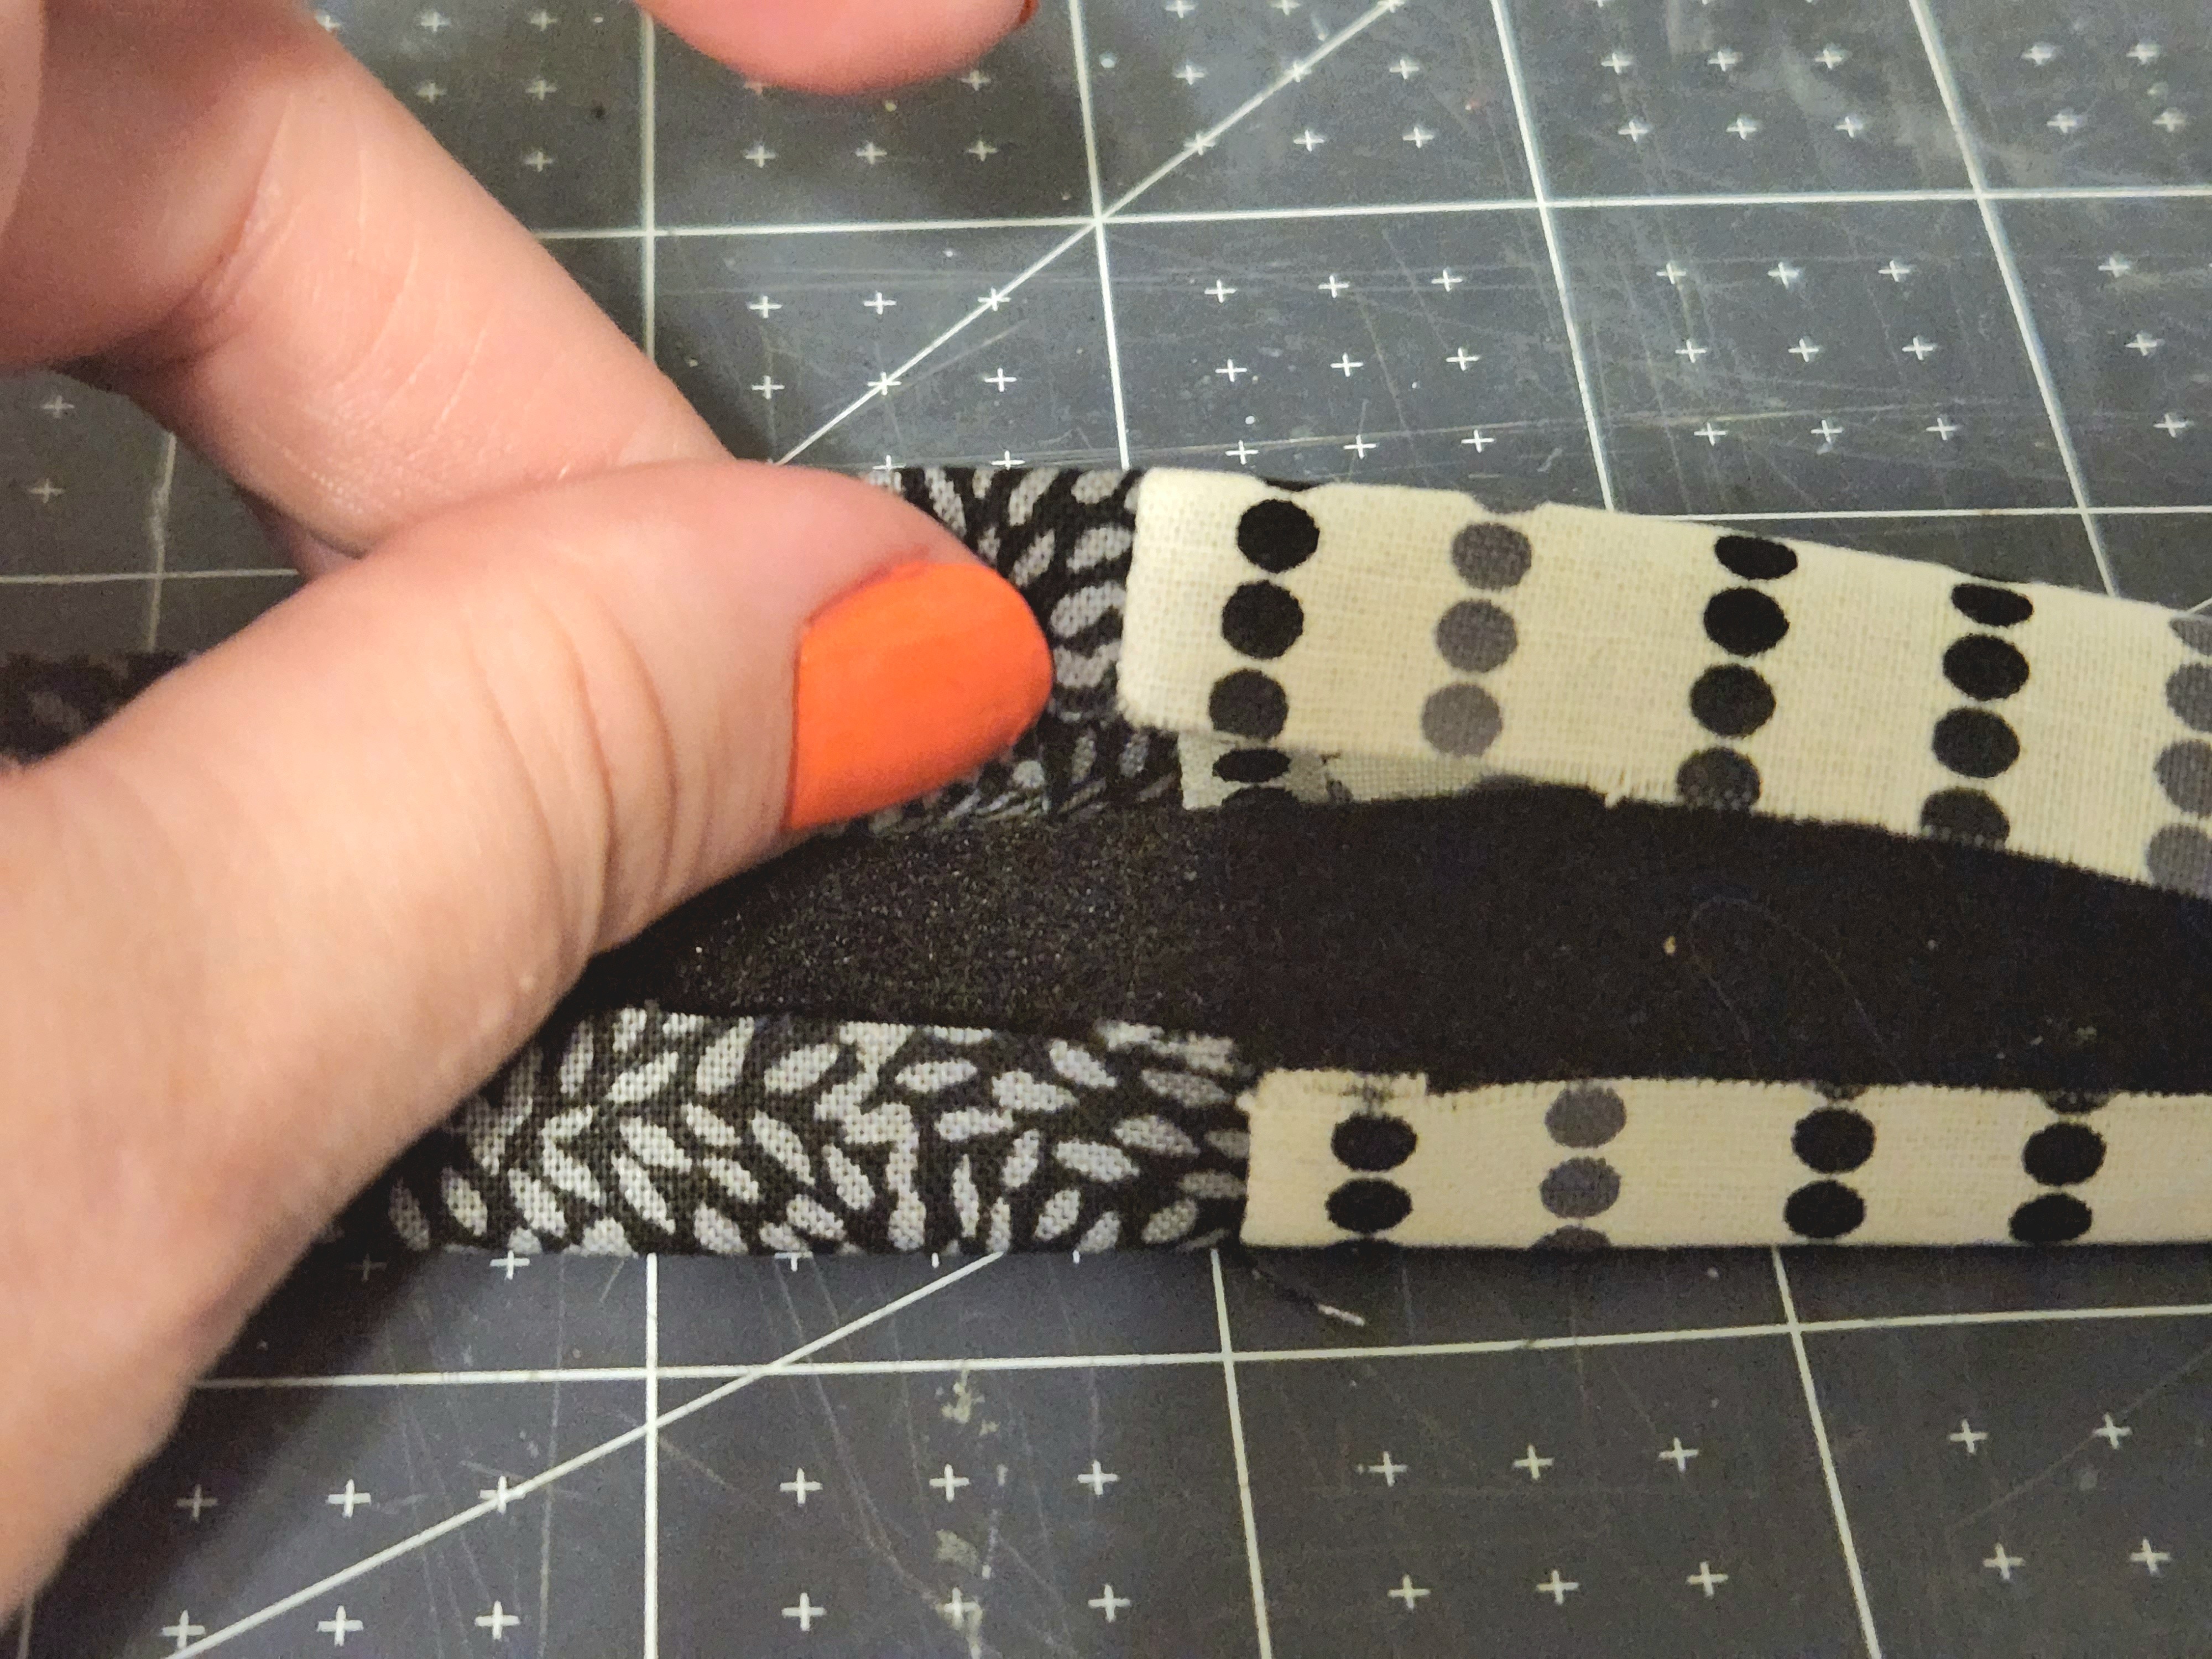
Place the Keyring on the Fabric Key Fob
Slide the keyring onto the length of fabric.

Open the two ends of the folded fabric and line the two raw ends up with the wrong sides of the fabric out. Be sure to fold the felt out of the way so it doesn’t get sewn with the fabric.
Sew the ends together with a 1/4″ seam. Keep the keyring and felt out of the way as you sew.

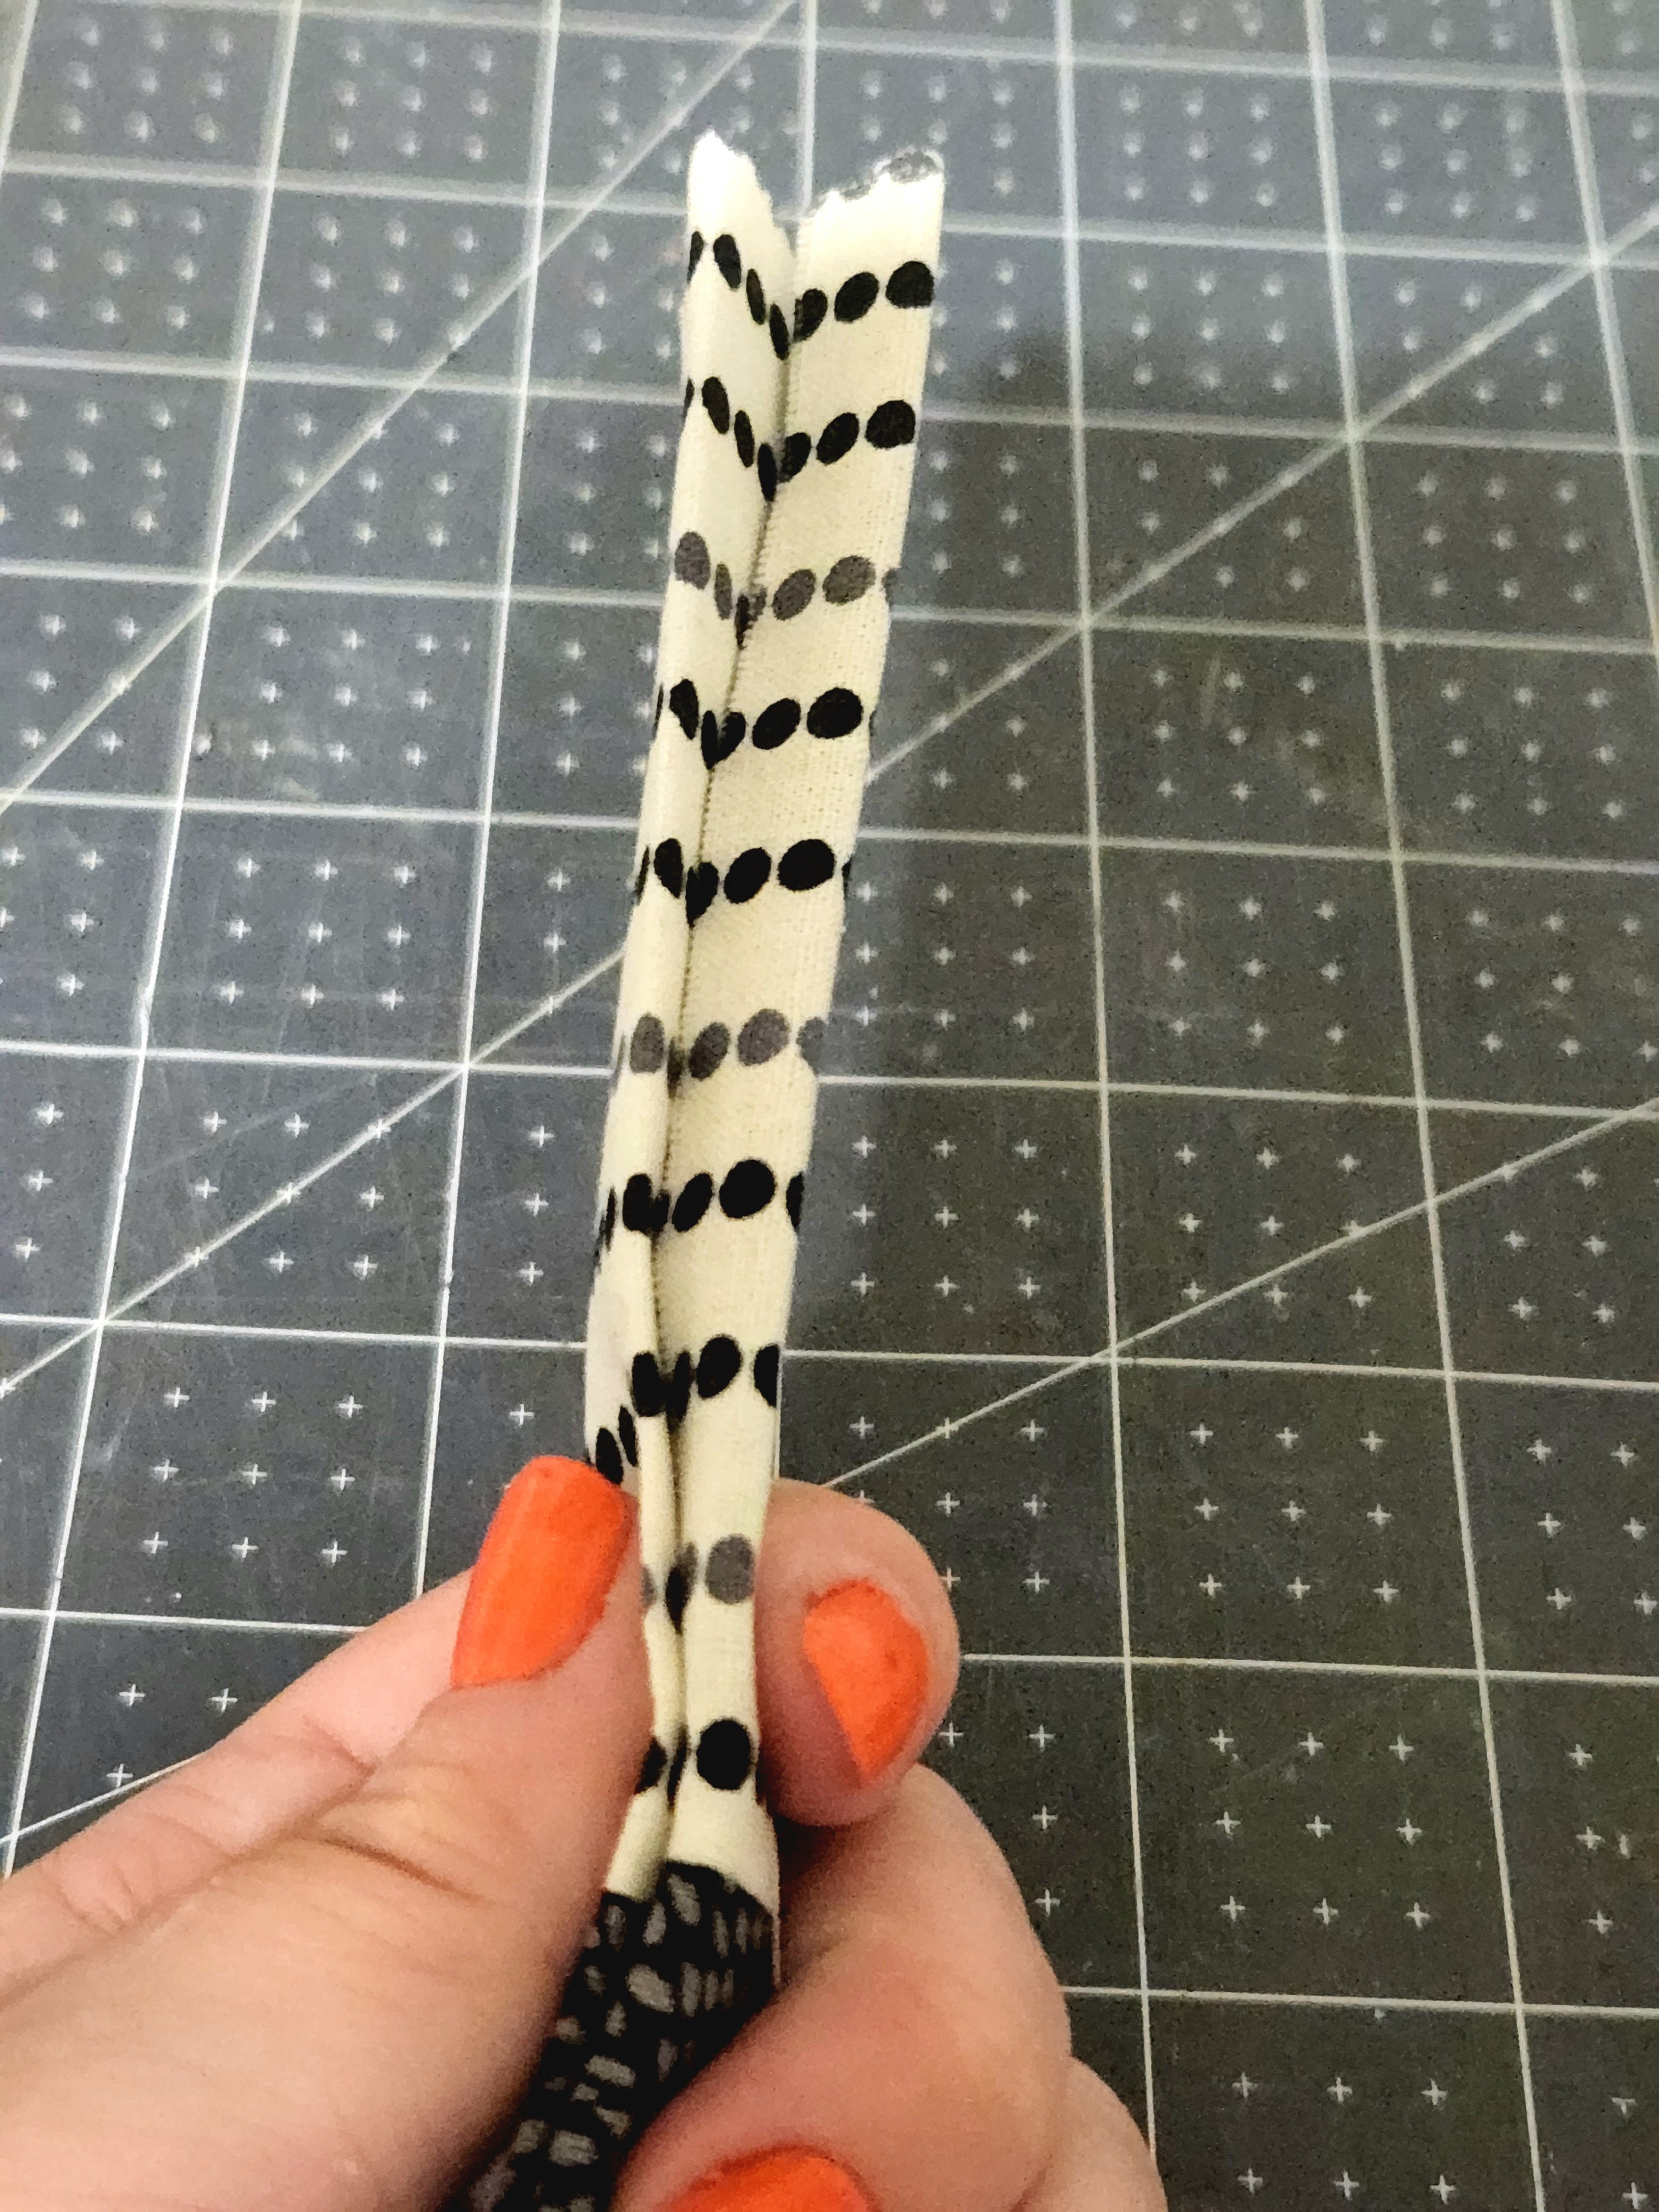
Fold the seam out and crease with your fingernails or iron it.

Fold the fabric back in place and trim the felt if it’s now overlapping.

Pin the fabric and felt in place.

Topstitch the Key Fob Keychain
Finally top stitch both sides of the fabric keychain at 1/8″ so that you have along each side. If you need help sewing 1/8″ it helps to add a piece of masking tape 1/8″ from the needle. That will allow you to keep the fabric aligned as you sew.
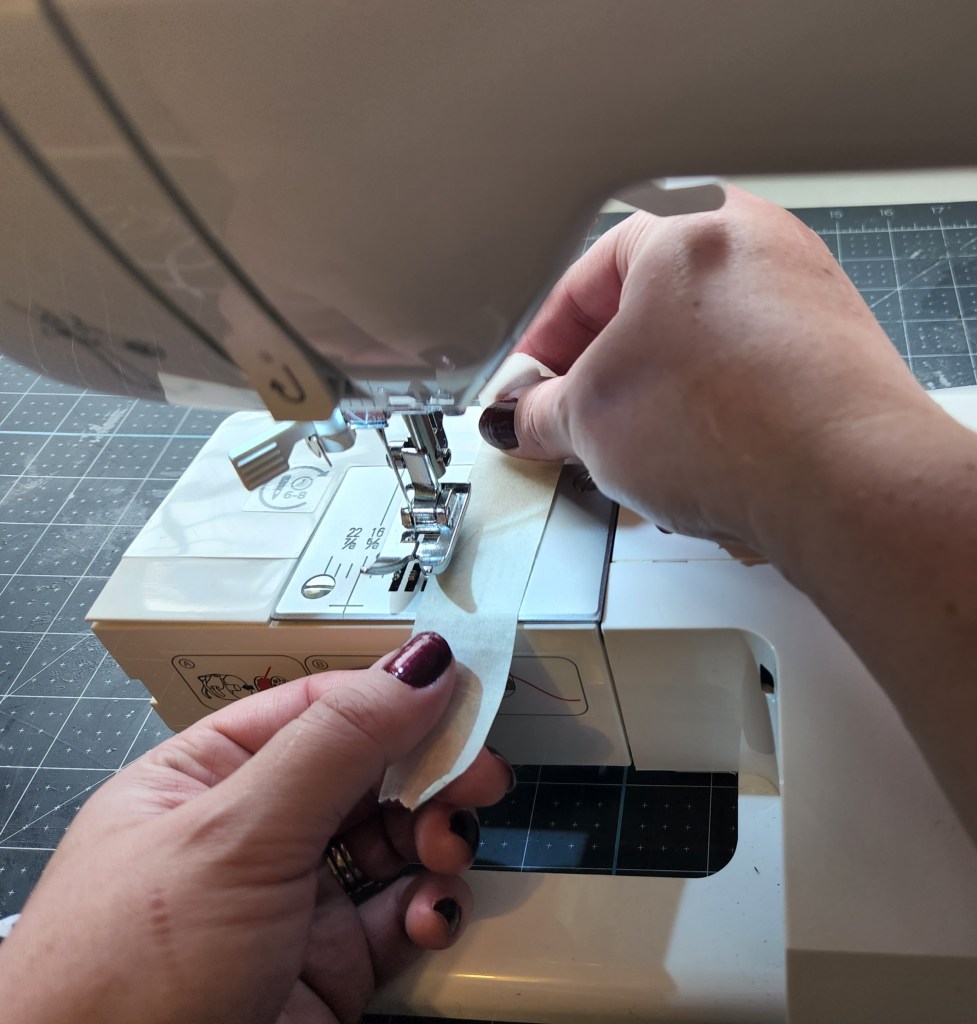
Begin to sew and then backstitch a few stitches before continuing straight. That will keep your thread from unraveling. Keep the fabric and keyring out of the way as you go. It’s actually really easy when you get started. Just keep the edge lined up with the tape. I started just before the two different fabrics meet so that when I backstitched it would reinforce the seam there, and it also allowed me to start sewing the other side in the same place.

Trim any excess thread. This is what you should have.


Finally topstitch the other side. I flipped my fabric keychain so that I was sewing on the opposite side. That way both backstitching sections were in the same place on the same side (so they look the same).


Stitch the Keyring in Place
Fold the key fob so that the two ends of the shorter section of fabric line up and move the keyring up to the middle of that fabric. I pressed mine so that it would stay in place.
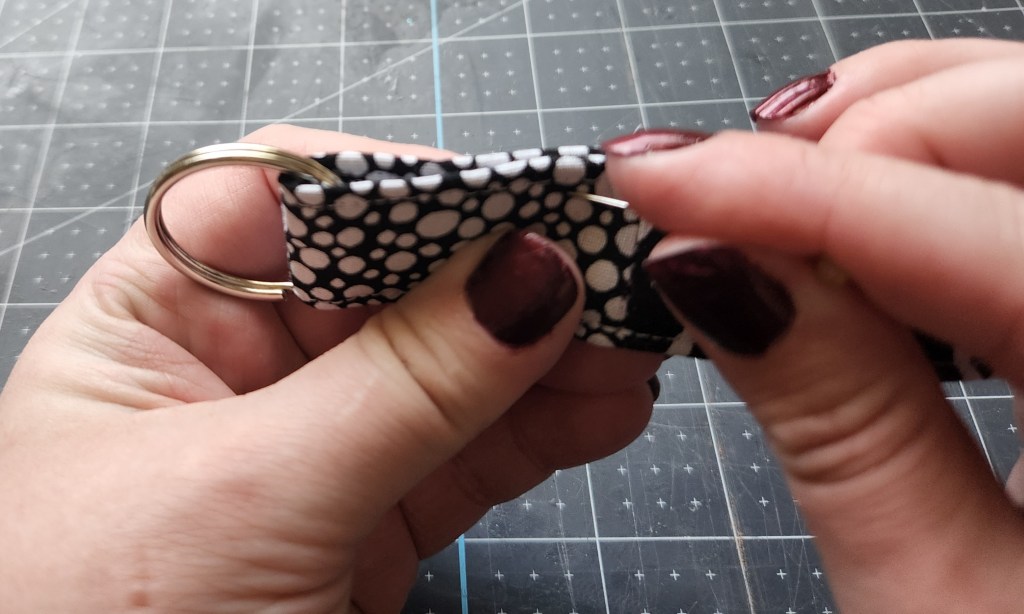

Topstitch the keyring in place. I placed my seam about 3/4″ from the top. You can adjust this if your keyring is thinner. My seam is as close as I could stitch to the ring. Place the start of this seam on one of the topstitches and stop on the other. Remember to backstitch it in place. Trim the excess thread, and ta da!

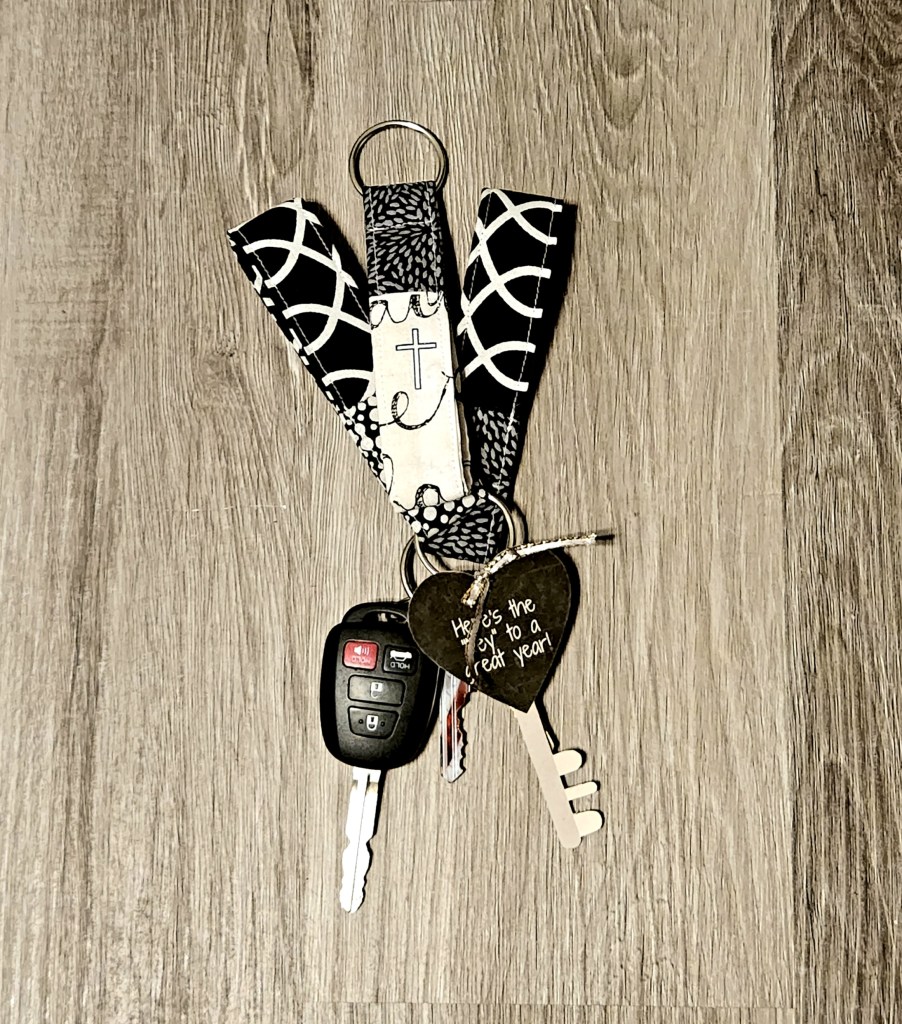
Your key fob keychain is ready to hold your keys!
That’s it! I told you it was easy, didn’t I? This, along with the chapstick holder keychain and the drawstring bag, is a great way to use fabric scraps. I’ve made four or five so far, and it’s a great way to practice my new hobby! One day I’ll move onto something that needs more than a fat quarter of fabric.

Like I mentioned, these are great back to school teachers’ gifts. Here’s a post with free printable gift tags. There’s a set for keychains and another for lip balm, whether it’s just lip balm alone or a lip balm holder.

I hope that you get a ton of use out of this tutorial! These fabric keychains are great for all kinds of gifts, Mother’s Day, little gifts for friends, or stocking stuffers!
Remember to pin the image below or share this post with the buttons on the left side of the page so you can find it when you’re ready to start your project! Also, follow me on Pinterest for new ideas added weekly! Be sure that you never miss a great tutorial for decor like wreaths, signs and other home decor, free printables, crafts, and other fun posts! Enter your email address below to be notified of new posts! Use the buttons below to follow me on social media for other great content.
Don’t go yet! There’s more to see!
There’s plenty more to see here on the blog! If you’re looking for something specific, use the search box in the sidebar to look it up. If not, you might enjoy these ideas. Don’t have time to read them all now? That’s ok, just click over to the posts using the pictures and pin them for later. You can also add Life as a LEO Wife to your favorites and check back for new ideas and free printables and SVGs every Wednesday, as well as link parties with tons of shared ideas on Sundays!


Wow, what a great idea. I love it. Congratulations, you are being featured at Thursday Favorite Things. https://www.eclecticredbarn.com/2022/08/come-share-at-thursday-favorite-things.html
Hugs,
Bev
Yay, thank you!