
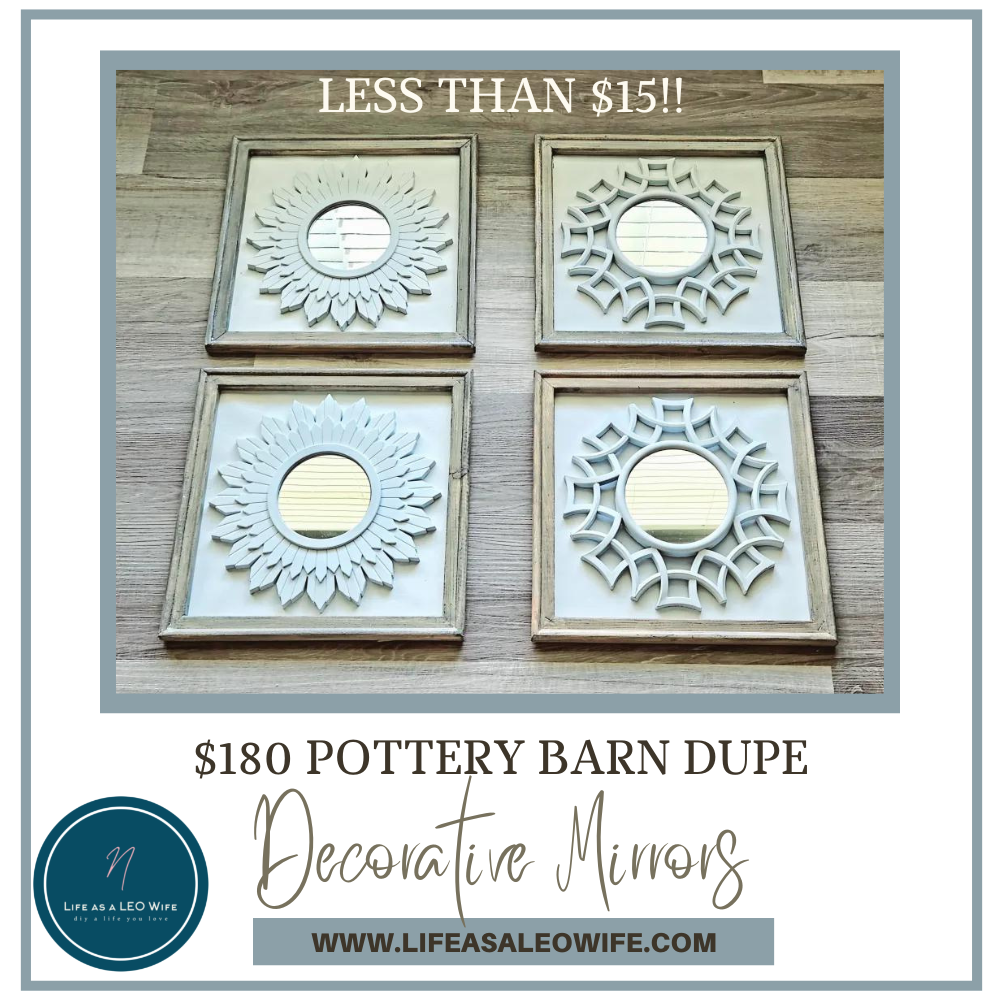
Hello friends! I’m so glad you’re here today because it’s time for our monthly Creative Craft Hop hosted by Sara from Birdz of a Feather. On to my project- a few months ago, I saw some beautiful decorative mirrors framed in wood on Pottery Barn’s website. They wanted $59.99 per mirror, and I’d need a set of four to fill the space above my couch, previously inhabited by my coastal farmhouse flag. I refuse to spend $180 on something I could make for much less! Today I’m sharing how to make a DIY decorative mirror, or a set of them, for less than $15!
On Creative Craft Hop, I join up with some lovely ladies from around the world every third Thursday to bring you DIY projects. Stick around after this post to see all of the great tutorials shared by some very talented ladies! If you’re coming over from Jenna at The Painted Apron, welcome! Wasn’t her gingerbread ornament adorable?!

I couldn’t find the picture of the Pottery Barn mirrors tonight, but I did find a similar set on Wayfair for $289.99! Can you believe that?! I actually like my version a lot better than these!

DIY Decorative Mirror Supplies:
I made a set of four mirrors, but you can just make one if you’d like. I’m sharing the supplies for one, you’ll need four each for a set.
- decorative mirror(s) from Dollar Tree
- 12×12 canvas: I bought a pack of 7 from Michael’s for $6.59 w/ a coupon.
- chalk paint or chalk spray paint: I used Rust-oleum Chalked spray paint in linen white.
- wood stain or paint for the wood frame: I used Rust-oleum Polyurethane + Stain in weathered gray.
- E6000 or hot glue gun
- staple gun or hot glue
- scissors or rotary cutter

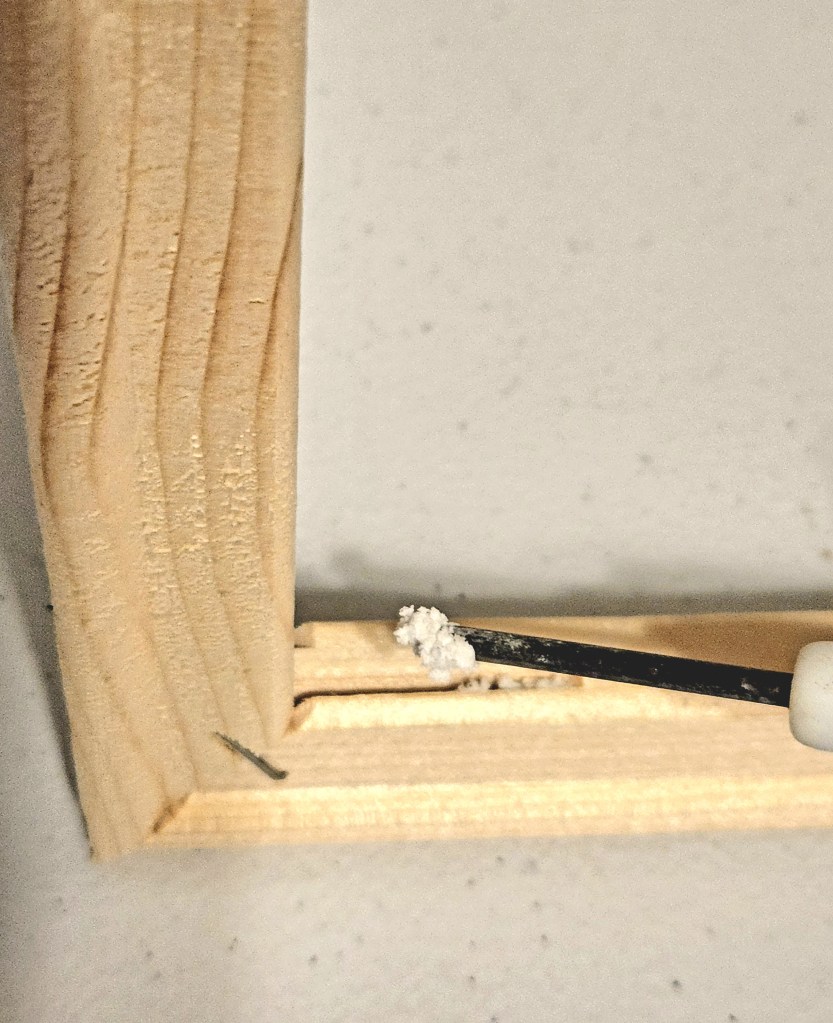
Remove Canvas from the Wood Frame
You’re going to need the wood frames that are under the canvases showing when you attach the decorative mirrors to the canvases. When I remove canvases from frames, I use a small flathead screwdriver or a butterknife to pry the staples from the back of wood. You can use pliers to pull the staples once you get them lifted up.

Once you’ve removed all the staples, take the canvas off of the wood frame.

Since I was making a 4 piece set of DIY decorative mirrors, I went ahead and removed the canvases from all four frames.
Fill the Holes in the Wood
Whenever I use reversed canvases, I always use spackling or wood filler to fill in the slats that you’ll find in just about any brand of canvases. If you need a more complete tutorial on this, you can check out my reverse canvas tutorial or coastal farmhouse flag tutorial, where I spackled then stained the wood, to see step by step instructions.
Fill the holes with spackle, then allow it to dry.


Paint or Stain the Wood Frame
Once the spackle dries, sand the entire surface of the wood frame. (By the way- why do my arms look so huge from this angle, lol?!)

Use a foam or paint brush to apply the wood stain or paint to the wood frames. If you’re using stain, remember to apply it with strokes that go in the same direction, not back and forth the way you apply paint. The Rust-oleum stain that I used dries in minutes and has the polyurethane top coat already in it which is amazing! I’m a huge fan of it.

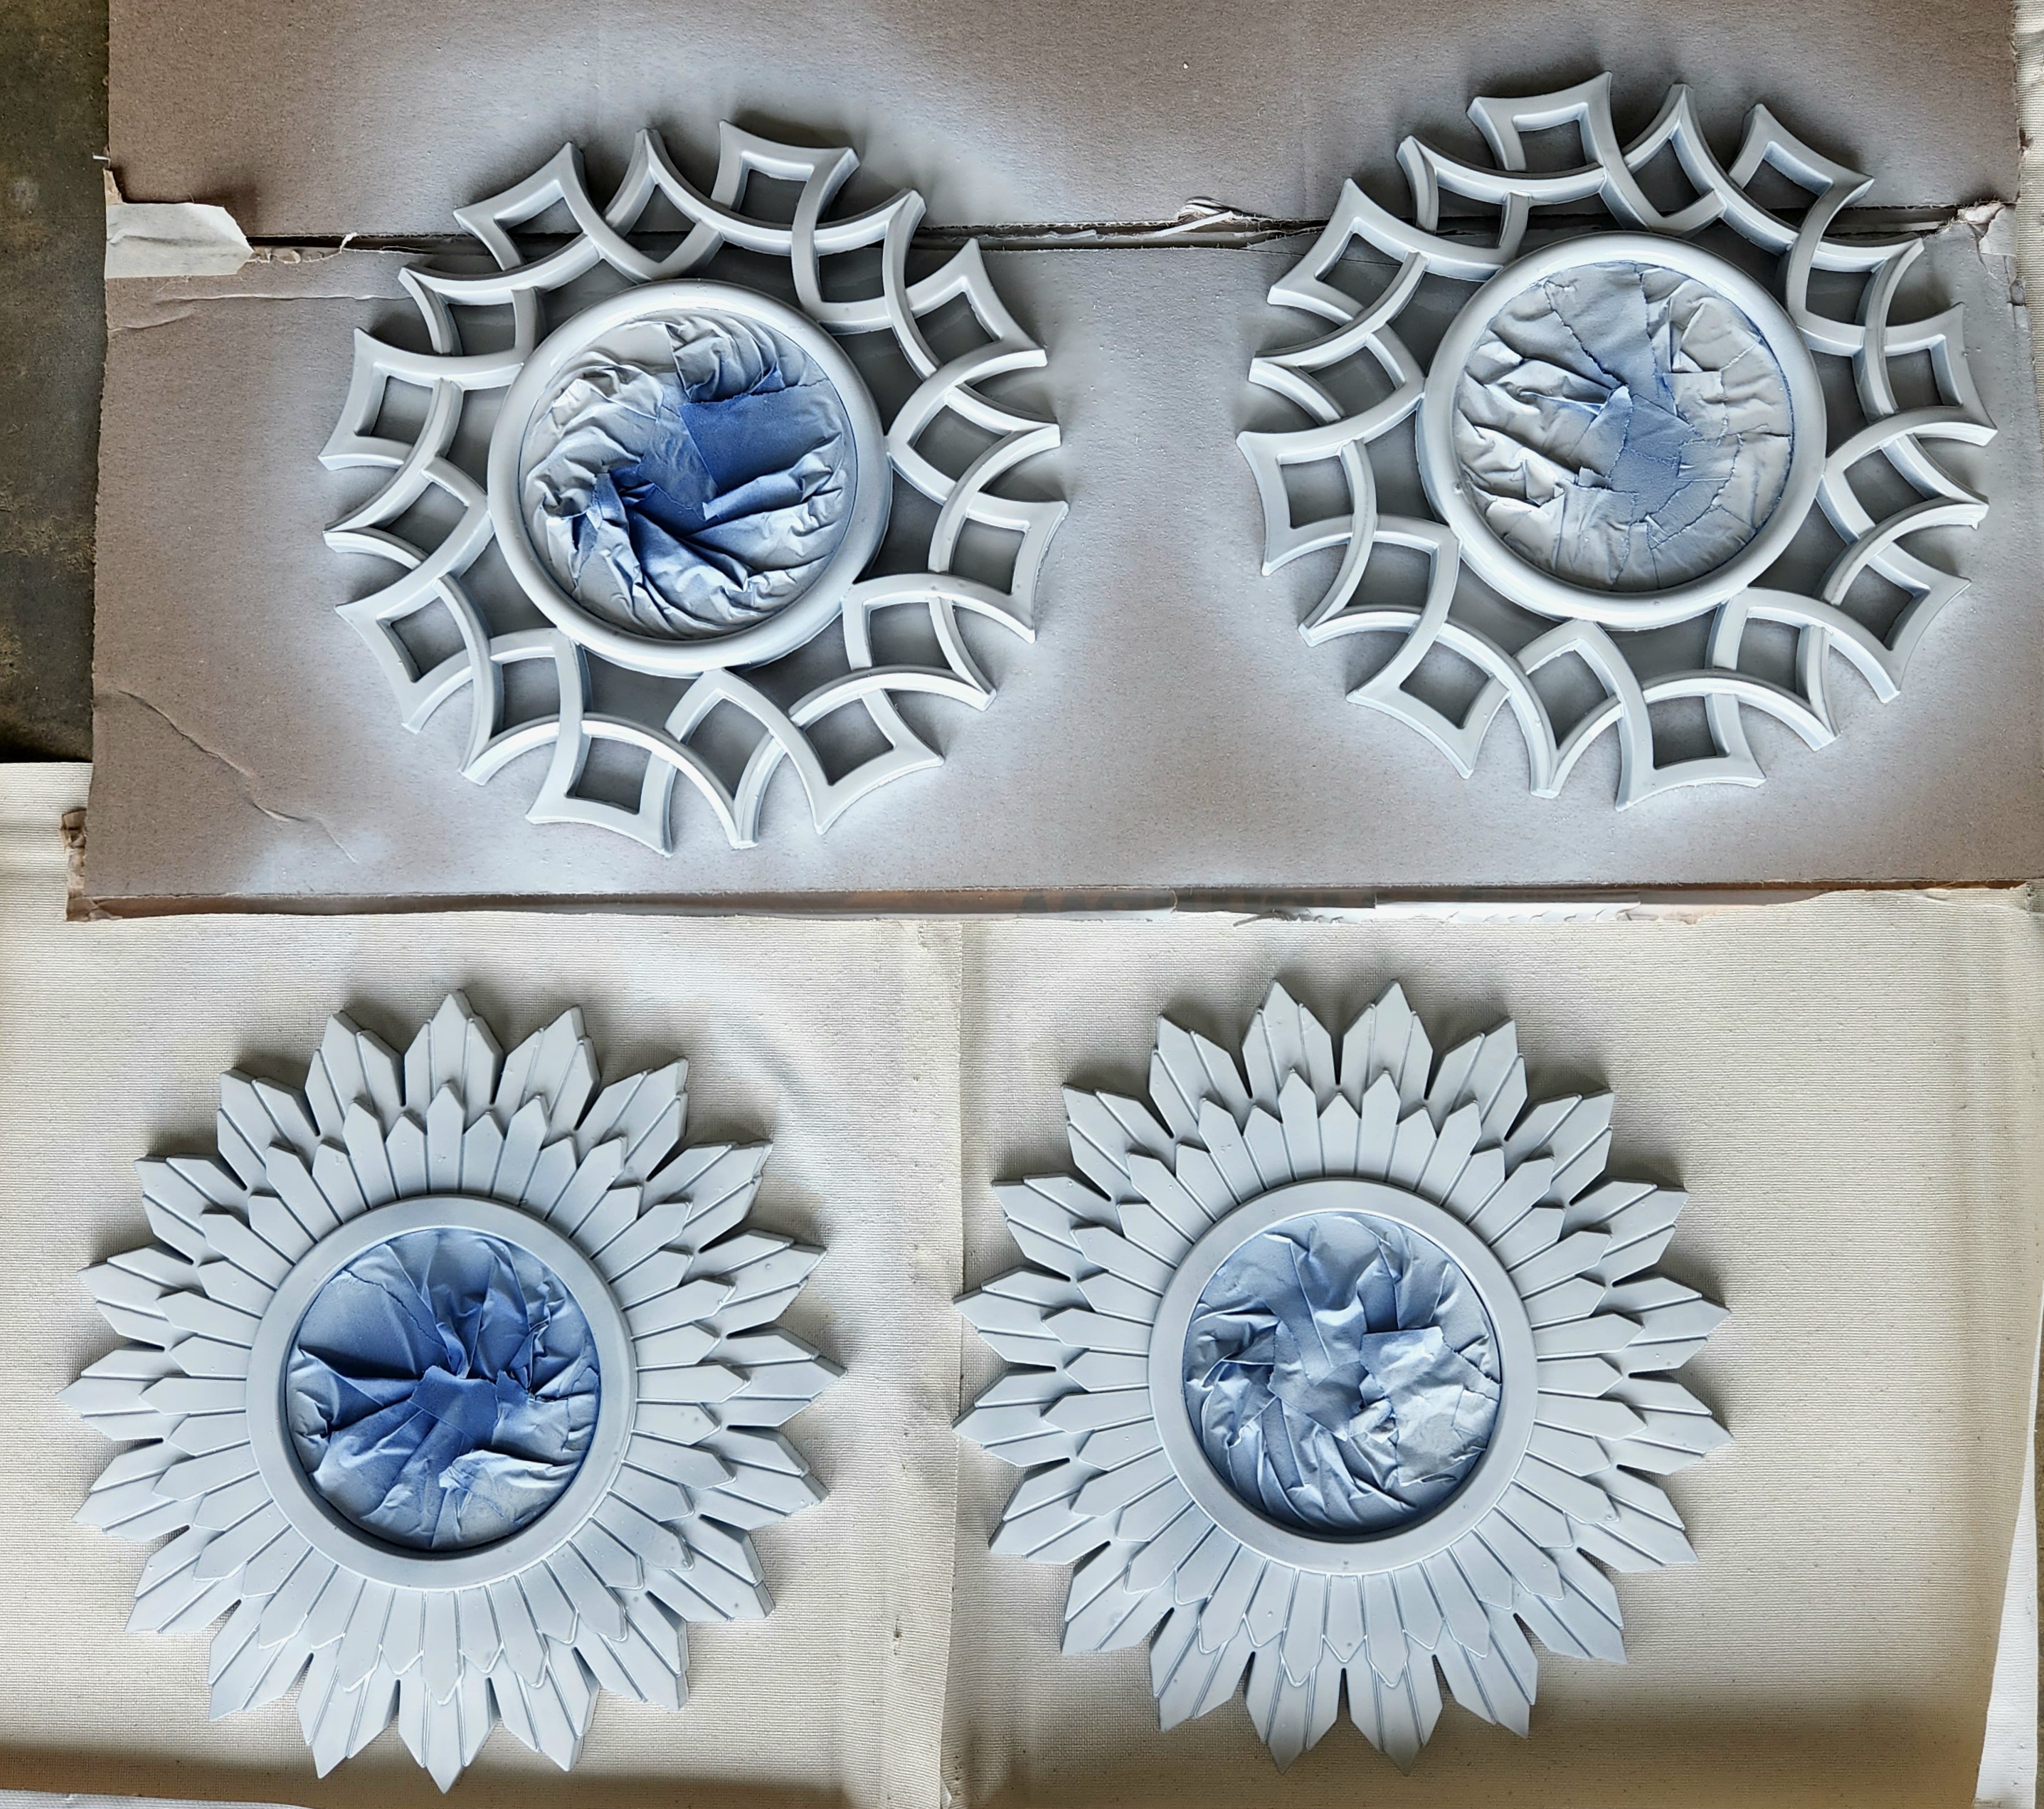
Paint the Decorative Mirror
Before you paint the mirrors, you need to use painter’s or masking tape to cover the glass. If you’re using chalk spray paint you need to cover the entire surface, but if it’s regular chalk paint you only need to tape off the edges where the mirror meets the plastic. If you’re making a decorative mirror set like I did, tape off all of the mirrors.

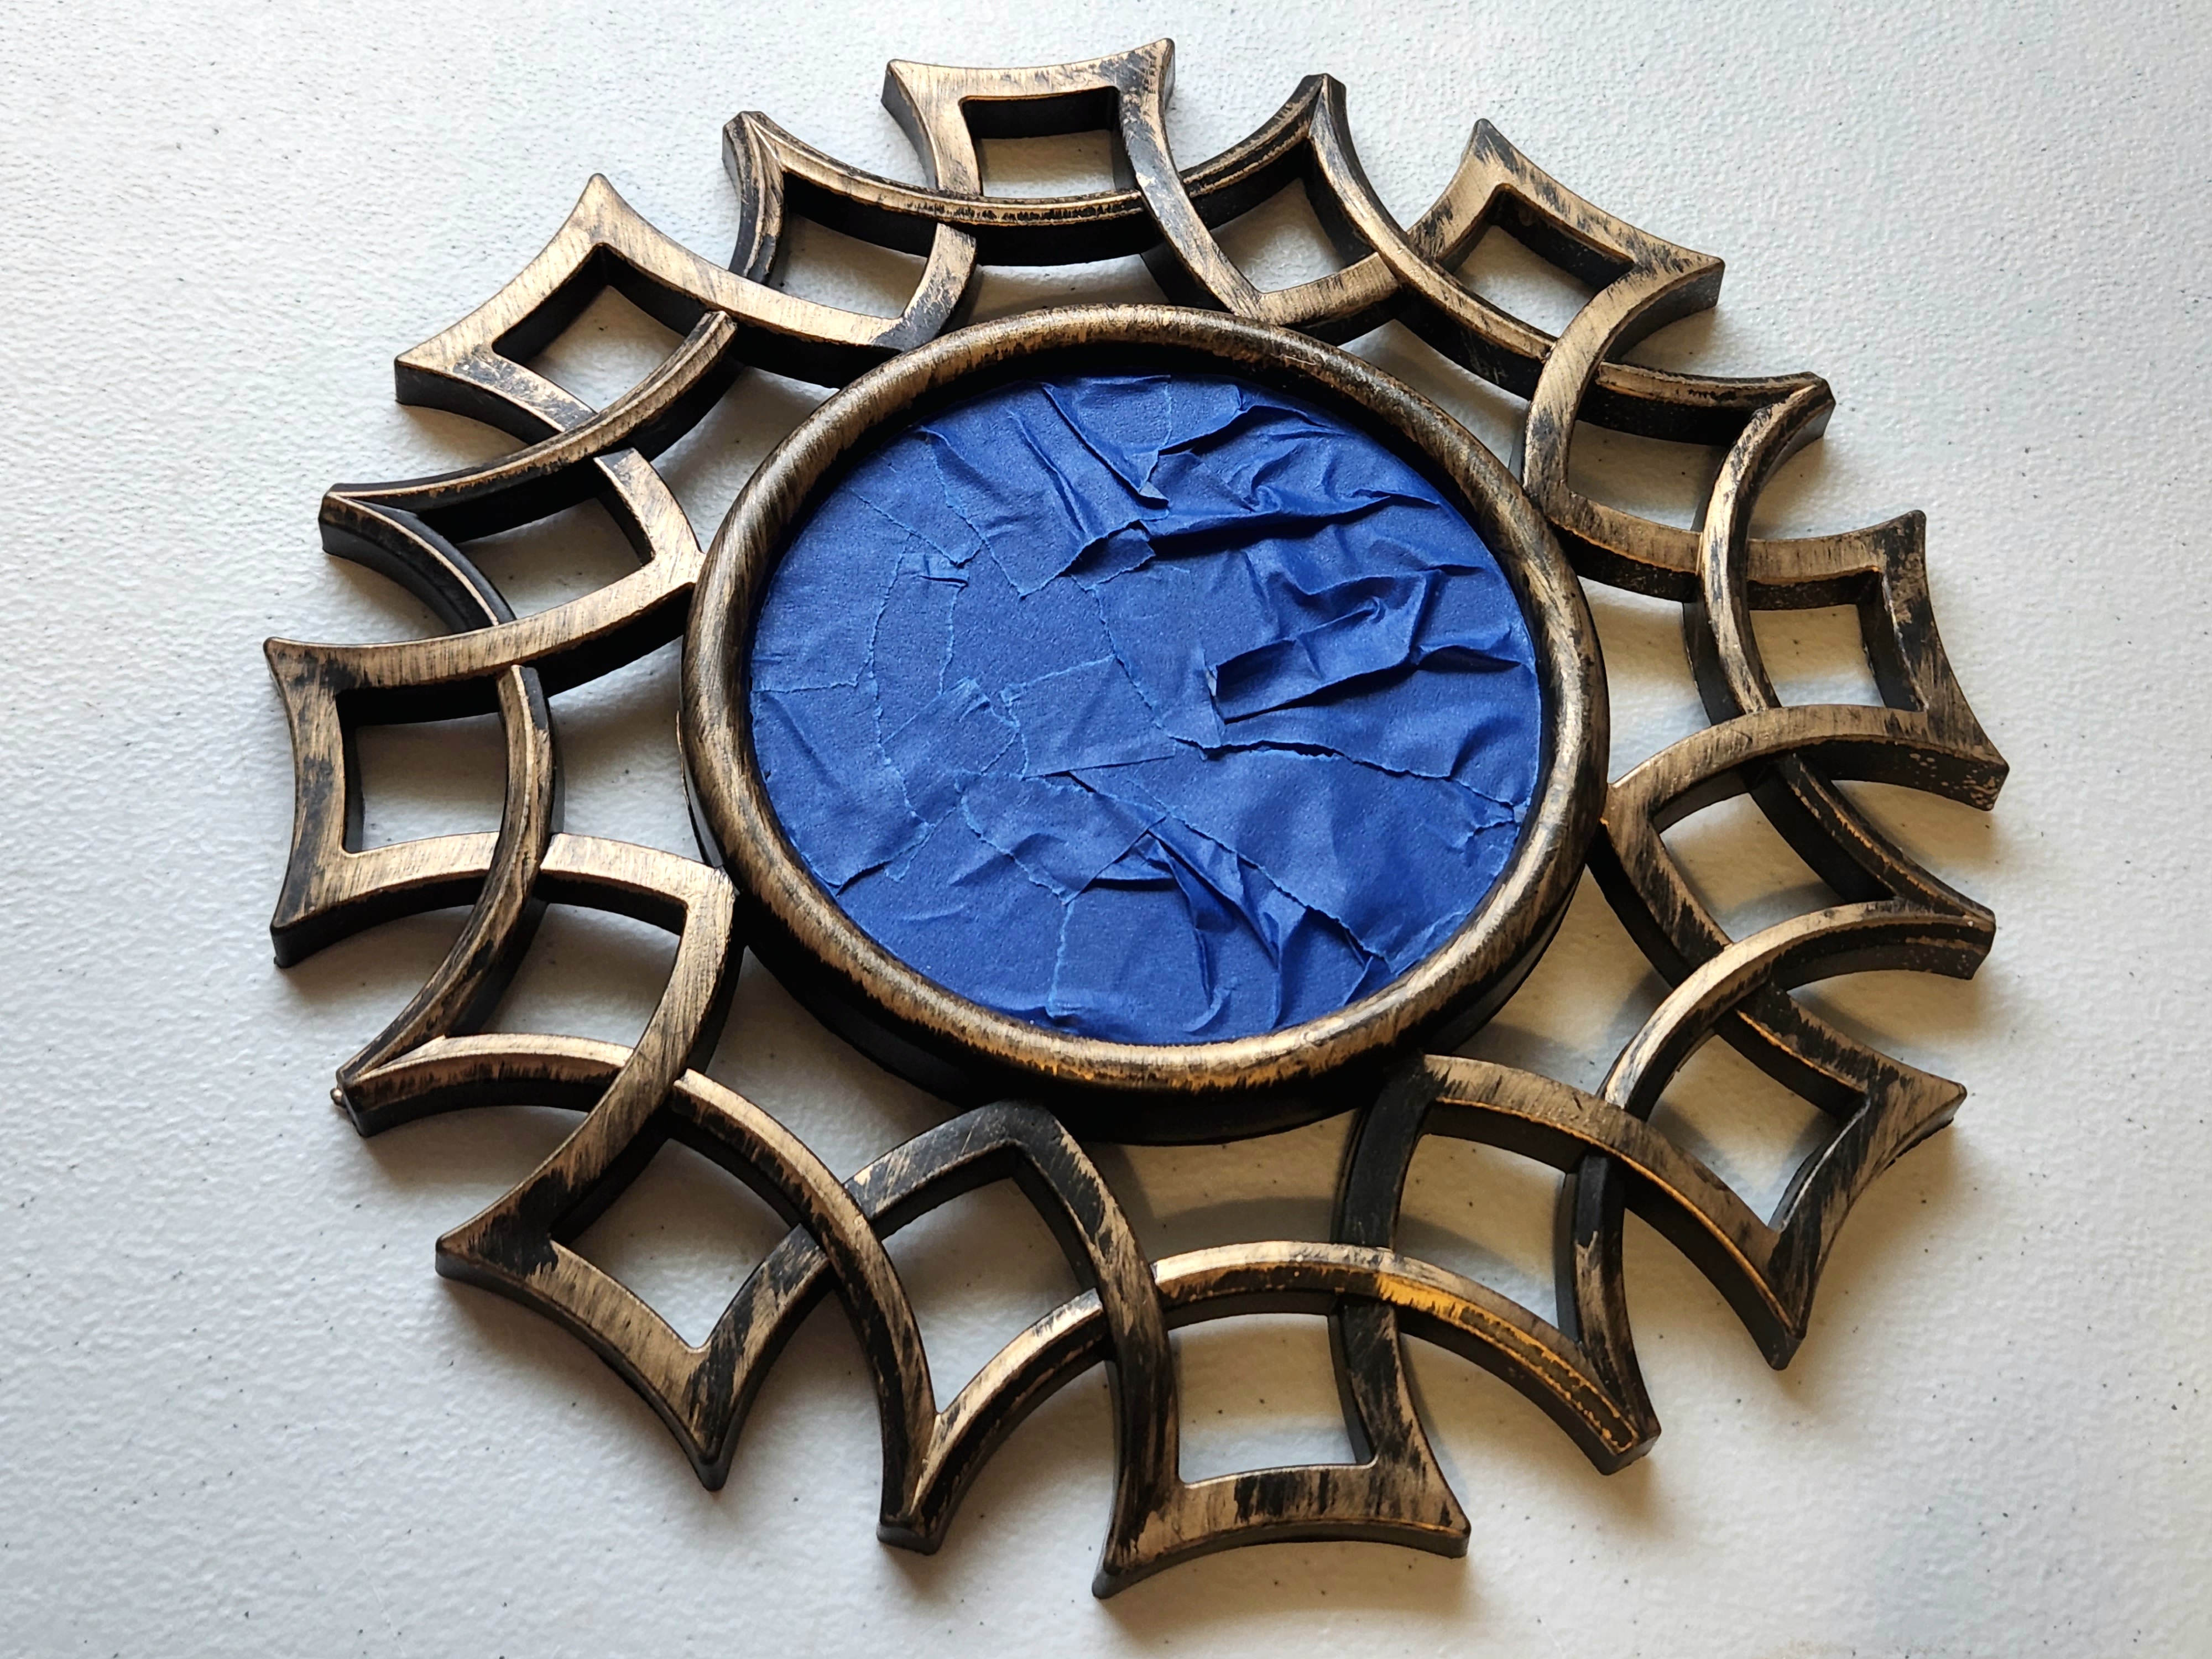
Paint the mirrors with chalk paint. You will probably need two coats. Be sure to add lights coats, especially when getting into the pointy edges. You don’t want a buildup of paint, or drippings!

Attach the Canvas to the Frame
Now reattach the canvas to the wood frame. There are two ways to do this. First, you can lay the canvas out flat and place the frame on top of it. Use scissors or a rotary cutter to trim the excess fabric that sticks out beyond the frame. I did this for the first time on this project.
Next, you can cut the canvas once it’s stapled on to the frame, rolling a rotary cutter along the edges of the frame then discarding the excess canvas. After my first canvas I went back to this method which is the way I normally do it. For me it’s so much easier, but most people like to do it first. Do what’s easier for you.


Now the frame upside down (if it isn’t already) and lay the canvas fabric on top of it. Staple the canvas on the frame in the center of one of the sides. Pull the fabric straight across and staple that side down. Be sure to pull the canvas tight. Now place a staple in each of the two sides remaining. With all sides stapled down, add a few more staples, about 2-3″ apart.


If you don’t have a staple gun you can use a hot glue gun to glue the canvas in place on the frame.
Glue the Decorative Mirror in the Frames
Squeeze some E6000 on the back of the decorative mirror and place it in the center of the canvas. If you don’t have any you can use hot glue, but the E6000 will hold the mirror in place much better. Since my decorative mirrors had really skinny parts to place glue on, I put it on a BBQ skewer and spread it on the edges with it. (Update: I’ve just discovered Beacon Quick Grip which is an amazing glue that dries much faster than E6000 and holds just as well.)


Place the mirror on the center of the canvas. Place something heavy on the mirror while the E6000 dries.


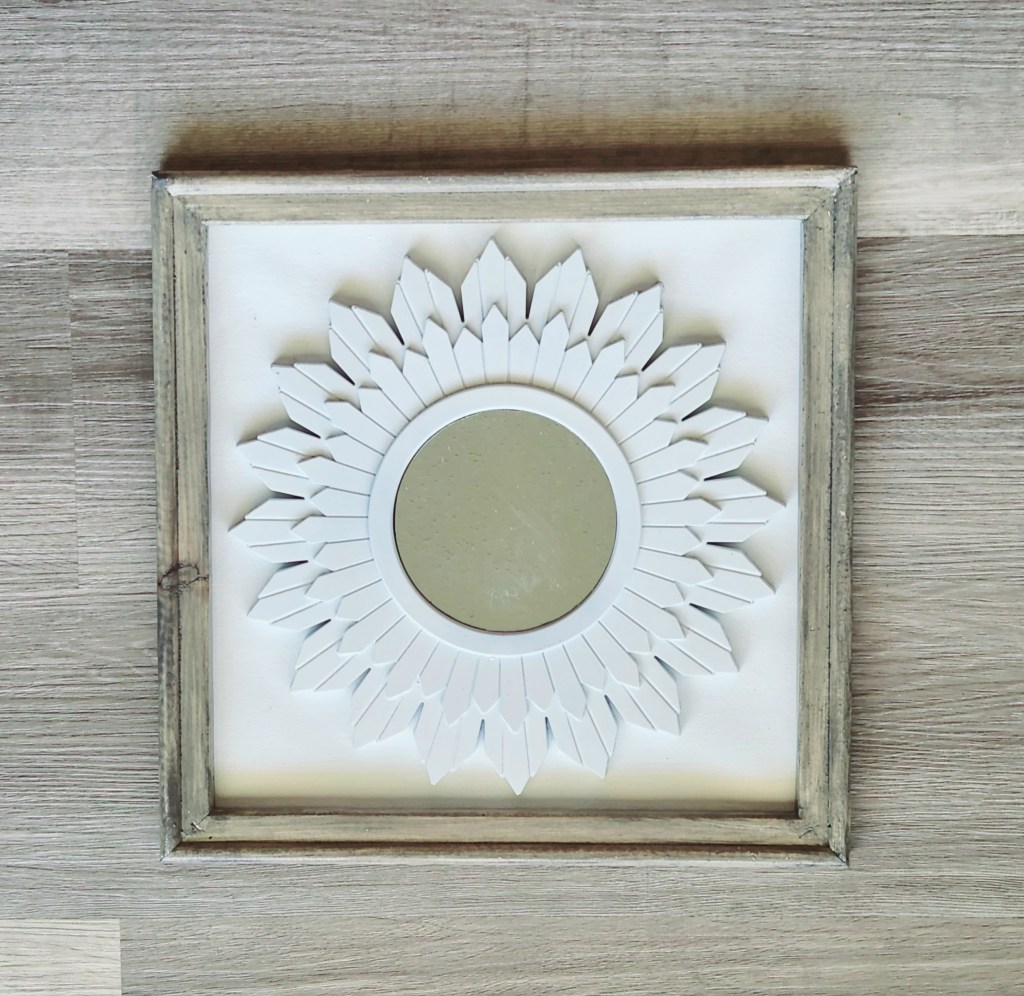
Now your decorative mirror or mirrors are ready to hang!
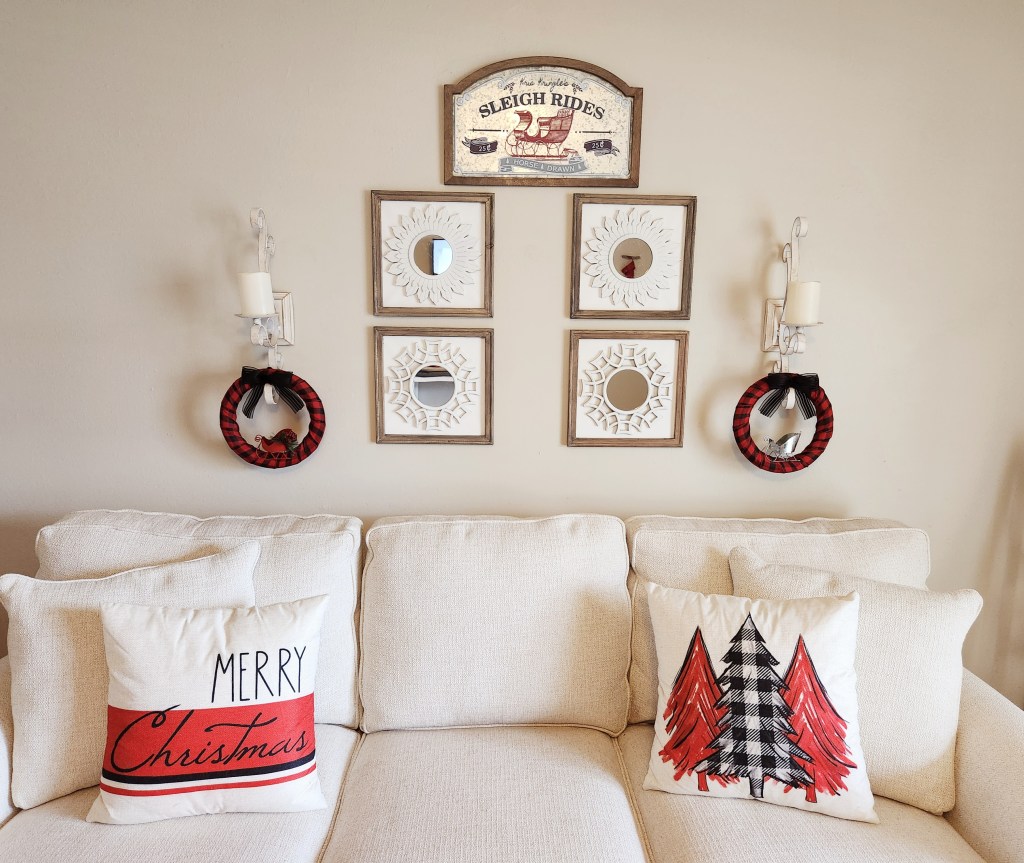
I know this project takes a quite a bit of work and takes some time, but the results are so worth it! I’m happy that I didn’t spend $180 for Pottery Barn’s verion because I love how my DIY decorative mirror set turned out! I’ve updated this post with some new pictures taken with better light. Here’s how my set turned out (they match our floors very well apparently lol):


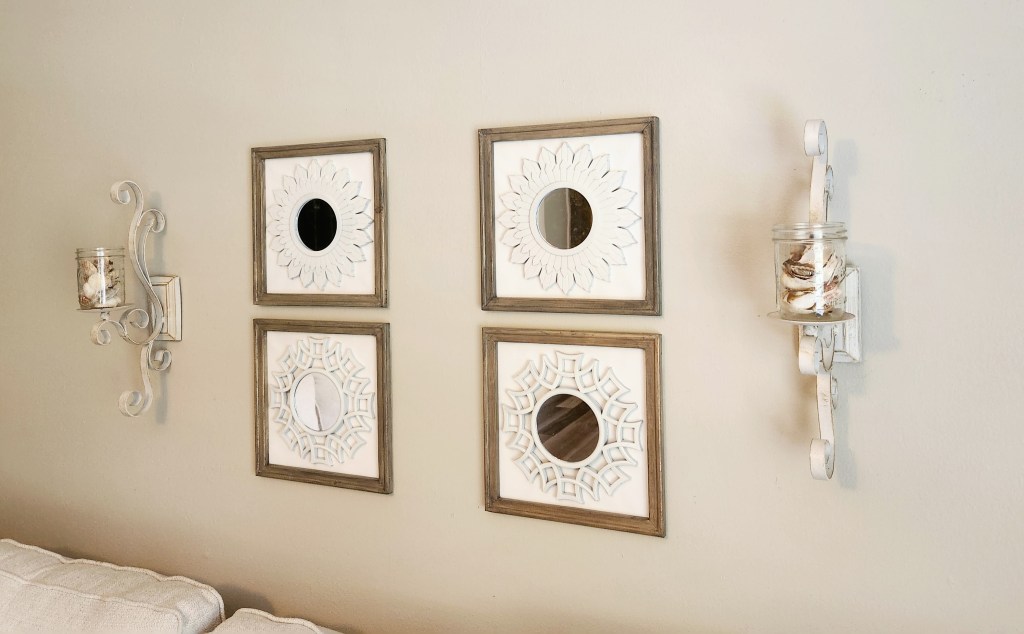
Here are a few photos of how I have decorated the area for the different holidays and seasons. I like to add easy wreaths to hang from the sconces to add color and a little pizzaz. If you like the wreaths, you can get the tutorials for the fall wreath here, the Halloween wreaths here, and the Christmas wreath here. (I know our couch is off center in the Christmas photo. We had to move it over to accommodate our Christmas tree. I’m sorry if it’s driving you as nuts as me lol!) They’re all so easy and can be made in less than an hour. The Christmas wreaths can be made in less than 30 minutes! I will update this posts throughout the year to add photos with different wreaths so show you how these mirrors look great throughout the year.


I hope that you enjoyed this tutorial! Can you believe you can save more than $160 by making these mirrors yourself?! Or if you look at the Wayfair price, you’d save more than $269!! I just love this project!
Remember to pin the image below or share this post with the buttons on the left side of the page so you can find it when you’re ready to start your project! Also, follow me on Pinterest for new ideas added weekly! Be sure that you never miss a great tutorial for decor like wreaths, signs and other home decor, free printables, crafts, and other fun posts! Enter your email address below to be notified of new posts! Use the buttons below to follow me on social media for other great content.

Don’t go yet! There’s more to see!
There’s plenty more to see here on the blog! If you’re looking for something specific, use the search box in the sidebar to look it up. If not, you might enjoy these ideas. Don’t have time to read them all now? That’s ok, just click over to the posts using the pictures and pin them for later. You can also add Life as a LEO Wife to your favorites and check back for new ideas and free printables and SVGs every Wednesday, as well as link parties with tons of shared ideas on Sundays!


On to the Creative Craft Hop!
Next up on our Creative Craft Hop is Cecilia from My Thrift Store Addiction. She is sharing a tutorial for giving an old metal lawn chair a retro makeover. I know you’re going to love it! Remember to pin it for when you’re ready to spice up your outdoor furniture!
Cecilia from My Thrift Store Addiction | Retro Metal Lawn Chair Makeover
Donna from Modern on Monticello | Clay Pot Solar Light Holders
Terrie from Decorate & More with Tip | Easy Peg Board DIY
Gail fromPurple Hues & Me | Purple and White Checkered Wood Ornaments
Sara from Birdz of a Feather | Terra Clay Paint Tiki Makeover
Tammy from Patina & Paint | Christmas in July Christmas Tree
Jenna from The Painted Apron | Shells on the Beach Canvas
Thank you for visiting us today. I hope you’ve found several of your next DIY projects! Be sure to pin this post and any others you like so you can get back to them when you’re ready to get crafty.


Great dupe Niki! I like yours way better than the ones from Pottery Barn. I’ll have to keep an eye out for those Mirrors from Dollar Tree, they are super cute! Pinning. Thanks for sharing!
Thank you! I like them better too. Might be because I spent two full days on them lol!
I like your version so much better too Niki; these are fabulous! I had no clue that the frames under those canvasses could look so good! What a great idea!
Thank you! I always remove the canvases for some cheap yet solid wood frames! Even the ones from Dollar Tree are nice. They don’t have the decorative lip, but they work great too.
Niki, I love a thrifty knock-off and you nailed this PB look! Pinned! Blessings, Cecilia @My Thrift Store Addiction
Thank you!
Niki, don’t you just love when you recreate something so expensive for a lot less? Your frames are spot on, girl!!! Couldn’t do it any better. Great job!!
Thank you! I love them!
Wow, Niki, this is fabulous! You certainly have a wonderful vision on re-creating high-end items! Who would have thought to use dollar store items to create these lovelies! Very impressive!
Thanks Gail!
I have considered purchasing those mirrors but couldn’t think of a single way to upcycle them. Your idea is creative and stunning. Thanks for sharing the inspiration and I definitely pinned this one.
Thank you!
What an amazing project Niki! I love how you created the frames by reversing a canvas, very thrifty and smart! The Dollar Tree mirrors are so cute, what a great find! I know you must smile every time you see these, knowing how much money you saved!
Thank you! Yes, there was no way I was spending that kind of money on wall decor. You know we crafty girls, “I could make that!”
Niki these came out so cute! I want them for my bathroom wall. Such a wonderful idea my friend. Great job
Thank you!
Looks really nice! I like them better than the originals. Great job! Thanks so much for linking up at the 25 and Done Link Party 22! 25 entries in 25 hours!! Pinned.
Thanks Dee! I like them better too, but I might be partial lol!
I love Dollar Tree crafts, and these mirrors are great! They are really cute and look “high end” ! Great job!
Thank you!
Those are beautiful!
Thank you!
CONGRATS Niki! Your post is FEATURED at the 25 and Done Link Party 23! 25 entries in 25 hours from Aug-18 at 5am to Aug-19 at 6am central.
Great! Thank you Dee!
Visiting again to say thanks so much for linking up at the #UnlimitedLinkParty 108. Shared.
Thanks Dee!
CONGRATS Niki! Your post is FEATURED at the #UnlimitedLinkParty 109!
Thanks Dee! I’m honored!