
Can you believe that it’s time to decorate for Valentine’s Day? Time seems to go faster the older you get, and I’m not even older yet (wait, what’s older? lol)! Just like time, budgets are flying out the window across the country right now, so it’s important to be able to decorate for holidays and seasons on the cheap. You certainly don’t want it to look cheap though! If that’s what you’re looking for, this farmhouse style Dollar Tree Valentine’s Day sign is perfect! Let’s get into this tutorial.
Dollar Tree Valentine’s Day Sign Supplies
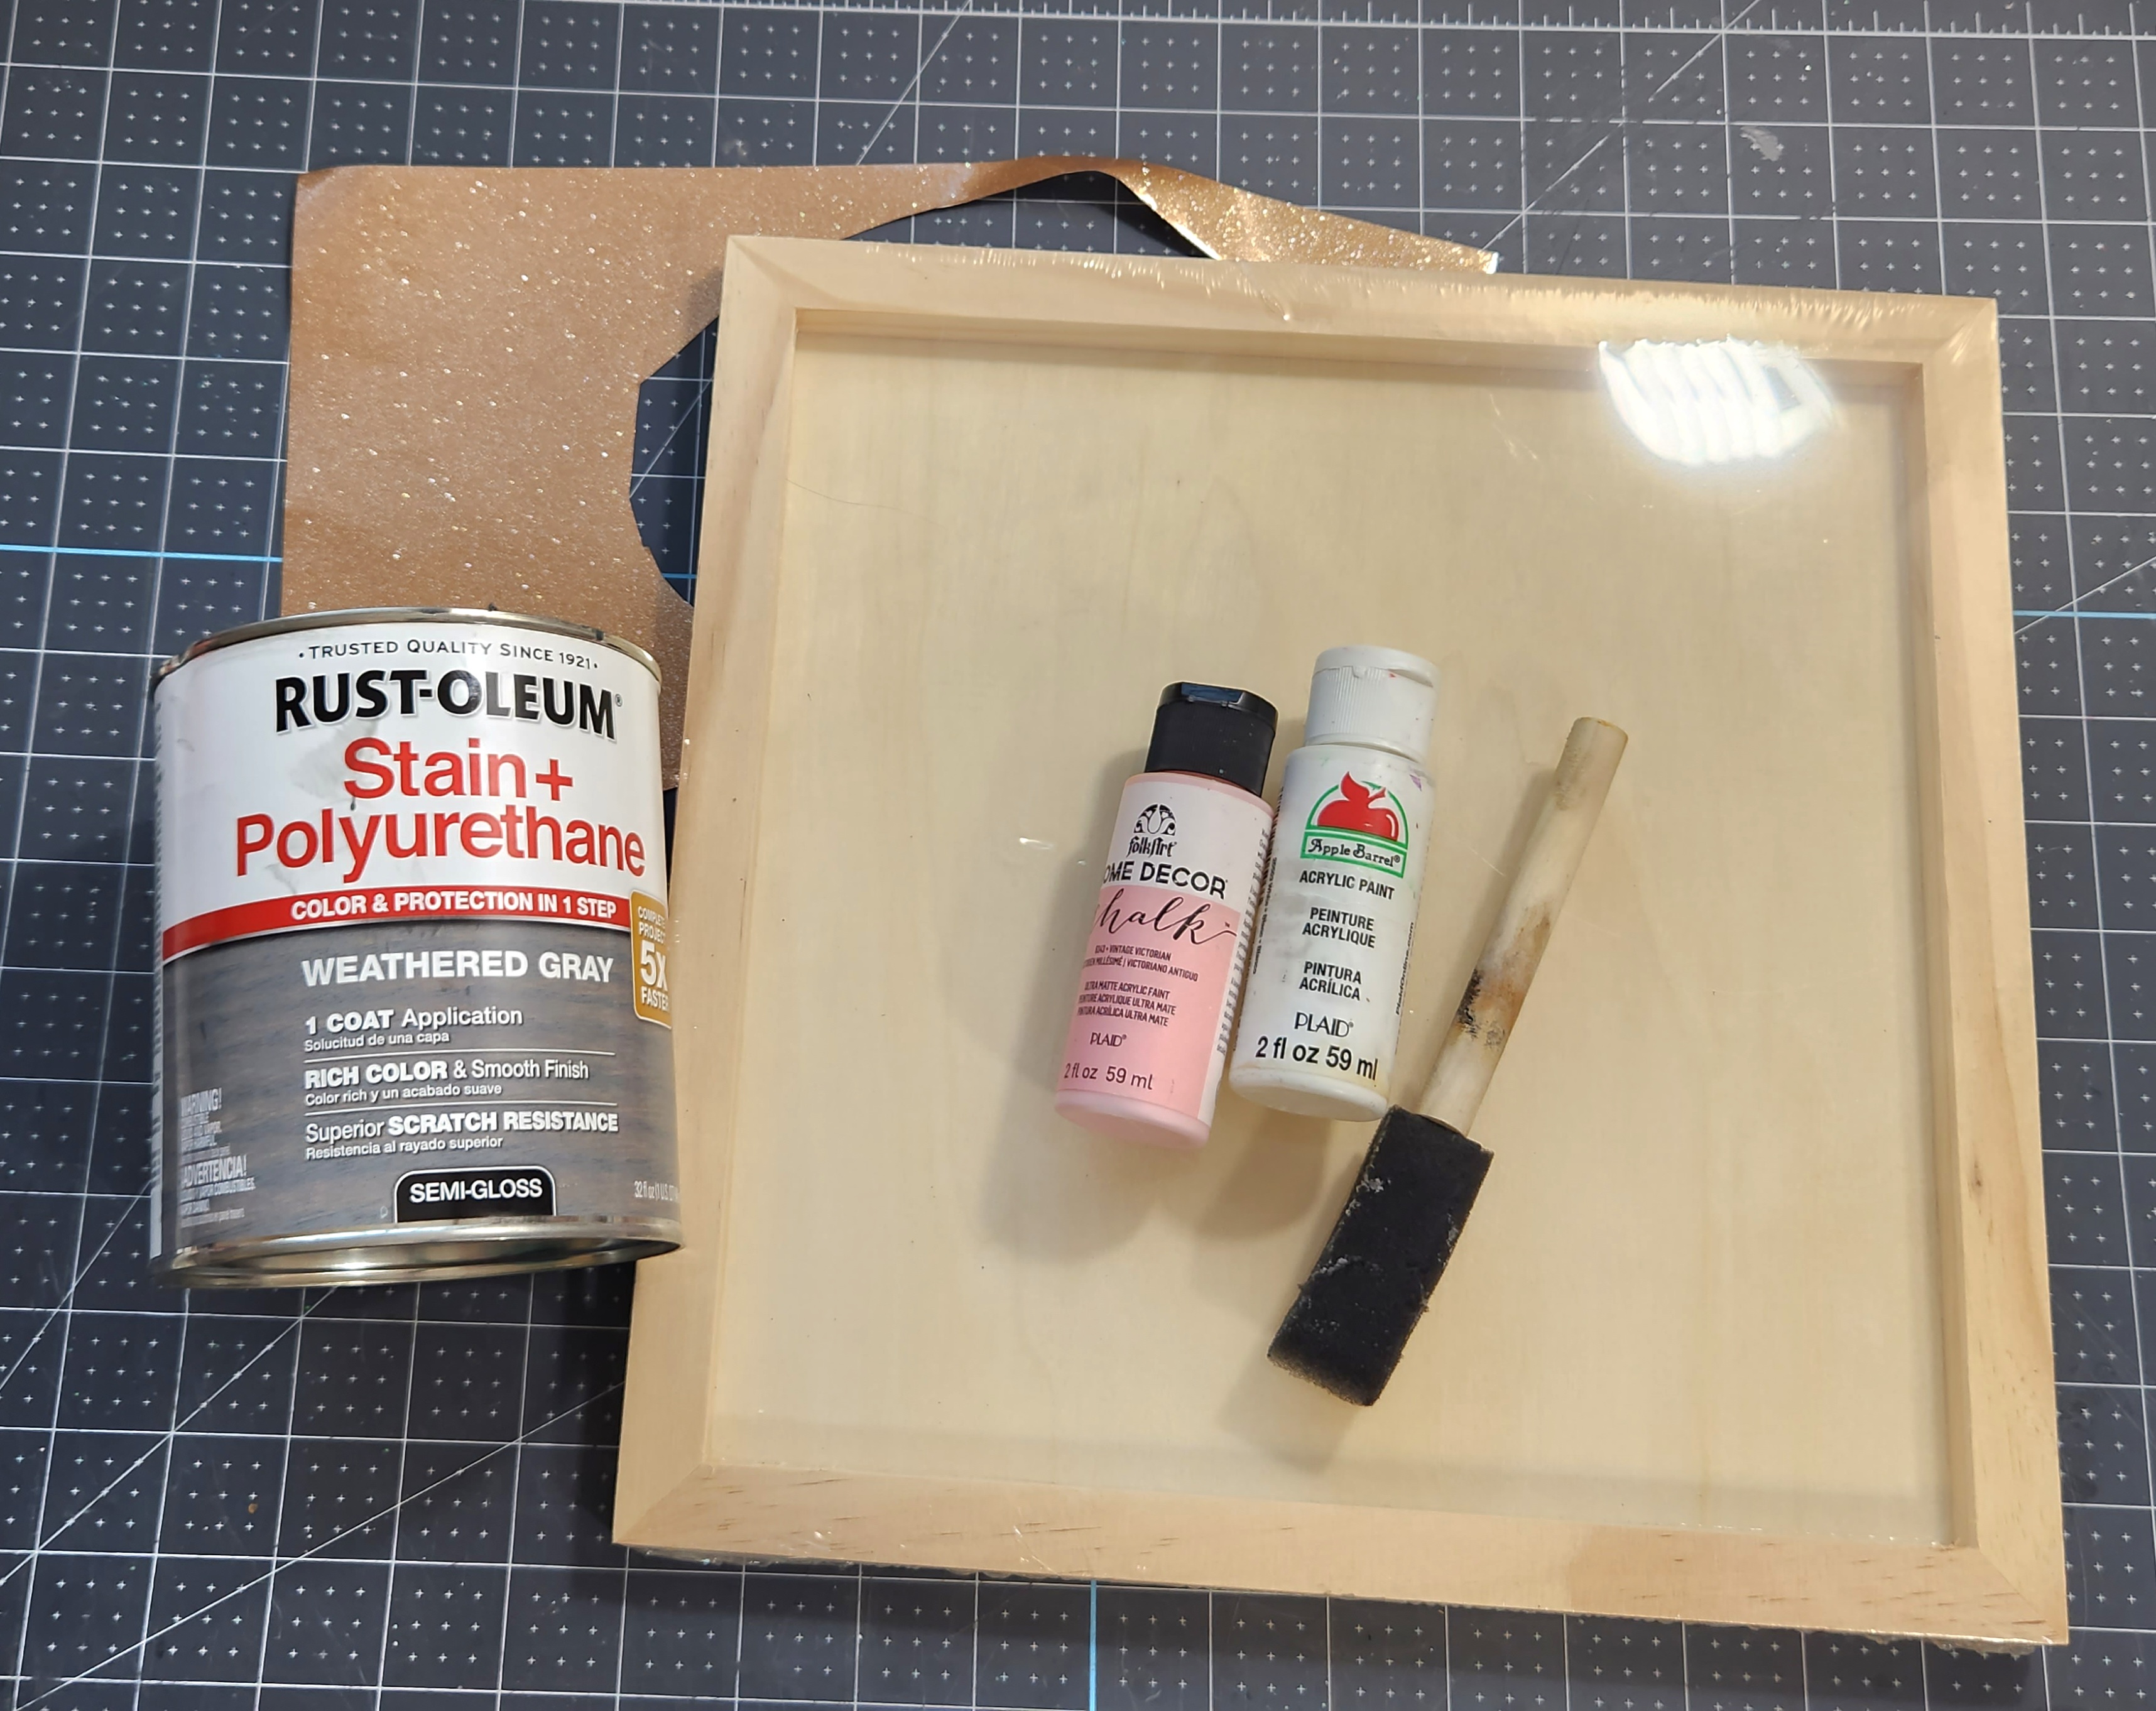
- $3 12″ square blank wood frame from DT or a canvas to create a reverse canvas sign with
- chalk or acrylic paint- I used chalk paint in Vintage Victorian (pink) and white acrylic paint.
- wood stain or acrylic paint and water for faux stain- I used Rust-oleum Stain + Polyurethane in weathered gray.
- paint brushes
- my design (optional)
- vinyl- I used gold glitter vinyl or
- pencil, printer, & white paper
Stain or Paint the Outer Frame
I used a 12″ Dollar Tree blank wood sign to make this Valentine’s Day decoration. It has an outer wood frame, but it’s also wood in the center. You could also use a canvas, either an 8×10 or a square like a 10×10 or 12×12, to create a reverse canvas. That will give you the wood frame on the outside and the inner sign will be canvas. If you need a tutorial for creating a reverse canvas, check out this post where I created several to make a $180 Pottery Barn piece for $15.
If you’re using the $3 Dollar Tree wood frame sign, you’ll first need to tape off the inside of the frame so that you don’t accidentally get stain on it. You’ll be painting the inside so, if you get stain there, you’ll have to sand it off. Going the tape route will save you a lot of time, trust me!

Next, stain the outer frame. If you don’t have wood stain on hand, you can use water and acrylic paint to create a faux stain. I used that method on my mini tea towel ladder if you need a tutorial. I used Rust-oleum’s Stain + Polyurethane in weathered gray. This is a great stain because it’s all done in one step, stain and seal, boom, done! Remember to brush in one direction when you apply the stain, not back and forth like you would with paint.

Create Stripes with Painter’s Tape
Once the paint or stain on the frame is dry you need to use the painter’s tape to create stripes on the main part of the Valentine’s Day sign. Tape off the inside edges of frame first.
Next, place a piece of tape across the top, right along the edge. Tear off two small pieces of tape and place one right up against the first piece on each end. That will help you keep the stipes even. Place a second stripe of tape right against the two small pieces of tape.

Remove the small pieces and place them below the second stripe to place the next one. Continue adding tape stripes until you have the entire inside surface taped off.

Paint the Inner Sign
Paint the areas between the tape with your lightest paint. I went with my pink chalk paint first because I always have issues with the white Apple Barrel acrylic paint that I was going to have to use on this project. It wants to rip off when I remove the painter’s tape. I never have any issues with any of my other chalk and acrylic paint, just this one bottle. Add a second coat once the first dries.

Once the paint has some time to dry, remove the painter’s tape.

Reapply the taped stripes, but this time over the dried paint stripes. Be sure to press it down firmly to keep the paint edges sharp.
Use your final paint color to paint the second set of stripes. It took me three coats of white paint to cover the wood well.

Remove the tape once the paint is dry.

Touch up any areas that need it. I had to wipe off a bit of white paint on the frame, but, luckily, I was able to get it all off.
Create or Cut a Design
Now it’s time to create a design to use on the bottom left side of the sign. I cut the word “love” on a piece of gold glitter vinyl with my Cricut. You can download my free design and either cut it with your cutting machine or print it and use the carbon copy method to transfer it onto the sign. It’s such an easy method and will take you no time with this small word. You can see exactly how to do that in my door hanger without a Cricut tutorial.
Whichever method you’re using, go ahead and download this free “love” file. It was created on an 8.5×11 canvas so if you’re printing you won’t have to change any settings.

Since I used my Cricut, I uploaded this design to Design Space and cut it with a height of 3.7″ on gold vinyl. If you’re doing the same, weed the vinyl and cut a piece of transfer or contact paper to fit.


If you’re using the carbon copy method, download and print the design on an 8.5×11 piece of paper. The word will print with a height of 3.7.” Use a pencil and scribble on the back of the paper over the word. Give it a really good coat of lead, then cut around the word in a square to make it smaller and easier to work with. Place it on the lower left side of the sign and trace the word with a sharp pencil. That will transfer the word onto the sign without a Cricut! Check out my winter door hanger tutorial or my winter porch leaner tutorial to see exactly how to do it. I have video instructions included so you can see how easy it is!
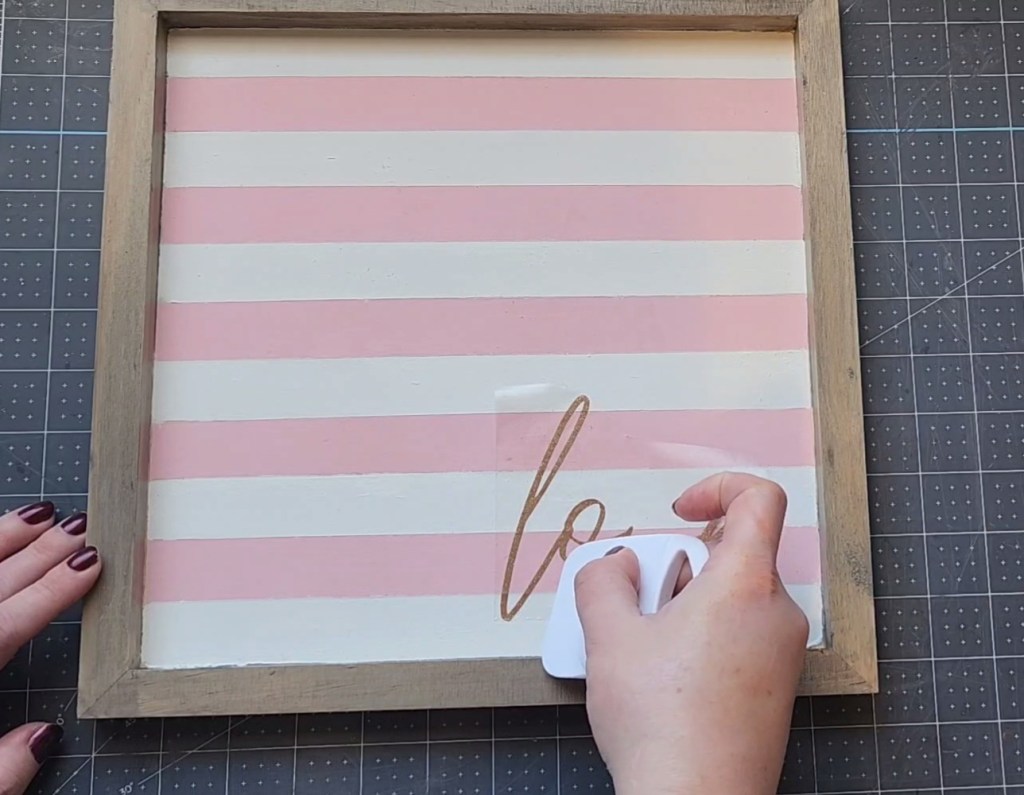
Transfer the Design to the Valentine’s Day Sign
Finally, it’s time to add the design onto the painted sign. Transfer it with transfer tape or by tracing the pencil lead covered paper. Place it in the bottom left quadrant of the Valentine’s Day sign.


Valentine’s Sign Video Tutorial
If you prefer a video tutorial, here you go!
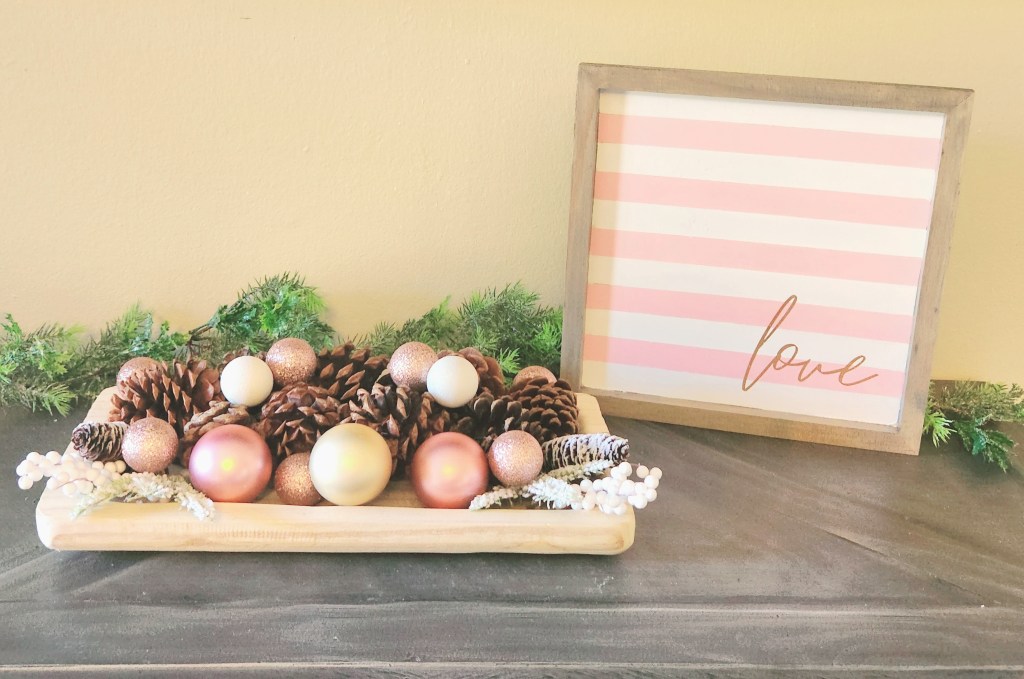
That’s it! Now place your beautiful Dollar Tree Valentine’s Day sign in its place of honor to admire it for the next month!
Remember to pin the image below or share this post with the buttons on the left side of the page so you can find it when you’re ready to start your project! Also, follow me on Pinterest for new ideas added weekly! Be sure that you never miss a great tutorial for decor like wreaths, signs and other home decor, free printables, crafts, and other fun posts! Enter your email address below to be notified of new posts! Use the buttons below to follow me on social media for other great content.

Don’t go yet! There’s more to see!
There’s plenty more to see here on the blog! If you’re looking for something specific, use the search box in the sidebar to look it up. If not, you might enjoy these ideas. Don’t have time to read them all now? That’s ok, just click over to the posts using the pictures and pin them for later. You can also add Life as a LEO Wife to your favorites and check back for new ideas and free printables and SVGs every Wednesday, as well as link parties with tons of shared ideas on Sundays!


5 thoughts on “Make a Farmhouse Valentine’s Day Sign from a $3 Dollar Tree Sign!”