
Valentine’s Day is less than a month away, which means it’s time to decorate for the holiday! Last week I shared an adorable DIY Valentine’s sign that I made for $3. I really loved the way it turned out, and I needed some more pink and gray decor to match it and the beautiful pillow covers that I got from Amazon. So, this farmhouse Valentine’s yarn wreath was born. I think I’m even more in love with them than the sign! Let’s get into this tutorial because I know you’re going to want to make your own!
If you’re looking for another great Valentine’s decoration, this DIY Valentine’s tabletop or centerpiece decoration is perfect! It goes well with the wreath and the Valentine’s “love” sign! You could also check out my roundup of 10 of the best farmhouse style Valentine’s decorations.
Valentine’s yarn wreath supplies:
Oh, did I mention that you can make this Valentine’s wreath for under $5? You’re going to love it even more now!
- styrofoam wreath form
- 2 sheets of different colored felt: I used light and dark gray. You can get sheets of felt from Michael’s for 33¢.
- chenille chunky yarn: I used white Mainstays from Walmart, but you can get some from Dollar Tree. I’m so excited that they started carrying it!
- regular yarn: I used a light dusty pink yarn. You can get regular yarn at DT as well.
- hot glue gun & glue
- fabric: You can use felt if you’d prefer. I used gray and white striped fabric from Walmart that was 97¢.

Before we get started, I have to share this Valentine’s Day advent calendar with you. It’s not only beautiful decor but makes a great Valentine’s Day gift for your hubby or kids for about $6! Add love notes or love coupons to make them a DIY gift that’s nearly free!

Wrap the Wreath Form
First, wrap the wreath form with the chenille yarn. It’s goes much faster if you wrap the yarn around something small that will pass through the center of the wreath form easily. I usually use our Fire Stick remote. You can use a piece of cardboard or something similar and wrap a good amount of yarn around it.

Glue the end of the yarn to the back of the wreath.
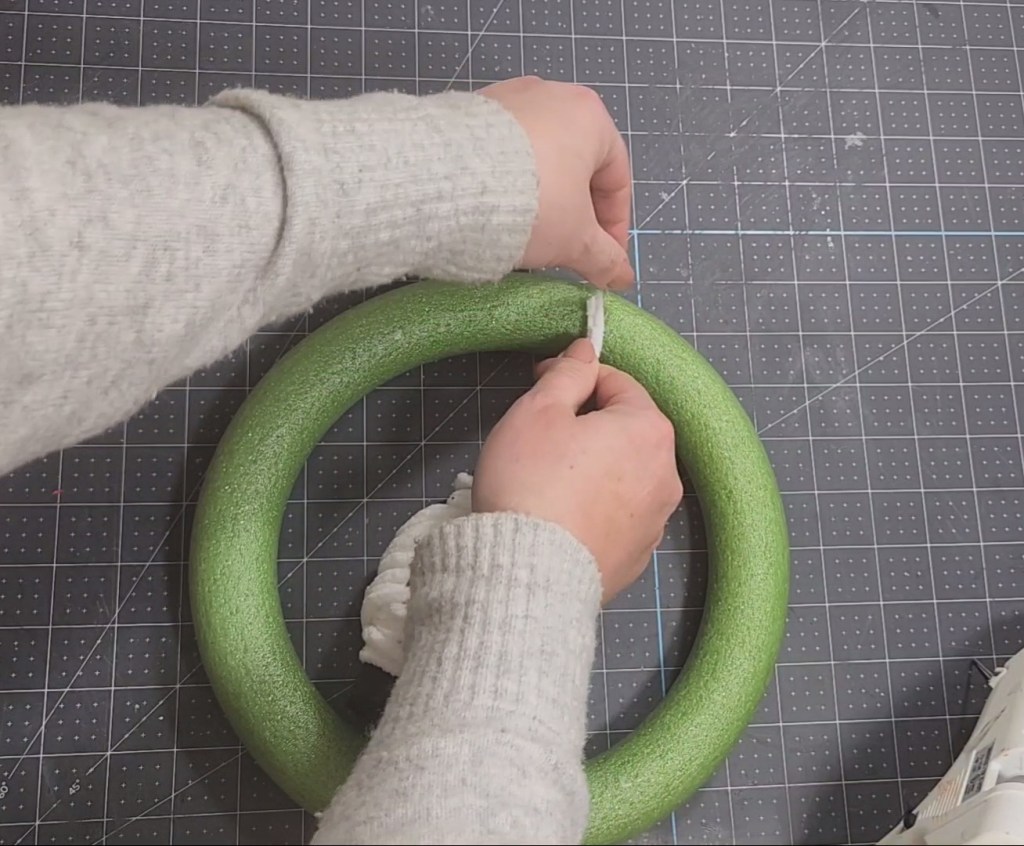
Next, begin wrapping the yarn around the wreath. It is so much easier, and goes much faster, if you place the wreath between your knees vertically and wrap the yarn around the form, passing the yarn through the middle of the form and back and back around. You can see exactly how I do it in the video tutorial at the end of the post.

If you run out of yarn, glue the end to the back of the form, and glue another piece beside it.

Continue wrapping until the Valentine’s wreath is covered. Hot glue the end of the yarn in place on the back of the wreath.


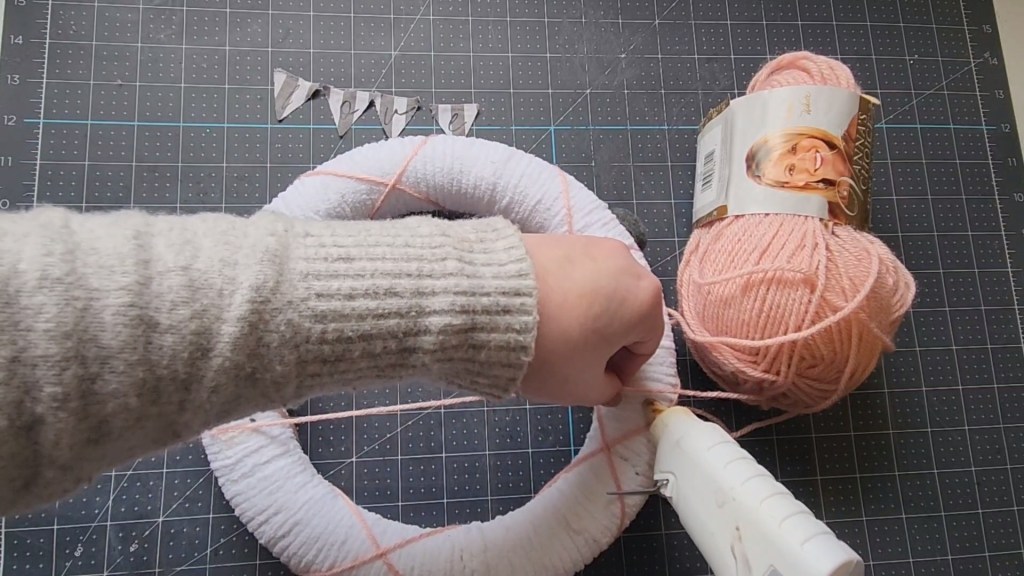
Add an X Pattern
Now that the wreath form is covered, you’ll create an X pattern with the second color of yarn. Gather a bit of the yarn and hot glue the end on the wreath. Wrap the yarn around the wreath diagonally.
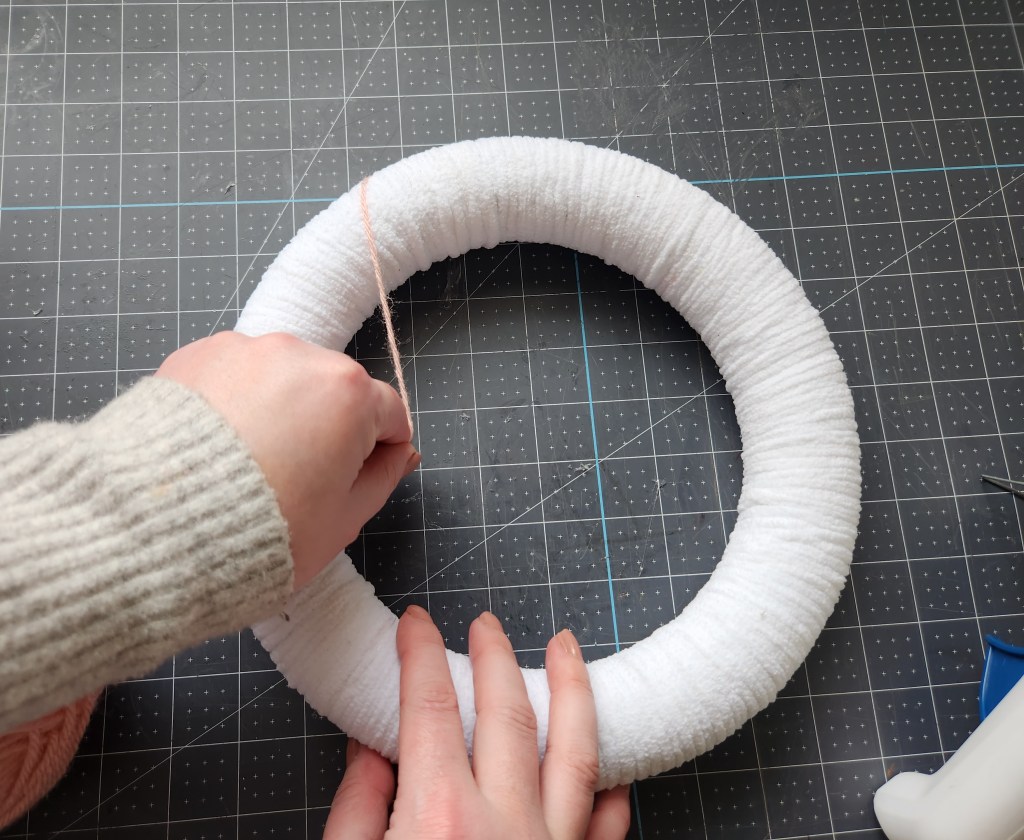
I wrapped my yarn around the form five times. You could bring the lines closer if you would like more X’s on the front. Once you get back to where you started, glue the end in place. Don’t cut the yarn yet.

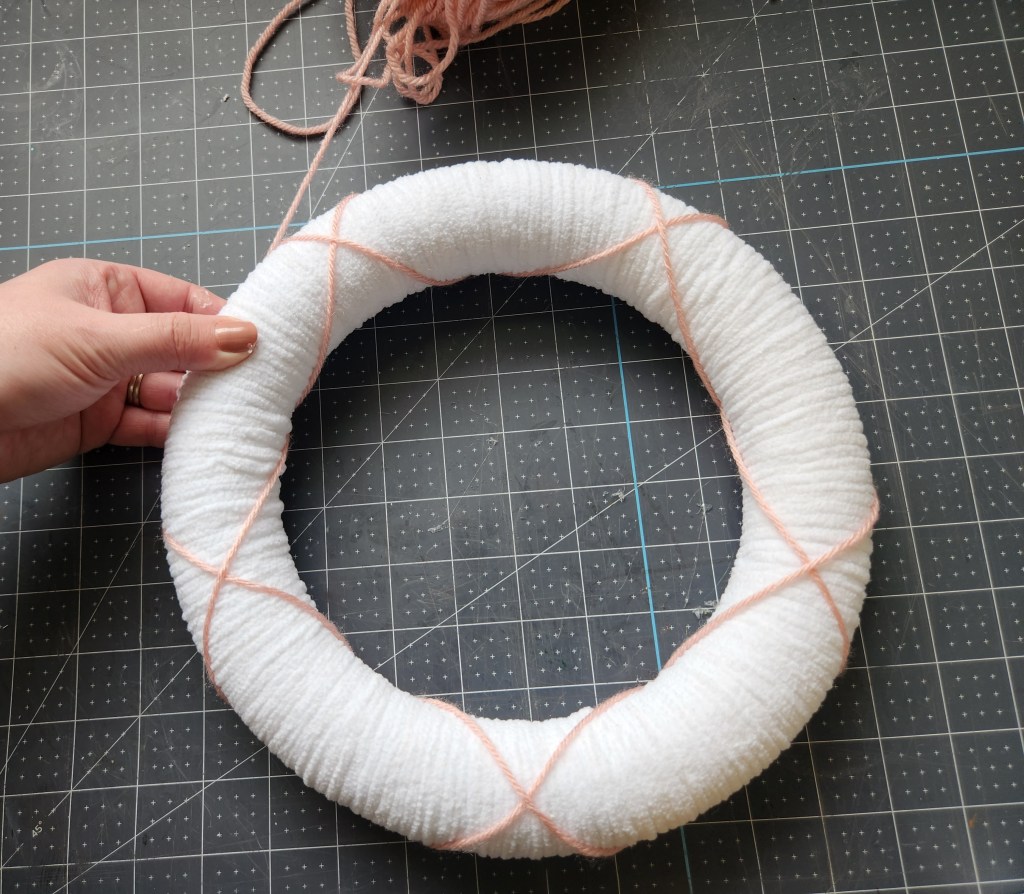
Turn the wreath around and start wrapping in the opposite direction. That will create an X everywhere the yarn intersects.


When you get back to where you started, glue the yarn in place on the back of the wreath and cut off any excess yarn. I like to cut the yarn off after I glue it in place because it allows me to hold the yarn down while the glue dries without burning my fingers.

Make Felt Rosettes
Now you need to make some felt rosettes to add to the wreath. They are really easy to make. Cut a circle out of the felt. I used gray and light gray felt since my Valentine’s decor is gray, pink, and white. My circles varied between 2″ and 3.” Don’t worry too much about them being perfect.

Cut a spiral from the outside edge to the center. When you get to the middle, cut a little circle. That will hold the rosette together when you roll it up.


Next, start on the outside edge and roll the felt into a circle, creating the rosette look.


Add hot glue to the circle at the end of the felt and place it on the bottom of the rosette to hold it together.


I made eight rosettes for each wreath, sixteen total.
Make a Cute Banner for the Valentines Yarn Wreath
Banners are a cute way to embellish wreaths.
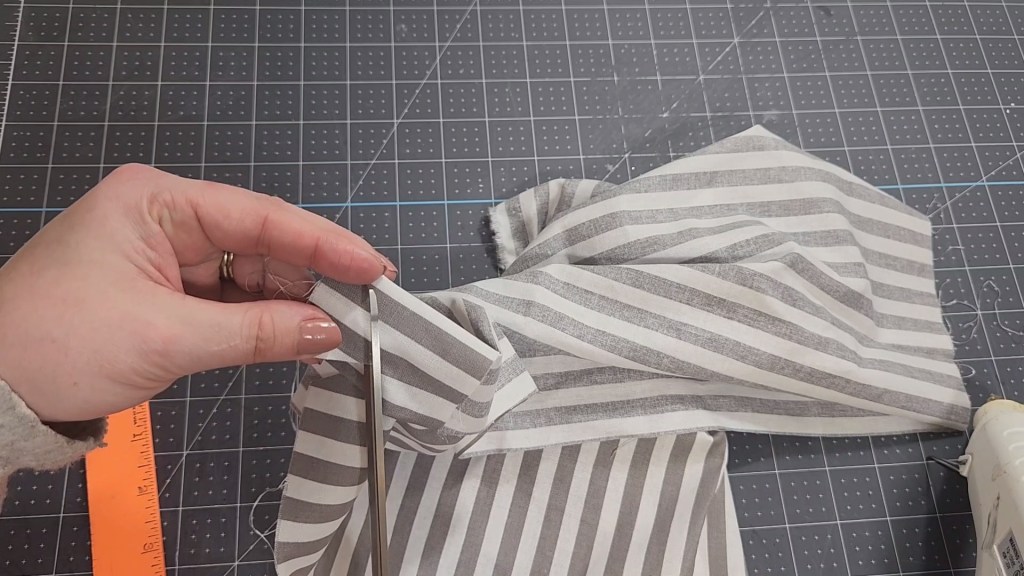
You can use paper, felt, or fabric for the banner. I used gray and white striped fabric and HTV for the letters.
First cut your fabric in 1″ triangles. I folded my fabric so that I had four layers. Then I cut a simple triangle. Cutting it all together ensured that all of my triangles would be exactly the same.


Create Designs for a Banner
You can make a banner with or without a Cricut. I did use mine for this project, but you can use the tutorial I used on my winter wreath to create one using your printer and a pencil. You would need to use paper for your banner which would be just as cute. I used paper in the banner on these beach wreaths. Another option is letter stickers, stamps, or stencils.
I made two Valentine’s yarn wreaths to hang from sconces in my living room, so I needed two words. I created a “love” and an “XOXO” design to use on them, and you’re more than welcome to use them. You can use them to upload to Design Space and cut the letters on HTV, or print them on 8.5×11 paper and transfer it to paper using the carbon copy method if you don’t have a cutting machine. Cut them individually to place on the banner.


Add the Letters to the Banner
Once you have your letters cut, if you’re using your Cricut, weed each letter. Center each letter on the triangles, place wax paper on top of them, and use an iron to adhere them to the fabric.


If you’re using the carbon copy method, print the letters from my design and cut the letters apart. Use a pencil to scribble on the back of each one, getting a good bit of lead on it. Next, lay the letter on one of your triangles and trace the outline, pressing down firmly to transfer the letter onto the paper. Once it’s on there, go back over the letters with a marker or pen in a color that coordinates with your Valentine’s wreath.
Assemble the Valentine’s Yarn Wreath
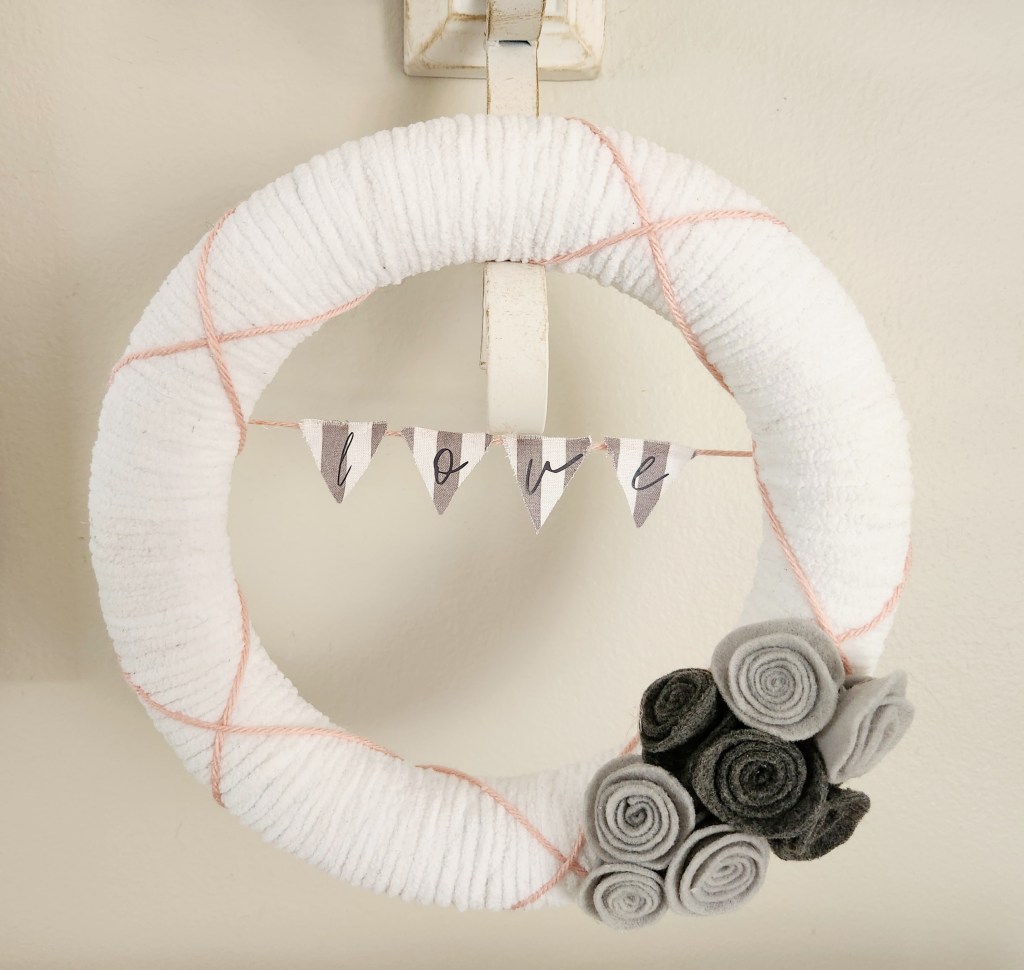
Now that all of the pieces are ready, it’s time to add them to the wreath. Place the rosettes on the wreath, moving them around until you’re happy with the look. I placed them on the bottom left corner on one wreath, then on the bottom right of the second.


Finally, add the banner to your Valentine’s yarn wreath. Place the pink yarn under the wreath to decide where you’d like it. Once you’re happy, hot glue it in place on the back of the wreath, and cut the excess yarn off.

Place the triangles on the pink yarn and space them how you’d like them. Add hot glue to the top of the triangles and place them on the yarn.


Valentine’s Wreath Video Tutorial
That’s it! Hang your beautiful Valentine’s yarn wreath & admire your handiwork!


Don’t you love my Valentine’s pillow covers? You can get them from Amazon here and here. After V-day I’ll be moving them into our master bedroom.
Remember to pin the image below or share this post with the buttons on the left side of the page so you can find it when you’re ready to start your project! Also, follow me on Pinterest for new ideas added weekly! Be sure that you never miss a great tutorial for decor like wreaths, signs and other home decor, free printables, crafts, and other fun posts! Enter your email address below to be notified of new posts! Use the buttons below to follow me on social media for other great content.

Don’t go yet! There’s more to see!
There’s plenty more to see here on the blog! If you’re looking for something specific, use the search box in the sidebar to look it up. If not, you might enjoy these ideas. Don’t have time to read them all now? That’s ok, just click over to the posts using the pictures and pin them for later. You can also add Life as a LEO Wife to your favorites and check back for new ideas and free printables and SVGs every Wednesday, as well as link parties with tons of shared ideas on Sundays!


This is such a cute wreath!! I’ve been a bit obsessed with making rosettes for projects, but have not tried them with felt yet! Thanks for the inspiration!! Pinning now!
Thanks Donna!