
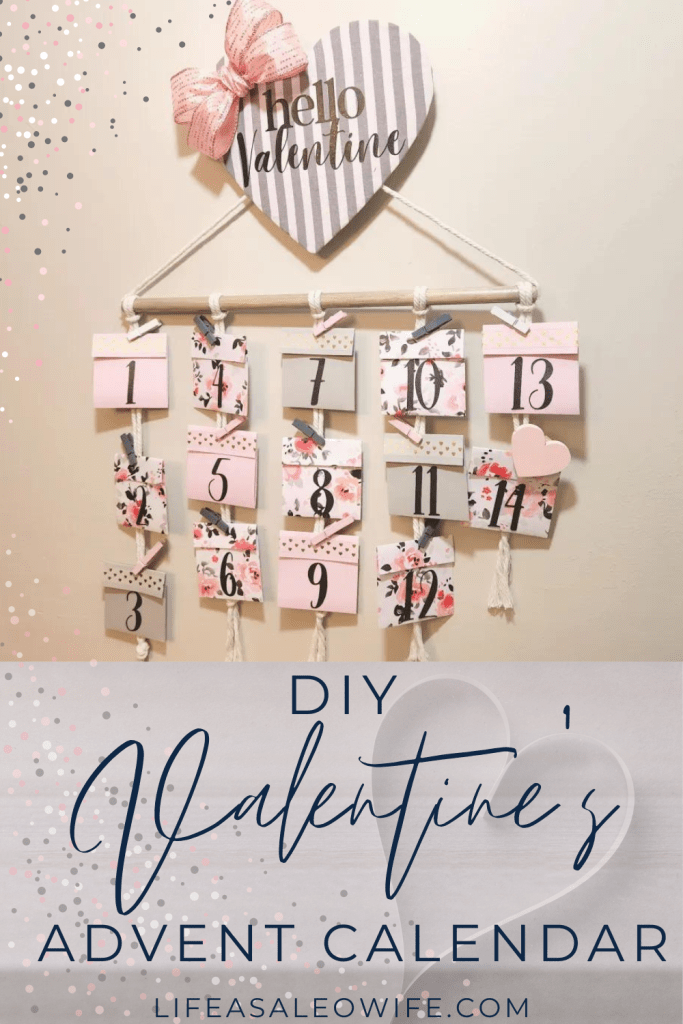
Tomorrow is the first day of the Valentine’s advent season. Well, it doesn’t have an official “advent season,” but you can create one yourself. I created this beautiful farmhouse style Valentine’s advent calendar for about $5. It’s easy, though it does take a quite a bit of time, but it’s so worth it. Let me show you how you can make your own!
Supplies for a Valentine’s advent calendar:
- wood dowel macrame kit with 6 tiny clothes pins from Dollar Tree (Yes, Dollar Tree! It’s labeled “photo hanger.”)
- 3 different prints or colored 12×12 cardstock (1 of one color, 1 of another, & 2 of your main print)- I used one pink, one gray, and two pieces of the pink & gray floral print.
- glue stick
- hot glue gun & glue
- 14 tiny clothespins- I had two of the macrame dowels so I used the 5 clothespins from that one along with the ones from the dowel I was using. Then I had a few small ones that were just a tad bigger and used one of those and a wood heart pin that I had to use on the 14th day for Valentine’s.
- ruler or grid mat- I used a grid mat which made this project very easy.
- scissors and/or
- paper slicer
- piece of cardboard at least 8″ tall and 7″ wide.
- heart template- I used a DT foam heart, but you can free hand one or download a template.
- fabric or another piece of cardstock to cover the heart
- 1.5″ ribbon for a bow
- decorative washi tape (optional)- I used a translucent gold heart print.
- paint or wood stain (optional)
- my designs- The numbers as well as the main sign design. No Cricut required!


Make a heart for a Valentine’s calendar topper.
First trace the foam heart or heart template (about 7″ tall) onto a piece of cardboard. If you’re a better artist than me (doesn’t take much for that lol), then you can freehand a heart on the cardboard. Then it cut out.


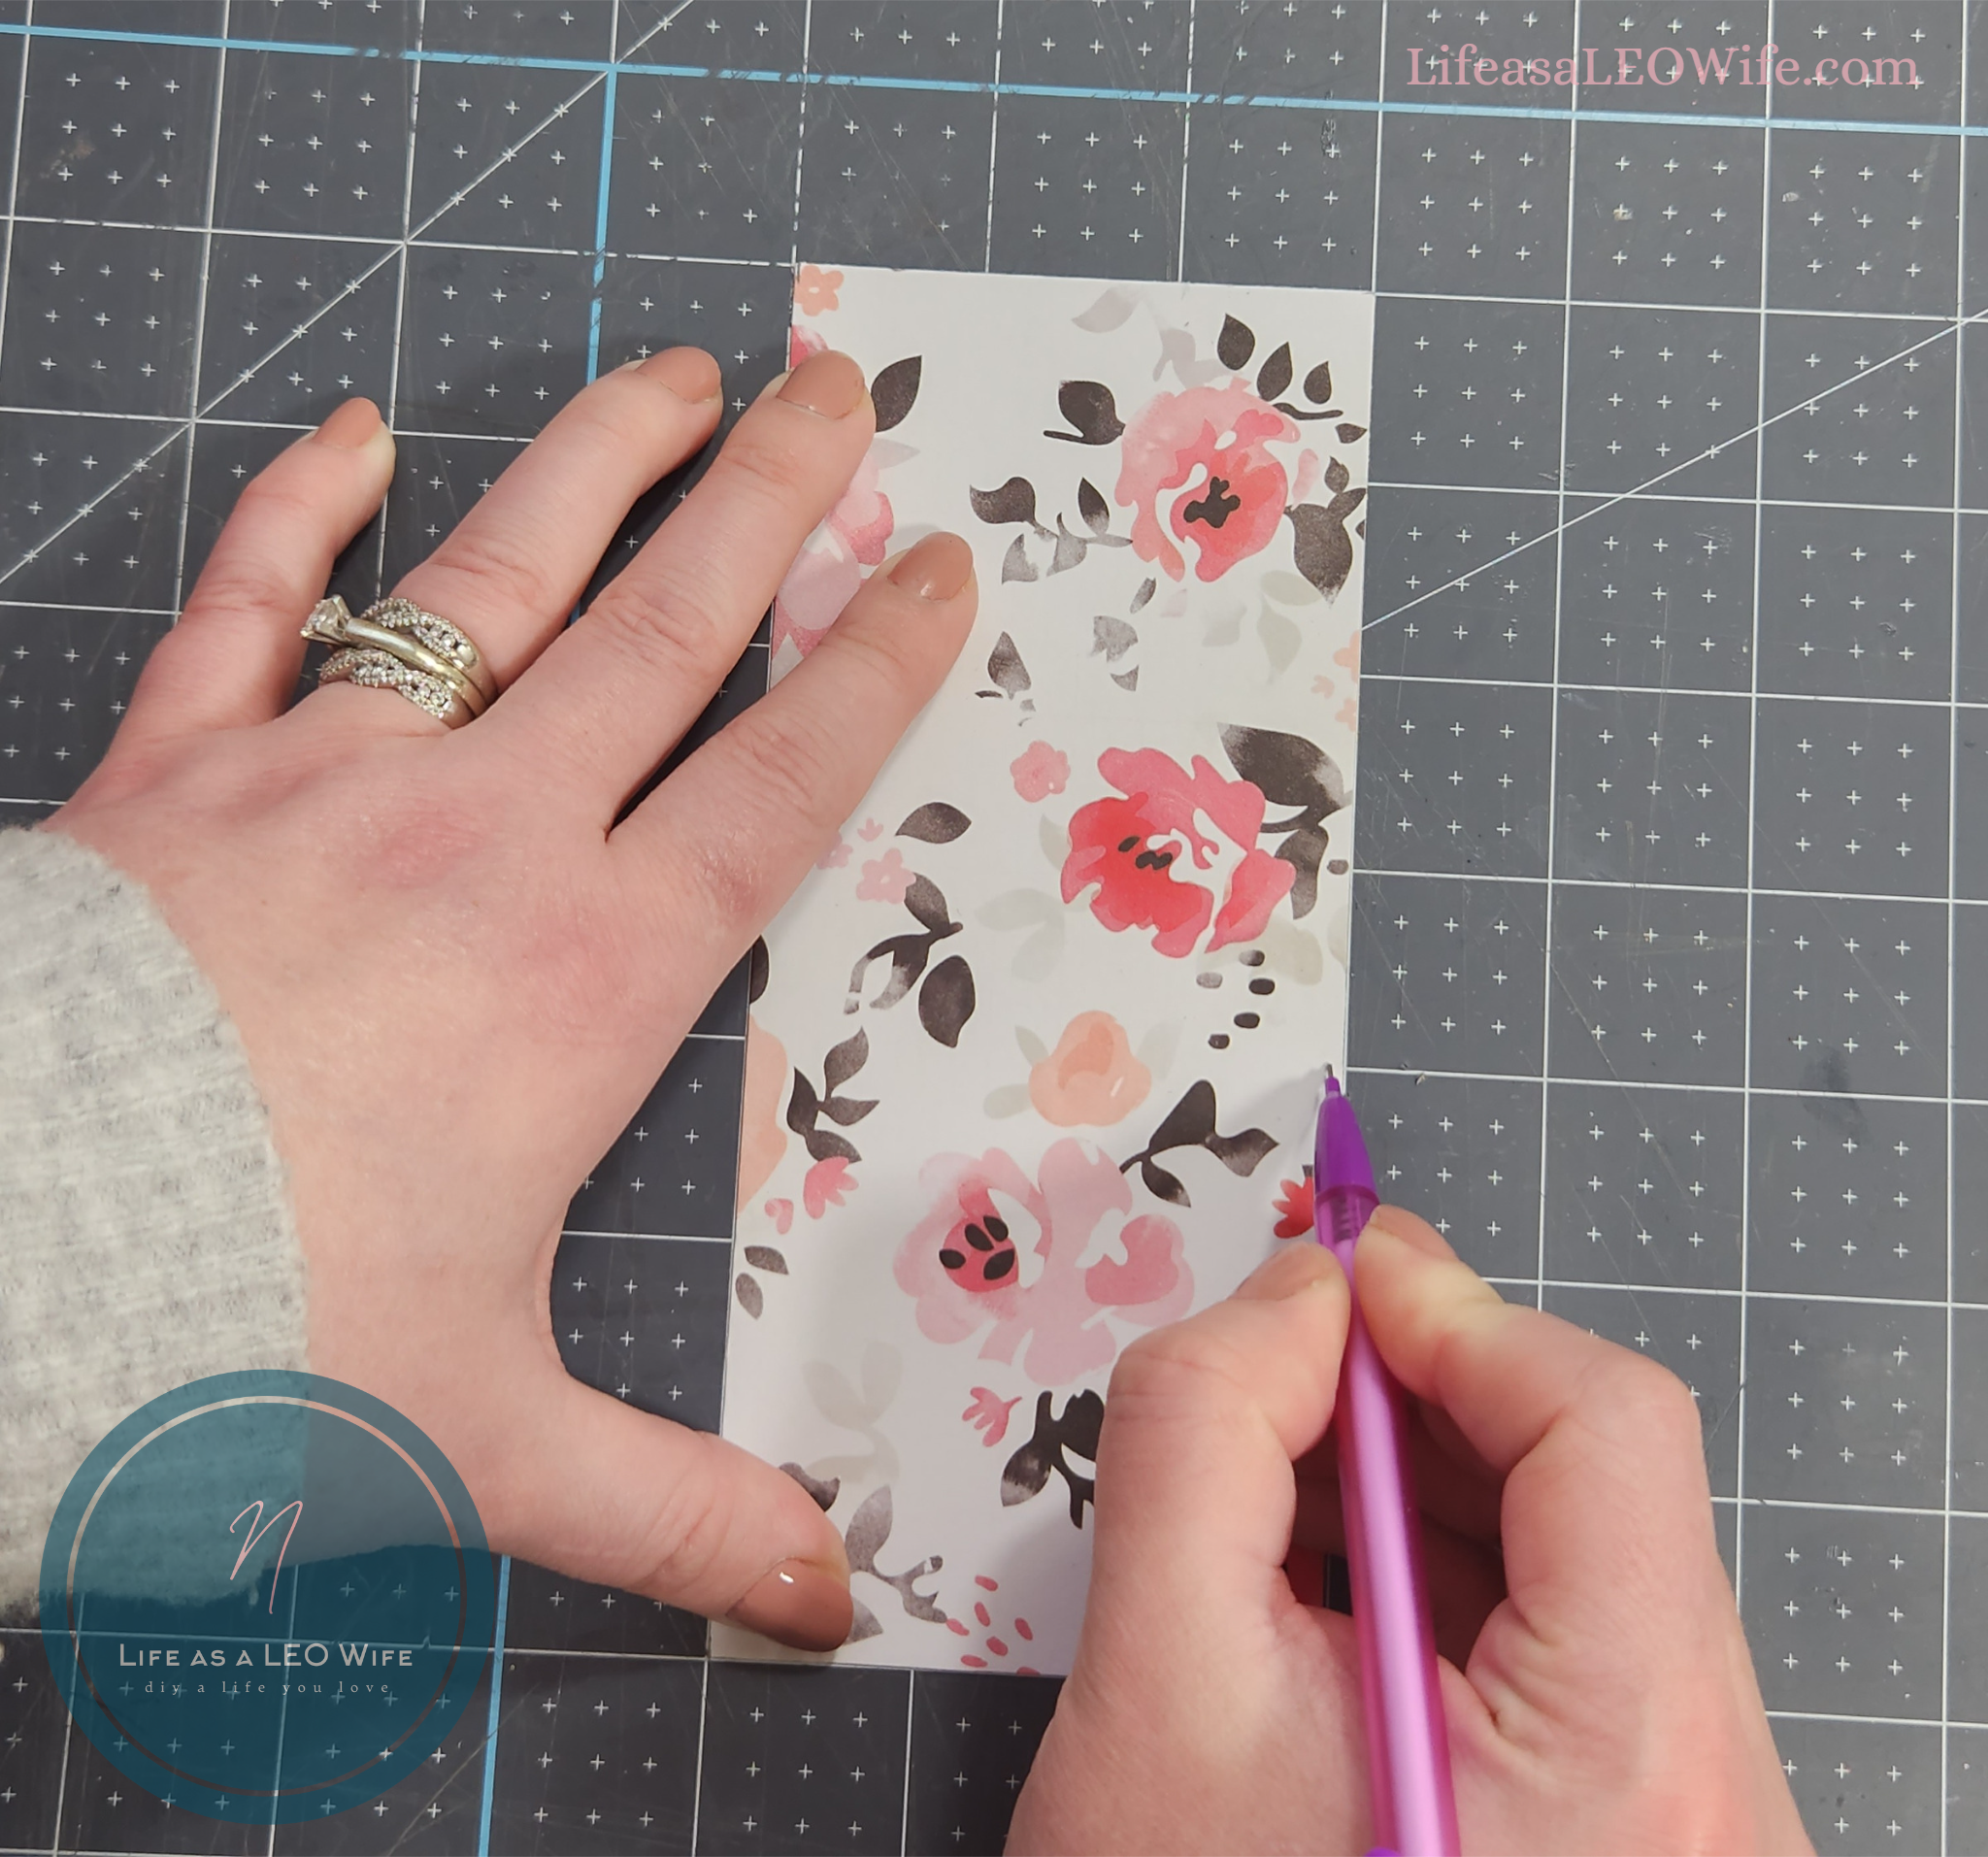
Next, trace the heart on your fabric or cardstock. Give yourself some space between the cardboard and where you draw your line because you’ll need the extra room to wrap the edges around the back of the cardboard heart. I used the gray and white striped fabric that I used in my Valentine’s tabletop centerpiece and my farmhouse wreaths for the holiday. Once the heart is on the fabric, cut it out.


Finally wrap the fabric around the back of the cardboard and use hot glue to glue it down.


Create a design for the heart.
Now that your heart for the top of the Valentine’s advent calendar is assembled, you need to decorate it. I made a design that you can download to use on your own heart with or without a cutting machine. If you have a Cricut, just download the design and upload it to Design Space. You can also use my design (just click the link) that’s already uploaded, the design as well as the numbers at the correct size, ready to go. If you don’t have one, you can use the carbon copy method from this door hanger tutorial using just paper and a pencil!
For personal use only. All of my free printables & cut files are copyrighted material. Feel free to download these free designs and print them or use on your Cricut projects for your own use at home. They are not for commercial use, not to be placed on items for sale. That helps me keep these printables, SVGs, and PNGs coming to you for free! Another note: you will not my logo overlay on your downloaded design. It is there to keep people from downloading the images straight from Google, or others from stealing them to use on their site. Thanks for understanding! Feel free to share this post for your friends and family to make their own projects with this design!
If you’re printing the design, be sure to change the settings to print in landscape mode.
Place the design on the heart.
When using a Cricut, be sure to mirror the image to cut on HTV and iron on the fabric. If you used cardstock to cover your heart, you can use regular vinyl or different color cardstock and glue it on.
Weed the design and iron it onto the middle of the heart.


To finish up your heart topper, you need to make a bow. I made a simple four-loop bow. You can find the tutorial for it within the video tutorial at the end of the post. Glue the bow to the top left corner of the heart.


Prep the photo hanger dowel & clothespins.
Now that the heart topper for the advent calendar is ready to go, it’s time to prep the photo hanger. Remove all of the ropes from the dowel. They will all just slip right off. If you want to leave the wood dowel as is, you can skip this section.

Paint or stain the dowel. I used Rust-oleum Stain + Polyurethane in weathered gray. Remember if you’re staining to only brush the stain on in one direction.

The clothespins that come with the photo hanger are primary colors with a couple of pink ones, so you’ll need to paint them to match a Valentine’s themed advent calendar. I painted six with light pink chalk paint and six with gray chalk paint. I left the two white ones alone.

Measure, mark, and cut the cardstock for the envelopes.
While the dowel dries, you can make the envelopes that will be opened every day during the Valentine’s advent season.
Each envelope will be 3×3 once they are finished.
Measure the cardstock and make a mark on each side at the 7″ point. Marking both sides makes cutting the paper perfectly straight in a paper slicer super easy. You can line both marks up on the slicer and you’ll get a perfect result every time. (If you notice in the video tutorial or photos that I marked the 6″ point ignore that! I messed up on one envelope and I’m not sure which pictures or videos it was on lol.)

Cut the cardstock to 7″ tall with your scissors or paper slicer.
Next mark the paper every 3.” With a 12×12 piece of cardstock you will get four envelopes with each piece. Again, I marked both sides of the paper to line it up properly.

I cut three envelopes with the gray paper, four with the pink paper, and seven with the pink and gray floral paper. You obviously need fourteen envelopes total.
Score & fold the advent calendar envelopes.
When you have your envelopes cut, you can score and fold them. My paper slicer has a cutting blade and a scoring blade. It makes folding easy and even. You don’t have to have one though.
Measure and mark 3″ (on both sides) from the bottom of one of your cut pages, then 3″ above that. That will leave 1″ at the top for the little lip of the envelope.
Once you have all four marks on the paper, you can score both lines.


Next, fold the envelope along the scored lines. You will have a 3×3 main section and a little 1″ piece to fold over the top.


Assemble the envelopes to hang on the Valentine’s advent calendar.
Using the glue stick (or liquid glue) apply a strip of glue along each long side of the envelope. Then press the sides together for a moment to allow the glue to adhere them together.

Repeat on the other thirteen envelopes.
Cut or create the numbers for the front of the envelopes.
Now it’s time to create numbers for each of the envelopes that you can open for each day of the Valentine’s advent season.
If you’re using your Cricut, you can simply use my already prepared design from Design Space. The “hello Valentine” and the numbers are all the correct size and ready to cut. Just click here, and you’re ready to go! I used a pretty fine glitter black cardstock paper for my numbers.

If you don’t have a cutting machine, again, no problem! Just download my designed numbers that match the font in the “hello Valentine” design. You can use the carbon copy method to transfer the design onto the front of the envelopes, then paint them to match the rest of the Valentine’s advent calendar. You could also cut out the numbers from the paper you print them on and glue them on. Or you could just write them on the front of the envelopes in your own handwriting.
Add numbers & embellish the envelopes.
Once your numbers are cut or transferred, it’s time to glue or paint them on. Since I used cardstock, I will be giving you the instructions for that.
Decide what order you want the cardstock designs in, glue the numbers to the envelopes with a glue stick. I added a floral print between each of the gray and pink envelopes. I used my grid mat to ensure that the numbers were placed in the center of the envelopes.


My solid-colored envelopes were just a bit too plain, so I went through my washi tape and found a transparent one with gold hearts. Using the grid mat, I lined up a strip of washi tape over the center of the lip of the pink and gray envelopes.


Finally, assemble your Valentine’s advent calendar!
It’s time to reassemble the photo hanger so that you can hang the advent calendar envelopes on the ropes. It came with six ropes to hang pictures from, but for this project we only need five to create more room. Just loop them back on the way they came. You can see how I did it in the photos below or in the video tutorial.


The photo hanger came with the handle tied onto the wood dowel, but we need more space for the envelopes. So, instead of that, hot glue each end of the rope hanger on the outside ends of the dowel. When it’s attached, move one of the hanging ropes to the very ends, then spread the others out a bit.

Tie a loop knot at the top of the hanging rope. That will make it shorter and also give you something to hang it from. I initially added a pipe cleaner loop but pulled it off the back of the heart because it wasn’t needed.
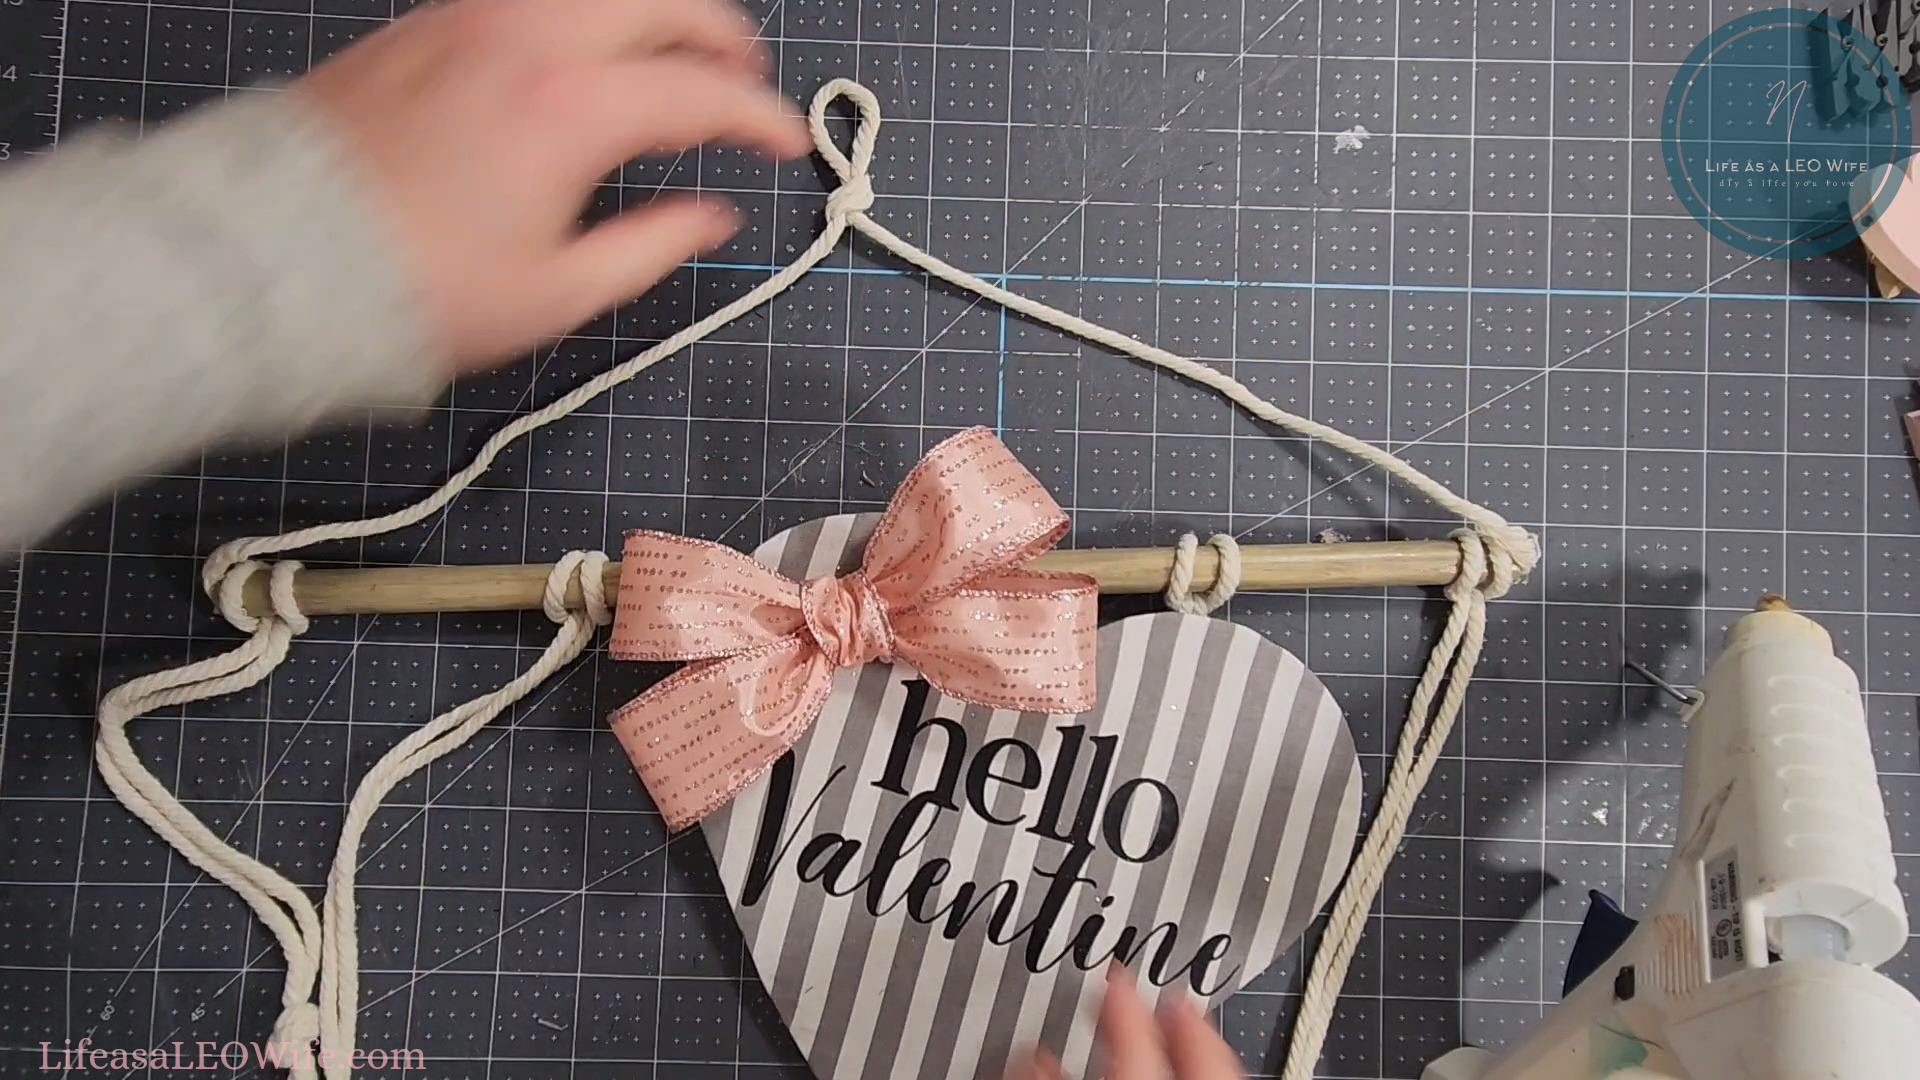
Hot glue the rope to the back of your heart.

Almost done!
Use the clothespins to hang three envelopes on the first four ropes and the last two on the final rope. I alternated between pink and gray clothespins and uses the two white ones on the first envelope and the second to last envelope. That made it look even because there was a white one at the top of the first and last ropes. Finally, I used a pink heart clothespin that came from a Target garland that I got years ago, to hang the 14th envelope for Valentine’s Day itself.

Valentine’s Day Advent Calendar Video Tutorial
Here’s a little video tutorial to help you out. By the way, I hate the way I sound! I think everyone feels that way lol!
Your Valentine’s advent calendar is ready to hang & use!
You can fill the envelopes with candy or small toys. Another great option is to use homemade coupons that your husband or children can cash in for something. For example, an extra 30 minutes before bedtime for the kiddos, and a back rub for your husband. My husband has quite a few ideas for his coupons lol! You could also add my free printable love notes and add one for each day leading up to Valentine’s Day. Love notes or coupons make great DIY gifts and they’re basically free! Get my free printable love notes for kids here and for your spouse here.
I absolutely love the way this advent calendar worked out. It matches the pink and gray theme that I’m using this year so well. It’s absolutely adorable!
Remember to pin the image below or share this post with the buttons on the left side of the page so you can find it when you’re ready to start your project! Also, follow me on Pinterest for new ideas added weekly! Be sure that you never miss a great tutorial for decor like wreaths, signs and other home decor, free printables, crafts, and other fun posts! Enter your email address below to be notified of new posts! Use the buttons below to follow me on social media for other great content.
Don’t go yet! There’s more to see!
There’s plenty more to see here on the blog! If you’re looking for something specific, use the search box in the sidebar to look it up. If not, you might enjoy these ideas. Don’t have time to read them all now? That’s ok, just click over to the posts using the pictures and pin them for later. You can also add Life as a LEO Wife to your favorites and check back for new ideas and free printables and SVGs every Wednesday, as well as link parties with tons of shared ideas on Sundays!


Such a cute idea Niki! So fun!
Thanks Jenna!
This is such a cute idea! I love that you used all Dollar Tree stuff so it was so inexpensive! Pinning now and hoping I will be able to remember to do this next year, lol!!!
Thanks Donna!
This is such a cute idea, I need to make one for my grandaughters!
Thank you! My son loves it, but I think my husband likes it more. He’s really hoping for some love coupons to appear in it lol. I think he’s hoping for an hour massage after his stressful days lol. Maybe I’ll put one it that says, “Give your wife an hour massage!” lol.