
Welcome to the first post of 2023 here on Life as a LEO Wife! I took the last week of the year off, for the most part, so I am so excited to get started and share today’s tutorial with you! Winter can be a difficult time to decorate for; Christmas is over but spring is quite far off (well not here on the Gulf Coast, but for most of y’all!). Today I’m sharing a beautiful winter door hanger that’s sure to warm your heart even as your toes are freezing. I’ve shared tutorials for making DIY door hangers, like this welcome sign for any season, but today I’m finally sharing a full, step-by-step tutorial for how to make a door hanger without a Cricut!

Today we’re also celebrating the first ever Sustainable Craft Challenge, formerly the Sustainable Pinterest Challenge. On the first Tuesday of every month I’ll join some very talented bloggers to bring you a DIY project with a sustainable twist! Our theme this month is warm/cozy as we stay indoors and toast our fingers by the fire. Well, those of you who live in a cold climate will at least, and I’ll live vicariously through you as I’m already toasting mine in the 70° to 80° weather. I’ll be sharing several designs that you can use on your door hanger (without a Cricut!), including a few warm and cozy ones! Let’s get started!
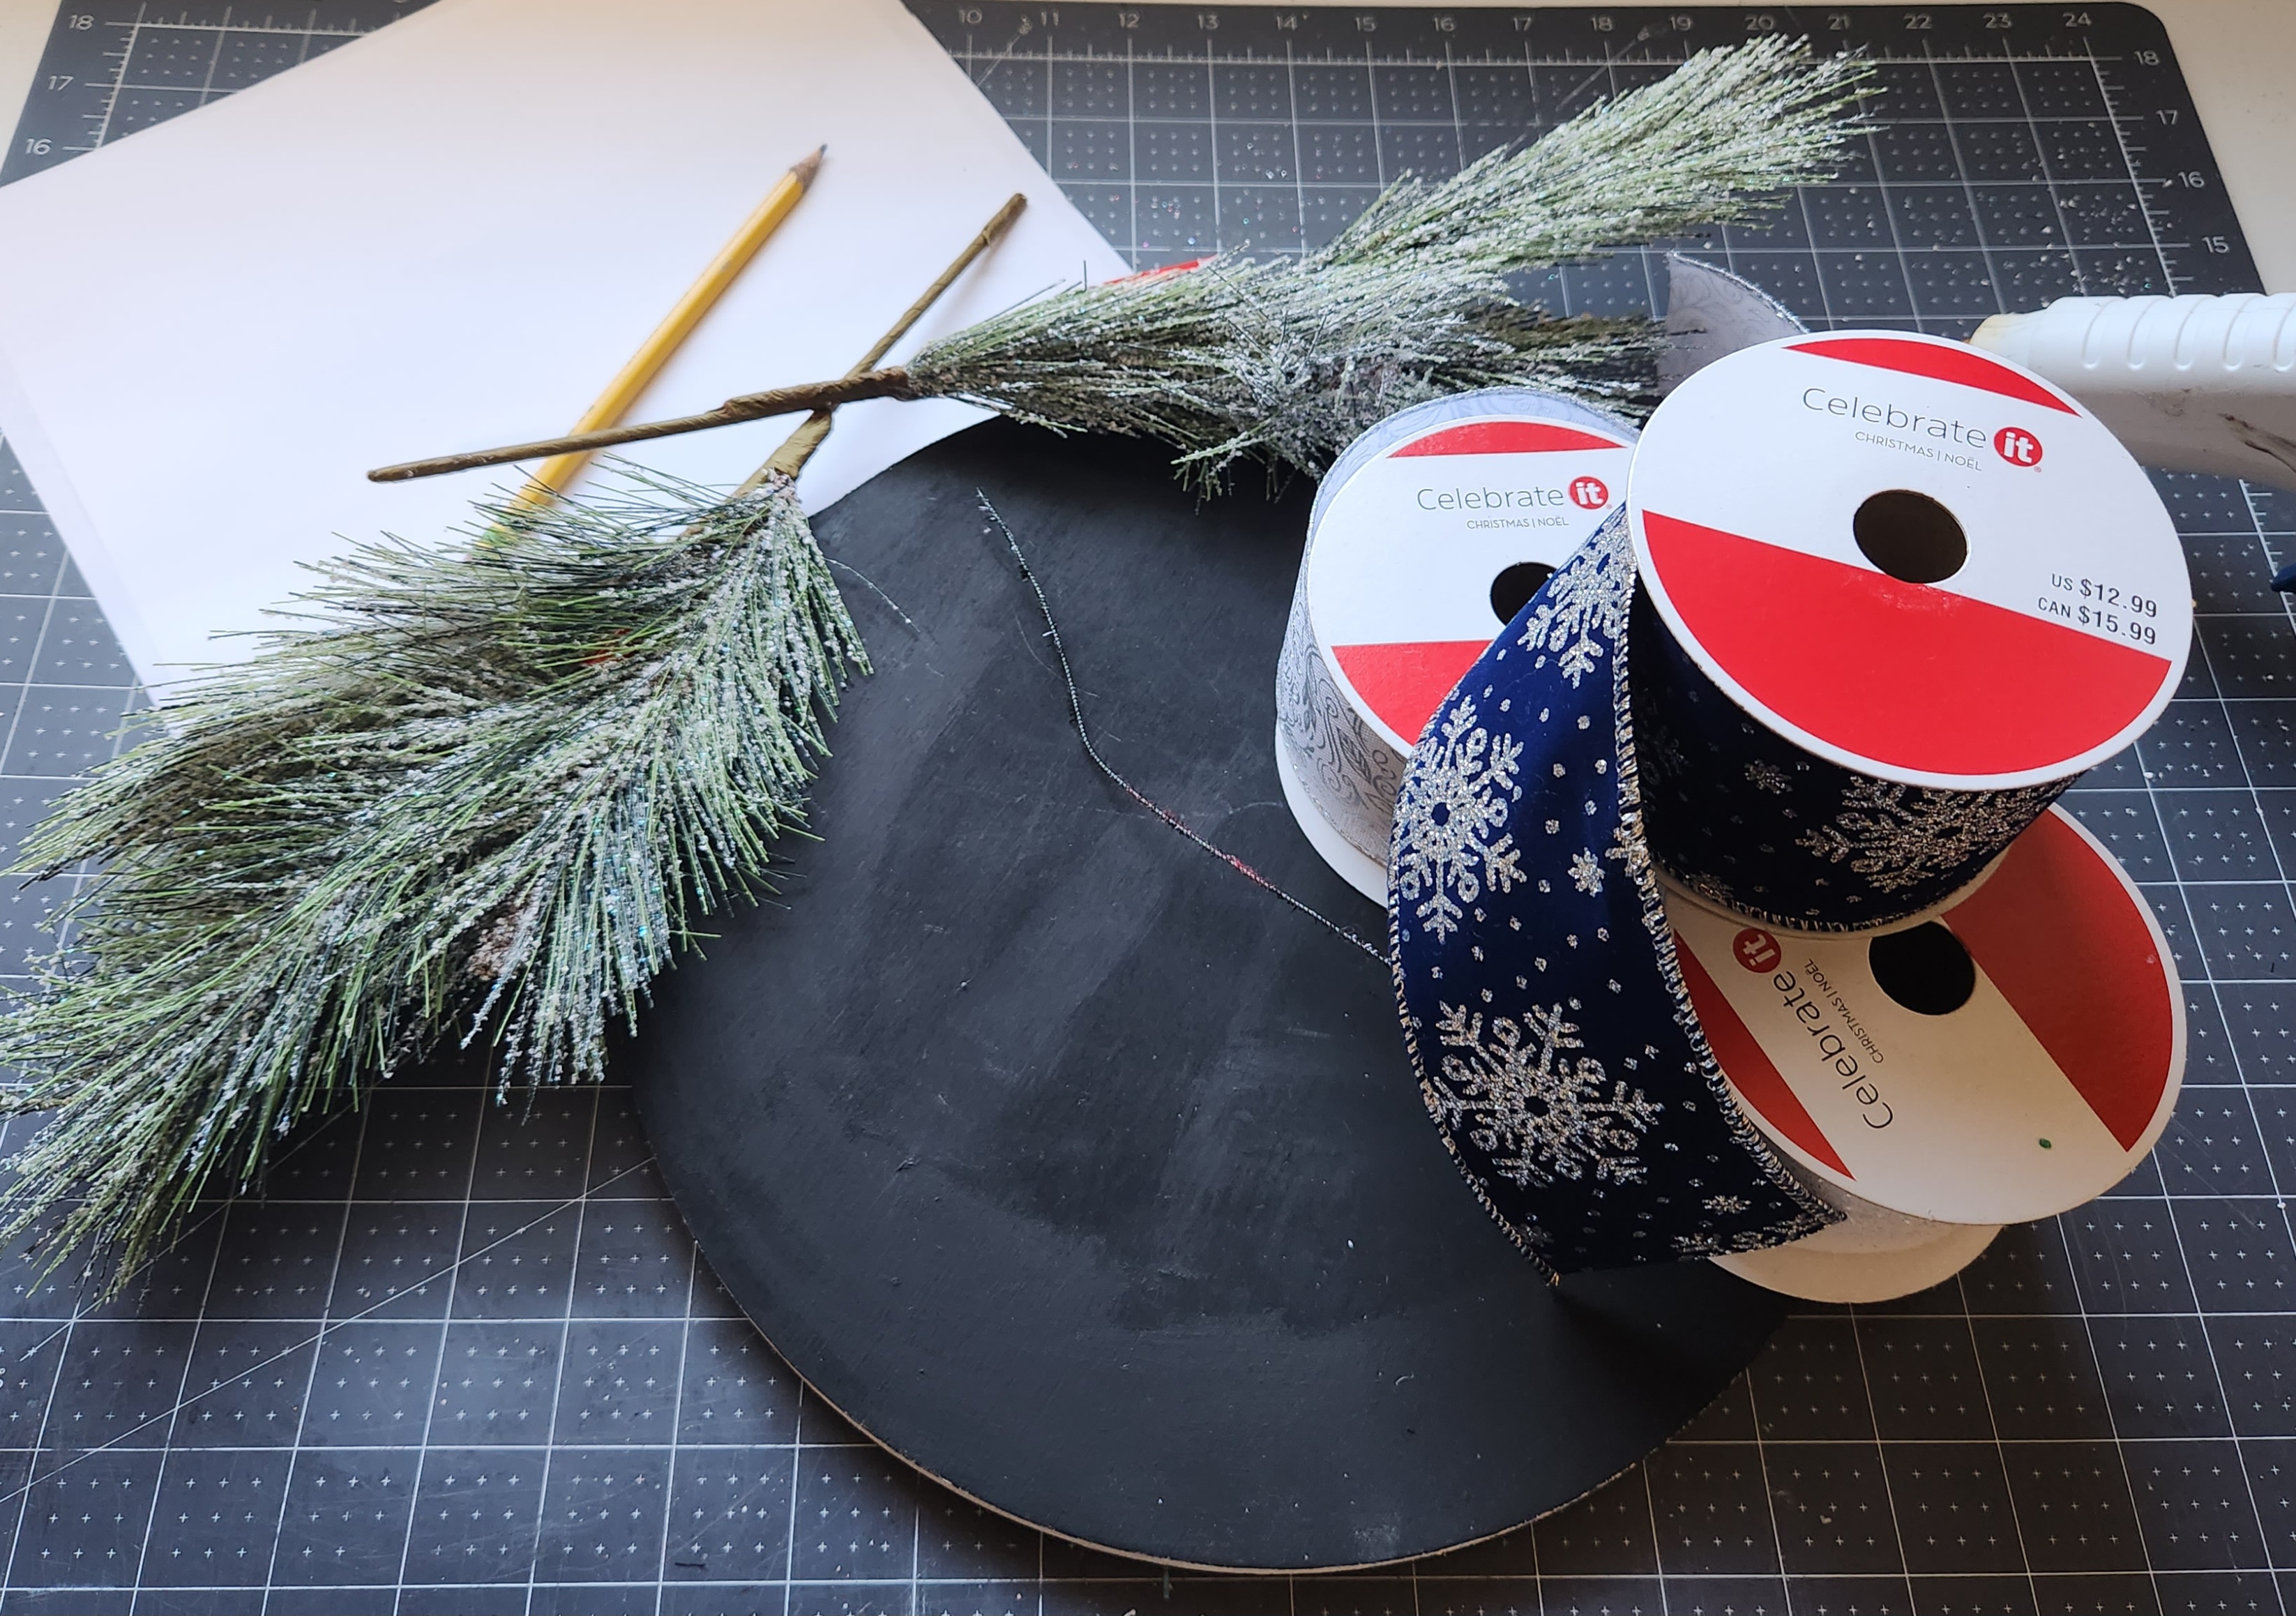
Supplies for a door hanger without a Cricut:
- round door hanger: As one of my sustainable elements, I’m using the back of my Welcome door hanger. It came from Lowe’s and is a 12″ circle. Using the back of an old sign keeps me from having to purchase a new piece of wood. Sustainability and a budget saving at its finest! This is the perfect option to keep you from having to store too many door hangers as well.
- faux greenery- I used a stem of flocked pine from Walmart.
- 2.5″ wired ribbon
- pipe cleaner for securing a bow & greenery
- paint & paint brush or
- a paint pen- I used a fine tip metallic silver pen.
- one of my designs
- printer
- paper
- pencil
- painter’s tape
If you’d like a tutorial for making this sign with a Cricut, check out this welcome sign tutorial. You can use any of the designs I shared in this post by downloading them and uploading them into Design Space. You’ll get a full supply list in the other tutorial as well.


For personal use only. All of my free printables & cut files are copyrighted material. Feel free to download these free designs and print them or use on your Cricut projects for your own use at home. They are not for commercial use, not to be placed on items for sale. That helps me keep these printables, SVGs, and PNGs coming to you for free! Another note: you will not my logo overlay on your downloaded design. It is there to keep people from downloading the images straight from Google, or others from stealing them to use on their site. Thanks for understanding! Feel free to share this post for your friends and family to make their own projects with this design!
Download & Print a Design
I created three different designs that you can choose from for your winter door hanger. Two fit right in with our warm and cozy theme. I chose to go with this first design since we live in a very hot and humid area. I thought “Let it Snow, somewhere else” was perfect because there’s no way it will ever snow here! The last time we had any snow that would stick (barely) was back in 1994 when I was really, really young. I don’t even remember it. Dang it, lol!
This first design should be printed in landscape mode. These designs could be used on other projects or as printables to just frame. When you print, choose the size frame that you’re using in the “photo size” drop down menu. For example, 5×7 or 8×10.
This design should be printed in regular portrait mode.
This warm winter wishes design was created as an 11×8.5, so be sure to change the print mode to landscape if you’d like to use it.
Download the design of your choice, create one of your own, or use my “Welcome” design and print it on regular white paper.

Transfer the Design to the Door Hanger
Turn the printed design facedown and scribble over the areas where the words are with a pencil. Keep going over it until you have a good bit of lead on it.


Center the design on the lower section of the round piece of wood. You want to leave enough room at the top of it to add the greenery and a bow. Tape it down with painter’s tape.
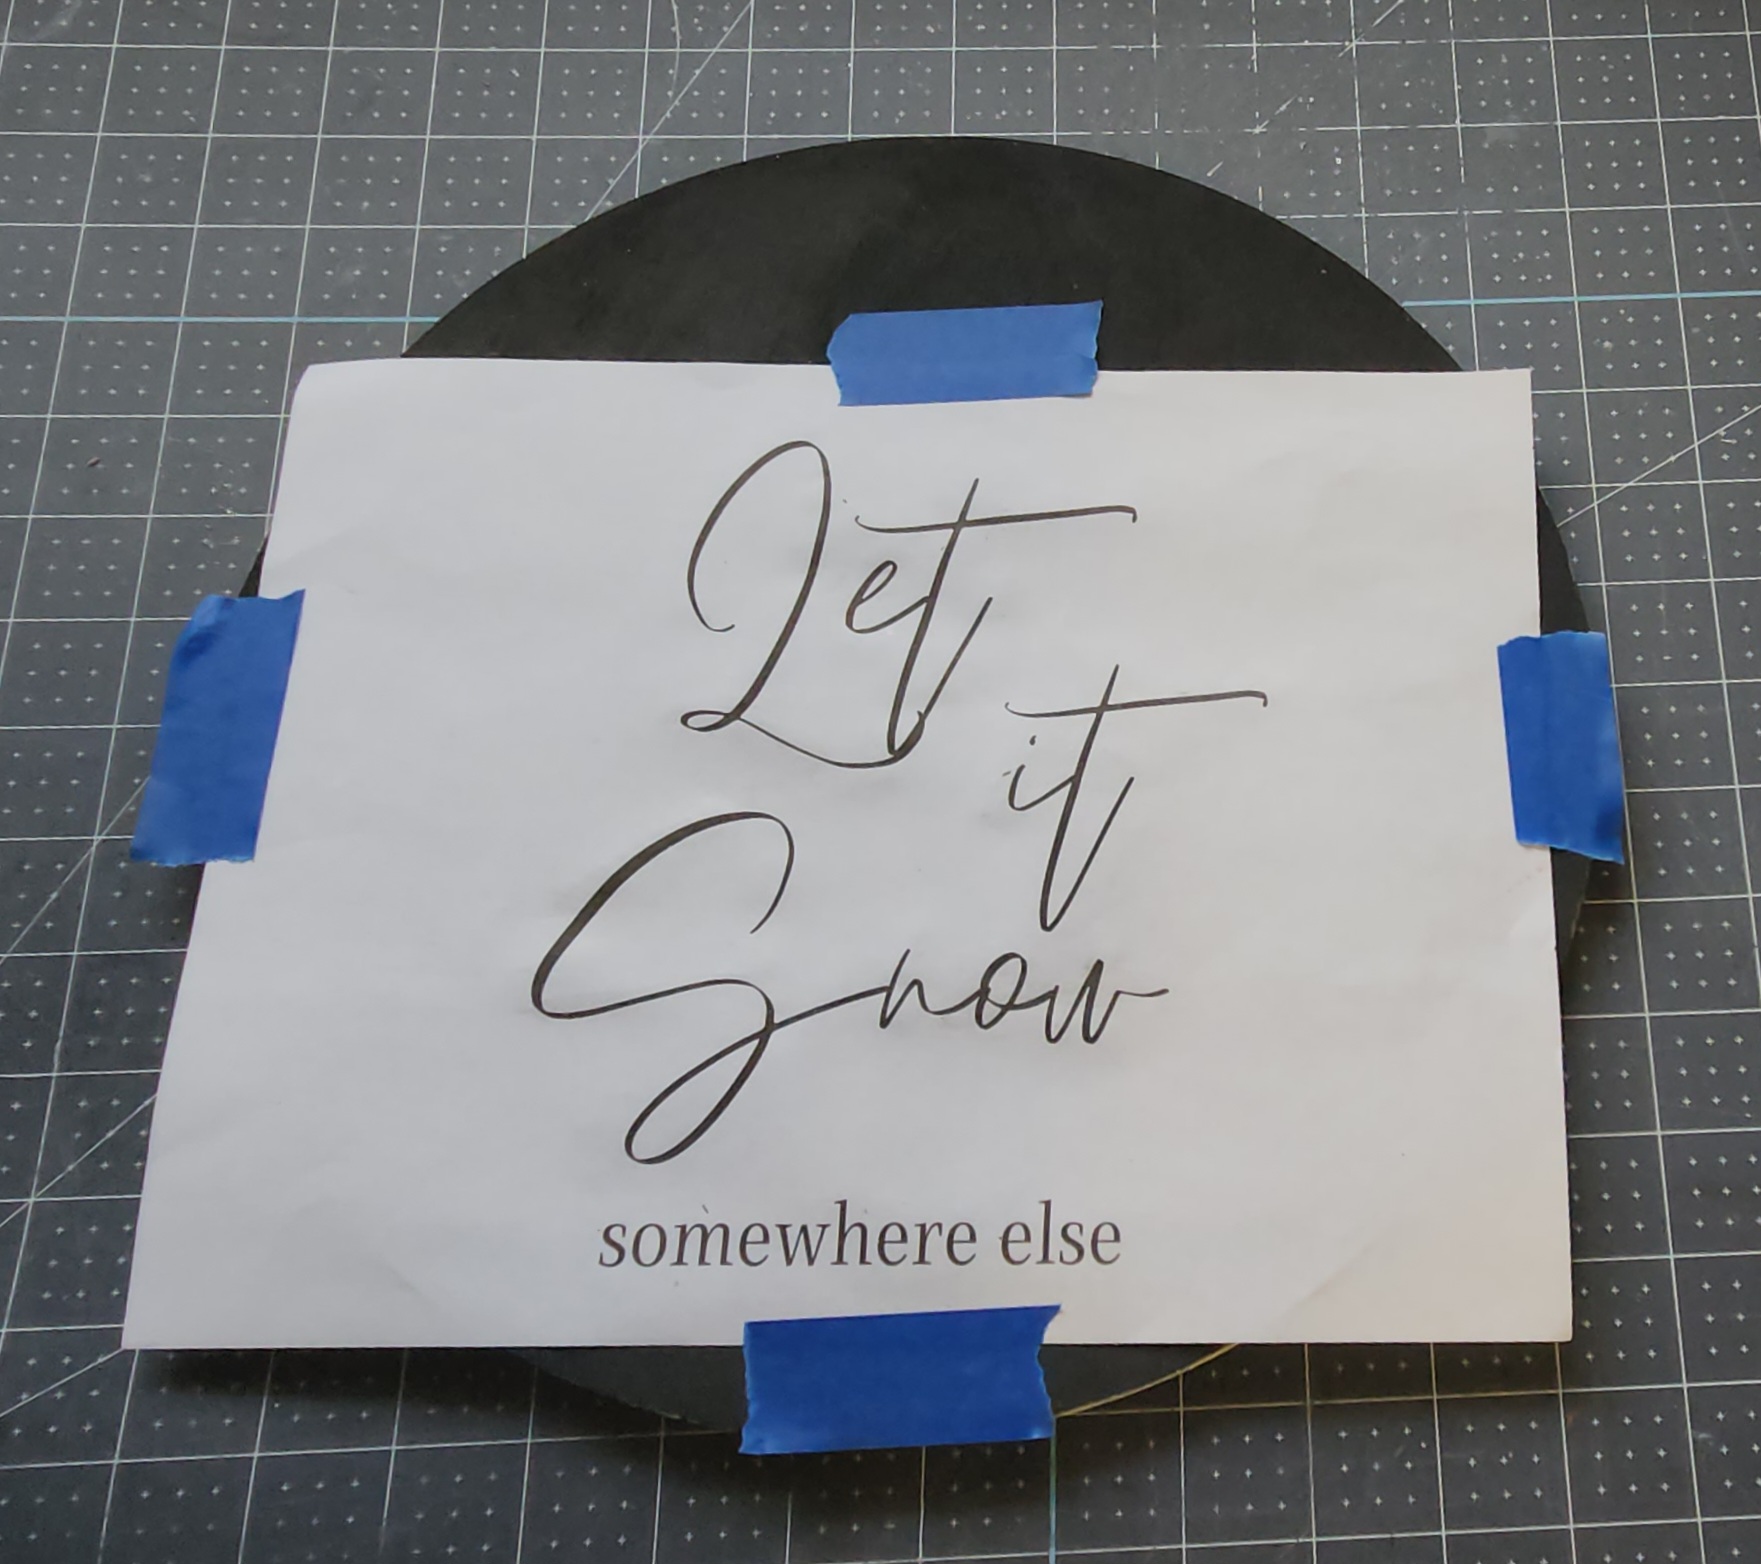
Now trace over the design with a sharp pencil. Press down really hard as you go. This will transfer the design to the wood by leaving the lead from the back of the paper on the wood once you remove the paper.


Leave the tape on the top of the paper but lift the rest to see how your design has transferred. If it isn’t completely finished, lay it back down and trace over the sections that you need to again. Once it’s finished, remove the paper and tape completely. You’ll have the pencil outline of the design on the winter door hanger without having to use a Cricut!

Paint the Design
With the design on the door hanger, you can now paint over the pencil. I used a silver metallic paint pen with a fine tip because the font is very thin. You can also use paint and a paint brush if you don’t have a paint pen.

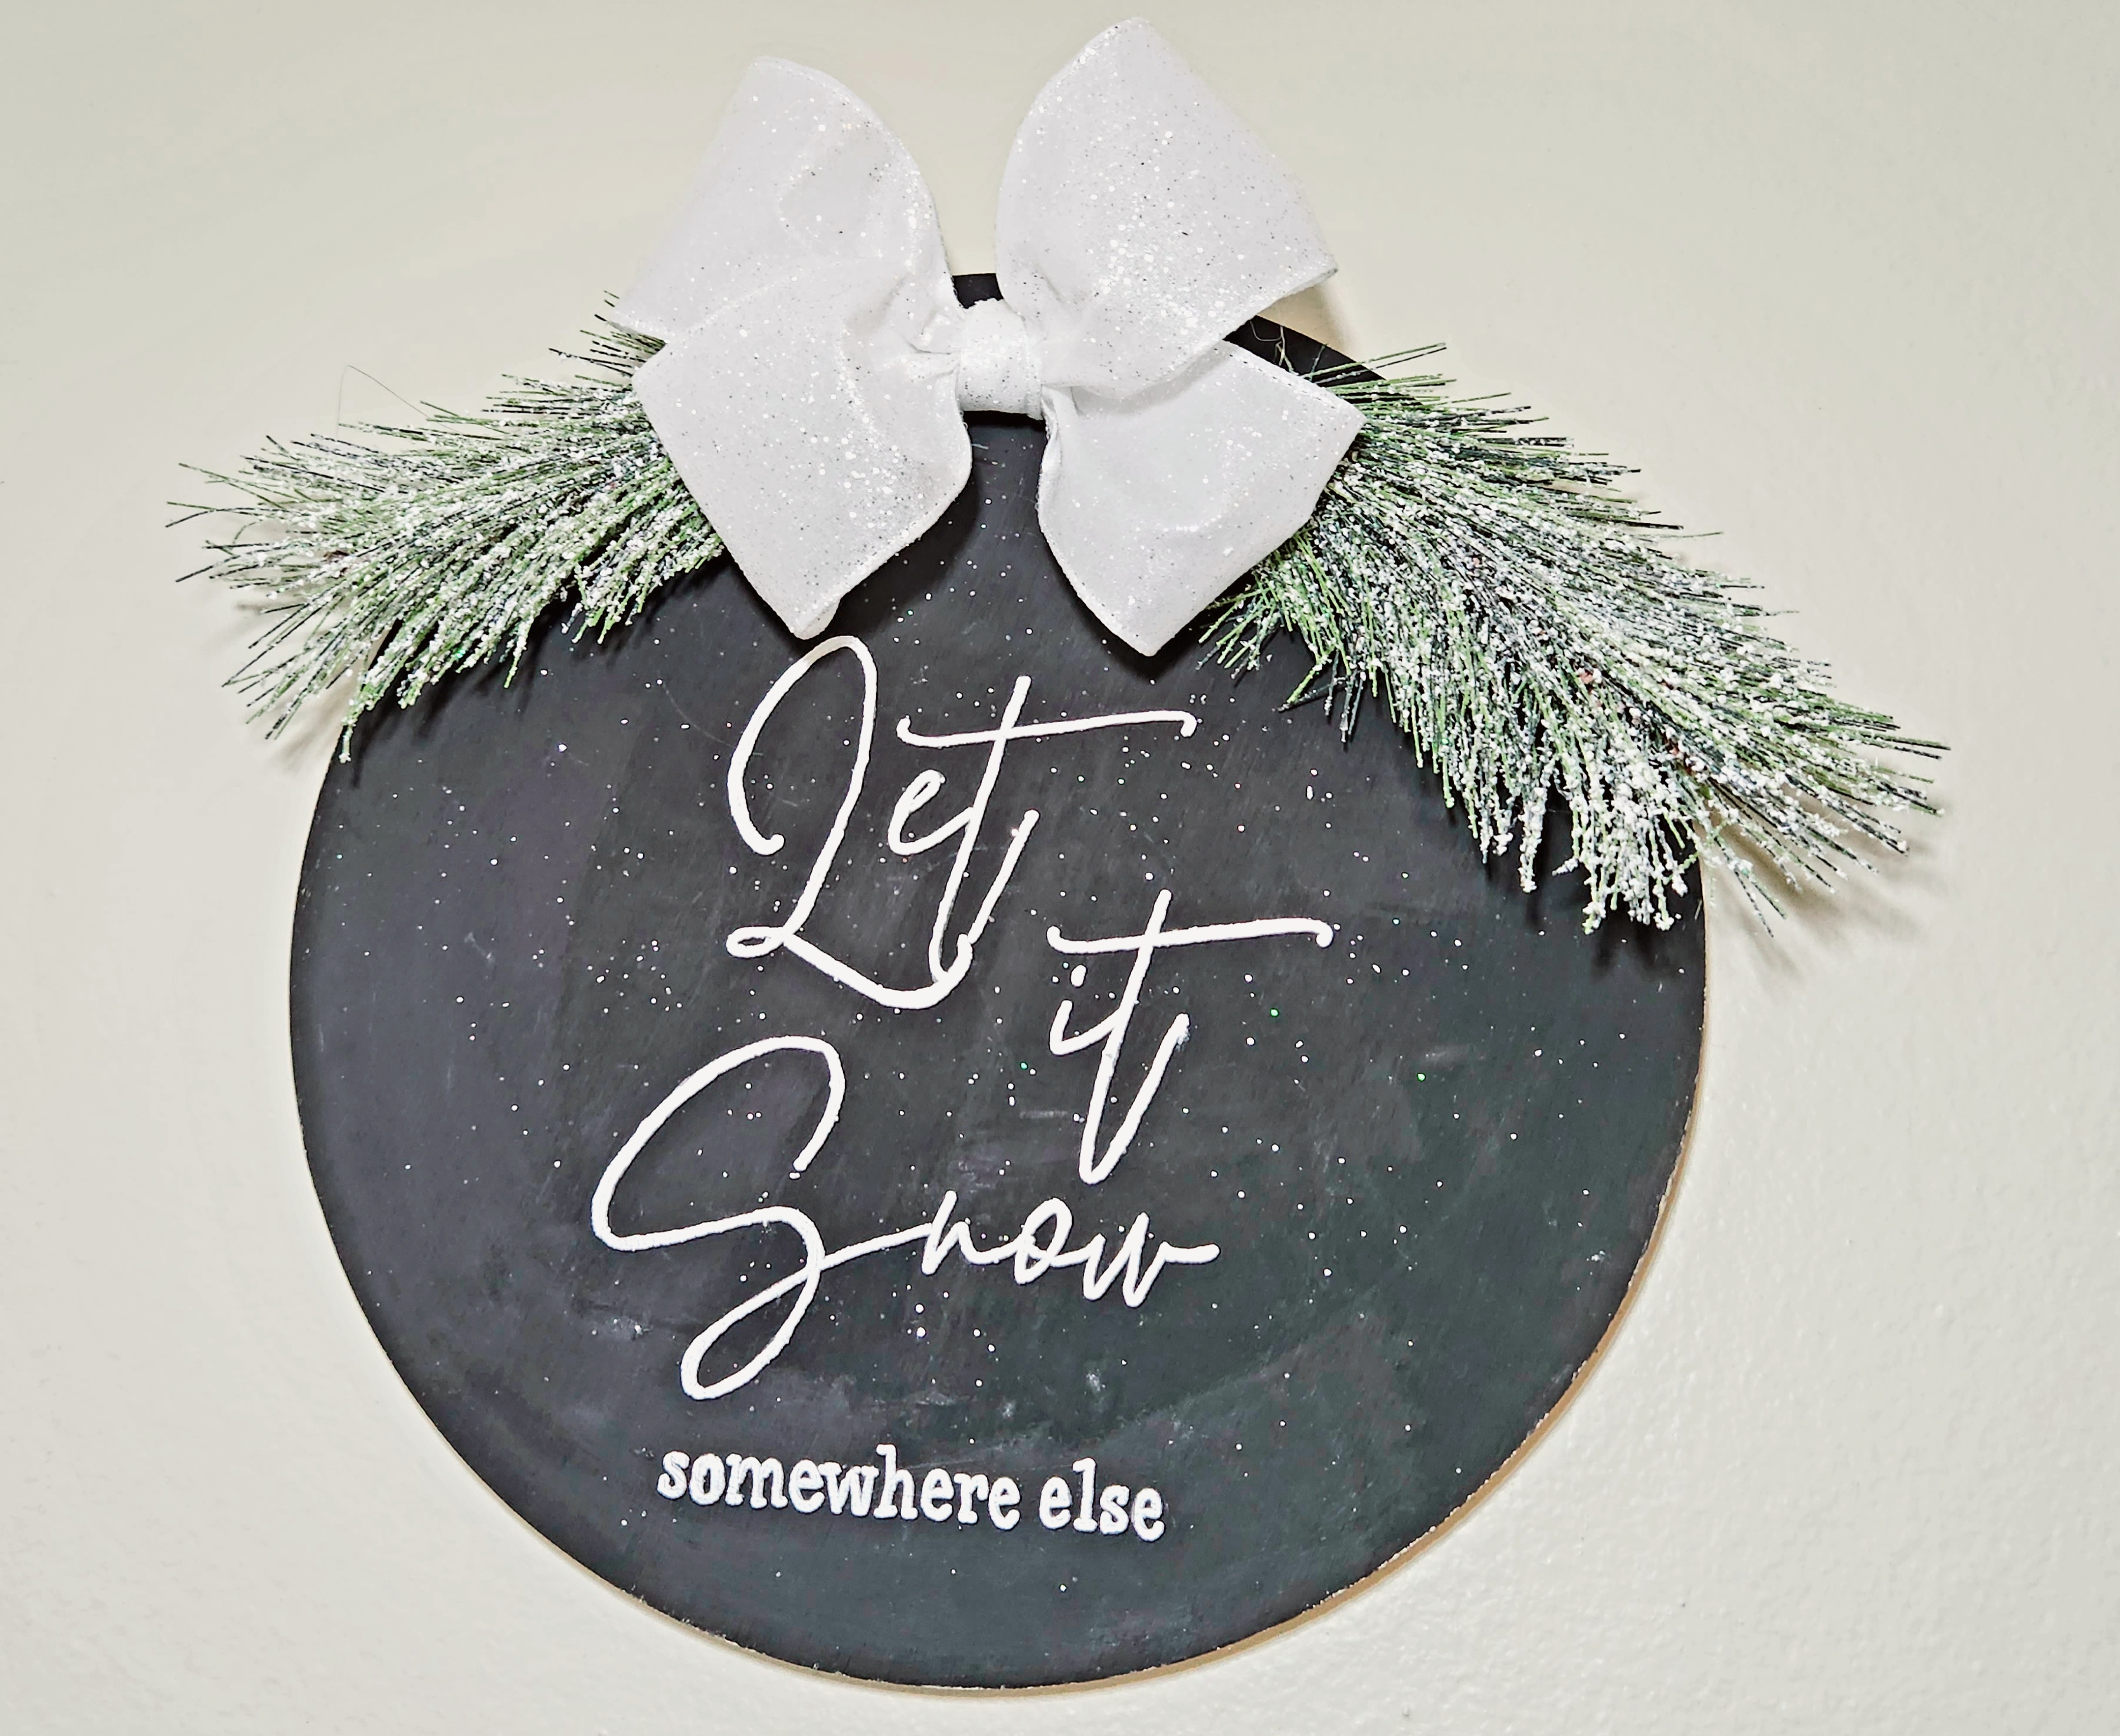
Now your winter design is beautifully on the door hanger completely without a cutting machine!
Add Greenery & a Bow
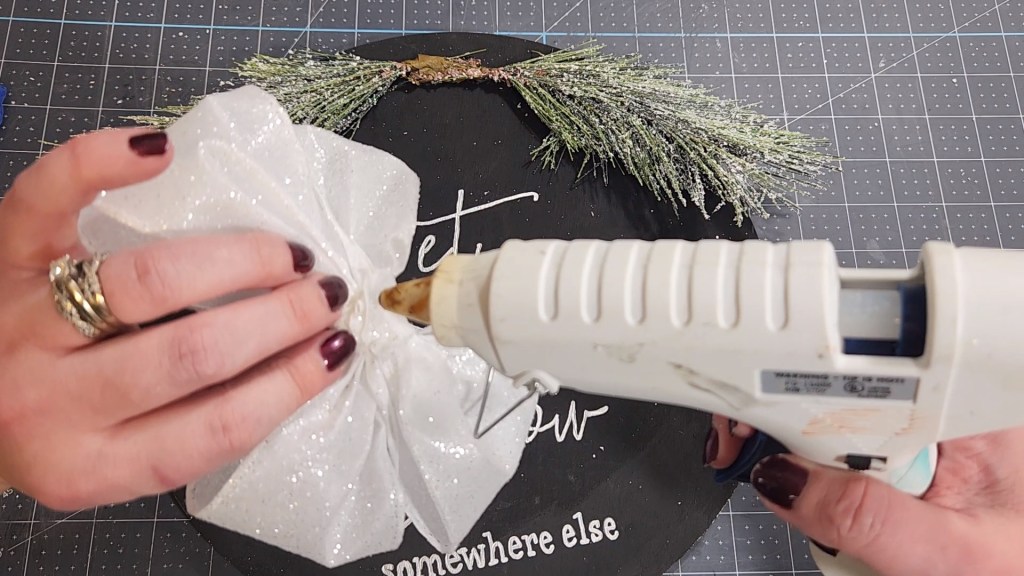
Finally, it’s time to add some decorative aspects to the winter wreath. The greenery will need to be added first. I used a flocked pine stem that was easily deconstructed by removing the floral tape. There were three pieces on the stem, so I used two pieces on the top of my door hanger. I added hot glue to the ends and placed them extending from the center out to the sides, curving down slightly.


Lastly, make a bow to add to the center of the door hanger. I used 2.5″ wired white glitter ribbon to make a simple four loop bow. Add hot glue to the center of the bow and place it over the attached greenery.

Door Hanger without a Cricut Video Tutorial
Here’s an instructional video to help give you a better idea on how to make a door hanger, or any sign for that matter, without a Cricut. I sped the video up so that you didn’t have to watch a 45 minute tutorial! If you need to, you can slow it down, but I think you’ll get it without having to do so.
That’s it! Your beautiful winter door hanger is ready to hang, all without the use of a Cricut!
Once I finished my sign the sun was completely gone, so I had to take hang it on a wall for the night to get a picture. I’ll update this post with how cute it looks on our door tomorrow. I made a Christmas porch leaner in November, and I plan to use the back as a winter sign for January and February. Be sure to come back Thursday for the tutorial and the free design!
This is a blog hop, so be sure to keep reading to check out the projects shared by the other lovely ladies!
Remember to pin the image below or share this post with the buttons on the left side of the page so you can find it when you’re ready to start your project! Also, follow me on Pinterest for new ideas added weekly! Be sure that you never miss a great tutorial for decor like wreaths, signs and other home decor, free printables, crafts, and other fun posts! Enter your email address below to be notified of new posts! Use the buttons below to follow me on social media for other great content.

Warm & Cozy Sustainable Craft Challenge Hop

Julie – Sum of Their Stories | Swiss Darn Stained Sweater Makeover
T’onna Sew Crafty Crochet | The Wednesday [Inspired] Snood
Gail – Purple Hues and Me | Recycled No-Sew Pillow Teapot Cozy
Mel – Decor Craft Design | DIY Warm Spices Gift Jar
Julie – Treasures Made From Yarn | Cozy Neck Cowl
Vicky – Vicky Myers Creations | Super Cozy Fleece Hot Water Bottle Carrier, Free pattern
Terri – Our Good Life | Homemade Swiss Mocha Hot Drink with Reusable Container
Shelly – Mimi Blog | DIY Snowy Luminary
Don’t go yet! There’s more to see!
There’s plenty more to see here on the blog! If you’re looking for something specific, use the search box in the sidebar to look it up. If not, you might enjoy these ideas. Don’t have time to read them all now? That’s ok, just click over to the posts using the pictures and pin them for later. You can also add Life as a LEO Wife to your favorites and check back for new ideas and free printables and SVGs every Wednesday, as well as link parties with tons of shared ideas on Sundays!


What a great idea, Niki! And your door hanger looks quite lovely! I love that you can transfer lettering without a Cricut or any other cutting machine because I don’t have one and actually refuse to get one, lol! Your technique is an easy and inexpensive way of transferring lettering! Thanks for sharing!
Thank you Gail!
This is so cute! “Let It Snow Somewhere Else” has me laughing so much! We recently had a bunch of snow, and after awhile, you just want it to go away. lol I love the chalkboard look and the greenery with the bow. Pinning!
Thanks T’Onna! Yes, it will never snow where I live. I have no idea what I’d do if I had to deal with it!
I don’t own a cricut and never made these types of crafts… however, you have made it an easy task to make an adorable door decoration! Thank you!
I’m so glad Terri! I figured it was finally time for me to make one without my Cricut so that I could show everyone how easy it is.
So clever! Reusing a sign you already have is such a great way of crafting whilst keeping costs down. I love all your word and phrase ideas and the sign turned out just beautifully.
Thanks Julie!
Hi, Niki! Your sign is so cute, I just love it! I have never tried this technique before so I’m pinning it now, to try later! I hope you had a very Merry Christmas and a Happy New Year! Here’s to a great 2023!!
Thank you! Happy New Year!
Love your door hanger!
Thank you!
This looks adorable. And since I am not the proud owner of a Cricut I am very happy with these instructions.
Thank you!