
Hello friends! Welcome to the second post of the year! Earlier this week I shared a tutorial for making a winter door hanger without having to have a cutting machine. I always make a porch leaner to match the season and my wreath. I thought making one for winter would be the perfect way to show you how to make a porch leaner without a Cricut to match your door hanger!
Supplies needed to make a winter porch leaner without a Cricut:
- 6′ wood board: I used a piece of cedar that’s 5.5″ wide
- pencil
- printer
- my design (or your own)
- paint for wood (optional)
- paint & small paint brush for lettering or
- paint pen: I used a metallic silver paint pen
- 2.5″ wired ribbon for a bow (optional)
- pipe cleaner for bow (optional)
- hot glue gun for attaching bow (optional)

For personal use only. All of my free printables & cut files are copyrighted material. Feel free to download these free designs and print them or use on your Cricut projects for your own use at home. They are not for commercial use, not to be placed on items for sale. That helps me keep these printables, SVGs, and PNGs coming to you for free! Another note: you will not my logo overlay on your downloaded design. It is there to keep people from downloading the images straight from Google, or others from stealing them to use on their site. Thanks for understanding! Feel free to share this post for your friends and family to make their own projects with this design!
Download & Print Designs
I used the same font for my winter porch leaner as I did on my door hanger which is a pretty and thin. If you’d like to make a matching door sign like mine, you can get the free design from this post. You can use the design below for your porch leaner, or you can make your own using a program like Microsoft Word, PicMonkey, or Canva. I have several other designs that you can use from other posts. You can get the free designs for making a Christmas porch leaner here, one for Halloween here, and several for everyday here. Each of my letters are between 3.75″ and 6″ tall, and they are all thinner than 5.5″ wide.
If you’re using my design, go ahead and download and print them now. You will need to use the W, e, i, and s twice to spell out “Warm Winter Wishes.”

Prep the Words
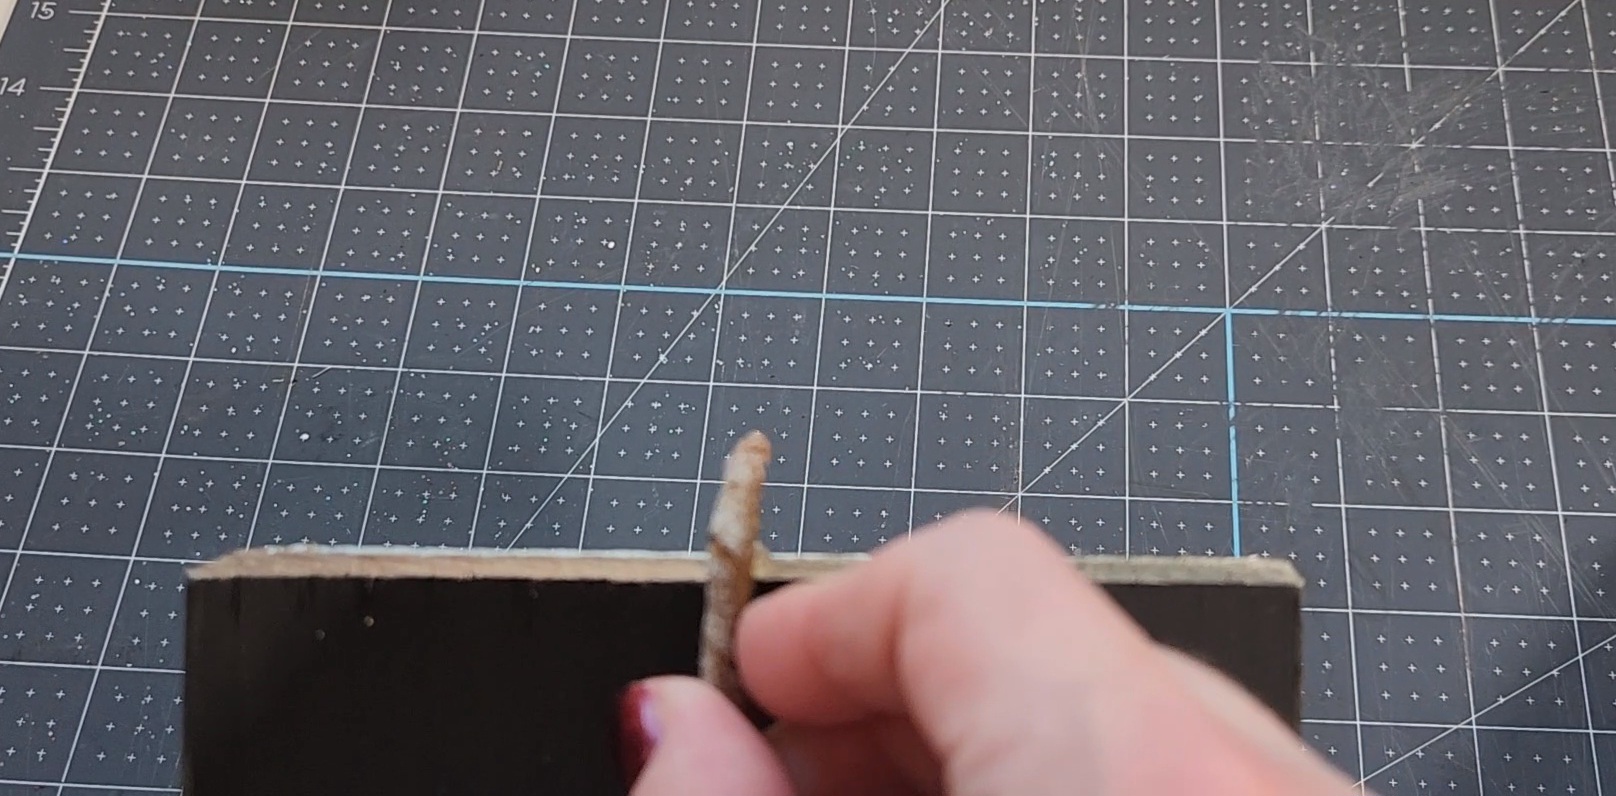
To transfer the letters onto the wood you need to first cover the back with pencil lead. Turn the paper upside down and scribble over the letters with a pencil. You want to get a nice, thick layer of lead covering them.

Once that is finished, cut the letters and the word apart. You don’t have to cut super close to the letter, but you do need it to fit on the board and be taped down.

Place them on the wood board and move them around until you’re happy with the placement. I left a gap at the top for some faux greenery and a bow. You can just use the letters if you’d rather not have a bow. When you’re happy with the placement, place a bit of tape on each side so they don’t move while you trace them.

How to transfer the letters onto the porch leaner without a Cricut:
Next, trace around all of the letters one by one, pressing down really hard as you do. Once you get around the whole word or letter, lift the tape from one side and lift the paper carefully. If your letter is on the porch leaner you can remove the paper and tape. If not, trace over it again before removing the paper.

This is what you will have when you remove the paper.

Continue tracing the letters until you have all of them transferred onto the wood. You will need to use the W, i, e, and s in both “winter” and “wishes.”
Paint the Outlines
Once all of the letters are traced, you need to paint the outlines. I used a metallic silver paint pen which is so much easier than using paint and a paint brush. It’s as easy as it sounds. Trace the outlines of pencil and fill in the inside. Easy as pie!

Attach the Greenery & Bow
I made a 7-loop bow and a piece of flocked greenery for this porch sign. To attach the greenery I squeezed a good amount of hot glue on top of the board in the center, then bent the stem and pressed it on the glue until it dried.

Next, I attached the bow with hot glue on top of the greenery stem to hide it.


Video tutorial for how to make a porch leaner without a Cricut:
Here’s a quick video tutorial for you. I didn’t film the entire process because I broke my tripod and I’m waiting for a newer, better one to come in. Let me just apologize for my husband thinking he was a videographer and director in one and moving the camera around in a circle while I was tracing the “e!” I could’ve killed him when I watched it lol!! I laughed and asked him what in the heck he was thinking when I watched it. He told me he was trying to create a visually appealing video for my readers. I told him it didn’t need to be visually appealing. My readers just want to watch how to do it! Anway, with that behind us, here’s the video.
Is it amazing how easy it is to make a porch leaner or any sign without a Cricut?!

Remember to pin the image below or share this post with the buttons on the left side of the page so you can find it when you’re ready to start your project! Also, follow me on Pinterest for new ideas added weekly! Be sure that you never miss a great tutorial for decor like wreaths, signs and other home decor, free printables, crafts, and other fun posts! Enter your email address below to be notified of new posts! Use the buttons below to follow me on social media for other great content.

Don’t go yet! There’s more to see!
There’s plenty more to see here on the blog! If you’re looking for something specific, use the search box in the sidebar to look it up. If not, you might enjoy these ideas. Don’t have time to read them all now? That’s ok, just click over to the posts using the pictures and pin them for later. You can also add Life as a LEO Wife to your favorites and check back for new ideas and free printables and SVGs every Wednesday, as well as link parties with tons of shared ideas on Sundays!


3 thoughts on “Winter Porch Leaner: How to Make One w/o a Cricut”