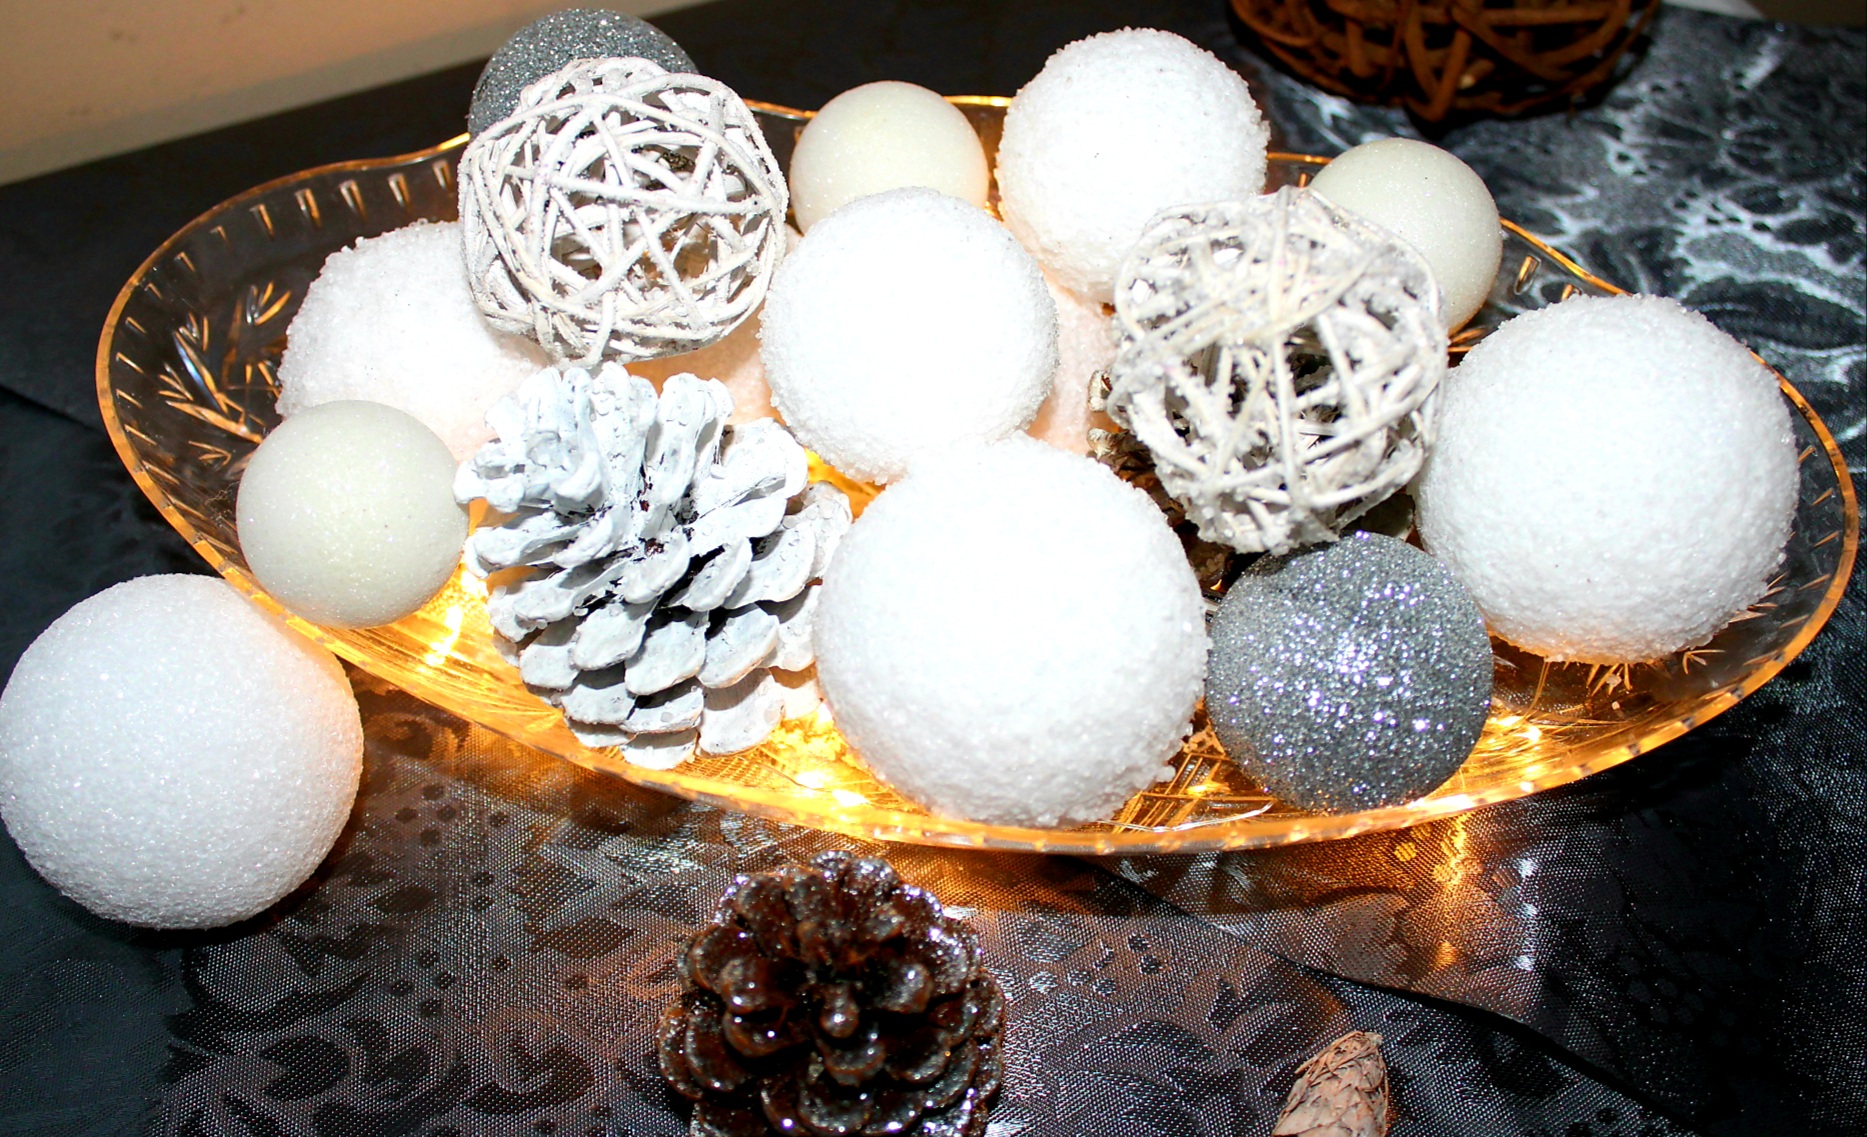
That time between Christmas and spring can be such an awkward time to decorate for. Most people pack up anything winter when they put away their Christmas decorations, but you don’t need to put them all away. After all, it is still winter after December 25th, even if it’s still 70° outside like it is where I live! In this post I’m going to show you how to make a DIY snowball centerpiece that includes icicle pinecones and faux snowballs. You can add some fairy lights for a beautiful piece even at night.
Looking for more winter DIYs? You’ll love this round door hanger and this matching winter porch leaner! Those projects contain great tutorials for great crafting ideas that you can use year-round, as well as PNG designs that you can use on signs and other decor!
For a DIY snowball centerpiece you need:
- packs of styrofoam balls- I got mine from Dollar Tree and used 2 packs of 3 2″ balls and 1 pack of 4 1″ balls. You may need more or less depending on the size of your bowl.
- pinecones- You can use store-bought pinecones or some from your yard. If you get them from your yard, be sure to bake them at 200° for several hours to open them and kill any insects.
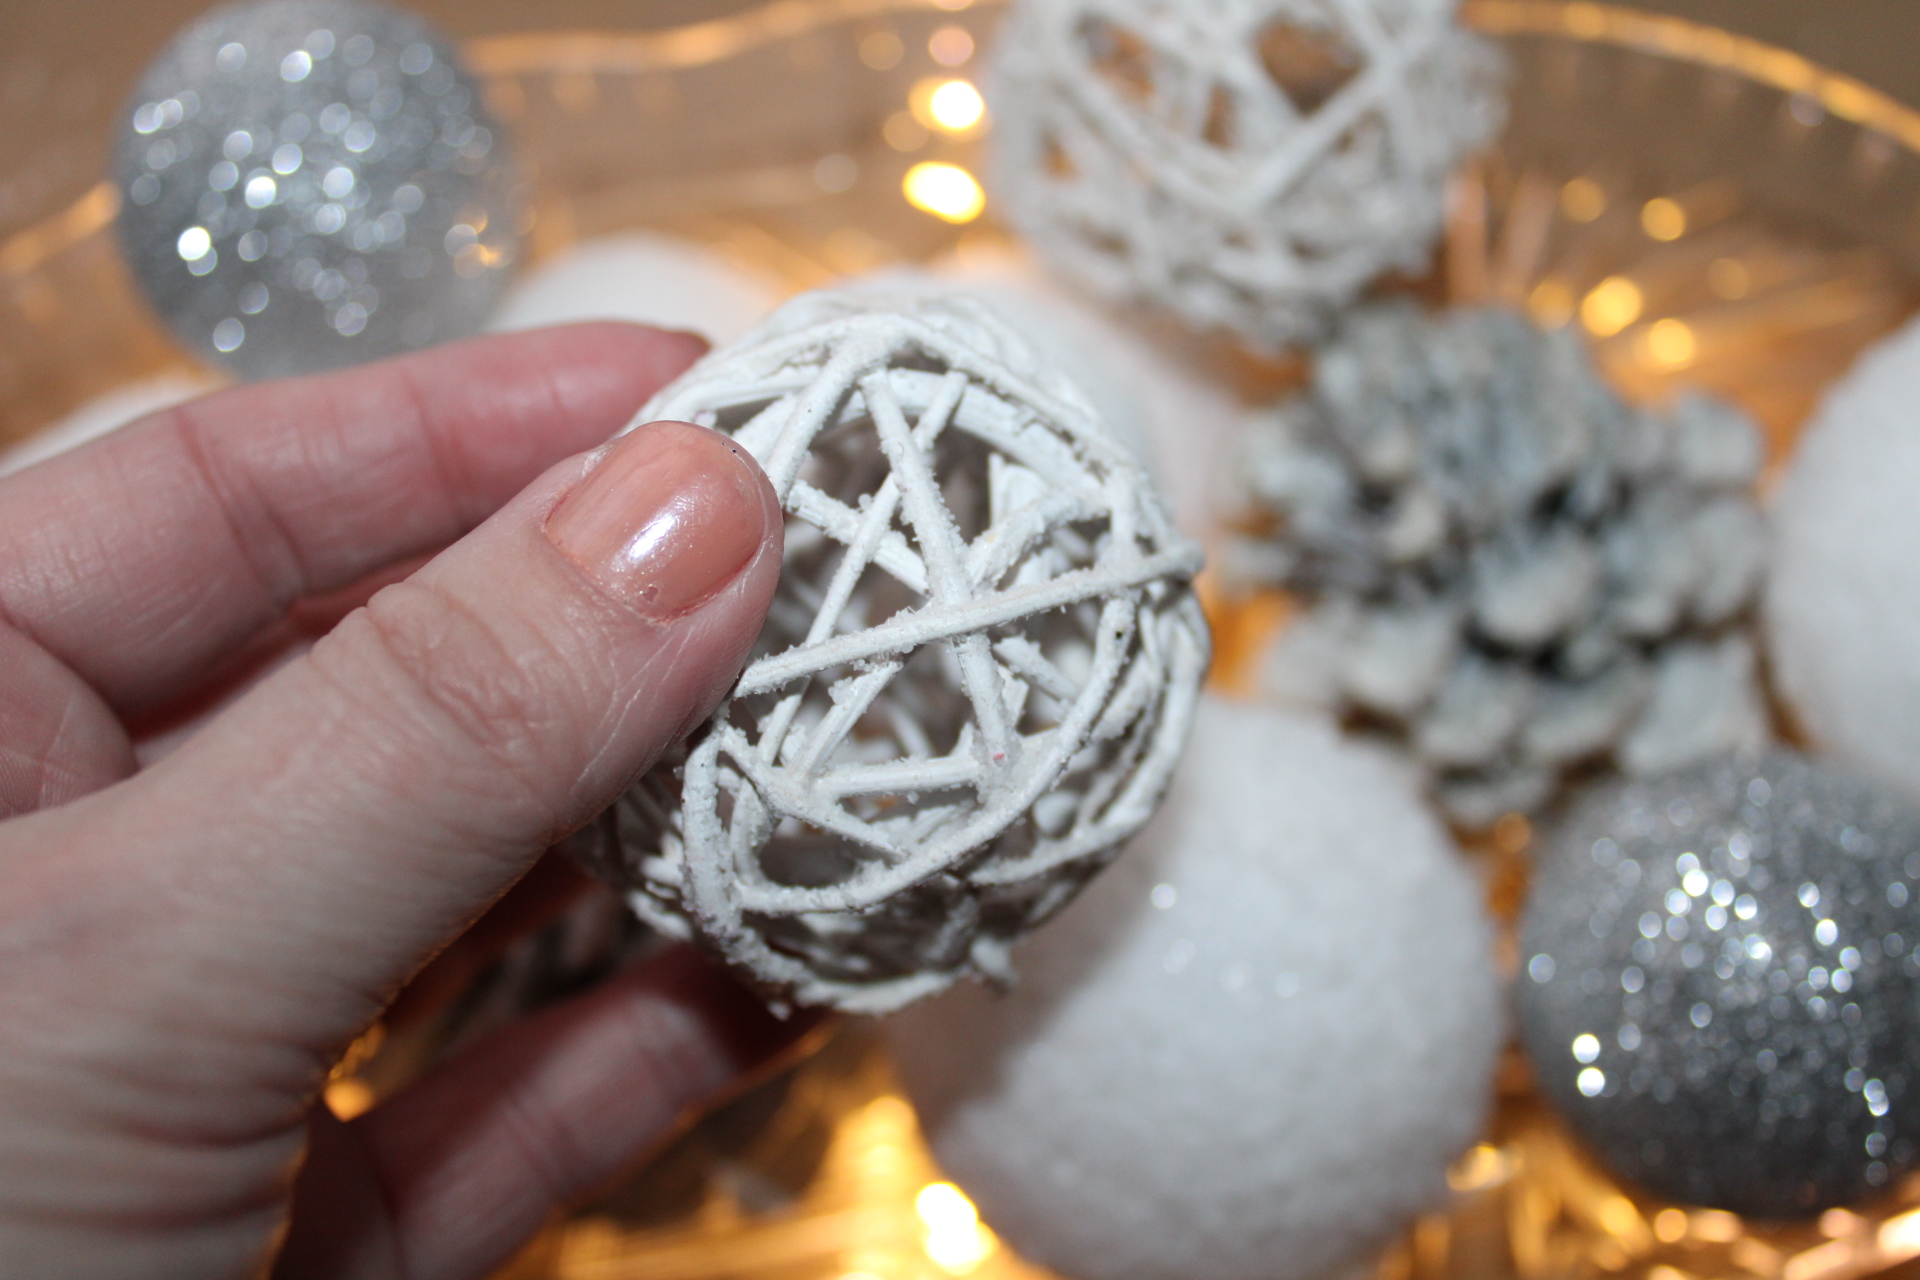
- other wicker balls or glitter ornaments- I used 2 wicker balls, 3 tiny white ornaments, and 2 small silver ornaments. If you use ornaments, don’t use any that have Christmas-y colors like red and green. Silver, blue, and white are good for winter decor.
- Mod Podge or liquid glue- Mod Podge holds a little better, but if you don’t have any liquid glue, like Elmer’s, will work.
- paint or foam brush
- Epsom salt
- fairy lights
- decorative bowl or dish
- white spray or acrylic paint (optional)

Mod Podge the Styrofoam Balls
Lay down some kraft paper, cardboard, or other scrap paper on your work surface then place the styrofoam ball on top of it. Brush a layer of Mod Podge or glue on one side of a styrofoam ball. You can do one entire side or a small section. Only add glue to the area you can work on before it dries.

Sprinkle the Epsom salt over the Mod Podge.

Continue adding glue to the ball and sprinkling the salt over the glue until the entire styrofoam ball is covered. You’ll have an adorable faux snowball. Continue making snowballs until you have the number you’d like for the DIY snowball centerpiece. You can scoop up the Epsom salt that is on the kraft paper and sprinkle it on the ball to avoid waste. When you’re finished, carefully pick up the paper and pour the excess salt back into the bag.

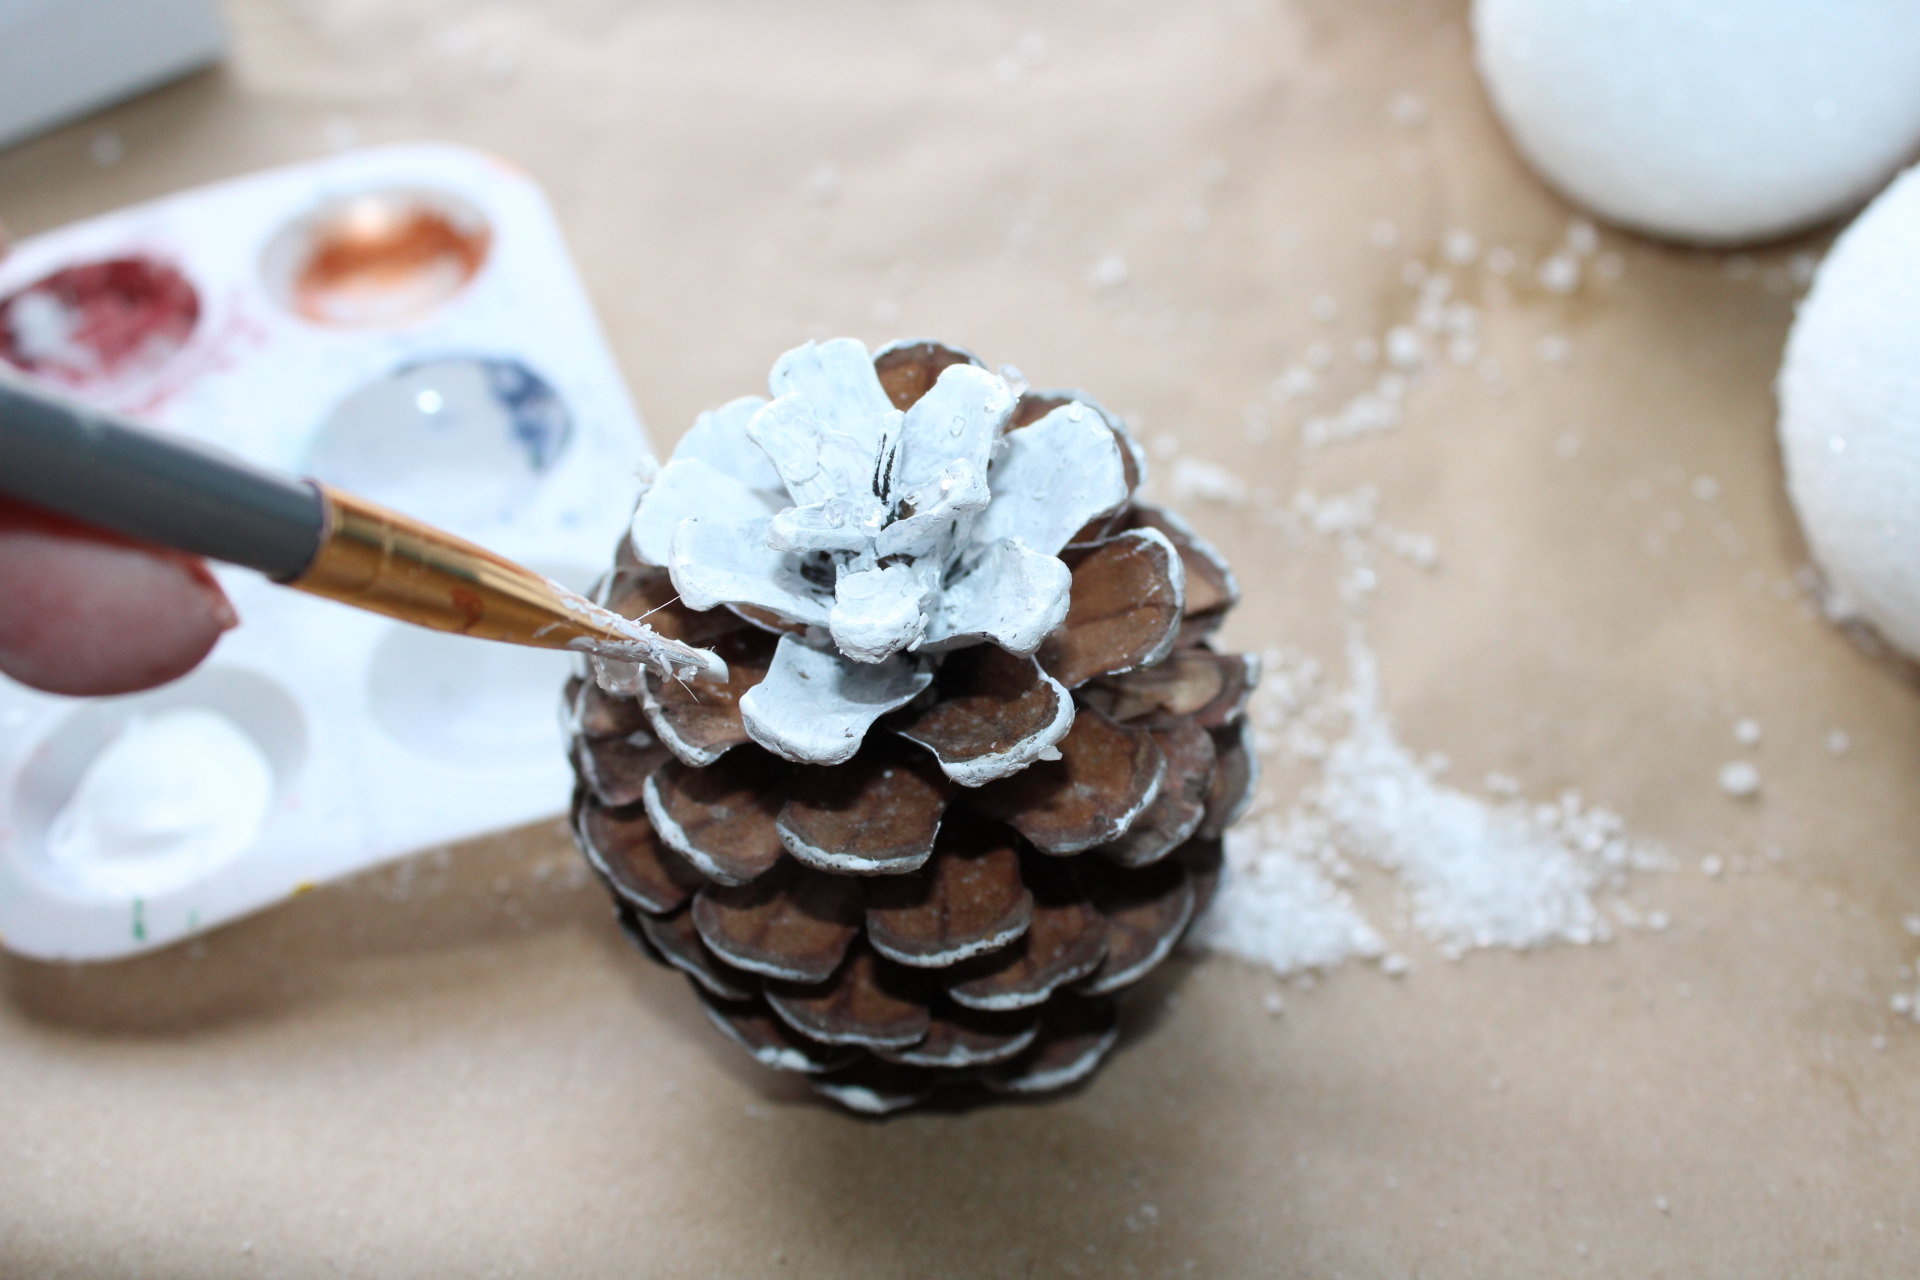
Paint the Pinecones
If you’d like a uniformly white or light-colored centerpiece, you will need to paint the pinecones. It’s absolutely optional as the Epsom salt will lighten the pinecones a little. I had some white pinecones that came from a decorative filler pack and some that were brown, so I painted the brown ones white. You can spray paint them or use acrylic paint. If you use acrylic paint, make sure you paint both sides. Meaning, paint the pinecones while they’re upright, then turn them upside down and paint that side.
Add Epsom Salt to the Pinecones
If your paint is still wet, you can pour the salt on the wet paint, and it will stick without glue. If the paint has already dried, use your paint brush and add Mod Podge to the tops of the little “branches” of the pinecone. Then sprinkle the salt on to the glue. Again, use any excess that’s fallen on to your kraft paper by scooping some up with your fingers or use the paper to pour it back into the bag or on to the ball.

Continue adding glue and salt until you’re happy with the way the pinecone is covered. When you have all of the icicle pinecones you need, do the same with your wicker balls. You can also add Epsom salt to the ornaments if you’d like to. Mine were covered in silver glitter so they didn’t need anything extra.

Place Fairy Lights in the Bowl
Battery-operated fairy lights are better for a centerpiece than the ones that plug in. It’s kind of hard to hide a cable coming out of the bowl! Add batteries to the lights then place the battery pack in the middle of the bowl. Wind the lights around the inside of the bowl, and if you need to, place some transparent tape on the cable to hold it in place.


Add Items to the DIY Snowball Centerpiece
All you have left to do is to add your beautiful snowballs and pinecones to the decorative bowl. Place your larger items in the middle to cover the battery pack.

When you add items, you want to even them out throughout the bowl. I added a snowball and a pinecone in the center to cover the battery pack. After that, begin adding an item to the left, and then the same or a similar sized item on the right.
Continue adding items until your DIY snowball centerpiece is full and you’re happy with the way it looks. Here is what mine looks like at night.

Now here it is with the lights on.
Remember to pin the image below or share this post with the buttons on the left side of the page so you can find it when you’re ready to start your project! Also, follow me on Pinterest for new ideas added weekly! Be sure that you never miss a great tutorial for decor like wreaths, signs and other home decor, free printables, crafts, and other fun posts! Enter your email address below to be notified of new posts! Use the buttons below to follow me on social media for other great content.

Tarah from Grandma’s House DIY also shared a great lighting project this month! Be sure to check out her LED bulbs for her garage that she says she’s infatuated with!

Don’t go yet! There’s more to see!
There’s plenty more to see here on the blog! If you’re looking for something specific, use the search box in the sidebar to look it up. If not, you might enjoy these ideas. Don’t have time to read them all now? That’s ok, just click over to the posts using the pictures and pin them for later. You can also add Life as a LEO Wife to your favorites and check back for new ideas and free printables and SVGs every Wednesday, as well as link parties with tons of shared ideas on Sundays!


Oh this is such a lovely and festive project, its great hopping with you! Happy new year!
Thanks Tarah!
Looks really nice, love that you added the lights! Thanks so much for linking up at the 25 and Done Link Party 2. Shared onto Fb, Pn, and Tw!
Thanks for sharing Dee!
CONGRATS! Your post is FEATURED at the 25 and Done Link Party 3!
Thanks Dee. Sharing on social media!