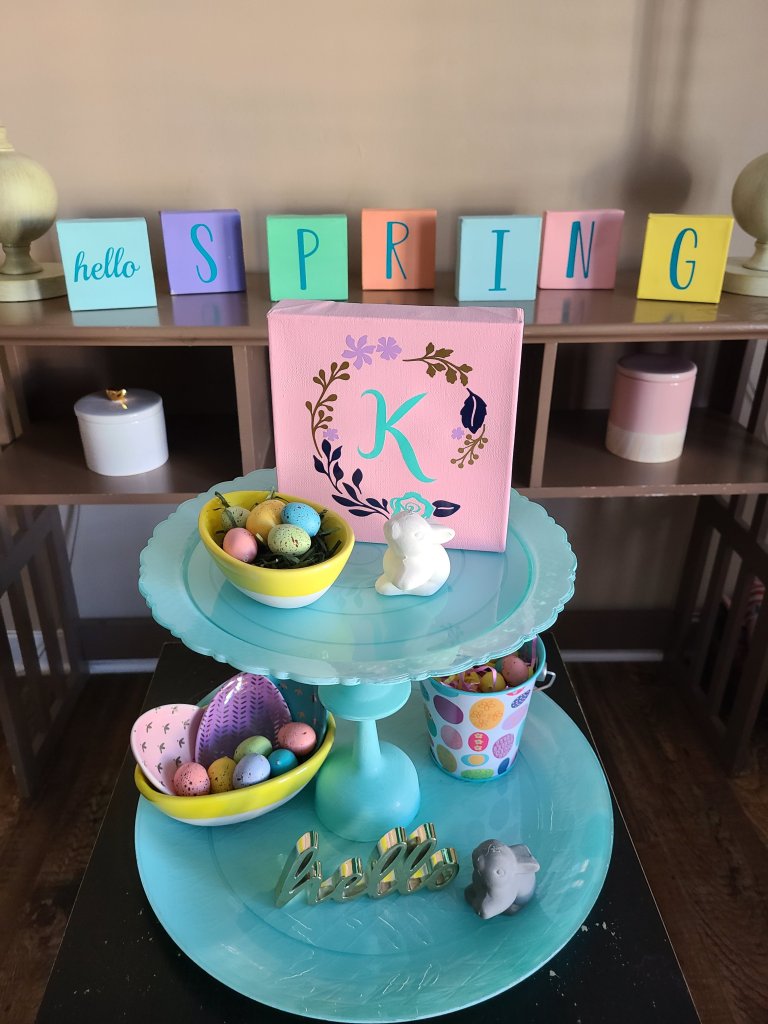
Hello spring! Spring has been with us officially for a little more than a week, but it’s felt like spring where I live for more than a month. I don’t know if that’s “lucky me” or not. I guess if you’re one of my lovely friends that is dealing with 40° then it definitely is! I’m sure that you’re more than ready for spring temps, and I’ve got a project that will get you in a warm weather mood in no time! These “hello” spring decor blocks are easy, affordable, and you can personalize them to fit with your home decor. Win, win, win!

Supplies for spring blocks:
- 4×4 canvases- I used a 9 pack from Michael’s that I bought years ago, but they still have them.
- vinyl or HTV- Regular vinyl would be easier, but I had metallic bronze HTV that was perfect for the cardstock that I used.
- scissors
- weeding tools
- chalk paint
- paint brush
- sandpaper
Guess what?! You don’t have to have a Cricut for this project! WHAT?! YES! You can make your own spring decor block set using the carbon copy method. You can find the tutorial for that in this winter porch leaner tutorial.
- paper
- pencil
- paint pen or
- paint & a small paint brush

I reused this spring blocks set that you see in these pictures to make this project. If you’d like to make that set, you can check out this tutorial. I painted the 4×4 canvas blocks and cut and applied vinyl to them. You can see the instructions at the end of this post if you don’t have a Cricut.
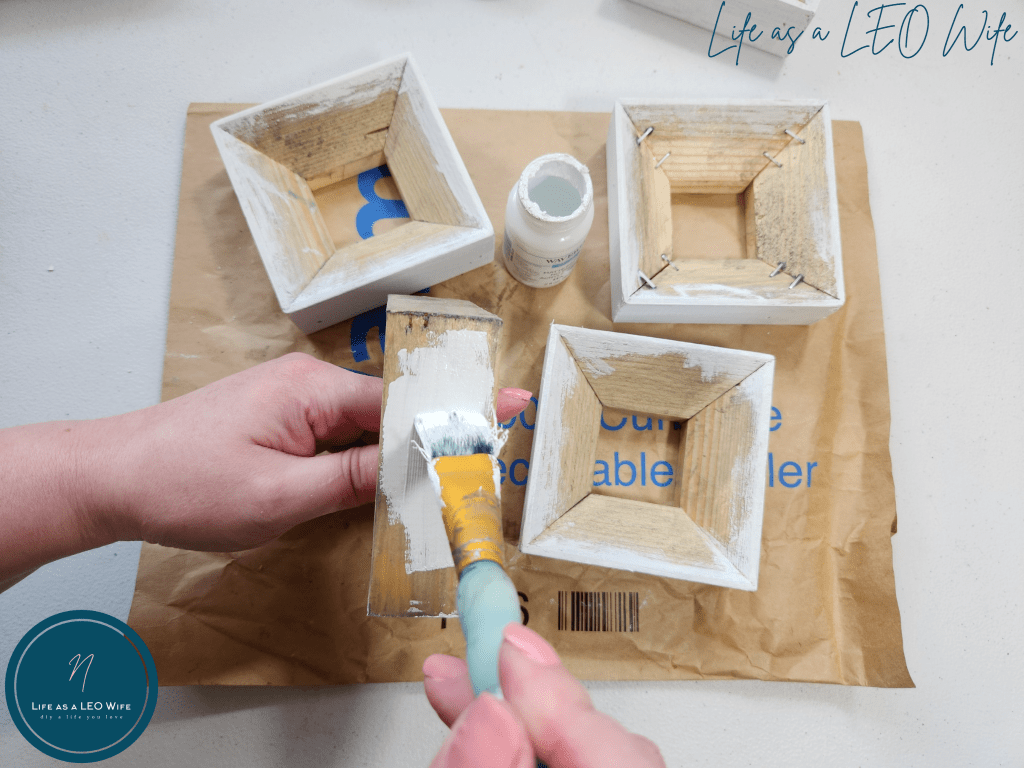
Remove canvas from the wood blocks.
Stretched canvases come with wood frames underneath them. You can always remove them to use the reverse canvas as a framed piece. I know! It’s wonderful!
In this case, the 4×4 blocks have more of a wood block underneath them when you remove the canvas. So, let’s do that.
Use a flathead screwdriver, or another flat object that you can wedge under staples, to pry them up. You can use pliers once you have them up high enough. I couldn’t find my needle-nose pliers, so my wire cutters had to do.


Once all the staples are removed, take the canvas off the frame.

Paint the wood blocks.
My blocks have a wide frame back with a small frame inverting into a “V” on the front. You can either use the back and have a flat front or place the cardstock into the frame side on the front. I did the latter.
I painted the sides and the skinny “frame” on the front of my spring blocks. Paint was my second go ’round because I stained the wood with weathered gray stain first. It wasn’t to my liking, so I painted over it, but if you’d prefer, you can stain them.
Cut spring cardstock to fit the frames.
My wood blocks are 4×4, but the space inside the frames is 3.75×3.75. I marked my ruler to the size of the frame because it was just a bit off and the squares had to be perfect to fit into these little notched “frames.”

Measure your spring cardstock to fit into your frames or to the 4×4 wood backs if you prefer. Once I had one cut, I was able to trace it on the other cardstock.


Use a paper slicer to cut the paper with straight edges.


Attach the cardstock to the wood blocks.
If you’re attaching the cardstock to the back, you can just brush Mod Podge on the paper and place it on the wood. Once it dries, add a layer or two on top of the paper.
Now, there are also a couple of ways to attach your spring cardstock to the blocks if you’re using the skinny frames. One is to place the cardstock inside the frame then lift the corners and squeeze hot glue in the corners and press the cardstock down. I had to lay it down first and center it well because each frame is different and you cannot bump it at all! The edges are uneven, but you can’t tell once the paper is attached.


The second option is to add Quick Grip around the edges of the spring patterned cardstock, then place it on the wood block. I used a combo of both ways, but once I figured out the second way, I was like, oh geez, I’m an idiot, and stuck with the Quick Grip only.
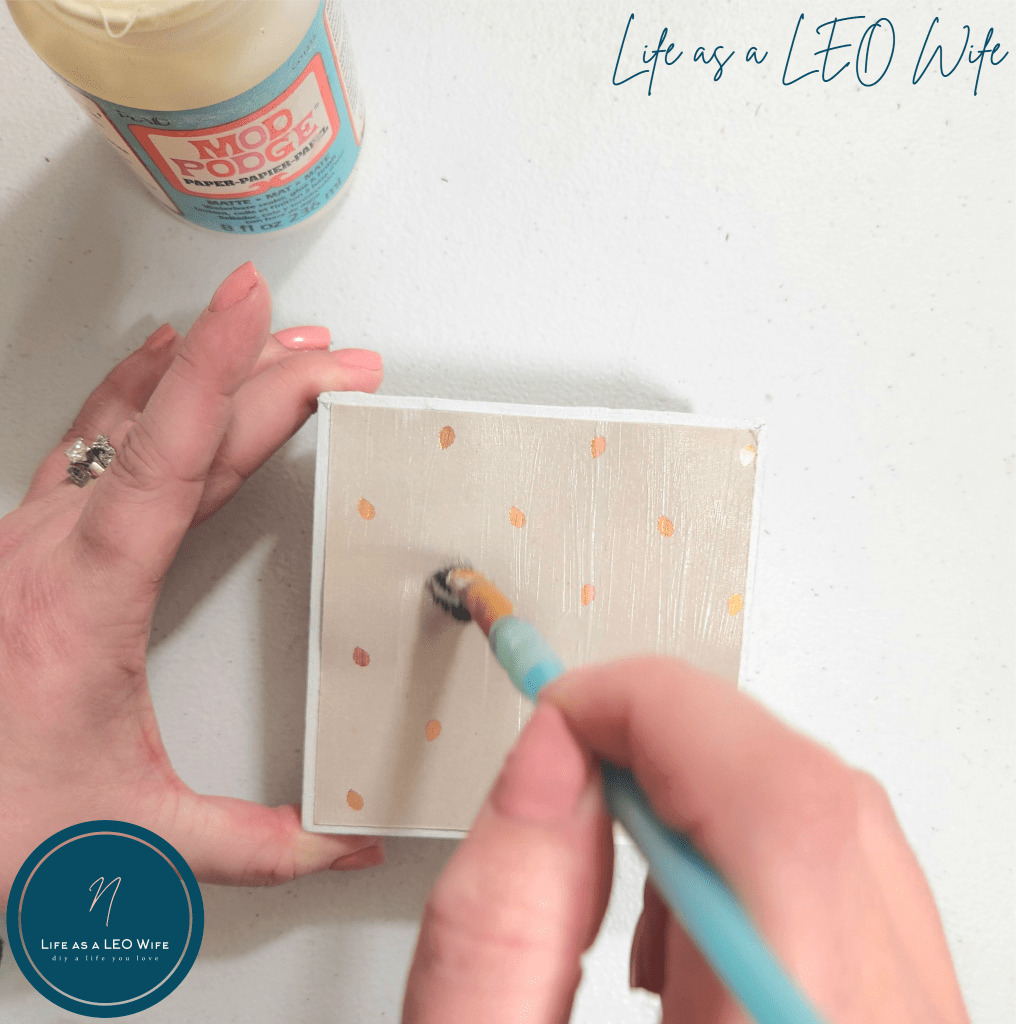
Apply Mod Podge to the cardstock.
To seal my cardstock to the spring blocks, I decided to add a layer of Mod Podge. It also helped me use an iron on cardstock…. Don’t judge me, it had to be done! HA! I didn’t have bronze vinyl on hand, and my HTV was perfect for me second spring patterned cardstock. You can see in the photo why I went back and added Quick Grip to all of my spring blocks. The paper is lifted on the left side a bit, but I was able to fix it later.
For personal use only. All of my free printables & cut files are copyrighted material. Feel free to download these free designs and print them or use on your Cricut projects for your own use at home. They are not for commercial use, not to be placed on items for sale. That helps me keep these printables, SVGs, and PNGs coming to you for free! Another note: you will not my logo overlay on your downloaded design. It is there to keep people from downloading the images straight from Google, or others from stealing them to use on their site. Thanks for understanding! Feel free to share this post for your friends and family to make their own projects with this design!
Download my free “hello spring” PNGs or printables.
I created these “hello spring” letter designs to use on my spring blocks, and I’m sharing them for you to use for free (as always). If you made my family bunny sign, these spring decor blocks will match them.
You can download the design and upload it to Design Space if you’re using your Cricut. Since it’s on one page, you’ll have to slice it into “hello” and then single letters to resize the letters because Design Space doesn’t keep the 8.5×11 paper proportions. You can also just use my already prepared design right here. Just click and cut!
Remember, you don’t have to have a Cricut to make your own spring decor set! Just download the image, and I’ll sum up the instructions in a bit.
Add “hello spring” to your spring decor block set.
Finally, cut your letter using your Cricut. You can use regular vinyl or HTV. It would probably be best to use regular vinyl, but what can I say? I’m a daredevil! The bronze HTV was just too perfect and sitting right in front of me not to use!
Cut the letters apart and weed them.


Place them on the center of the blocks, using transfer tape if you’re using regular vinyl.

Now, watch my magic, tricky application of the HTV to my cardstock! (If you’re a rebel too, you can see how I did this. However, you know paper and heat don’t go together all that safely, so you’re taking your life into your own hands I warn you😉!) I used the tip of my iron and went over each letter for a moment. It didn’t take long to transfer the letter onto the paper. When it did, I used a pick to lift the adhesive paper and removed it from the spring block.


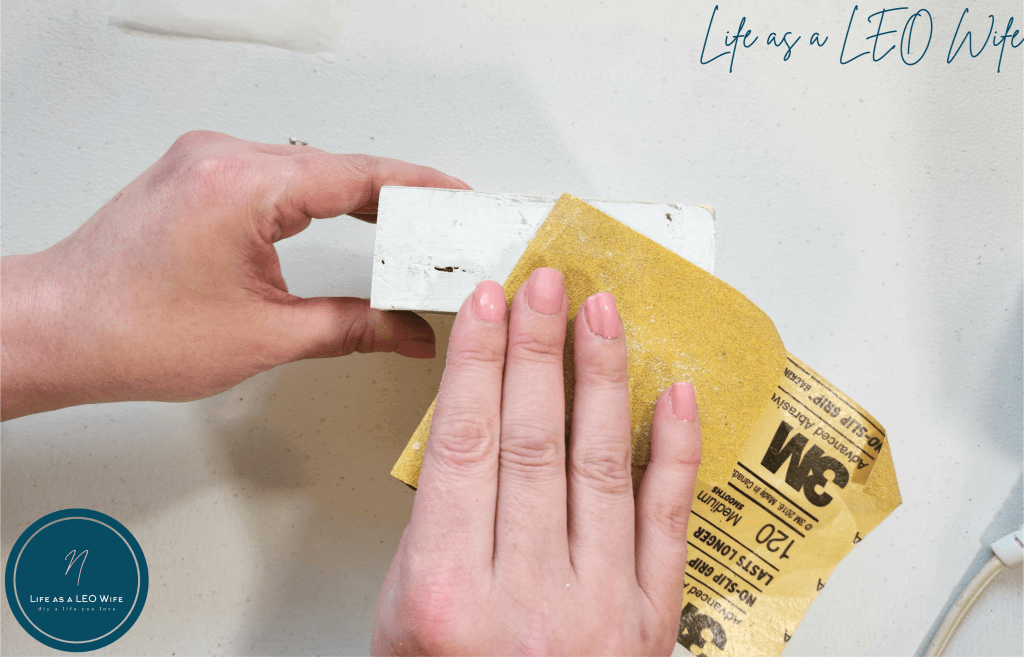
Repeat on the other six of your wood blocks to spell out spring. When you’ve done that, sand strategic locations on your blocks, like the edges and corners, to distress them, giving them that farmhouse look.
Making spring blocks without a Cricut…
Now, I promised you that you don’t need a Cricut to make your own spring decor blocks. You can see the tutorial for transferring individual letters onto a project in my winter porch leaner tutorial. Simply download and print the “hello spring” design on regular 8.5×11 paper. Scribble on the back of the paper, over the letters, with a pencil. Give it a good coat. Then cut the letters and “hello” apart and place them on the center of the blocks, taping them in place with painter’s tape. Trace the letters to transfer them to the blocks, then remove the paper. Finally, go over the design with a paint pen. Voila! Spring blocks without a cutting machine!

That’s it! Your spring decor block set is complete!
What do you think? Aren’t they cute? What’s great is that you can customize them to fit your home perfectly. Since it’s cardstock, you can also change them up year after year if you create a new spring decor theme like I occasionally do!


Remember to pin the image below or share this post with the buttons on the left side of the page so you can find it when you’re ready to start your project! Also, follow me on Pinterest for new ideas added weekly! Be sure that you never miss a great tutorial for decor like wreaths, signs and other home decor, free printables, crafts, and other fun posts! Enter your email address below to be notified of new posts! Use the buttons below to follow me on social media for other great content.

Don’t go yet! There’s more to see!
There’s plenty more to see here on the blog! If you’re looking for something specific, use the search box in the sidebar to look it up. If not, you might enjoy these ideas. Don’t have time to read them all now? That’s ok, just click over to the posts using the pictures and pin them for later. You can also add Life as a LEO Wife to your favorites and check back for new ideas and free printables and SVGs every Wednesday, as well as link parties with tons of shared ideas on Sundays!


These are cute ideas.
Thanks Cindy!
These are so cute Niki. I have a Cricut, but we have a love/hate relationship, so I appreciate when I can find a craft and I do not need to use it. 😉
Thank you! Gotta love the carbon copy method!
Seems like a lot of work. Why not just decorate the canvas?
I do reverse canvases all the time. The wood frame looks so much better and more finished than just a canvas. Mostly because I had already used those canvases as you see at the beginning of the tutorial.