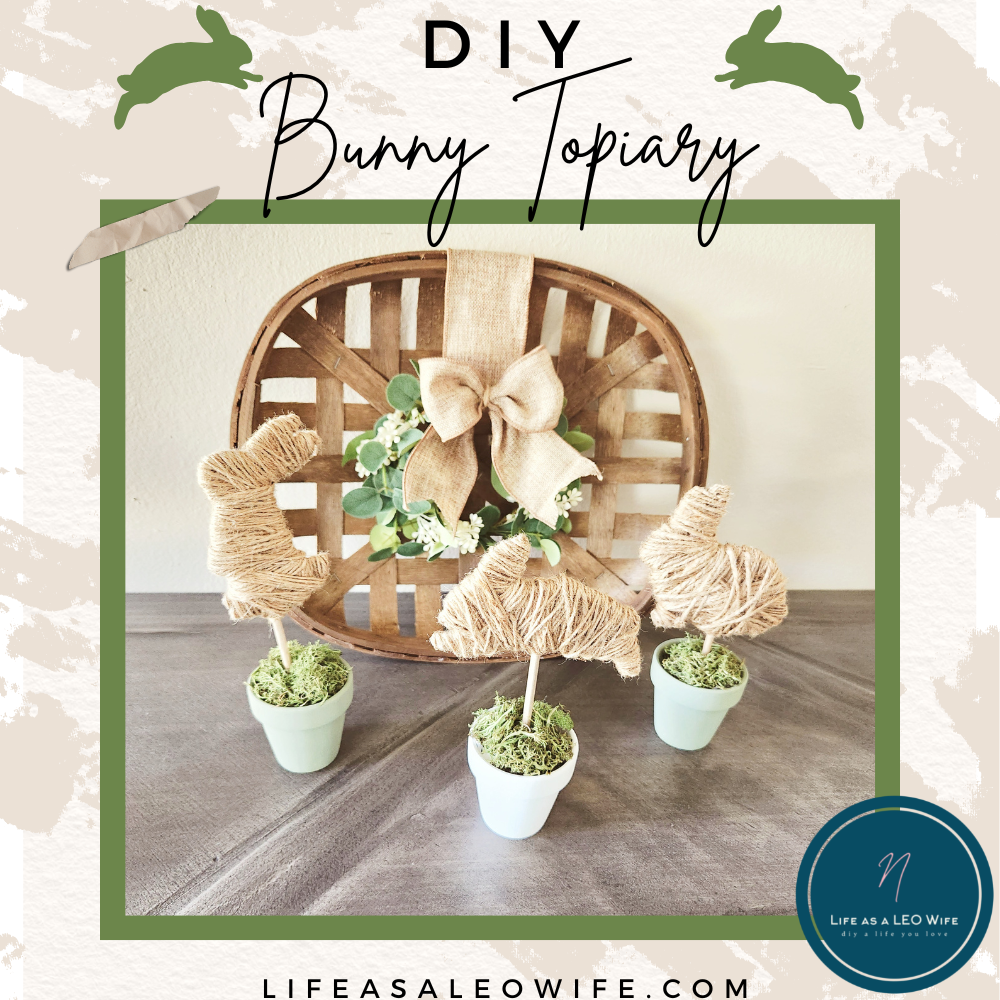
Hello friends! I’ve got a great spring decor project to share with you today. Topiaries are popular in the farmhouse style right now, and I’m a big fan of them. I wanted to put a spring spin on one, and I thought what’s more spring than bunnies? So, I combined the two and made a bunny topiary! Actually, I made three bunny topiaries!
It’s time for our monthly Creative Craft Hop hosted by Sara of Birdz of a Feather. On the third Thursday of the month I join some talented ladies and we all bring you a new craft tutorial. If you’re coming over from Tammy at Patina and Paint, welcome! Wasn’t her Easter craft great?! Stick around after the post, and I’ll send you to the next stop on the hop.
A few years ago I made a large bunny topiary with a bunny garden stake from Dollar Tree. If you come across one, snatch it up! I haven’t been able to find one in two years, so I baby that moss-covered bunny topiary!
Bunny Topiary Supplies:
- small terracotta pots: I used a 3 pack of 4″ pots.
- wood dowels
- twine, yarn, or fabric: I used twine.
- hot glue gun & glue
- moss
- chalk paint: I used white and moss Waverly chalk paint.
- wood stain (optional)
- paint brush
- cardboard
- my bunny templates
- scissors

For personal use only. All of my free printables & cut files are copyrighted material. Feel free to download these free designs and print them or use on your Cricut projects for your own use at home. They are not for commercial use, not to be placed on items for sale. That helps me keep these printables, SVGs, and PNGs coming to you for free! Another note: you will not my logo overlay on your downloaded design. It is there to keep people from downloading the images straight from Google, or others from stealing them to use on their site. Thanks for understanding! Feel free to share this post for your friends and family to make their own projects with this design!
Print my bunny templates.
When I first started thinking about making a bunny topiary, I thought that I would use a pack of wood bunnies from Dollar Tree, but they were much too small. What to do, what to do? I thought back to my Valentine’s Day heart centerpiece using cardboard hearts covered in fabric and twine and knew that would work perfectly.
Since I wanted to make several bunny topiaries I had to decide if I wanted them all to be the same or not. I decided to go with three different bunny shapes.
Download my free bunny template and print them out. I like to use cardstock when I’m going to be tracing the design because it’s so much easier to hold down and trace. Regular paper just slides everywhere and drives me nuts! If you don’t have any, no problem. Just use regular paper and go slow while tracing.
Remember that my logo will not appear on your printed design.
Trace & cut bunnies.
Once you print the template, cut all three of the bunnies out.

Place the bunny on a piece of cardstock and trace it. Any scrap cardboard will work. I used a corrugated shoe box that my son’s dress shoes came in. You can even use a food packaging box for the bunny topiaries.
You can use all three of the bunnies, or just one. It just depends on how many bunny topiaries that you want to make. For each one, you need two of the same bunnies.

Trace the bunny again and cut both of the shapes out.

Paint the terracotta pots.
This is optional as I know that some people like the original color of terracotta. I feel like that color is more appropriate for fall in my home, so I painted mine with chalk paint.
I wanted the set to match, but not be identical so I painted two with Waverly’s moss chalk paint and one with their white. You may be able to see the top of the inner pot when the topiary is put together, so paint the top section of it as well.


Stain & cut a wood dowel to fit the bunny topiary.
Next, prepare the wood dowels to hold the bunnies in the topiary pots by painting or staining them. I used weathered gray stain to match the furniture and other wood pieces in my living room.

The wood dowels are 12″ long which is much too long for small topiaries. You could make a larger bunny topiary with a bigger terracotta pot and enlarged bunnies. However, for these 4″ pots, the dowels will need to be cut down.
Since I made three topiaries with three different bunnies, I wanted them to be different heights. One of the bunnies is standing on his back feet, so he can have the same length dowel as the leaping bunny and still be a different height.
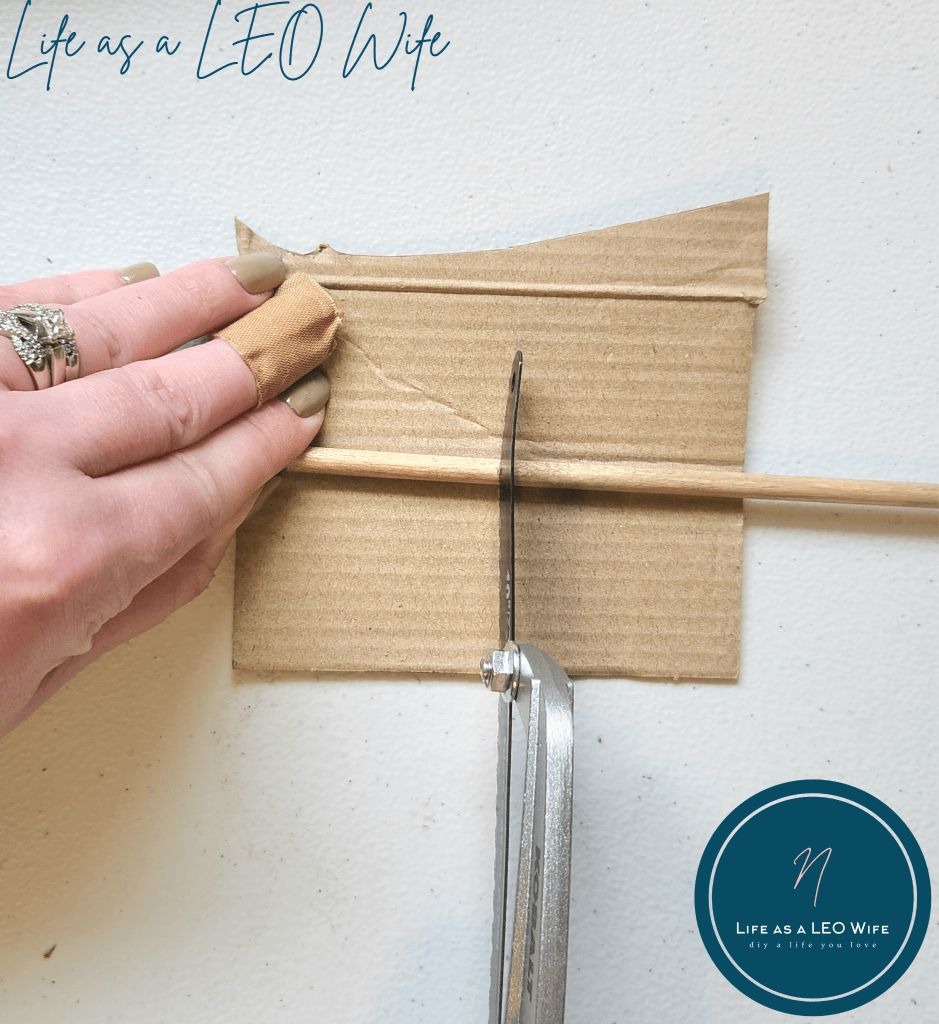
Measure and mark a dowel at 6″. If you’re making a third topiary, mark another dowel at 4″.

Cut the wood dowel(s) with a saw or a miter cutter.
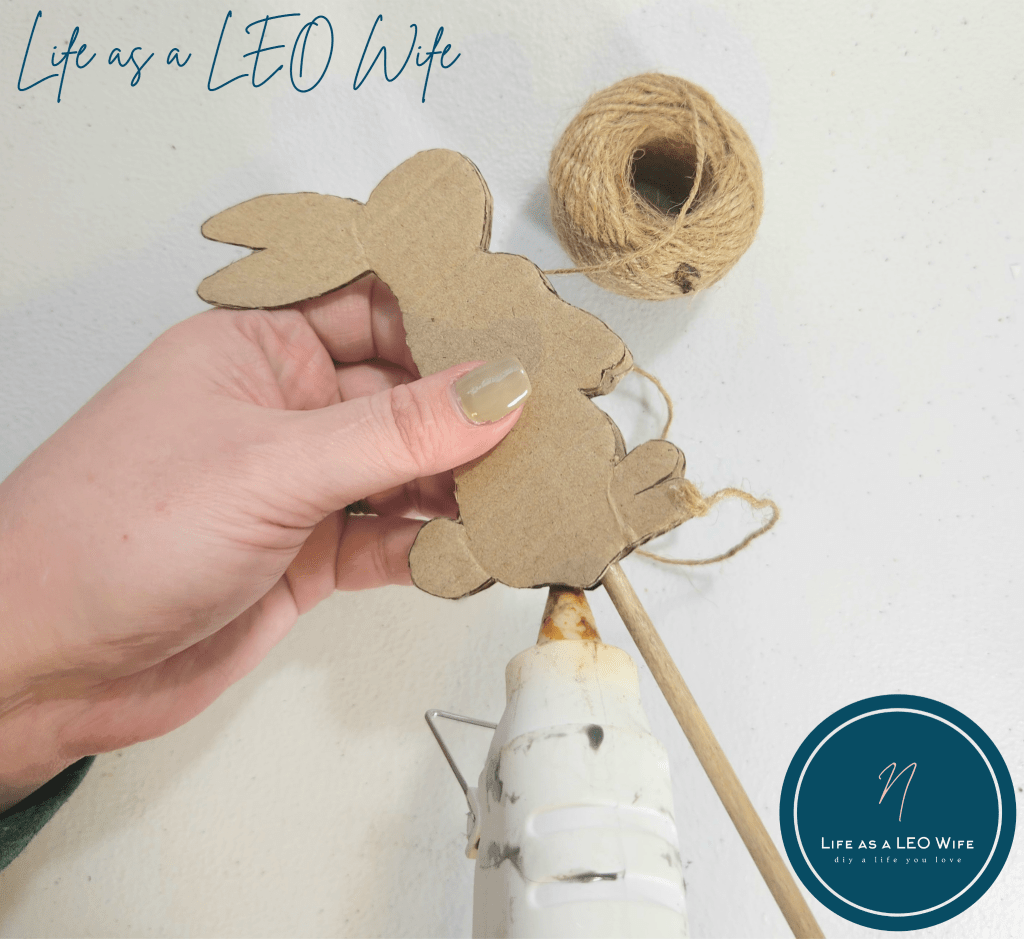
Attach the bunny to the wood dowel.
Now it’s time to start assembling your bunny topiary.
Hot glue two of the same bunnies together, leaving a gap at the bottom for the wood dowel.


Add glue to the end of the wood dowel and place it between the two cardboard bunnies. Then glue the bottom of the bunnies together.
Wrap the bunny with twine.
There are several ways that you can cover the bunny for the topiary. Yarn, fabric, or twine. If you choose fabric, you can see how to do that in my Valentine’s heart centerpiece tutorial. I used twine for my bunny topiaries, and that process is the same for yarn so you can follow the rest of this tutorial.
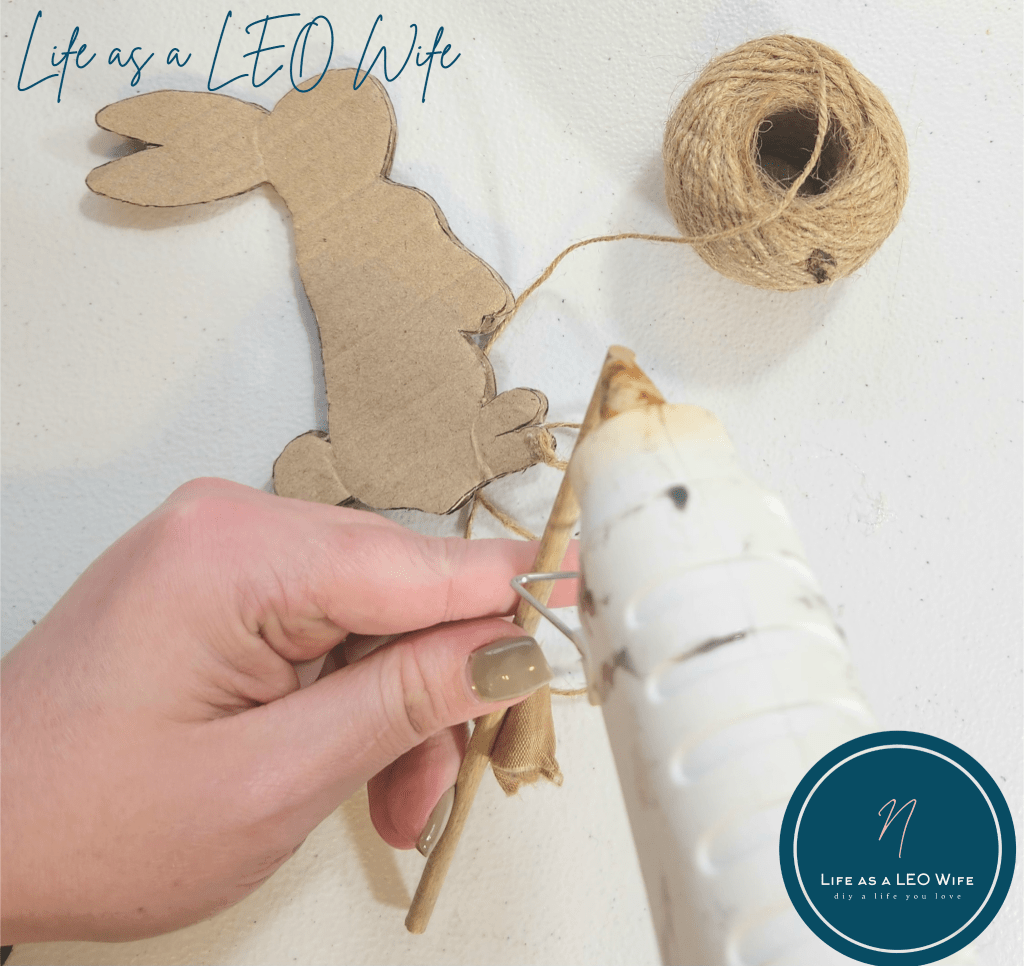
Add a strip of hot glue on the cardboard bunny and place the end of the twine on it.

Begin wrapping the twine around the bunny. You may need to add hot glue to hold the twine for full coverage on the small places, like the ends of the feet and the tips of the ears. You can see how I did that in the video tutorial.

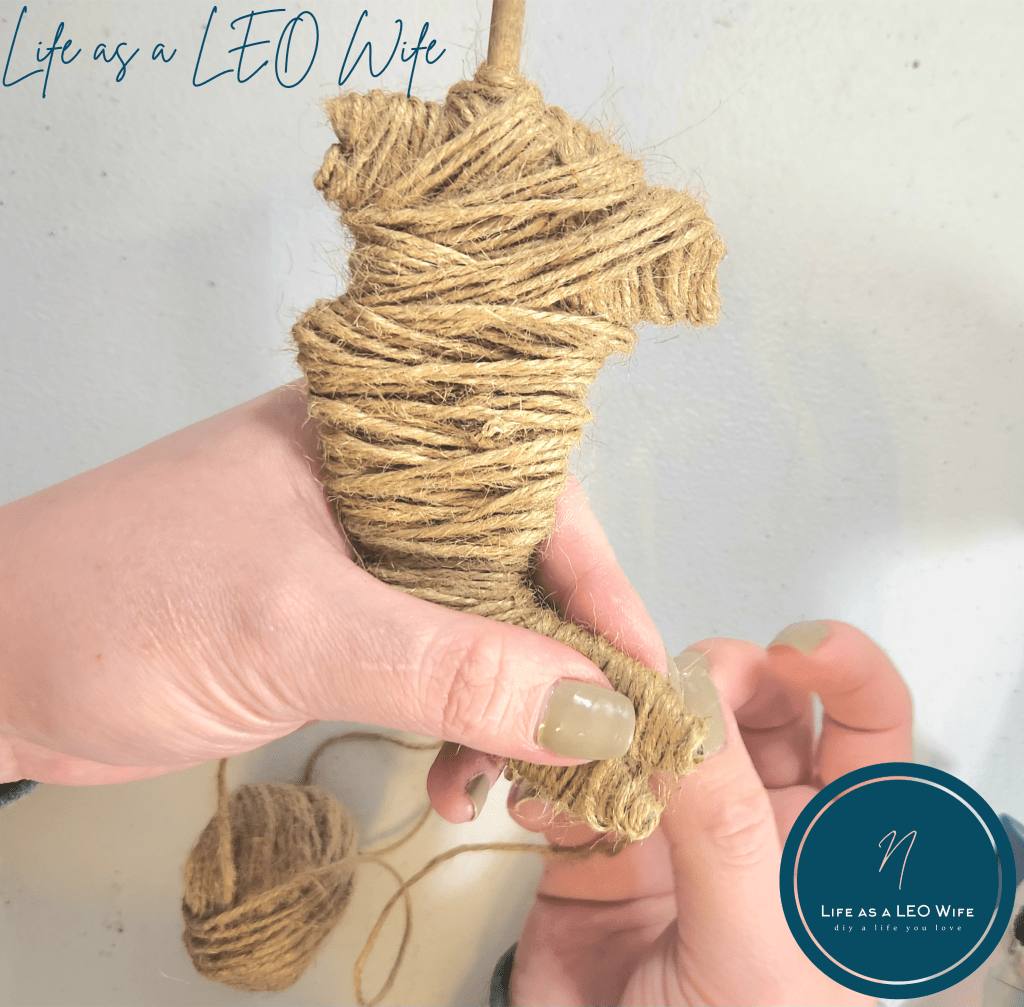
Continue wrapping until the bunny is completely covered. You can make it as thick or thin as you’d like your topiary to be. Once you’re happy with it, cut the twine and glue the end in place.

Assemble the bunny topiary.
Now that all of the pieces of the topiary are complete, it’s time to put it together. Add hot glue or Quick Grip (similar to E6000) to the end of the dowel and place it into the center of the terracotta pot. Hold it there for a minute while it dries.


Next, add something to fill the space around the dowel and stabilize it and so you don’t have to waste a lot of moss filling the pot. Anything will work. I used paper for two and a shipping bag from Amazon in one. Tear the paper or whatever you’re using to fit it on each side. Sorry that the camera focused on the bunny and not the pot!

Finally, add moss on top of the filler, around the dowel.


Bunny Topiary Video Tutorial
Here’s a very quick video tutorial if you have any questions about making your own bunny topiaries. If you need to, you can use the video controls to slow it down at any point if you need to see anything more closely.

Now display your adorable bunny topiaries with pride!
Aren’t these so cute? I love how they turned out!


Wouldn’t it be nice to have an extra $100 for new spring decor or an outfit? Enter to win $100 in our Spring 23 Giveaway between March 14 and April 14!
Remember this is a blog hop, so keep reading and I’ll send you to the next stop on the tour!
Remember to pin the image below or share this post with the buttons on the left side of the page so you can find it when you’re ready to start your project! Also, follow me on Pinterest for new ideas added weekly! Be sure that you never miss a great tutorial for decor like wreaths, signs and other home decor, free printables, crafts, and other fun posts! Enter your email address below to be notified of new posts! Use the buttons below to follow me on social media for other great content.

Creative Craft Hop
Next on our hop is Gail at Purple Hues and Me. She’s sharing a tutorial for making a rope container with a top. I know I can always use another basket or container, and hers is adorable! After you visit her, I hope you’ll check out all of the fabulous projects shared by the lovely ladies participating today!
Peat Pot Easter Basket Gift Ideas
Twisted Rope Container with Top
Egg-cellent DIY Floral Arrangement in 2 Easy Steps
How to Easily Decorate Old Bottles with Paper and Vinyl
How to Decorate a Dollar Tree Bunny Wire Wreath
Don’t go yet! There’s more to see!
There’s plenty more to see here on the blog! If you’re looking for something specific, use the search box in the sidebar to look it up. If not, you might enjoy these ideas. Don’t have time to read them all now? That’s ok, just click over to the posts using the pictures and pin them for later. You can also add Life as a LEO Wife to your favorites and check back for new ideas and free printables and SVGs every Wednesday, as well as link parties with tons of shared ideas on Sundays!


Your farmhouse topiary bunnies turned out great and they look wonderful displayed on your console table!
Thank you! Now I have to work on my ladder shelf.
These are cute. I love the jumping bunny. I’m a huge fan of painted terracotta pots
Thank you Cindy!
Your bunny topiaries are darling–such a cute idea! Blessings, Cecilia @My Thrift Store Addiction
Thank you!
They turned out so cute. Thank you for the tutorial I pinned to create one for myself.
Thank you Terrie!
Your topiaries are adorable Niki! Very clever and they look so cute with your tobacco basket tray! Who knew cardboard could look so good! Such a pretty and fun Spring and Easter decoration~ Thanks for the great tutorial too 🐇
Thank you! Can you believe the tobacco basket was $7?! I snatched it up!
I love your bunny topiaries; the neutral with a pop of green is so beautiful! By the way, great idea to use cardstock to trace (I wish I had thought of that for the project I posted today lol).
Yes! I traced shamrocks last month & the regular paper kept wanting to flip up, especially in the thin areas. Cardstock is so much easier to trace!
Next time, I’m using your tip for sure :)!
This is a wonderful little Spring craft. I thought I was done crafting for Spring but now I want these Bunny topiaries and those Easter Bunny coffee coasters. Pinning and thanks for the ideas.
Thank you Leanna!
Niki, you transformed plain old cardboard and twine into beautiful bunny topiaries! These are so cool and perfect for Easter!
Thank you!
Nikki these are sooooo cute. I love the neutral colors but also think they would be great in pastels too. Thanks so much for sharing and for templates to make them!
Thanks Tammy!
It’s definitely ‘bunny season’ and this is such a cute idea!
Isn’t it?! Thank you!
These are more than just adorable they are a great way to upcycle cardboard at the same time! Such a great project. If only I had some small pots in my craft room stash I would be making my own this weekend.
Thank you! I have so many boxes in my craft room it’s ridiculous lol!
What a cute idea! Love how you wrapped the bunny with twine for a rustic look.
Thanks Carol!
Niki, I am in love with your topiaries! I love bunnies any time of year, and these I would leave out all the time. How clever, pinned!
Thank you! I love the way they turned out. I think I’ll leave them out until May lol!
Niki, these are so darn cute! I am partial to bunnies and love them out year round. Thank you for sharing with Whimsy Home Wednesday. I can certainly see why you would want to leave them out until May!
Thank you! I love them too!