Spring is officially here! Strangely we had a cold snap down here where it dropped to 32-38° for three days after it had been higher than 80° for more than a month! The temperature has climbed back to the high 70s, so I’m sure the flowers will continue to bloom and bunnies will be hopping out to greet us. To celebrate, I made this adorable DIY spring or Easter garland using mostly Dollar Tree supplies to replace my shamrock garland from St. Patrick’s Day. Let’s get into this tutorial!
DIY Spring Garland Supplies:
- twine- You will probably need 2 rolls depending on how many bunnies you want on your spring garland. I made 8 bunnies, so I used a little over a roll and a half of Dollar Tree twine. This package of twine will be more than enough.
- scrap cardboard
- faux carrots from Dollar Tree- I used 2 Dollar Tree spring carrot garlands, but I think they sell them individually as well. If you can’t make it to DT, this pack of foam carrots from Amazon would work and they already have a twine hanger.
- wood beads (optional)- I used 20mm from Amazon. Dollar Tree does sell them now.
- hot glue gun & glue
- orange burlap (optional)- I got mine from Walmart last year.
- scissors
- leaves from faux flowers- Baby’s breath (like I used in the carrot wreath) or these fake greenery bushes would work , but I couldn’t find mine, so I used dark green leaves from some kind of flower from Michael’s. I don’t know what it was, but the leaves look very real.

Remove the carrots from the Dollar Tree spring carrot garland.
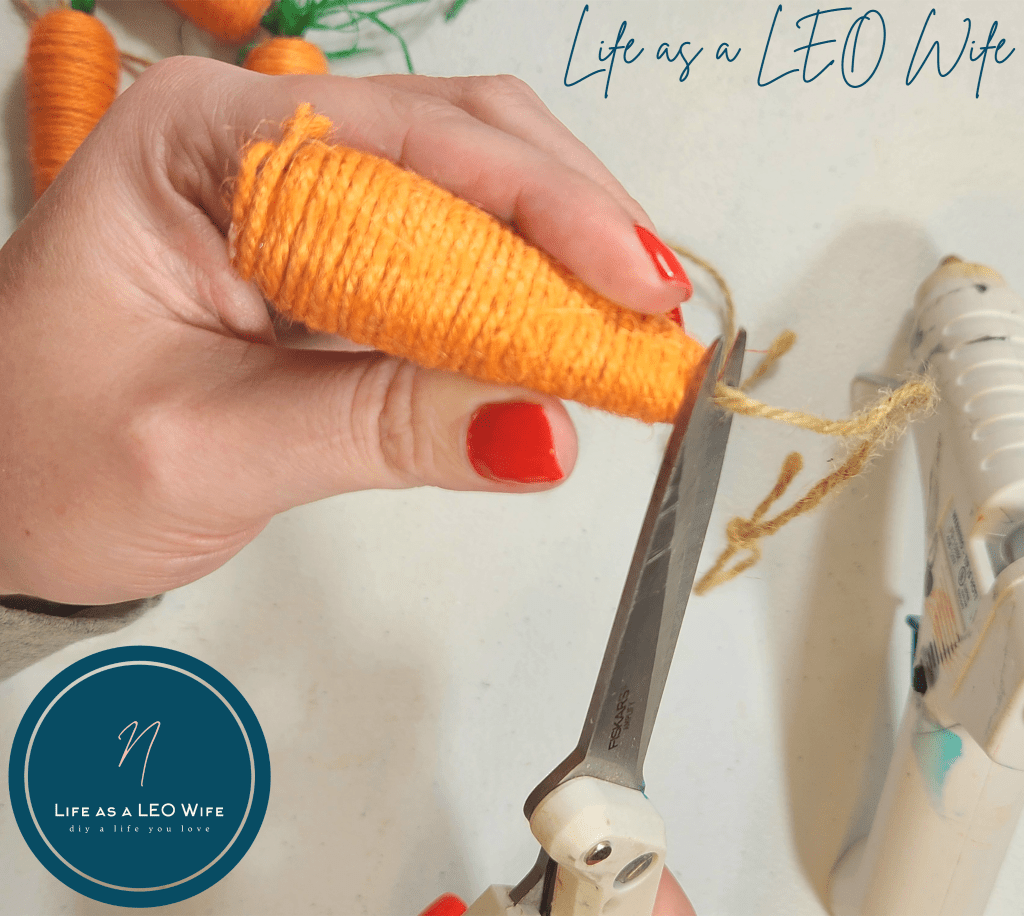
First, pull on the green raffia leaves and they will come out along with the top piece of twine. Then cut the twine at the bottom right up against the orange twine. If the orange twine starts to come loose, just glue it back down. You can leave the carrots the way they are, but they look much better after the makeover!

Zhuzh up the faux carrots.
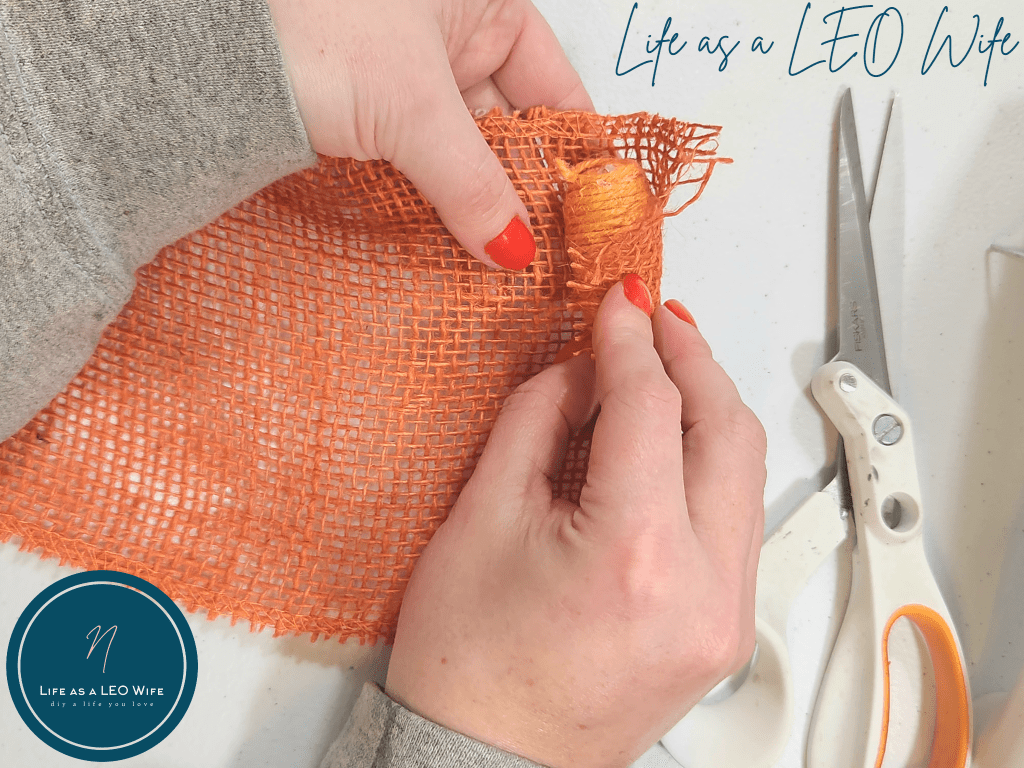
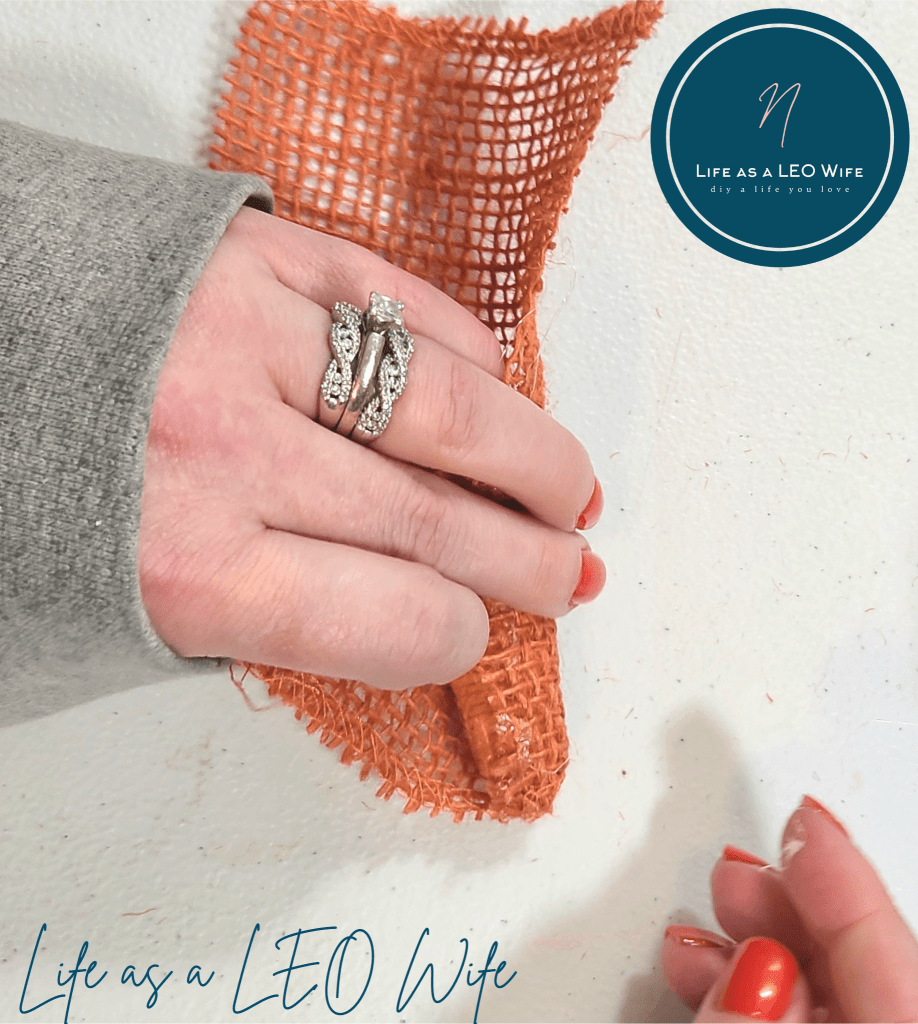
Next, wrap them in orange burlap. I laid out the burlap, rolled it around the carrot and then cut where I needed to.

Add glue to the end of the carrot. After I made this particular carrot, I moved to placing it where the sewn edge was a little bit higher than the top. You can see that in the video tutorial.

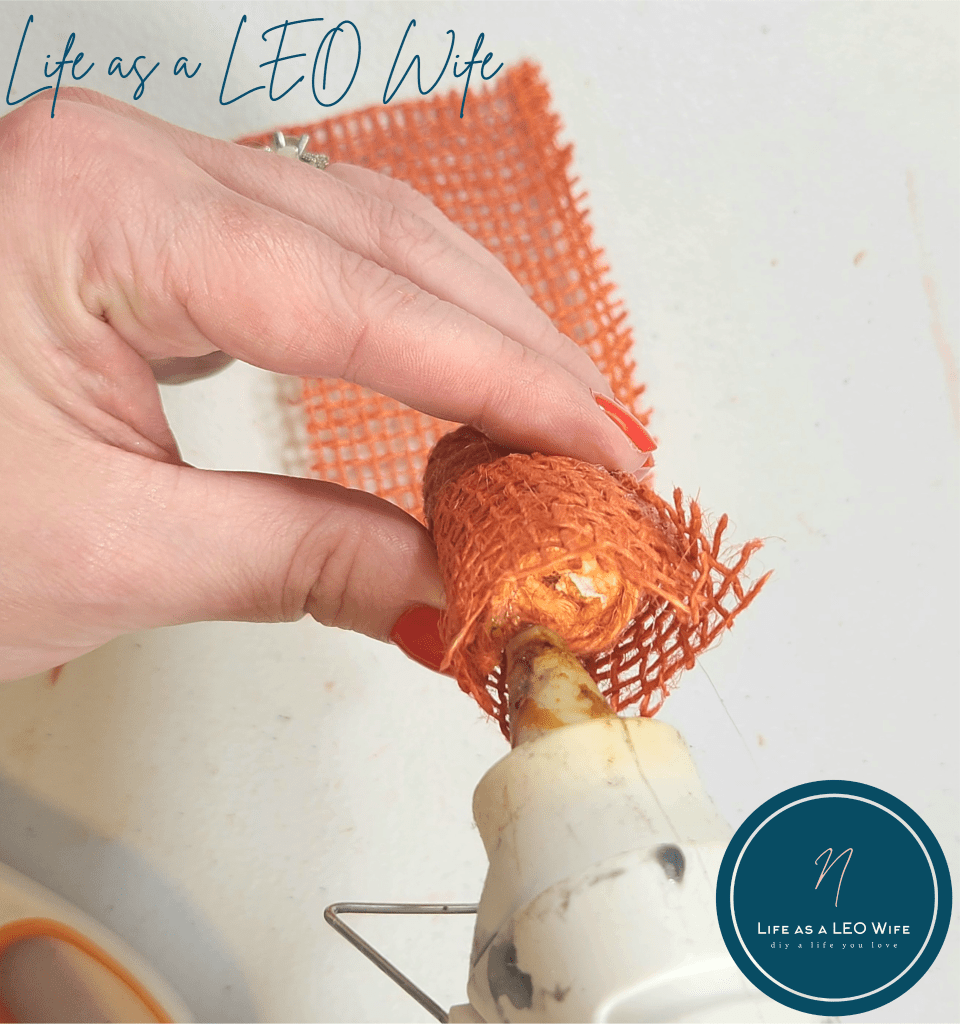
Next pinch the burlap around the end of the carrot on the hot glue, then cut off the excess.


Glue down the rest of the burlap. I wrapped it like a gift, pushing the “L” side up and cutting of the excess, then gluing the rest down.
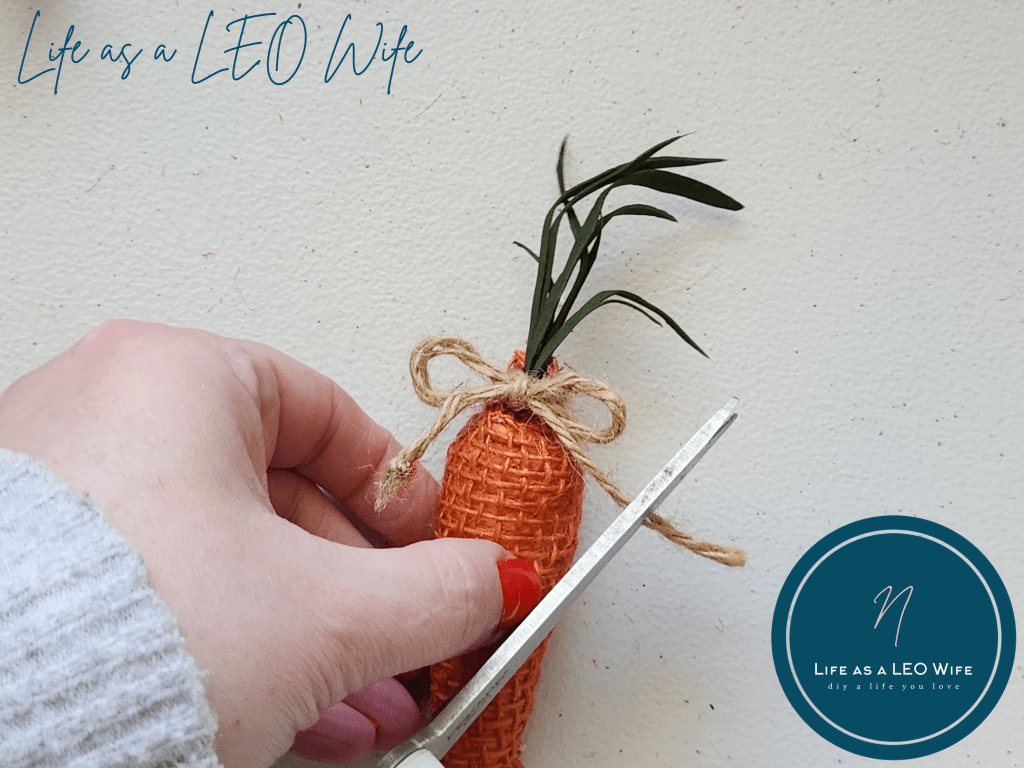
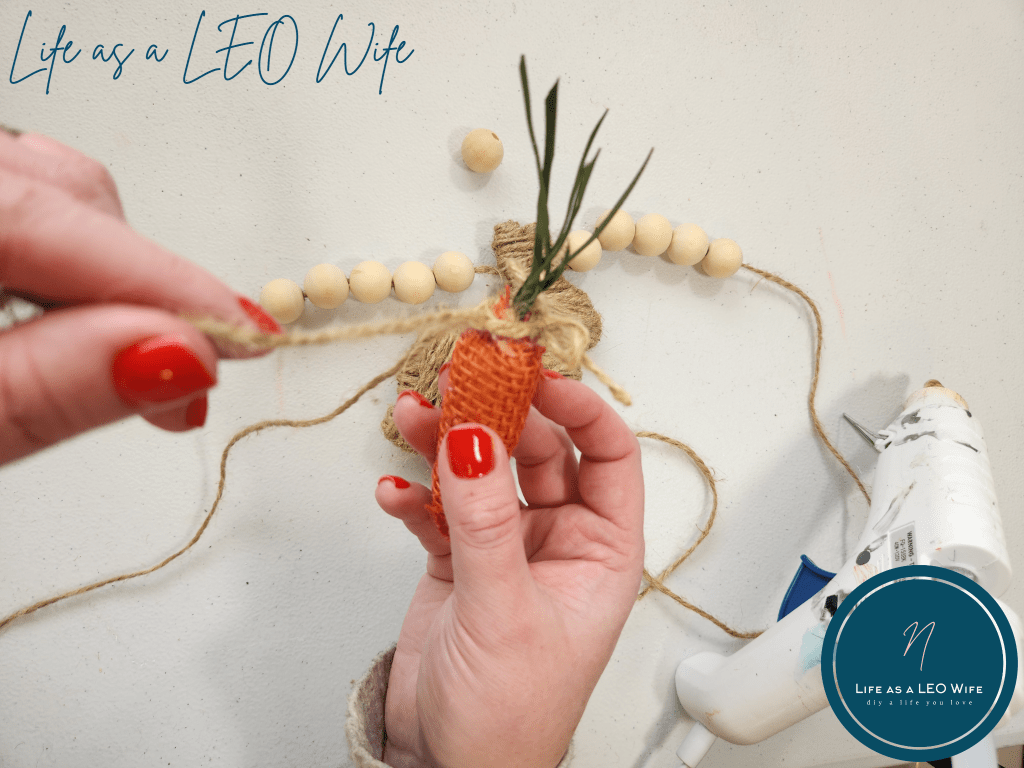
In this first carrot I didn’t leave any burlap sticking above the top, but on the rest I did. That allowed me to tie a twine bow around it, cinching it closed. I was then able to hang the carrots on the Easter garland using it.
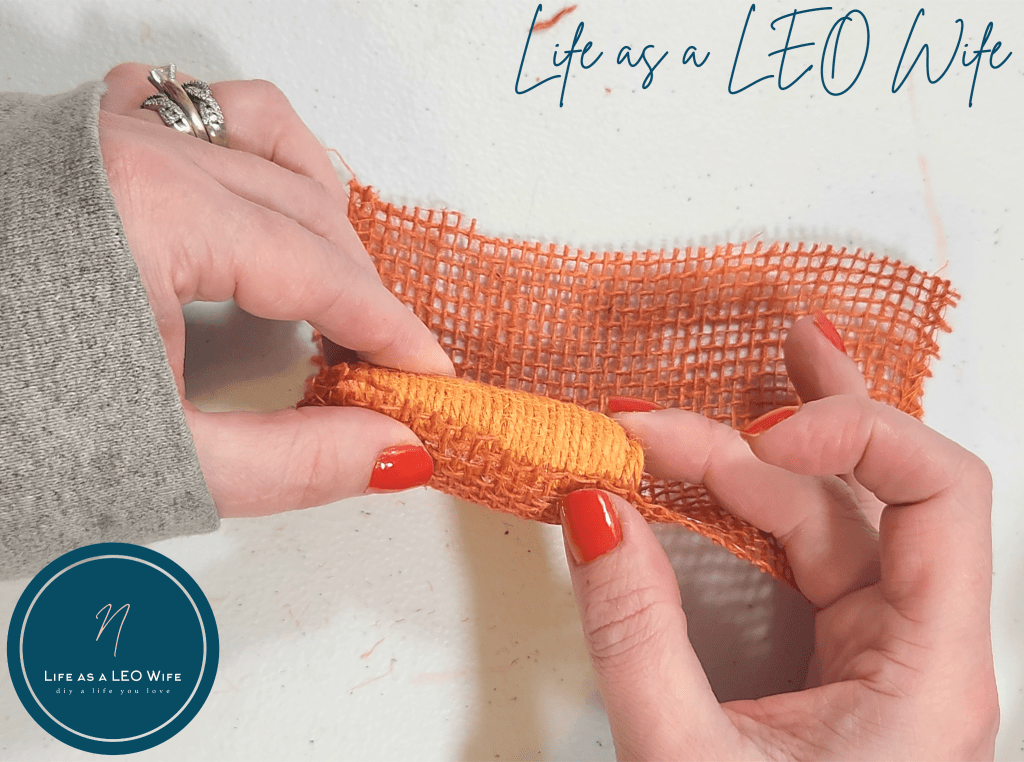


Add a little glue around the outside edges of the top and press the burlap down a little. Leave a small amount above the carrot.
Create leaves for the tops of the carrots.
I used a velvety finished leaf from a faux floral bush. It looks similar to dandelions, but not exactly.
Cut slim strips in the leaf. Do not cut all the way to the bottom.


Roll the base of the leaf into a thin strip and insert it into the top of a carrot with a sharp tool. I used a Cricut hook for weeding. This was the first carrot I made, so it doesn’t have any extra burlap at the top. The rest of my carrots do. It just looks better.

Tie a piece of twine (I used the pieces I cut off of the DT carrot garland, no waste!) around the top of the carrot, cinching it closed. Finish with a bow.

For personal use only. All of my free printables & cut files are copyrighted material. Feel free to download these free designs and print them or use on your Cricut projects for your own use at home. They are not for commercial use, not to be placed on items for sale. That helps me keep these printables, SVGs, and PNGs coming to you for free! Another note: you will not my logo overlay on your downloaded design. It is there to keep people from downloading the images straight from Google, or others from stealing them to use on their site. Thanks for understanding! Feel free to share this post for your friends and family to make their own projects with this design!
Cut bunny shapes to add to the DIY spring garland.
When I first started this project, I started using Dollar Tree bunnies with pompoms on the butts. They’re small and come in a 12 pack. Then my family and I agreed it would look better with the bunnies that I used in my bunny topiaries. Who the heck am I kidding. When I say, “when I started…” I really mean I made the entire garland then took it apart! It looked odd that the bunnies, created to look like they’re standing on hind legs, were the same height as the carrots.

So, back at the beginning, I traced my bunny template onto cardboard and cut them out, sniffling as I went… Just kidding. No crying, just getting on to myself about finishing a project before really taking a good look at it when it was half done!
Download my bunny template, then trace them on cardboard and cut them out like I did. You can use whichever bunny you’d like. I used the sitting one. Scrap cardboard from boxes will do perfectly for this project.


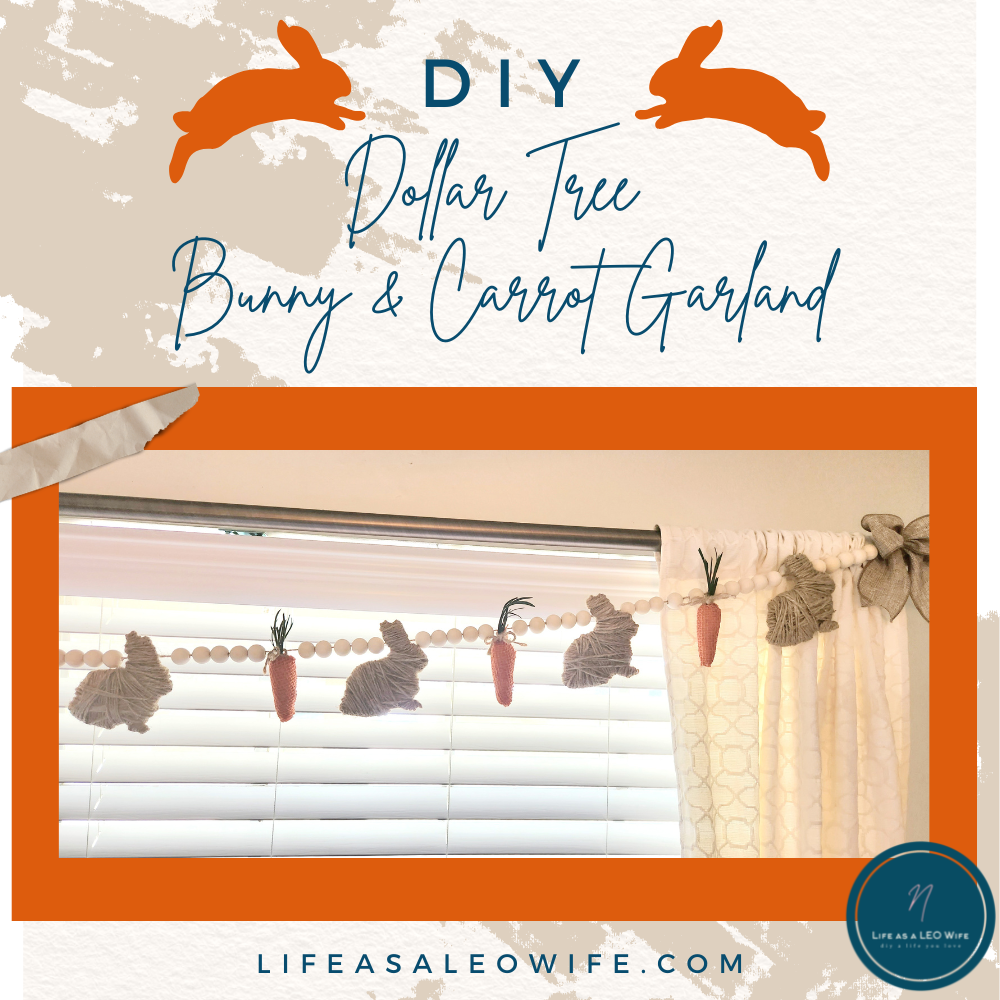
I cut eight bunnies, and they, along with nine carrots, made a 12′ DIY spring garland.
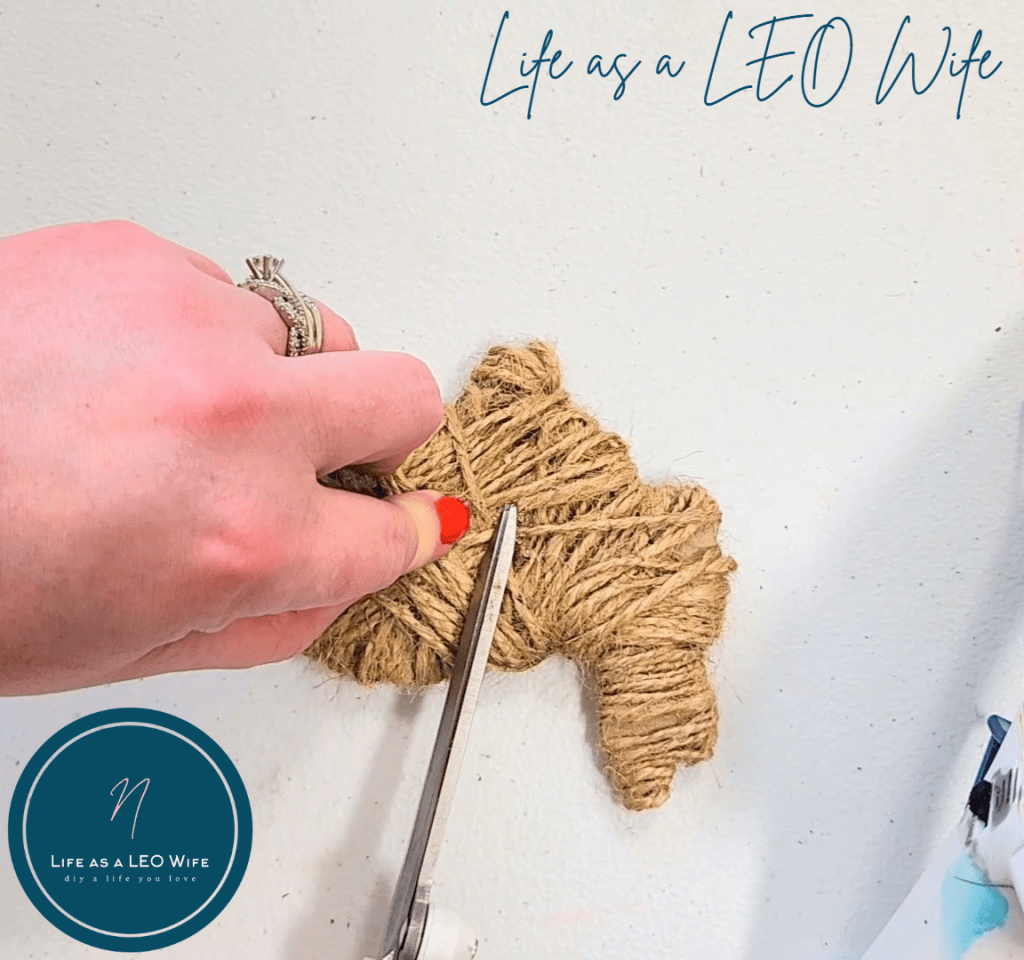
Wrap the bunnies in twine.
First add glue to the cardboard bunny and place the twine on it. I usually add the glue below the head. Begin wrapping twine around the bunny. In some places, like the tips of the ears and feet, you may need to add hot glue to hold the twine down so it doesn’t slip off.


Continue wrapping until you’re happy with the coverage, then glue the twine down and cut off the excess.

Begin assembling the spring & Easter garland.
Yay! Now all of your pieces are ready to add to the spring garland (can you believe everything so far came from Dollar Tree?!)
Roll out about 13-15′ of twine. How much you need will depend on the length of your DIY spring garland. I hung mine across a 12′ window, so I used about 15′ for safety.
String on wood beads. I used five beads at the beginning and end of the garland, then five after each carrot and bunny.

Next add a twine bunny. Pass the twine garland under one of the rounds of twine at the base of the ears and slide the bunny to meet the beads.

To keep the bunnies straight when you hold up the garland, you can add a dot of glue on the right and left side of the twine garland and press it down. After that, hold up the twine to make sure the bunny hangs straight.


Add five more beads.
The next addition to your super cute DIY spring garland will be your fancied up carrot. Slide the twine under the twine on the carrot and push it down to meet the beads. Sometimes I had a difficult time and I had already glued the twine bow down, I would use the Cricut weeding tool to grab the garland twine and pull it through. On the ones that aren’t glued, I would just tie it around the garland.


Add five more beads and then continue the pattern until you’ve finished you’ve added all of your carrots and bunnies.
Make & add a bow.
Finally, make a simple two loop bow to add to each end of the Easter wreath. I used a khaki 2.5″ linen ribbon. Secure it with a pipe cleaner or wire and leave enough to secure it to the garland. Cover the wire with a piece of twine. Again going zero waste, I used part of the Dollar Tree carrot garland that I cut off from the carrots.


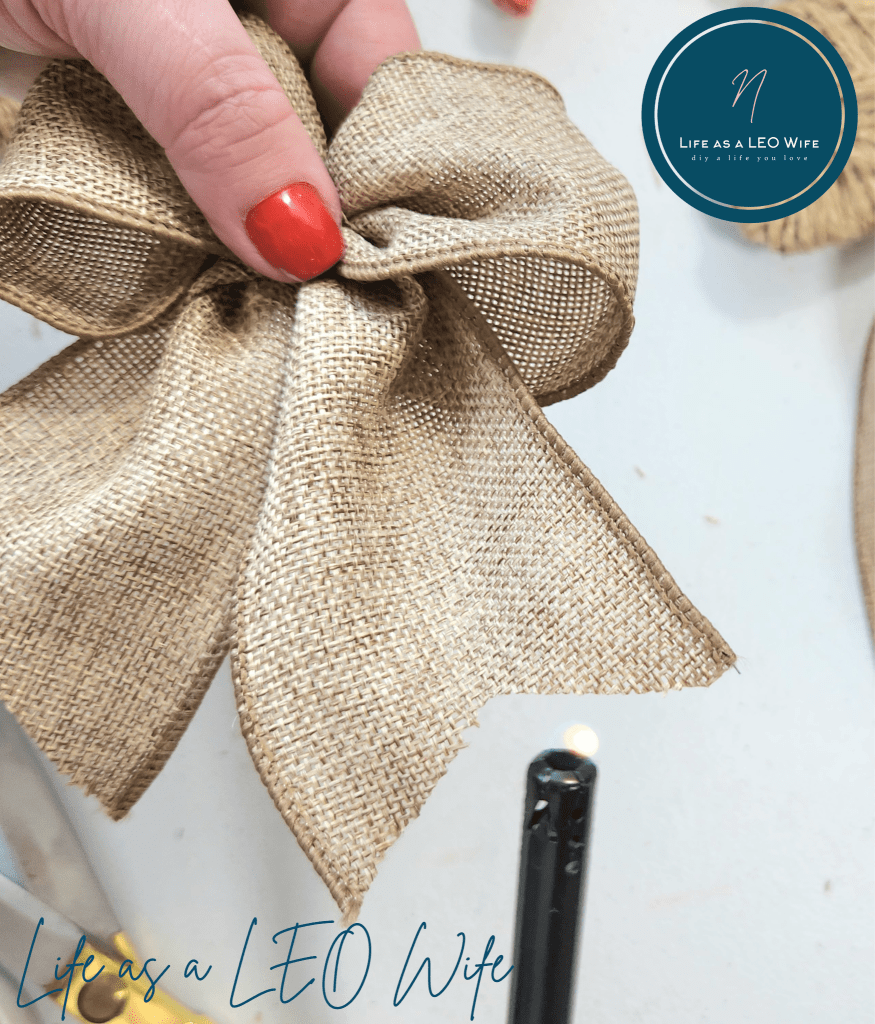
Attach the bow to the spring garland, and c’est fini!

DIY Spring or Easter Video Tutorial
Shop this post:


Hang your spring garland with pride!
I really love the way this garland turned out using Dollar Tree items! I feel like I can leave this garland up past Easter through the end of April. What do you think?

Yes, I know that there are two carrots together in two places in the center of my DIY spring garland. I saw one set of them when I hung it and was like, “Ho-ly crap. No Way! Not again!” Maybe another choice word or two thrown in. I was out of twine and needed that extra length. My solution was to take it halfway apart and add another place with two carrots, so that the four would be in the center of the Easter garland. The best I could do in a pinch. We’ll see if I take it apart when I get more twine. Probably not, but I am a perfectionist so you never know!


Remember to pin the image below or share this post with the buttons on the left side of the page so you can find it when you’re ready to start your project! Also, follow me on Pinterest for new ideas added weekly! Be sure that you never miss a great tutorial for decor like wreaths, signs and other home decor, free printables, crafts, and other fun posts! Enter your email address below to be notified of new posts! Use the buttons below to follow me on social media for other great content.

Don’t go yet! There’s more to see!
There’s plenty more to see here on the blog! If you’re looking for something specific, use the search box in the sidebar to look it up. If not, you might enjoy these ideas. Don’t have time to read them all now? That’s ok, just click over to the posts using the pictures and pin them for later. You can also add Life as a LEO Wife to your favorites and check back for new ideas and free printables and SVGs every Wednesday, as well as link parties with tons of shared ideas on Sundays!


Thank you for sharing such an amazing idea!
Sending hugs and more hugs to you
XO Daniela
Thanks Danila! Hugs back!