Spring is definitely here in the deep, deep south! It’s been around 80 for a few weeks now (though the weather app is predicting a dip into the 30s over the weekend, WHAT?!), so it’s way past time that I get to decorating for it. Today is March 10th, so it’s time for our monthly blog hop, Under $10 on the 10th. For this hop, I gather with several lovely ladies to come up with a project that can be made for under $10. This month we are sharing spring DIYs with you. My contribution is this adorable buffalo check Easter bunny door hanger! Let’s get started!


Supplies for an Easter Door Hanger: (all from Dollar Tree)
- 2 wood eggs
- bunny bursting from egg sign
- acrylic paint- I used white, light pink, Tiffay blue, teal, and black.
- paint brushes
- painter’s tape
- moss- I used preserved moss, but Spanish moss from DT will work.
- hot glue
- Easter acrylic vase or small pail
- faux flowers

Paint the Bunny
For this project it’s easier if you use the back of the bunny sign. However, if you like the front of the bunny as is, you can use it, just remove the burlap “happy” sign. I didn’t like how cheap the painting looked, so I painted the back.
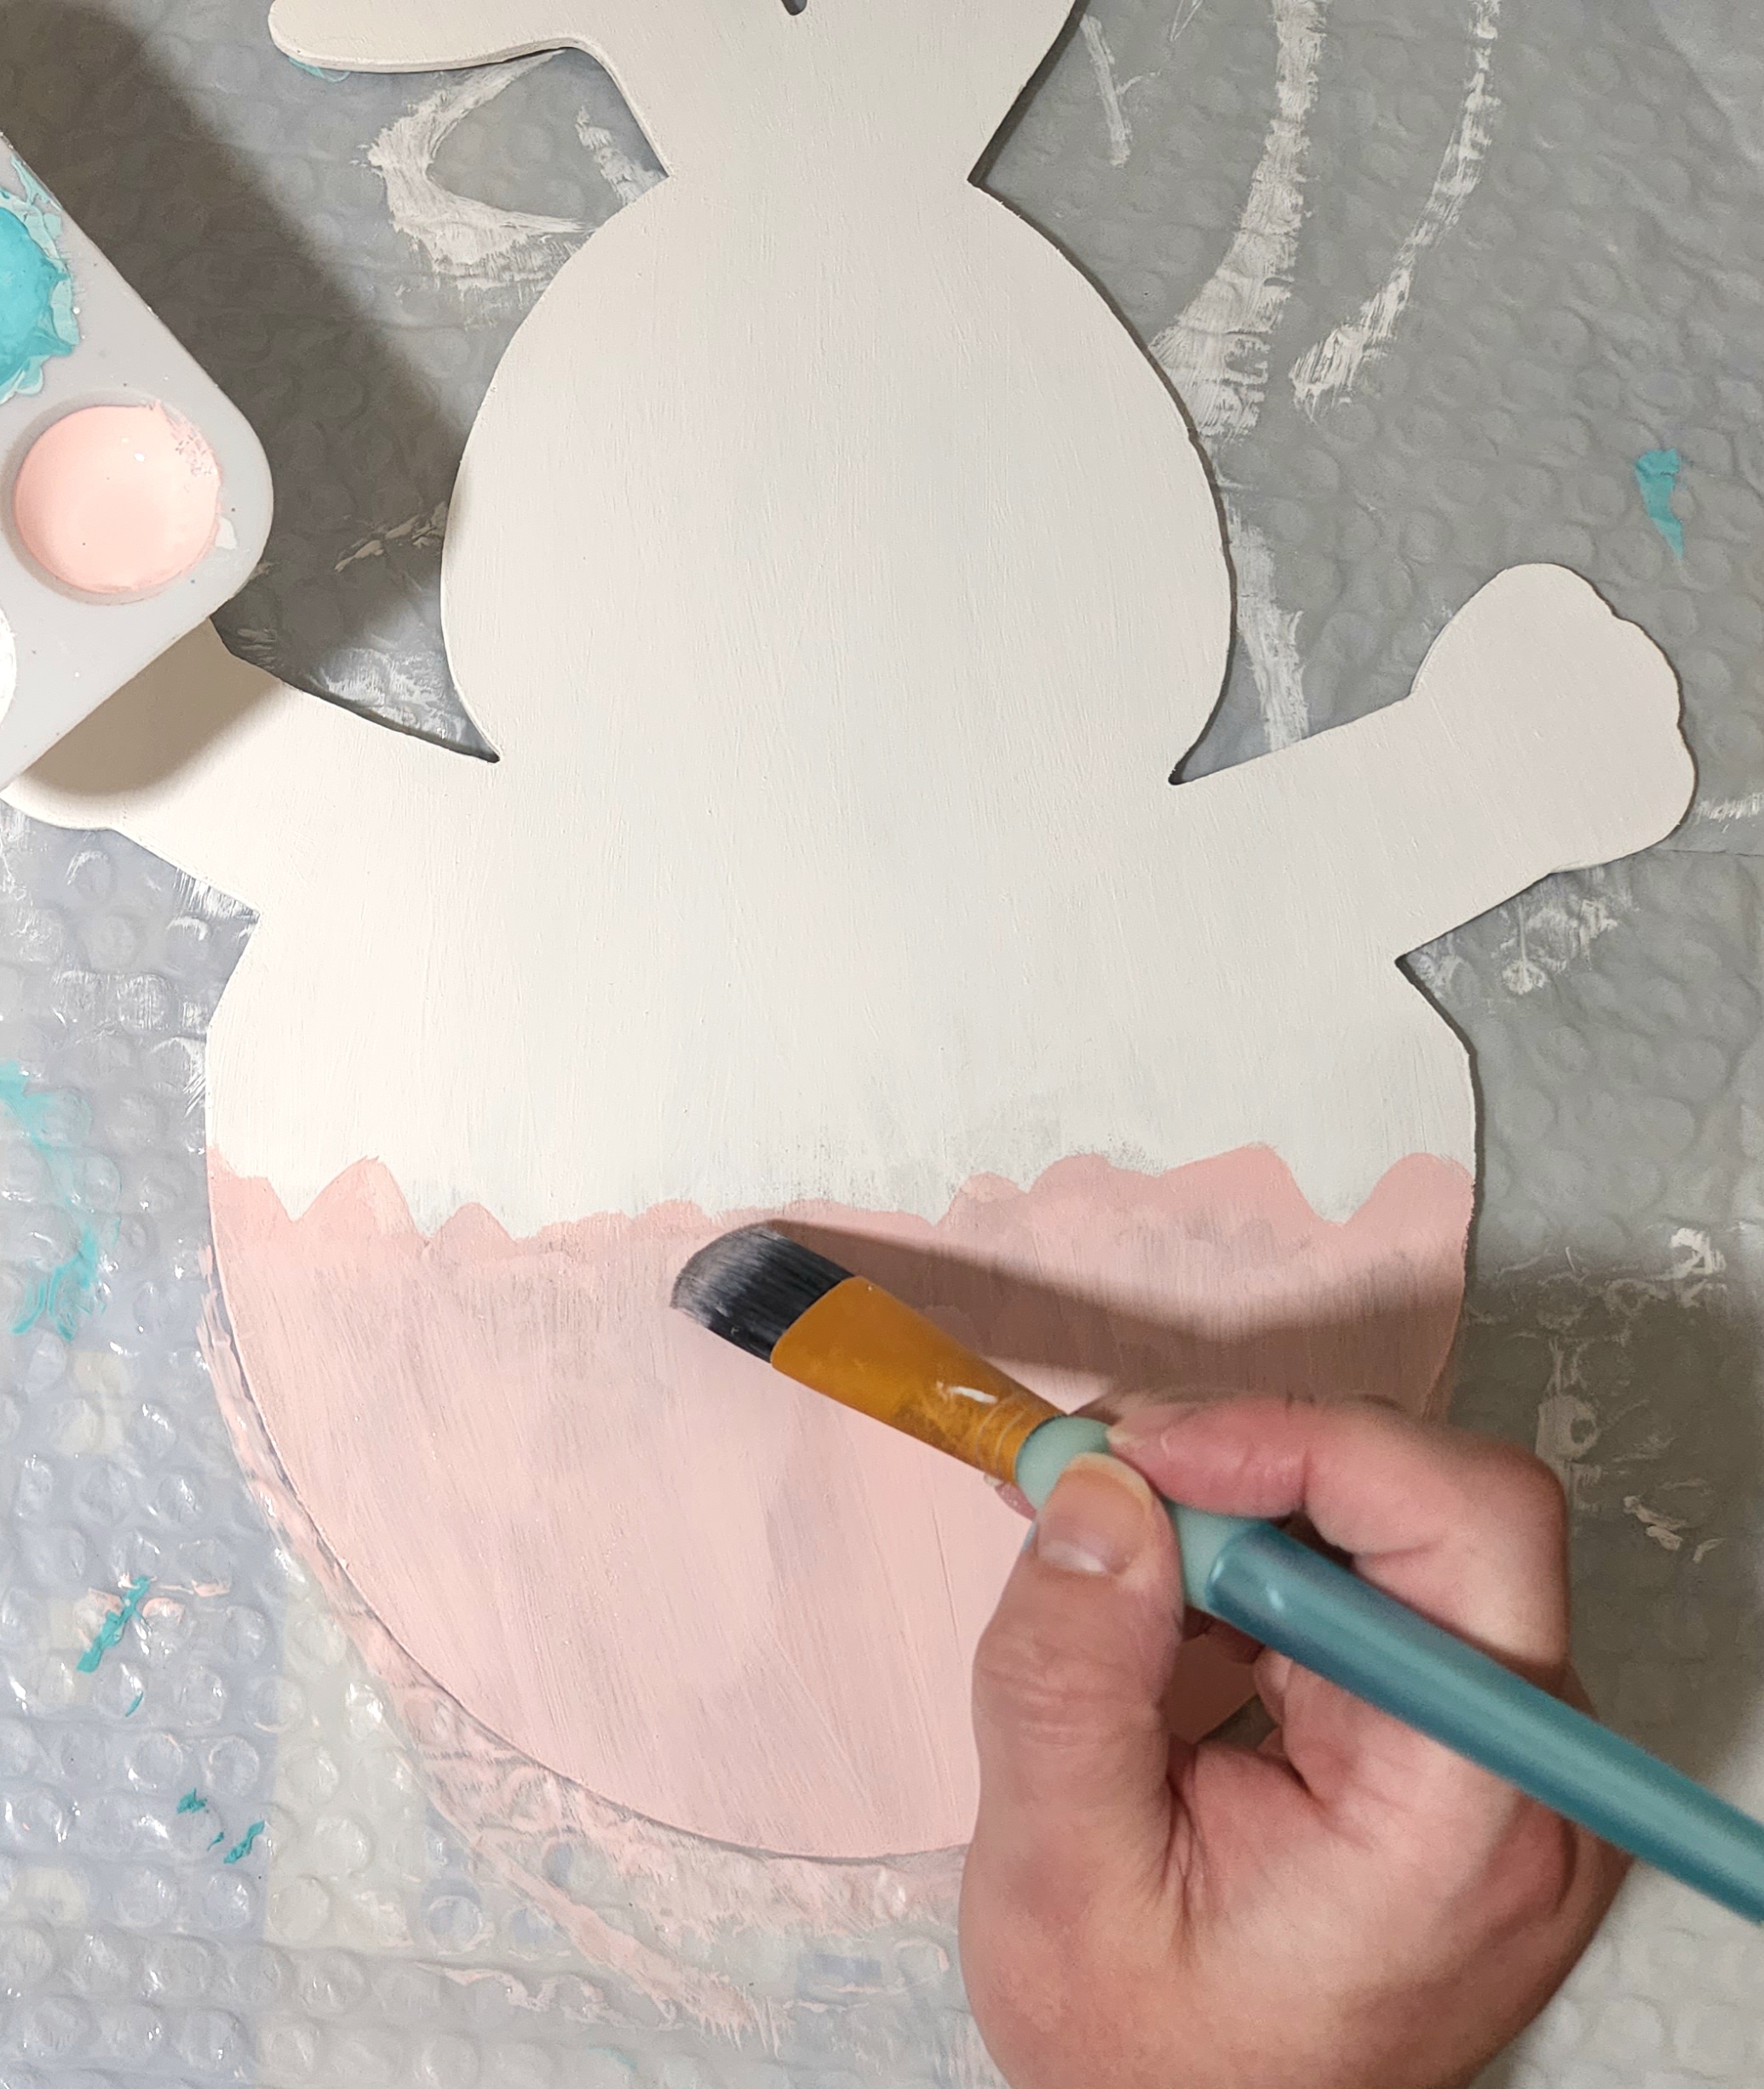
Paint the back of the bunny white. You only need to paint the upper portion of the bunny, its head and arms and just below the arms. I used three coats to cover it completely.

The bottom portion is the egg which you can paint whatever color you’d like. I chose light pink. Again, I gave it three coats.


To make the bunny look like it’s hatching from the egg, you need to make the top of the egg look broken. I just painted some random triangles jutting from the top.

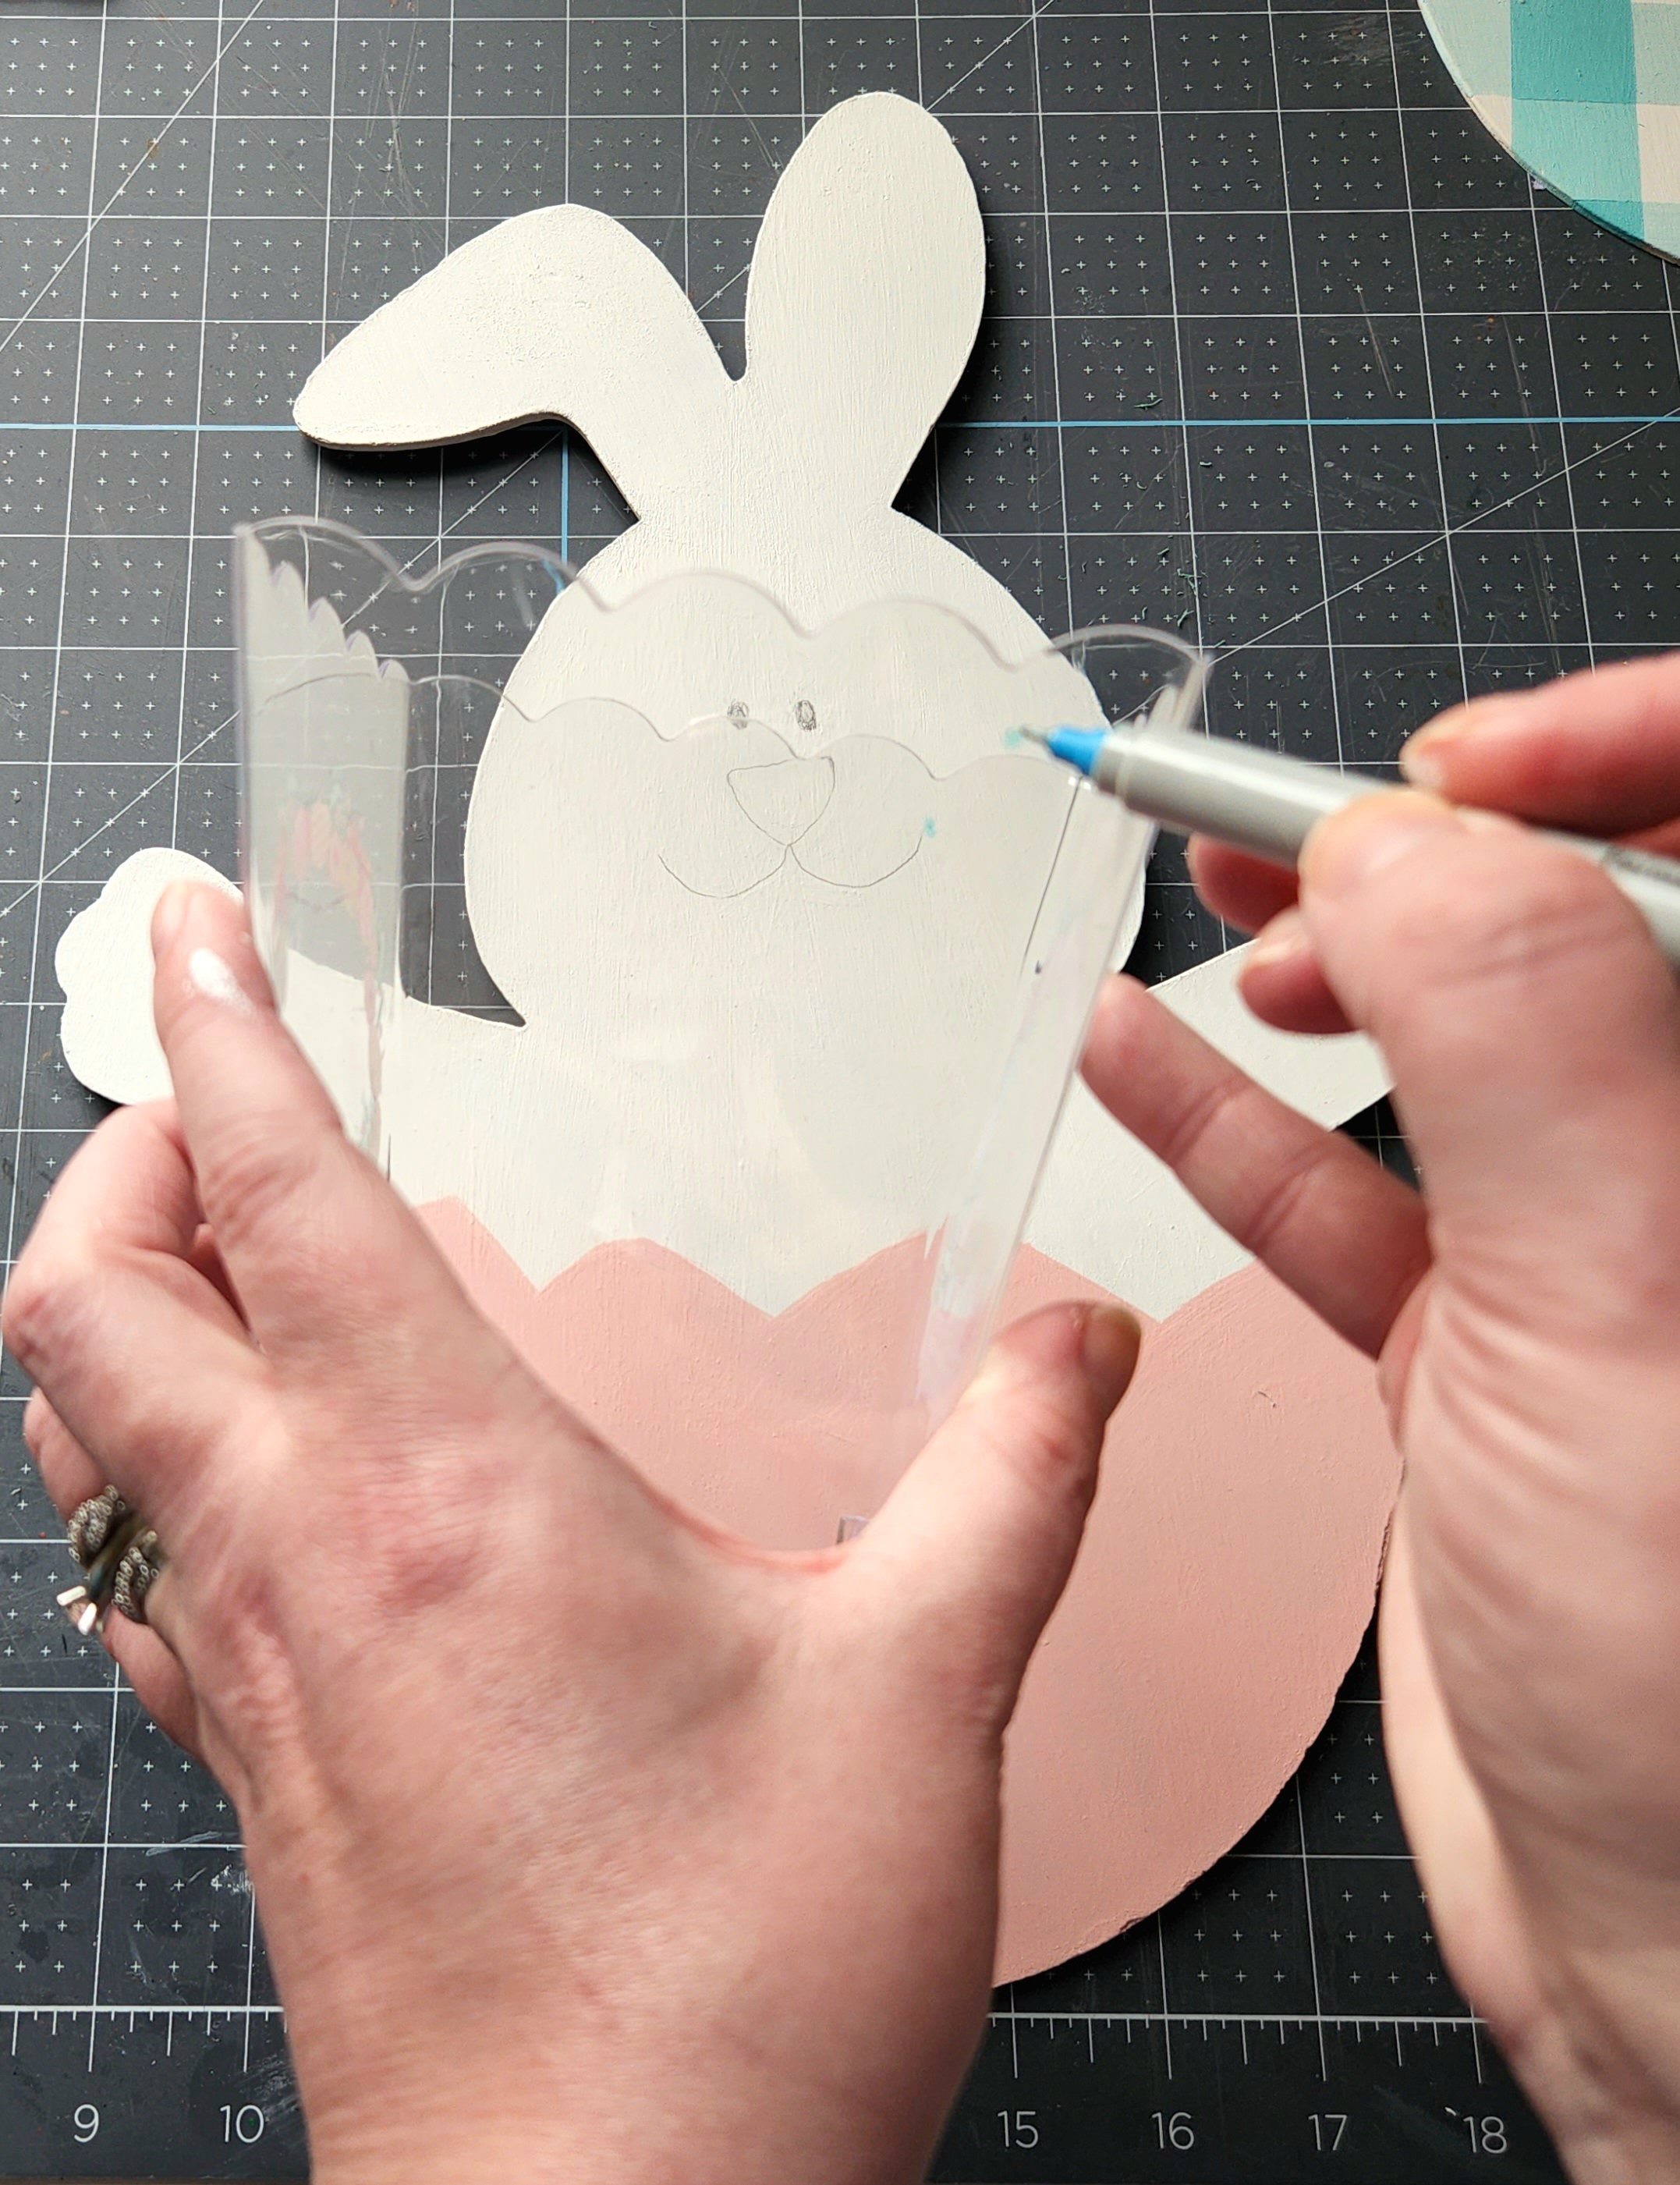
You can leave the bunny like it is, all white, or you can give him a face. I chose to paint a face on, but if you’re using taller flowers, you won’t see the face. I used the face on the front side to judge where I wanted to place mine. I sketched on eyes, an upside-down triangle nose, with smiling whiskers extending from it. Once sketched, I painted the nose pink and the eyes and whiskers black.


Paint the Eggs
While your bunny is drying you can start painting the eggs.
Pry the bunny on the front off the eggs. They come up really easily.

Prep the eggs. Remove ropes that they hang from.

Spackle the hole on the eggs where the rope was. This will make it look better when it’s hung, but not a requirement.


You can choose to paint the front of the eggs with the original pattern (if you got the patterned eggs) and forego the buffalo check. Another option is to just paint them a solid color which I would do if you’re going to use really bright or dark colors. Here are my eggs before I glued the bunny on. The color looks like a regular light blue here, but it’s a Tiffany/robin’s egg blue. I shared the buffalo check tutorial in this post.

Prep the Vase
When I began this project I intended to use a little white metal pail from Dollar Tree on the door hanger. During my shopping trip at DT I threw these little clear Easter containers in my cart. The ones I bought are adorable and have little buffalo check farmhouse trucks on them. During the process of my project I decided to use one of the containers instead of the pail.
Since the bunny has its arms open, I felt like he somehow needed to be holding the container-turned-vase up. He was originally holding a burlap sign (now removed), so I decided to attach the vase with a rope. I used the rope that I removed from the eggs. In order to place the rope through the vase you need to create holes in the sides to pass it through. To keep the holes even, mark each side of the vase with a marker about .2″ from the top.
Press that tip of your preheated glue gun to the mark you just made. Put only a slight amount of pressure on the vase because it will crack! It will only take about 10 seconds with a high-temp glue gun to make a hole. You may need to push some of the plastic out of the bubble formed (you’ll see what I mean) with a pointy object.
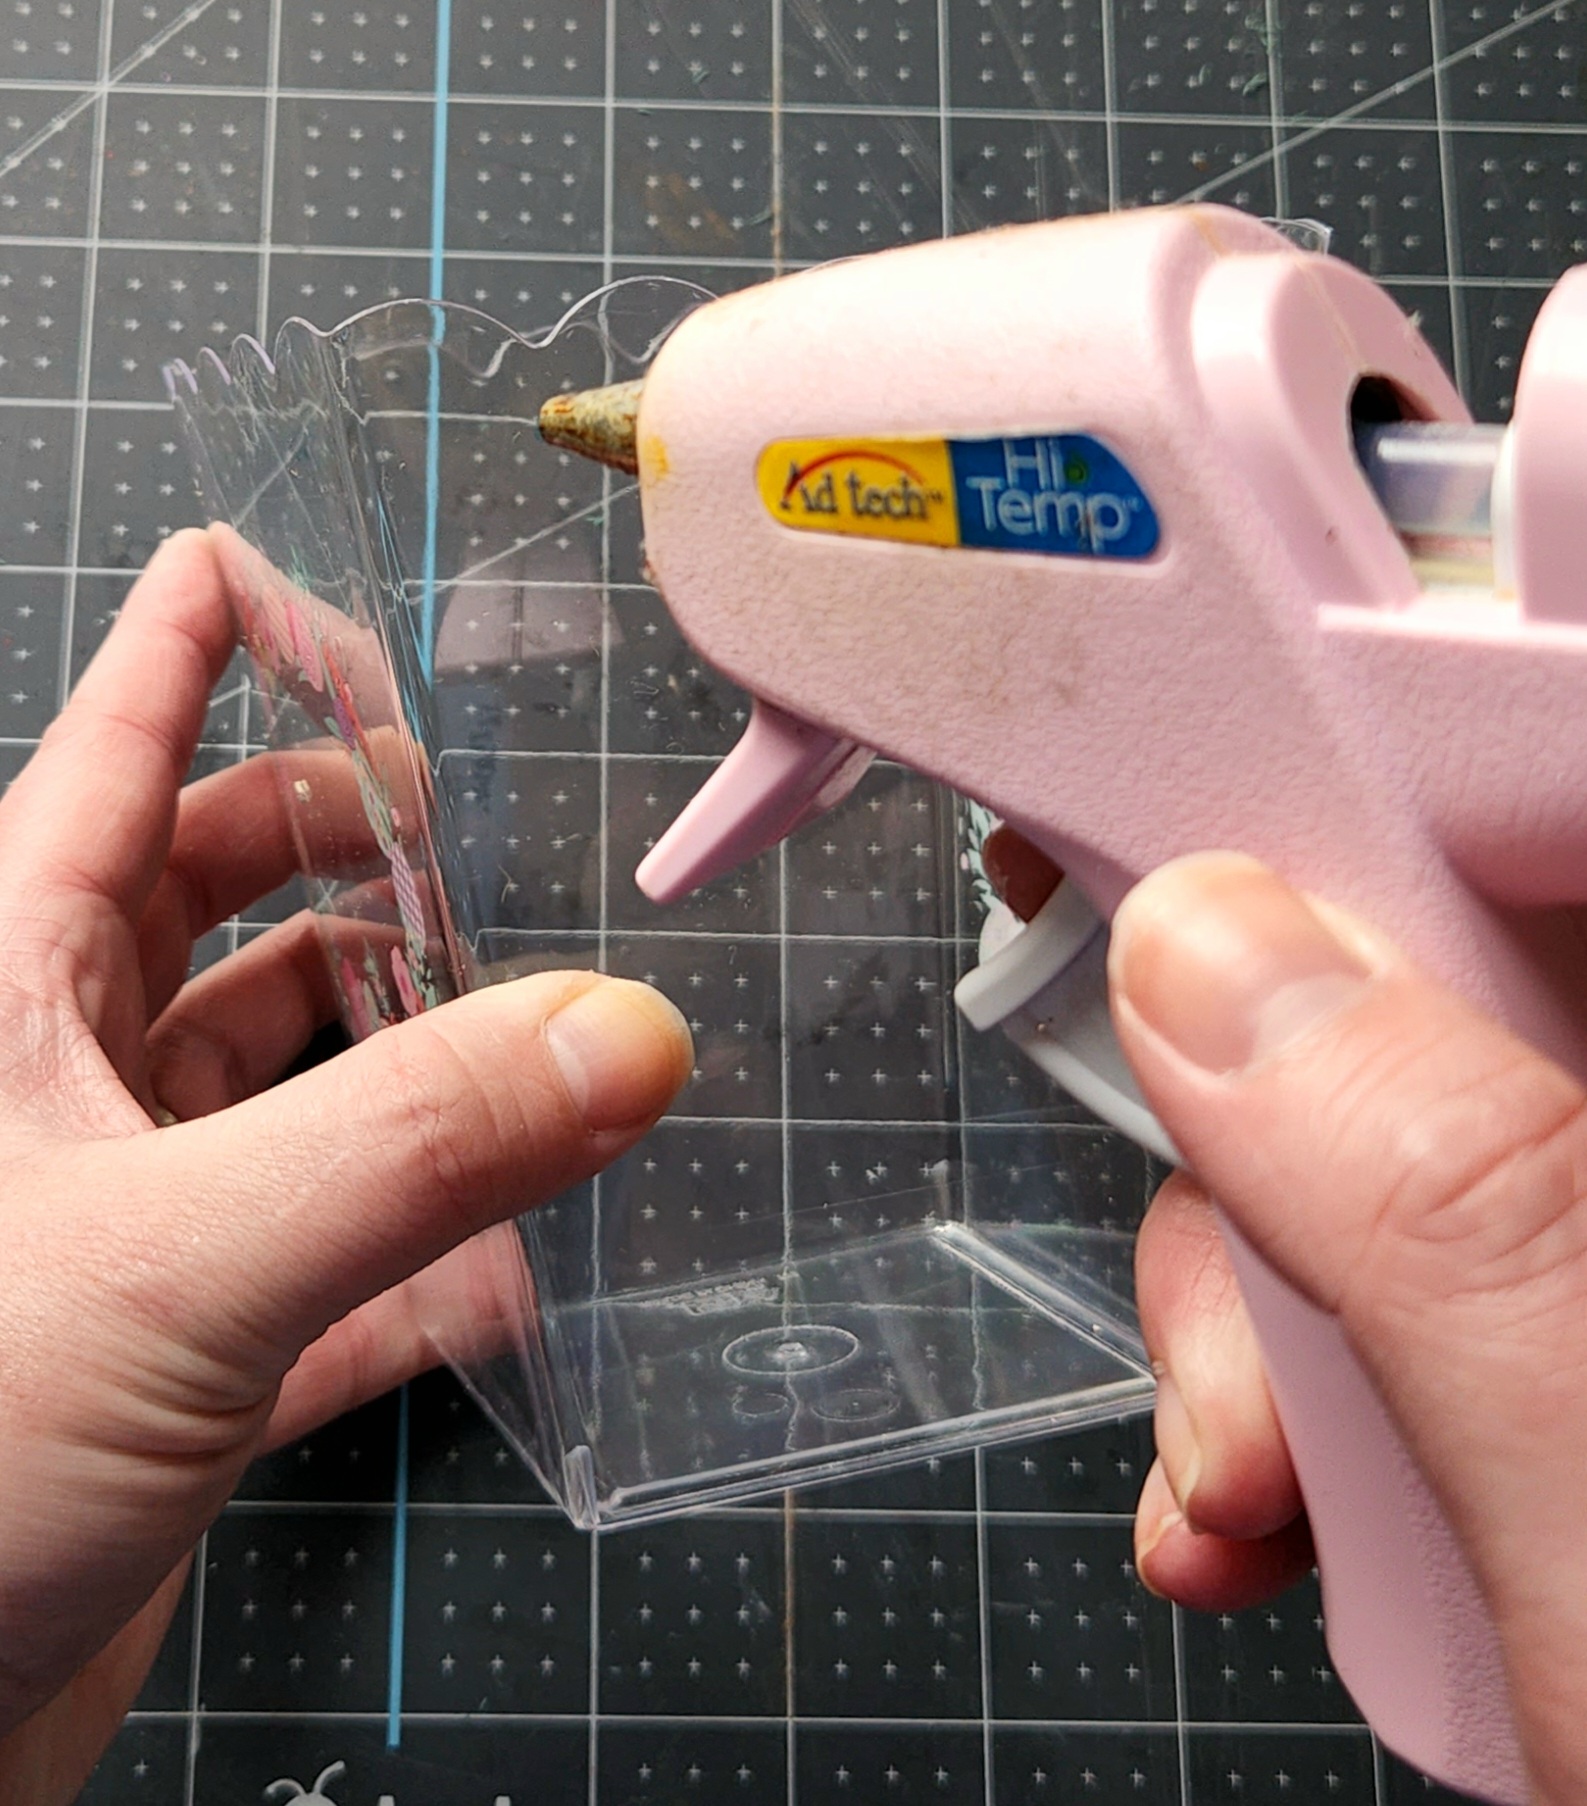
Repeat the process on the other side.
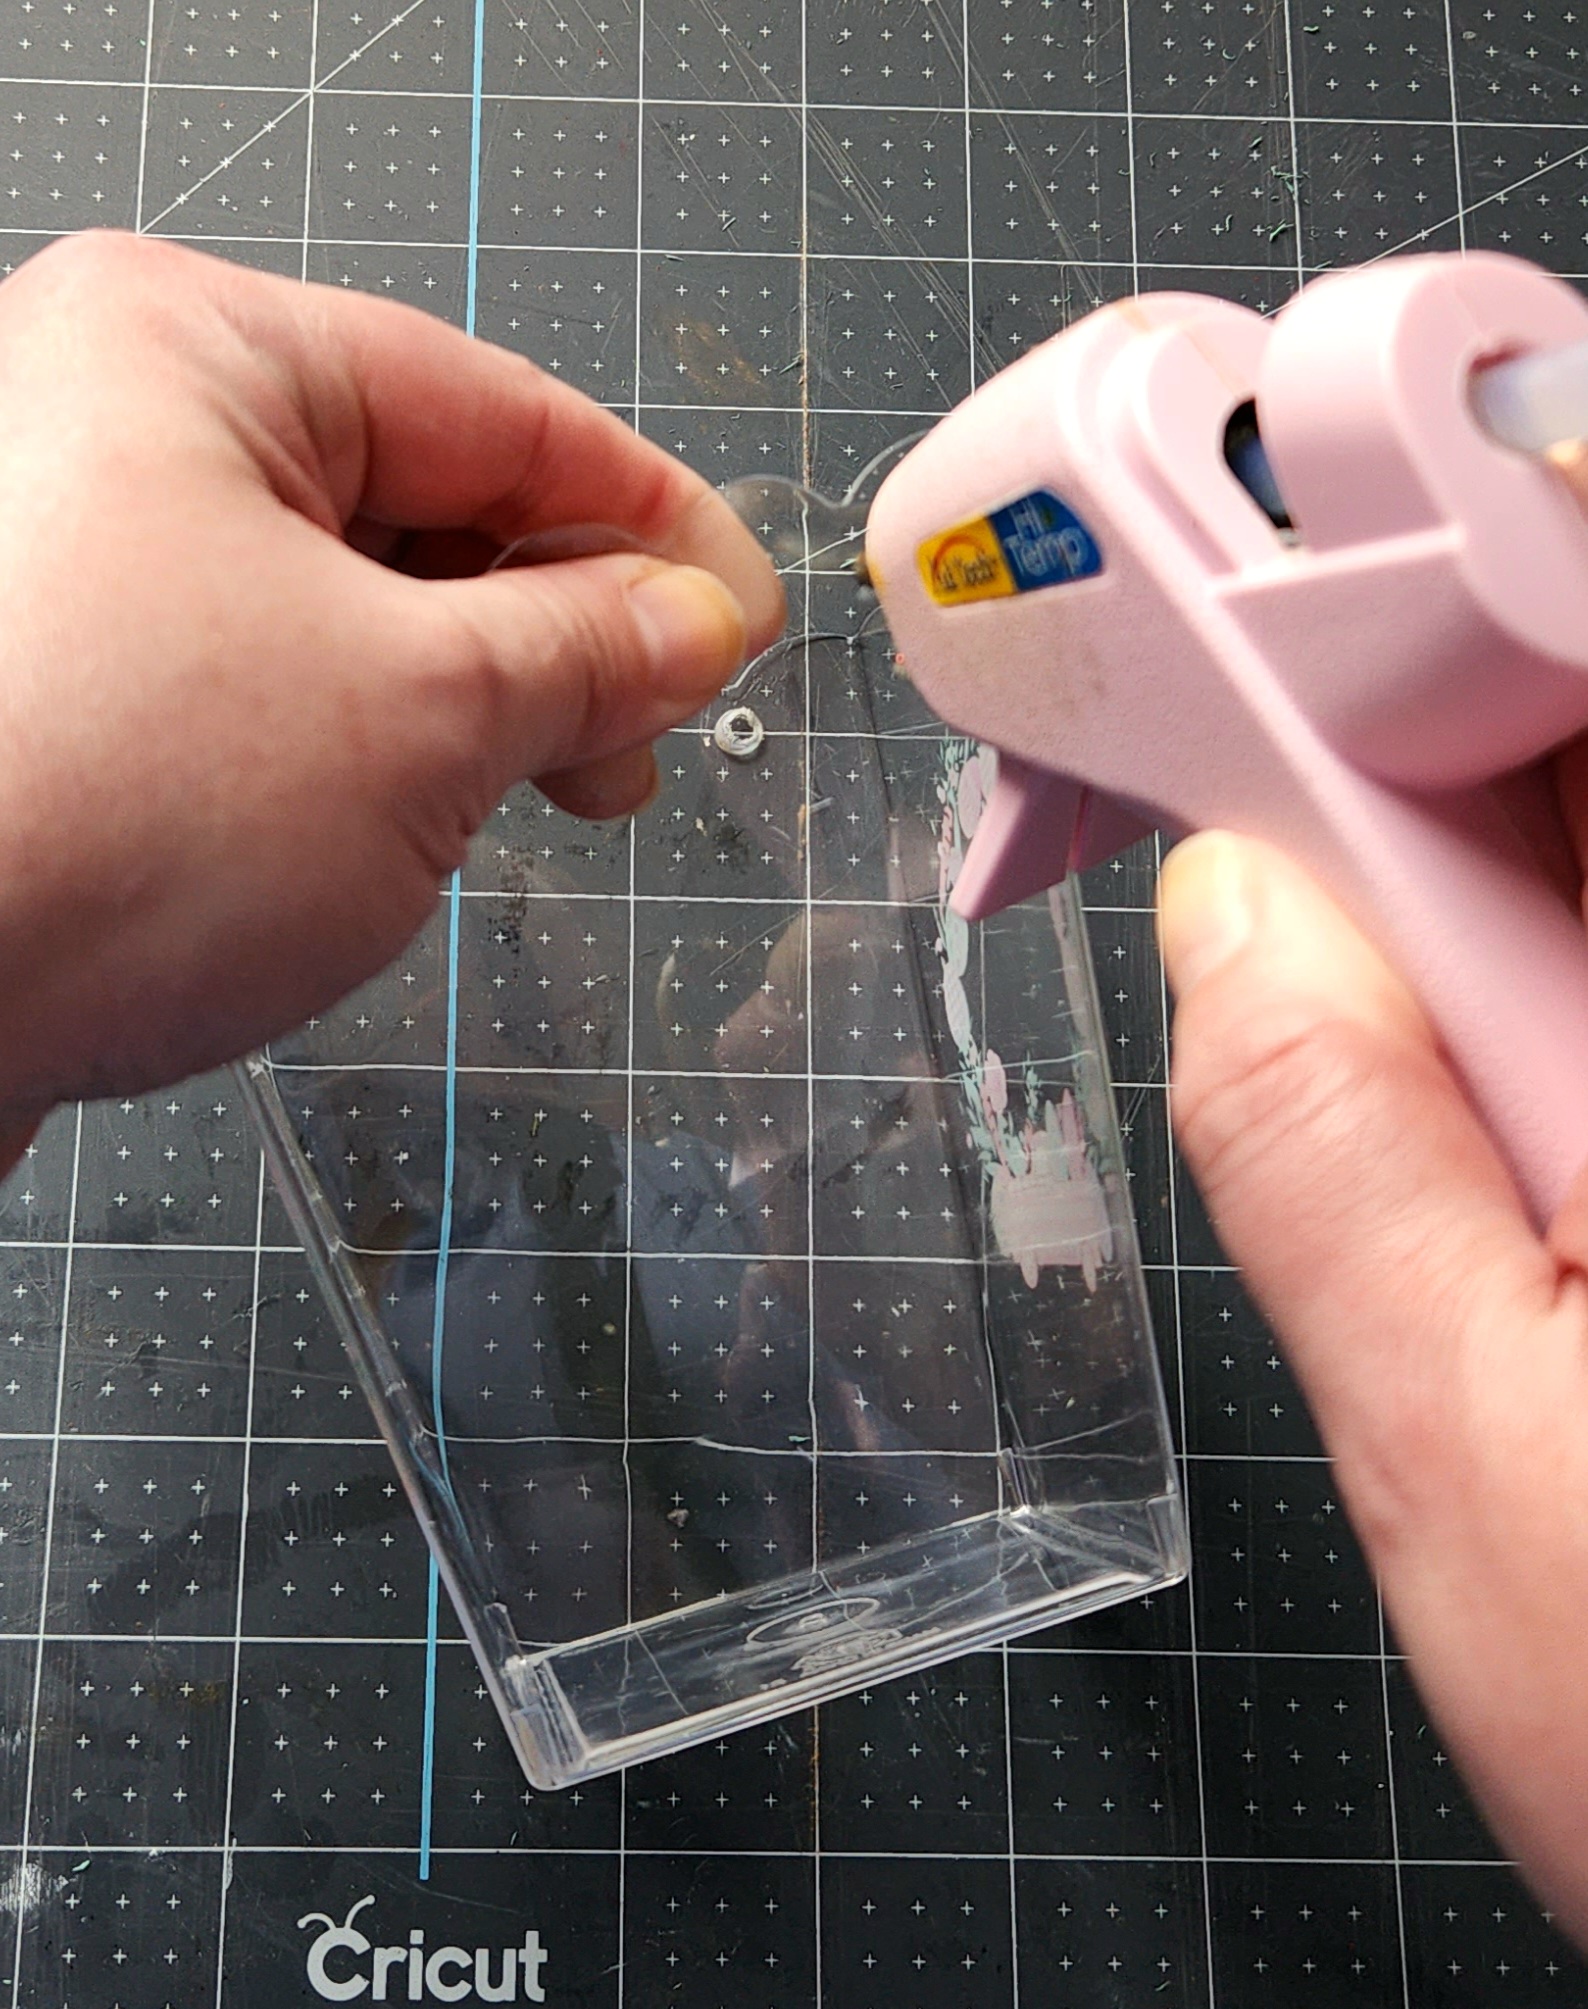
Once both holes are in, pass the rope you removed from one of the eggs through the hole. If you’d rather, you can use twine instead of the rope.


Assemble the Easter Door Hanger
I hung my vase on my door hanger before assembling it, but I think it would be easier to do that last. Lay your two eggs about a 1/2″ apart, then place hot glue on the inner sides.

Center the bunny over the eggs and press it down.

Now attach the vase. Place a dot of glue on one of the bunny’s hands, then place one end of the rope on it.

Do the same on the other palm, but don’t place the end of the rope to it. Place the rope on the glue so that the bottom of the vase is about 2″ from the bottom of the bunny’s egg. Then cut the excess rope off.


Fill the Vase
To save moss, I placed styrofoam in my vase before filling it. Place moss around the foam to hide it.


Cut your flowers from the bunch and place them in the vase until you’re happy with the way they look.
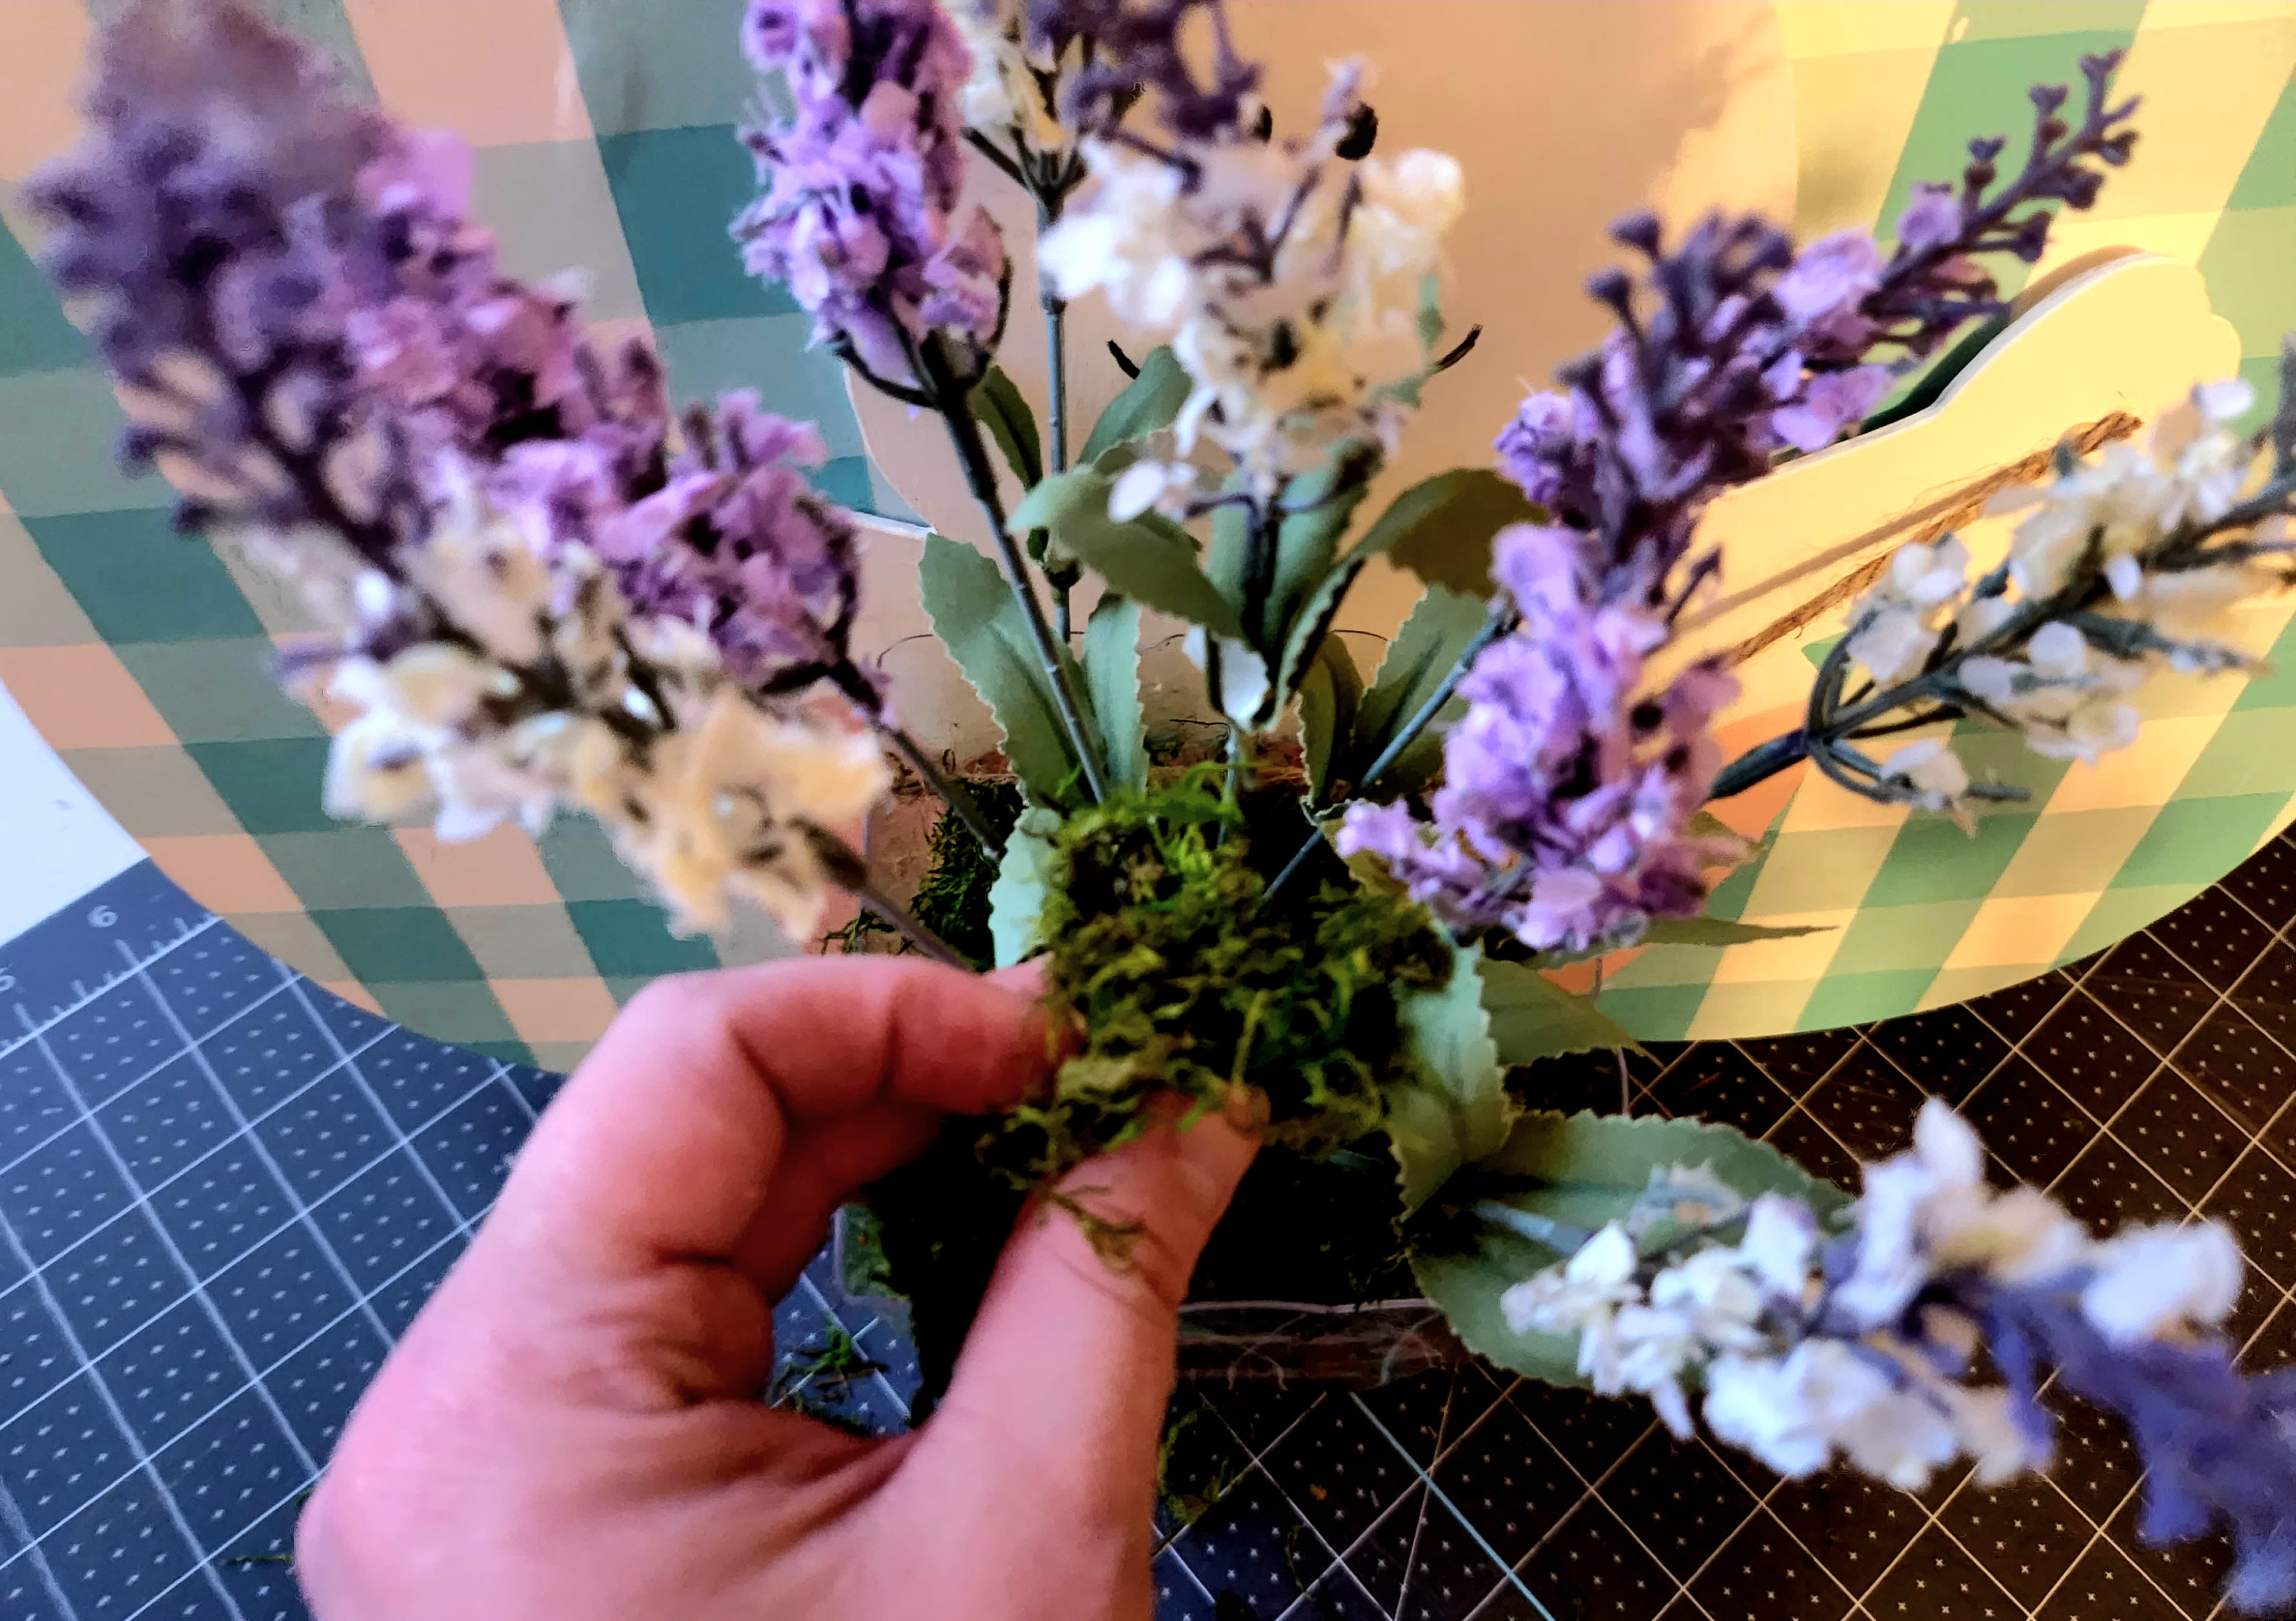
I used lavender from Dollar Tree at first but thought it was too tall. Here is how it looked before removing them. After this, I removed them and placed white hydrangeas in the vase.


Hang your Easter door hanger!
You can place this on your door, wall, or even create a spring vignette around it. It does actually sit up on its own, but you could attach a Jenga piece to the back to help if you’d like to leave it sitting.


I hope that you enjoyed this tutorial. If you’re looking for more spring wreaths and door hangers, check out this roundup of 30 spring wreaths to find the perfect one for you. They can all be made with Dollar Tree supplies, so they’re all within budget! If you’re one of my blogger friends, don’t forget to go link up on Crafty Creators Link Party. Now let’s get to our fantastic blog hop!
Don’t go yet! There’s more to see!
There’s plenty more to see here on the blog! If you’re looking for something specific, use the search box in the sidebar to look it up. If not, you might enjoy these ideas. Don’t have time to read them all now? That’s ok, just click over to the posts using the pictures and pin them for later. You can also add Life as a LEO Wife to your favorites and check back for new ideas and free printables and SVGs every Wednesday, as well as link parties with tons of shared ideas on Sundays!

On to the Blog Hop!
I know you can’t wait to see what the other lovely ladies in the hop have cooked up this month! I know I can’t!
Tammy – Patina & Paint (main blog)
Terrie – Decorating & More with Tip (main blog)
Allyson – Southern Sunflowers (main blog)
Corine – Junk to Gems (main blog)
Follow me on Pinterest for new ideas added weekly! And don’t forget to link up to our weekly link parties on Sundays and Thursdays!


This is so creative Niki. Thank you for sharing the step by step tutorial, so easy to follow.
Thank you!
Niki, wow, you amaze me! I would have never thought to put all of that together. It made such an adorable piece. Great job!
Thank you Corine!
Adorable!!! I love this!!! Tanks for sharing and thanks so much for stopping by!!
Stay safe, healthy and happy!!
Hugs,
Debbie
You too!
Nikki this is seriously cute! I wish our DT had half of the good things you are sharing. Pinning and definitely will be on the look out for supplies so that I can make one too. Thanks for sharing!
Thank you! Lately mine has been bare. I lucked out on this visit!
Your Easter door hanger is super duper adorable!! How to add holes to that plastic container sure is a nifty tip to know.
Isn’t it? I was worried by little tiny glue gun might not do the trick and I’d have to break out the big guy. Luckily it did!
Super cute and creative Niki!
Jenna
Thank you!
Cute project, Niki. The dollar store just keeps getting better and better things for crafting!
Thank you! They do, don’t they?!