Buffalo check is all the rage right now. One reason is that you can use it year-round, from Christmas to Easter to fall. Even an accent wall in light colors would look great in buffalo check (if it’s a large, well-lighted space you could go with darker colors). There are four different colors involved in painting buffalo check, but not to worry. Today I’m going to give you an in depth tutorial on how to paint buffalo check!

Supplies needed to paint buffalo check pattern:
- painter’s tape
- acrylic paint- white or your base color and middle color and dark color. I used 3 & lightened my dark color with white for the middle color.
- paint brushes


Paint the Base Coat
First you’ll paint the base of your project. In my case I was painting my wood eggs for this Easter door hanger.

Since I was painting Tiffany and robin’s egg blue and white buffalo checks, my base coat was white. However, if you’re doing other colors, like red and black, your base coat will be red.

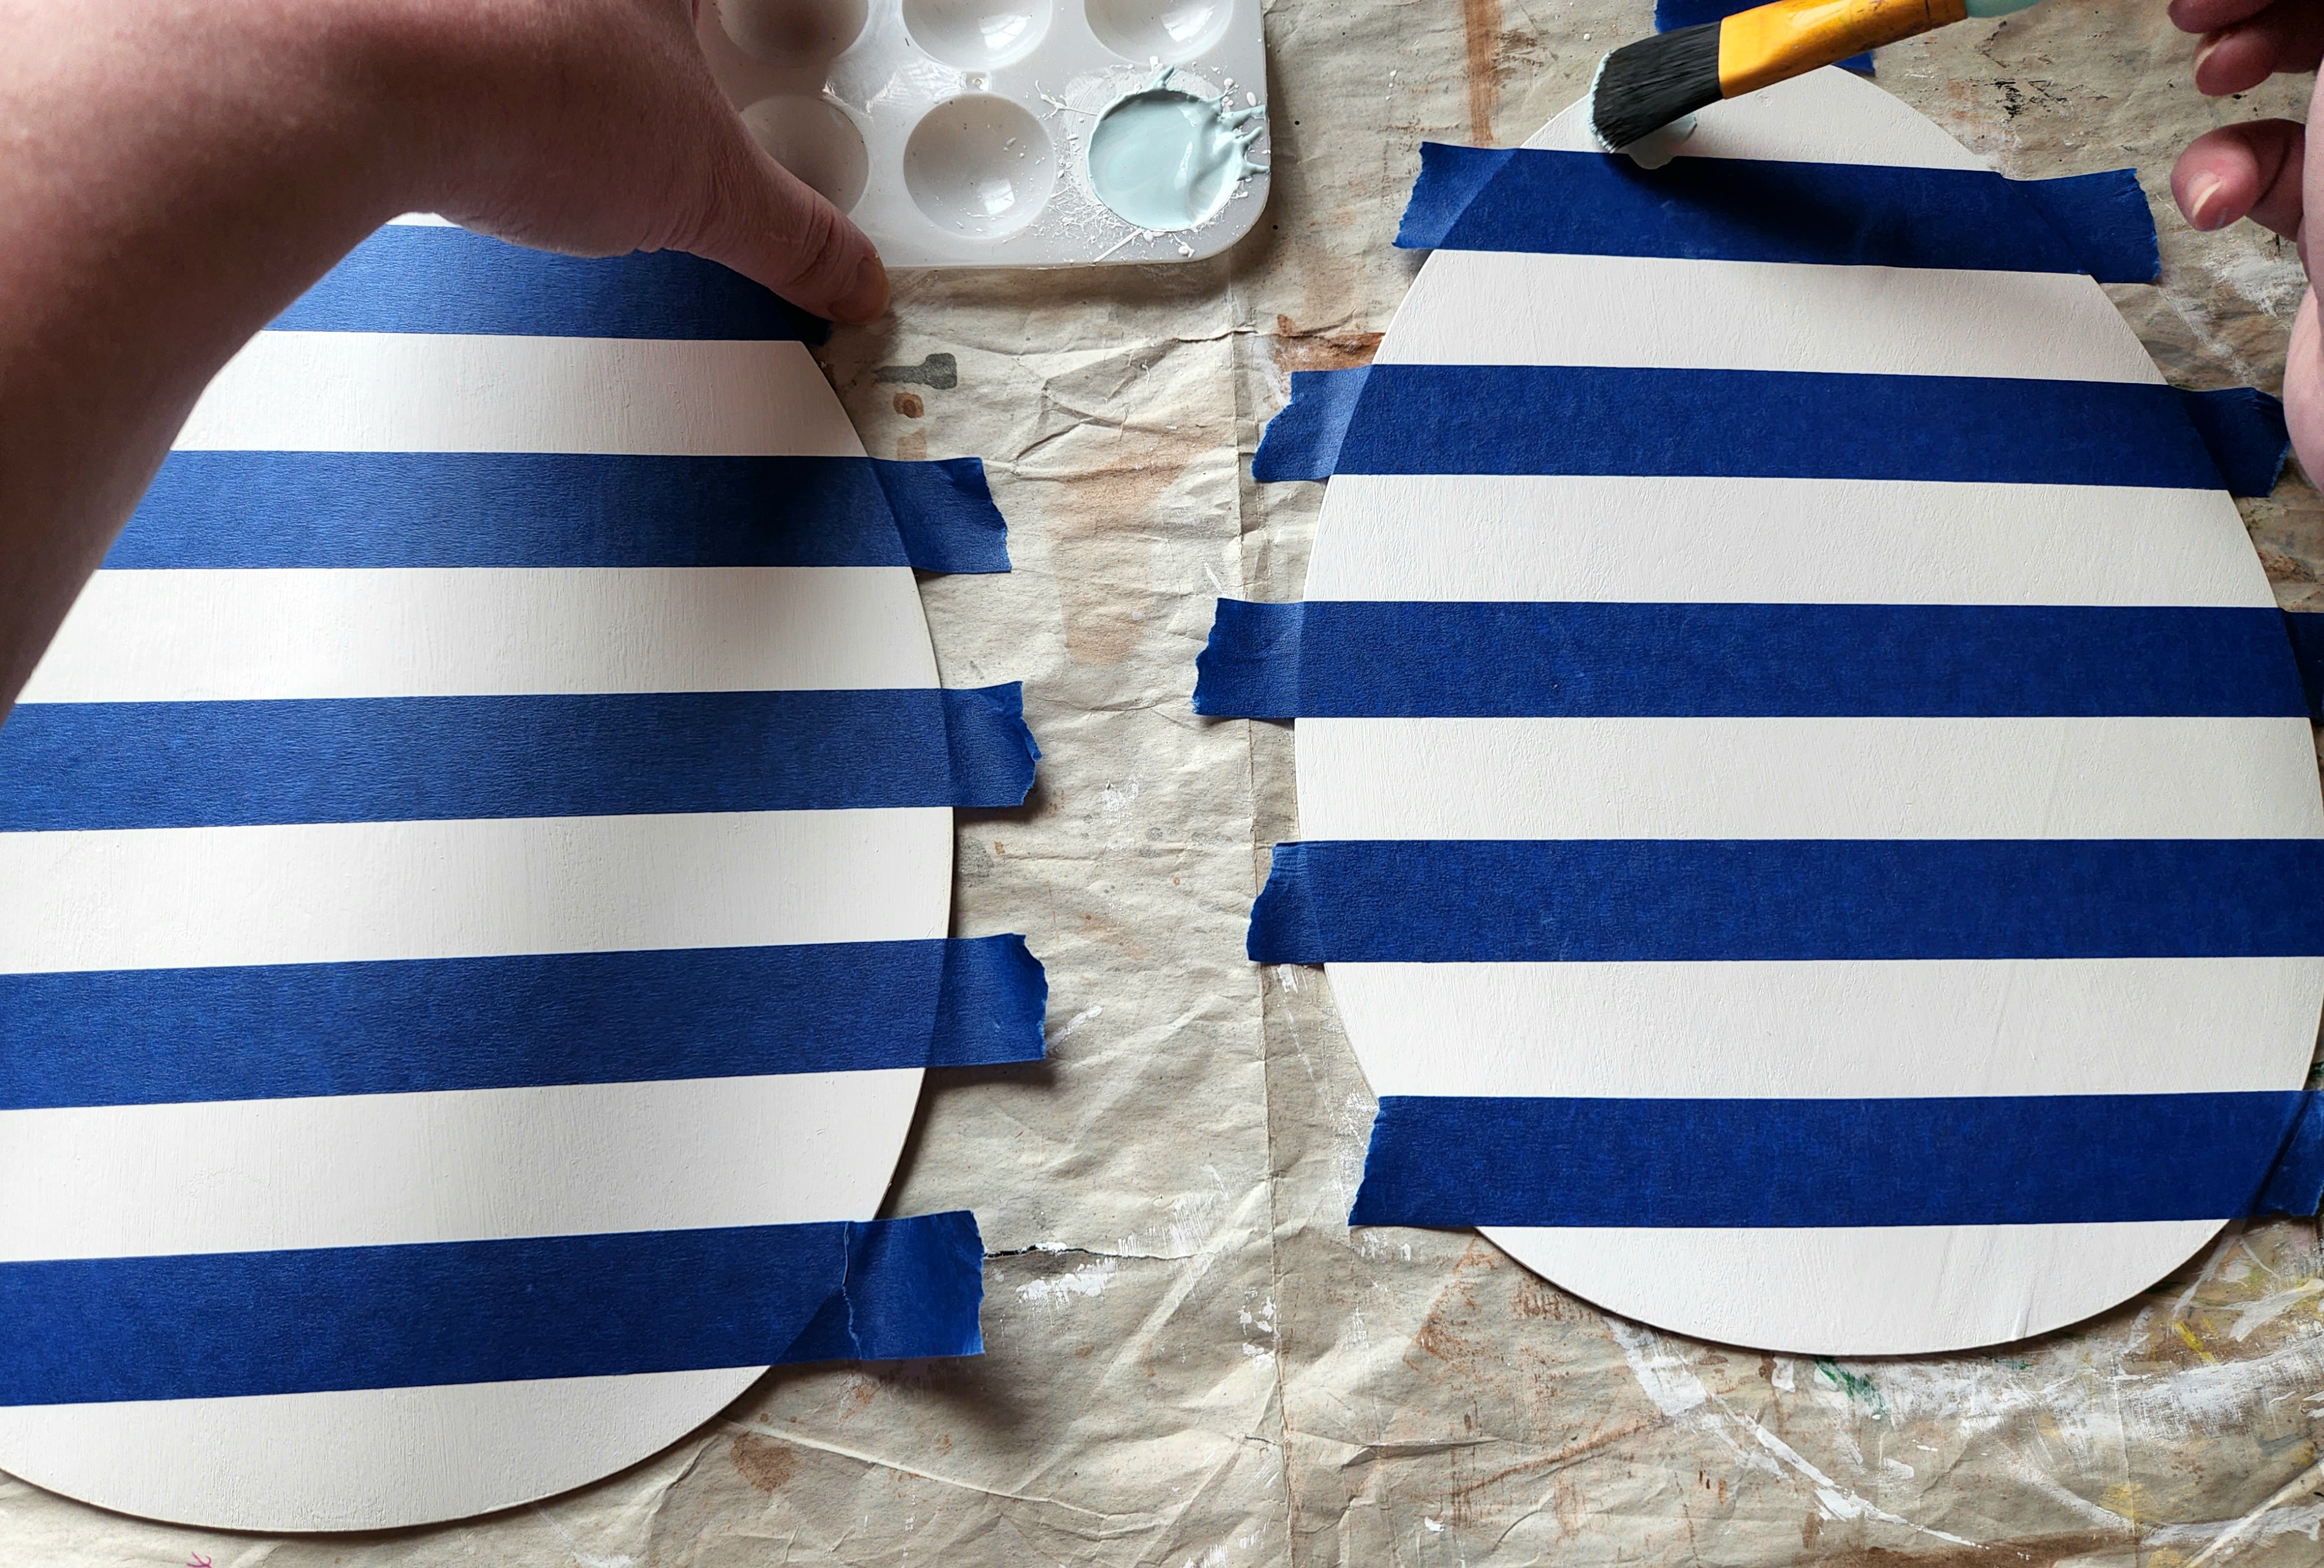
Tape Horizontal Lines
Once the base coat is dry, tape horizontal lines on the egg (or whatever you’re using; we’ll go with egg from now on). I placed my egg on a large self-healing cutting mat that has a grid on it. That makes spacing the lines out extremely easy. I placed the bottom edge of my first strip of tape on the 1″ line. With the grid it allows you to make sure you place the tape on completely straight. You can make sure the bottom of the tape is at the line on each side.

If you don’t have a grid cutting mat, you can measure with a ruler and make pencil marks where you’d like the next stripe to start (1″-1.5″ from the top of the last piece). Easier than that is to use a small piece of tape and place it above the last piece of tape. Since the tape is always the same width, the spaces will be even. On my egg, I placed the bottom of the tape at the next full inch line from the top of the previous piece, so they ended up a little over an inch apart.

I painted two eggs, so here are both of them with their horizontal tape lines.

Paint the Horizontal Lines
The horizontal lines will be painted with your lightest paint color (other than the white). I mixed about 1/3 white to 2/3 robin’s egg blue.

Paint the horizontal lines. Don’t get a ton of paint on your brush at once. Painting lightly will help keep the paint from seeping under the tape. I had zero issues with seeping because the Duck Brand Clean Release Painter’s Tape is great. I added two light coats.


Allow it to dry, then remove the tape. If you need to, you can make tiny pencil marks at the top of the horizontal lines. I didn’t need to because I know I placed the bottom of the egg at the 0 line on the grid, so the tape will go on the same lines later. If you think you won’t be able to tell exactly where the lines are now, make the marks, but do so lightly.
Tape Vertical Lines
Now you’ll follow the same process that you followed with the horizontal lines, but this time making vertical lines. If you’re using a grid, line the edge of the egg up on one of the inch lines. Place the edge of your first piece of tape on the edge of the egg (or another object). Again, the grid helped me keep the tape straight on each end.

Place a small piece of tape against the side of the first line, then add another line of tape. If you’re using your grid, you don’t have to worry about the small piece of tape as a spacer. Just place the next line of tape at the next inch mark after the end of the first piece.

Continue adding vertical pieces of tape until the egg is covered.

Here’s my egg with its (fixed) vertical stripes.

Paint the Vertical Buffalo Check Stripes
I mixed 1/4 white paint with 3/4 robin’s egg blue. When I wasn’t sure if it would be noticeably darker, I added one tiny dab of Folk Art’s aqua acrylic paint. Make sure you mix enough to cover the entire surface. You don’t want to run out because you might not mix it exactly the same next time.
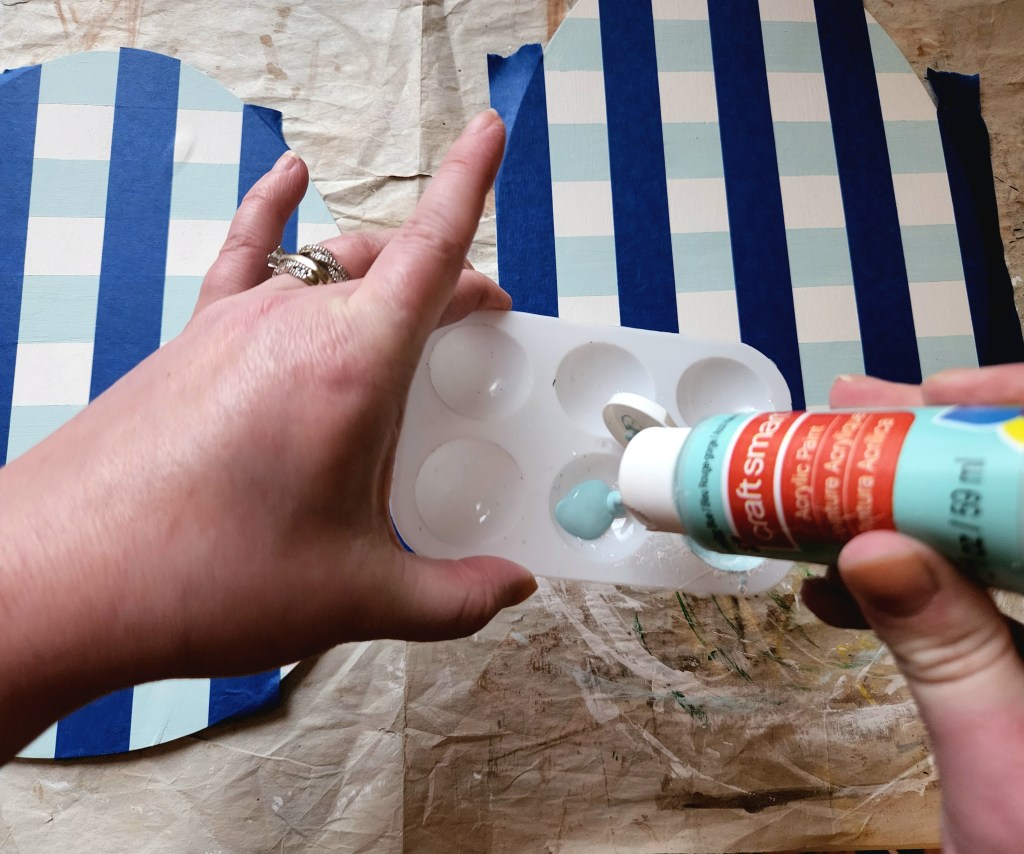

Paint the vertical lines with two light coats, allowing them to dry in between.


Allow them to dry completely, but don’t remove the tape.
Re-tape Horizontal Lines
Place the horizontal tape back where the first lines were taped. If you used the grid, line the bottom the egg back up where it was and re-tape. Same goes with the tape-space method. If you made pencil marks, line the tape up with them. You can probably see where the paint is from the first horizontal lines. I could.
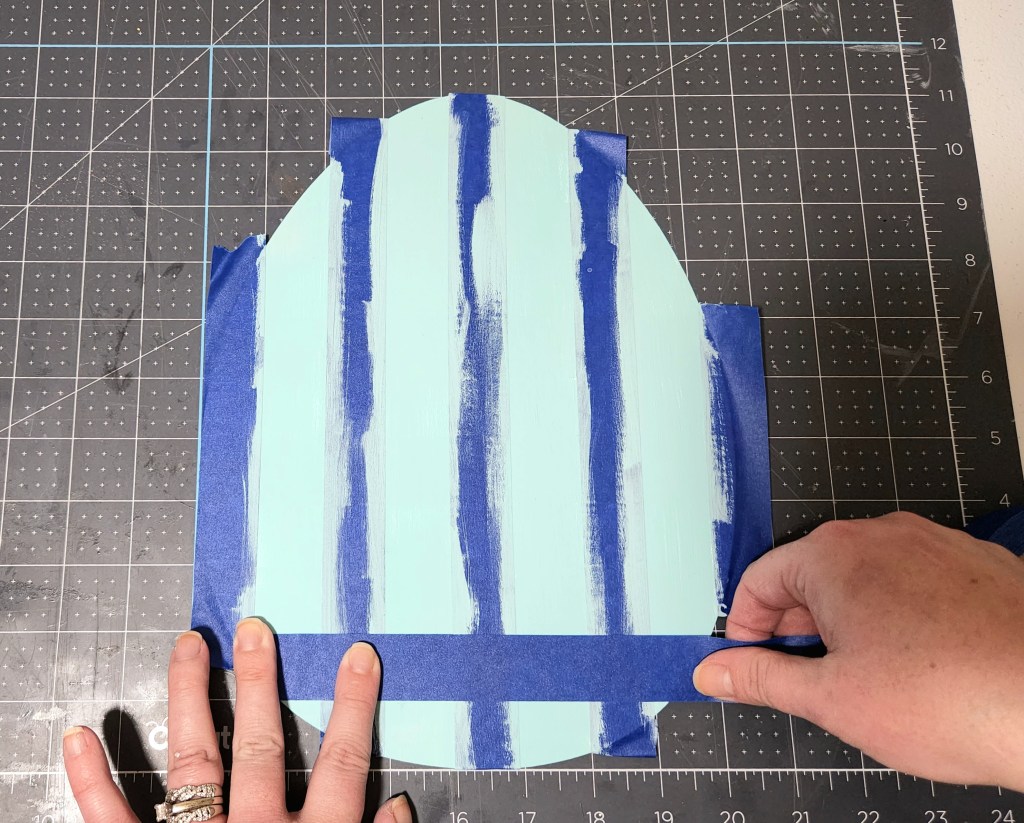
Here’s what you’ll have.

Paint the Buffalo Checks
Mix the darkest version of the paint. For most people that will be the full-strength version of the paint that’s not the base color (mine was white). I added a few dabs of the aqua to make a Tiffany blue. Mix well.
Paint two light coats in each of the boxes, again, allowing them to dry in between coats.


Allow the paint to completely dry. I left mine overnight, but an hour or so will do.
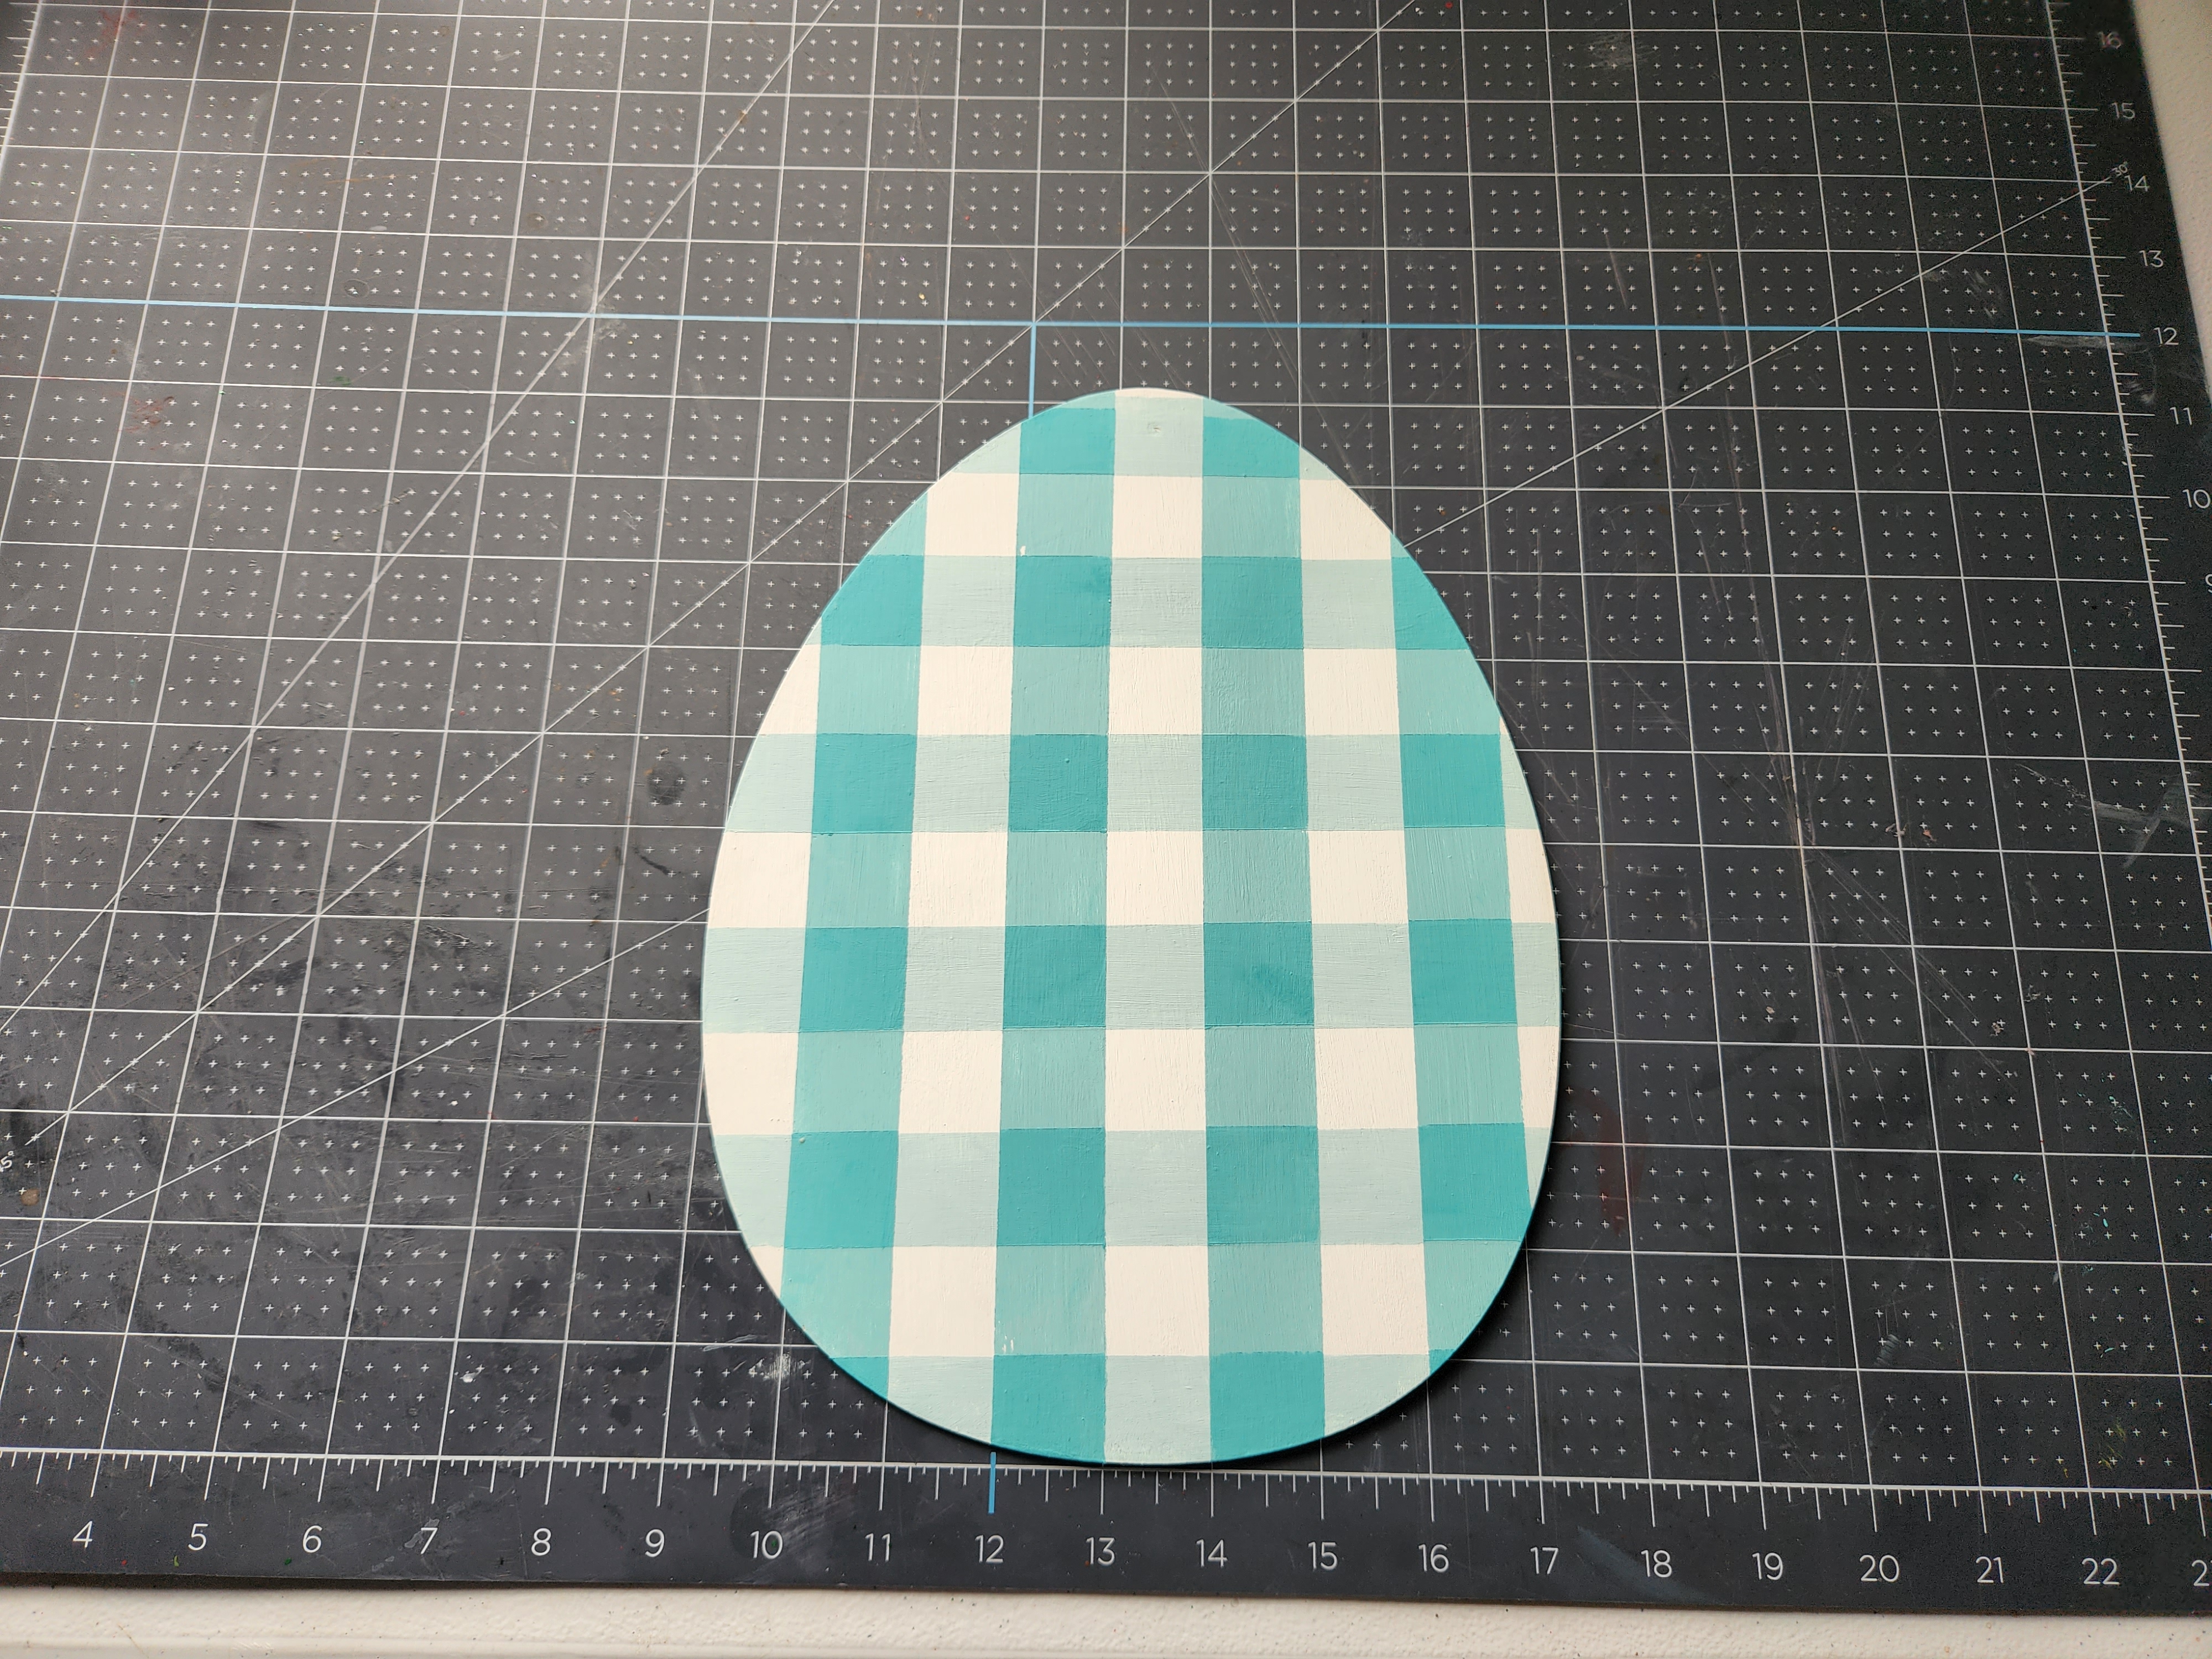
Remove Tape to Reveal Buffalo Check Pattern
You’re almost there! Remove the horizontal tape first.


Next carefully remove the vertial tape.

That’s it! Your buffalo check pattern is complete. Sit back and enjoy your handy work! For some reason, my eggs look light blue, but they’re actually Tiffany blue at their darkest.

Now you can get to buffalo checking everything! I hope you enjoyed this tutorial. Make sure to pin or share it using the buttons at the bottom so you can get back to it later. I have some great Easter and spring printables coming as well as DIY spring decor, so make sure you’re following me on social media using the buttons in the sidebar to keep up with what’s going on here. Make sure you never miss a post or link party by entering your email address below. You’ll get an email when I add a new post.
More Spring Decor
There’s so much more for spring and for everyday home decor here on the blog. If you’re looking for something specific, like a DIY burlap wreath, use the search box in the sidebar. Here are some spring and Easter ideas to check out.


If you’re looking for more ideas, check out all of the great posts linked up to our link parties, Happiness is Homemade and Crafty Creators, each week where bloggers from around the world share tons of great DIYs. You’ll find crafts like sewing projects, Cricut projects, and wreaths, fashion, furniture upcycles, free printables, family and Christian articles and so much more shared every week. Visit my Link Parties page to see each week’s party. If you’re one of my blogger friend’s, don’t forget to link up every week for your chance to be featured!


Niki,
This is so cute!! Thanks so much for stopping by and for your kind words!!! I hope you are having a great weekend!!
Hugs,
Debbie
Thank you! You too!
Great tutorial Niki, and your eggs look professionally done!
Jenna
Aw thank you Jenna. I keep staring at where it’s uneven lol. I guess that’s what happens when you DIY, and you know where you messed up!
Such a pretty Easter decoration! I love how you showed step by step how to recreate this look.
Thank you! I love how the little bunny & vase that I added to it look on my door.
Love this Niki! I am so crazy about buffalo checked anything! You’re tutorials are always so easy to follow too. Thanks for sharing and have a great weekend!
Thank you Denise. It took me a while, but now I love buffalo check!