
Birch logs are huge in winter decor right now. They look great wrapped in holiday ribbon with greenery tucked in. You can place them in a basket, in a fireplace, or on tables that have a lower level to decorate. Swap out the ribbon and you have decor to last through February. You can see why they are so big! The only downside is that they cost a pretty penny. I saw a grouping of three that were about 12″ long for $29.99! Ok, no. I cannot pay that for decor, especially at Christmas and with the economy being so bad. If you’re like me, I have great news. You can make your own faux birch logs for pennies on the dollar! Let me show you how to do it.
Supplies for Faux Birch Logs:
- pool noodle- One noodle will make two faux birch logs.
- knife or box cutter
- kraft paper
- scissors
- acrylic paint: black, gray, brown, & white
- paint brush & foam brush
- Mod Podge
- toilet paper


Cut Pool Noodles & Kraft Paper
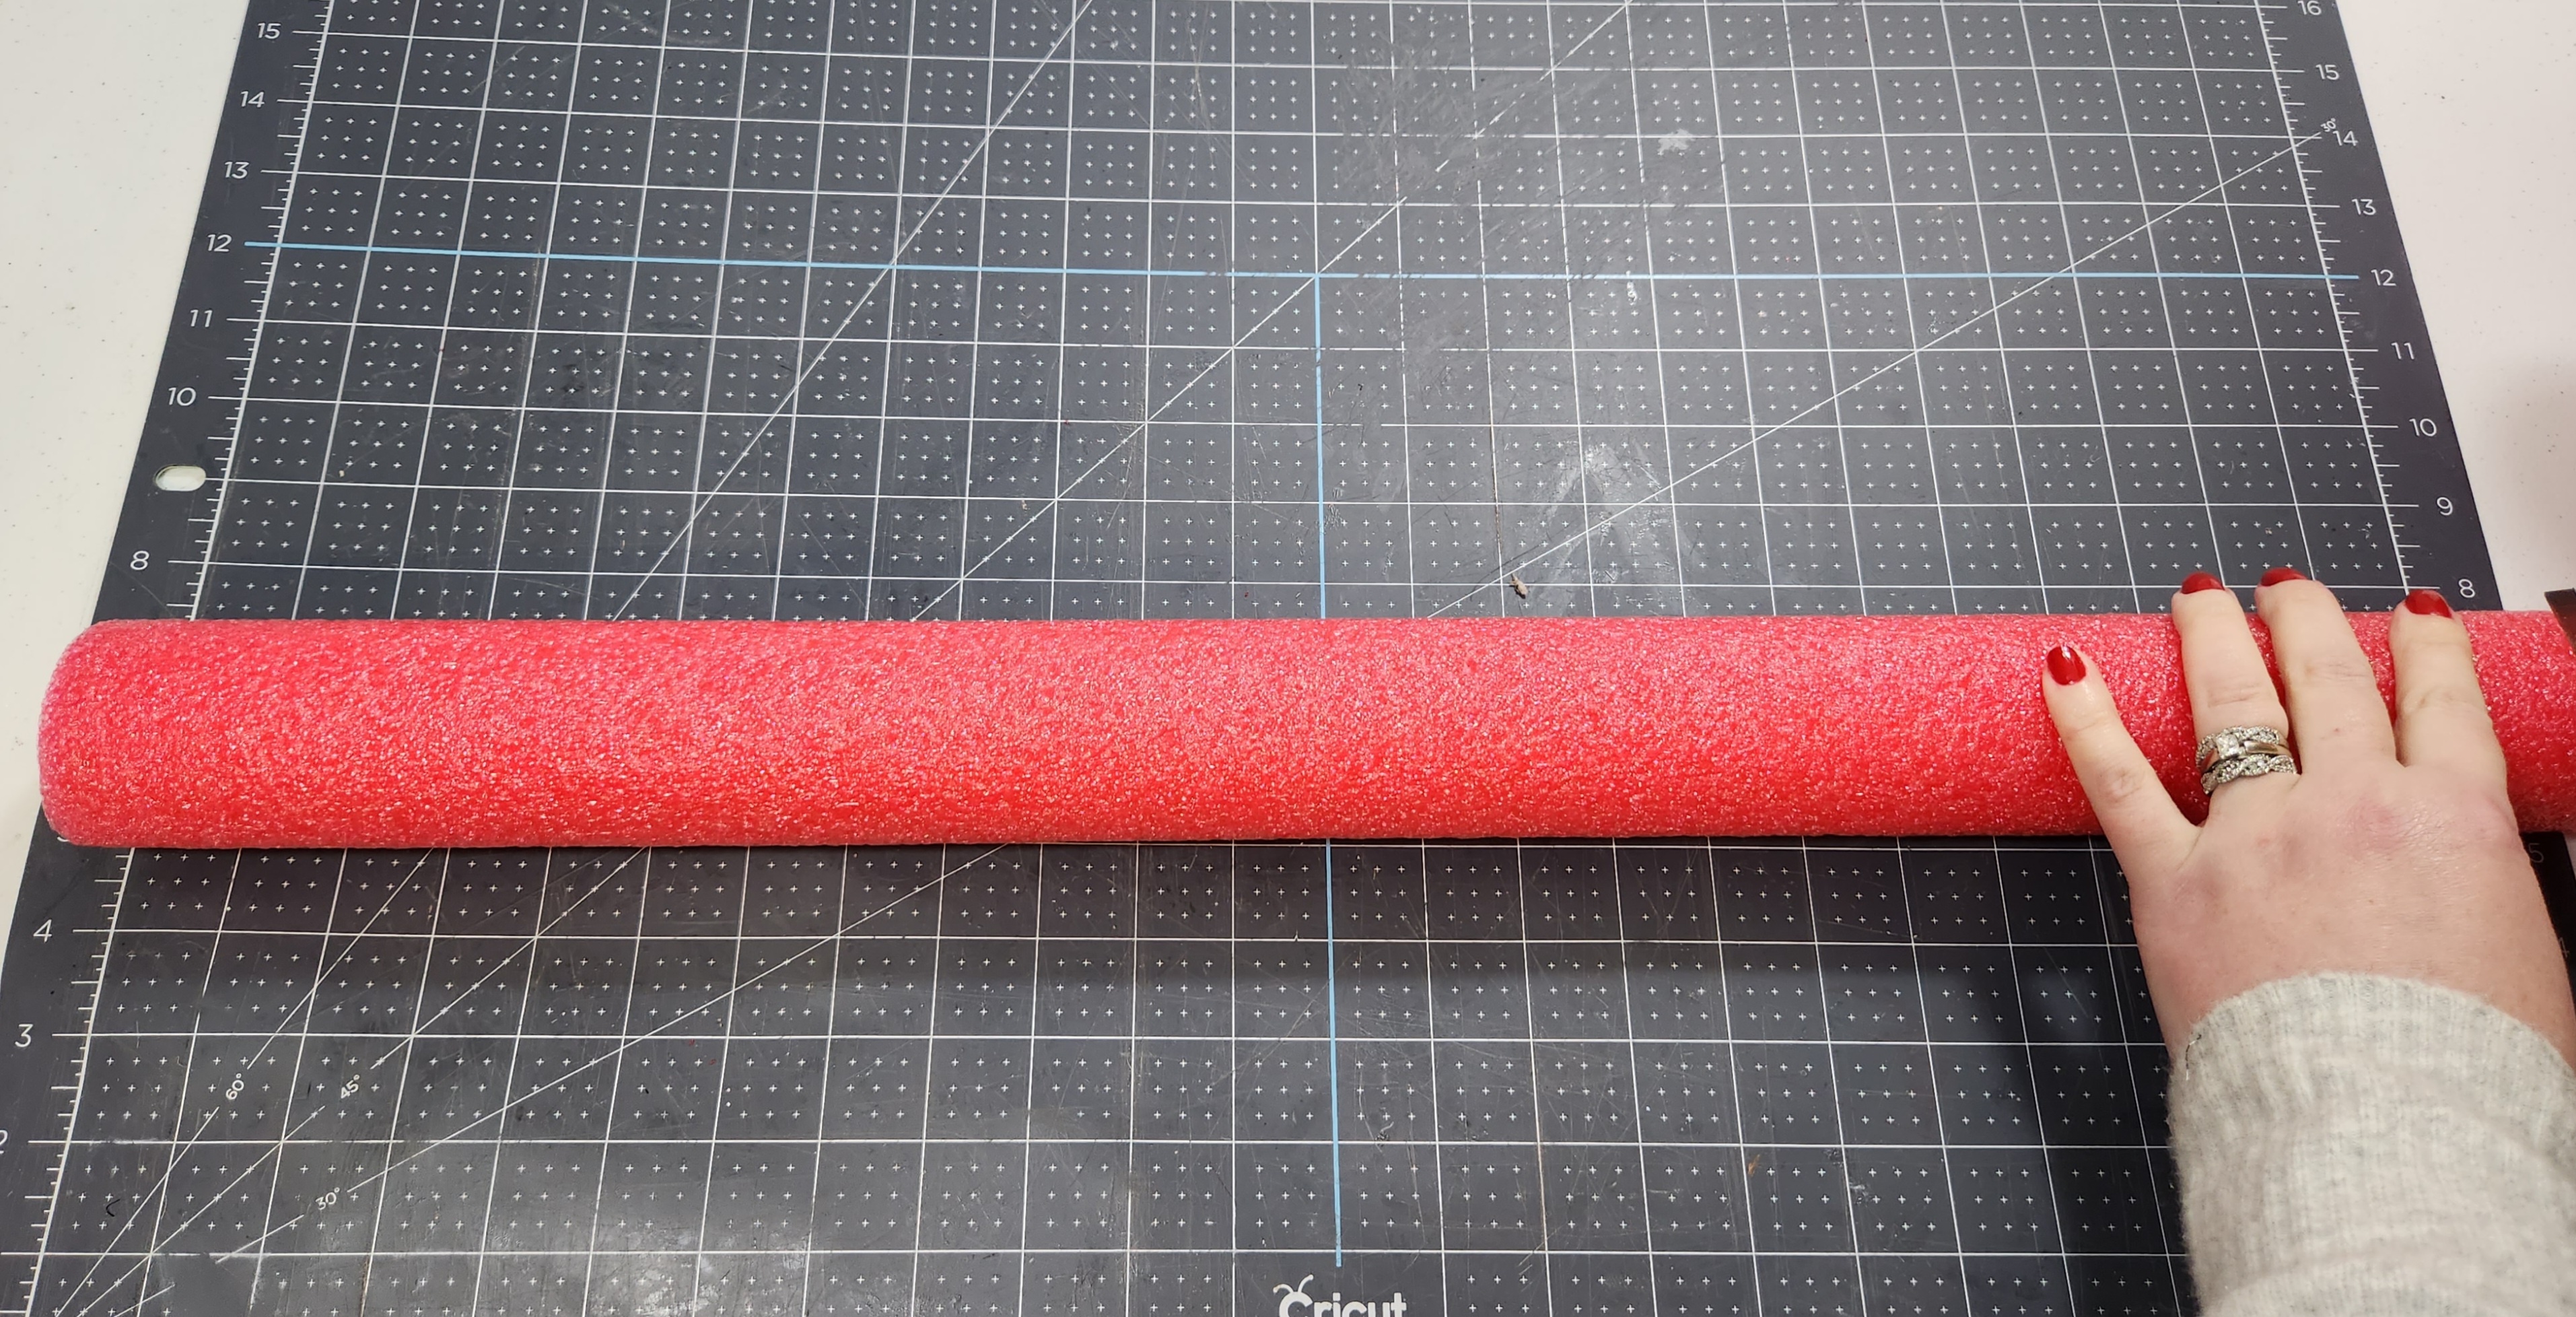
Pool noodles are 48″ long, so you will first need to cut them down. I cut mine to 24″ each which allows you to make two faux birch logs per pool noodle. Two feet long is a great size to put in the fireplace or in a large basket. You can cut them to any size you’d like.
Place the cut noodles on kraft paper and cut it to fit. The roll of kraft paper that I bought is about 28″ so I was able to just cut it to the correct width and didn’t have to worry about cutting the length as well. If you have long kraft paper, you may have to cut the length as well.


Trace the end of one of the pool noodles on the end of the cut kraft paper, then cut the circle you traced.

Once you have one circle cut, you can trace it onto the kraft paper to cut it for the other end. You will use these circles to cover the ends of the faux birch logs.

Apply Kraft Paper to the Ends of the Birch Logs
Use a foam brush to add Mod Podge on one end of the pool noodle and the back of the kraft paper circle and place the circle on the noodle. Repeat on the other end.

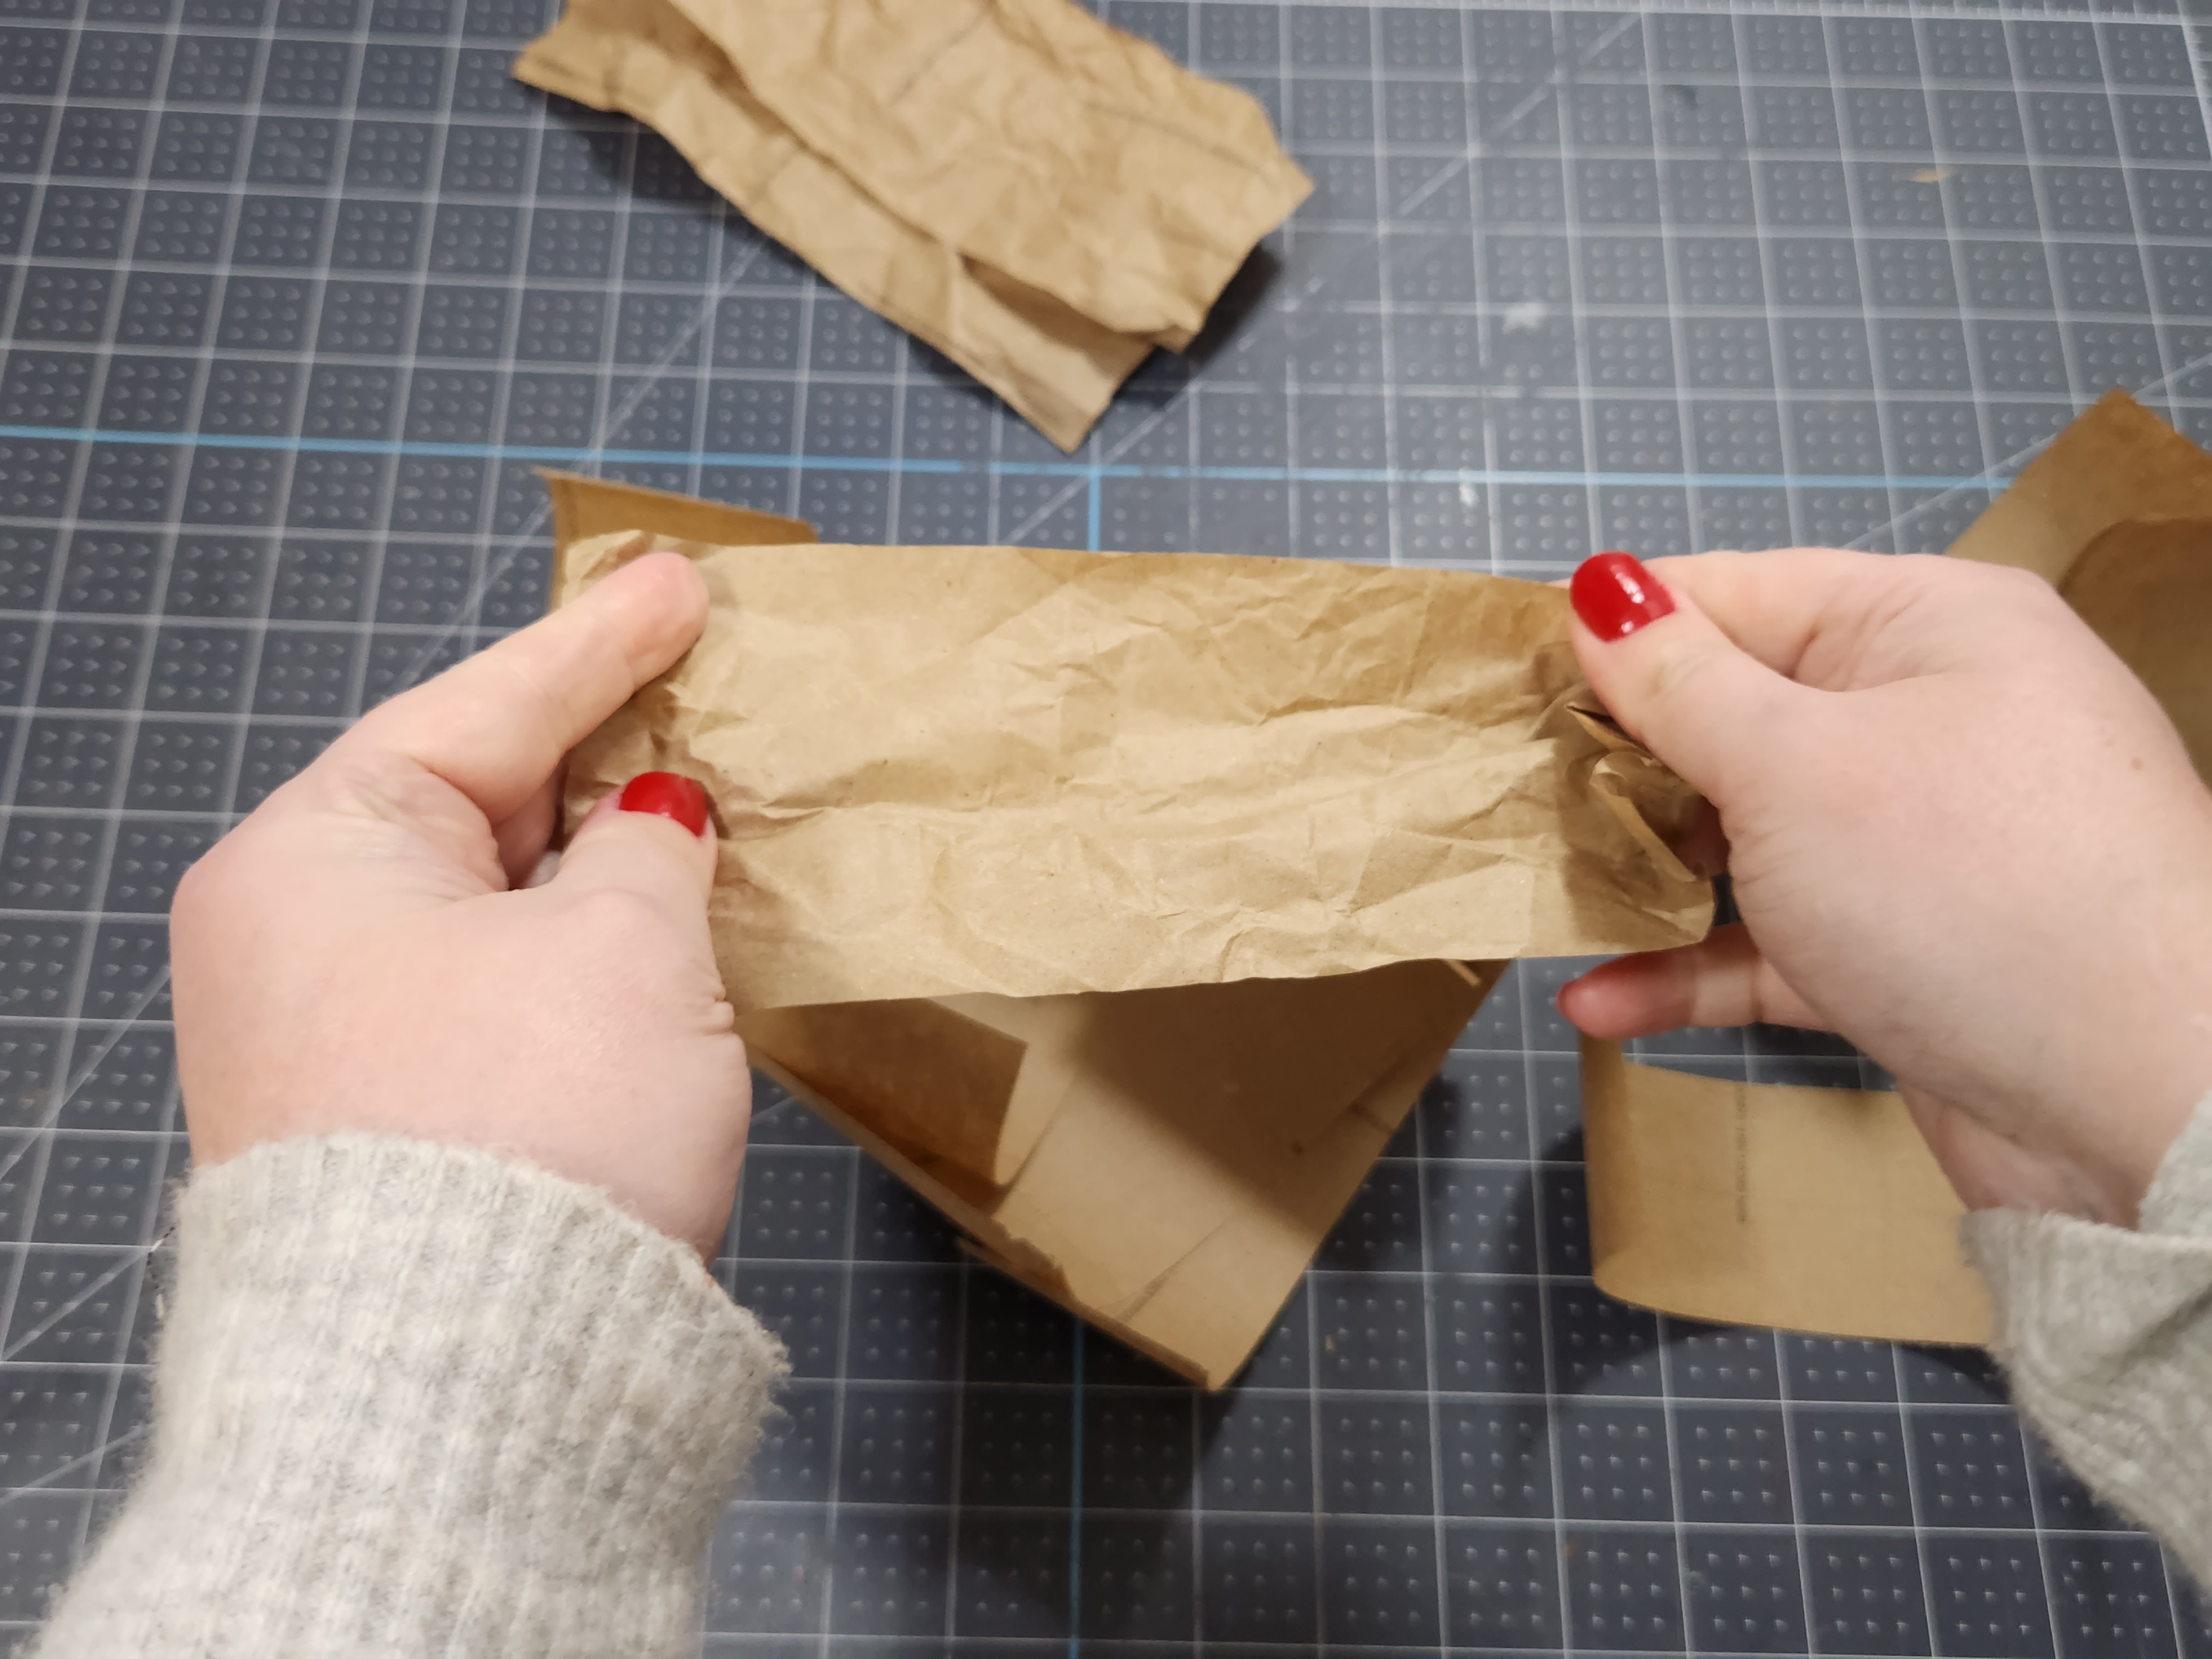
Prep & Apply the Kraft Paper
Now it’s time to get the kraft paper ready for application. For my first birch log I cut the paper into strips varying between 2″ and 4″ long. For the following logs, I ripped the paper into 2″ and 4″ strips, and I love the look of the ripped paper on the log. I recommend ripping the paper into various widths. In the picture I’m cutting the paper, but you get the idea.

Crumble the strips of kraft paper into balls and then open them back up.

Next apply Mod Podge to the back of a paper strip and onto a section of the pool noodle. Then wrap the kraft paper around the pool noodle.
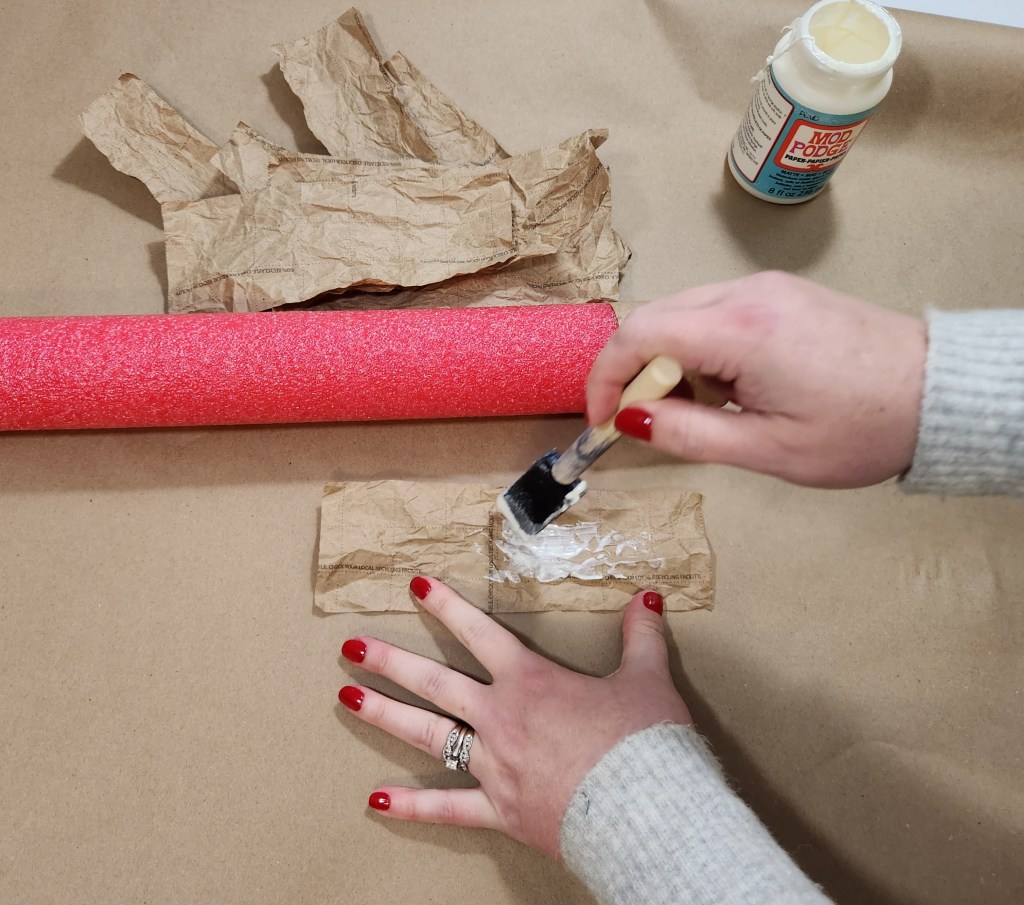
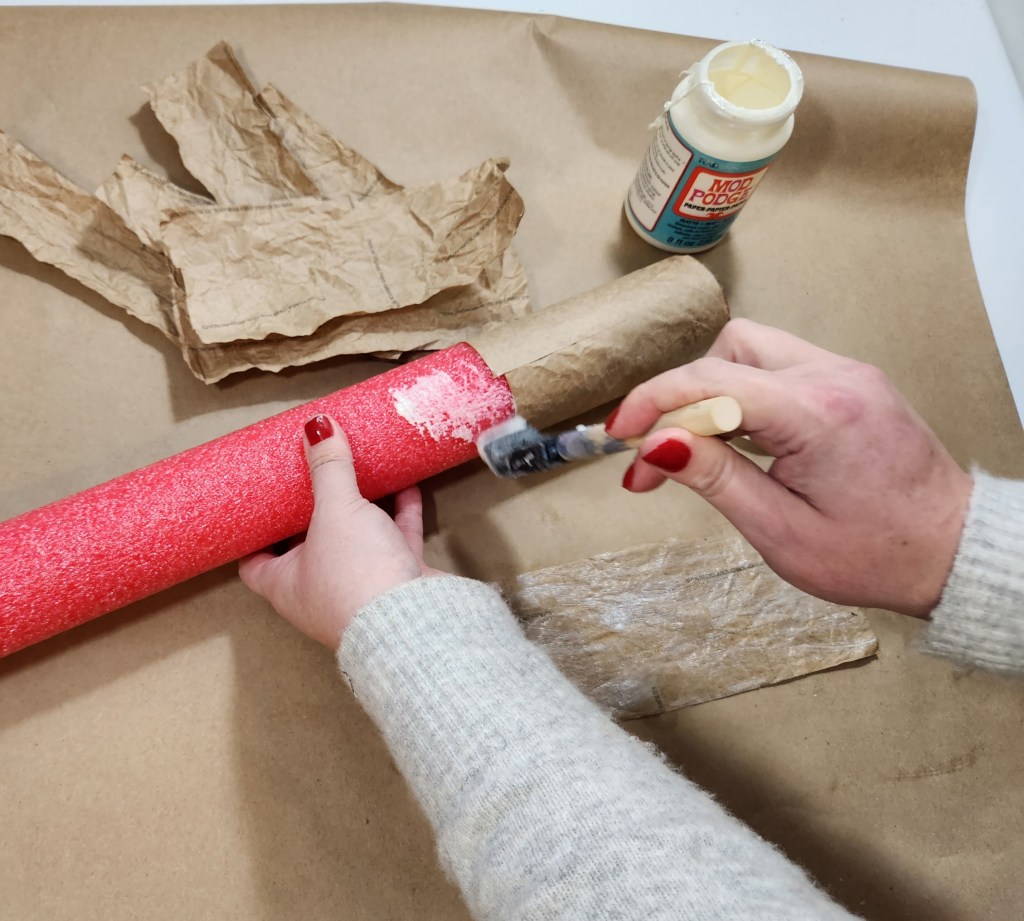
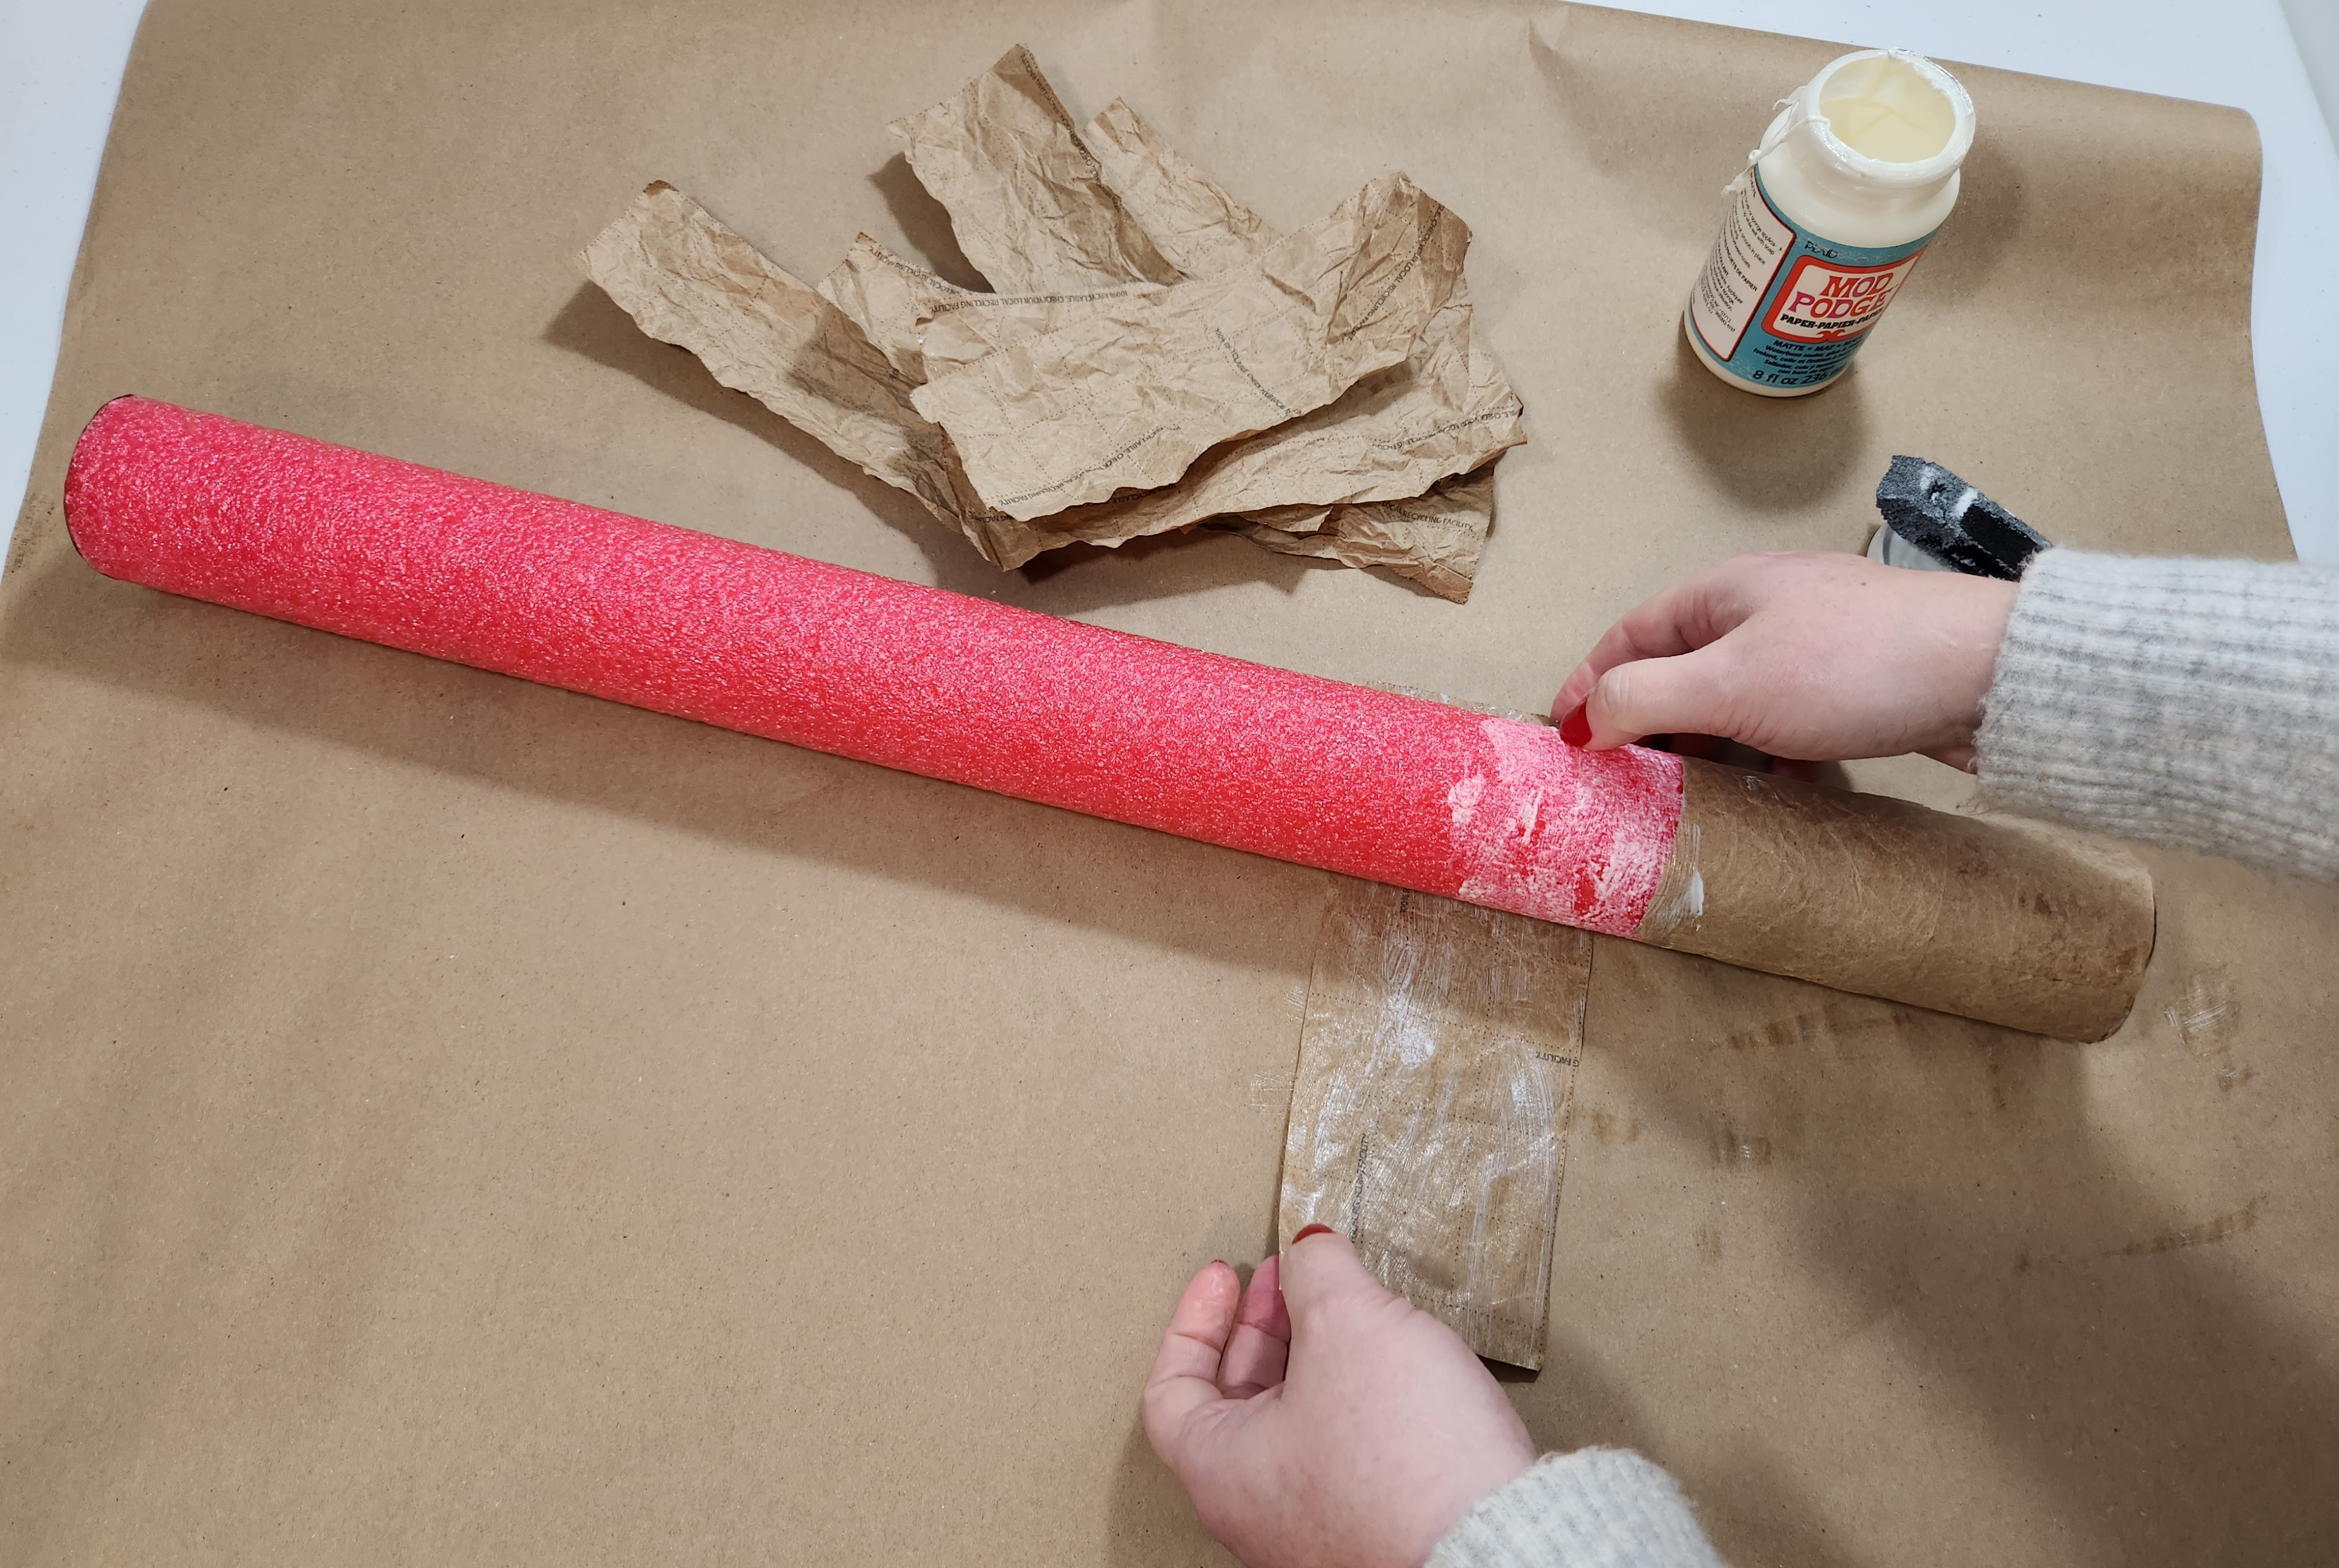
Continue adding kraft paper onto the pool noodle creating the look of birch log bark. I made sure that the ends of the paper strips were in the same spot each time so that I could hide it in the back. They aren’t noticeable on the finished birch logs though.

Add Toilet Paper
The next step in creating the look of birch logs is to add “knots.” Take toilet paper squares and rip them into strips and then crumble them up like you did with the paper. I had 3-6 strips per square.

Dip the crumbled up toilet paper strips into Mod Podge and combine a few strips together.

Place the ball of toilet paper onto the faux birch log then smooth the edges out so that you the edges are flush with the paper.

Continue adding toilet paper “knots” in random places on the faux birch log. I added 5-7 “knots” to each log.
Paint the Faux Birch Logs
Once the Mod Podge has dried on the log, paint the logs white. Don’t worry about getting into the crumbled kraft paper perfectly. That creates the uneven look of bark.

While the white paint is drying, create a gray paint wash by adding gray paint to water.

Once the white paint is dry, brush on a coat of the gray wash. Keep the extra wash that’s left over.

Next, create a tan wash by adding a few drops of brown acrylic or chalk paint to water. It should be very light tan. Brush a coat of tan wash on top of the dried gray coat.

Allow the tan wash to dry then add a bit of the gray wash over the log.
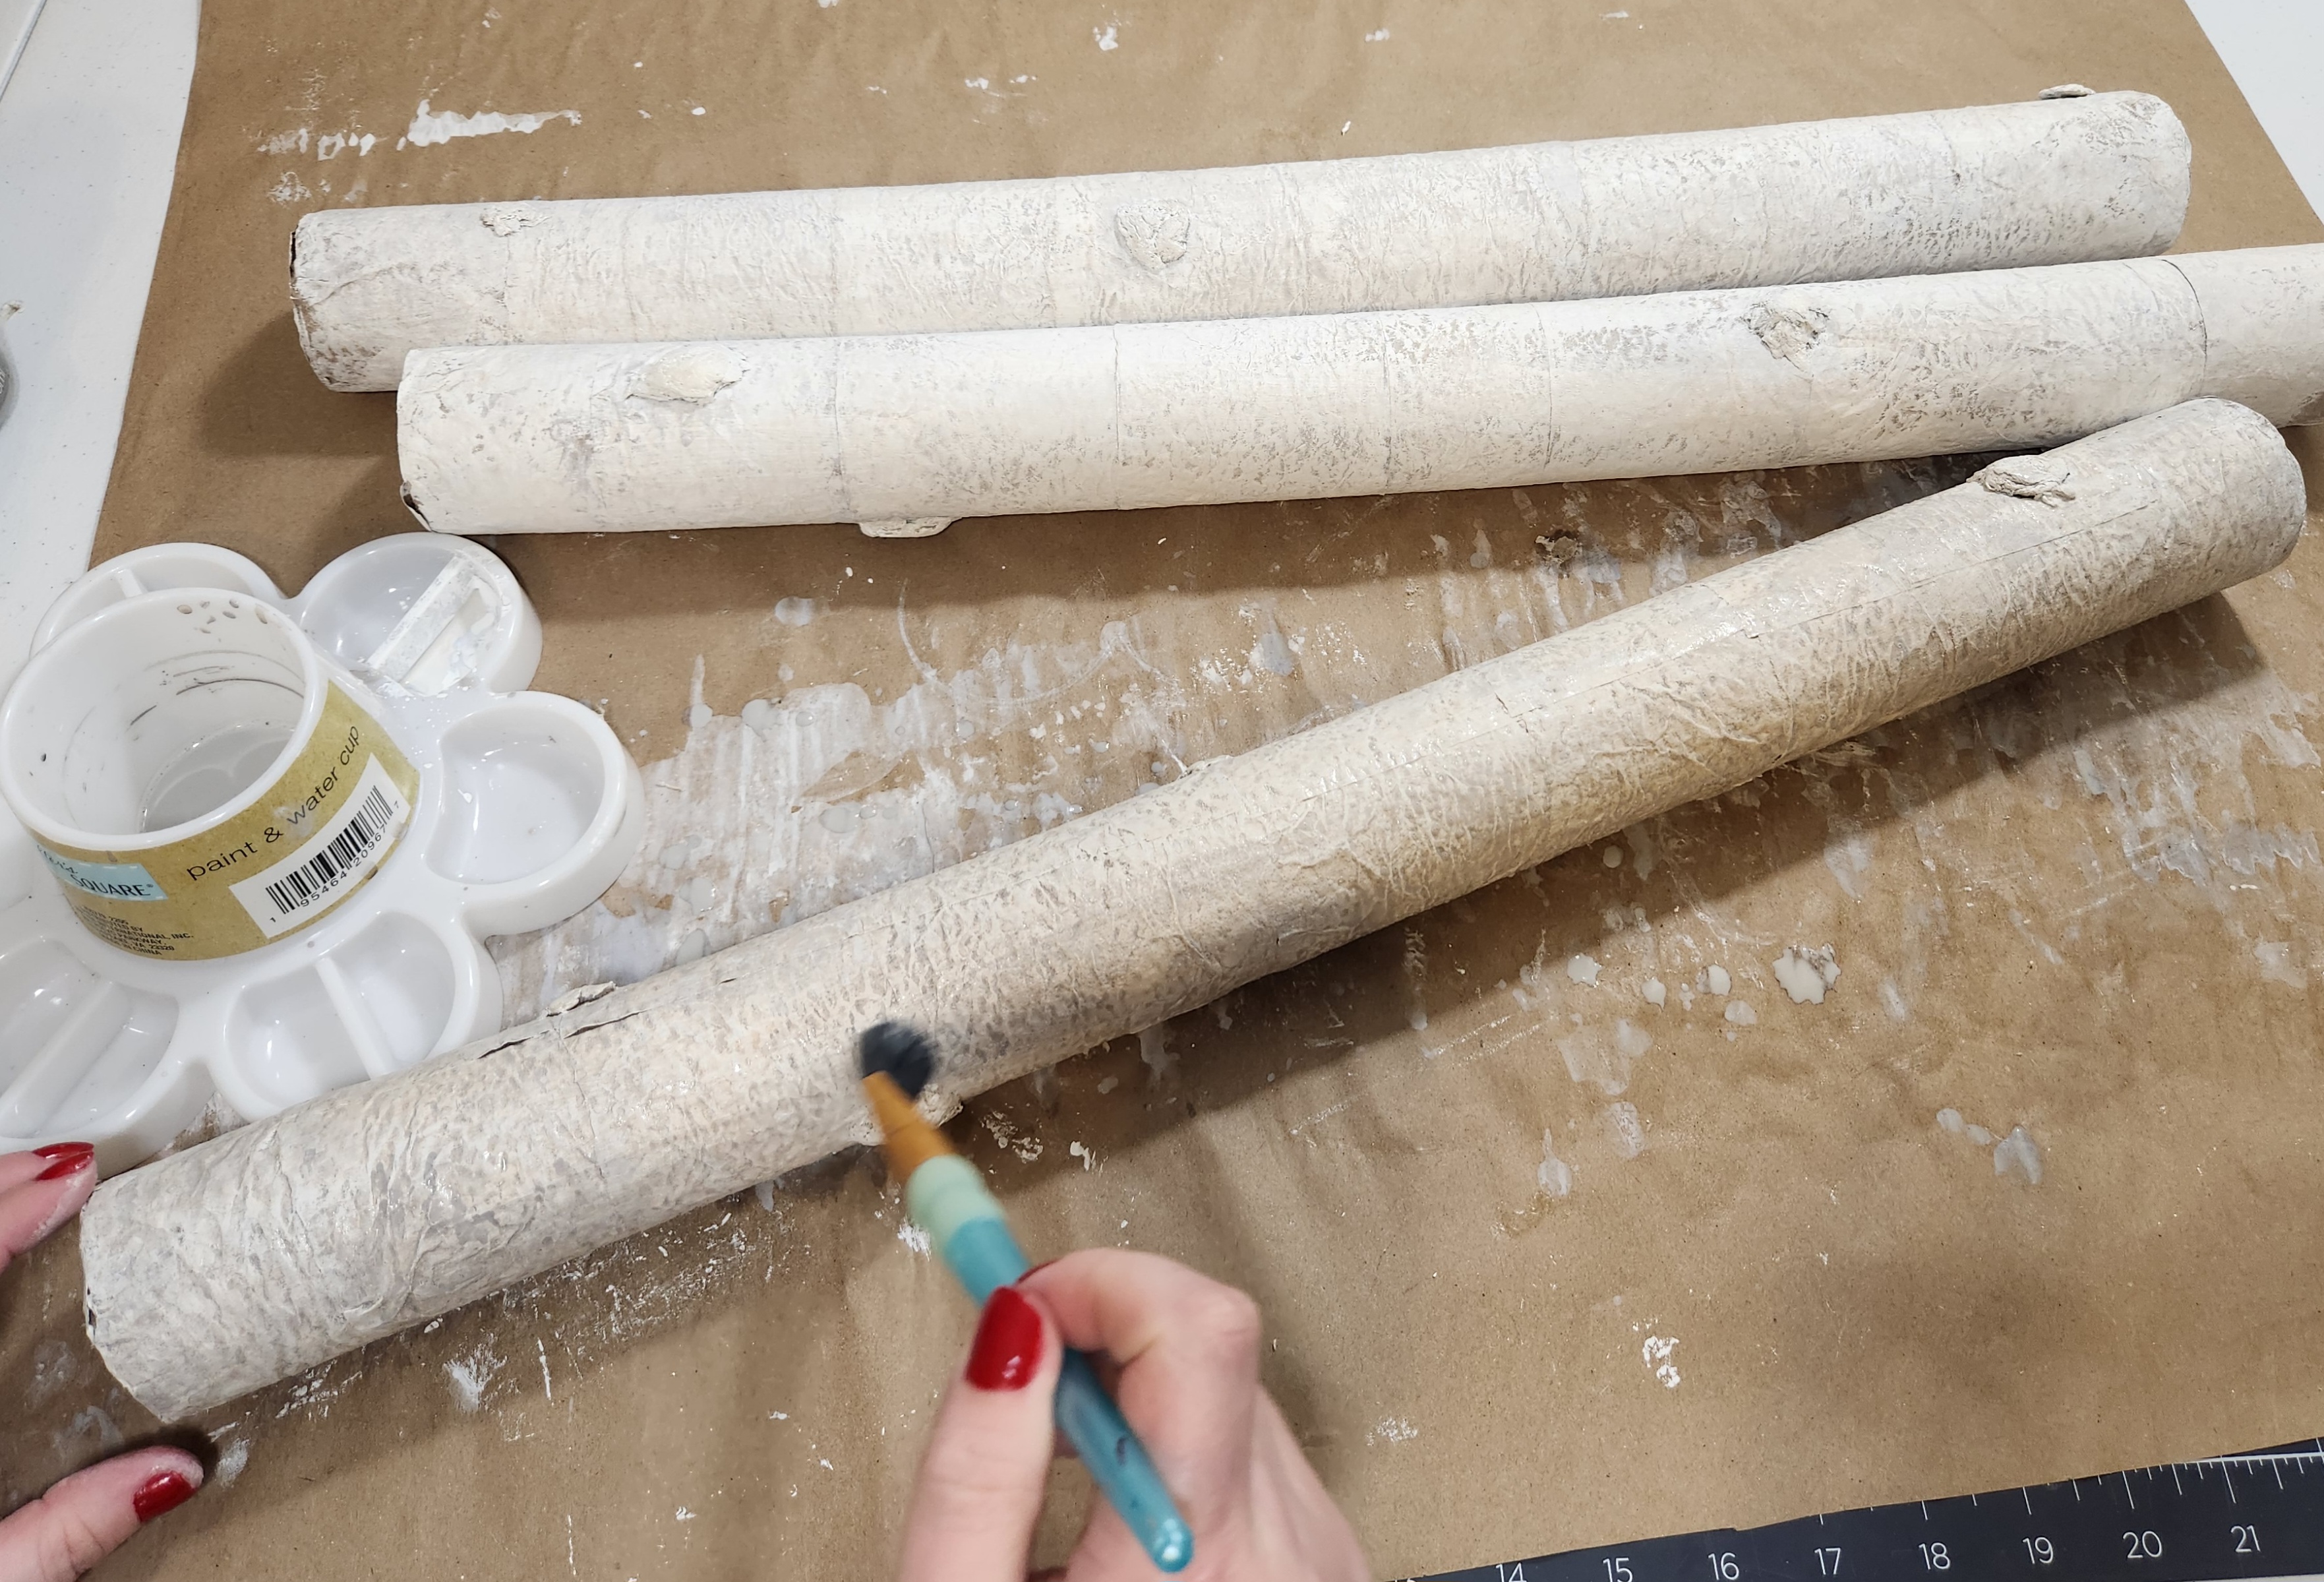
Next, add a few drops of black paint to the gray wash.

Add the darker gray wash onto the toilet paper “knots” and allow it to drip down them, then brush the wash into stripes around the width of the birch logs.


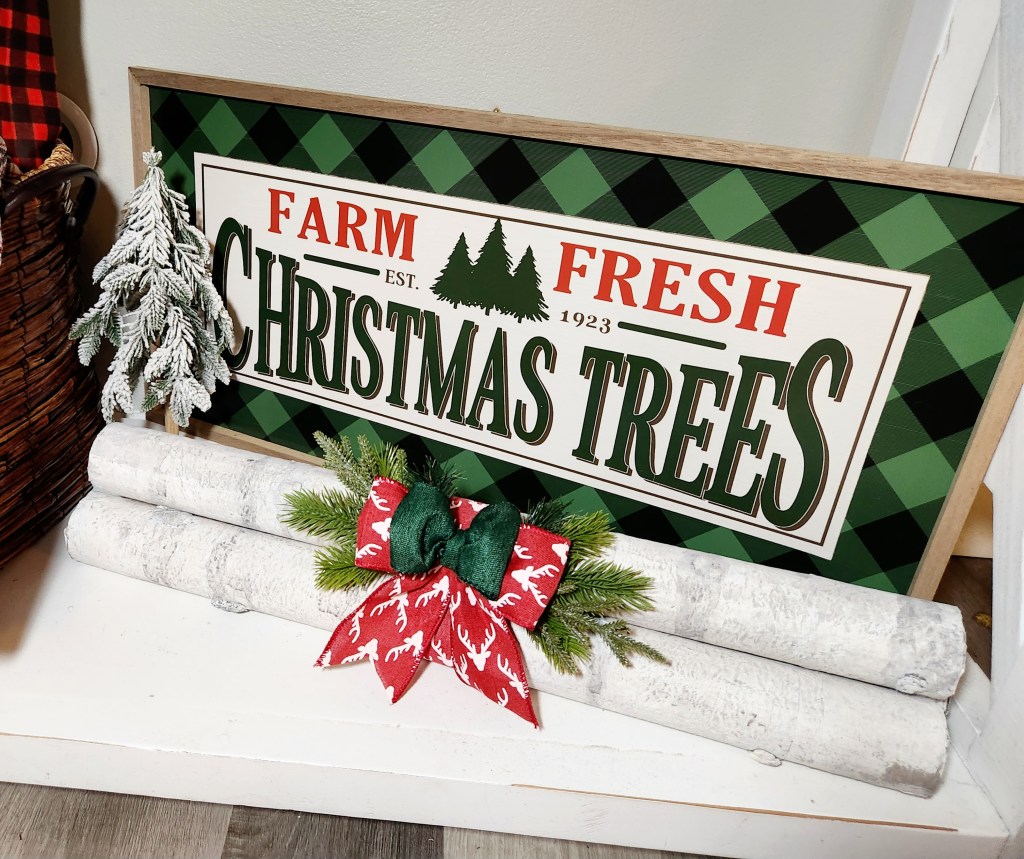
Create a Bundle of Faux Birch Logs
Once you have three birch logs created you can create a cute little bundle. Stack one log on top of two and wrap a bit of 2.5″ wired ribbon around them. Add hot glue to the ribbon to keep it in place. I slid the ribbon so that the glued portion was hidden underneath.


Gather some winter greenery and create two bundles to add behind a bow. I wrapped a piece of pipe cleaner around mine to hold them together. At first I hot glued the bundles on, but they fell off. So, I wrapped a piece of pipe cleaner around the ribbon that’s wrapped around the birch logs and then attached the pipe cleaners on the greenery to it. You can see exactly how I did that in the video tutorial. If you have lighter greenery you can probably hot glue them on with no problem.


Make a bow with the ribbon. I made a simple two loop bow with the reindeer ribbon with 1.5″ dovetailed ends and added a smaller two loop green bow on top of it. Hot glue the bow over the greenery. You can change the ribbon out after Christmas so that you can leave the bundle out after the holidays.


Faux Birch Log Video Tutorial
That’s it! Now display your bundle of faux birch log bundle as beautiful winter decor!
These logs look so realistic and saved me over $30! I have two 2′ long bundles that I spent about $5 to make, and Michael’s wanted $29.99 for a 12″ bundle. I’m so happy that I followed my instinct to try to make my own!
Remember to pin the image below or share this post with the buttons on the left side of the page so you can find it when you’re ready to start your project! Also, follow me on Pinterest for new ideas added weekly! Be sure that you never miss a great tutorial for decor like wreaths, signs and other home decor, free printables, crafts, and other fun posts! Enter your email address below to be notified of new posts! Use the buttons below to follow me on social media for other great content.

Don’t go yet! There’s more to see!
There’s plenty more to see here on the blog! If you’re looking for something specific, use the search box in the sidebar to look it up. If not, you might enjoy these ideas. Don’t have time to read them all now? That’s ok, just click over to the posts using the pictures and pin them for later. You can also add Life as a LEO Wife to your favorites and check back for new ideas and free printables and SVGs every Wednesday, as well as link parties with tons of shared ideas on Sundays!


Hi, Niki! Your faux birch logs turned out wonderful! I was super inspired by your creativity with this Dollar Tree project. I would love to invite you to link up your project at Whimsy Home Wednesdays to inspire others and have a chance to be featured https://www.artsandclassy.com/category/diy/whimsy-home-wednesdays-linky-party/
Thank you & I’ll be sure to drop by!
Hi again, Niki! The hosts and I couldn’t stop thinking about this adorable fake birch log decor from pool noodles! I’m excited to tell you this post is being featured in Whimsy Home Wednesday Link party this week! Thanks for joining us and I hope to see you at the party this week! Pinning! https://www.artsandclassy.com/whimsy-home-wednesday-no-8-edition/
I’m honored! Thank you!