
Christmas decorating time is almost here! It’s time to nail down a theme, order new decorations, and make the ones that you can create better and cheaper that the store-bought options. I know that you’re going to love the DIY farmhouse Christmas tray that I’m sharing with you in this post, so let’s get into it!
Today it’s time for our monthly DIY Blog Hop hosted by Tarah of Grandma’s House DIY, and our theme for this month is “holidays.” Stay tuned to the end of this post to check out what she has to share with you!
If you’re thinking of having a farmhouse style buffalo check theme, check out the must have decor pieces in this post.
DIY Christmas Tray Supplies:
- blank square sign- The one I got from Dollar Tree is 9.5×9.5
- black and white chalk or acrylic paint
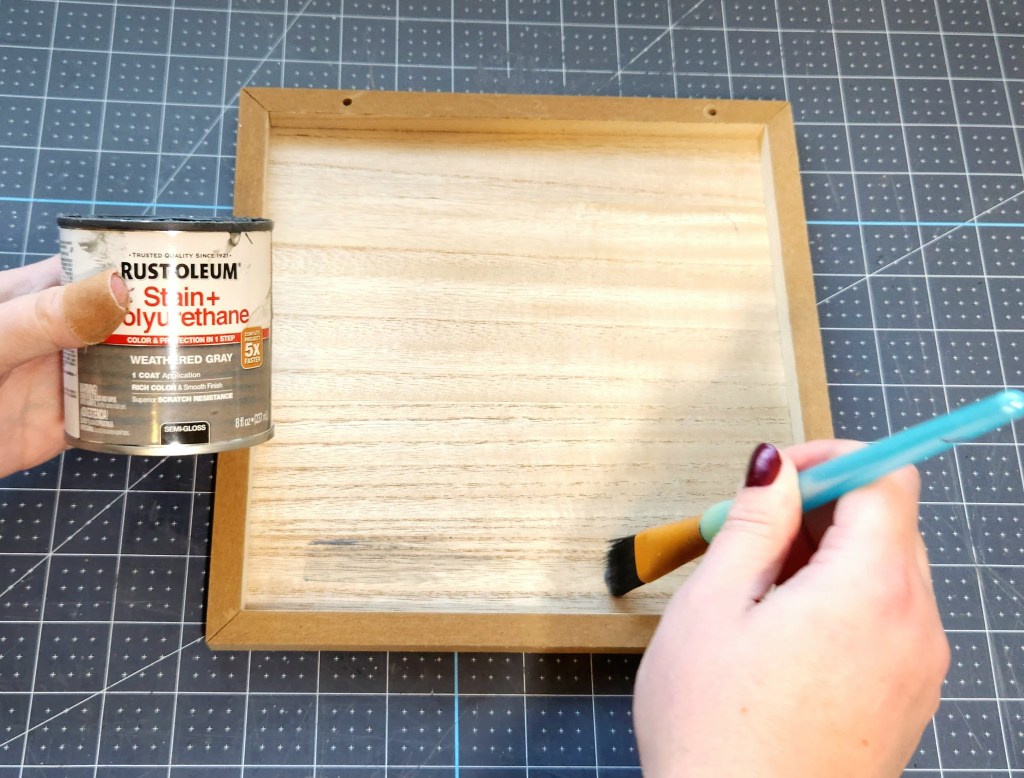
- stain (optional)- I used weathered gray.
- paint brush
- hot glue gun & glue
- Beacon Quick Grip (or E6000)
- ribbon- I used 2.5″ red and black buffalo check.
- 32 half wood beads (optional)- I used 15mm.
- wood Christmas tree ornament- I used one from a Dollar Tree pack.
- galvanized metal container or a vase- I got mine from DT & it says “noel.”


Stain the Wood
The square wood frame from Dollar Tree has a really light wood finish. You can either paint it, stain it, or give it a faux stain with watered down paint like I did in this DIY tea towel ladder. I chose to stain my sign as well as the wood beads and the Christmas tree.

Cover the Tray with Ribbon
I used 2.5″ wired ribbon to cover the raised edge of my Christmas tray. You could paint it instead. I tried that in the beginning, but the weird wood material that makes up the edge didn’t look good with paint on it. Since my Christmas theme this year is buffalo check, the ribbon was the perfect way to cover it.
Before attaching the ribbon, I painted the bottom of the tray black just in case someone gets a peak of the underside.

Cut a length of ribbon that will fit around the perimeter of the Christmas tray. Bend it so that it’s in the square shape around it. Add hot glue to the inside of the tray where the lip meets the flat inner tray. I started my ribbon about an inch from one of the corners. Press the ribbon down on the glue. Fold the ribbon into the corner like you would a Christmas tree. Cover the entire edge, then end on a folded corner.


Here’s a video if you need a little more help. I will be updating the post with a full video tutorial later today.
Embellish the Christmas Tray
At first I planned to add half wood beads around the entire top lip of the DIY tray, but it looked off once they were stained. It also looked weird around the entire outside edge, so I compromised. I placed them about a finger width apart around the entire perimeter. That gave me eight on each side.


Embellish the Christmas Tree Ornament
You will use the Christmas tree ornaments from Dollar Tree to decorate the front of the galvanized bucket that will be the base of the DIY Christmas tray. Use some paint to give the tree a rustic vibe and dimension. Dry brush some black paint on the edges of the tree.
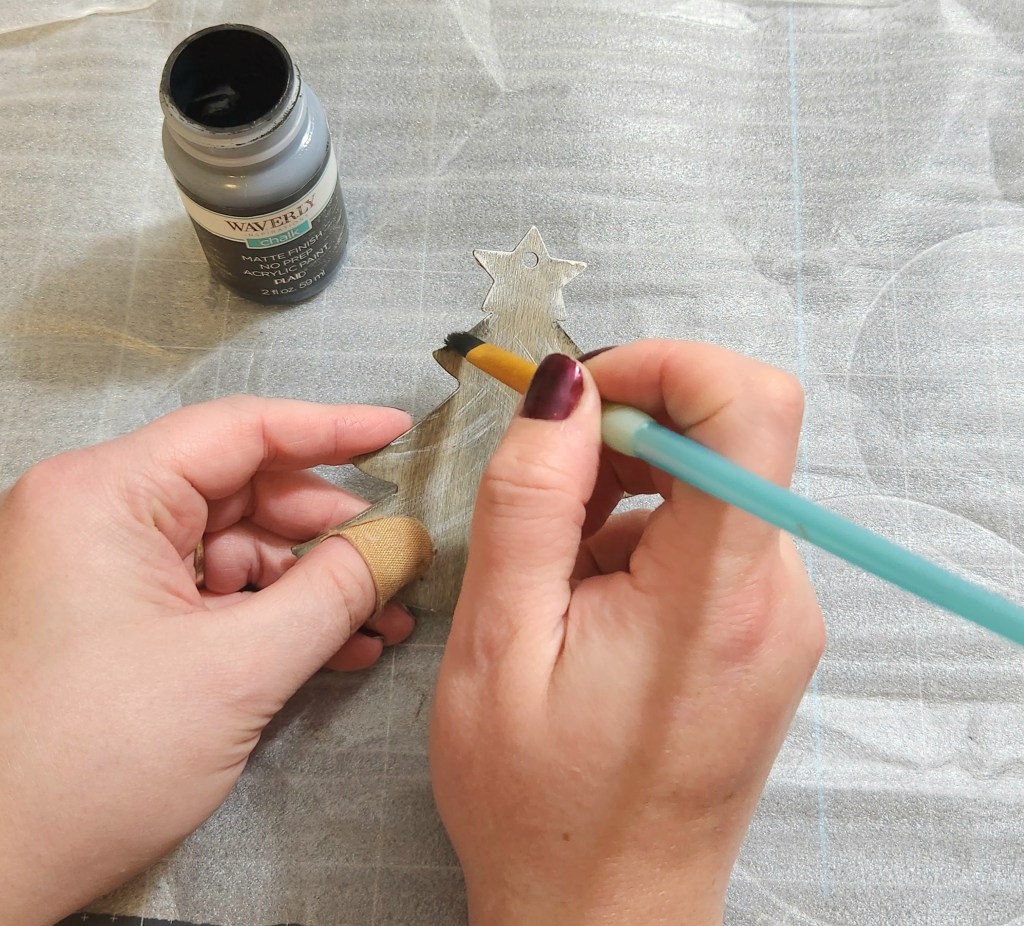
Next, dry brush white in down and outward strokes on the tree and the bottom of the star. You can outline the entire star in white if you don’t want to add the buffalo check ribbon to it.

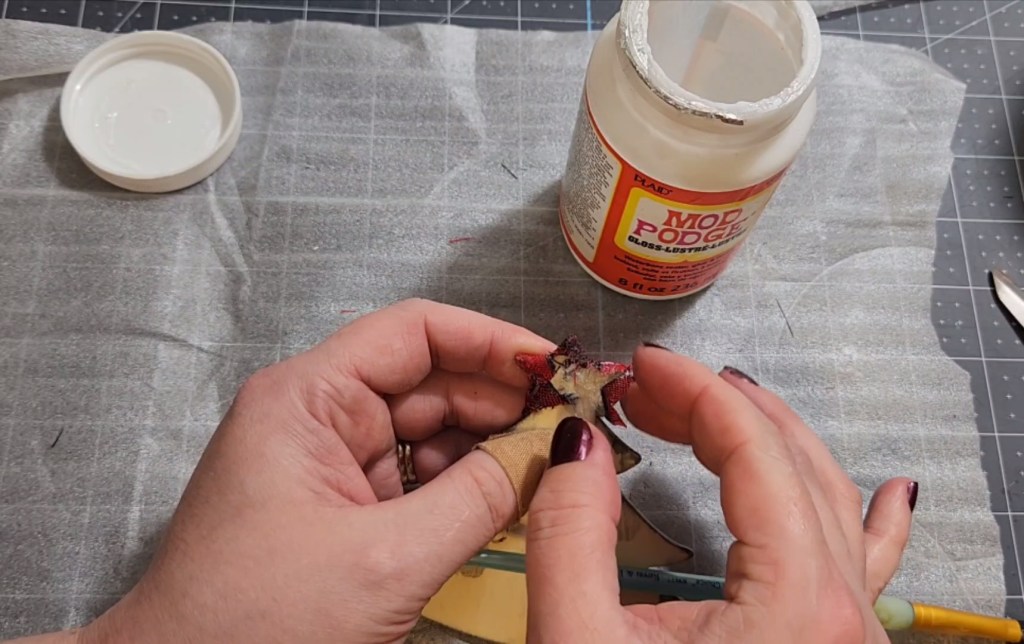
Now cut the wires off the edges of the wired buffalo check ribbon. That will make it easier to work with. Cut a “v” in the bottom that will line up with the bottom of the star.
Brush Mod Podge or craft glue on the star. You can see the “v” I cut in the ribbon in the picture below. I cut the wires off of the ribbon after this picture was taken.

Place the ribbon on the star and smooth it out, then cut around the star in a circle. Leave enough to wrap around the back.


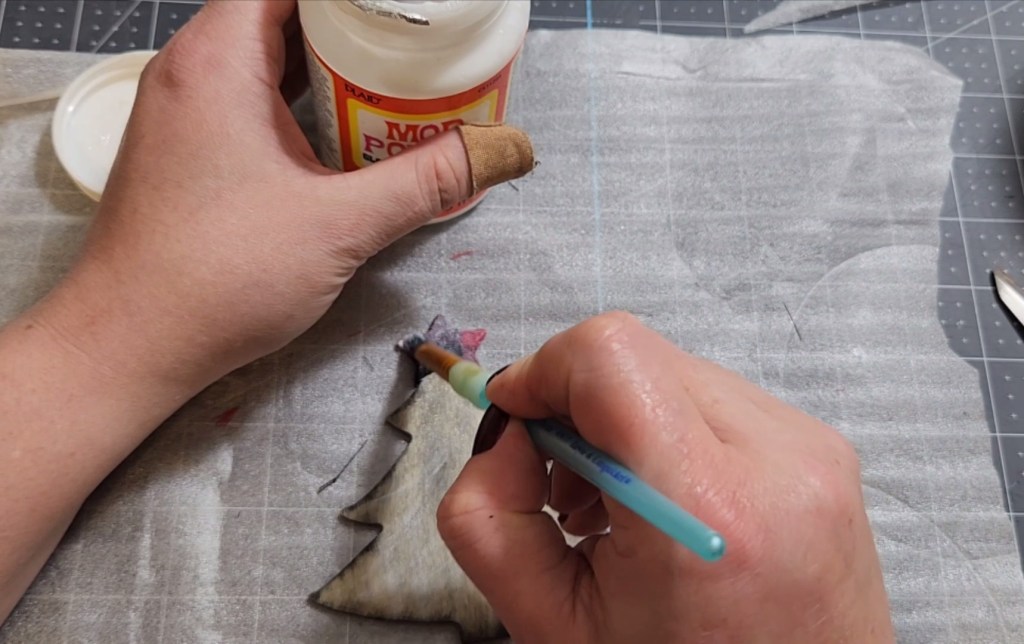
Brush Mod Podge on the back of the star. Next cut slits in the ribbon in between each point on the star and fold the excess around the back.

Assemble the DIY Christmas Tray
Add a good amount of hot glue to the back of the Christmas tree ornament and press it on to the front of the galvanized metal tray. I placed it in the center at first but removed it and lined it up with the bottom. Since the DIY tray will be on top, it will be easier to see if the tree is at the bottom.


Finally, add Quick Grip to the rim of the galvanized metal container. You can use E6000, but Quick Grip holds faster than it does. With E6000 you have to wait so long for it to dry and hold, but with Quick Grip it’s only about 15 seconds. Place the sign upside down and press the container in the middle of it, a few inches forward of the length center. If you place it in the dead center it’s harder to see it. I wanted to be able to see the container and tree as much as possible. The directions on the glue say to lift whatever you’re gluing up and down two to three times as that will help it to adhere faster. Place something heavy on top of the tray while the glue dries.


Video Tutorial
For my friends who’d like to learn by watching, here’s a quick video tutorial to help you out. As always forgive me for the times that I bump the tripod! If you need to, you can slow the video down by clicking the speed button.
That’s it! Your DIY Christmas tray is ready to be styled!
This tray turned out so cute. I placed it beside our kitchen sink and styled it with a Christmas soap dispenser, a rolled up towel with a bow tied around it, and a few Dollar Tree items. Remember this is a blog hop, so stick around to see the holiday post Tarah has to share with you today!


Remember to pin the image below or share this post with the buttons on the left side of the page so you can find it when you’re ready to start your project! Also, follow me on Pinterest for new ideas added weekly! Be sure that you never miss a great tutorial for decor like wreaths, signs and other home decor, free printables, crafts, and other fun posts! Enter your email address below to be notified of new posts! Use the buttons below to follow me on social media for other great content.

On to our DIY Blog Hop!
Tarah – Grandma’s House DIY | Holiday – a little autumn Home Tour

Don’t go yet! There’s more to see!
There’s plenty more to see here on the blog! If you’re looking for something specific, use the search box in the sidebar to look it up. If not, you might enjoy these ideas. Don’t have time to read them all now? That’s ok, just click over to the posts using the pictures and pin them for later. You can also add Life as a LEO Wife to your favorites and check back for new ideas and free printables and SVGs every Wednesday, as well as link parties with tons of shared ideas on Sundays!


Love how it turned out! Its great blogging with you!
Thank you! You as well!
That soap dispenser is so cute!
Isn’t it?! It’s from Dollar Tree!