
Welcome friends! I’m so excited to see all of the Christmas decor and craft supplies in stores right now. My local Dollar Tree was putting out all of theirs the other day when I went with my son, and I left with quite the haul. I grabbed ten packs of ornaments in different sizes not knowing what I was going to do with them yet, but I knew I’d find something. Well today I decided to make a farmhouse style tree of Christmas ornaments, and it turned out cute! Let’s get into this tutorial.
Looking for more affordable Christmas decor? You’ll love this Christmas picture or card hanger, this farmhouse tray perfect for holding soaps and lotions by the kitchen sink, and these DIY stocking holders. Need a little tabletop tree but hate the way Dollar Tree mini trees look? Learn how to make them full and perfectly farmhouse with this easy tutorial. Save yourself hundreds this season by making your own deco mesh wreath. My tutorial is so easy anyone can do it!!
Christmas ornament tree supplies:
- 2 packs of 12 pack ornaments: I used packs with red matte and red glitter ornaments.
- Beacon Quick Grip glue: You can use E6000 or hot glue, but I just found Quick Grip and it’s awesome. It holds in seconds!
- 2.5″ wood block
- 12″ wood slat
- acrylic paint or wood stain: I used weathered gray stain.
- star tree topper from DT or
- ribbon for a bow top


Don’t forget to enter our Joy of Giving Giveaway to win a $175 Etsy gift card! There are entries for subscribing to the blog and for following me on each social media platform (links are in the sidebar), as well as daily entries, so come back each day to enter!

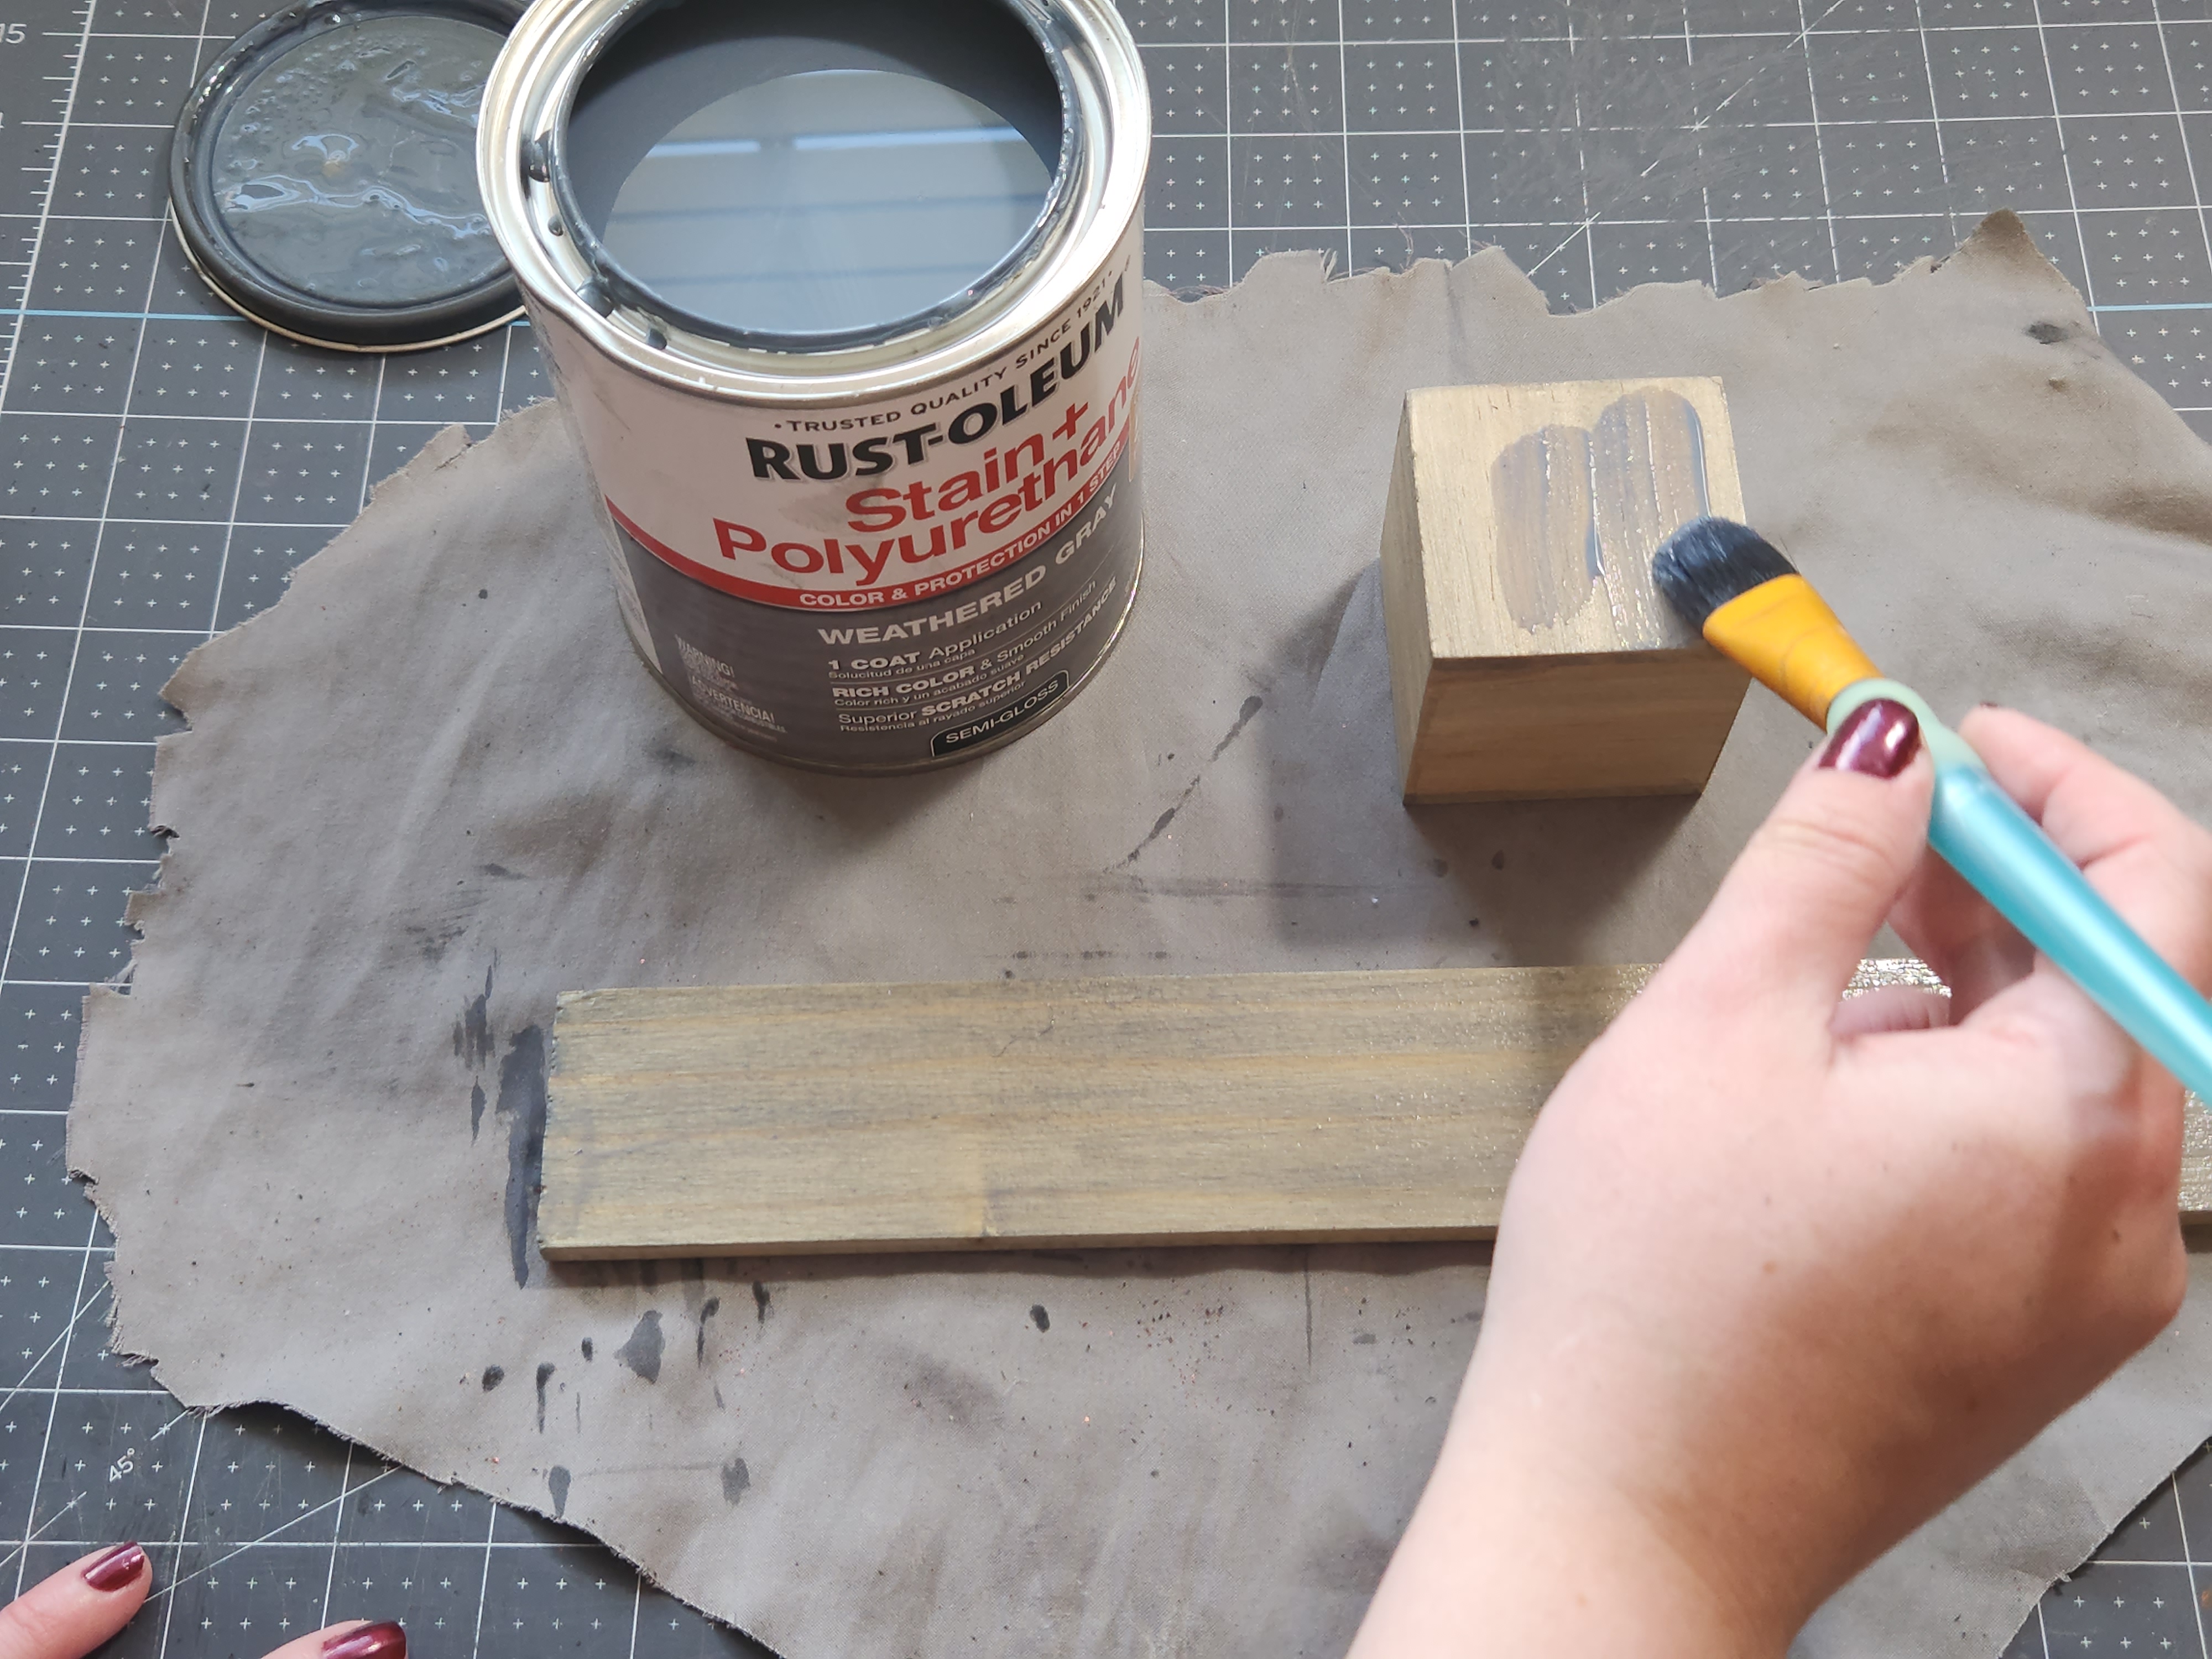
Stain or Paint the Wood
Most of Dollar Tree’s wood products are a bit rough, so if you need to give the wood block and the slat a light sanding.
Once they’re nice and smooth, paint or stain them. I stained mine to match my DIY Christmas tray and the rest of my home decor using Rust-oleum weathered gray stain and polyurethane in one. It took three coats to make me happy with the color. This stain is amazing, and it dries in minutes.

Prep the Ornaments
Before you place the ornaments on the wood you need to remove the hanger and the raised knub under it. Y’all it’s the only thing I can thing to call it lol! Pull up on the gold hanger and it will pop right off.
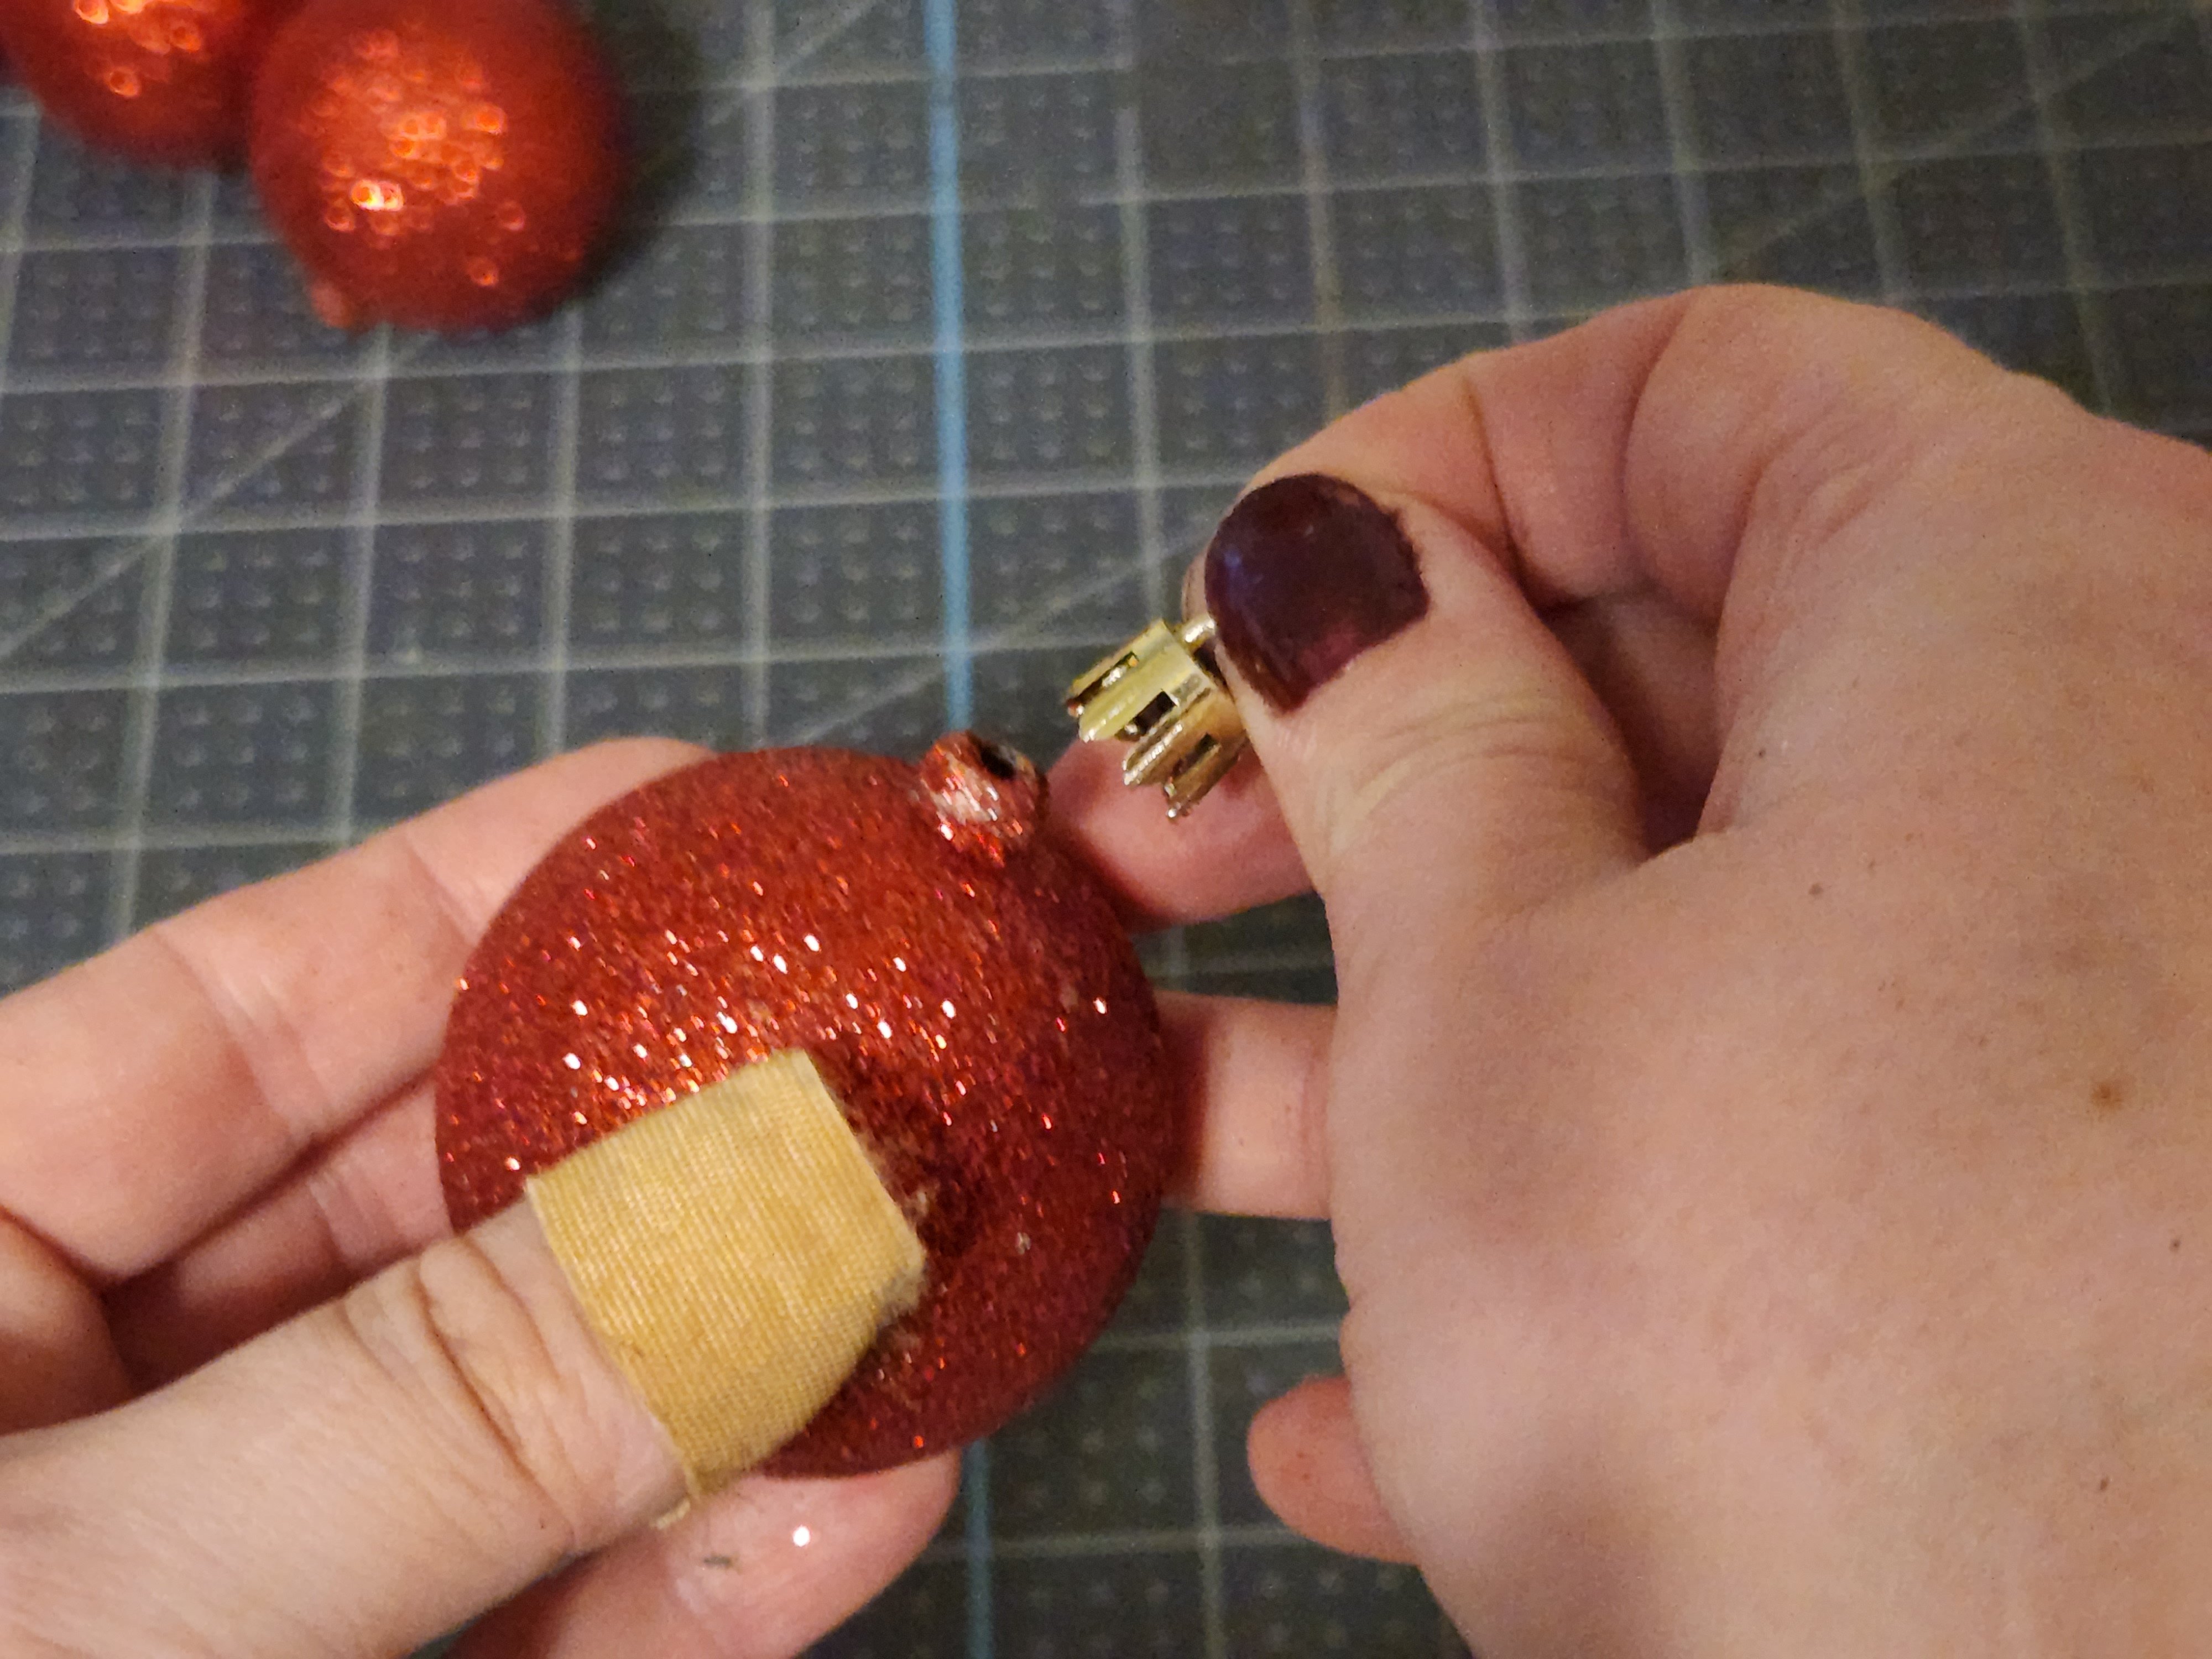
To begin, I used a small hack saw to make a tiny cut in one side.

Once you’ve made a tiny cut, use pliers to rock pull the raised portion off. Just rock it back a little and it will pop off cleanly.

Assemble the Christmas Ornament Tree
I put my tree together with six ornaments on the bottom row, five on the second, four on the third, and so on. After I put it together, I didn’t like the amount of glue showing from the front side and I didn’t like that starting off with an even number left one edge all the same color with the opposite side alternating colors. So, I pulled the entire Christmas ornament tree apart and placed seven on the bottom row. I didn’t get photos remaking the ornament tree, so I’ll share the process of using six on the bottom row, and you can decide if you’d like to use six or seven ornaments on the bottom row.
First Row
Place some Quick Grip glue on the bottom of the first ornament, around the hole left from removing the hanger.

If you’re using six ornaments on the bottom row, place it a few centimeters from the edge of the wood slat. If you’re using seven ornaments, place it so that about 1/3 of the ornament hangs off the edge of the slat.

Continue adding glue to the ornaments and placing them along the rest of the wood. If you’re using seven, the last ornament will hang off a bit like the first one.


Second through Sixth Rows
When you add the second row, place the ornaments in between the ones on the first row. Squeeze the glue a few millimeters to the left and right of the hole on the bottom, not around it entirely.


Continue adding rows to the ornament tree- four on the third row, three on the fourth, two on the fifth, and finally one on the top. If you’re using seven, you know what to do, one less on each successive row.


Add a Tree Topper
There are several things you can use as a tree topper if you want one. It is fine without one, but I wanted to add a little something extra. I used a small Dollar Tree silver glitter star tree topper for the top of my tree. It’s too tall with the springy thing that goes on the top of a regular tree, so I had to remove it. It came off pretty easily using pliers. Just grab it tightly and wiggle it back and forth.

Some of my glitter came off in the process so I brushed on some glue and added more silver glitter.


Video Tutorial
For my visual learning friends, here’s a quick video tutorial.
That’s it! Your Christmas ornament tree is complete!
I love my little Christmas ornament tree! I think the star on the top just puts it over the top.

Remember to pin the image below or share this post with the buttons on the left side of the page so you can find it when you’re ready to start your project! Also, follow me on Pinterest for new ideas added weekly! Be sure that you never miss a great tutorial for decor like wreaths, signs and other home decor, free printables, crafts, and other fun posts! Enter your email address below to be notified of new posts! Use the buttons below to follow me on social media for other great content.

Don’t go yet! There’s more to see!
There’s plenty more to see here on the blog! If you’re looking for something specific, use the search box in the sidebar to look it up. If not, you might enjoy these ideas. Don’t have time to read them all now? That’s ok, just click over to the posts using the pictures and pin them for later. You can also add Life as a LEO Wife to your favorites and check back for new ideas and free printables and SVGs every Wednesday, as well as link parties with tons of shared ideas on Sundays!


love this definitely going to make some 🙂
Thanks Sue!
What a cute idea Niki! I love the way it turned out!
Thank you!
Hi Niki! This tree is so adorable, I think I’ll add it to my list of Christmas crafts do to this year! Pinning it now in case I can’t get to it right away! Thanks for the inspiration!
Thank you!
Is the treat stable or does it fall over?
It’s completely stable. The ornaments are very light and the block is pretty large and situated in the center of the wood slat.