
Hello friends and welcome to our monthly Under $10 on the 10th Blog Hop hosted by Tammy of Patina and Paint. I’m joining a talented group of bloggers to bring you a Christmas project that you can make for less than $10. Today I’m going to show you how to turn a Dollar Tree Christmas tree into a full looking farmhouse tree that you will be proud to display!

Dollar Tree Christmas Tree Upcycle Supplies:
- 2 mini Christmas trees
- pack of small ornaments
- wire cutters/pliers
- hot glue gun & glue
- tree topper or
- ribbon- I used 2.5″ wired ribbon to make a bow tree topper.
Two trees- $2.50, ornaments- $1.50, tree topper or ribbon- $1.50, galvanized metal tree collar- $1.50. Total $7!


Disassemble a Tree
Unbox both of the mini Christmas trees. I used white ones from Dollar Tree because they only had one green. It actually turned out prettier with them, but either color will work.
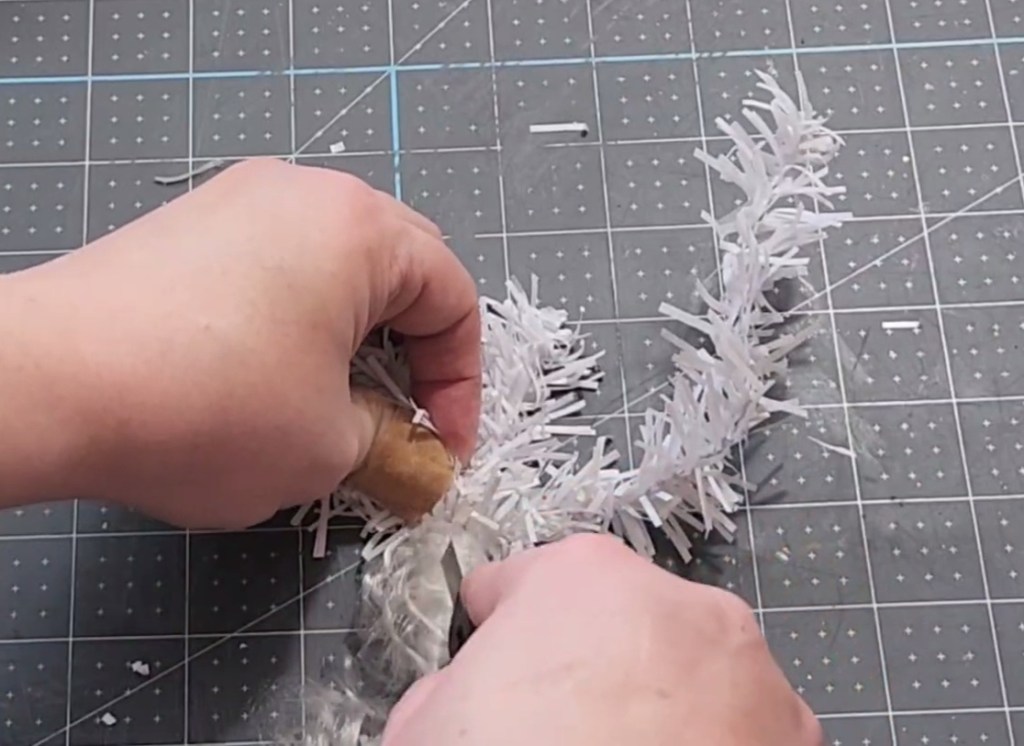
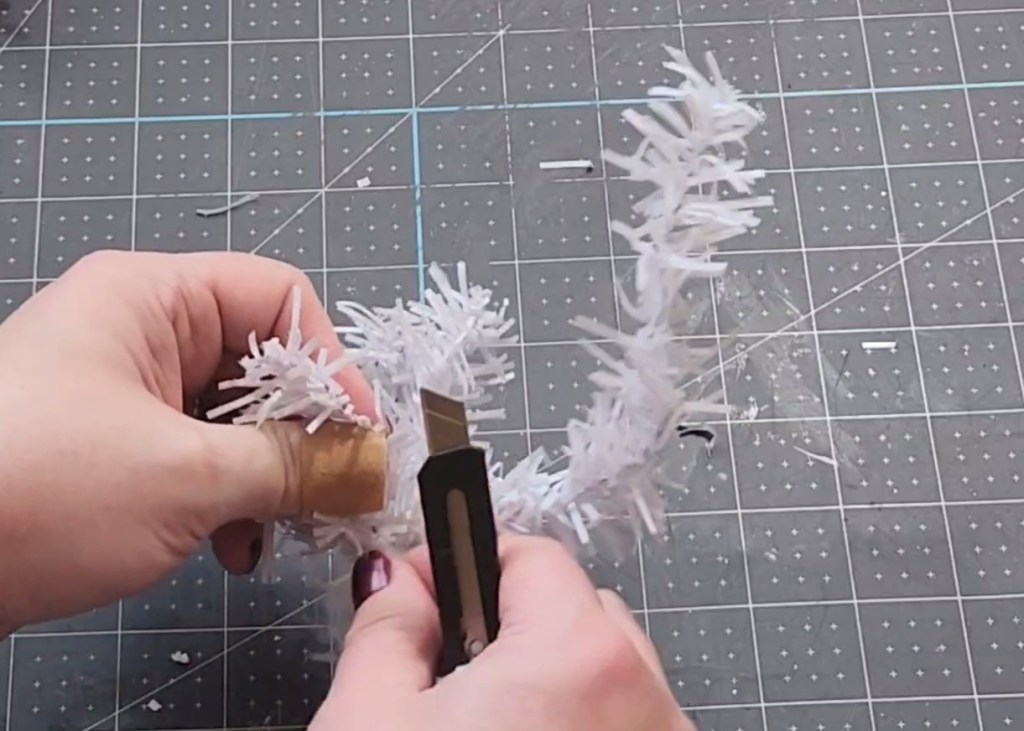
Next use wire cutters to cut the branches from one of the trees. Mine weren’t strong enough to cut through the wires, so I clamped each branch and wiggled it back and forth until it came off. It helps to place the branches in piles by size as you remove them. It makes assembling the upcycled Christmas tree faster.


If you don’t have wire cutters or pliers, you can use a utility knife to cut through the white strings holding the branches to the metal pole in the center. I did that for the top two sections. It works best on the sections below the very top one. It took a while to cut through the strings at the top of the tree.
Assemble the Upcycled Dollar Tree Christmas Tree
Once all of your branches are removed from the first tree, it’s time to attach them to the second one. If you haven’t already put the tree together, pop the plastic feet on the bottom and spread out the branches as evenly as possible.

Bend about 1/8″ of the end of one of the long branches 90° and squeeze some hot glue on it.
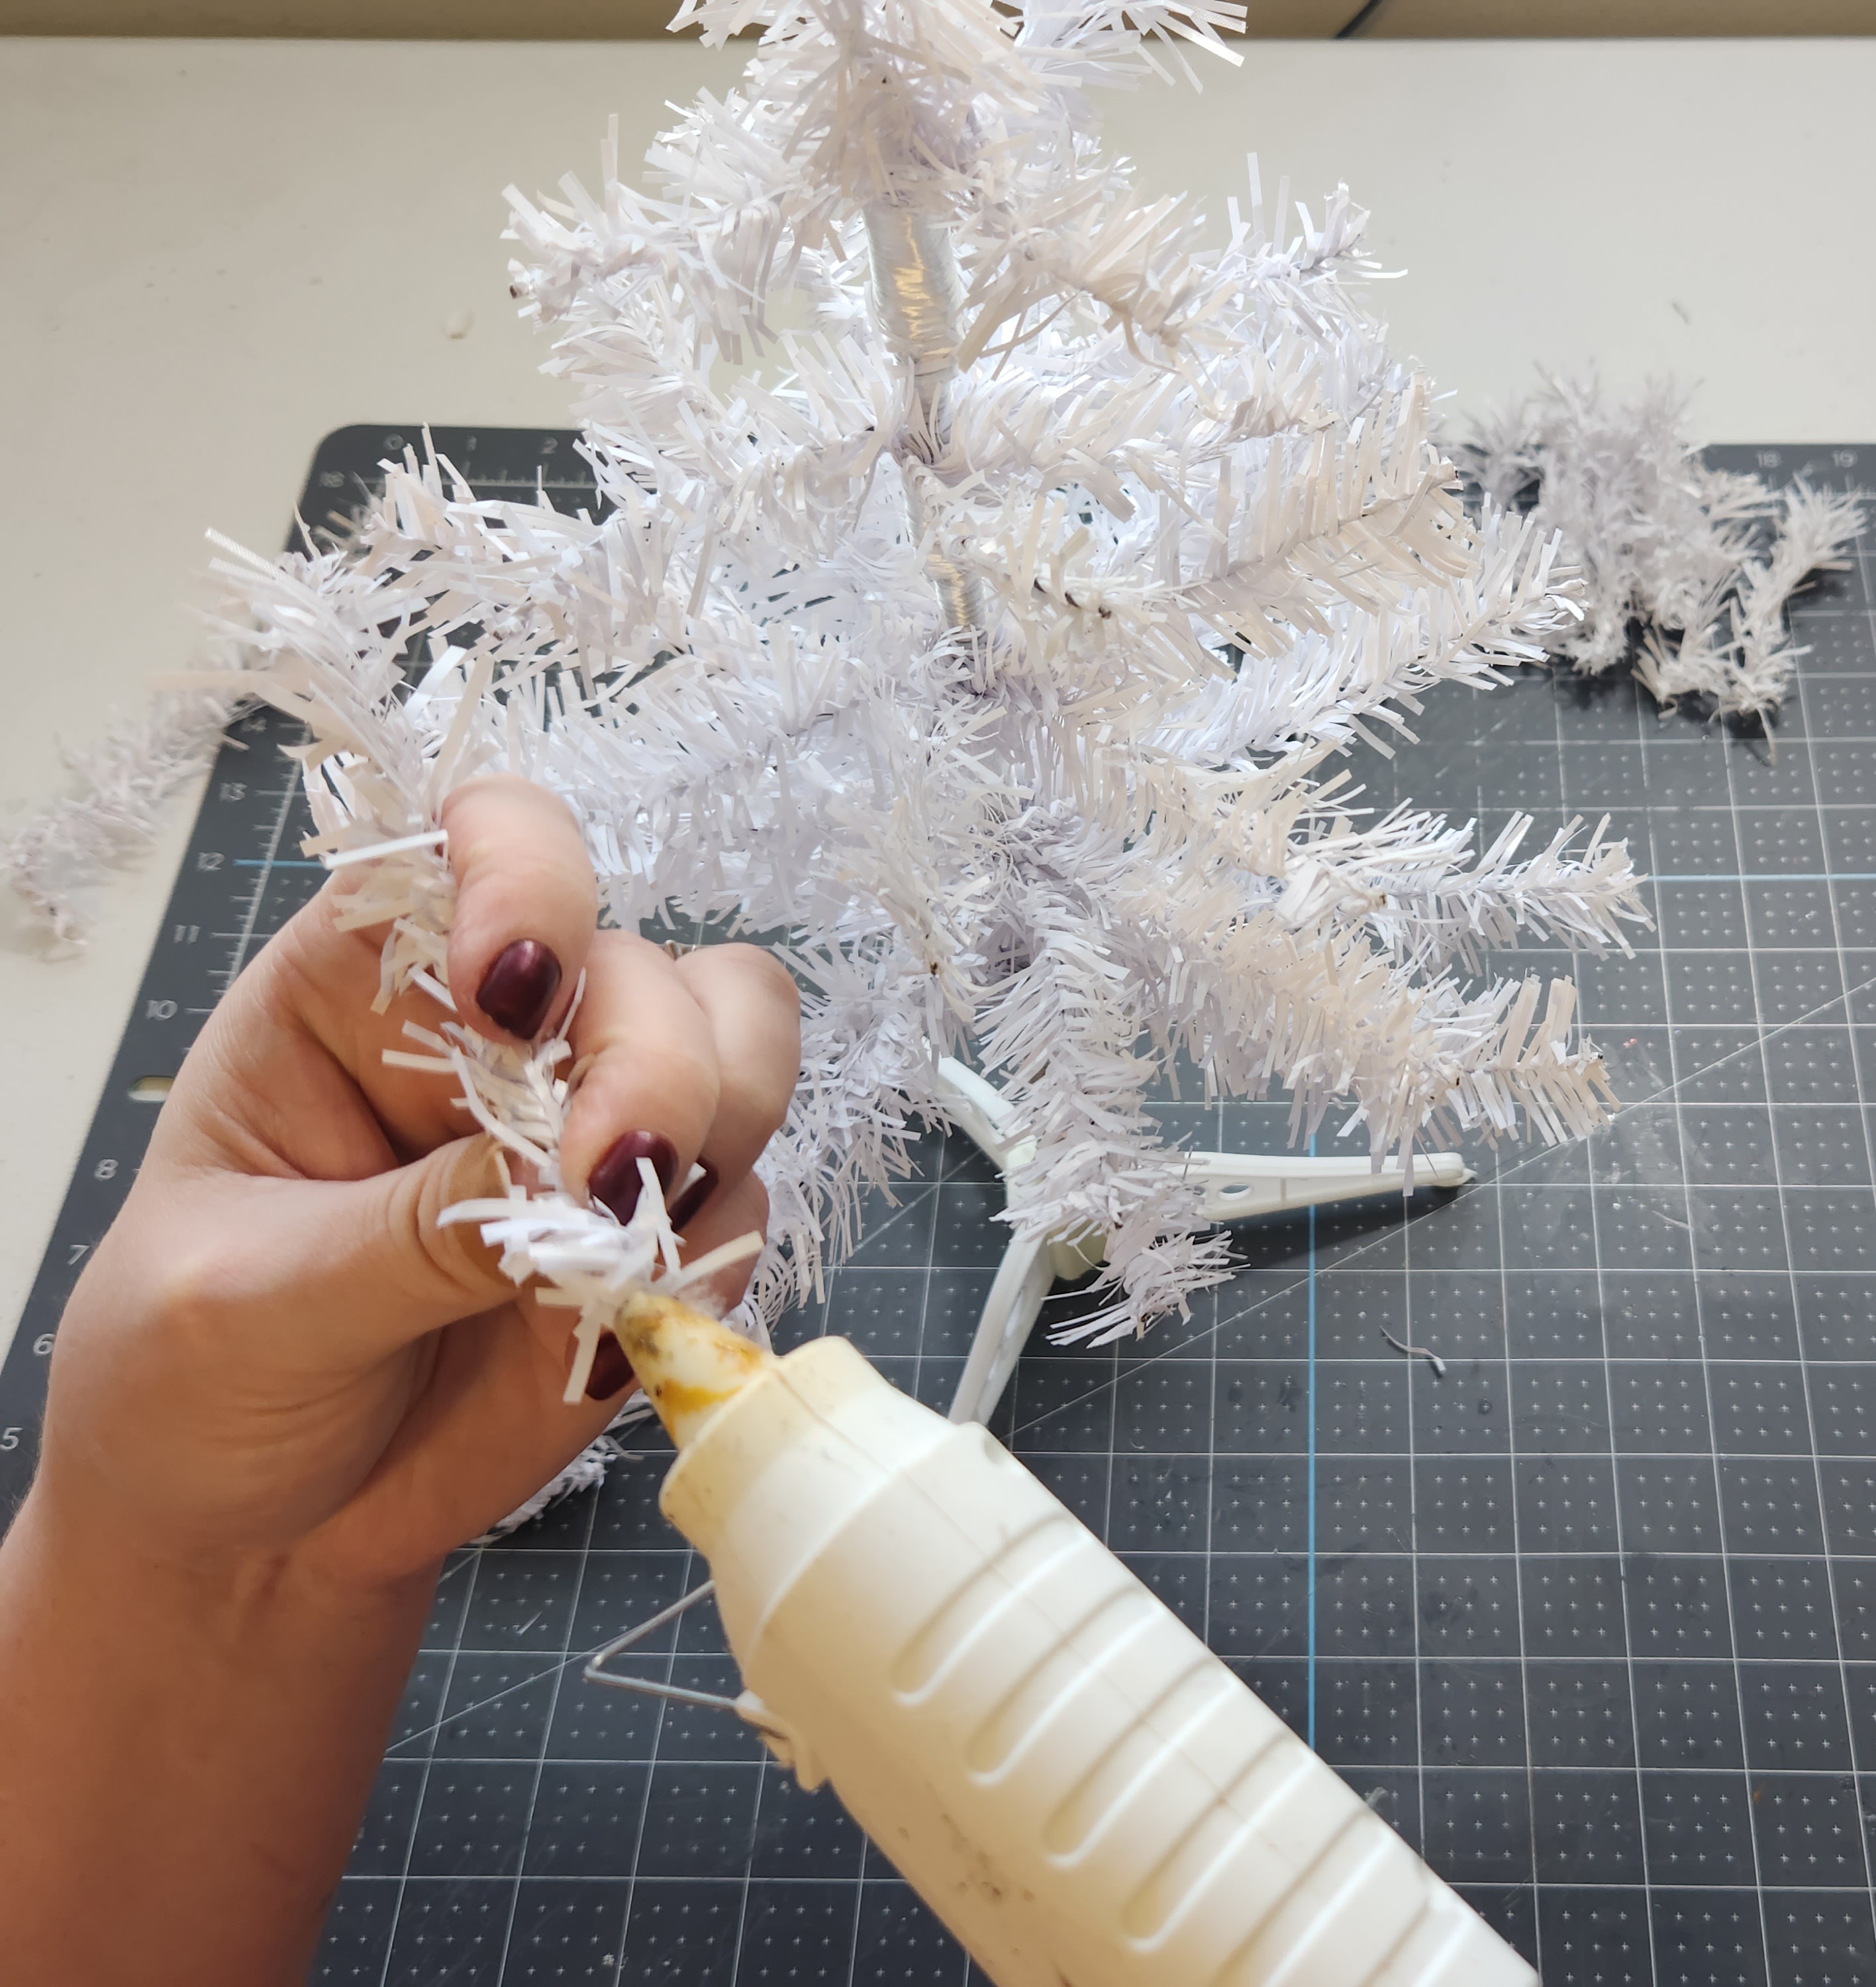
Place it on the metal pole on the Christmas tree in an open space between the bottom branches.

Continue gluing and adding branches to the tree in blank areas in between sections. Place them by size in the same sections you cut them from. That’s why it’s really helpful to place them in piles as you remove them from the first tree.


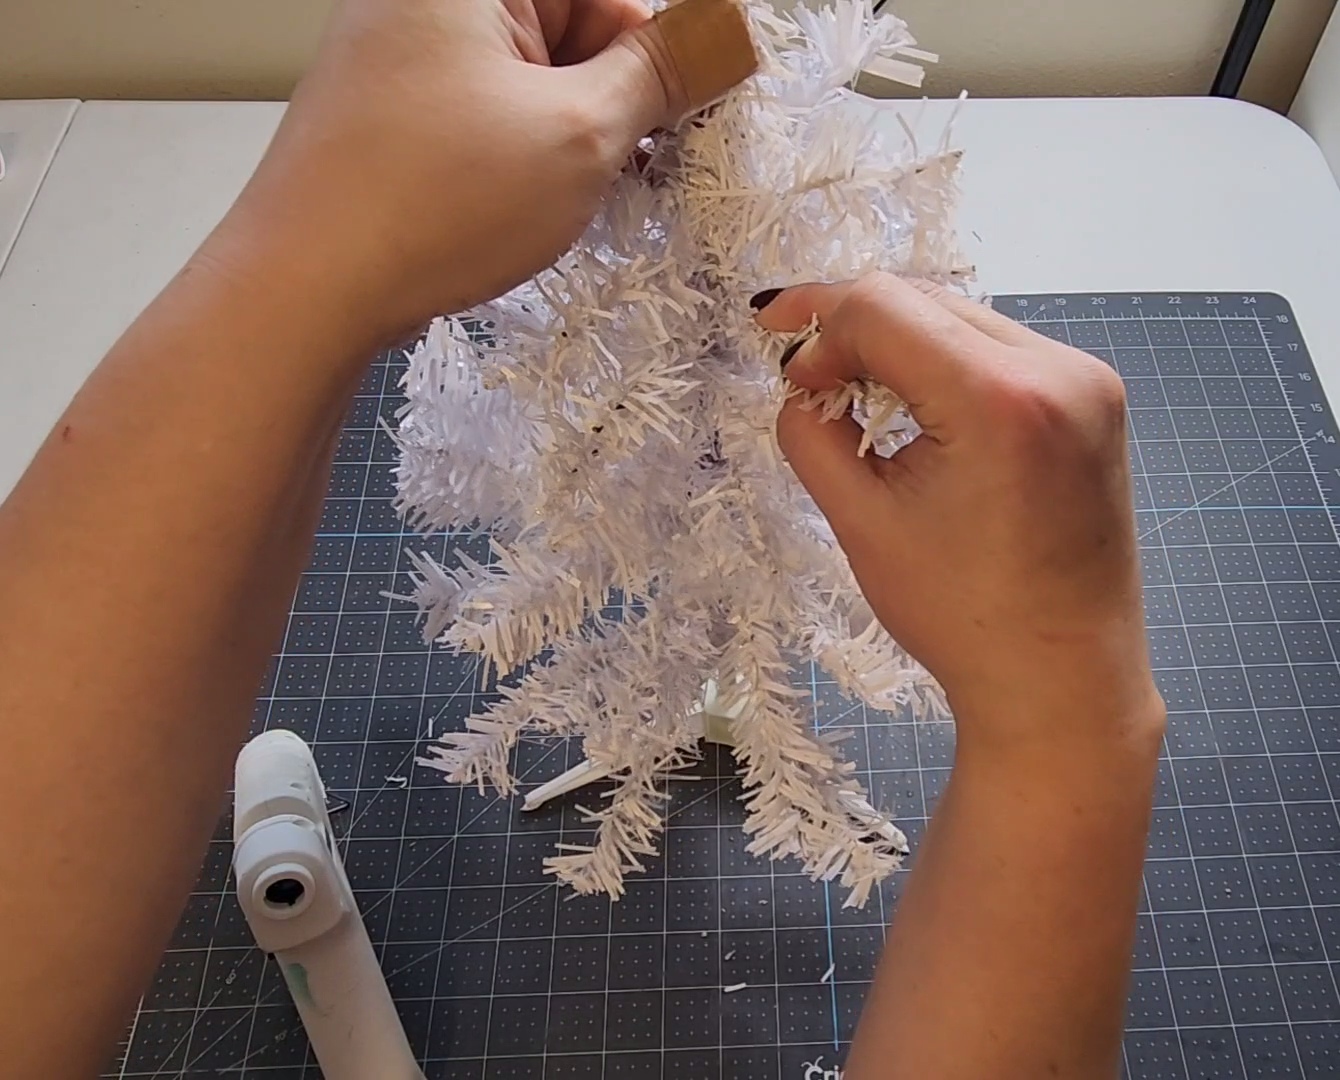
Once you have all of the branches glued to the second DT Christmas tree, this is what it will look like.

Add a Bow or Tree Topper
I bought a red and black buffalo check star tree topper during my last Dollar Tree run. I planned on using it for this tree but my son really wanted it for the tree in his room. It had a gold spring to place on the tree and since the metal tree collar I was placing it in was silver, I felt like it would be best to use something else. I searched my ribbon stash and found a cute 2.5″ wired ribbon with patterned Christmas trees on it that I thought would make the perfect bow topper for this project. You can use Dollar Tree ribbon to make a bow with or use one of their tree toppers, either one would look cute on the tree.
I made a six loop bow with 2″ ends that I dovetailed. If you’re using a bow topper, leave the wire or pipe cleaner that you secure it with a bit long.

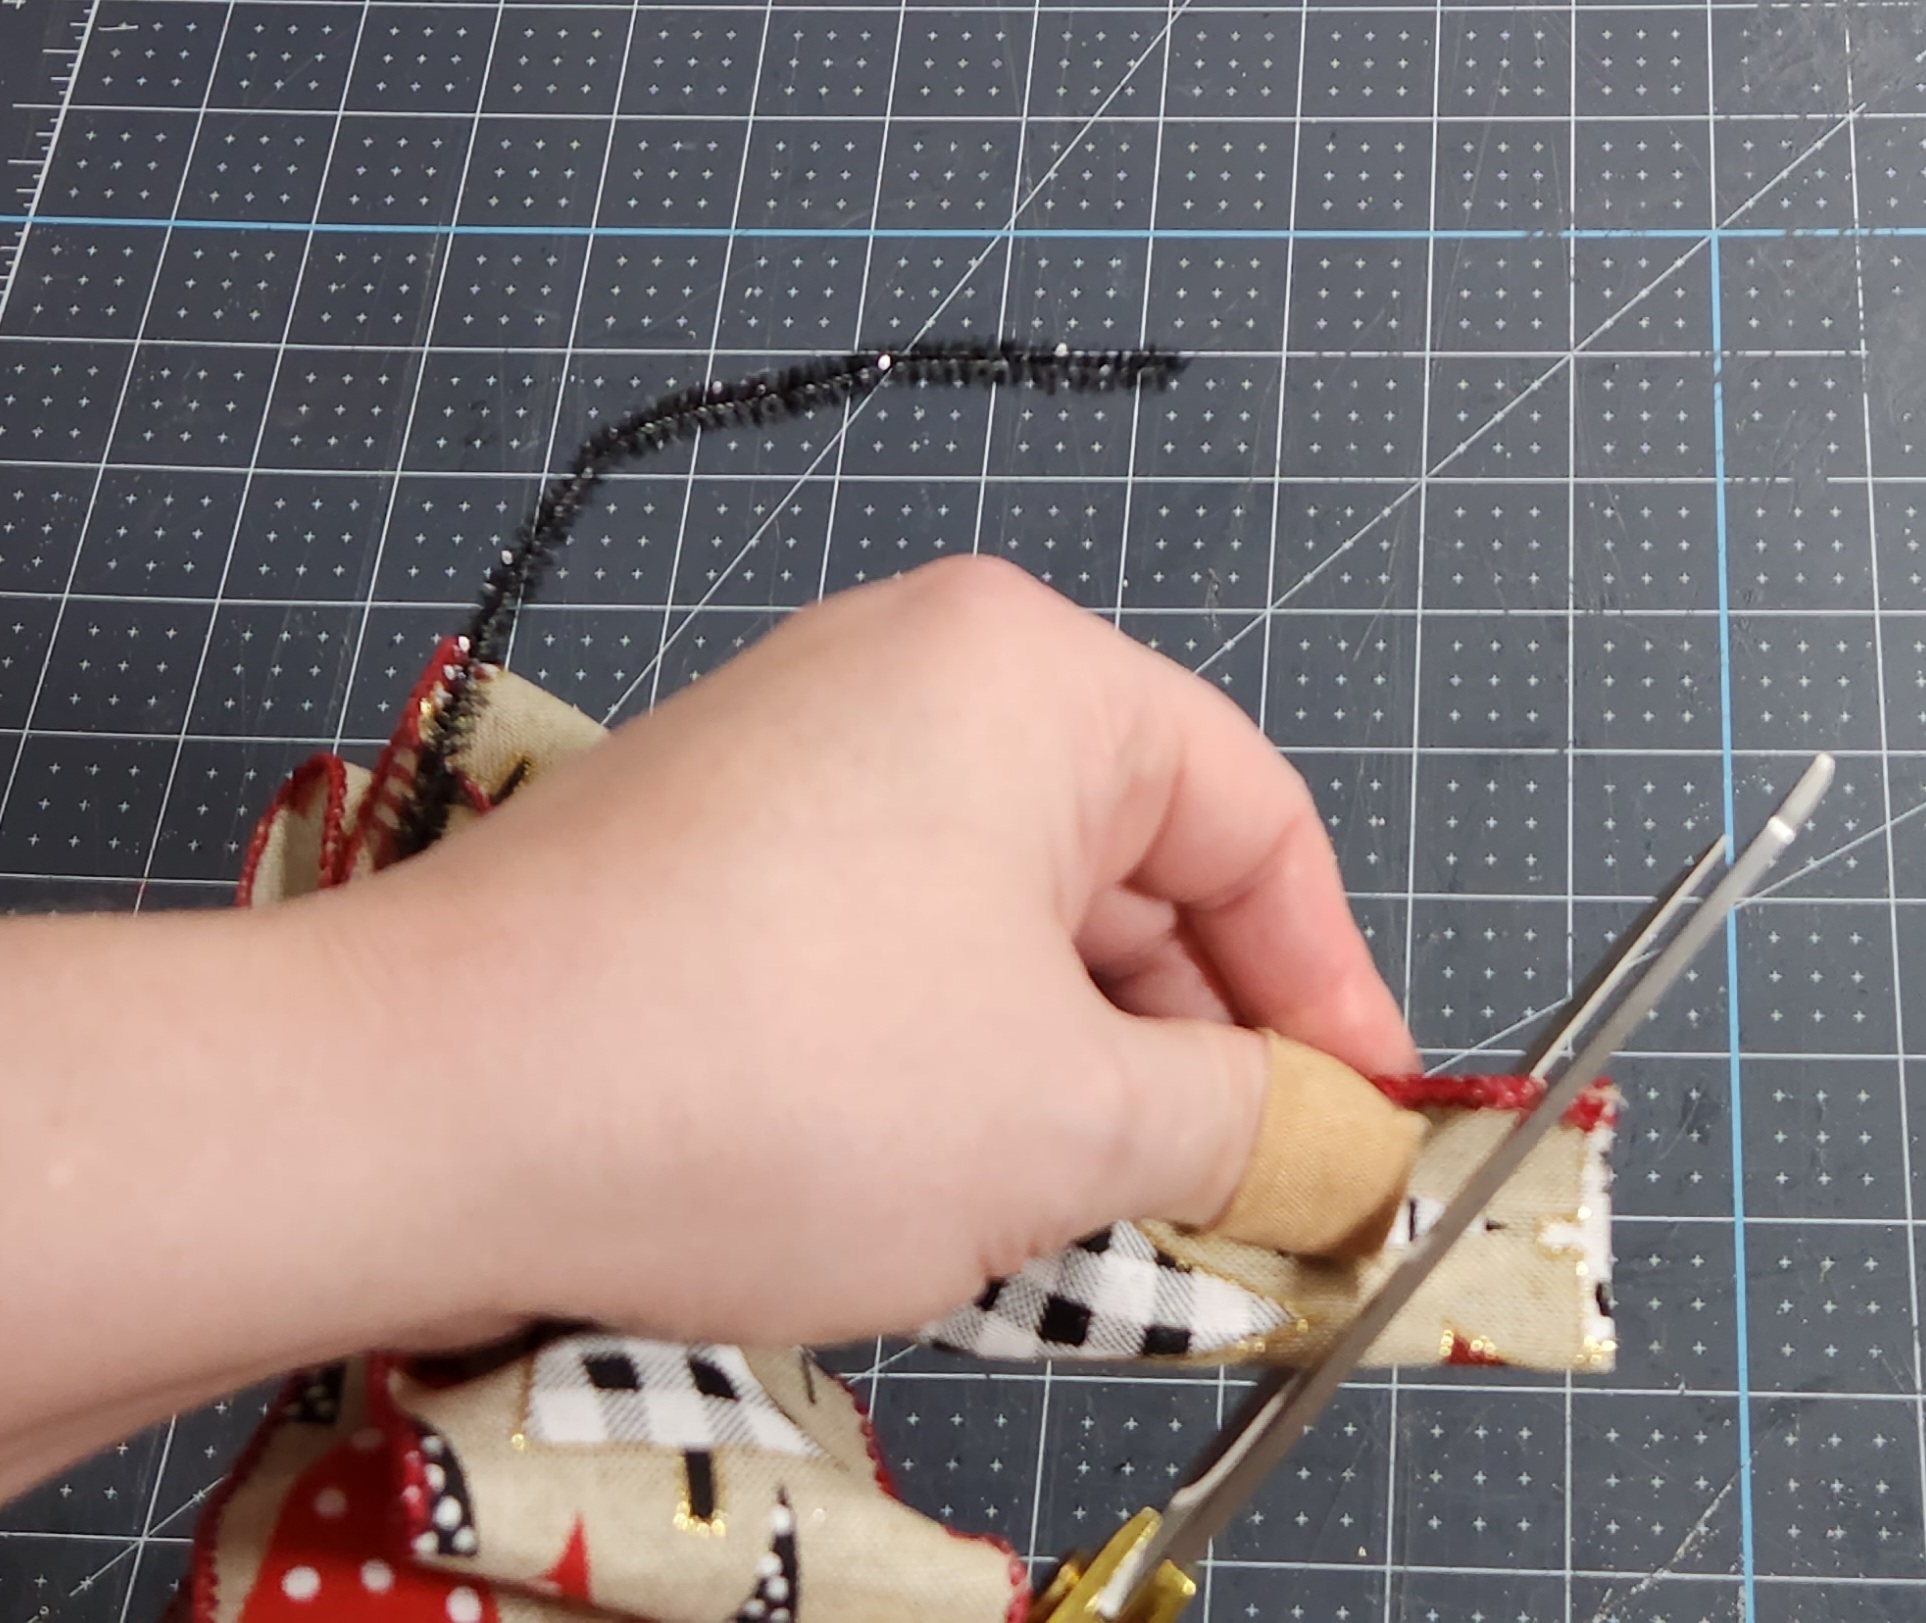
Next wrap the pipe cleaner securing the bow around the top branch of the Christmas tree. I bent the top branch in half because for some odd reason Dollar Tree mini trees have a 6″ or longer top branch. It looks really weird if you leave it that long, towering over the rest of the tree.

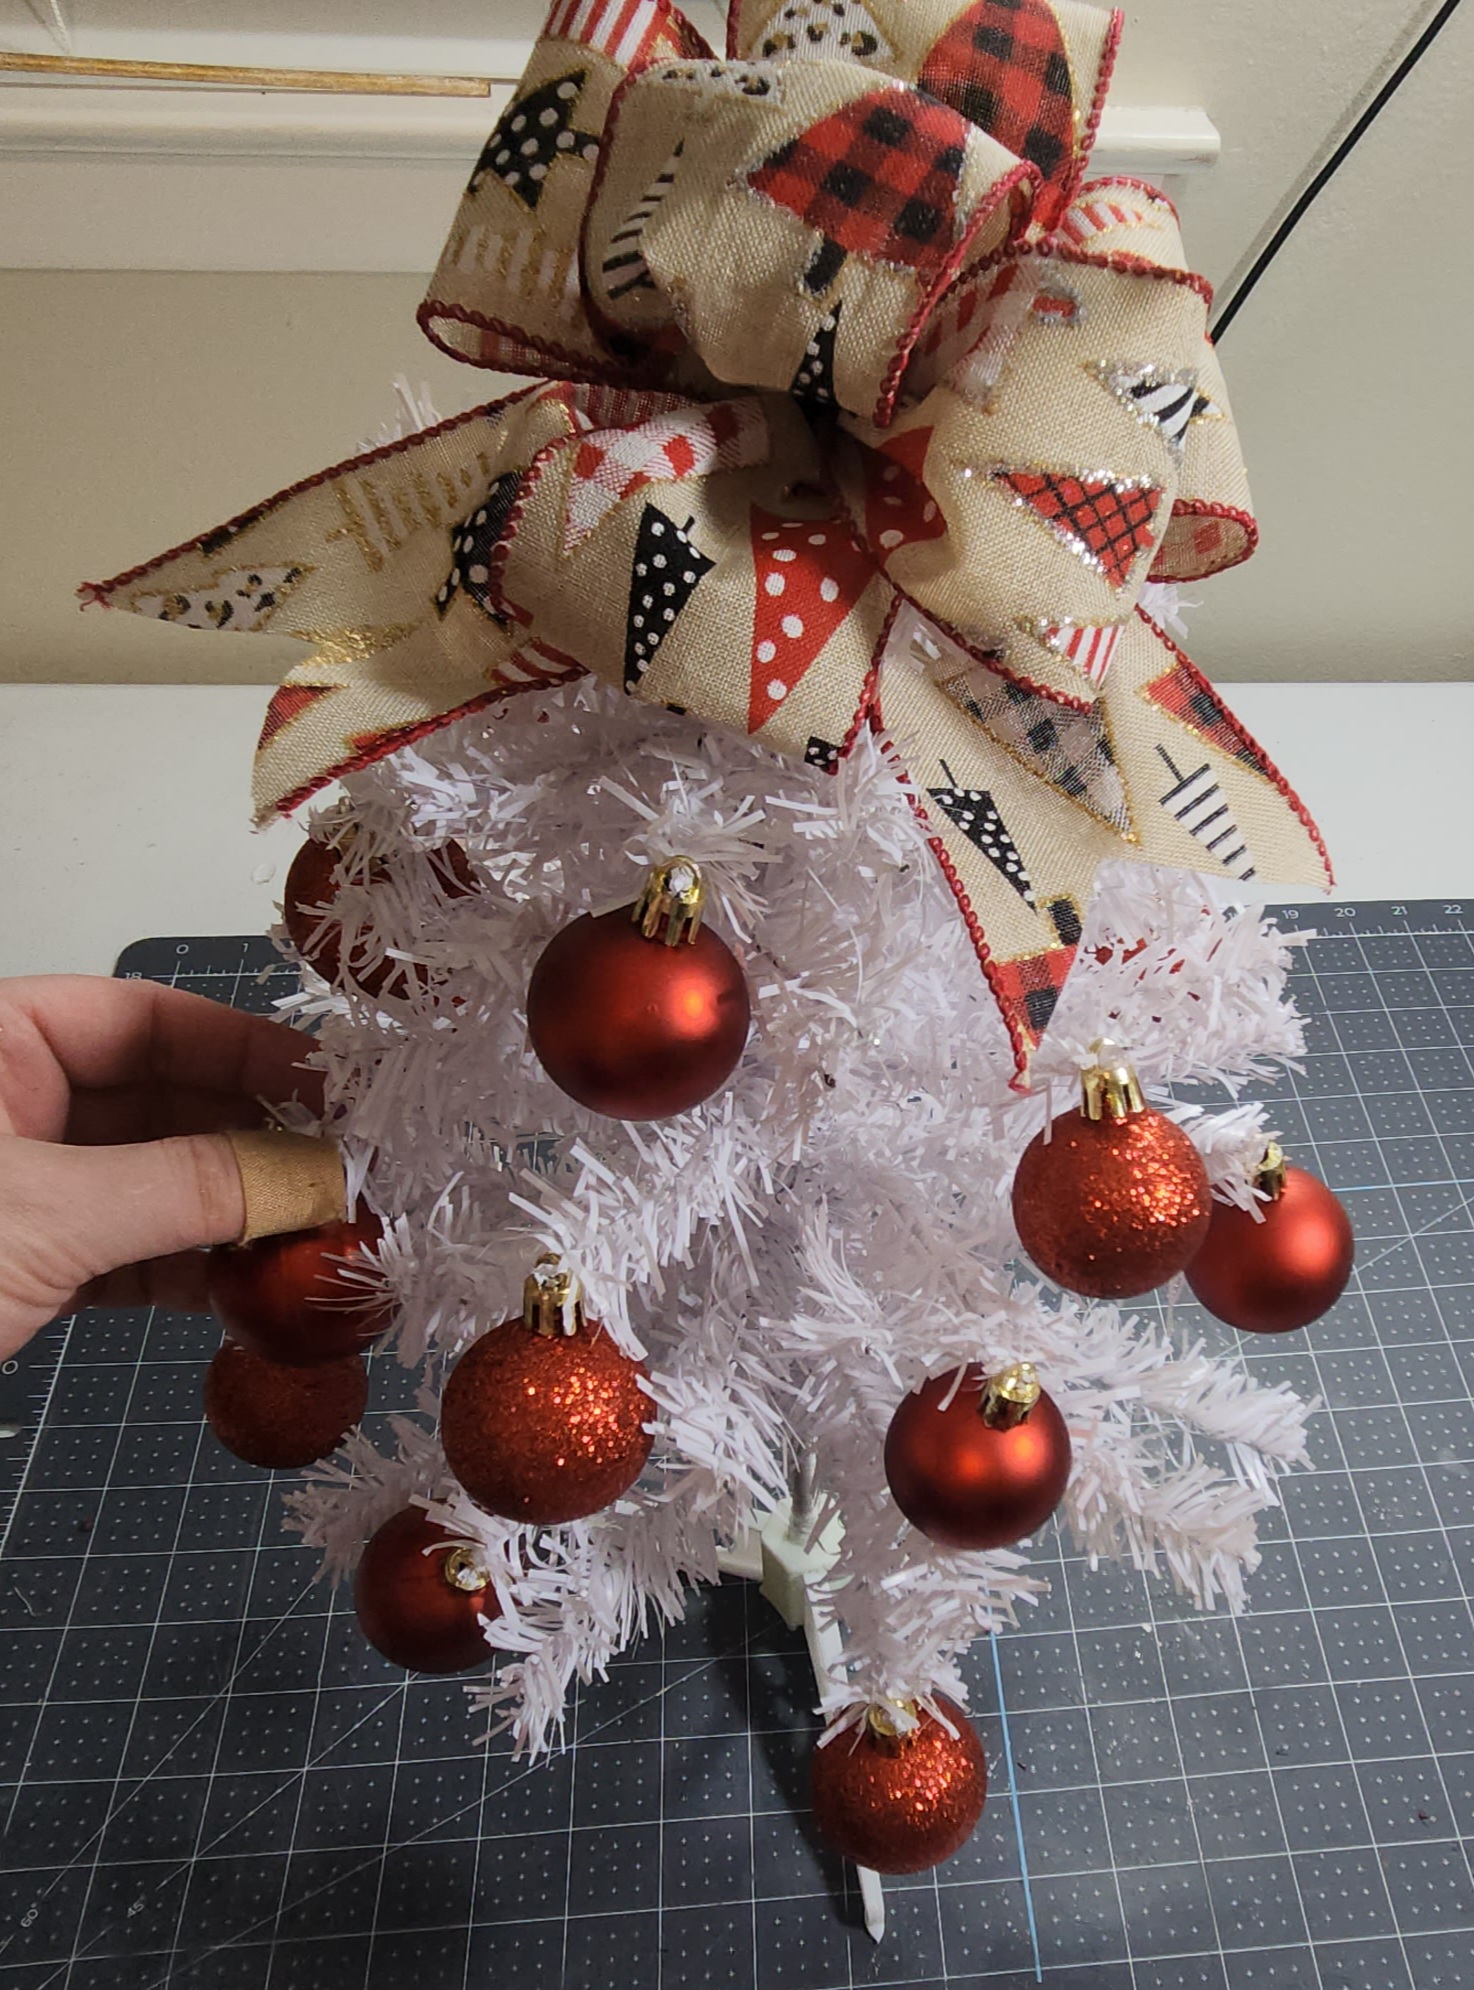
Fluff the loops and position the tails so they drape down opposite sides of the tree.

Adorn the Tree with Ornaments
Finally, add some ornaments to the now full Christmas tree. I used small, red ball ornaments from Dollar Tree. Since the branches are thin wires, you can just slide the hanger at the top of the balls onto the branches themselves. It’s a lot easier than trying to tie those little strings onto them.

Video Tutorial
That’s it! Your Dollar Tree Christmas tree is refabbed & ready to display!
Combining two of the trees makes such a difference in their look. Before each one of them had 1 to 2″ of space in between each section of branches. Now it’s full and something that I can happily display this holiday season. Remember this is a blog hop, so keep reading to see what the other ladies on the hop have to share with you today!


Remember to pin the image below or share this post with the buttons on the left side of the page so you can find it when you’re ready to start your project! Also, follow me on Pinterest for new ideas added weekly! Be sure that you never miss a great tutorial for decor like wreaths, signs and other home decor, free printables, crafts, and other fun posts! Enter your email address below to be notified of new posts! Use the buttons below to follow me on social media for other great content.

Under $10 on the 10th Blog Hop
Tammy – Patina & Paint | Christmas Tree in a Bag
Terrie – Decorate & More with Tip | Christmas Pinecone Swag
Allyson – Southern Sunflowers | Dollar Tree Yarn Christmas Wreath
Teresa – Through a Vintage Door | Christmas Bead Decoration
Don’t go yet! There’s more to see!
There’s plenty more to see here on the blog! If you’re looking for something specific, use the search box in the sidebar to look it up. If not, you might enjoy these ideas. Don’t have time to read them all now? That’s ok, just click over to the posts using the pictures and pin them for later. You can also add Life as a LEO Wife to your favorites and check back for new ideas and free printables and SVGs every Wednesday, as well as link parties with tons of shared ideas on Sundays!


Niki! Are we on the same page lately or what? I love your tree all decorated and ready to go! So cute!!! I love the idea of gluing the tree branched to the tree instead of putting two trees together. Great idea. Thanks so much for sharing!
Thanks! Great minds think alike! Is that just a southern saying? lol
Niki I have done this myself but love the little collar you found in Dollar Tree. I haven’t found one in ours. I am still on the hunt. Your tree looks nice.
Thank you! A few years ago I added real branches from the tree cutoffs at Lowes. It worked really well, you just have to throw the whole thing out after Christmas.
Wow you did a great job on the tree Nikki .. I love the white and the red .. The simplicity makes it look classsy and rich .. I love this .. Makes me want to hurry up and decorate!
Teresa!
Thank you Teresa! My son is dying to decorate! He keeps playing Christmas music, then it gets stuck in my head lol. He may wear me down to decorate just before Thanksgiving. He’s the baby so he’s spoiled. Good spoiled, not bad lol!
Your tree looks so good beefed up with the extra tree limbs ~ what a big difference. I love how you decorated it and the vignette you created with it is so pretty and festive! Pinned.
Thank you!
This is so clever Niki, and it looks adorable!! What a great decoration for $7!!!
Thank you!
Nikki, how clever and creative, with an adorable result — pinned!
Thank you!