Hey friends! Welcome to our monthly Creative Craft Hop hosted by Sara over at Birdz of a Feather. If you’re coming over from her site, wasn’t her crochet phone pouch adorable?! Today I’m going to show you how to make a spiral deco mesh wreath for Christmas. My spring wreath is still one of my most popular posts, but today I’m going to share a little twist to help save you time and mesh. Stick around after the tutorial to see what the other bloggers on the hop have to share. Now let’s make a wreath!


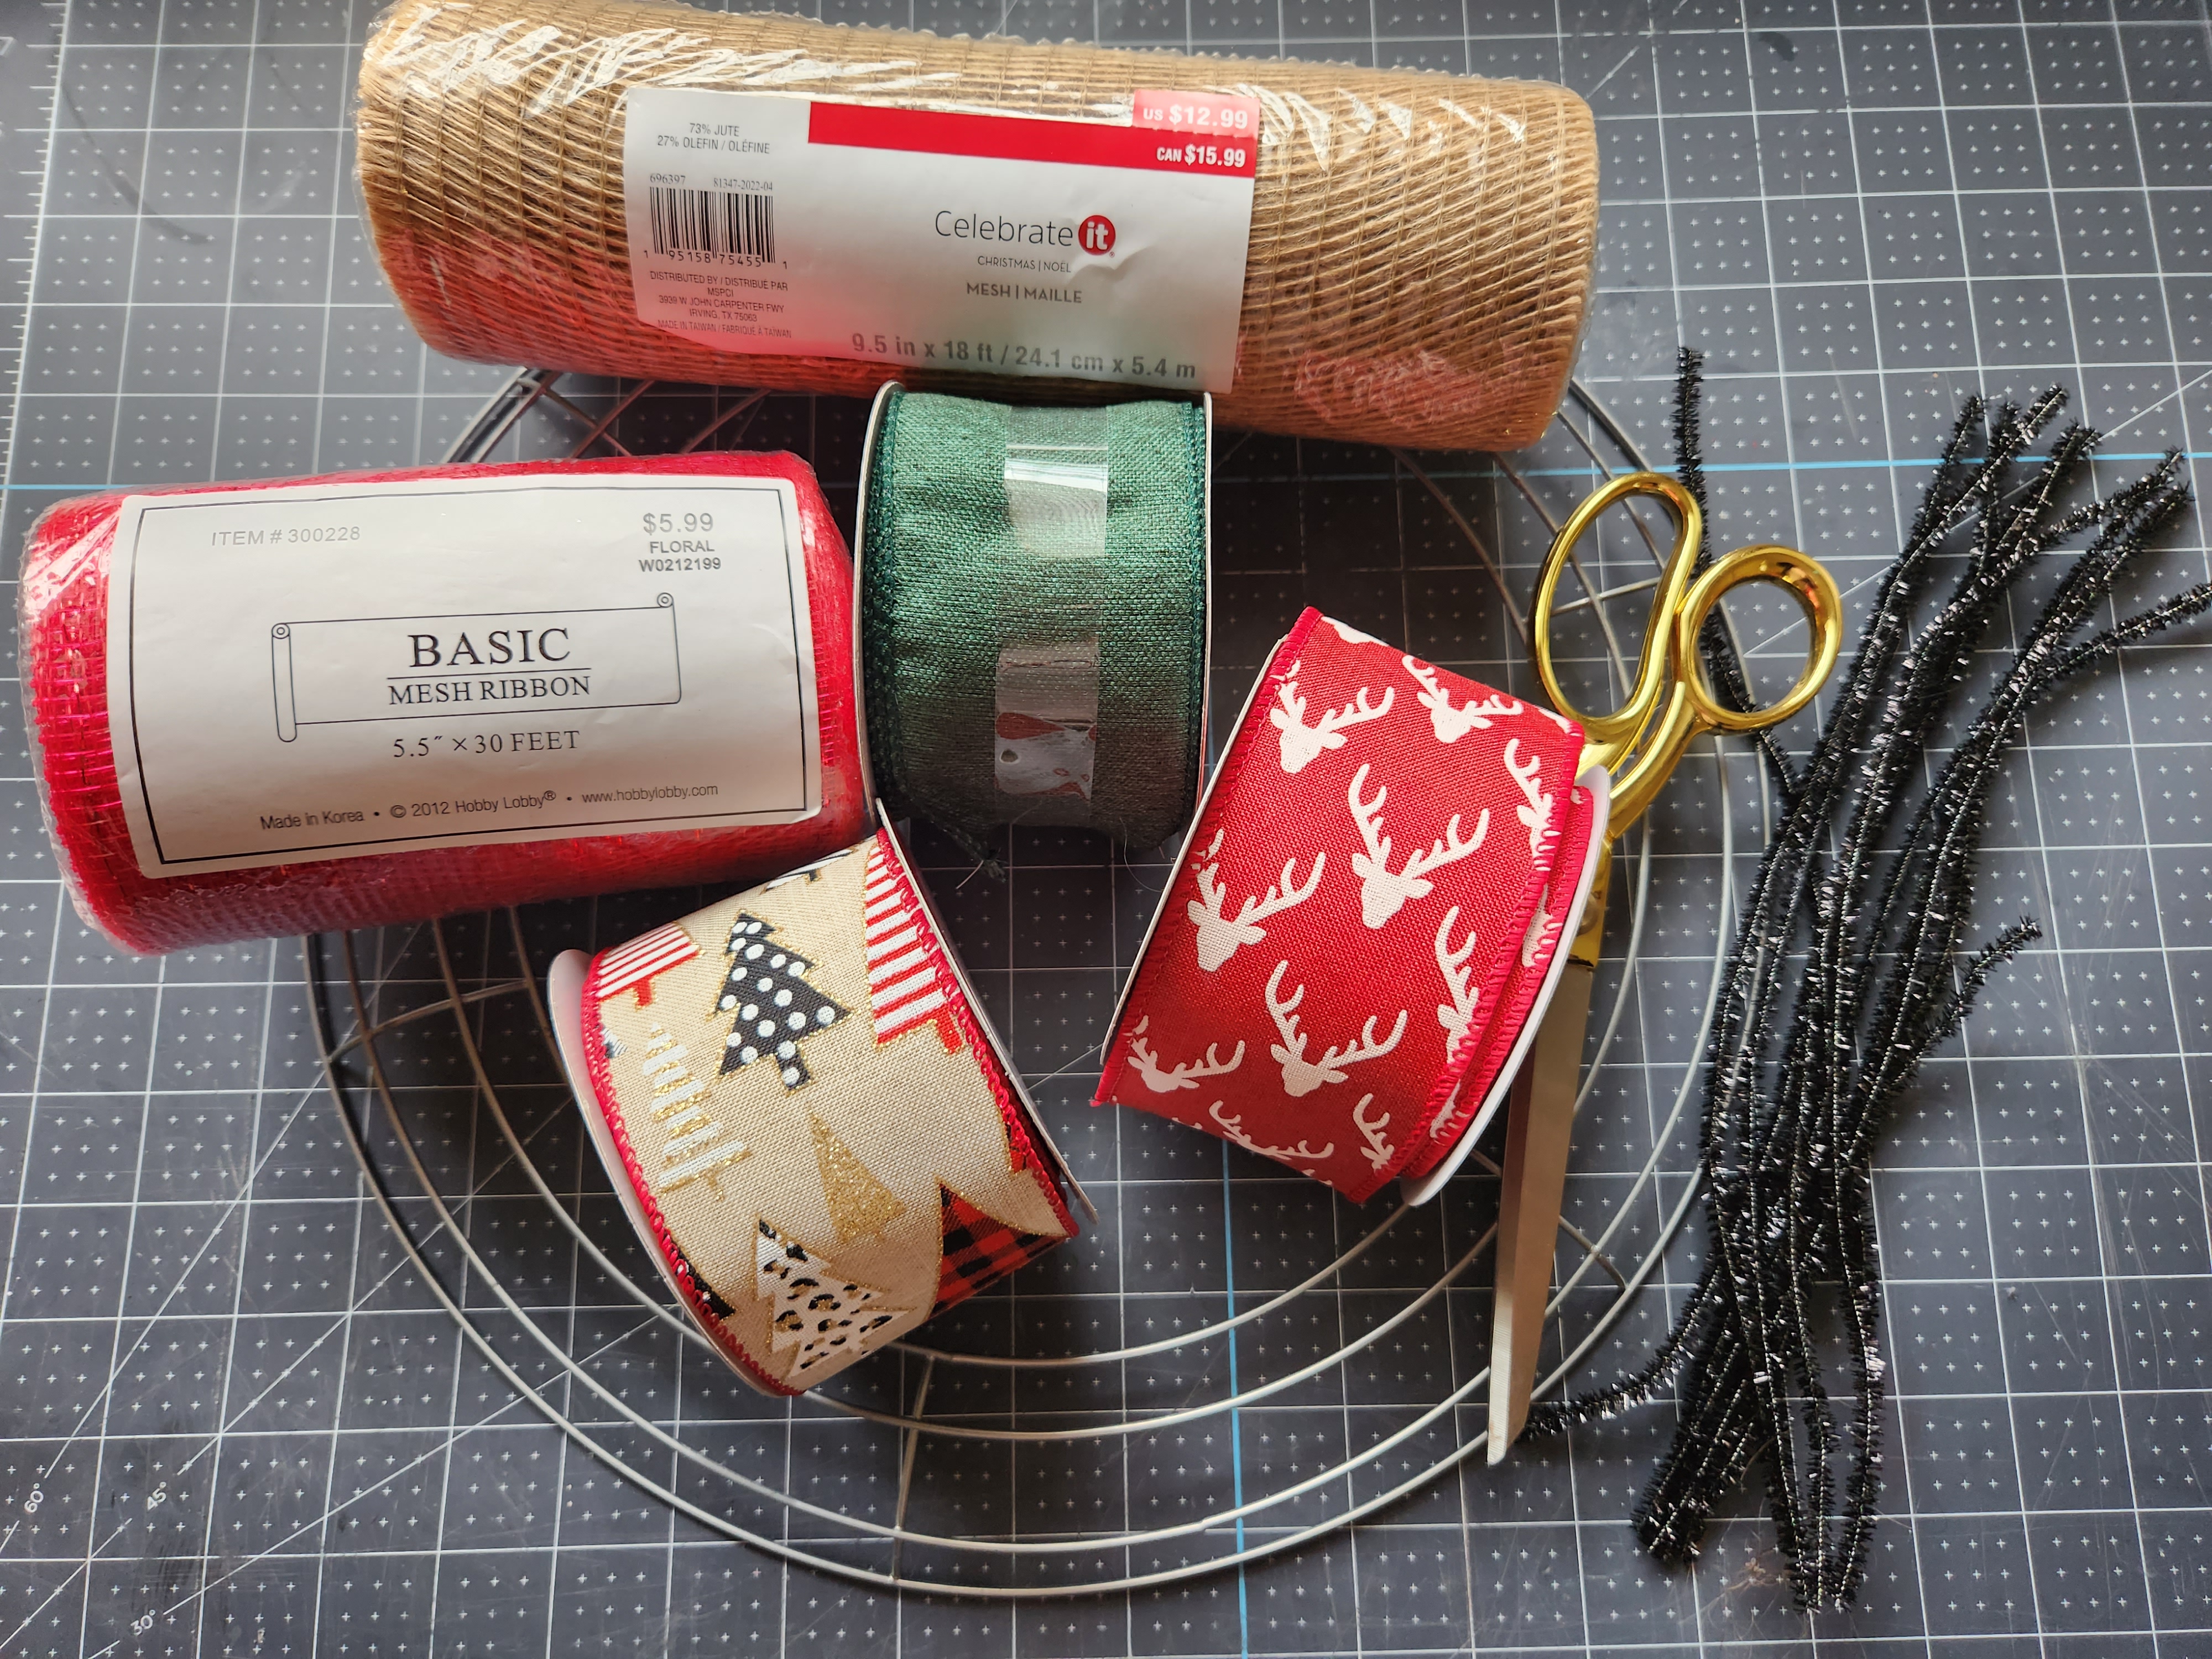
Christmas deco mesh wreath supplies:
- 2 rolls of 10″ deco mesh- I used a roll of burlap for the spirals & had a 5.5″ roll of red mesh on hand so that had to do.
- 4 rolls of 2.5″ coordinating ribbon
- 24 pipe cleaners (or 12 cut in half)
- hot glue gun (optional)
- sign for the center


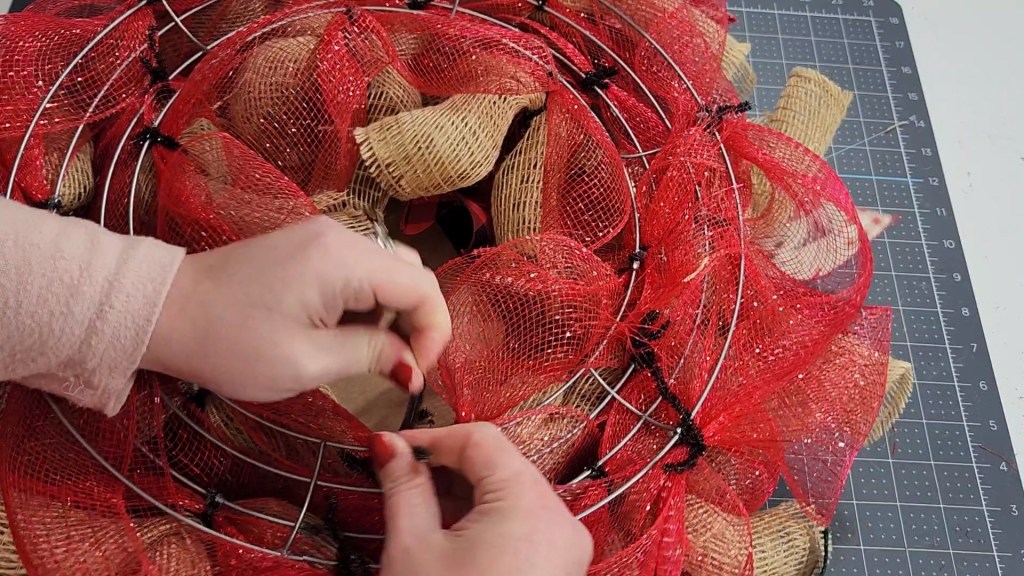
Prep the Wreath Form
You don’t really need an entire pipe cleaner in each spot on the wreath, but if you don’t have a lot of wreath experience or it’s hard for you to hold a lot of ribbon in one hand it might be easier to leave them long. I cut mine in half to cut down on all of the excess left over at the end.
Place a pipe cleaner at the junction of the top wire and each of the cross bars and one in the middle between each crossbar on the inner wire. Next attach one in each section on the second wire from the outside, in the middle between the pipe cleaner on the outer wire and the one in the center on the inner wire. Then one in each section on the third wire where you placed the last one but on the opposite side. Adding a bit of hot glue on the wire before you twist the pipe cleaner closed helps keep it in place. If you have two packs of 10″ deco mesh, you can just add mesh to three of the wires. However, I had a 5.5″ pack of red mesh on hand and didn’t see the need to waste money on more, so I used it and attached it to all four wires.
In this photo I had a pipe cleaner alternating between each of the two middle inside wires. I ended up adding one to each wire between every crossbar because I felt the wreath was a little bare once I got the base layer of mesh on.

Add Deco Mesh to the Wreath
Attach one of the 10″ deco mesh rolls to the wreath form. Place the end of the mesh into a pipe cleaner on the outside wire and twist it closed. Continue adding the mesh to the pipe cleaners creating little bubbles between each pipe cleaner until you’re back to where you started.

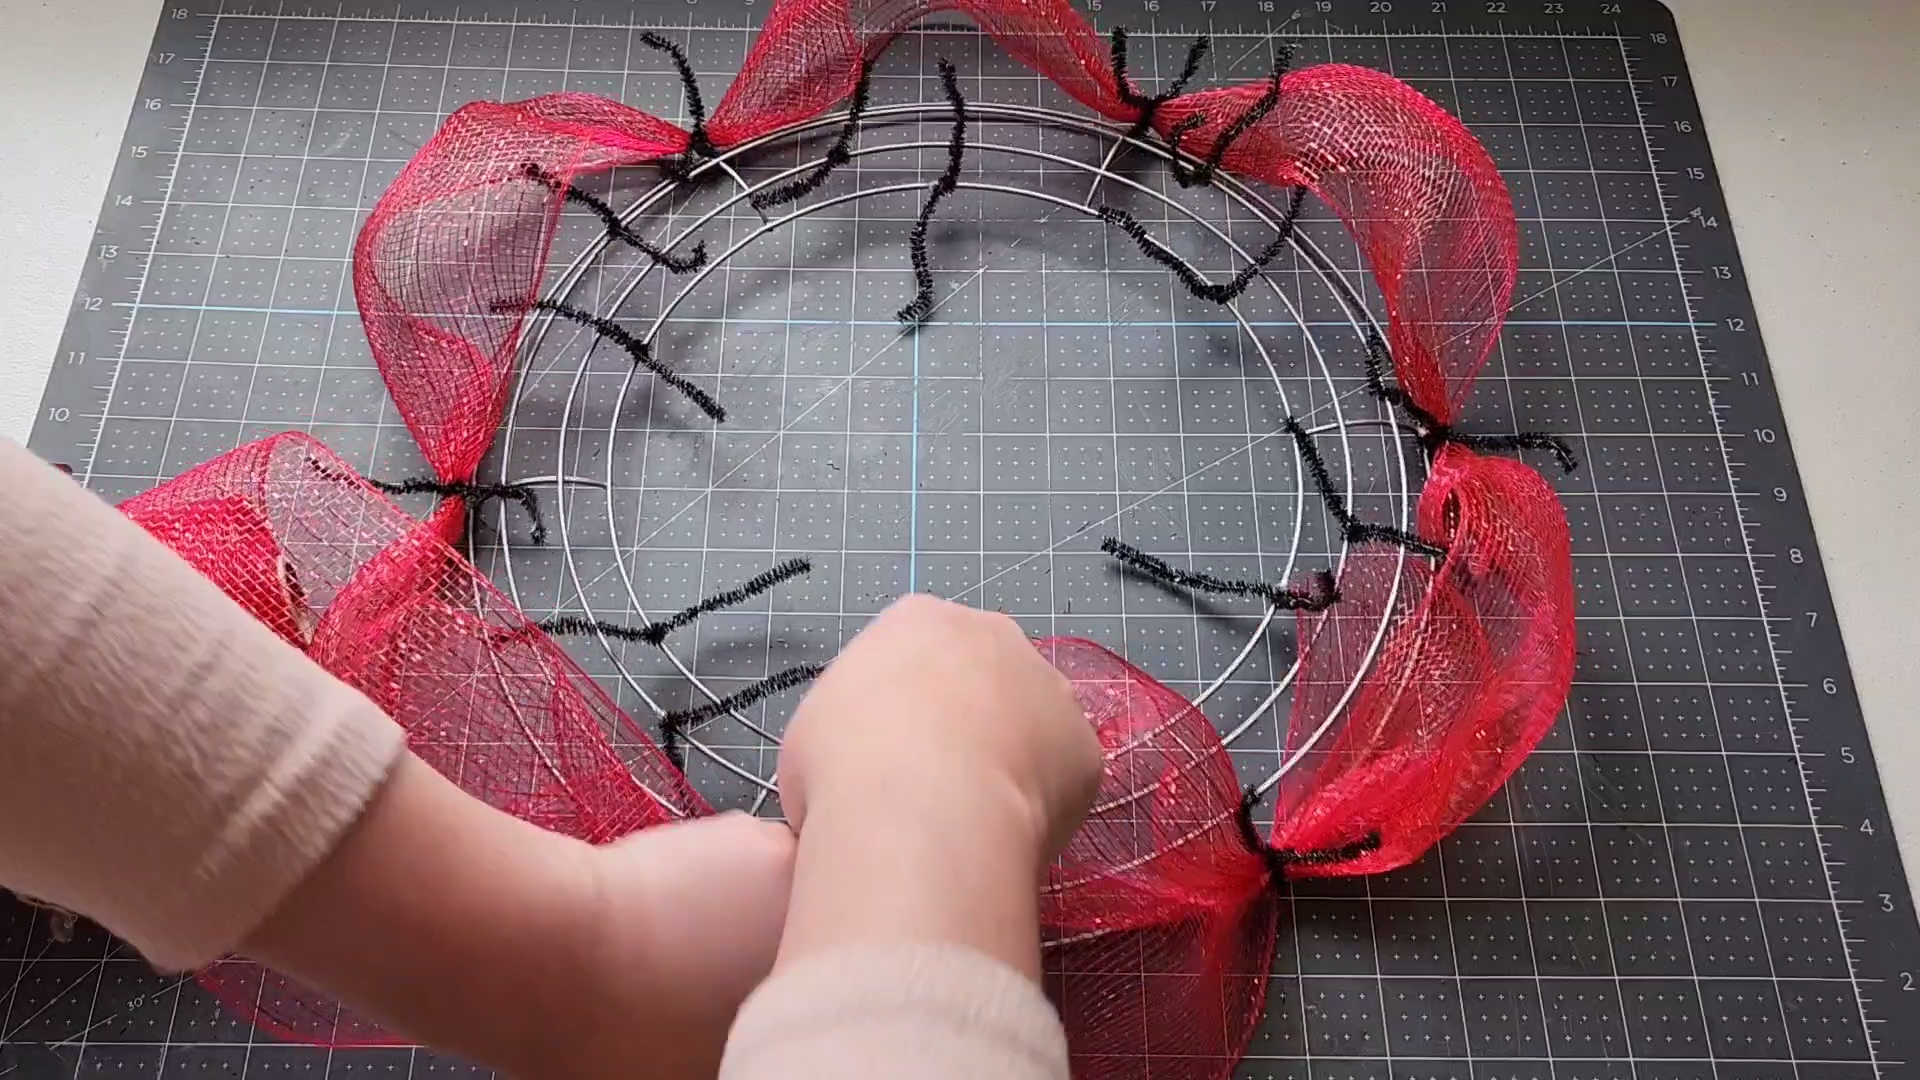
Now move to the second wire adding mesh, then the next, and so on until all of the pipe cleaners are full. This picture was taken before I added pipe cleaners to both of the center wires. When I did that I added more deco mesh to that section as well. Again, if you have 10″ deco mesh it should be fine to have only three rows of mesh, and it may be just fine to have pipe cleaners only to the inner and outer wires.
Prep the Ribbon
You need four 12″ pieces of ribbon for each section between the crossbars. Cut six 12″ pieces from each of your 2.5″ ribbon, then dovetail each of them. If you have ribbon that seems to want to fray, singe the edges with a lighter to prevent it.


Next cut the 10″ deco mesh in to 10″ pieces. I was able to cut 22 pieces, but you need 24. I had to cut two of my 10″ pieces in half in order to get 24. It’s not ideal, but it’ll work. If you have another roll of mesh you won’t have to do this, just cut 24 pieces.

Attach Ribbon to the Christmas Deco Mesh Wreath
First roll one of the pieces of deco mesh into a tight roll. They will roll into a spiral on their own when you cut them, you just need to make them a little tighter.
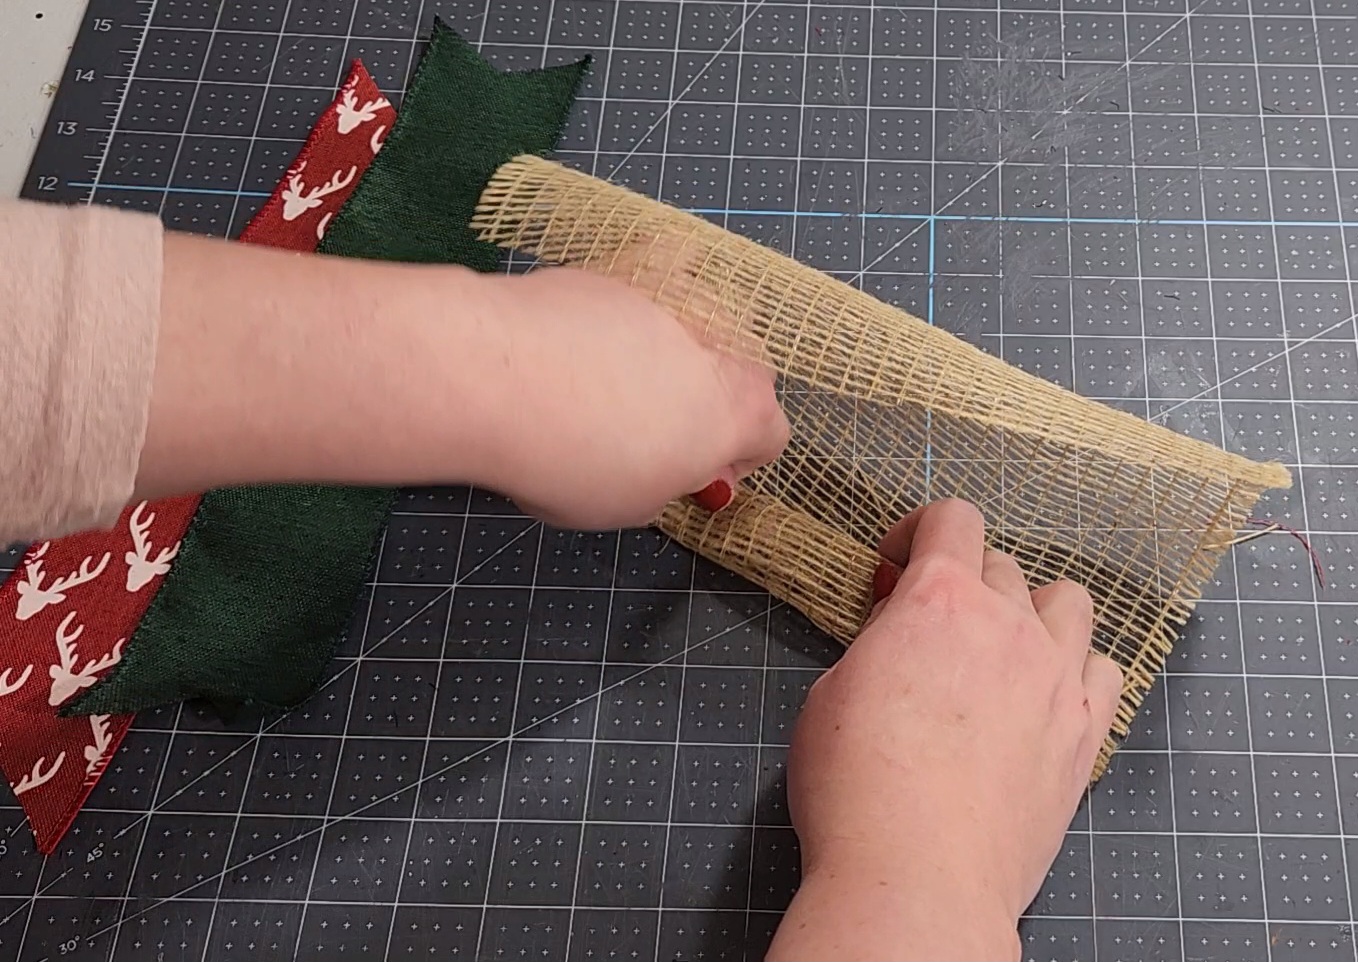
Roll a second piece and place it on top of the first in an X. Then layer two of the coordinating ribbons on top of those, crisscrossing them.


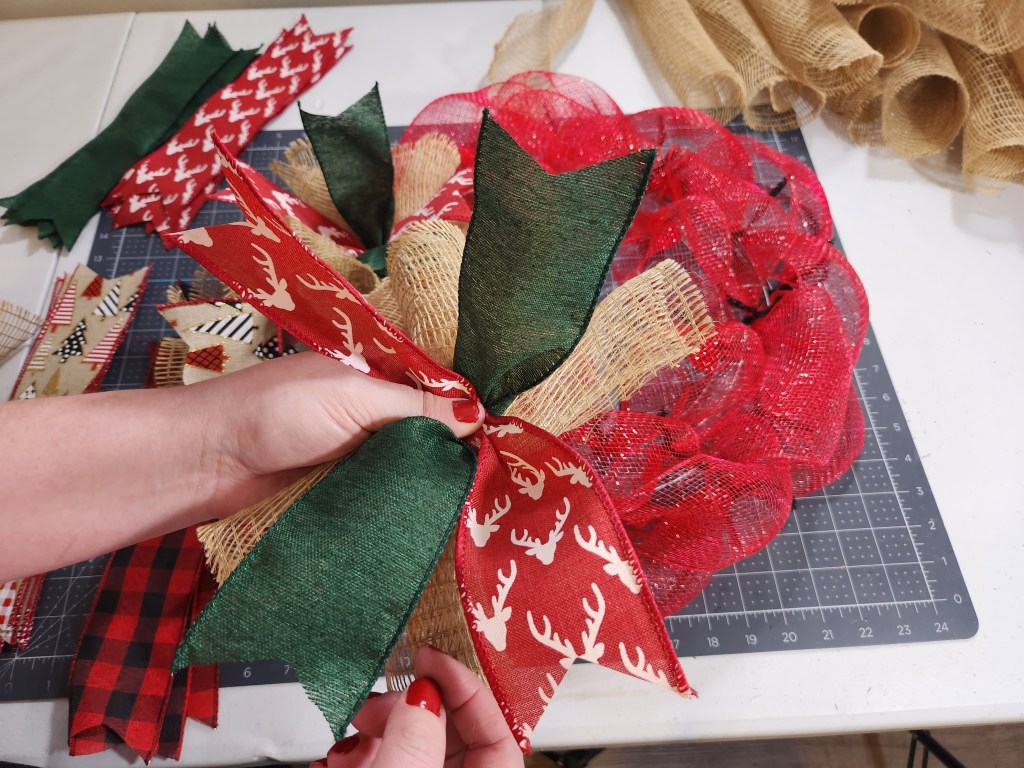
Attach the bunch to one of the pipe cleaners on the second wire from the outside.


Create another bunch and attach it to the wreath on the inner wire in that same section between crossbars. This time use the two other coordinating ribbons.
Continue adding bunches of ribbon and mesh on the inner wire and second wire from the outside, alternating ribbon colors, until each one is filled. Finally, go back and fluff and adjust the ribbon and mesh as needed.

Add a Sign
I used a large tag shaped sign that says “Joy” from Dollar Tree for the center of my wreath. You don’t have to have one, it just adds the finishing touch. You could also add floral or other Christmas theme picks or greenery.
The joy sign did look a little too Dollar Tree for me so I carefully removed the fabric buffalo check bow from it and add a bow made with the green ribbon I used on the wreath. I used a tiny bow made of black glitter ribbon to cover the pipe cleaner that I secured the bow with.


Add pipe cleaners to each side of your sign with hot glue.

Move the ribbon and mesh from the middle to make room for the sign. Sit the sign securely inside and turn the Christmas wreath over. Twist the pipe cleaners around the wires of the wreath form. You don’t have to worry about tightening them too much because the mesh will hold it in place.

Deco Mesh Christmas Wreath Video Tutorial
That’s it! Your deco mesh Christmas wreath is ready to hang!
I just love this spiral deco mesh Christmas wreath! I can’t wait to hang it on my door and finish my Christmas porch leaner to add next to it. I’ll update with some photos as soon as I’m able to get some in the daylight. Remember this is a blog hop, so keep reading to see all of the other great projects the other bloggers have shared!

Remember to pin the image below or share this post with the buttons on the left side of the page so you can find it when you’re ready to start your project! Also, follow me on Pinterest for new ideas added weekly! Be sure that you never miss a great tutorial for decor like wreaths, signs and other home decor, free printables, crafts, and other fun posts! Enter your email address below to be notified of new posts! Use the buttons below to follow me on social media for other great content.

On to our Creative Craft Hop!
Now it’s time for our Creative Craft Hop! The next stop on the hop is Ann from Apple Street Cottage. She will be sharing a DIY haunted house which you’re sure to love! She is so talented. I hope that you’ll stick around and check out all of the DIYs shared by these lovely ladies.
Donna – Modern on Monticello | DIY Wood Bead Wired Christmas Tree
Terrie – Decorate & More with Tip | Wreath Wall Decor DIY
Gail – Purple Hues & Me | Vintage Ornament Christmas Tree Wall Hanging
Carol – Blue Sky at Home | How to Make the Prettiest DIY Yarn Christmas Trees
Tammy – Patina & Paint | Salt and Pepper Snowmen
Cecilia – The Thrift Store Addiction | Vintage Ornament Christmas Tree Wall Hanging
Jenna – The Painted Apron | Holiday Gift Buckets
Sara – Birdz of a Feather | Crochet Phone Pouch
Don’t go yet! There’s more to see!
There’s plenty more to see here on the blog! If you’re looking for something specific, use the search box in the sidebar to look it up. If not, you might enjoy these ideas. Don’t have time to read them all now? That’s ok, just click over to the posts using the pictures and pin them for later. You can also add Life as a LEO Wife to your favorites and check back for new ideas and free printables and SVGs every Wednesday, as well as link parties with tons of shared ideas on Sundays!


This is gorgeous Niki and it sure brought me joy to see it! Hope you have the happiest of holiday seasons!
I see what you did there lol! Thank you, & you as well!
Niki! I have to admit that I don’t normally like deco mesh, however I LOVE this one. It’s so pretty and I love the colors you used. Great tutorial. Pinning. Thanks so much for sharing!
Thank you! I love the burlap deco mesh. It looks so much better than the regular mesh.
I love the color/pattern combination you used and the “Joy” in the center really completes the look! Pinned! Wishing you a joyous holiday season! Blessings, Cecilia @My Thrift Store Addiction
Thank you! Merry Christmas!
What a fun idea, Niki! Your mesh wreath is quite festive and pretty! Makes for a beautiful addition to your holiday decor!
Thank you!
Such a fun and happy creation Niki! I love the JOY sign in the center and the combination of colors and textures you used, what a great holiday decoration! Thanks for the detailed tutorial, love it!
Thank you! It really is so easy to make & will save $$$!
I love all the cute ribbons you put on your wreath. It turned out so festive Niki.
Thank you! My son insisted on the reindeer head ribbon at Michael’s!
Wow! That’s a beautiful wreath. You gave great instructions. Will look so festive on the front door.
Thank you!
Niki, your wreath is so festive and beautiful! So happy you shared it with us today at the Home Imagined Link party. Have a wonderful week. Merry Christmas
Thanks Meagan! Merry Christmas!
Hi Niki – I love how your wreath turned out. It is so full and has such character. I also love that you added the “joy” sign. Thank you for sharing this post on the Home Imagined Link party! Wishing you a Merry Christmas.
Thanks Anna!