Hi, hello, and welcome! I’m so glad you’re here today because I’ve got a special project to share with you. If you’re a regular reader, you know that we’ve recently moved into a new house. I’ve always wanted a porch sign. You know, the cute ones with a fall sign on one side and a Christmas one on the other? I haven’t been able to make one because we lived in an apartment right by stairs going up to the third floor, then going down to the first. Now my dream has come true, and I’m going to show you how to make a DIY porch sign, with or without a cutting machine! Plus, I’ve included a free printable and/or a cut file to use on it! Use those designs on any project. Don’t feel limited to an outdoor sign only!

Supplies for a DIY Front Porch Sign:
- 6’x5.5″ piece of wood or fence picket- I used a 6’x5.5″ piece of pine.
- wood stain or paint- I used Rust-oleum stain & polyurethane in one in weathered gray.
- HTV, outdoor vinyl, or paint- I used a deep plum HTV.
- foam or paint brush
- iron if using HTV
- transfer tape if using outdoor vinyl
- scissors
- floral wire or pipe cleaner
- white cotton or sisal rope (optional)
- 2.5″ wired ribbon- I used two different prints for a bow.
- hot glue gun & glue


Stain or Paint the Wood
I used a wood stain with a sealant in one step. I used three coats of weathered gray. Normally you probably wouldn’t need three coats, but it just wasn’t dark enough after the first two. The same thing happened with my earlier project, the coastal farmhouse flag. You could also paint the wood.

If you’re not using a cutting machine, you will want to paint or stain the wood with a really light color. The pencil lines left after the carbon copy method need to be visible in order to paint them. You could use paint in white, ivory, light gray, etc. If you’d like a stain, my weathered gray could work if you do one light coat. Another great farmhouse style option would be a white or ivory stain. I saw Rust-oleum “farmhouse white” stain at Walmart that looked really pretty.
For personal use only. All of my free printables & cut files are copyrighted material. Feel free to download these free designs and print them or use on your Cricut projects for your own use at home. They are not for commercial use, not to be placed on items for sale. That helps me keep these printables, SVGs, and PNGs coming to you for free! Another note: you will not my logo overlay on your downloaded design. It is there to keep people from downloading the images straight from Google, or others from stealing them to use on their site. Thanks for understanding! Feel free to share this post for your friends and family to make their own projects with this design!
Cut Designs for the Porch Sign
Since my wood door hanger (with free SVG or PNG) already says “welcome,” I decided to put “home sweet home” on the DIY porch sign. I’m sharing that design with you today! In order to change the size of the font to fit your sign, I will include the word “sweet” one letter at a time. Just download and cut two of the “home” designs. I’m uploading the files as PNGs. Any cutting machine software will use them the same as SVGs. What’s great about them is I can share them to use as cut files for my friends out there that want to cut, and my friends that don’t have a cutting machine can use them as a printable! The files will download with a transparent background.
I’m uploading the files for each letter in sweet separately. Well, not all the letters. The “e” will only be up once lol. Just print two e’s if you’re painting the letters on with the carbon copy method.
Print & Carbon Copy Method without a Cutting Machine
If you don’t have a cutting machine, don’t worry! You can still make a DIY porch sign. Download and print each letter after resizing them to fit your board. Cover the back of the paper with pencil. Remember leaf rubbings as a kid? Yea, just like that. Once it’s covered, place it on the wood where you want it to go. Trace over the edge of the design with a sharp pencil. That will leave the outline of the letters on the board. Once you’re finished with every letter, paint inside the lines. All done, easy peasy!
If you need more of a full tutorial, check out my wood utensil coastal kitchen decor post (free PNGs in that post) and my carbon copy post (free PNG in that post too!). My “S” is 7.8″ tall (you can round up to 8″), the lowercase letters are 4.45″ tall (again round up if needed), and both of the “home” designs are 5″ wide and 3.5″ tall.
Transfer the Design to the Wood
Once you’ve cut or printed your design, it’s time to add it to your wood. I used HTV because it holds well outside, and I had already made the round door hanger with the matching vinyl.
Besides the “home sweet home” that I put on the porch sign, I added our family name and the year we became a family. I left about 8-10″ of open space at the top of the board, then added “The.” After that I placed our name with family under it and “est. 2015″ below that. I left about 3.25” between the words and letters. If I had it to do over, I’d place the second “home” about 3″ higher than it is now.

If you’re using regular vinyl, use transfer or contact paper to place the image on to the wood just like you would normally. I would add a sealant on top to protect it after you finish.
If you’d like me to give you a file with your last name and year, just use my contact page to send me your info or place it in the comments. Hopefully I can get that for you via email, but only because I love you guys! Once you get your signs made, tag me on social media @LifeasaLEOWife so I can see how great they turned out! You can use these downloadable designs on other projects as well! Don’t feel limited to a front porch sign alone!
Add Rope & a Bow
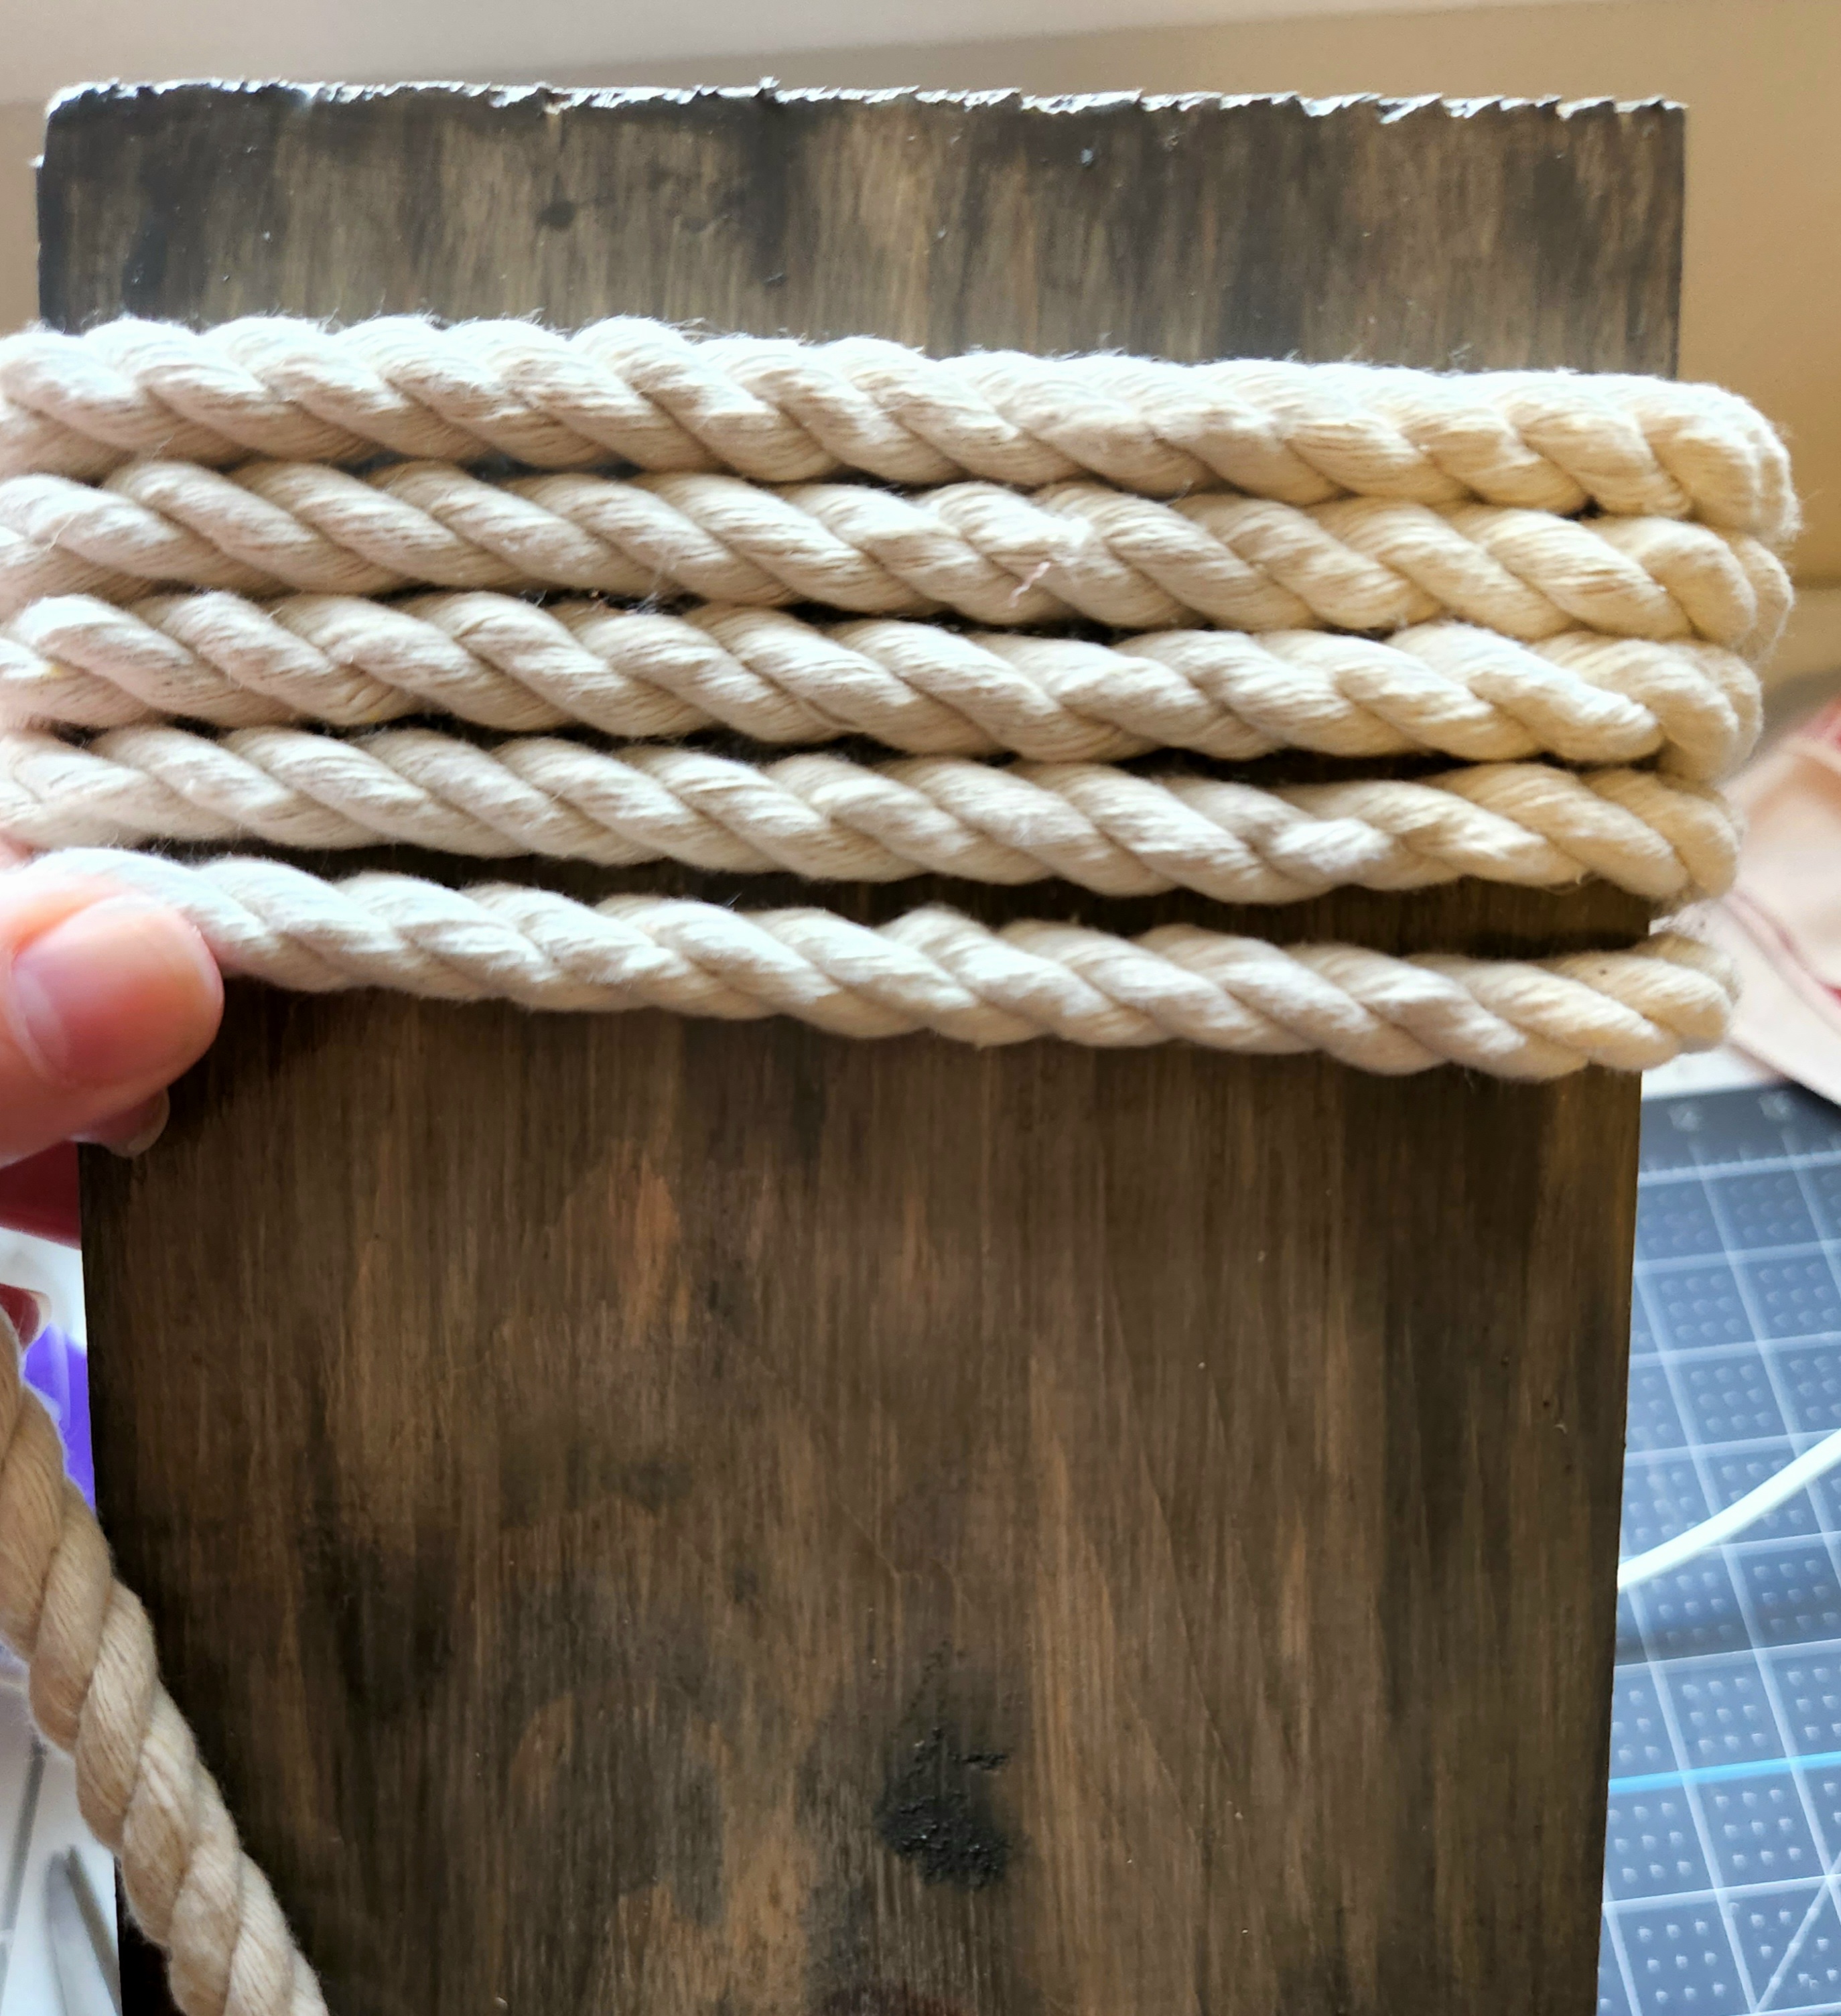
I thought about adding twine to the top of my sign, but it’s so big and twine is so thin, that that seemed impossible. Instead, I added about 6″ of white cotton rope from Dollar Tree to the top. You could also use sisal rope or leave it empty except for the bow. Looking back at it, I may add a bit more of the rope to the top because it’s covered almost completely by the bow.


Finally, add a pretty bow! A pretty bow always makes things better! I added a seven loop bow to the top of my porch sign. If you need a bow tutorial, I have several available. The first is an easy loopy bow, and the other is a super, easy loopy bow, so easy my hubby and son can make it!
Leave the pipe cleaner or floral wire on the back of the bow long. Wrap it around the rope so that you can change the bow out for every season! One outdoor sign for every season, who could ask for more?!


That’s it! Your DIY front porch sign is ready to display next to your door!
I wish I had finished this project a little bit earlier because just as I was about to place my sign outside, a hailstorm broke out. My son said, “Wow mom! I’ve never seen hail before! I want to go outside, but I don’t want to die.” I laughed and told him that Armageddon wasn’t upon us just yet, lol.
Here are the best pictures I was able to get after the storm passed. It was a weird kind of storm because the sun was still partially out and the sky was orange. Weird. By the way, can anyone tell me how to get that concrete or putty or whatever it is, off of the brick where it meets the concrete? I hate it and it must go!

Remember to pin the image below or share this post with the buttons on the left side of the page so you can find it when you’re ready to start your project! Also, follow me on Pinterest for new ideas added weekly! Be sure that you never miss a great tutorial for decor like wreaths, signs and other home decor, free printables, crafts, and other fun posts! Enter your email address below to be notified of new posts! Use the buttons below to follow me on social media for other great content.

Don’t go yet! There’s more to see!
There’s plenty more to see here on the blog! If you’re looking for something specific, use the search box in the sidebar to look it up. If not, you might enjoy these ideas. Don’t have time to read them all now? That’s ok, just click over to the posts using the pictures and pin them for later. You can also add Life as a LEO Wife to your favorites and check back for new ideas and free printables and SVGs every Wednesday, as well as link parties with tons of shared ideas on Sundays!
There’s plenty more to see here on the blog, so stick around! If you’re looking for something specific, you can use the search box in the sidebar. If not, you might like these ideas:


This turned out beautiful Niki! Even Covid couldn’t dampen your creativity! I am so sorry that you’re having to fight this awful disease and I’ve got you in my prayers!
Thank you Denise!