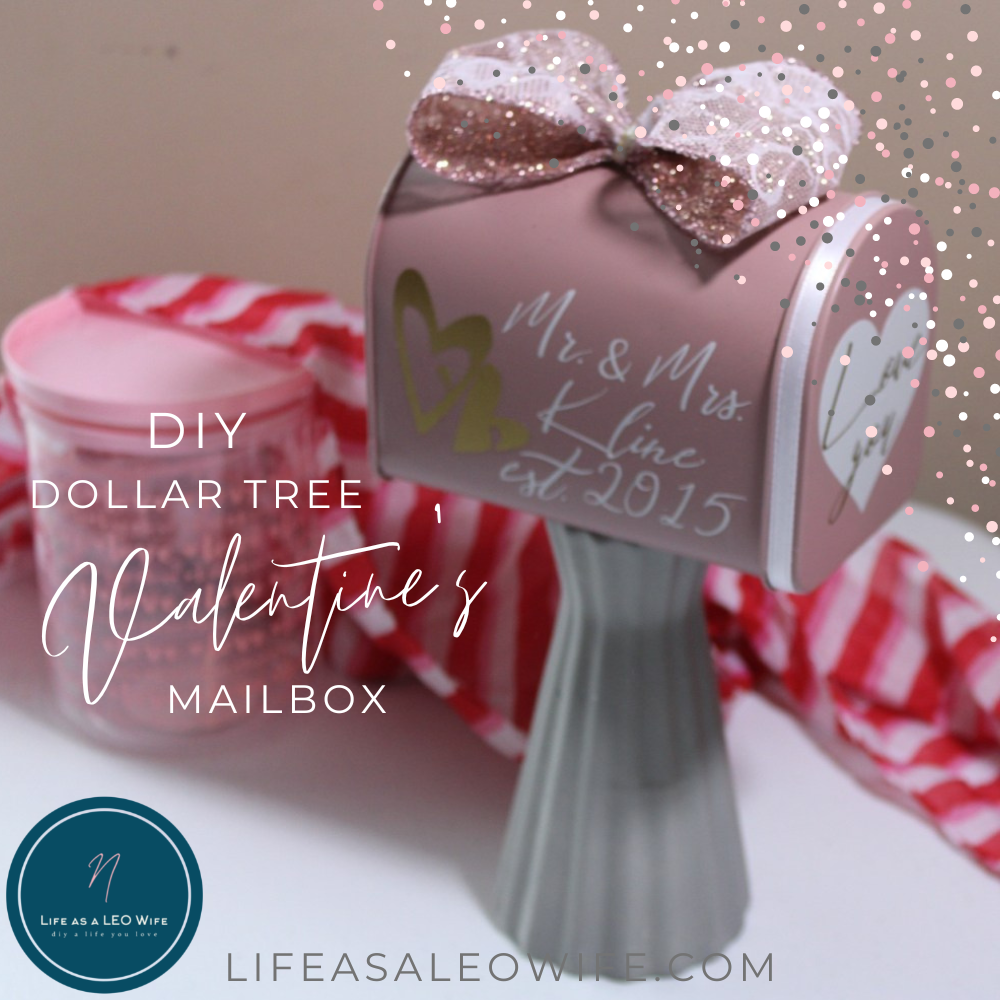
Earlier this week I shared my free printable love notes for kids with you. I promised a tutorial to create a way to deliver those adorable notes, and it’s here! Today I’m sharing how to make a DIY Valentines mailbox with you. This is the perfect Dollar Tree Valentine’s decoration because you can leave it out as decor and it serves a fun purpose. Your kids won’t be able to wait to get to that mailbox to see what you that day.
The mailbox that I’m sharing today is one that I made to deliver my husband’s notes in. If you’d like to share love notes with your hubby, here’s some free printable love notes to deliver in your own mailbox! I made it to match my home decor for the season. You can check out the tutorials for the pieces that match this here: a tiered tray set, DIY globe upcycle (a huge hit on Pinterest), and a cute tabletop decoration that you can also use to put love notes and candies in. I have a Dollar Tree Valentine’s mailbox as-is for my son that I may change for him, I’m just trying to figure out how to make it different than this one, yet match, and make it boyish.
Supplies for a Dollar Tree Valentine’s Decoration Mailbox:
- small metal mailbox
- spray paint (or acrylic that says “for all surfaces”)
- paint brush
- painter’s or masking tape
- vase or candleholder
- E6000
- hot glue
- ribbon for a bow- I used 2.5″ wired ribbon that is vintage blush w/ white lace and glitter.
- ribbon for trim- I used 1/4″ white ribbon.
- vinyl- I used light gray and metallic gold. or
- stencils with paint or
- stickers or vinyl wall stickers from DT or
- this tutorial for transferring printed designs onto painted surfaces

Paint the Surfaces
First you need to decide if you want to paint the candleholder or vase and your mailbox the same color or if you want them to be different colors. I painted each a different color. If you have a glass vase/candlestick, you want to use paint that will adhere to the surface. The easiest way to paint either piece is to use spray paint, but if you only have acrylic or chalk paint, that will work. Make sure that you have a bottle that’s labeled “for all surfaces” or that it says that it works on glass.
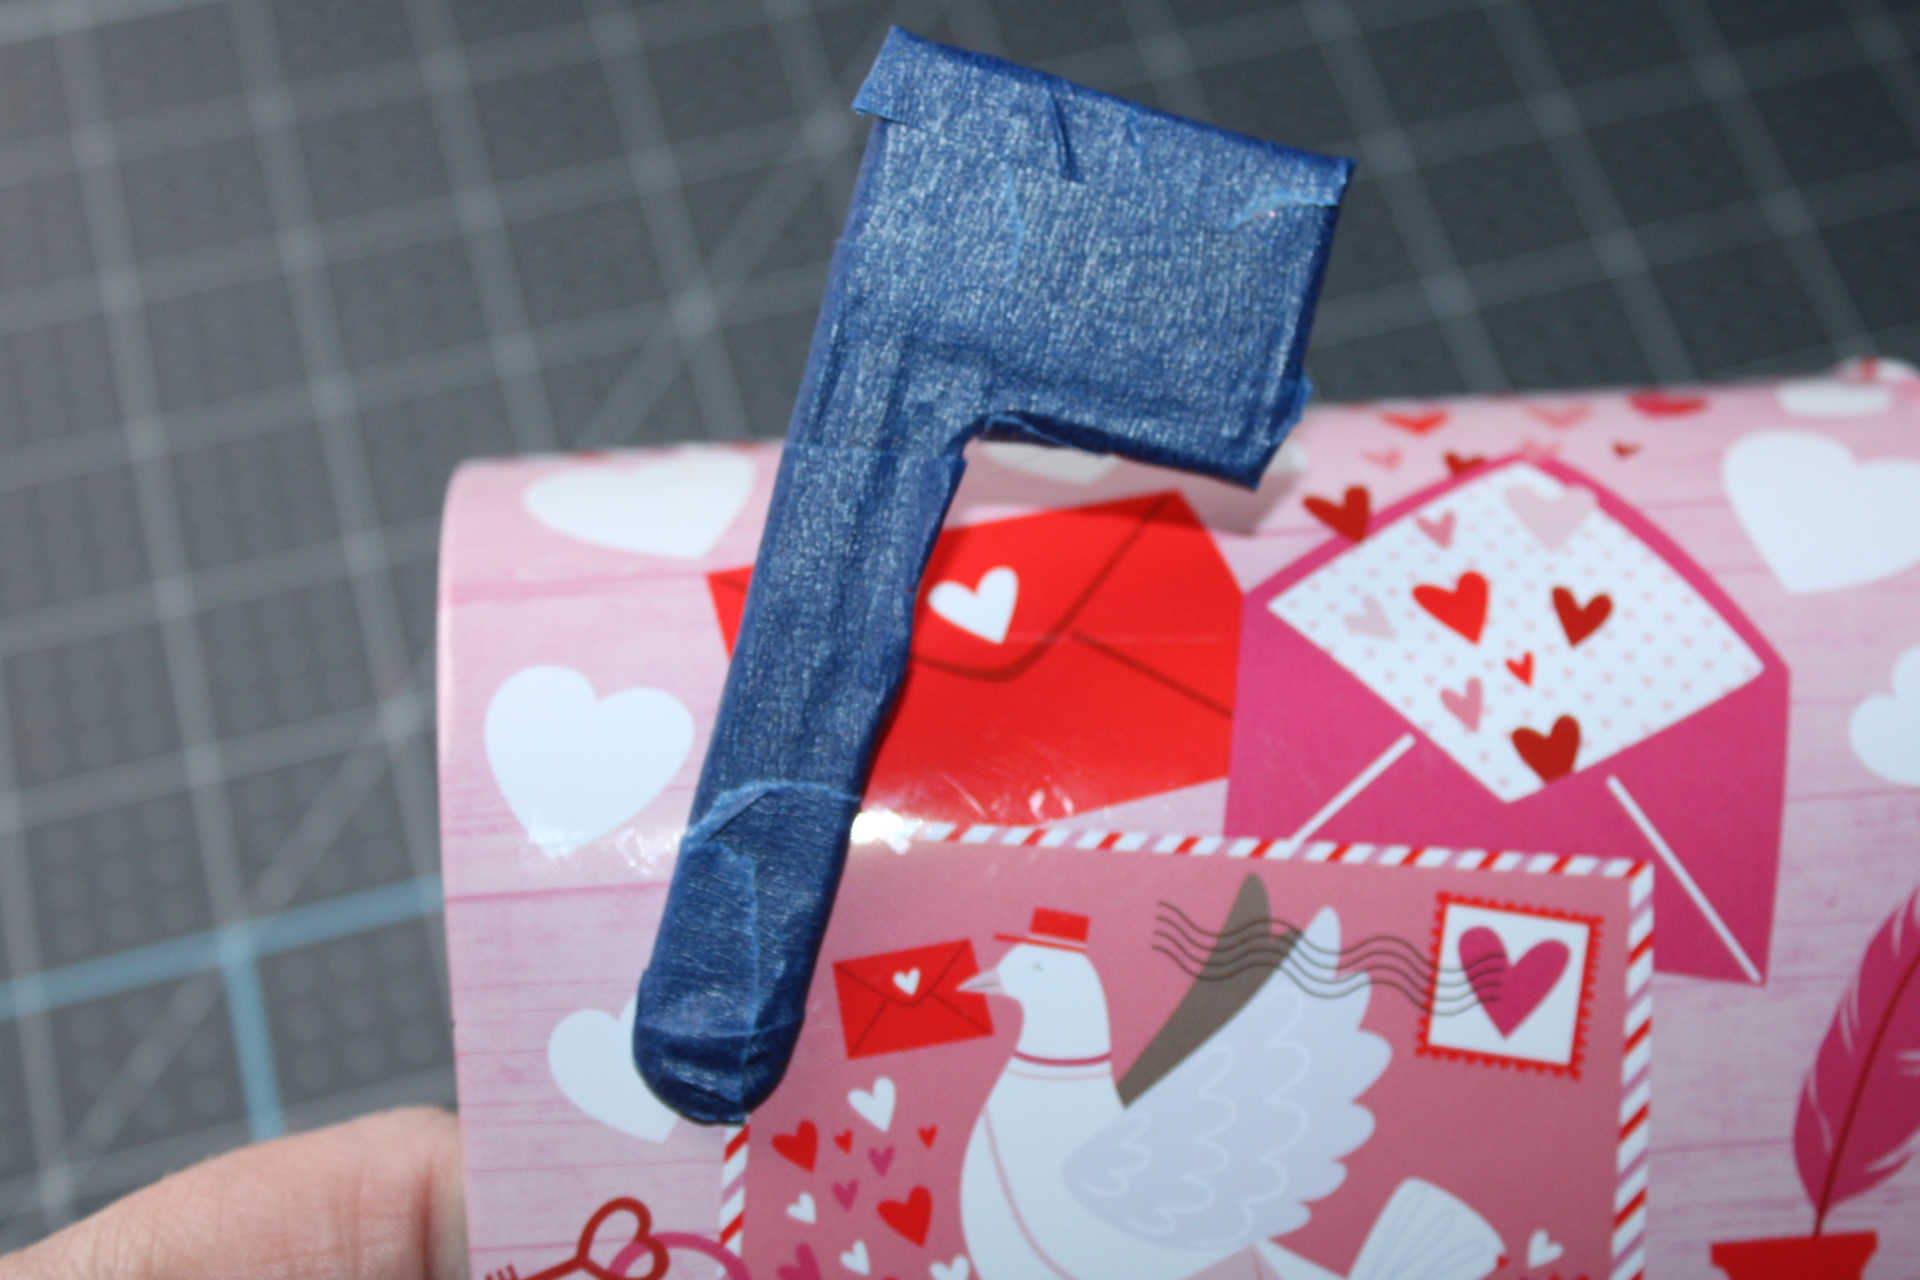
Before you paint the mailbox, you need to cover the flag if you want it to stand out from the rest of the mailbox. Use painter’s or masking tape and wrap it around the flag.

I used Rustoleum spray paint in vintage blush for my mailbox. You will probably need at least two coats as I did.


Now paint your candleholder or vase. I didn’t have gray spray paint, so I had to use acrylic paint. To make sure that the paint doesn’t chip, I spray painted a clear coat on it once it dried. My vase took two coats of gray acrylic paint and one clear coat. You won’t have to worry about painting the inside of the vase because the mailbox will cover it.


Once the mailbox is dry, remove the tape from the flag. Put more painter’s tape on the mailbox around the flag to protect the it while you paint the flag, then paint the flag. I used white acrylic paint.


Create a Design for the Dollar Tree Valentine’s Decoration
Cricut Design Space
Once the paint is dry, you can decorate your mailbox. I used my Cricut and created some designs for mine. For one side I cut two hearts and “Mr. & Mrs. Kline est. 2015.” For the flag I cut a heart and used the inside of the heart on the back side of the flag. I also cut a heart with the words “Love you” for the door. If you want to use my design, you can get it here. Just remember to change the last name before you cut. Like I always mention, I have the Cricut Access subscription so the items I used to create the design were included in it.

Other Design Options
Carbon Copy Method
Don’t have a die cutting machine? Don’t worry, you can still make this Dollar Tree Valentine’s Day decoration! You can add a design with a printer and a pencil. If you like the way I decorated my mailbox, with our last names and wedding year, you can create a design in Word or PicMonkey, and then print it out. Make sure to measure your mailbox and create a design that fits. When you have the designs printed, use this tutorial to transfer the images onto the mailbox, then paint over it with acrylic paint.
Free Printable for Carbon Copy Transfer
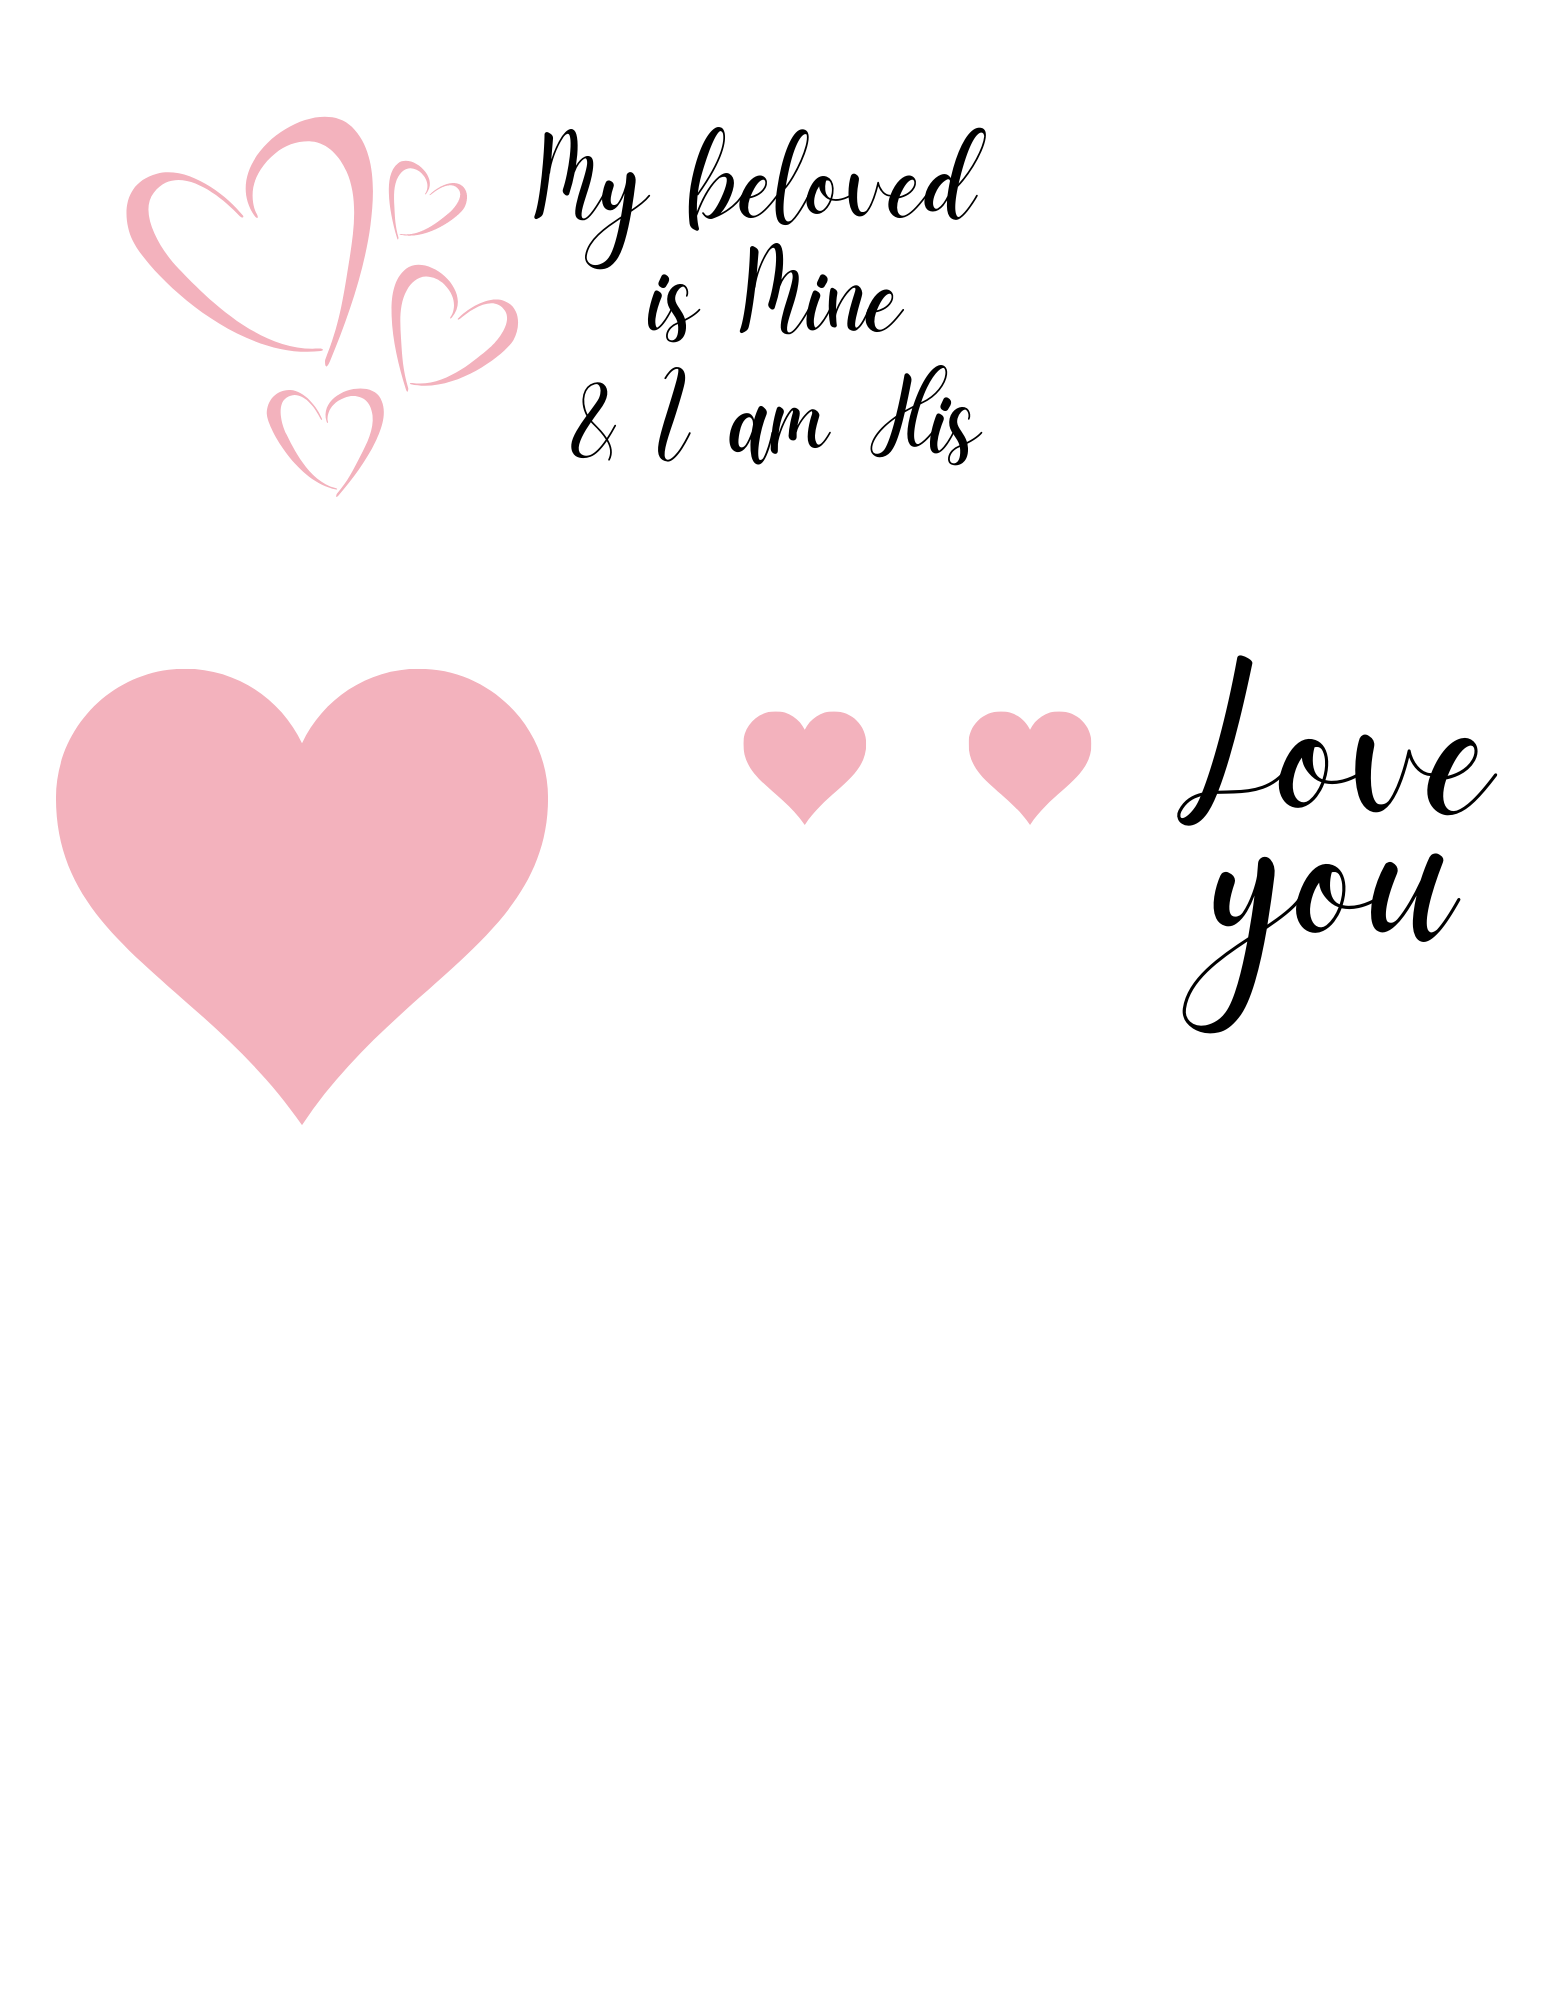
If you don’t want to make your own design, I have created a free printable for you! You can print it out, cut the pieces apart, then use the tutorial (or this one with a full tutorial) to transfer the images to the mailbox. This document is an PNG file. You can resize the images without losing any quality. When you print, make sure that the settings aren’t going to resize the document for you. The small hearts are for either side of the flag, the large heart is for the front with the “Love you” to be overlaid on top of it, and the quote with the hearts next to it are for the blank side of the mailbox. You can print the hearts and cut them out then Mod Podge them onto the mailbox if you don’t want to do all of the carbon copying and painting.
This printable matches the look of the ones I created for the tabletop decoration and the tiered tray set for Valentine’s Day. So make sure you get those and use the tutorials to make a matching set of three pieces! All of them are Dollar Tree Valentine’s decorations since they use supplies almost exclusively from there! Update: I’ve added a few new pieces to our DT Valentine’s decor an adorable $3 sign (no Cricut needed!), farmhouse yarn wreaths, and a double-sided tabletop decor piece.
My beloved is mine, and I am his: he grazes among the lilies.
Song of Solomon 2:16 ESV
Stickers & Stencils
There are a few other ways to add some flair to your Valentines mailbox. Dollar Tree sells letter stickers as well as a huge selection of hearts and other designs that can be used for Valentine’s Day. They also have a lot of rub-ons that are perfect for a project like this. I also like to use their vinyl wall stickers in signs and other decor. You can cut the words or even letters apart to place on the mailbox. A lot of those sets have a love theme. I’ve seen the good old “live, laugh, love,” “love is patient, love is kind,” and other hearts and flourishes.
Finally, you can use stencils. Again, Dollar Tree has those as well. I’ve seen 1/2″ and 1″ letters there, and I’m sure you can find hearts and other things are appropriate for Valentine’s Day. You can use Mod Podge on the edges of the stencil to keep the paint from bleeding under the stencil.
Apply the Design to the Mailbox
There are so many ways that you can decorate the mailbox, but I’m going to show you how I made mine. You can alter yours to fit your home decor and for the person who will be using it.
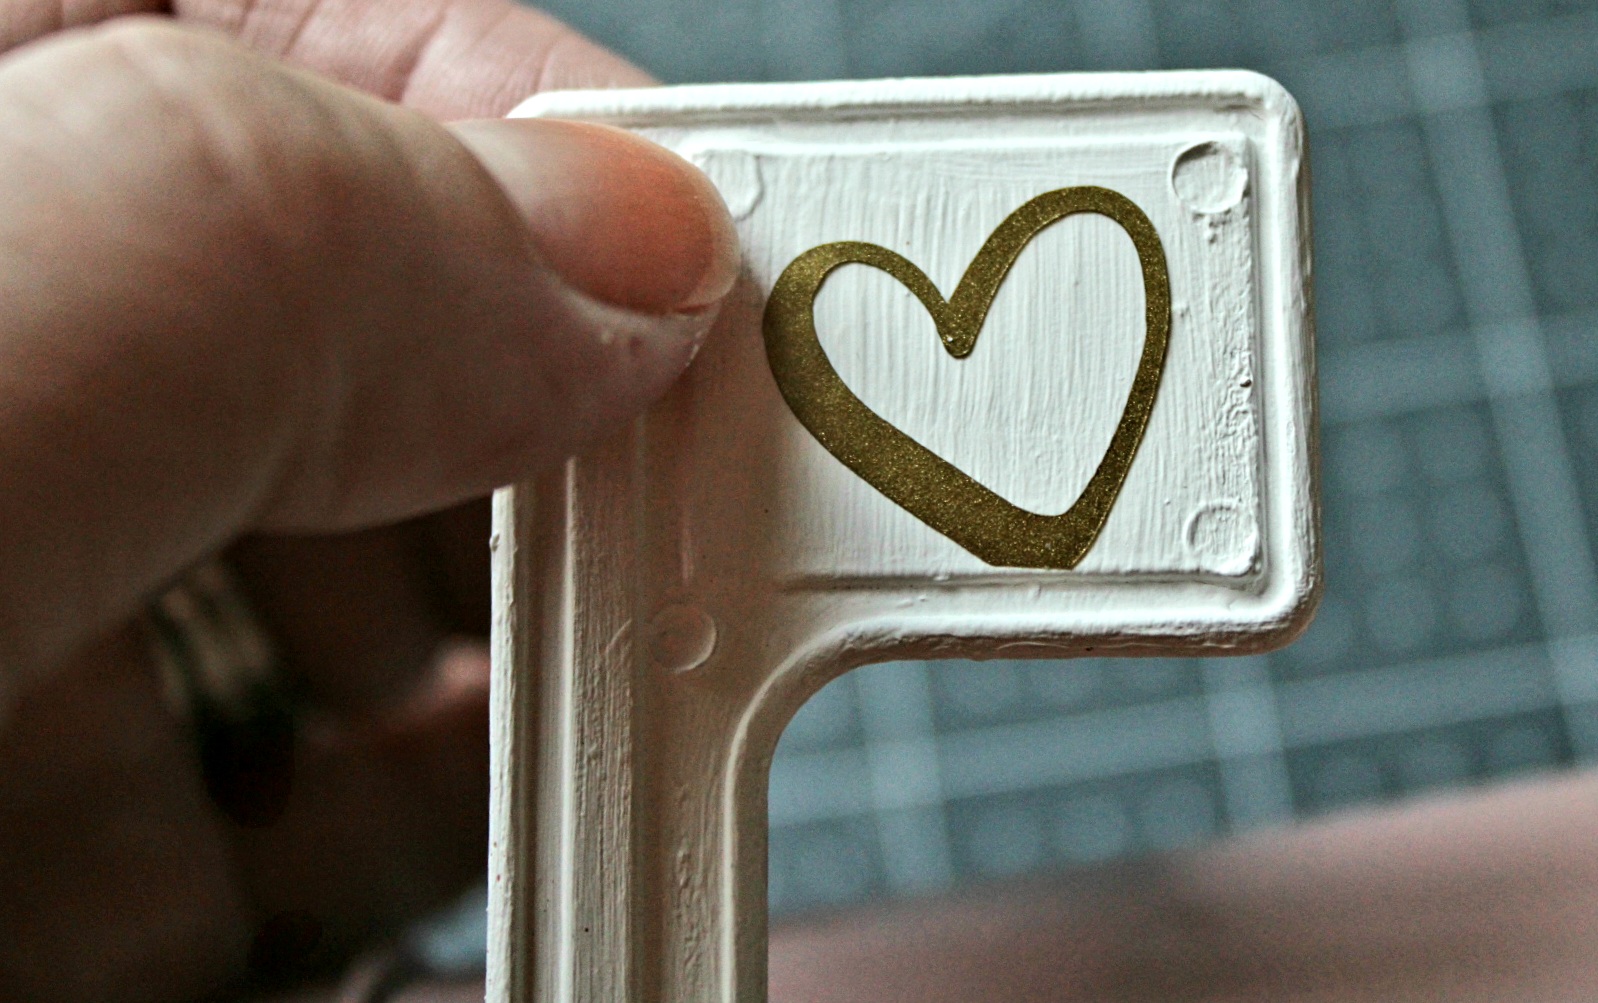
There is a small box inside the flag where you can line the heart vinyl or sticker up. I cut a heart that was hollow, so I used the inner part that you would normally weed and throw away, on the back side of the flag. You will see it when the flag is raised.

On the front I placed a light gray heart then laid “Love you,” cut in gold, on top of it.


On the open side I placed our names as well as a heart that I cut. Like I did on the flag, I decided to use the inner heart that would’ve normally been discarded. I placed it at an angle right up against the other one.


Add Trim to the Door
This is optional, but I think the mailbox door looks really cute with a ribbon trim. Place a dot of hot glue on the bottom mailbox door. Then place your thinner ribbon on top of it, making sure to place the edge of the ribbon up against the raised lip of the door. Wrap the ribbon around the top of the mailbox, back down to the bottom, and hot glue it there. I was really low on white ribbon, so I left a gap in the middle, but you can add the glue in the middle of the bottom first, then bring the other end to meet it.

Attach the Mailbox & Vase
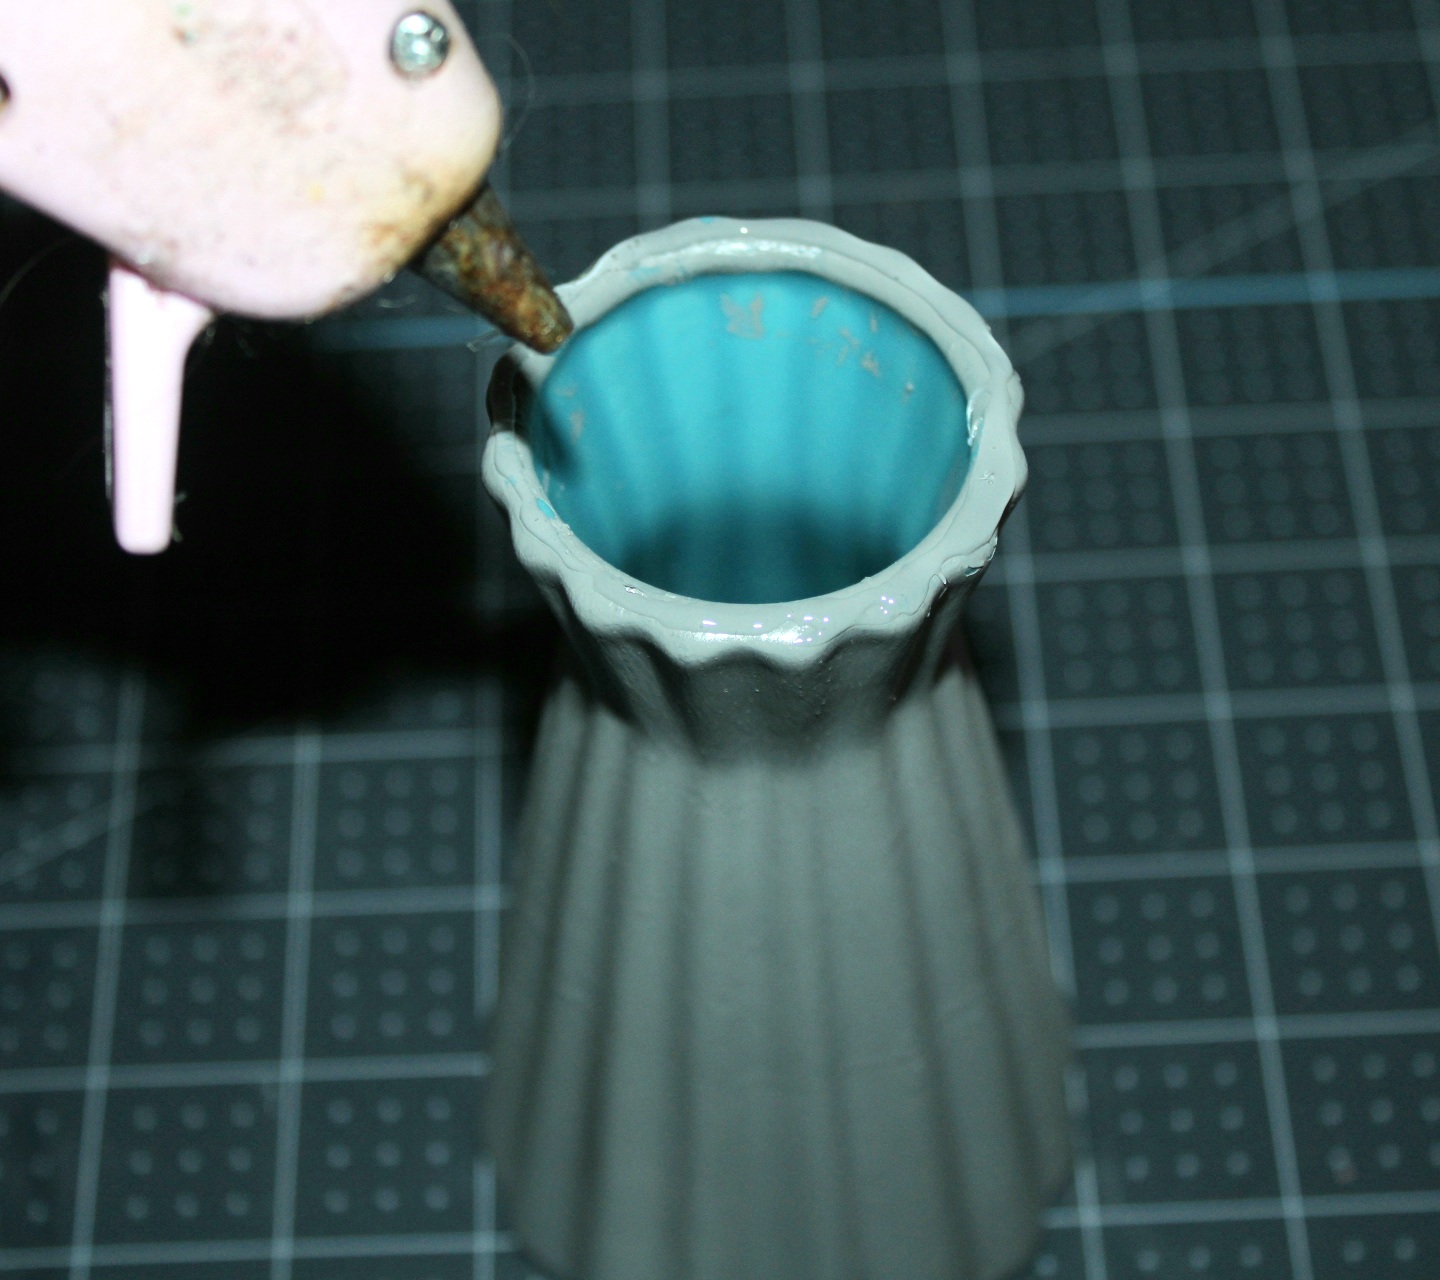
Put E6000 around the top of your vase or candlestick. If needed, you can squeeze some hot glue on top of that to help the mailbox stay on while the E6000 dries.

Center the mailbox on top of the vase and press in down on to the glue.

Add a Bow to the Dollar Tree Valentine’s Decoration
Finally, make a bow to add to the top. I stuck with a simple two loop bow because it’s a small mailbox. You don’t want too much on it, but if you have a 1″ or 1.5″ ribbon, you could get away with more loops. Maybe. I like the simple bow though. Add a dot of hot glue to the middle of the bow and place it on top of the mailbox. It looks best if it runs the length of it.


That’s it!
Your Valentine’s Day mailbox is complete! I hope that you enjoyed this tutorial and that you have the perfect way to deliver your Valentines! I would love for you to tag me on social media when you make it. You can use the buttons in the sidebar to follow me. Here are a few pictures of my mailbox.


Love Notes to Deliver in the Valentine’s Mailbox
Now you need something to put inside your decorative mailbox. Head over and print my free love notes for kids and love notes for your significant other. There are two sets, one animal set and an adorable gnome set. Each one has five pages with four notes per page. You can place one note in their mailbox each day leading up to Valentine’s Day, and a special note on the big day (they’re also good for lunchbox notes). They will love checking the box each day, and you can up their excitement even more by adding something special along with it. My son doesn’t like candy, but you could go that route, or pencils, erasers, or other little happies from Dollar Tree.


Remember to pin the image below or share this post with the buttons on the left side of the page so you can find it when you’re ready to start your project! Also, follow me on Pinterest for new ideas added weekly! Be sure that you never miss a great tutorial for decor like wreaths, signs and other home decor, free printables, crafts, and other fun posts! Enter your email address below to be notified of new posts! Use the buttons below to follow me on social media for other great content.

Don’t go yet! There’s more to see!
There’s plenty more to see here on the blog! If you’re looking for something specific, use the search box in the sidebar to look it up. If not, you might enjoy these ideas. Don’t have time to read them all now? That’s ok, just click over to the posts using the pictures and pin them for later. You can also add Life as a LEO Wife to your favorites and check back for new ideas and free printables and SVGs every Wednesday, as well as link parties with tons of shared ideas on Sundays!


This is an adorable Valentine’s Day project. The little mailbox looks so much better after you painted and embellished it. What a wonderful way to deliver valentines cards and notes to your children and husband. Thanks for linking up at Talent-Sharing Tuesdays.
Carol
http://www.scribblingboomer.com
Thank you! I was hoping it would look better. Sometimes my projects don’t end up like I envision, but this one did, thank the Lord!
Absolutely adorable Niki! Thanks so much for sharing. Pinned!
Thank you! It’s fun to use too!