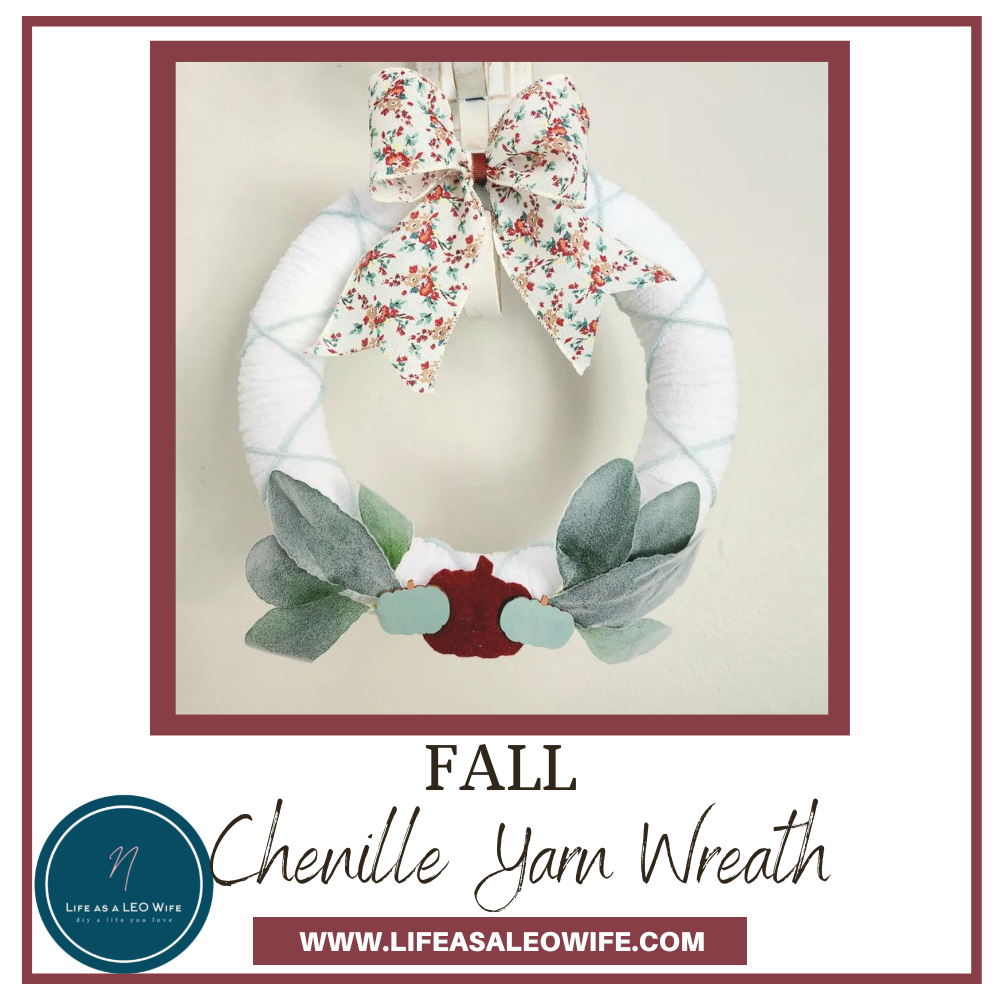
Fall on the Gulf Coast doesn’t even really seem like much of a change of season from the summer, but I still decorate like it is! I don’t use dark, heavy colors however because it’s still 90° outside and will be at least 75-80° for a few months still. When I found these beautiful watercolor fall pillowcases, I reworked my entire early fall decor around them because of their aquas, tans, and sages. After getting all of my decor placed, I noticed that the main wall in our living room was a bit bland. So, I decided to make some wreaths to hang from two scones. Today I’m going to show you how to make an adorable chenille yarn wreath for fall that’s perfect to hang on walls as well as doors.
Looking for more fall wreaths? You might like this burlap pumpkin wreath, this fall pizza pan wreath, a fall hoop wreath, this chunky yarn pumpkin wreath, this fall burlap wreath, these felt leaf wreaths, this burlap and lace pumpkin wreath, and of course my most popular fall wreath ever, this buffalo check pumpkin wreath.

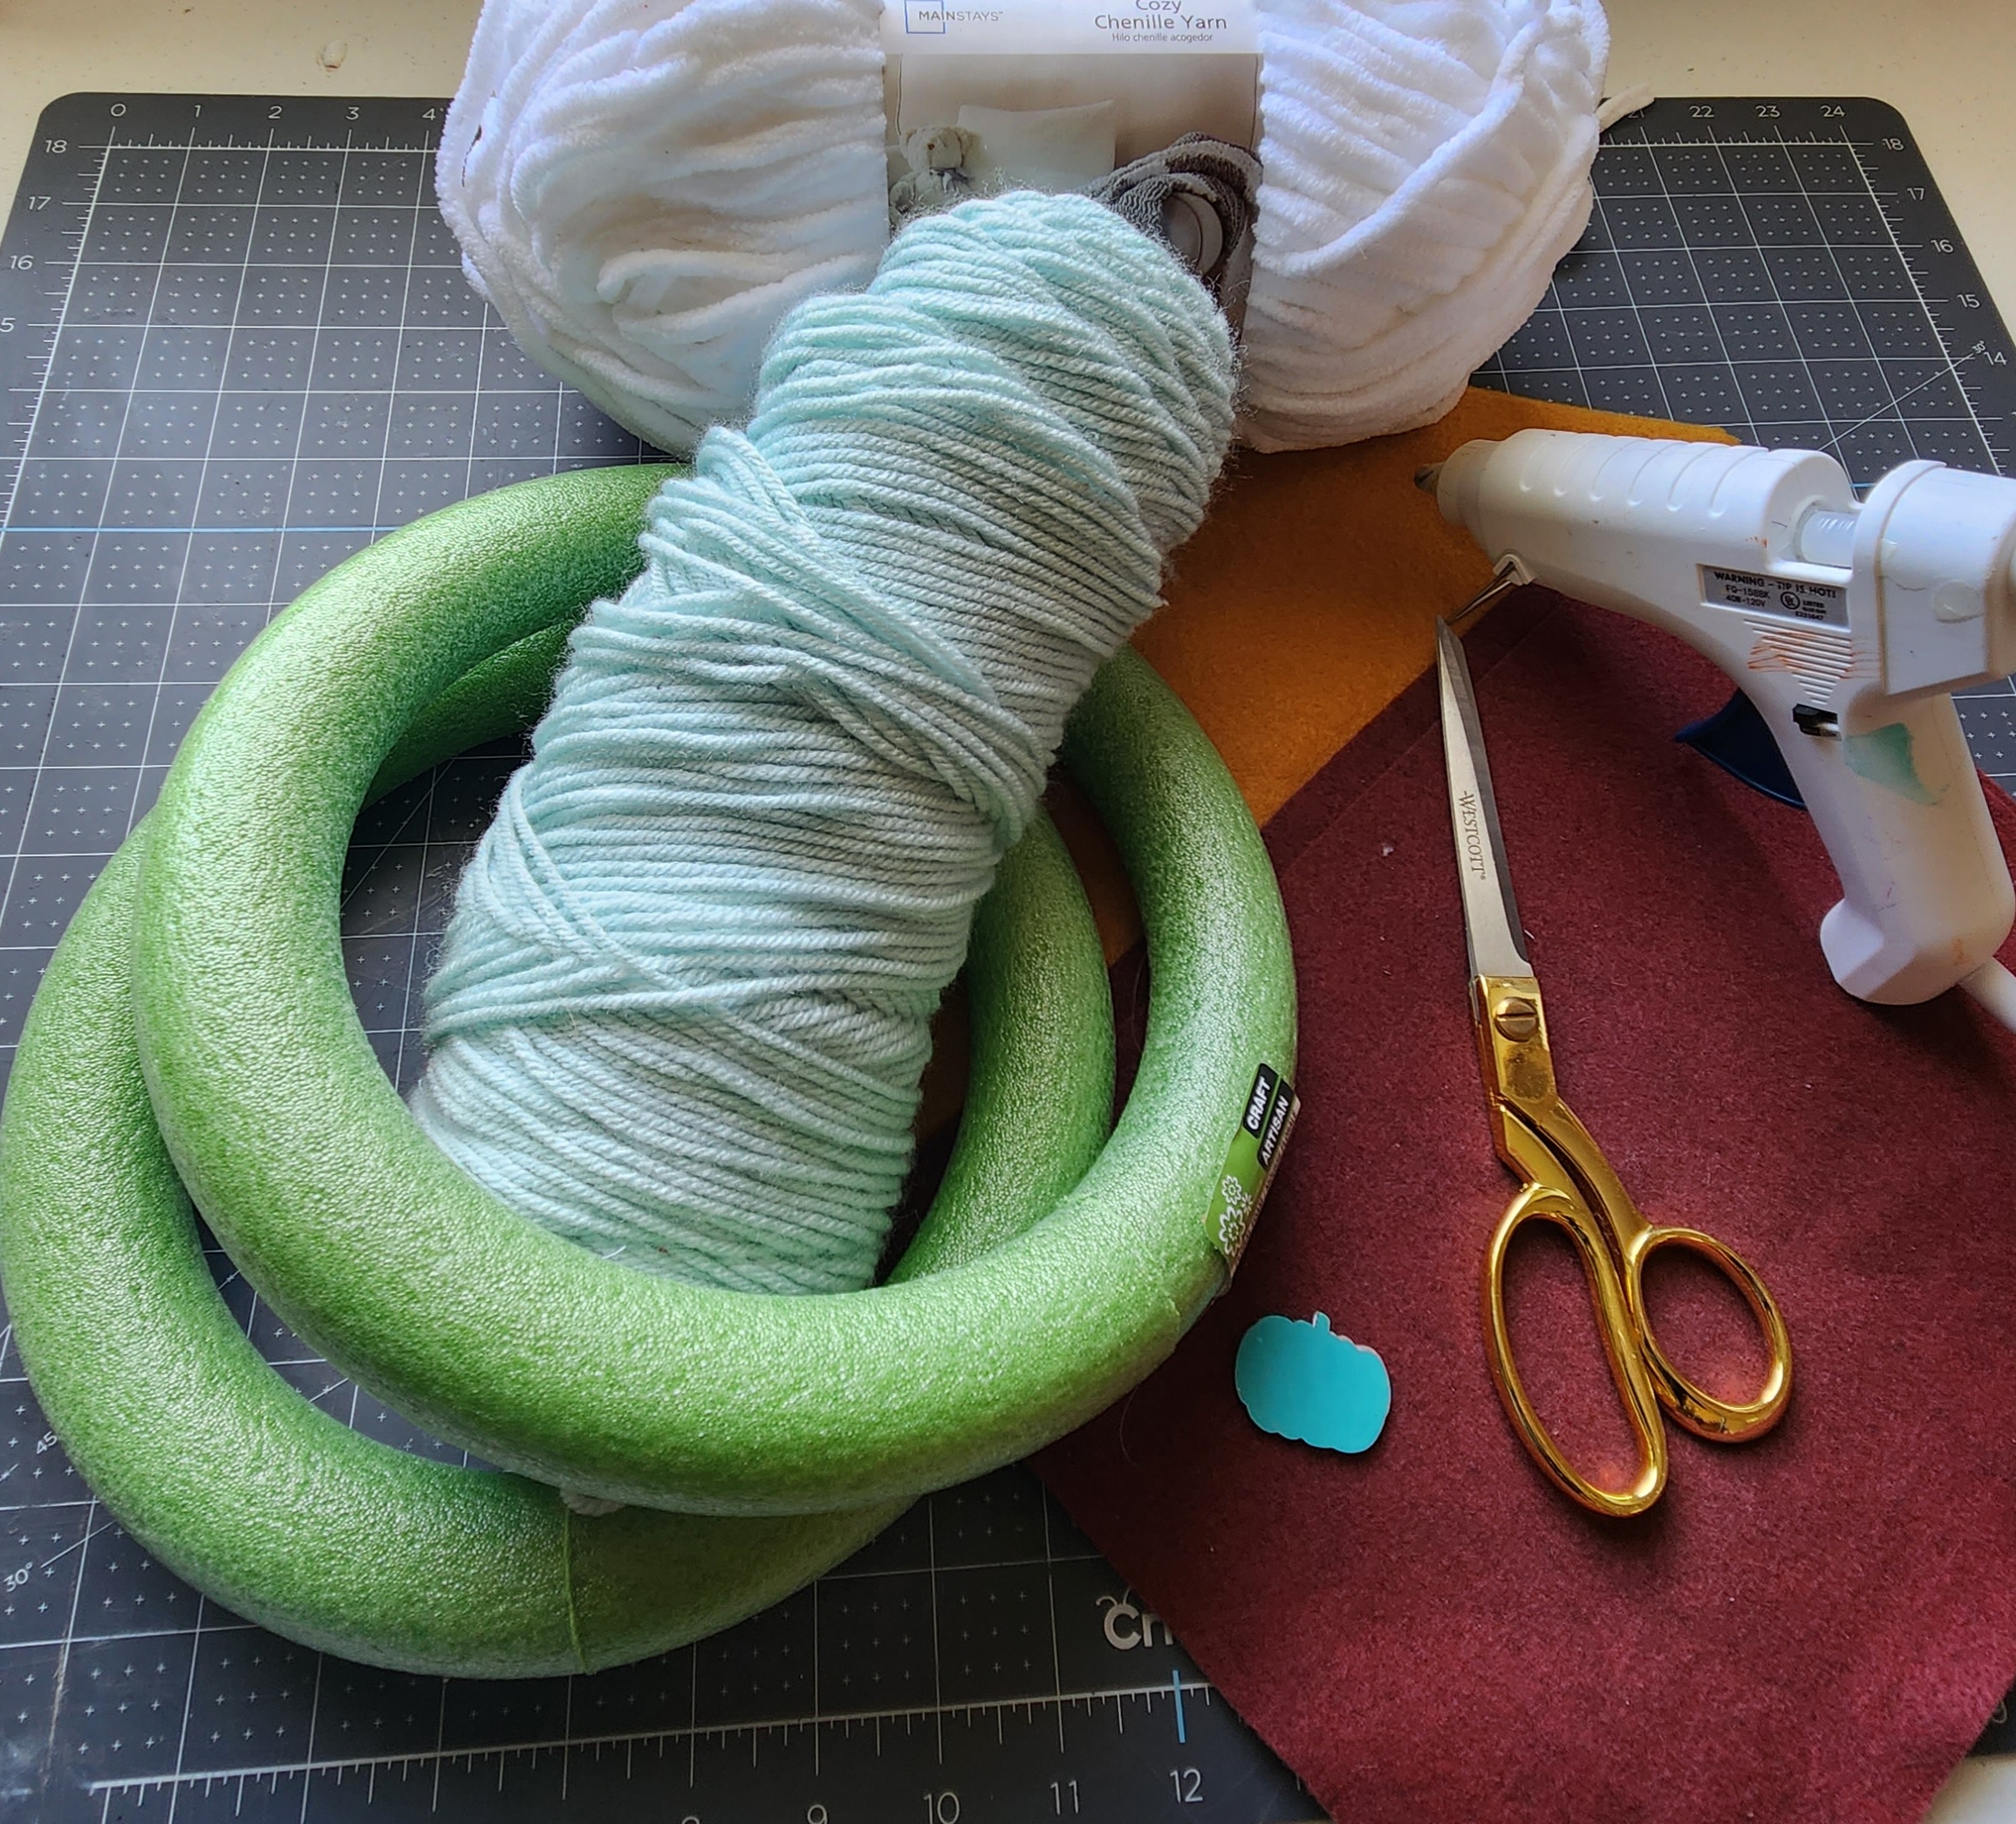
Supplies for a Fall Chenille Yarn Wreath:
- chenille yarn: I used white. This is the width I used, and this is the very chunky version.
- regular yarn: I used aqua mist.
- styrofoam wreath form: I used two 10″ forms from Dollar Tree, but any size will do. This pack is a great deal ($10.99!), coming with two 10″ forms, burlap, pinecones, berries, & leaves. You can use the items not used in this project for other fall or Christmas wreaths & decor!
- hot glue gun & glue
- felt
- scissors: fabric scissors are great for this project. I love mine!
- lamb’s ear stem
- 2.5″ wired ribbon: This pack has some lovely light fall colors as well as traditional fall colors.
- wood pumpkins &/or gourds: I couldn’t find the ones that I used, but these have 2.8″ pumpkins with some other fall shapes that can be used, or
- my free printable pumpkin & gourd outlines
Disclosure: I am a participant in the Amazon Services LLC Associates Program and the Dollar Tree Affiliate Program, affiliate programs that allow me to link to the products that you can use to make this project quickly and easily. If you purchase any of these products I may receive a very small commission at no cost to you! That commission helps me continue to bring these great decor DIYs, free printables, and all of the other goodies on this site to you. Thanks so much for your support!


Wrap the Wreath Form
Wrap a good amount of chenille yarn around something that will easily pass through the center of the wreath form. I usually use my Fire Stick remote, but you can cut a piece of cardboard that’s about 2″x6″.
Hot glue the yarn on the back of the fall wreath form and wrap the yarn around it. I find it easiest and fastest to place the bottom of the form between my knees (the skinny way). Then you can quickly pass the yarn around the form over and over faster than what you’ll see in the video.
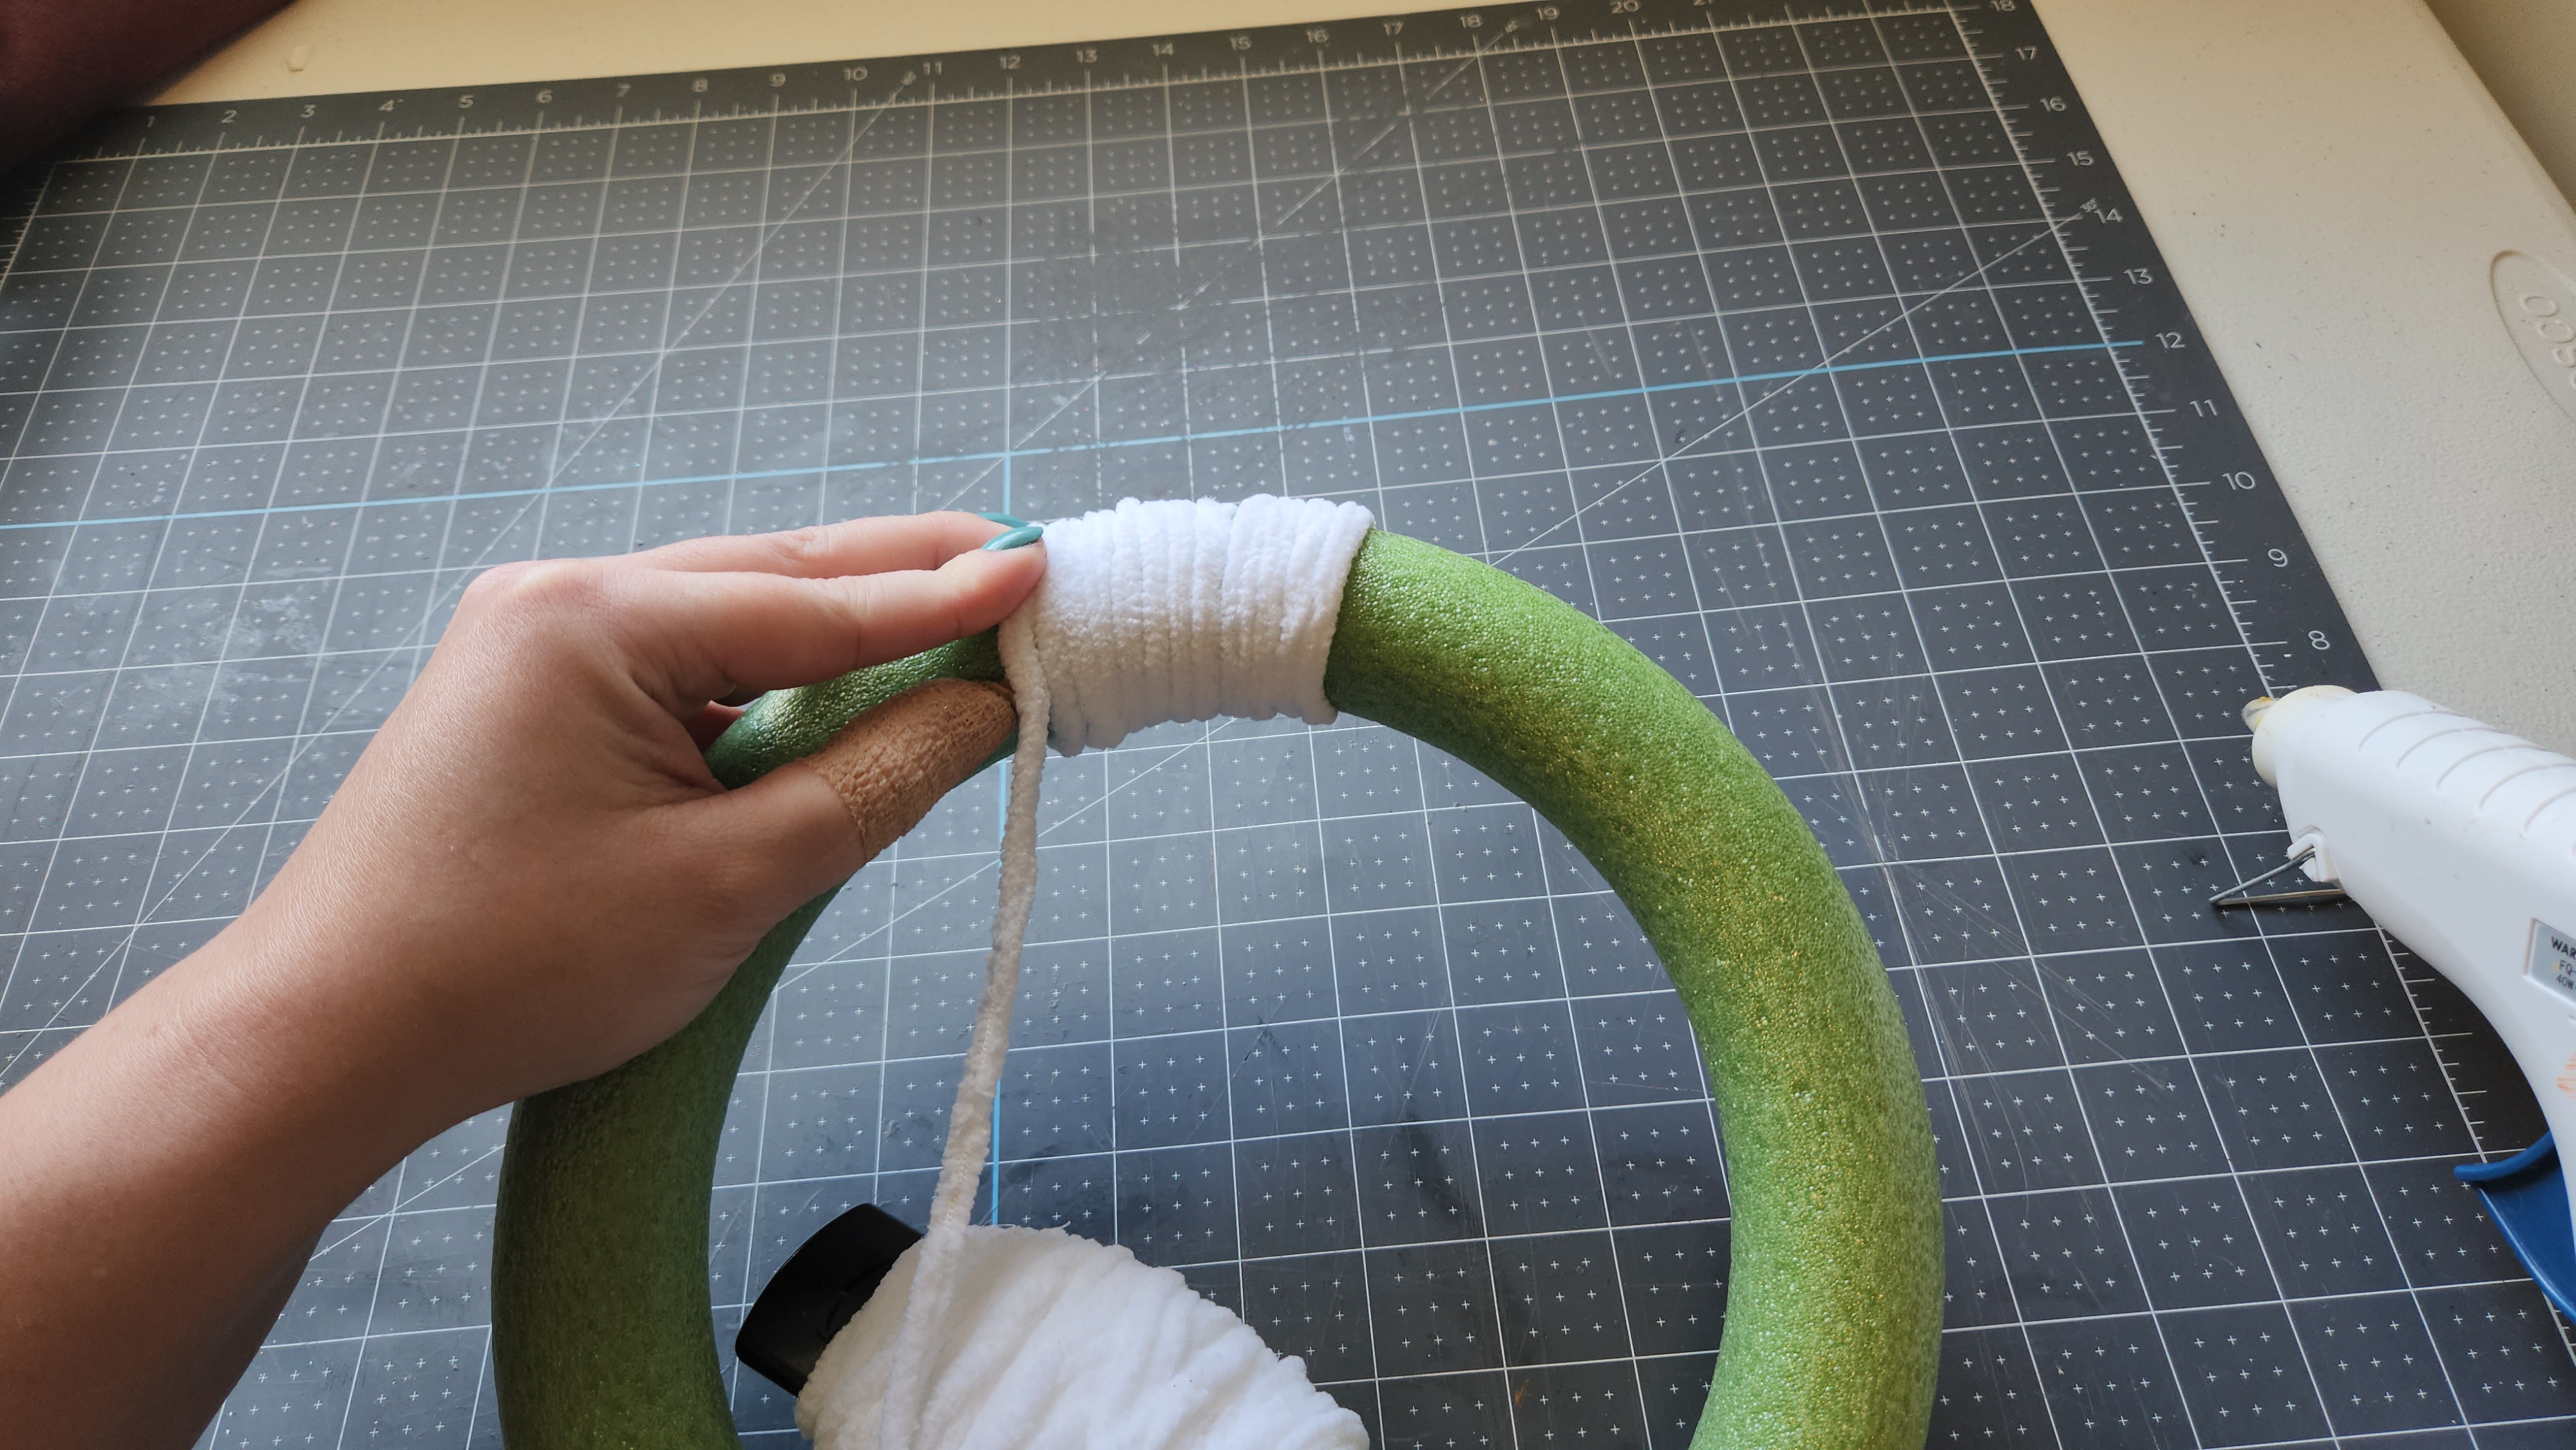
You won’t see me wrap the entire wreath in this video because it goes so much faster when I place the wreath between my knees. It cuts the time by more than half!
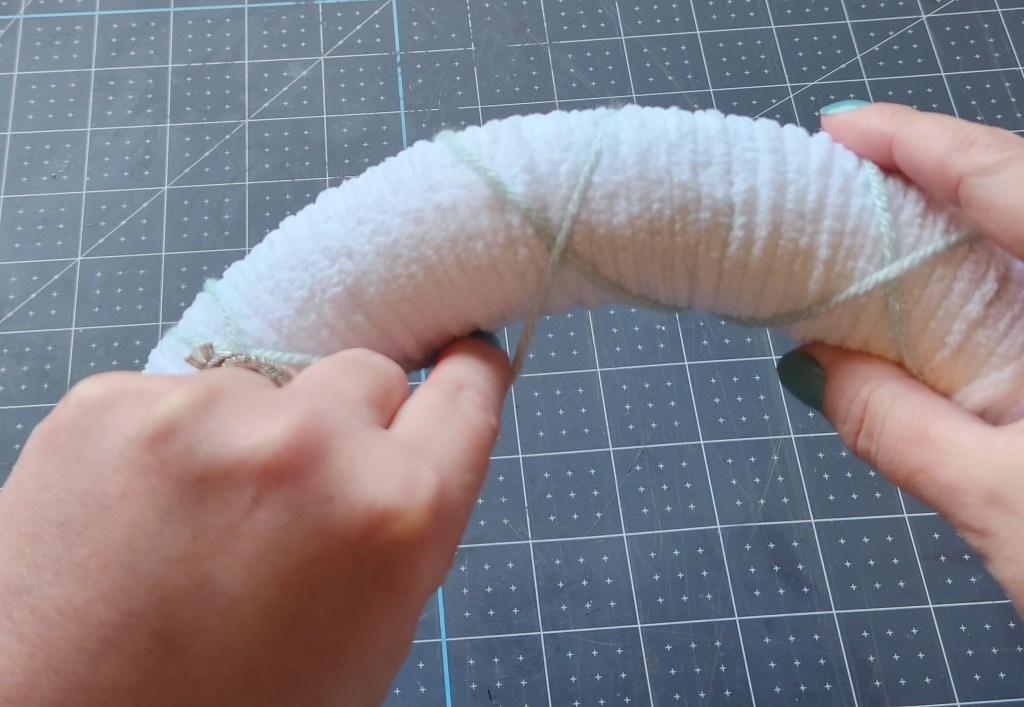
Wrap the Accent Yarn Around the Fall Chenille Yarn Wreath
Hot glue the end of a long piece of yarn onto the back of the chenille yarn wrapped wreath form. Begin wrapping it in a wide spiral manner.


Keep wrapping the yarn around the wreath in the wide spiral pattern until you’re back where you started.

Glue the yarn in place on the back, but don’t cut the excess off. Reverse your spiral so that you create a “X” pattern over the first layer of the secondary yarn. When you’re back to the beginning, hot glue the yarn in place and cut off the excess.


Cut Pumpkins from the Felt
I traced a wood pumpkin sticker that I got from Target a few years ago onto the felt to use on the fall wreath. Cut the pumpkin on your felt color choice. I used burgundy because it goes well with my fall watercolor pillowcases (gorgeous and so cheap!) and the watercolor fall prints that you can download for free in this post. If you’re making two wreaths like I did, cut two pumpkins. These small wreaths are great to make in multiples to use on double doors, chairs, sconces, to each side of gallery walls, etc.


Free Printables to Use w/o Wood Shapes
If you don’t have small wood pumpkin shapes, you download and cut these free printable outlines. Just trace the outer portion onto felt. I painted my small wood pumpkins and gourds with sage chalk paint, so you probably want to use felt in a different color for the pumpkin (1.5″) and the gourd (3″) than the one you used for the 3″ wide pumpkin. Choose which shape you’d like to add to your wreath and cut two of them. If you’re making two wreaths, cut two of the other shape as well.
For personal use only. All of my free printables & cut files are copyrighted material. Feel free to download these free designs and print them or use on your Cricut projects for your own use at home. They are not for commercial use, not to be placed on items for sale. That helps me keep these printables, SVGs, and PNGs coming to you for free! Another note: you will not my logo overlay on your downloaded design. It is there to keep people from downloading the images straight from Google, or others from stealing them to use on their site. Thanks for understanding! Feel free to share this post for your friends and family to make their own projects with this design!
In case you didn’t read the printable alert, the logo will not be on the downloaded version of the shapes.
Embellish the Bottom of the Fall Chenille Yarn Wreath
Place the larger felt pumpkin on the bottom of the wreath, but don’t hot glue it down yet. Make sure that you have an “X” with the secondary yarn in the top center, right above your embellishments. Lift the edge of the pumpkin and hot glue a three-leaf piece of lamb’s ear to one side. In the photo it looks like I’m leaving a gap between the pumpkin and the leaves, but I lifted the edge and glued it to the right side. The lamb’s ear on the left wasn’t glued down yet.


Next, add hot glue to the middle of each of the gourds. Place them slightly under the felt pumpkin. Adding glue only to the middle of the wood will allow you to place the lamb’s ear under the gourd on the left side.


Glue the pumpkin on top of the gourds. Then place the final piece of lamb’s ear slightly under the left gourd.
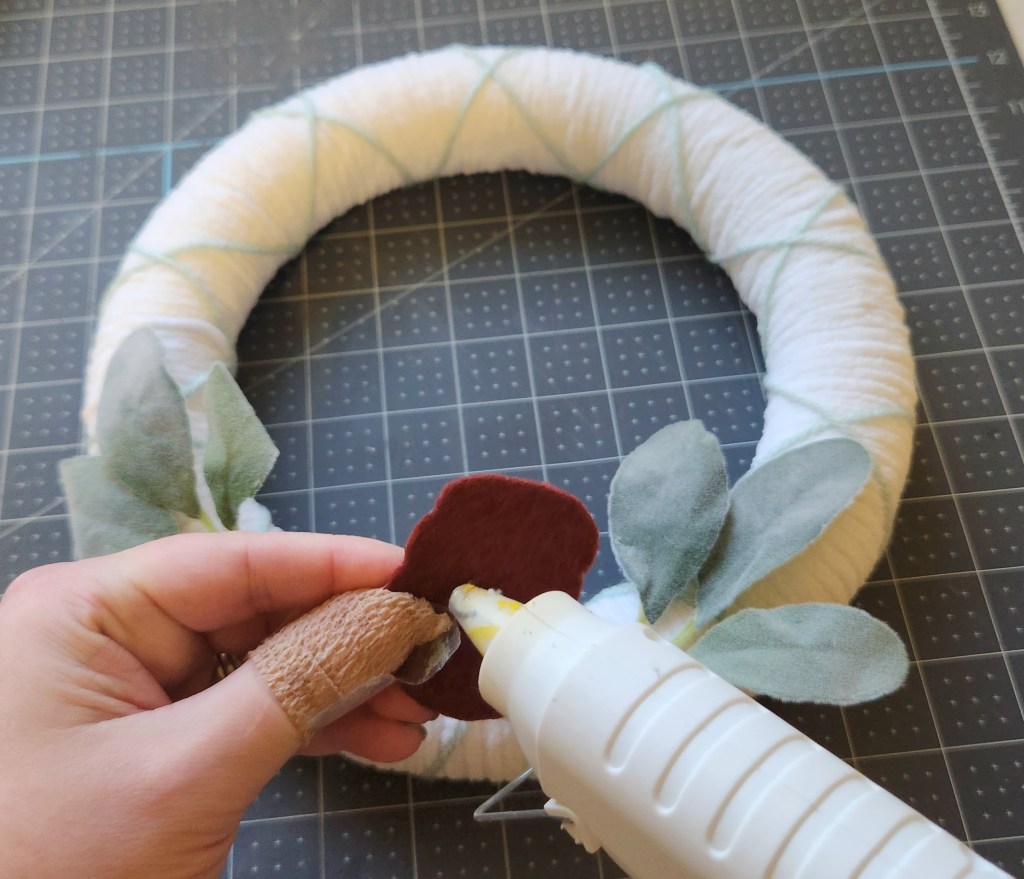


The lamb’s ear that I used came from Walmart. The three leaf pieces leave an open space, so I pulled off two more leaves from the bunch and glued one over the bare space on each side.
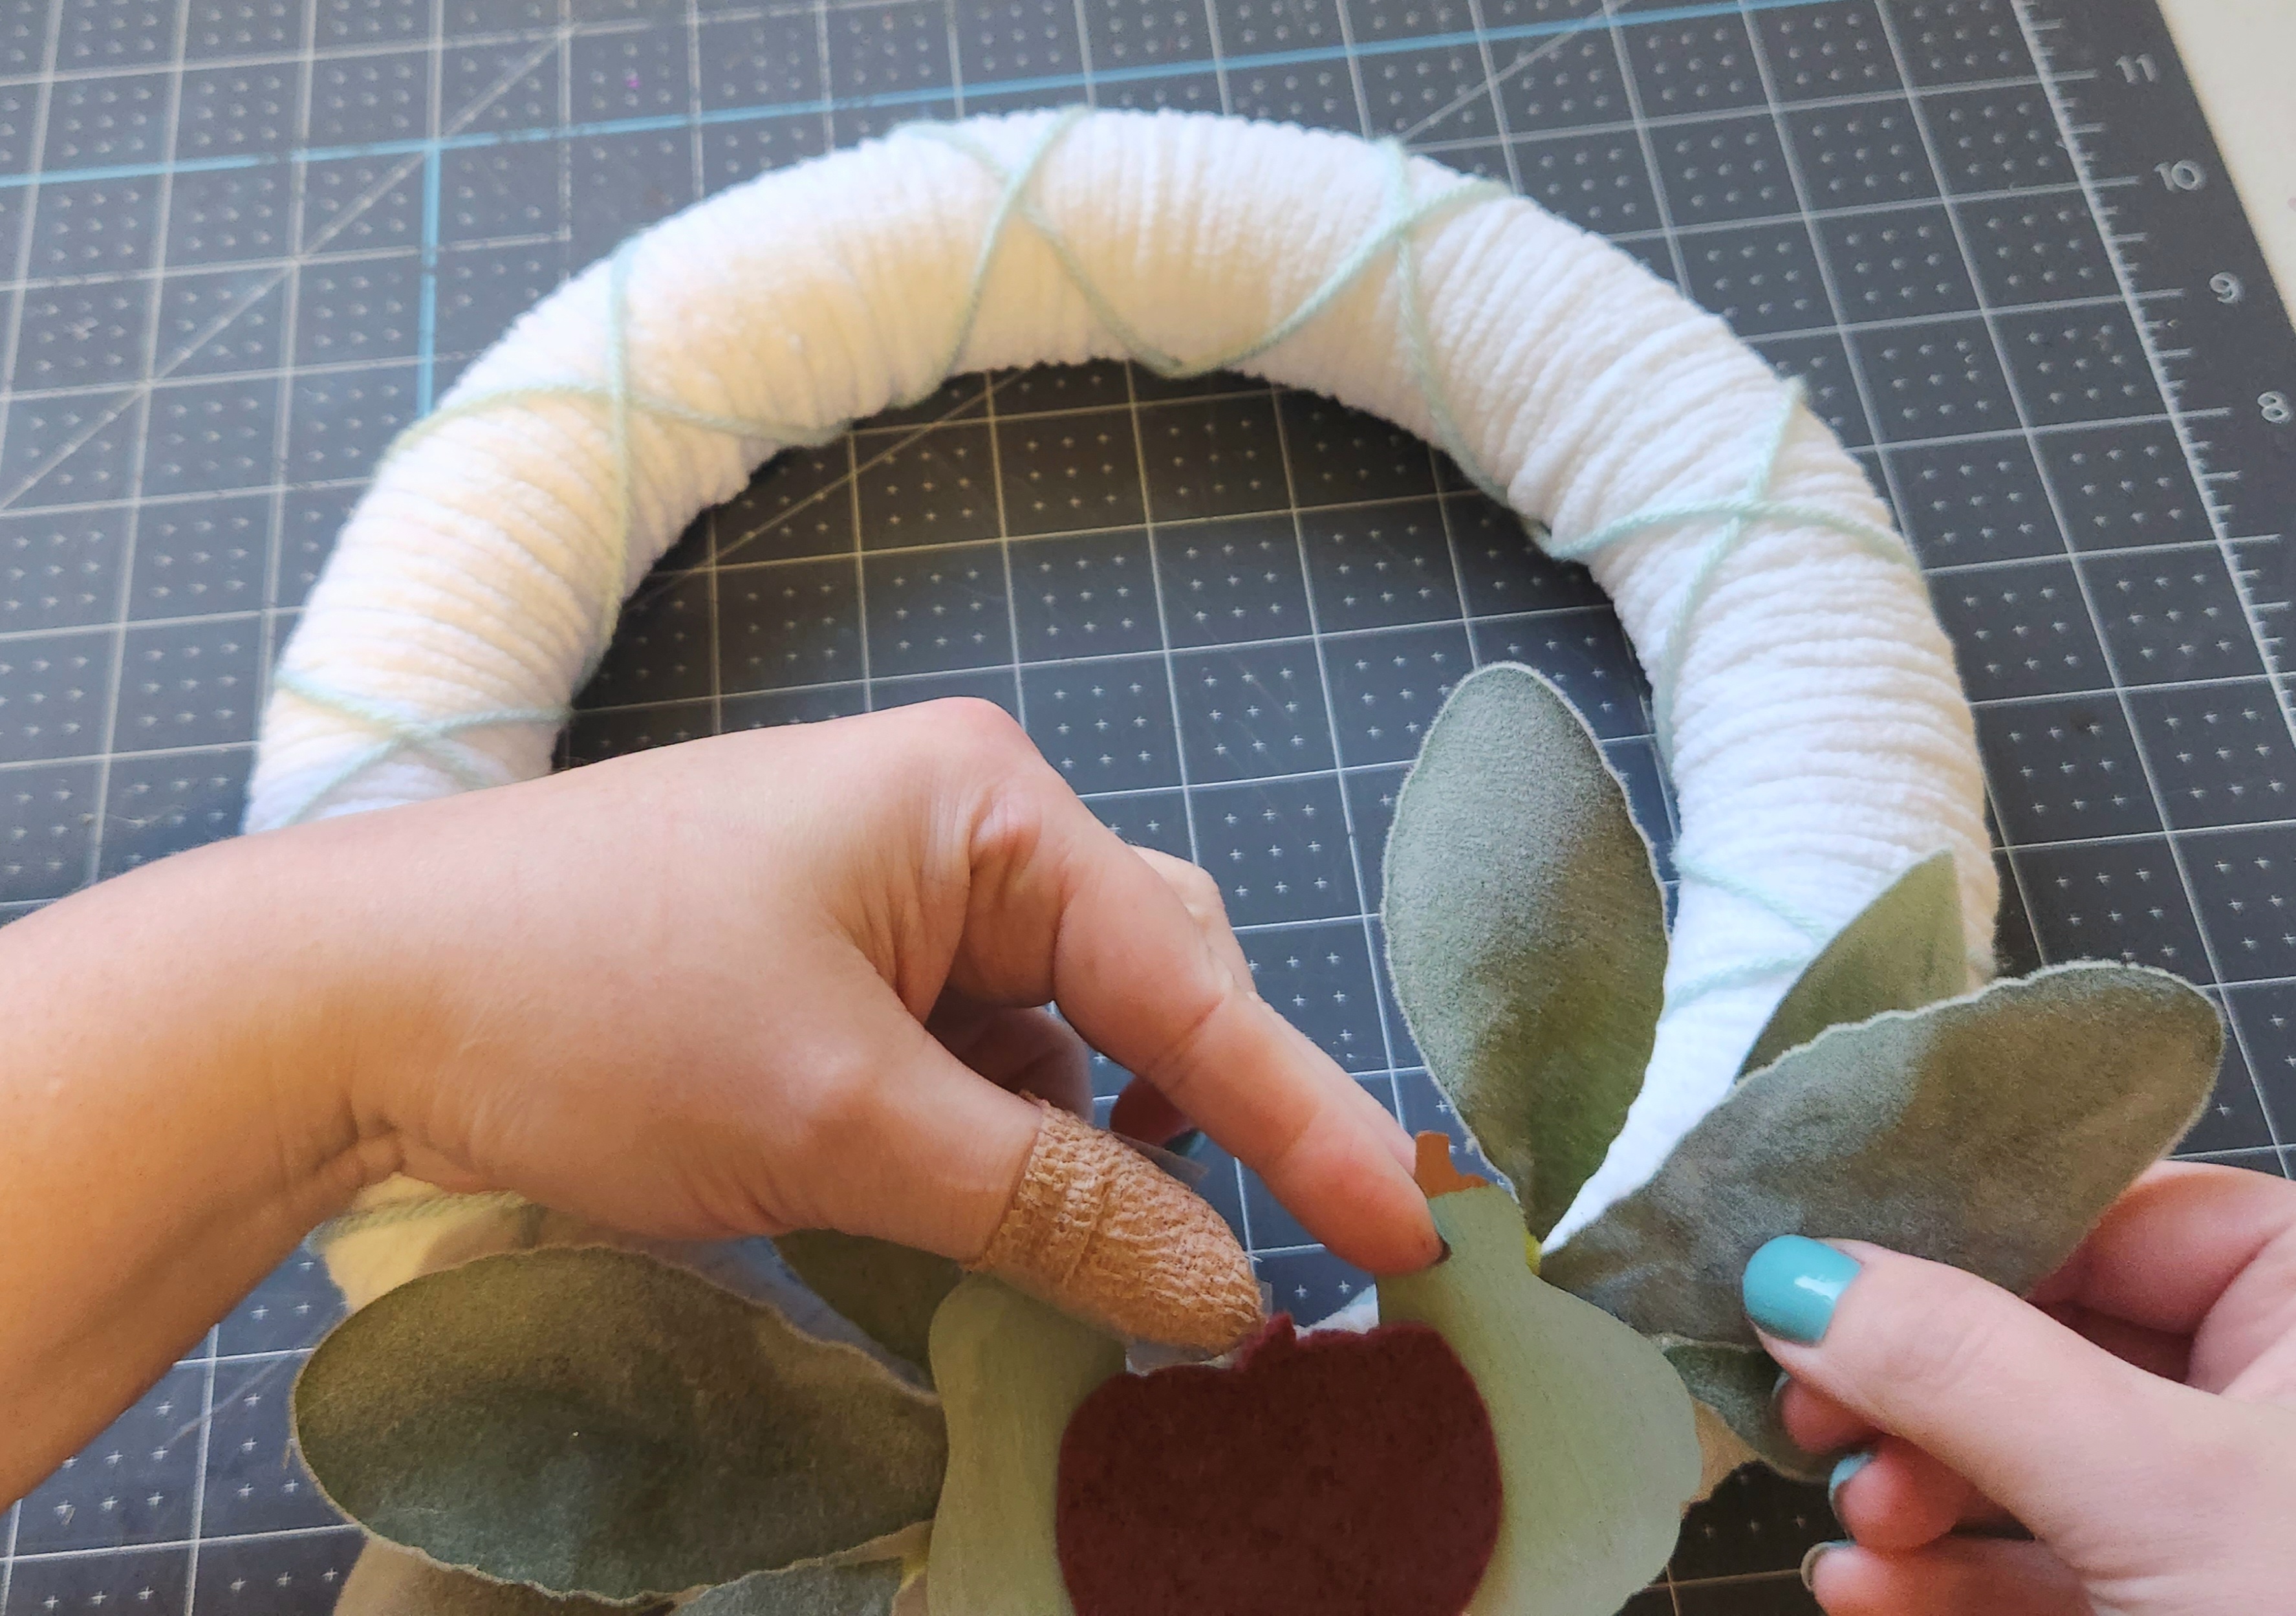
On my second wreath I glued the felt pumpkin down first, then added the two small pumpkins to the sides of it (on top). The rest of the process is the same.

Add a Bow
It’s time to finish up the fall chenille yarn wreath! Make a two loop bow with 3-4″ tails. The width of my bow is 5″. Leave the pipe cleaner or floral wire that you secured your bow with a little bit longer than you need. Wrap the pipe cleaner around the “X” that you have at the top center of your wreath.


Here’s a video tutorial of the yarn wreath process:
Hang your adorable fall chenille yarn wreath & admire your work!
I hung my wreaths on sconces that are on each side of my Pottery Barn dupe decorative mirrors to add a little more color to the space. They add the touch of fall on the wall that I was looking for.


If you like the ladder shelf to the right of the couch, you can get that here (and it’s on sale for much cheaper than I got it for!). It’s a cute little addition to our living room since I only ordered one end table and a sofa table. I hope to show you the rest of my living room fall decor sometime next week. We bought a TV wall mount with an in-wall cord hider which we installed this weekend. You can check out the full tutorial for hiding your cords, easily in minutes with this tutorial. Now I can decorate my sofa table like a mantle. Yay!
I hope that you enjoyed this tutorial! When you make your fall chenille yarn wreath, I’d love for you to tag me on social media (@LifeasaLEOWife). I love seeing the twists that y’all put on these decor ideas!
Pin the tutorial for later!
Remember to pin the image below or share this post with the buttons on the left side of the page so you can find it when you’re ready to start your project! Also, follow me on Pinterest for new ideas added weekly! Be sure that you never miss a great tutorial for decor like wreaths, signs and other home decor, free printables, crafts, and other fun posts! Enter your email address below to be notified of new posts! Use the buttons below to follow me on social media for other great content.

Don’t go yet! There’s more to see!
There’s plenty more to see here on the blog! If you’re looking for something specific, use the search box in the sidebar to look it up. If not, you might enjoy these ideas. Don’t have time to read them all now? That’s ok, just click over to the posts using the pictures and pin them for later. You can also add Life as a LEO Wife to your favorites and check back for new ideas and free printables and SVGs every Wednesday, as well as link parties with tons of shared ideas on Sundays!


Here are a few Halloween ideas that you might enjoy:


So pretty – can’t wait to give this a try. I think I’ll invite a friend over and we’ll make one together. Thank you.
Thank you! It would make a fun craft day with a friend. Quick, easy, & you don’t have to think too much, so you can still chat away!
Niki,
This is such a pretty wreath!! I really love the colors you chose…Thanks so much for taking the time to stop by and for your kind comments…I have been busy decorating for Fall and Halloween so I am playing catch up on responding to comments….
Hugs,
Deb
No worries. Thank you!
I like your pale neutrals for fall decor. I live in coastal Georgia, and we don’t get much of a seasonal change in the fall. Our live oak and magnolia trees stay green in the fall, so we don’t get the red/orange/gold/brown fall colors. I prefer the watercolor-type hues with pale neutrals. These yarn-wrapped wreaths are so attractive!
Thank you for participating in Talent-Sharing Tuesdays Link-Up 34.
Carol
http://www.scribblingboomer.com
Thanks Carol! I think we may get a few days under freezing per year, but that’s not usually until late January or February. I think I’ll take this light color palette all the way through Christmas this year.
How pretty, matches your living room décor perfectly! Thanks so much for linking up at the Unlimited Link Party 82. Shared.
Thank you!
Love it! I’ll be featuring you this week when the next to Grandma’s house we go link party starts – thanks for sharing!
Thank you!