During my craft room makeover I saw exactly how much felt I have- a ton! Over 50 sheets! I always hang small wreaths from two wall sconces in my dining room, and I needed two new ones for early fall. I have been making some new early fall decor pieces in orange, aqua, and white, and I had felt in those colors. Perfect! What’s more fall than falling leaves? So the felt leaf wreath was born. Actually two were, and here’s how I did it.
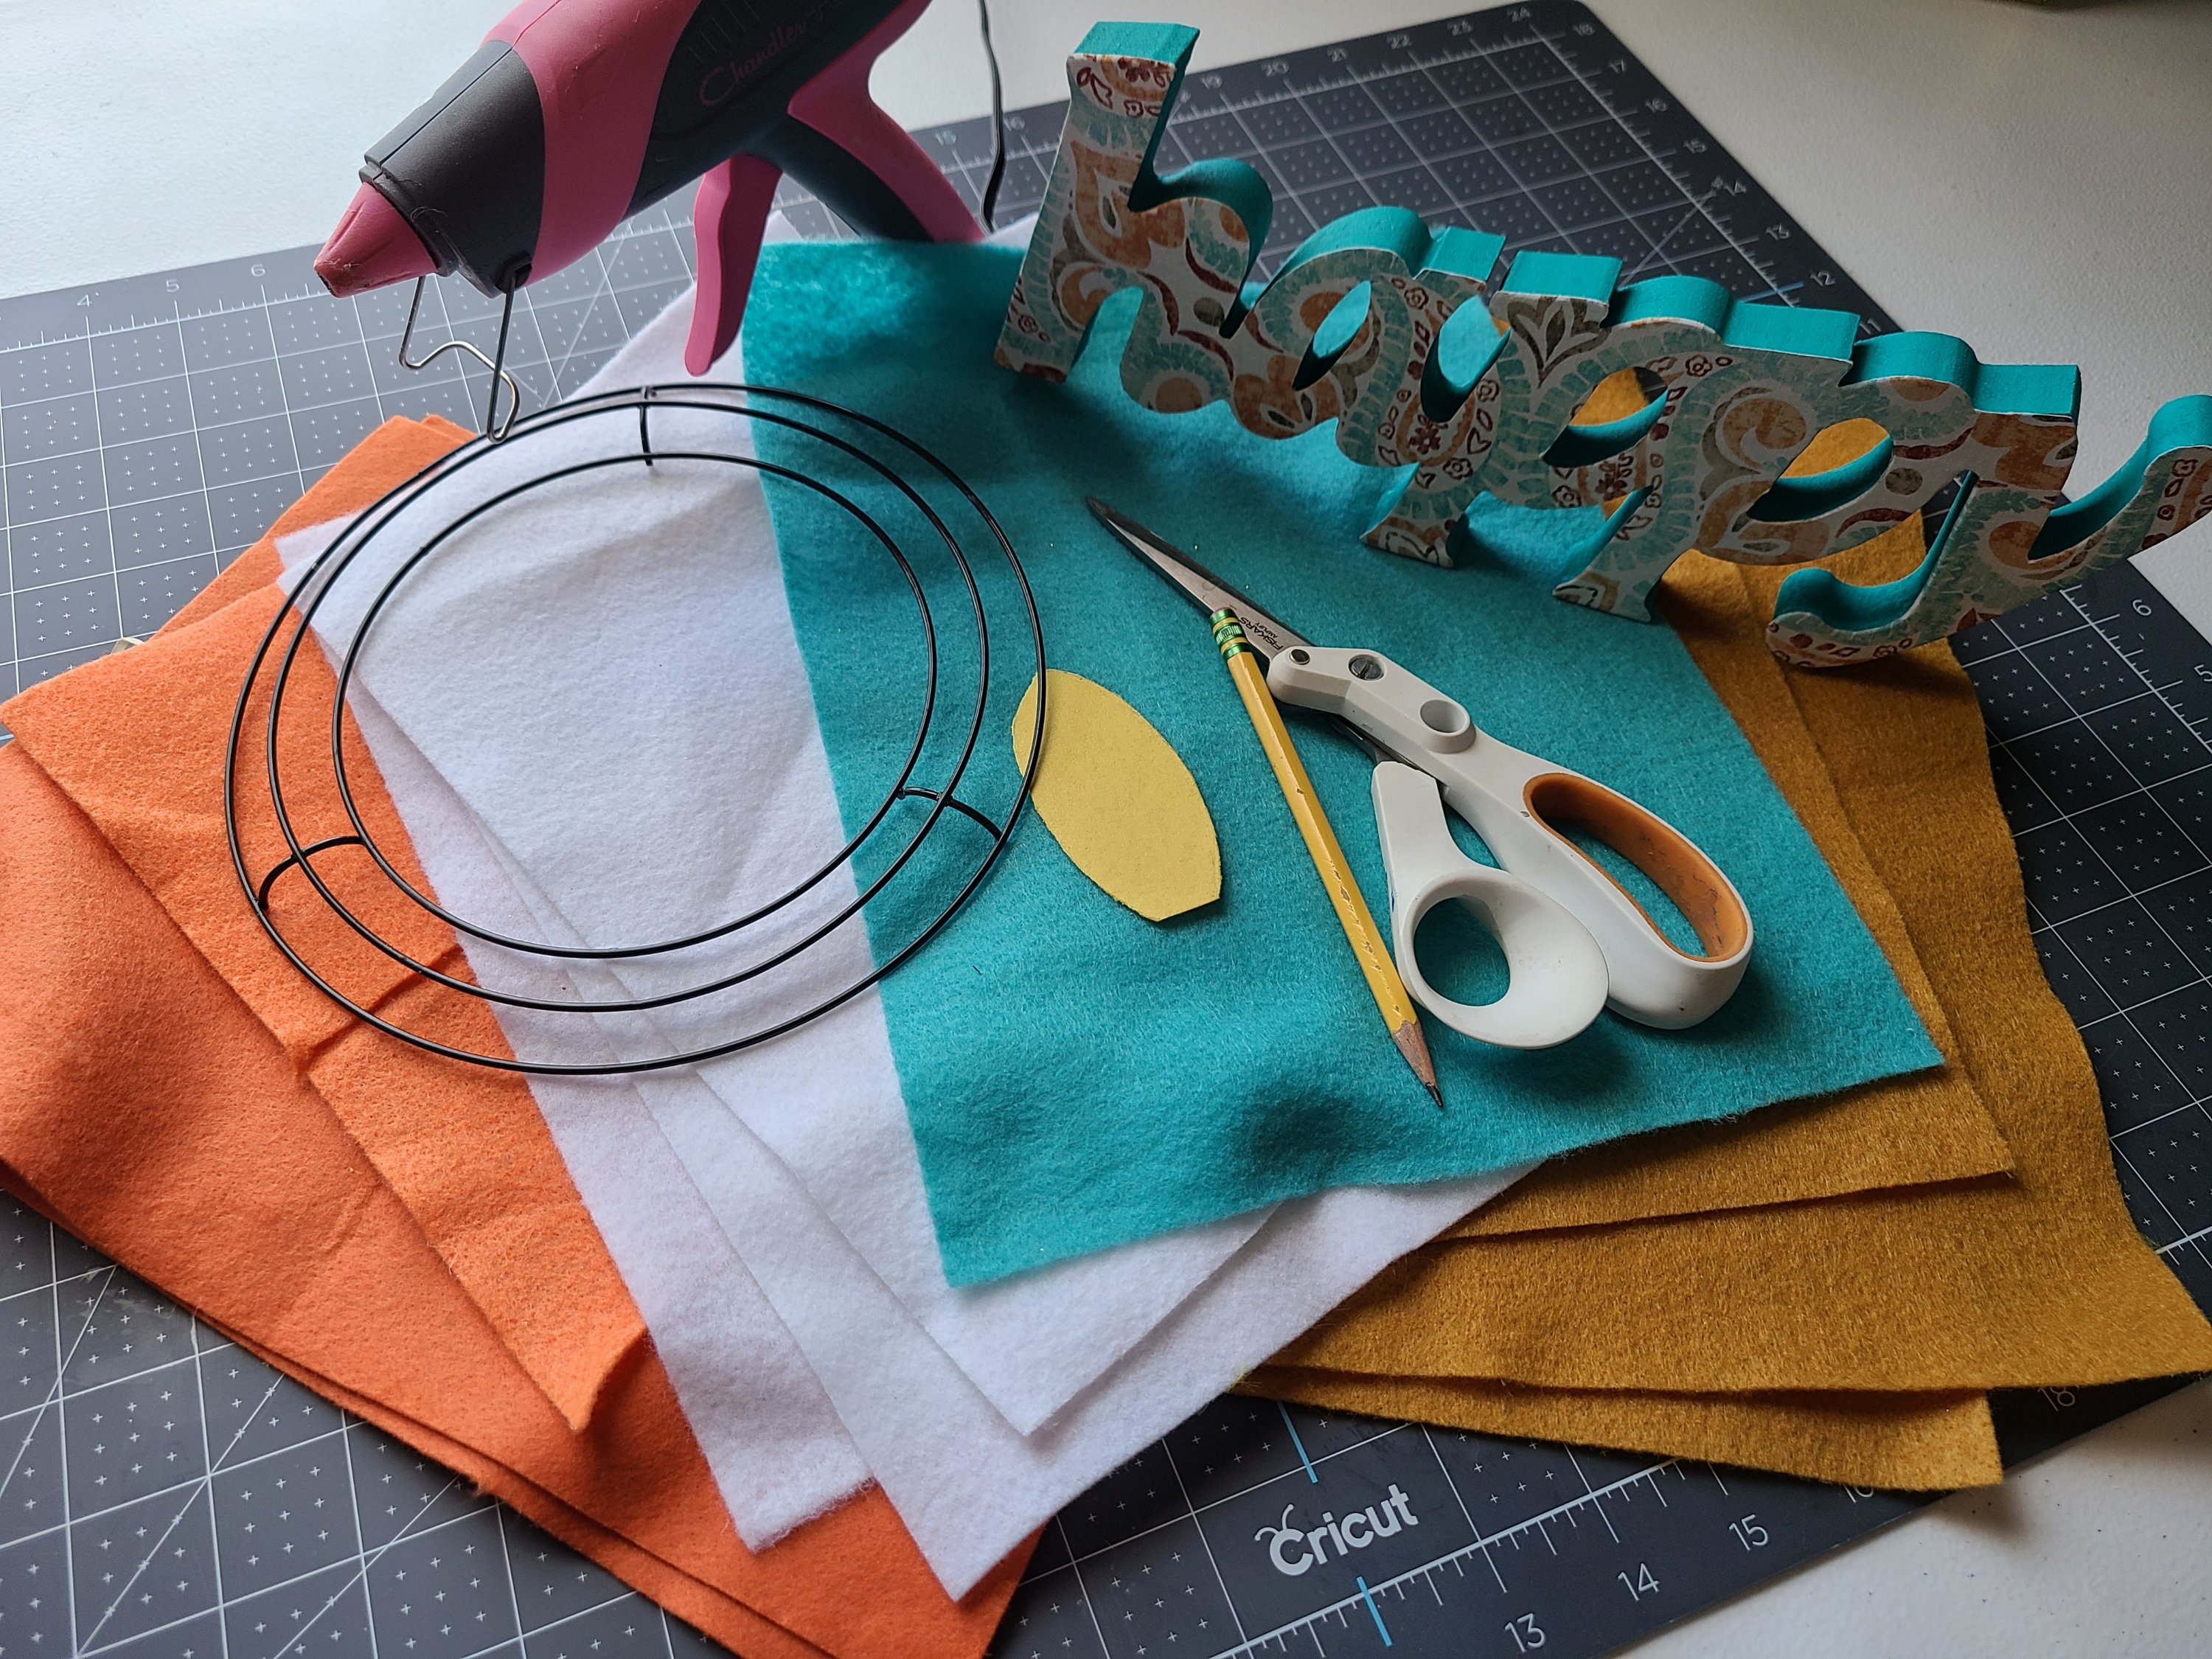
To make a felt leaf wreath you need:
- felt in your color choices- I used white, orange, aqua, and mustard.
- 8″ wire wreath form or your size choice- I used a two pack from Dollar Tree.
- hot glue gun & glue
- scissors
- pencil & paper for leaf template
- twine
Create a Leaf Template & Leaves
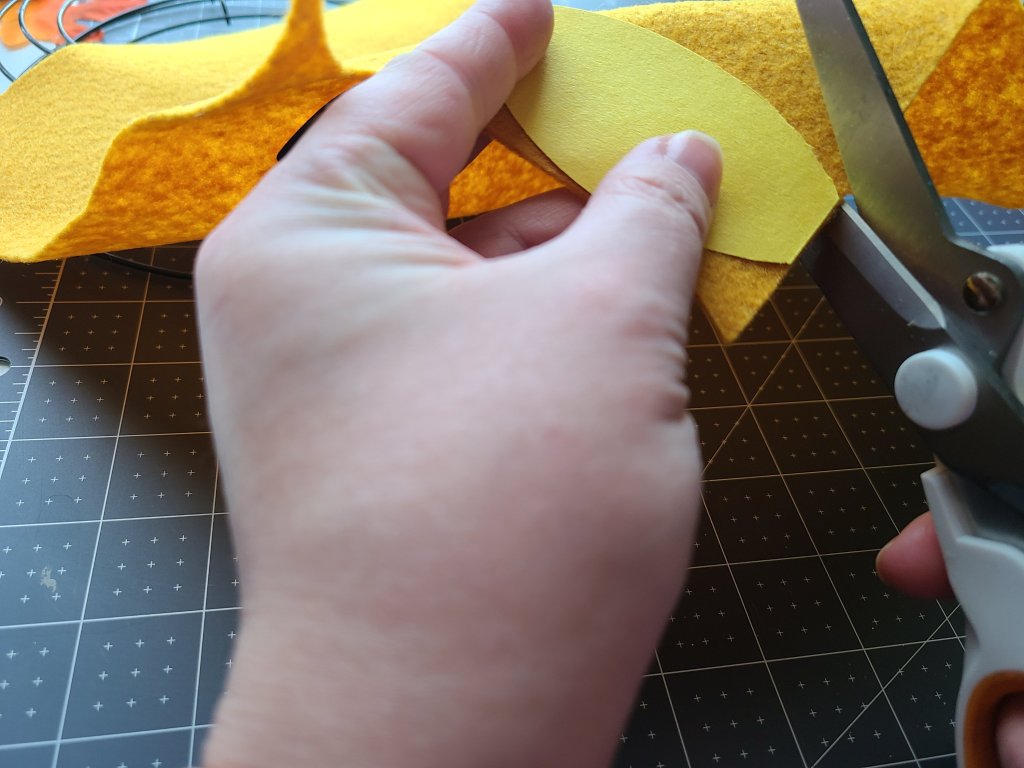
Draw a leaf on a piece of paper. You can change the size depending on what size wreath form you’re using or how many leaves you’d like to have on your completed wreath. My leaf is 3″ tall. Don’t worry, you don’t have to be an artist to draw one. I definitely cannot draw. Just draw a leaf with a square base that tapers to the tip in a triangle. Cut it out.

Place your leaf on top of your felt and cut around it. Repeat with each color felt you’re using and for as many leaves as you need. I used 4 mustard, 3 aqua, 3 white, and 3 orange on each wreath for a total of 26 leaves.


Create Leaf Shapes
Now it’s time to make the leaf more 3D. Add a small strip of hot glue to the bottom 1/4″ of the leaves. Then fold that small section of the leaf together. It will make the leaf, well, 3D, ha!


Wrap the Wreath Form
Add a bit of hot glue on the back of the wreath form at the top of one of the crossbars. Place the beginning of the twine on the glue, then begin wrapping the form with the twine. Continue until the form is completely covered by the twine. Ribbon or yarn could be used here instead.


You could skip this step and go straight to adding the leaves. You will see the wires if you go that route. I just didn’t like the way it looked, but it could go with your decor depending on what it is.


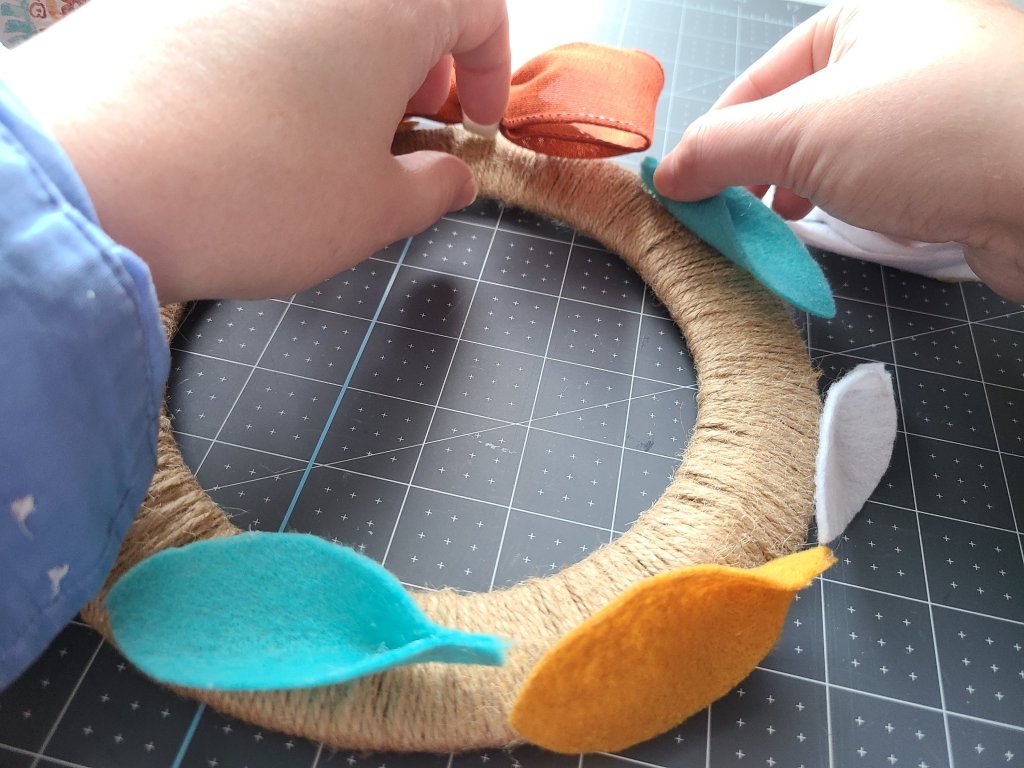
Lay Leaves on the Form
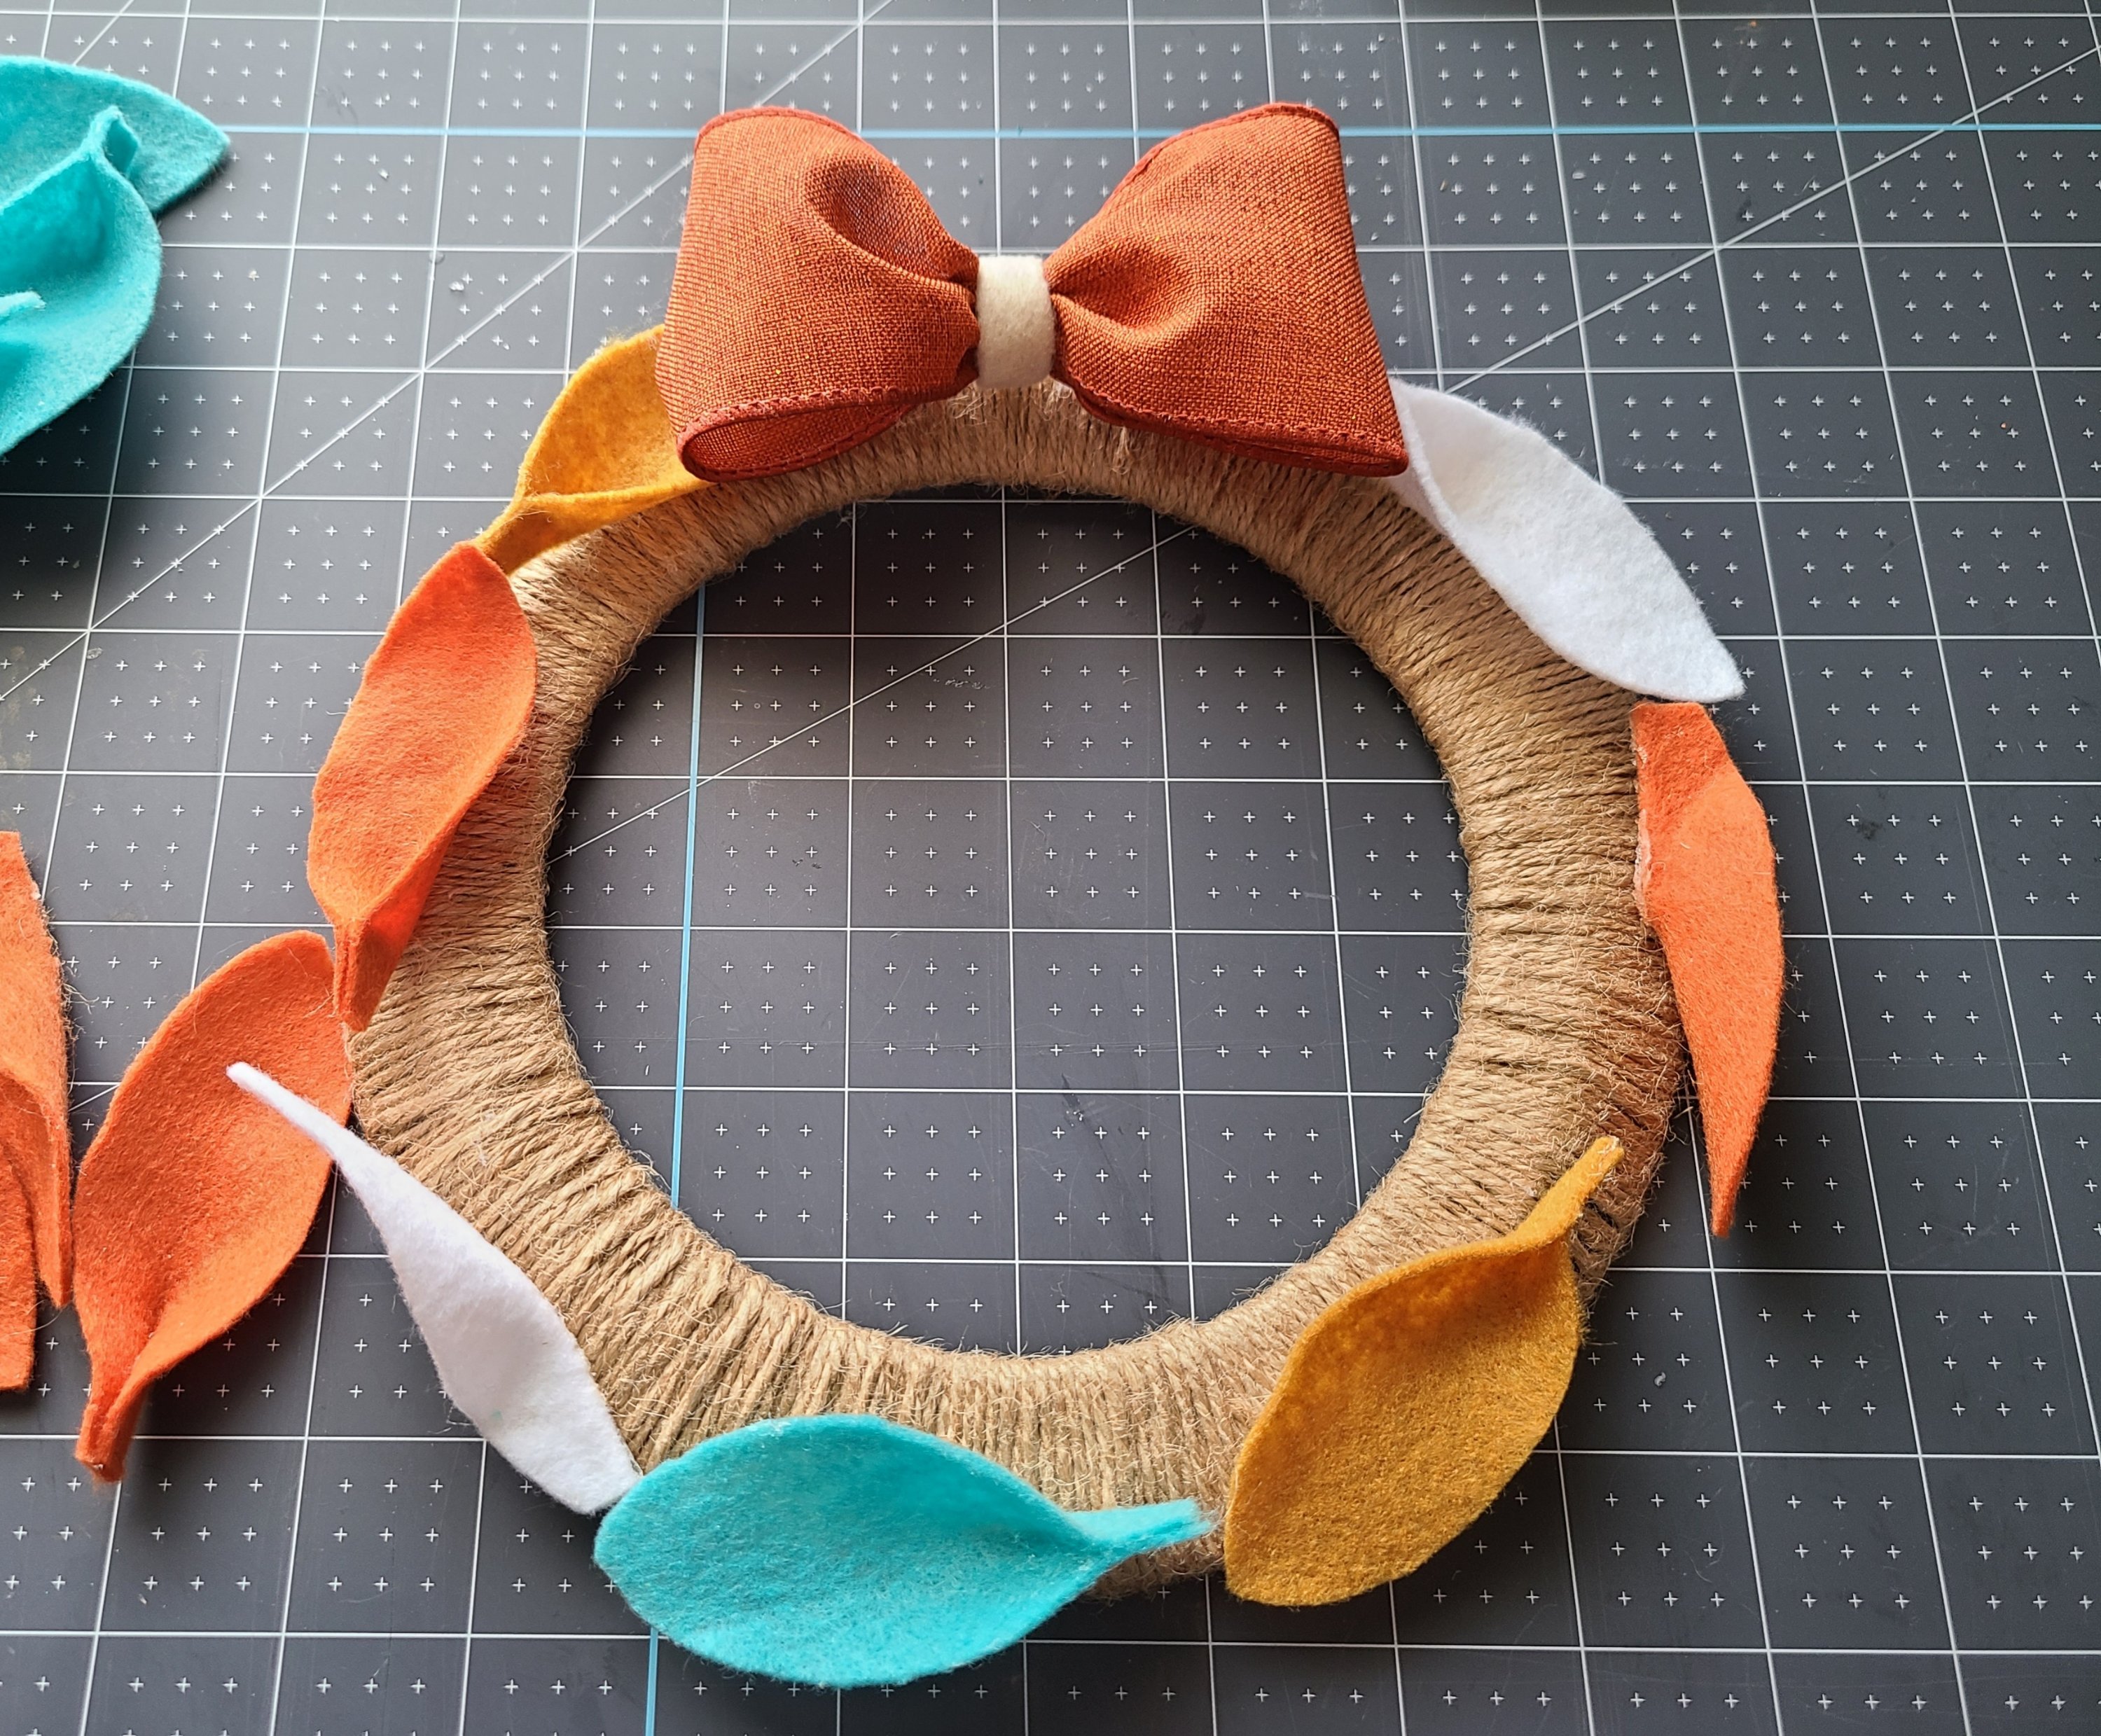
Make a small bow. The size will depend on how big your wreath is. Mine is 4″ across with no tails. I used a 2.5″ wired orange ribbon with a piece of white felt in the center to keep the felt moving through the whole wreath. Lay it at the top of the form, but don’t hot glue it on yet. You just want it there to measure where you’d like to have everything.
Begin laying your leaves on the wreath form starting from just under the edge of the bow. Lay them all around the form, about 1/4″ from the edge. This way you’ll know how many leaves you need and how far apart to space them. Don’t glue them on yet. This step is to help you judge where to glue them so they are spaced correctly.
Glue Leaves on the Felt Leaf Wreath
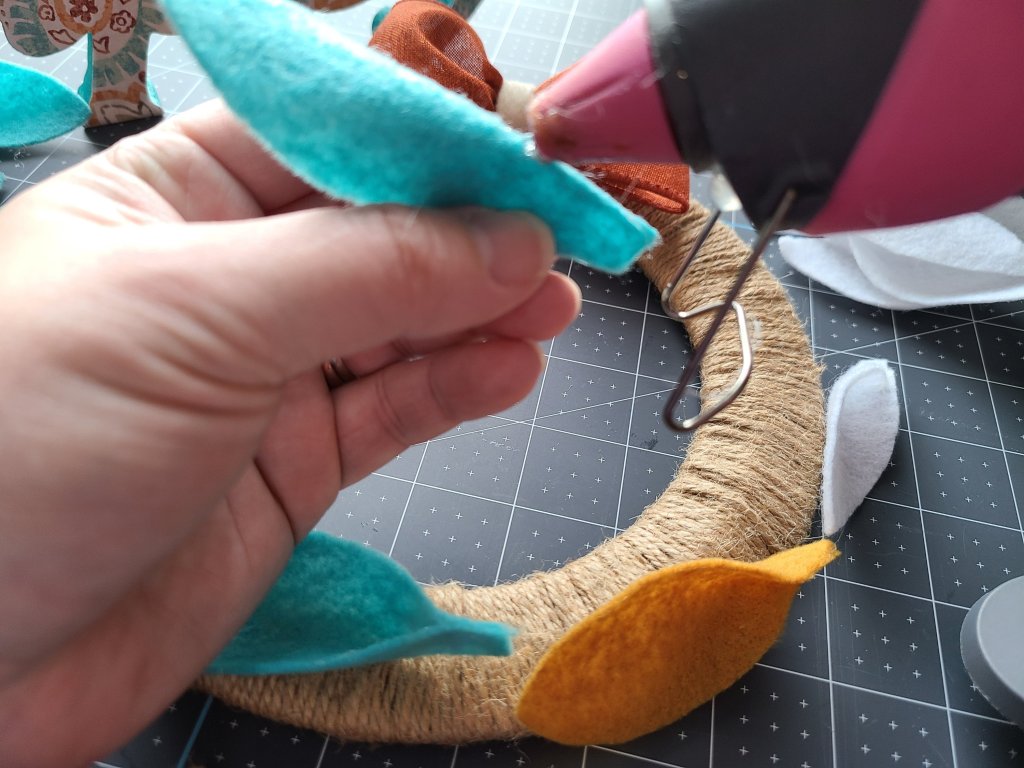
Lift the top leaf, add a strip of hot glue on the bottom folded part of it, and press it back down where it was. Continue like that around the entire form. On my wreath the tips of the leaves went ever-so-slightly past the end of the next one.

Place the second leaf just under the tip of the first. Here almost all of the leaves are glued on in the first layer.


When the first round is glued on, the felt leaf wreath will look like this.

Now it’s time to add the final row of leaves. This part might be a little harder to explain. Lift the bow a little again, and glue the first leaf. You want them staggered with the others, so that most of the twine and form is covered.

Continue around the wreath until the entire thing is covered.


Add the Bow & Hanger
Now lift up your bow, add some hot glue to the back, and press it back on the wreath.

Cut about a 3.5″ piece of pipe cleaner to use to hang the wreath from. Fold it in half and twist the ends together to form a loop. Add some hot glue to the twisted end and press it at the top of the wreath, directly behind the middle of the bow. You can make the loop bigger if your wreath is bigger.


Your felt leaf wreath is complete!
You can hang it or sit it in a vignette since nothing juts out from it. Here’s what my first one looks like.

I made two, like I said. They will eventually hang on the sconces, but for now I set them on my new shelves in my craft room. Here’s a few pics!


I hope that you enjoyed this tutorial! Make sure you pin it for later! If you know others who love fall decor just as much as you and I, use the share buttons at the bottom of the post to let them know about it.
If you’d like to see the fall decor that matches this fall felt leaf wreath, you can check them out here: reversible faux fall/Halloween books, reversible fall/Halloween pumpkins, fall Dollar Tree word art, and this fall DIY centerpiece. You might also like this beautiful burlap wreath.


Make sure you don’t miss any great tutorials, free printables, or other fun posts by following me on social media and by email! You can find the follow buttons in the sidebar. Enter your email address below so that you get an email when a new post is added.
Get new content delivered directly to your inbox.
If you’re one of my blogger friends make sure you stop by each week and share your family friendly posts on our three link parties: Happiness is Homemade, You’re the Star Blog Hop, and Traffic Jam Weekend. Not a blogger? Make sure you visit those parties to find lots of great posts and inspiration for crafts, recipes, DIYs, gardening, home decor, family ideas, and more!


What a beautiful wreath you created. Thank you for sharing at TTCRD challenge.
Thank you!
The wreath is beautiful and perfect for the fall!
Thank you Joanne! It’s the first felt leaf wreath I made, and I really love the colors!
Very cute! #TrafficJamWeekend
Thank you!
Absolutely adorable! Dollar Tree has gold wire wreath forms now — then maybe you could skip the twine if you were going for more of a glam look. (I like the twine myself.) Thanks for sharing at Vintage Charm. Pinned! xo Kathleen
I can’t wait to find the gold forms! That’s so exciting! Sad isn’t it, that I find that exciting. I find that I tell my kids things that I think are great & exciting & they look at me like I’m nuts. Guess that means I’m old!
I am honored to be featured on Celebrate Your Story!
Hello, I love your felt wreath. The colors are perfect!
Happy Fall,
Kippi
Thank you so much Kippi! Those are the colors that I use throughout my early fall decor. If you like this, you might enjoy those posts too! The reversible faux books, the reversible pumpkins, my buffalo check pumpkin wreath, and several others.
What a gorgeous colour scheme you used. Simple but really effective.
Thank you! It’s way too hot where I am for dark fall colors. I can’t wait for November to put out my burgundy, navy, and copper color scheme!
Love the combination of colors in your felt wreath! I’m like you, I have lots and lots of felt. Thanks for sharing at the #HomeMattersParty.