Use in Your Tiered Trays or Vignettes
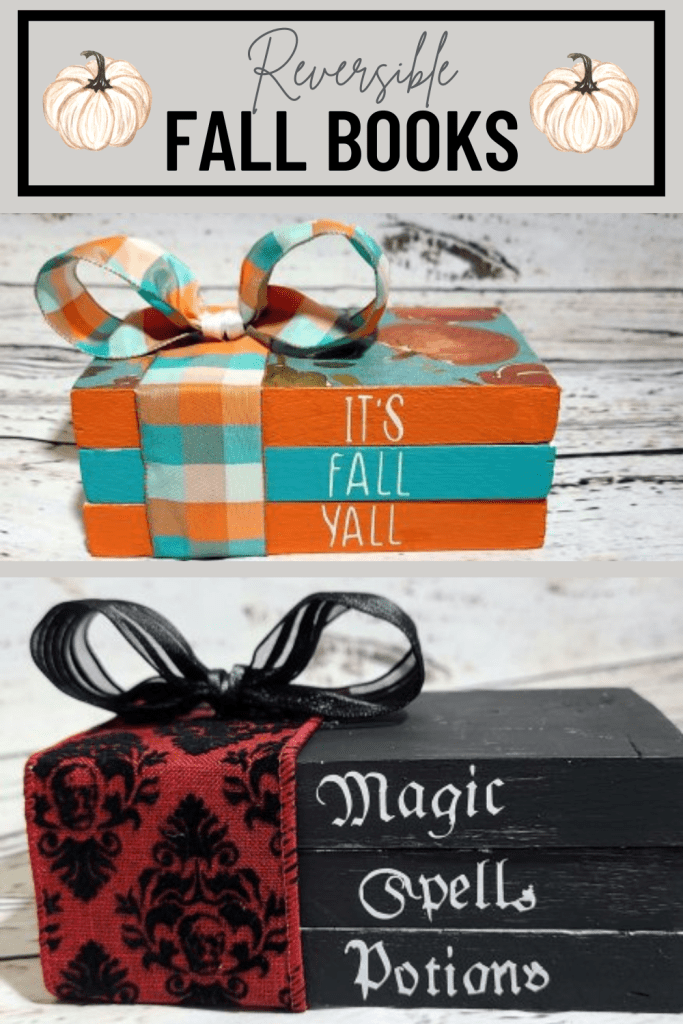
I made a set of faux wood books to use on my tiered tray at the end of the spring. The theme for that tray was the beach, and they lasted me through the summer. It’s time to create fall tiered tray decor, so I decided to make a set of reversible faux books for fall and Halloween. I usually change up my fall decor three times. Once in September for early fall in which I use bright colors like orange and aqua, then in October for Halloween, then again in November for Thanksgiving. Making a reversible set helps me to only have to make one, ok probably two, but on the next set I can make reversible faux books for Thanksgiving and Christmas!

To make reversible faux books you need:
- wood- Mine was 3.5″ wide, & I cut 3 pieces 6″ long. You will need one at least 18″ long, but you can go wider that 3.5″ if you wish.
- saw, pencil, & ruler- I used a small (like tiny) hand saw by Kobalt.
- acrylic paint to match your ribbon or theme- I used black, white, aqua, & orange
- paint brushes
- ways to add letters to book spine- You can use stencils & paint, stamps & ink, stickers, Cricut w/ vinyl, or free-hand with paint or markers.
- ribbon for fall & for Halloween- I used my early fall 1.5″ wired ribbon for both the wrap & the bow. On the Halloween side I used a 2.5″ wired ribbon for the wrap & a 1.5″ wired ribbon for the bow. I used what I had on hand. You can use the same for the bow & wrap or different for each.
- hot glue gun & glue
- scissors
- pipe cleaner for bow
- cardstock or other item to create a book cover (optional)
- Mod Podge (optional)

Cut the Wood
Use you ruler and measure 6″ down from the top of the wood. You can change the size if you need to so that your books will fit in with your other fall tiered tray decor. With the pencil mark that spot. I like to measure on the left and right edge then attach the two lines using the pencil to draw a straight line. If you are not using an electric saw and are using a small handsaw like I am, measure each side. I have to do that because my saw is so small that I have to flip the wood over and start to saw on that side as well to cut through to the middle.


Once you have cut your first piece, measure 6″ from the top again and cut your second piece. Follow the process once again to cut your third and final piece. You now have three “books.” Sand down any sharp edges on the ends and go over the rest a little. It helps the paint stick better.
Paint the Wood
I put a base coat of white on each piece. I had to give it about three coats. You can skip this and just paint the tops and bottoms of your books, but having this base really helps the brighter colors pop. It also looks great when you paint one coat of black for you Halloween reversible faux books. They look aged and really cool. I didn’t get a photo of me painting them white, but I think you can figure that part out.
Paint the Fall Spines of Your Faux Reversible Books
Now it’s time to paint the fall “spines” of your tiered tray decor. I left the tops and bottoms of the books white since it’s supposed to be paper. You can choose to leave the spines white too, but I really wanted a fall look, so I chose to paint mine. For the early part of fall it’s really hot here on the Gulf Coast, so I am going for an orange, white, and aqua theme that matches my DIY orange and white pumpkin wreath. I used what little bit of ribbon I had left over from that wreath on the books as well. These books also match the reversible wood pumpkins that I made.

I chose to paint the spines of my fall books to match the wreath: two orange and one aqua. When painting the spines, it’s best to use a foam brush or paint brush that isn’t too much wider than the spine. This will help you to not get paint on the front or back of the book. If you accidentally do, wait until it dries, then cover it with more white paint. If you are painting the front of your book you won’t have to worry about going back over it with the white You could just use painters tape to line each side if you choose.


Paint or Mod Podge the Cover of the Fall Book
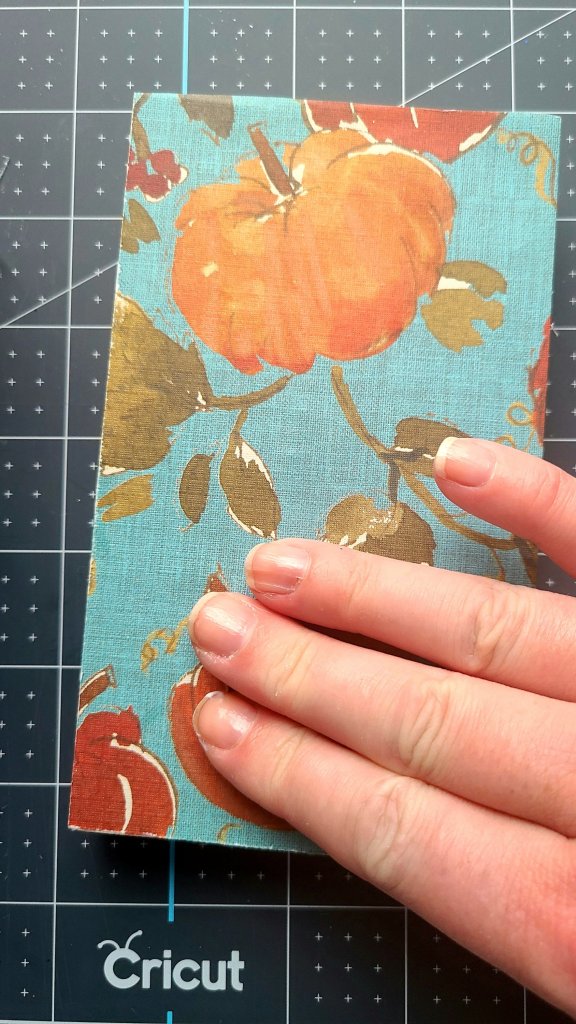
I have a pack of the cutest fall themed cardstock that I got from Michael’s last year. It has all the colors I am using, so I decided to use Mod Podge to attach one of the pieces to the fall cover book. If your spines are dry, you can go ahead with the decoupaging.
Flip your book and cardstock upside down, the book on top, and trace it on the paper. My wood wasn’t perfectly straight because of the saw I used, so I did have to trace all four sides. Using scissors or a paper slicer (technical name-uhhh… probably not!) cut out your book shape. I used a saved piece of paper that I cut from last year. I love being able to use up scraps! Go money saver, go money saver, it’s ya birthday!


Using a foam brush, paint a layer of Mod Podge on the top of one of the pieces of wood. Make sure that it’s: 1-the piece that will be on top (for example if you used two different colors on the three books and want to separate the same colors with the other color, you want the cover to be one of the two with the same color) and 2- that it’s on the correct side. Don’t accidentally put the cover on one then realize that puts one of your fall colored sides on the Halloween side.

If you want to you can paint some Mod Podge on the back of the cardstock too. I did just a little. Smooth the paper onto the wood. Make sure to push out any bubbles as you go. Now brush a layer of Mod Podge on top of the cardstock. I only did one layer, but you can let it dry and add another if you need to. Allow to dry.

If you would just like to paint the “cover” go ahead and do that now. Allow it to dry and give it another coat if needed. If you want to speed up the process, use a blow dryer to help it to dry faster.
Paint the Spine of the Halloween Reversible Faux Books
Now it’s time to paint the Halloween book spines. If you’d like to, go ahead and add painters tape to the edges of the front and back. I didn’t, so don’t feel like you have to. I used black on mine. Using a foam brush I gave it one coat, and I think it turned out cool looking. You can see some streaks of white through it so it looks old and kinda creepy! You can obviously add more coats if you’d like.

Paint or Decoupage the Halloween Cover of the Reversible Faux Books
I didn’t have a pack of Halloween cardstock paper, so I used black acrylic paint on the cover. Again, be sure you are painting the correct side of the book. This time it won’t be as easy to mess up since the other sides are already painted. I painted the opposite side of my fall cover book, but you could use one of the other books as the top one for Halloween. If you are decoupaging, follow the same steps from above. Allow the book to dry.
Add Titles to the Reversible Faux Books
Fall Titles
There are so many options for titles of your books. For fall you could do Happy, Fall and Yall, or Farm, Fresh, and Pumpkins, or Free, Hay, and Rides, etc. The possibilities are just about endless. I chose It’s, Fall, and Ya’ll for my fall books. I used stickers on this set of books. You could use cardstock paper with words on them like I used on my beach books here.
Another thing on the endless list of possibilities is how to add the titles to the books. You can use your die cutting machine with vinyl or cardstock, stencils, stamps, you could even freehand them. I used stickers on mine so I could show you that this can be done without a die cutting machine. When you place your letters on the reversible faux books make sure you place them far enough down so you have room for the bow. You can use a ruler and get really precise with the placement, but I just eyeballed it. Be sure to add the first “title” on the cover book.


Halloween Titles
Just like with the fall books, there are a ton of titles you can add for Halloween. I’ve seen a lot of Hocus Pocus themed trays, so they add titles like It’s Just, A Bunch, and Of Hocus Pocus or Amuck, Amuck, and Amuck. I went with a magic theme and used Magic, Spells, and Potions. For this side I used stickers that looked like Old World lettering. I think it makes it look very creepy and Halloween-y! If you don’t have stickers or a Cricut, you can use this tutorial where I show you how to make all of your seasonal and home decor using only your printer! You can see in the picture below that the lettering for the top Halloween book should be upside down when you’re using the fall side.

Here’s a look at how the books will look when they aren’t stacked together. You’ll see that I didn’t worry about the paint getting on the white part of the books that aren’t on the top, just like above.


Make Bows & Cut Ribbon
Fall Ribbon & Bow
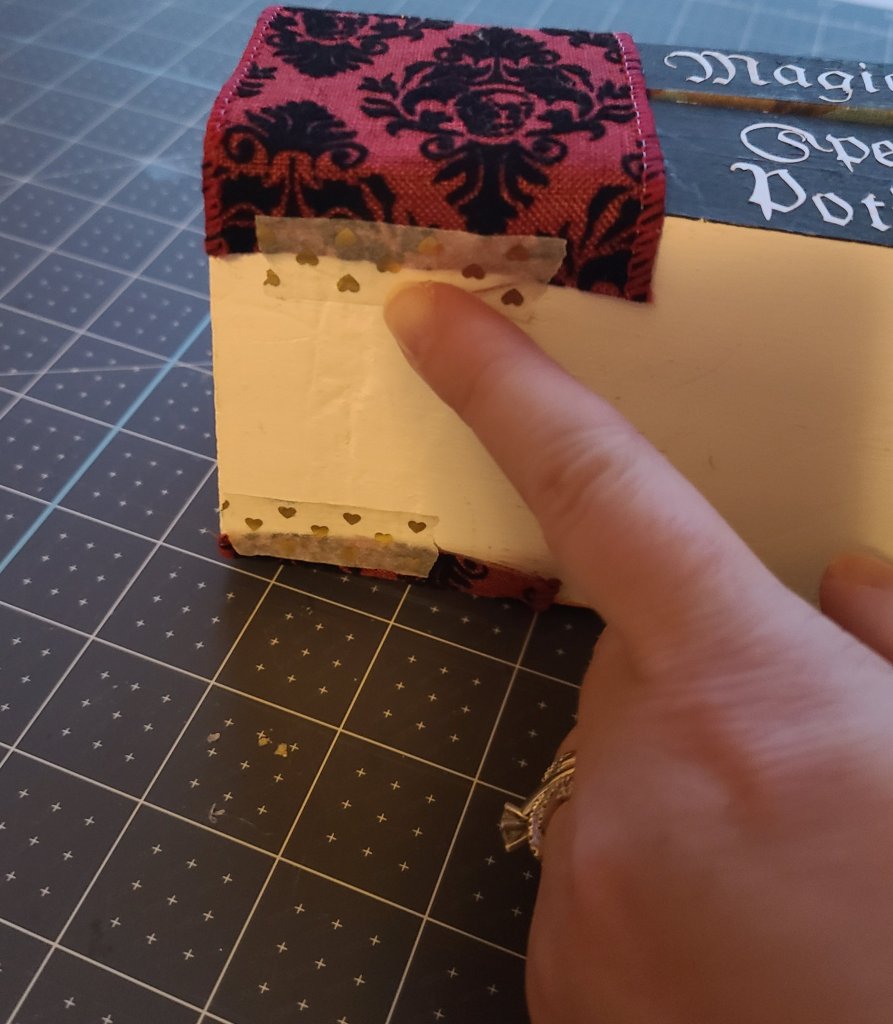
I didn’t have any of the plaid ribbon that I used on the pumpkin wreath left on the spool, but I did have three scrap pieces left in my stash. I had one big enough to wrap around the books if I taped them on each side of the bottom, woohoo! You can choose to cut a piece large enough to go all the way around and tape it in the middle, or cut one like mine and tape each side. I cut my Halloween ribbon just like below to save some. You probably want to stick with using tape because you will have to remove the fall ribbon when it’s time to add the Halloween one.

Then I had two small pieces left. Neither one was big enough for a bow. So I engineered one by making a loop out of each piece then attached them in the middle with a pipe cleaner. You will just make a simple two loop bow. You can just tie one like you’re tying your shoe or use the method that I do. Just pinch the ribbon in the middle and make two loops. Check out my teacher door hanger tutorial for a step by step tutorial with pics if you’re not sure how to do this. That post will also show you how to make an amazingly cute teacher gift! Use a thin piece of ribbon or twine to cover the pipe cleaner. Add hot glue to the middle of the bow and place it in the middle of the ribbon on the books, facing forward.

Halloween Ribbon & Bow
Repeat the same process as you did with the fall ribbon. I had to be more careful with the placement of the Halloween ribbon because I used a 2.5″ ribbon here. I had to line the ribbon up with the tops of the books. Since I plan to use more of this ribbon at Halloween and it’s running low, I didn’t wrap it all the way around the bottom of the books. I just taped it on each edge of the bottom book.
Make a two loop bow and glue it, facing forward on the top of the ribbon.

Completed Reversible Faux Books
Your reversible faux books are now finished. I absolutely love the way these turned out! It’s going to be fantastic not to have to saw another three for three months! My hands couldn’t take anymore once I sawed these. They’re perfect to use as fall tiered tray decor items!


I hope you enjoyed this reversible faux books tutorial! Make sure you pin the image below so you can get back to the post when you’re ready to make your own set to use as fall tiered tray decor. Share this post using the buttons on the left sidebar. I would love for you to follow us using the buttons below so you’ll get updated about what’s going on here on Life as a LEO Wife. Enter you email address below to get an email when I upload a new post so you never miss a great idea! I am working on the DIY pieces for the rest of the fall tiered tray including some free printables. You don’t want to miss those!

Follow me on Pinterest for new ideas added weekly!
Don’t go yet! There’s more to see!
There’s plenty more to see here on the blog! If you’re looking for something specific, use the search box in the sidebar to look it up. If not, you might enjoy these ideas. Don’t have time to read them all now? That’s ok, just click over to the posts using the pictures and pin them for later. You can also add Life as a LEO Wife to your favorites and check back for new ideas and free printables and SVGs every Wednesday, as well as link parties with tons of shared ideas on Sundays!
If you don’t yet have a tiered tray, check out this post where I show you how to make one for $3 using items from the Dollar Tree! Then you can head over to this post where I show you how to make fall tiered tray decor. Enjoy!
Don’t go yet! There’s more to see!
There’s plenty more to see here on the blog! If you’re looking for something specific, use the search box in the sidebar to look it up. If not, you might enjoy these ideas. Don’t have time to read them all now? That’s ok, just click over to the posts using the pictures and pin them for later. You can also add Life as a LEO Wife to your favorites and check back for new ideas and free printables and SVGs every Wednesday, as well as link parties with tons of shared ideas on Sundays!


Looks nice, I like them! Thanks so much for linking up at the Unlimited Link Party 32. Pinned!
Thanks you!
Very clever! I love the reversible idea!
Thank you Kristie!
Great idea. Very creative. Thank you for sharing at #omhgww. Pinned & Tweeted. See you next week.
Thank you!
Such a great idea to make the book stack reversible! I love the colors combo for the Fall book stack.
Very cool project! I’m a little confused as to how they are reversible when you are using two different ribbons and bows. Do you remove the Fall ribbon and add the Halloween when you reverse it for the holidays? Just curious. Thanks for playing with The House That Stamps Built.
Yes. You remove the bow & add the other one. In the tutorial you’ll see how to use washi tape to be able to easily remove them to add the other.
Lovely project. The colors you chose are perfect. I am happy to feature your faux books at Love your Creativity.
Thank you for hosting & featuring my faux books! I enjoy sharing with you!
Making the book stack reversible is such a great idea. I have stacks and stacks of wood book stacks because I made them individually. I’ll have to start using the backs of the ones I already have for my new sets so I don’t have to purchase more wood. Thanks for sharing on Love Your Creativity.
I’d love to see them when you do it! You can tag me on social media or do a link back. I’m so happy so many people have told me they’d use this technique!