November is coming faster than I could’ve imagined! If you’ve been around the blog this fall, you know that for each month during fall I have different home decor that I put out. My early fall color scheme was aqua, orange, and white, October is of course Halloween decor, and for late fall I use the colors burgundy, navy, and copper. I made this gorgeous pumpkin topiary to add to my late fall home decor.
I am joining a group of lovely ladies for a blog hop today! This is my first month joining them, and we are creating a project that will cost you less than $10 to make. Our $10 on the 10th theme for this month is pumpkins. I had three Dollar Tree styrofoam pumpkins left over from last year’s projects, so this pumpkin topiary was born!

To make a fall pumpkin topiary you need (from Dollar Tree unless noted):
- 3 styrofoam pumpkins ($3)
- galvanized metal bucket ($1)
- pack of fabric leaves ($1)
- stick for the pumpkin stem
- square piece of styrofoam (floral or regular- optional)
- acrylic paint (DT now has them, but I used old *Apple Barrel acrylic paint from WalMart that I’ve had for years. Back when I bought them they were $0.54. I looked them up on their website and they are still $0.54. I used English navy, burgundy, and copper. The copper I used is made by *Folk Art and is from their metallic line which is $1.97.)
- spray paint (optional- If you’d like a faster project, you can spray paint the bucket, but it will make the project more than $10 if you don’t already have the paint. For most of my crafty ladies, you probably already have a variety of spray paint!)
- ribbon or a premade bow from DT (optional)


Paint the Bucket
If you don’t want to leave the bucket as is, go ahead and paint it now. The original bucket is very farmhouse chic, and you can definitely leave it as it is. It does say “Flowers & Garden” which you may want to cover up since it’s fall. My metal color for late fall is copper, so I needed to paint over the silver galvanized metal. I had a can a copper spray paint laying around, so I gave it two coats.

Paint the Pumpkins
While the paint is drying on your bucket, you can start painting the pumpkins. Pull the green styrofoam stem out of all three. They’re really easy to pull out. If you are using light colored paint, it will probably take you five to six coats at least. I used navy, burgundy, and copper, and those took about four coats. Be very careful if you choose to spray paint the styrofoam. I have melted them before with it. I would give it at least a coat or two of acrylic before spray painting. If you’re in a hurry, use a blow dryer between coats.

Paint the Leaves
Adding leaves to the fall pumpkin topiary, is optional, but I really like the look. If you add styrofoam to give more height to the pumpkin, it also helps to cover it. I used the burgundy and English navy acrylic paint and painted five leaves of each color. Only three of the them ended up on my topiary. I put one coat of the copper spray paint on one of the leaves. In the pack of leaves from Dollar Tree you will have a few that are gold, copper, with a slight bronze, so I used one of those as well.

Add Stem
You can use the stem that came with one of the pumpkins for the top, or you can get a stick. I think the stick looks a lot better. I chose a stick that is about 1″ around, so it’s a pretty thick. If you have a larger stick, you may need to cut the pumpkin where the original stem was. Use a craft knife and cut around the stick until you can slip it in. Miss Bella helped me pick this stick!


Assemble the Fall Pumpkin Topiary
You have two options when you’re putting your topiary together. You can sit the first pumpkin straight into the bucket, and a little less than 1/4 of the bottom pumpkin will be hidden inside it. The second option is to put a piece of styrofoam in the pot for the pumpkins to sit on. It doesn’t make that big of a difference, but I chose to add the styrofoam under the pumpkins.
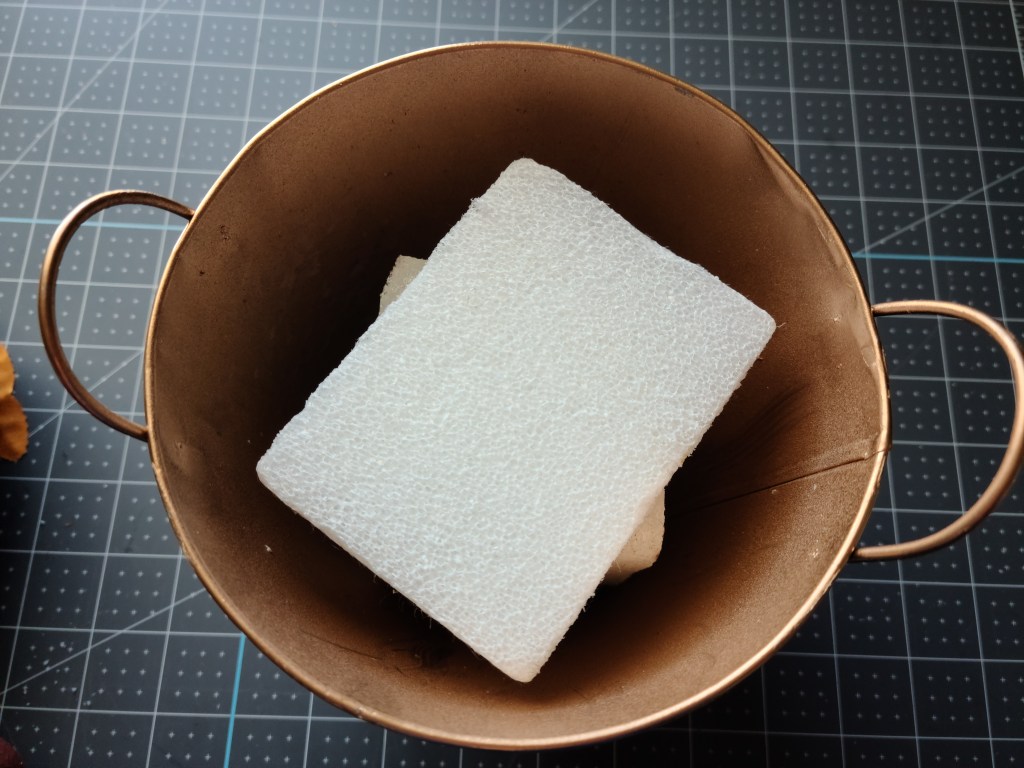
Add Optional Styrofoam
For my project I used a square piece of regular white styrofoam from Dollar Tree. If you have floral foam around, that will work as well. I used a craft knife to shave about 2″ off of it.
Here’s a quick, funny aside- I also nearly took about 2″ off my thumb in the process. You’ll see the band-aid on my thumb in the subsequent pictures, lol. I was using a craft knife that comes in the 3-pack at Dollar Tree, and I had been pushing the back of it through the foam. I flipped the styrofoam, and proceeded to push. Well- it was the wrong side, so I pushed my thumb through the blade instead of the blade through the foam… Ouch! There was blood everywhere. I had a very severe blood clot that almost killed me last year (about an inch from my heart) so now I’m on blood thinners. If I go missing my husband is in serious trouble because this room will light up like a Christmas tree if they sprayed it with luminol, haha!
Add Pumpkins
Sit the first pumpkin in the bucket or on top of the styrofoam. You don’t want to hot glue the first pumpkin in so that you can remove it to add the leaves in the correct place and remove them for storage.

Place hot glue on the bottom of the second pumpkin and press it on top of the base pumpkin.

Next place hot glue around the top of that pumpkin and place the top pumpkin on it. Press it down for a moment while the glue dries.


When you glue them together make sure the seams on the pumpkins line up.

Add Optional Embellishments
Bow
Make a simple two loop bow. I used a 1.5″ navy satin bow, secured it with a pipe cleaner, then covered that with a 1/8″ copper ribbon. You have a few options for where to place your bow. You can place it on the top of the top pumpkin or on the front of the bucket. I chose to glue mine to the top center of the bucket. I glued the large copper leaf I spray painted to the back of the bow, upside down, then placed a bit of hot glue on it. Then I pressed it to the top rim of the bucket so that it sits up a bit from the top.

Leaves
Take note of where the bucket hits the bottom pumpkin and where the bow on the bucket is, then take them out. Put a dot of hot glue on one of your leaves , then press it on the bottom pumpkin just about where the bucket will hit. The leaves will fold out and over the edge of it, so the styrofoam inside the bucket will be hidden. Continue around the bottom pumpkin, alternating the colors in the leaves. Don’t worry about adding leaves where the bow is.

Now combine a few leaves to place on the stick at the top of the pumpkin. I placed a navy and a burgundy leaf on top of one of the copper leaves and adhered them with a tiny dot of hot glue. Next glue them toward the bottom of the stick in a way that they kind of sit up like they would on an actual pumpkin.

Your fall pumpkin topiary is complete!
It’s that easy! The painting is the longest, most laborious part. After that it comes together quick. Here’s my beautiful fall pumpkin topiary! If you like the woven yarn pumpkin wreath in the background, you can get that tutorial here.


I hope that you enjoyed this tutorial! Make sure you pin or share this tutorial with the buttons at the bottom of the post. I have many more tutorials coming up, so make sure you follow me on social media using the buttons on the sidebar. To make sure you don’t miss a thing, enter your email address below to get an email when I post a new tutorial, free printable, or other great post!
Don’t miss a post!
$10 on the 10th Blog Hop
Make sure you head over and show some love and check out the other projects in our pumpkin theme $10 on the 10th projects by these lovely bloggers! I’m sure they have something gorgous cooked up for you!
Patina & Paint -Pumpkin Pail Jack-0-lantern

Decorate & More with Tip – Customized Dollar Tree Pumpkins

I hope that you will make your own fall pumpkin topiary! Please follow me on social media using the buttons in the sidebar and share this post with your decor loving friends and fam! If you are one of my blogger friends, make sure you head over to my three link parties, Happiness is Homemade, You’re the Star Blog Hop, and Traffic Jam Weekend, and share your family friendly posts with us! Not a blogger? You’ll definitely want to check them out anyway because you’ll find tons of inspiration for crafts, recipes, home and seasonal decor, fashion, gardening, and so much more!
There are lots of fall and Halloween decor tutorials and printables here on Life as a LEO Wife, so stick around and check them all out! Have a blessed week! I love and appreciate you guys so much!


What a beautiful pumpkin topiary! I made one too last year, they are so much fun. Love the colors you painted your pumpkins. Love working with you Niki!
Thank you Terrie! I’m so happy to be working with you all!
Niki what a great tutorial! I love the colors you used. So cute! Thanks so much for sharing.
Thank you!
Looks nice. Thanks so much for linking up at the Unlimited Link Party 35. Pinned!
Thanks Dee!
Very pretty. #WonderfulWednesday
Thank you!
what a great idea! I love the dollar tree. Thanks for sharing at the Share the Wealth Party!
You’re welcome! Thanks for visiting!
I love your topiary!
Thank you!
Thanks for sharing at My Big Fat Menopausal Life’s Share the Wealth Party. Have a fabulous weekend. See you again after the 15th!
Thank you & thanks for hosting!