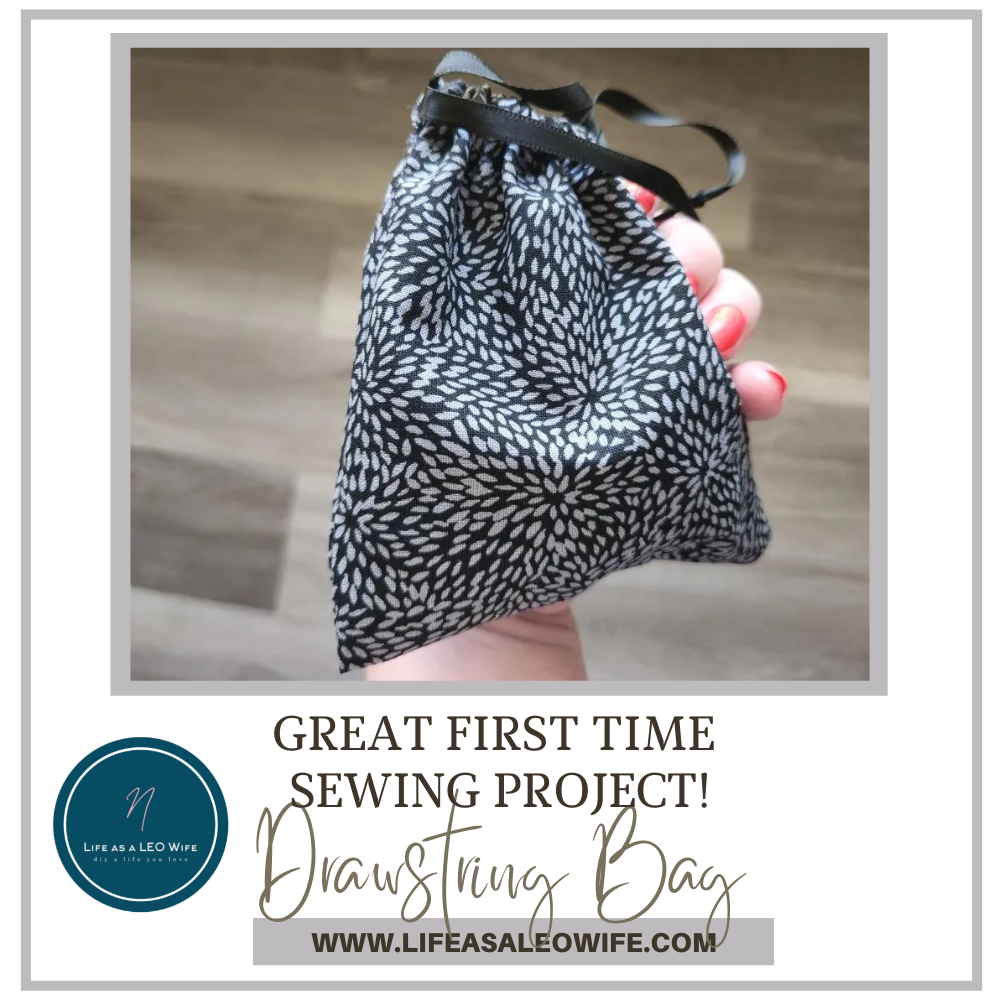
I did it! I finally ordered a sewing machine! It’s almost impossible to run a craft and DIY blog and not find tons of sewing projects that you’d like to do. It came in last week, and the next day I had already completed my first sewing project! If you’re waiting because you think it will be too hard, don’t. There are plenty of easy projects to start off with. I made a DIY menstrual disc drawstring bag in a little over an hour, even while trying to figure everything out. If you’re already a seamstress, you could knock one out in about 15 minutes! You can use the bag for carrying other small items as well: money, credit cards, ID, keys, lipstick, etc. It’s the perfect project for practicing your new sewing skills!
About Menstrual Discs
I don’t know about you, but I think menstrual discs are the greatest thing since sliced bread. Seriously. I will never use tampons again! I’ve heard that many people have issues with menstrual cups, but discs are completely different. They sit just under the cervical opening so there’s nothing just lodged in you know where. That was very uncomfortable to me. I don’t even feel the disc. They look wide, but they squish down to the width of a tampon. You slide it into place, and it goes into the wide area above of the vaginal canal and sits flat under the cervix. You will definitely need a carrying bag to keep your menstrual disc in. They need to be kept clean and sanitary. You could also put tampons or disposable discs in it to carry in your purse.
I would like to make another one lined with PUL to carry with me. However, I felt I needed to get more proficient at sewing before I try to use a non-cotton fabric. Having one lined would allow you to remove a disc, should you ever need to, while you’re away from home and have somewhere to put it if you’re not putting it back in. I’ve never needed to remove mine while away from home, but it would be nice to know that I could. I’d be able to wipe down the PUL and not worry about stains on my everyday disc carrying bag. Maybe it should be a DIY bag with a zipper instead of a drawstring bag.
CareCup
I bought the CareCup on Amazon for $7.99 (now $9.99), and I’ve been using it for about 9 months. (This is not a sponsored post in any way.) During that time, I’ve had to take blood thinners, on top of having endometriosis, and I’ve still had zero leaks. It comes with a regular size and a larger size. Sometimes on the first day I use the larger (during the months I’m able to afford my crazy expensive blood thinner), but that’s rare. The rest of the time I use the regular one.
It self-empties when you use the restroom. When you first get it, you can take it out and empty it every few hours just to check. Eventually you’ll learn when you need take it out for your body. Mine stays in all day (8 hours). Boil it before and after use and keep it clean, washing it before placing it back in after emptying. Be careful taking it out the first few times. Otherwise, your bathroom will look like a crime scene.
Before I bought it I thought I’d try the cheaper one and if I didn’t like it I could just throw it away. No big deal. The name brand discs and others are $30-40. I could throw away a $7.99 disc, but $40, oooofff. That would hurt a little. I figured I could buy the more expensive one if I kind of liked the CareCup. Nope. I’m keeping my cheap one because it’s great. I recommend watching several videos and read instructions on placement. That’s the key to comfort and no leaks! Now, on to the actual project!

Supplies for a menstrual disc drawstring bag:
- fat quarter of fabric
- matching thread
- thin ribbon or twine
- sewing machine or needle for hand sewing
- scissors
- iron
- fabric marking pencil
- seam ripper
- pins

Prep Your Machine
If this is your first sewing project like it was mine, remove your machine from the box. Wind your bobbin, place it in the machine, thread your needle, and draw the thread from under the metal plate (I’m sure it has a name), and bring the thread through the needle and under the foot. Both pieces of your thread should be long enough so they extend behind the machine. That’s something none of the tutorials tell you. Follow your machine’s instructions and/or videos for doing all of this.
My family and friends always think I’m weird because I learn better by reading than by watching videos or seeing someone else in person do something. I don’t mind written instructions with pictures, but I’d much prefer wording and if pictures fit, then great. When I say that, people look at me like I’m an alien lol. Perhaps it’s the reason that I never got anything below an A in school. And we weren’t on a 10-point grading scale, a 93 to 100 was an A! Not bragging, just explaining how my strange mind works and why my tutorials try to explain everything in great detail for those who might learn like me, if there are any out there lol.
A few thoughts:
There are a few issues I had while sewing that I couldn’t find anything about in tutorials or my manual. I have a Singer Fashion Mate, but I’m sure there’s a hook that holds the thread in place on every machine. In the case of mine, it’s the hook is used in the fourth step when bringing the thread from the top down to thread the needle.
I’m not sure what I was doing to cause it as it would happen when I had already been sewing fine for a minute or two, but sometimes the thread would somehow come off of that hook. It would cause the machine to sew all wrong and bunch many stitches together on top of my disc drawstring bag. I couldn’t figure out what was going on until l removed all of the thread and realized it was no longer over the hook. So, if you have that start happening and you’re new to sewing like me, unthread the needle and repeat all of the steps to ensure its threaded properly with the thread over the hook.
Second tip: remember to put the foot down once you place your fabric under it!! I can’t emphasize that enough. No one in tutorials or videos tell you how easy it is to put your fabric in, concentrate really hard at getting the seam allowance lined up, then just start sewing. Holy, moly, I must’ve done it ten times. Sometimes twice in a freaking row! It matters, otherwise you just get a jumbled mess of thread.
Prep Fabric
First you need to iron your fabric. This is something you don’t want to skip. Imagine getting all of your fabric cut and marked, then you iron your fabric, and the sides no longer line up because one side is longer now that a few wrinkles are ironed out! No, that’s no good. You’ll be doing a lot of ironing for your new hobby.
You only need to cut one piece of fabric for your menstrual disc carrying case. If you’re not new to sewing, you might not need to mark your fabric with a fabric pencil. I did just to ensure that it was straight all around. Place a ruler at the top edge your ironed fabric and draw a line at 12″.

Measure from the top over 6″ and make a mark. That will be the width of the disc’s drawstring bag. I also placed a line about halfway down then near the bottom line.

I connected the lines that I drew at the 6″ marks so that I had one solid, straight line to cut on. I forgot to take a picture of me cutting the first fabric on the pencil lines, so here’s a photo of me cutting a second piece in the same size.

Fold the Fabric
Fold the fabric in half, bringing the length up, with the wrong sides together. Iron over the fold so it’s nice and crisp.

Fold the top of one of the sides down about 1.5-2″. I folded mine down 2″ because I intended to use wider ribbon. However, I ended up using a scrap piece of 1/2″ wide ribbon, so I could’ve folded it anywhere between 1.25″-2″. If this drawstring bag is a first sewing project, go ahead and do 2″ to give yourself plenty of space for the seam allowance and to allow you to feed the ribbon through easily. Iron the fold down.

Flip the fabric over and fold that top side down to match the other. Iron it as well.

Sew the Sides of the Menstrual Disc Drawstring Bag Together
Now it’s time to sew your first seam and the first side of the menstrual disc bag together! Exciting, right? I did make sure that my sewing machine was threaded properly and that I knew how to sew straight on a piece of scrap fabric the night before. If you haven’t done that yet, you might want to do it on another piece of fabric. You don’t want to have to mark, cut, fold, and iron all over again if something with the machine isn’t right.
Sew the First Side
Raise your presser foot and place the folded fabric under it, wrong side up. Line up the needle so that your first stitch will be placed right where the raw edge of the folded section and the wrong side meet. You don’t want to sew the folded tops completely shut. You only want the fold tacked down a little so it doesn’t flip up when you sew that section. Next line up the side with the 1/2″ seam allowance mark on the machine. For some reason 1/2″ isn’t written on my machine; 3/8’s is, and the 1/2″ is the mark just past that one. Be sure that the rest of your fabric isn’t at an angle, and that it’s in line with what’s lined up on 1/2″. Lower the presser foot, lol!

Press the foot petal slightly so that you are sewing slowly, one stitch at a time. If you have a switch that sets speed, turn it to the lowest setting if this is your first sewing project. Add a couple stitches then lift your foot. Press the backstitch button and let it sew backwards a few stitches. Then begin going forward again. This will keep your seam from coming undone.

Continue sewing to the bottom of your first sewing project. Once you reach the end of the fabric, hold the backstitch button for a few stitches, then go forward, sewing to the very end again. Lift the presser foot and remove the fabric, pulling the thread with it. Use scissors or the blade on the side to cut the excess thread. Then trim the thread at the top and bottom of the seam.
Remember to start the seams so that the edge of the folded section is sewn along with the sides.
In the above photos and video, I started my stitching just below the top folded section. I didn’t realize that having the top completely free would cause a problem when I sewed the top, the slot that the ribbon for the drawstring bag would be place through. When turned it right side out like that, it allowed the edge of the ribbon slot below the seam to stick out a little unevenly. So, I placed a few stitches at the raw end of the fabric, connecting it to the rest of the side seam. If you go ahead and start the seam on the folded section just a little, you won’t have to go back and do extra work.
Sew the Opposite Side
Now flip the fabric over and place the fabric under the presser foot, again lining it up with 1/2″ seam allowance mark. Remember to place the needle at the very edge of the raw end of the folded section so that you sew the edge down, but don’t sew the whole thing closed. My video shows me starting below the raw edge of the fold, but I had to go back and fix that. Put the presser foot down and sew a few stitches. Use the backstitch button to sew backward a little, then continue sewing this side closed. Again, backstitch, then go forward again to keep your seam from unraveling. Trim off excess thread.
Sew the Slot for the Drawstring of the Menstrual Disc Drawstring Bag
With the carrying bag (your first sewing project, yay!) still inside out, sew the folded top section down. Do not sew the two sides of the drawstring bag together. You need to fold one side under and out of the way to sew one side at a time. I guess I was so excited to sew these last seams and flip mine right side out that I forgot to take a picture or video of this part. Hopefully these photos will help show you how to sew only one side and where to sew.

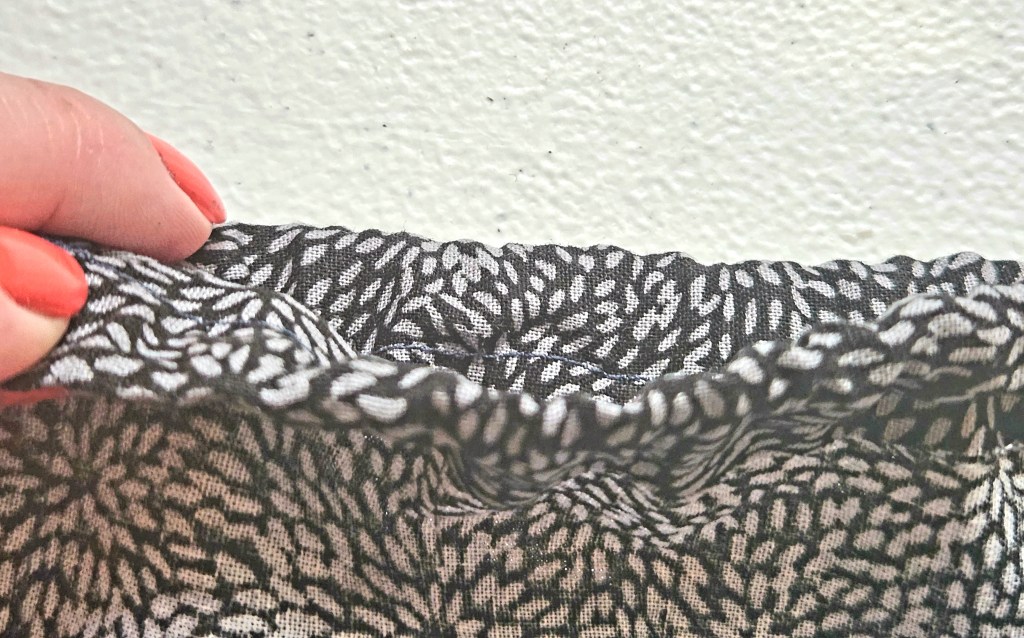


Line up the fabric so that you place the seam at the bottom of the fold, the 1/2″ seam allowance above the raw edge of the fabric, and not from the top of the bag at the fold. That will leave on open “pocket” to place the drawstring through.

Flip the bag and sew the final side of your first sewing project just like you did in the previous step. Remember to fold the side you just finished under and out of the way. You don’t want to mess up and sew both sides together here in the final stretch!

Iron the Seams & Flip the Bag Right Side Out
Fold 1/2″ fabric on each of the side seams back to the main part of the bag. Iron them down flat so that they stay in place and create a nice, finished look.


Turn the bag so that the correct side of the fabric is on the outside. Iron the bag so the corners and sides look crisp.


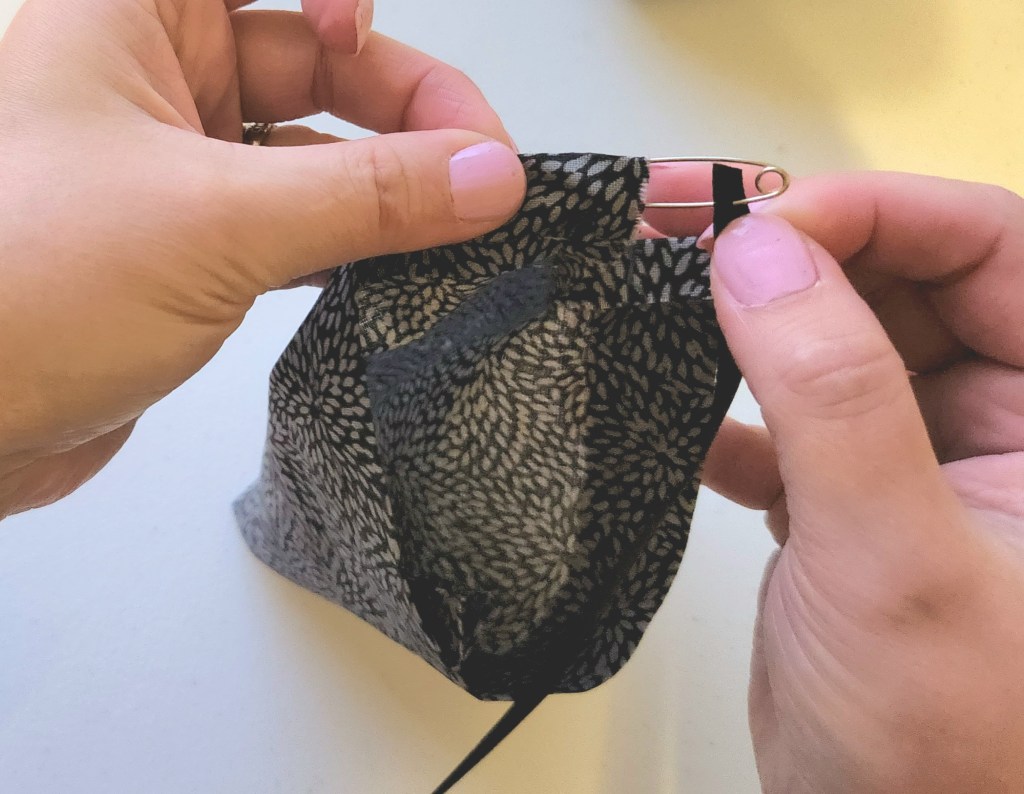
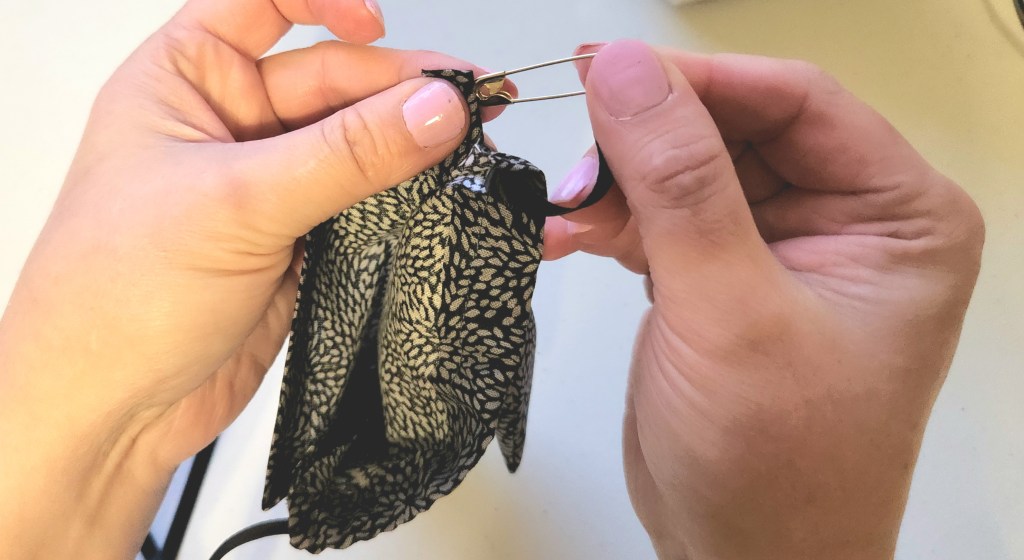
Put the Drawstring for the Menstrual Disc Carrying Bag in Place
Place a safety pin in the end of your ribbon or twine and close it. Put the pin in one of the open sides of the drawstring slot and feed it through to the other open side. Feed it through the other open slot and bring the safety pin and ribbon back out so that it’s right back at the side you started.

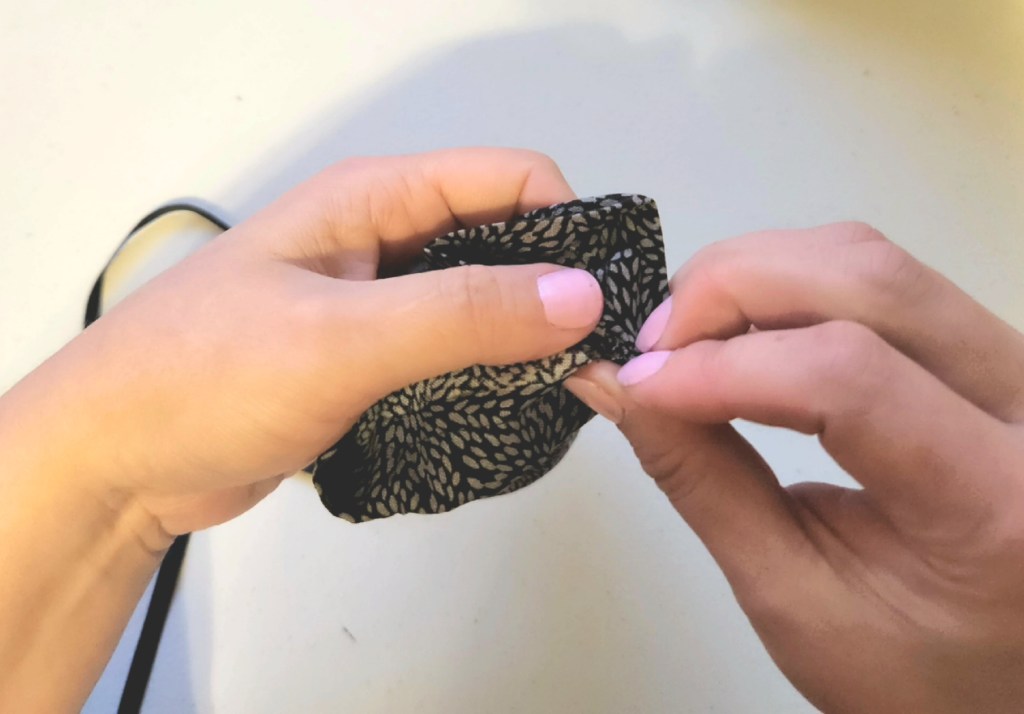
Leave enough ribbon to be able to tie the two ends together and cut the excess off. There are several options for the string or ribbon on a menstrual disc’s drawstring bag. You can give yourself longer ribbon on this step and only have it on one side, using it alone to close the bag. Another option is to have tied strings on each side of the bag like I did but have them the same length. I placed two pieces of ribbon, having a tied piece on each side, but left one side longer than the other. That way I can carry it on my wrist and carry the menstrual disc or use my first sewing project to carry my debit card, money, keys, lipstick, and other small items. If you cut the fabric a little longer, you can carry your phone in it.

Tie the two sides of the ribbon together.
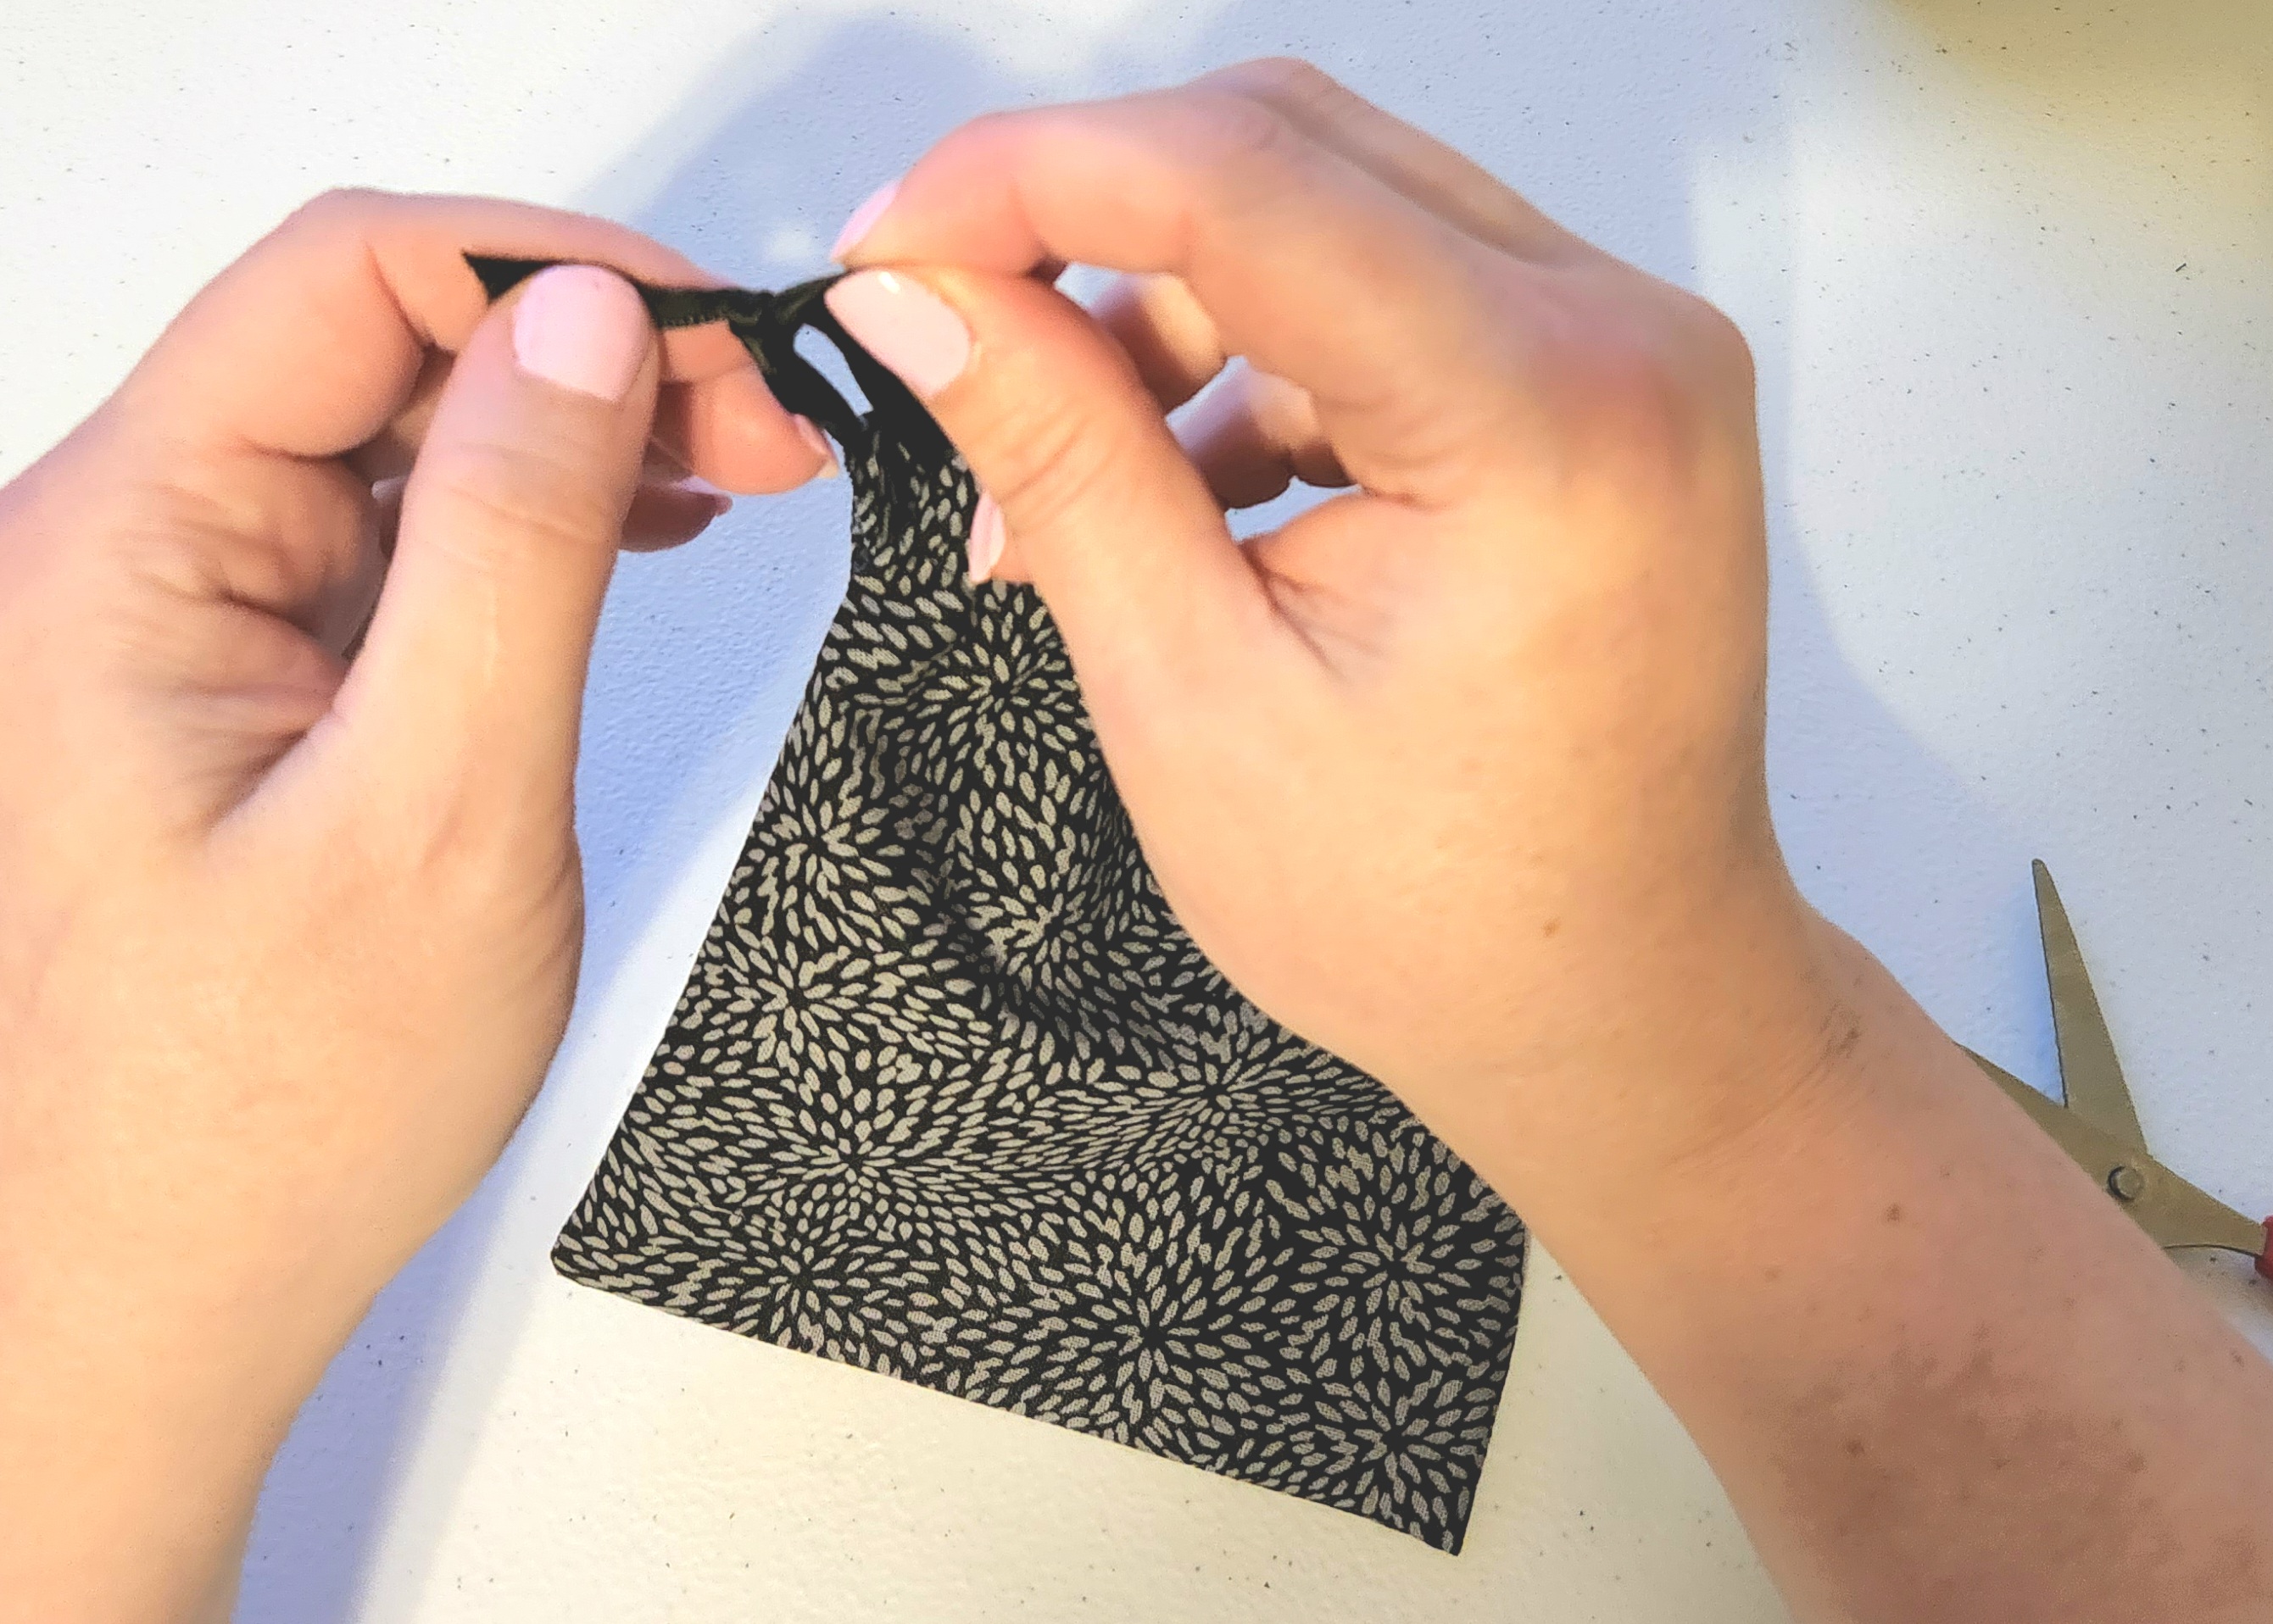
Slide Another Piece of Ribbon in Place (optional)
Start at the other end of the bag and string another piece of ribbon through the drawstring bag. This is optional because technically you only need one. I felt like the bag was more secure with two, in case one gets loose. This ribbon was left longer so that I could put it on my wrist. Tie the ends together.


I also made a menstrual disc travel bag with twine drawstrings. You can use the same technique with the safety pin to put it in place.

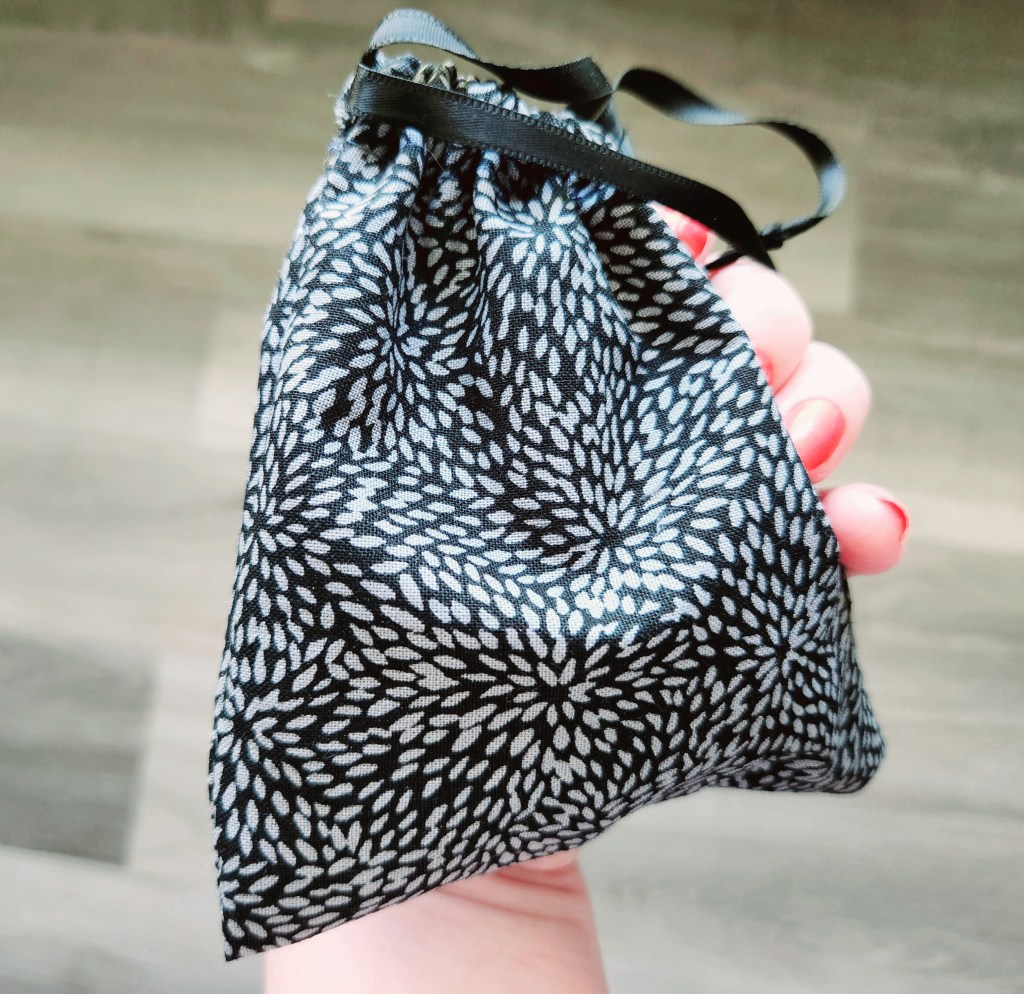
Your first sewing project is complete!
Place your disc or other small items and proudly check out your hard work!


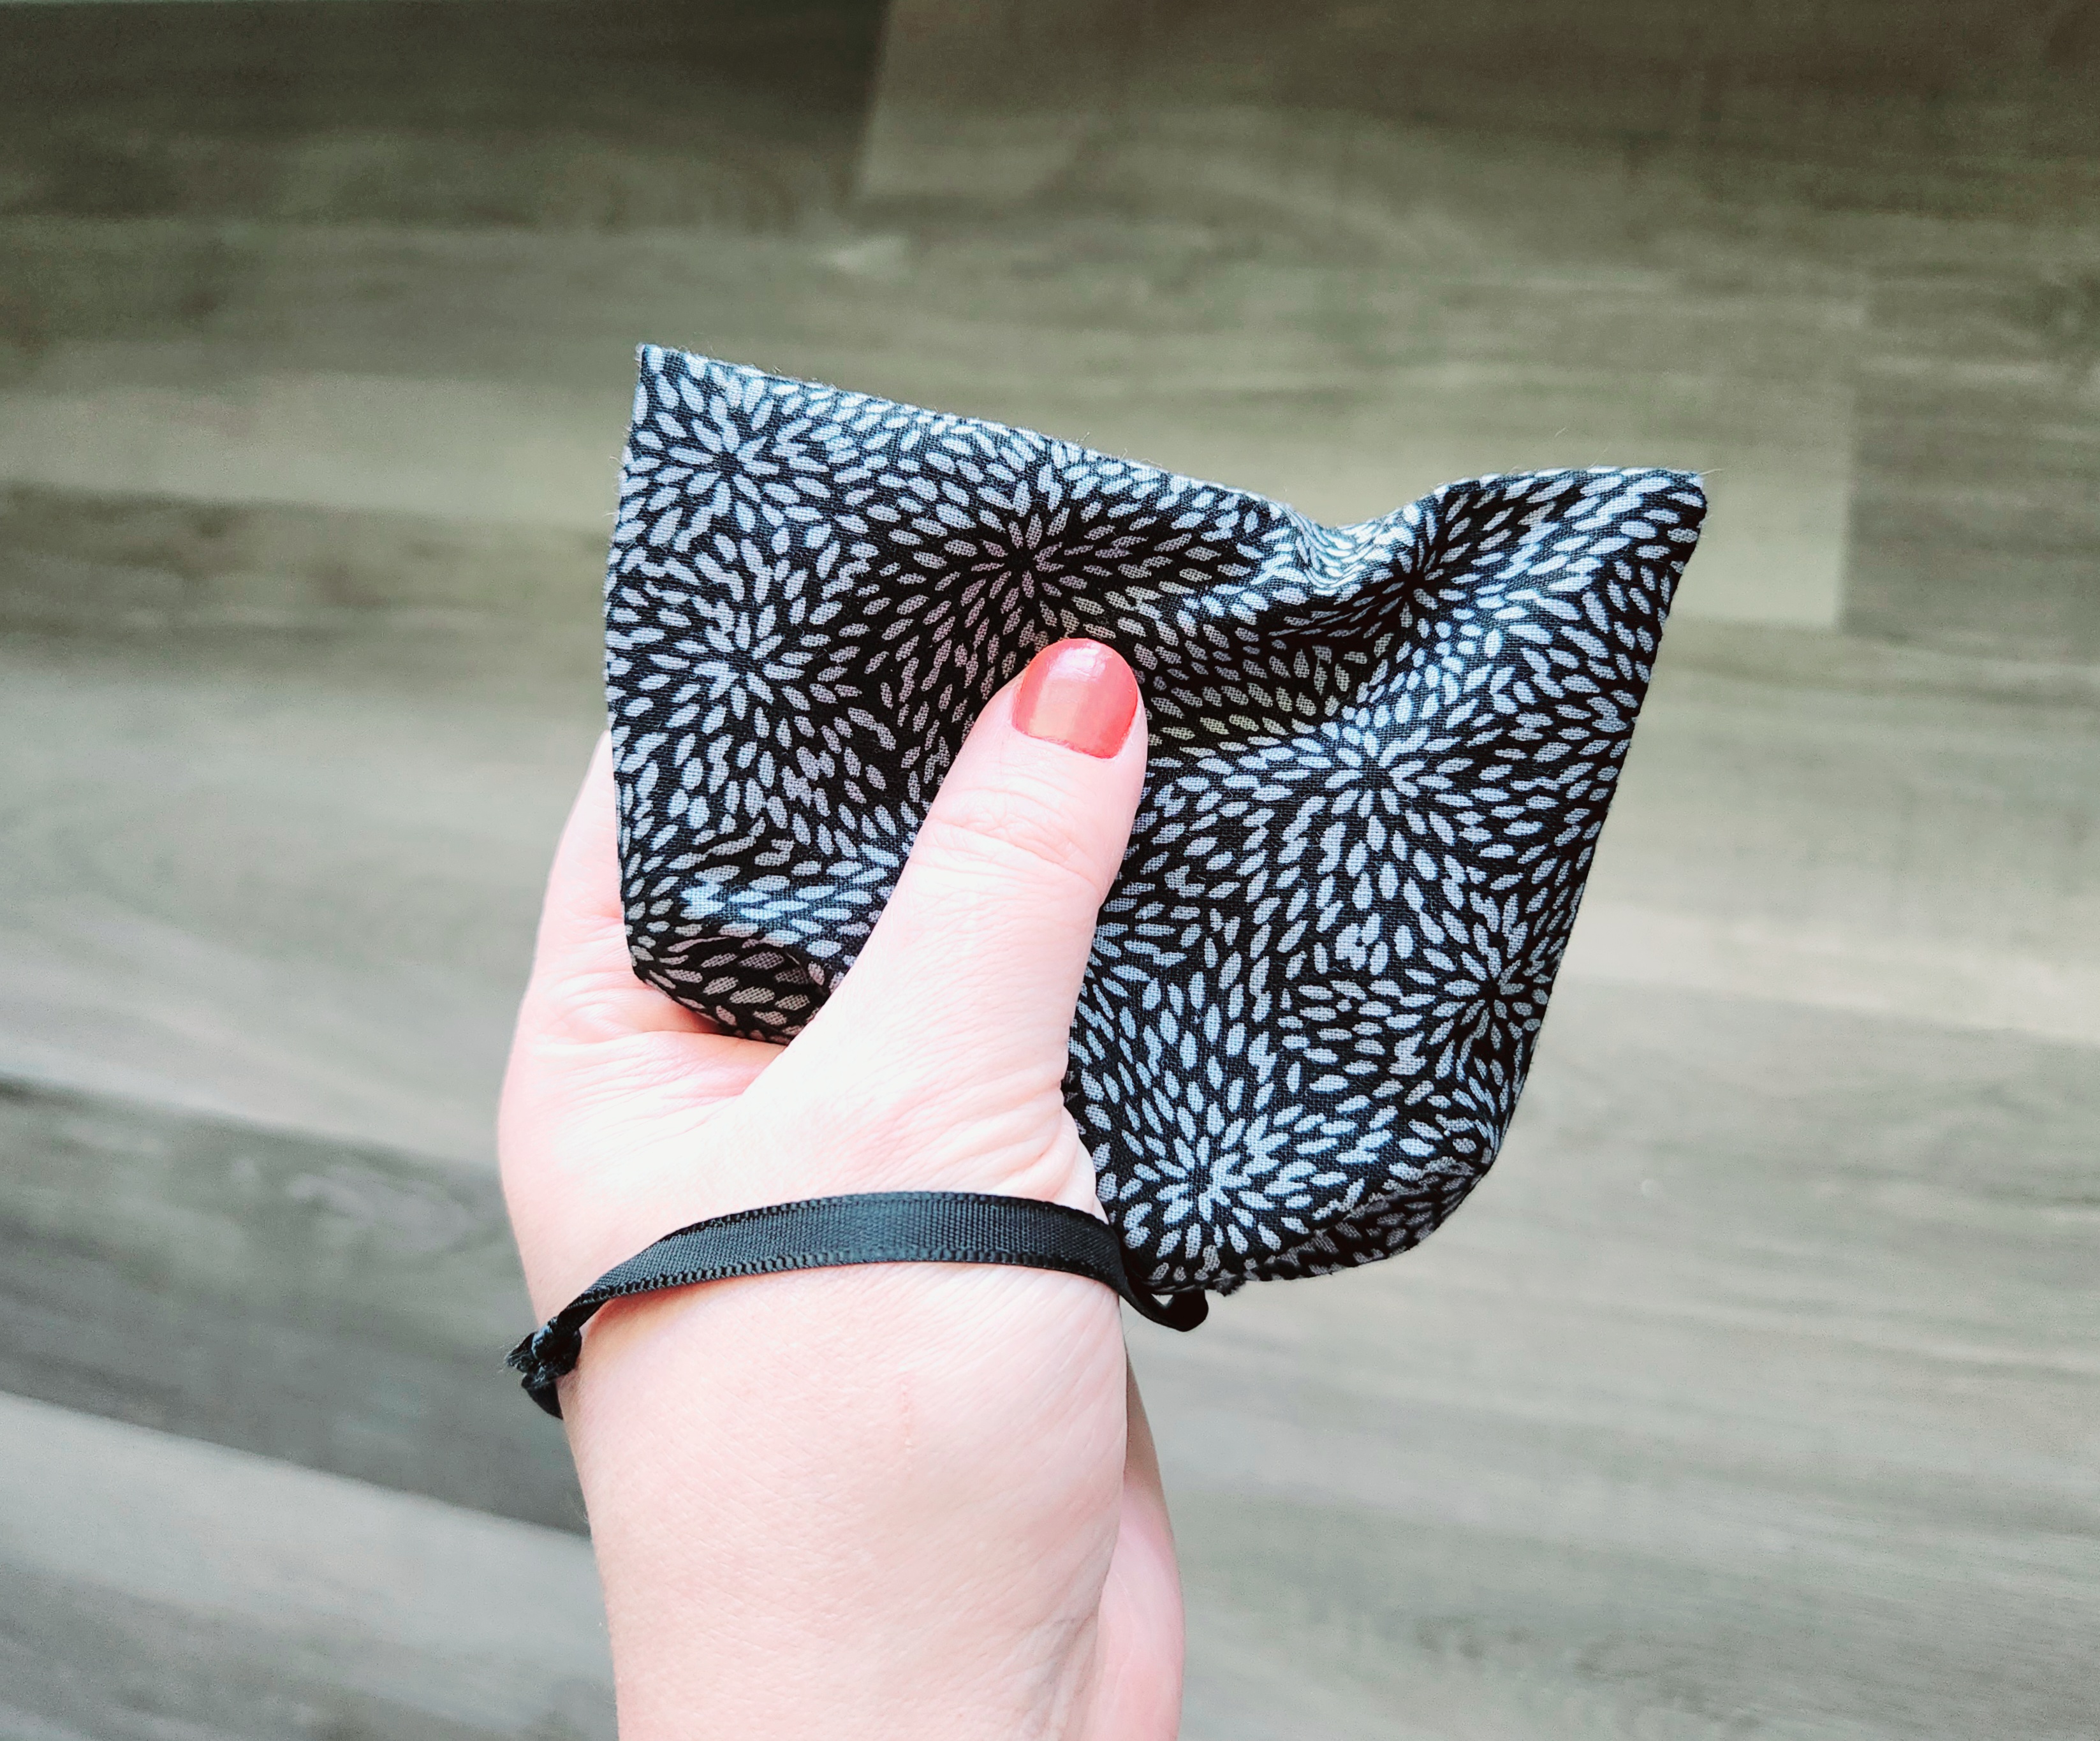
Here’s a few angles of my menstrual disc drawstring bag.


I really hope this tutorial has helped you make your first sewing project or has helped you create a new travel case for menstrual discs or other feminine products! This was such fun for me, and I absolutely love my new sewing machine. I have so many projects planned, and I can’t wait to crank them out! Come back Thursday for a new back to school teacher’s gift idea (sewn of course!) along with free printable specialty gift tags to go along with it. It’s actually a project that you can use as gifts for anyone at any time.
Remember to pin the image below or share this post with the buttons on the left side of the page so you can find it when you’re ready to start your project! Also, follow me on Pinterest for new ideas added weekly! Be sure that you never miss a great tutorial for decor like wreaths, signs and other home decor, free printables, crafts, and other fun posts! Enter your email address below to be notified of new posts! Use the buttons below to follow me on social media for other great content.

Don’t go yet! There’s more to see!
There’s plenty more to see here on the blog! If you’re looking for something specific, use the search box in the sidebar to look it up. If not, you might enjoy these ideas. Don’t have time to read them all now? That’s ok, just click over to the posts using the pictures and pin them for later. You can also add Life as a LEO Wife to your favorites and check back for new ideas and free printables and SVGs every Wednesday, as well as link parties with tons of shared ideas on Sundays!
There’s plenty more to see here on the blog, so I hope that you will stick around! If you’re looking for something specific you can use the search box in the sidebar. If not, you might like to check out and pin these ideas:


Posts with free PNGs (work just like SVGs) and/or printables:


One thought on “First Time Sewing Project: Drawstring Bag for Menstrual Discs or Other Small Items”