St. Patrick’s Day is all about the green baby! What’s greener than a shamrock? It’s the perfect shape for a St. Paddy’s wreath. This year Dollar Tree has shamrock wreath forms, and when I saw them last month, I snatched them up. I knew I had to do that because the shelves have been so bare in the holiday sections lately! A few days ago, while I was trying figure out what to do with it, I came across some rolls of burlap. Lightbulb moment- a burlap shamrock wreath! Today I’m sharing exactly how to make one of your own. However, if you can’t find a shamrock wreath form, you can always make this St. Patrick’s Day wreath!
Shamrock Wreath Supplies:
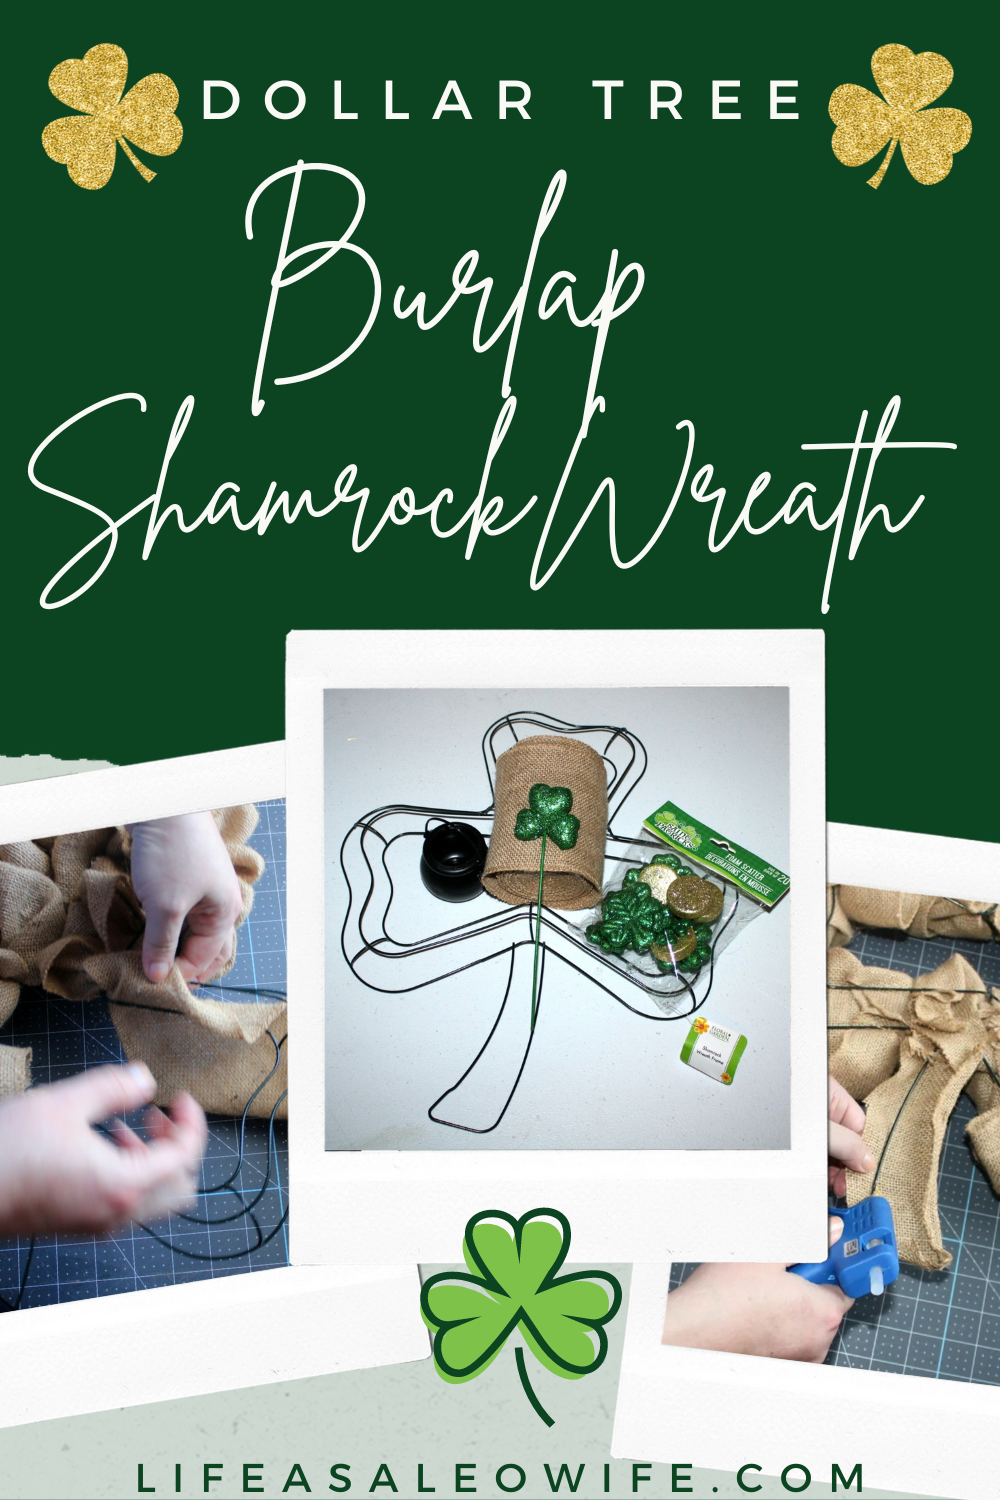
- shamrock wreath form
- 1.5 to 2 rolls of burlap- I used 1.5 rolls of Ashland 20ft burlap from Michael’s. This was the only item that I didn’t get from Dollar Tree.
- St. Patrick’s Day print scarf
- hot glue gun
- scissors
- shamrock pick or foam scatter

Begin Adding Burlap
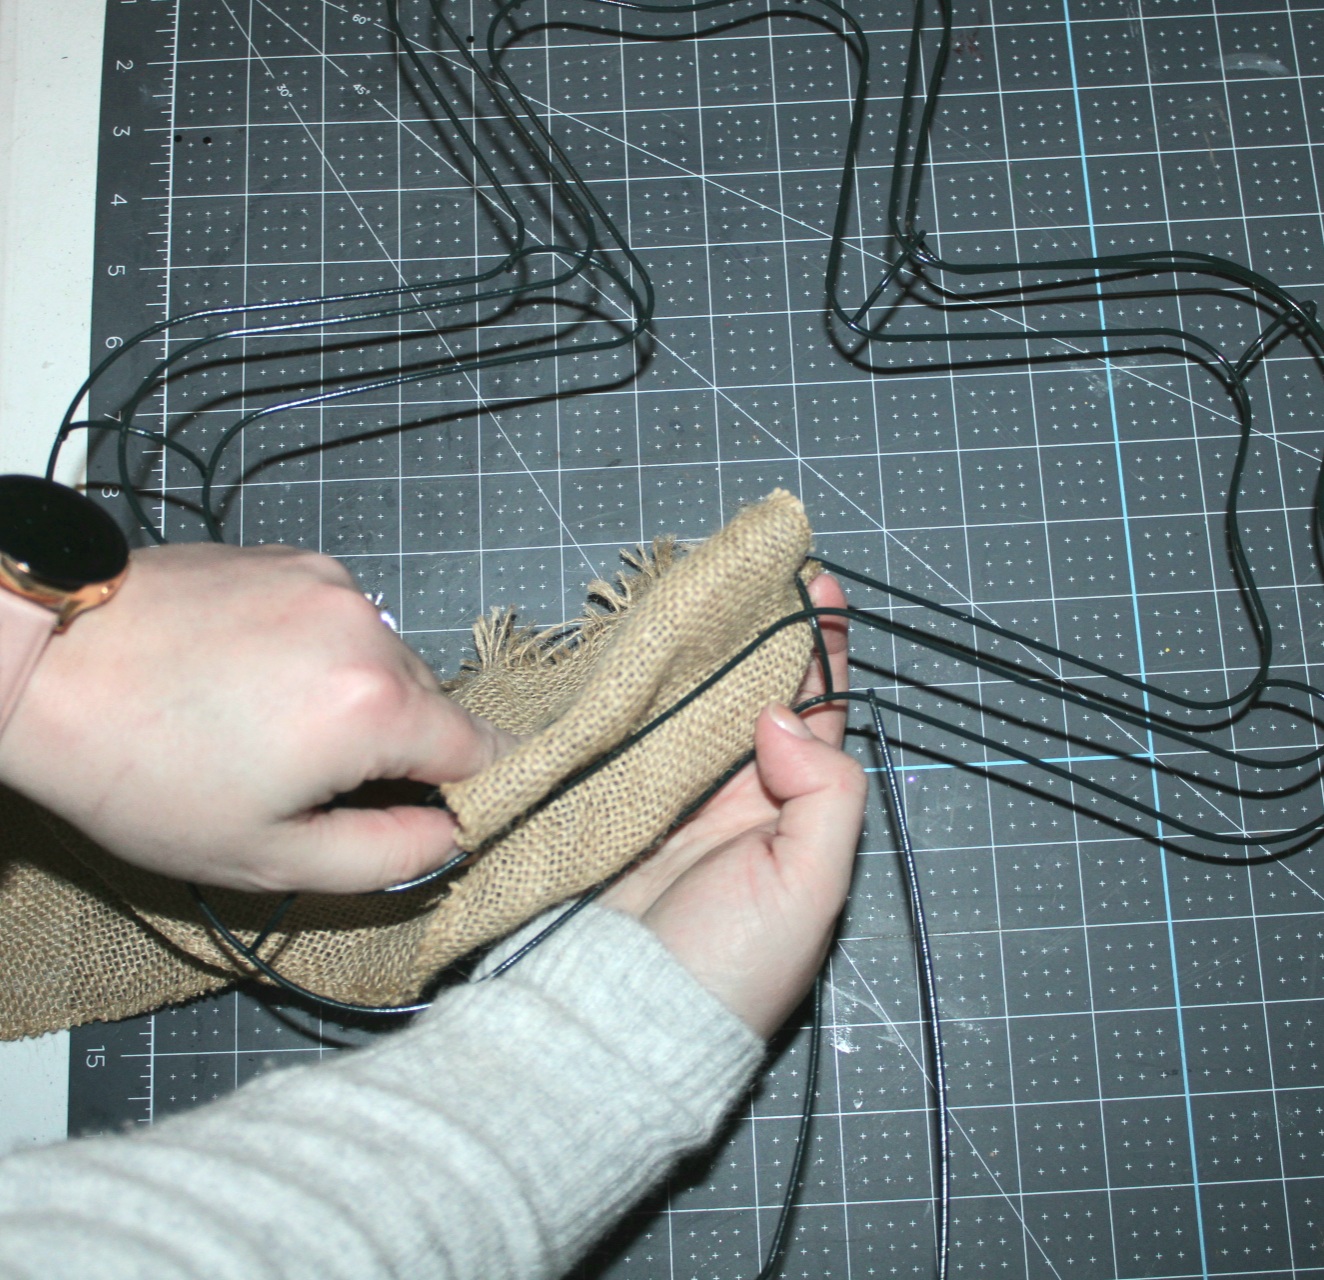
If you’ve ever made a regular, round burlap bubble wreath, this is very similar. Begin at the section of the shamrock to the left of the stem. I didn’t bother tying the end of the burlap to the form because I’ve done so many burlap wreaths that I can hold it in and know that it’ll hold fine when it’s full. If you don’t think you’ll be able to keep it in until the first section is full, tie the end to the middle crossbar before you begin. Slide the burlap horizontally into the inner ring of the form at the first crossbar (the middle of the stem) to form a sort of bubble.
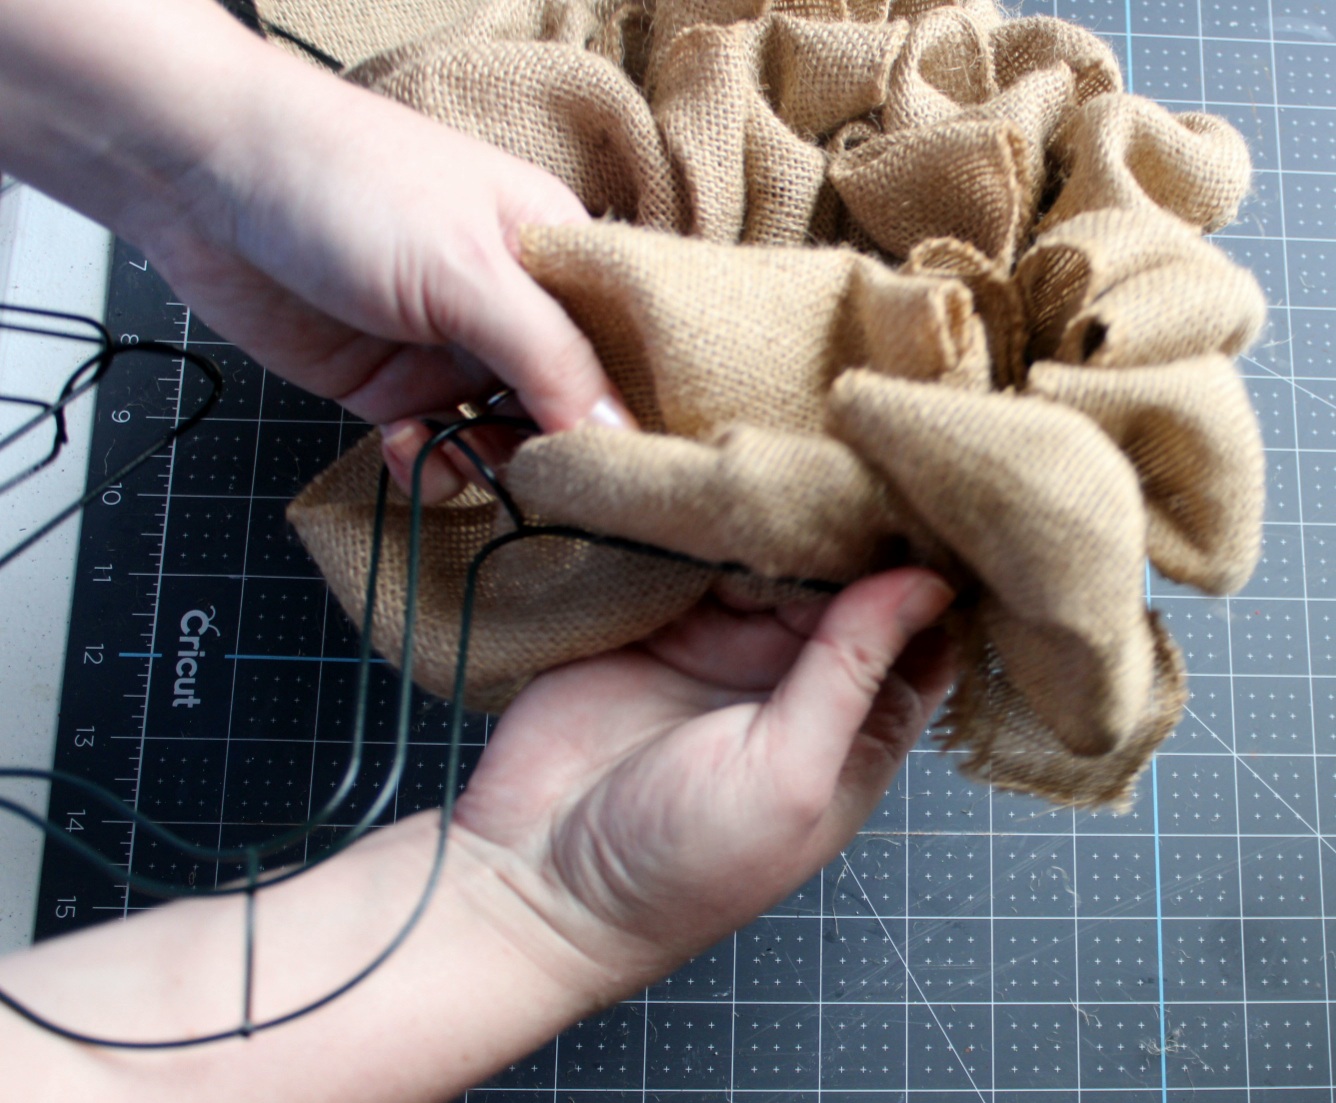
Push another “bubble” into the outside ring so that you have two horizontal rows of burlap.


Push those two “bubbles” toward the crossbar where you began.

Continue sliding in bubbles of burlap and pushing them together. You make the sections as full and tight or as loose and wide (as long as it’s close enough to hold it in) as you’d like. I think I put about 7 to 9 rows of burlap in between the crossbars.


Adding a New Roll
Since I started out with 1/2 roll (or maybe a little less), I ran out pretty quickly. When you run out of the roll, just tuck the end up into the bottom of one of the prior bubbles. Start a new roll, and, again, you can tie it on if you need to. This time you’ll have to tie it where you’re starting, but under the bubbles that you’ve already created so it doesn’t show. I didn’t tie mine; I just began adding more bubbles.


Continue adding burlap to the form in the same way until you get back to where you started.

When you’ve pushed the last bubble through, turn the wreath over. Cut the burlap about 3-4″ from the form. Give yourself enough room to tuck the burlap in so it doesn’t come undone.
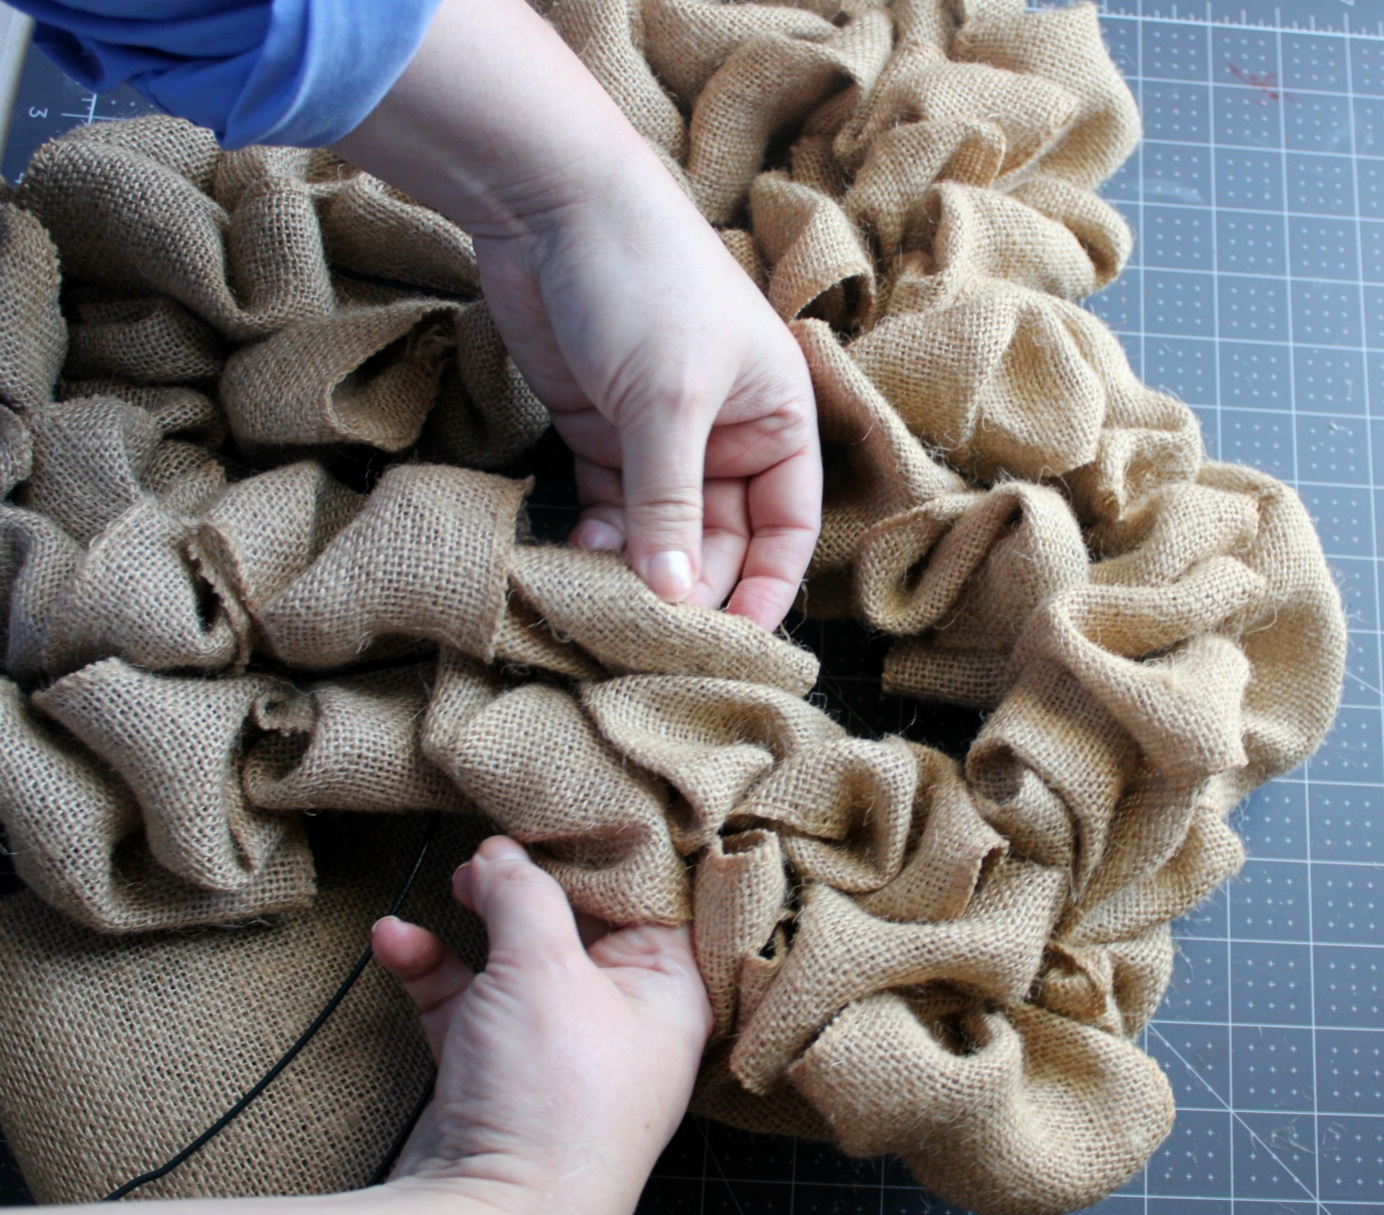


Finally turn the wreath over and fluff the bubbles and cover any the wire any place that it’s showing through.

Cover the Shamrock Wreath’s “Stem”
Now that the leaves are complete, it’s time to cover the stem. Initially I used the bubble method on the stem. You can do that, but I felt it blended in way too much. So I covered it with one piece of burlap.
Lay your burlap on your workspace. I folded the top of the burlap down about an inch at the top before I added it to the stem this since burlap tends to unravel. I didn’t get a picture of that, but just fold it and run your finger over the fold a few times to make it stay. If you need to you can glue it down you can, but I didn’t need to. Turn the wreath over and lay the stem on top of the burlap. Cut it about 1″ or so below the end of the stem.

Squeeze hot glue on one of the wires and fold the edge over it. I glued it close to the seam so I could cut it down in width before gluing the other side down. Then add glue to the bottom and press the fabric on.


The burlap is wider than the stem and will double back to the front, so it needs to be cut to fit. Cut an inch or so from the wire.

Glue that side of the burlap to the wire. Don’t worry about gluing the top of the piece to anything, you need it free for the next step.

Add Scarf Bow
Take your St. Patrick’s Day print scarf and feed it through the open space at the top of the stem and put the other side through the middle of the wreath.
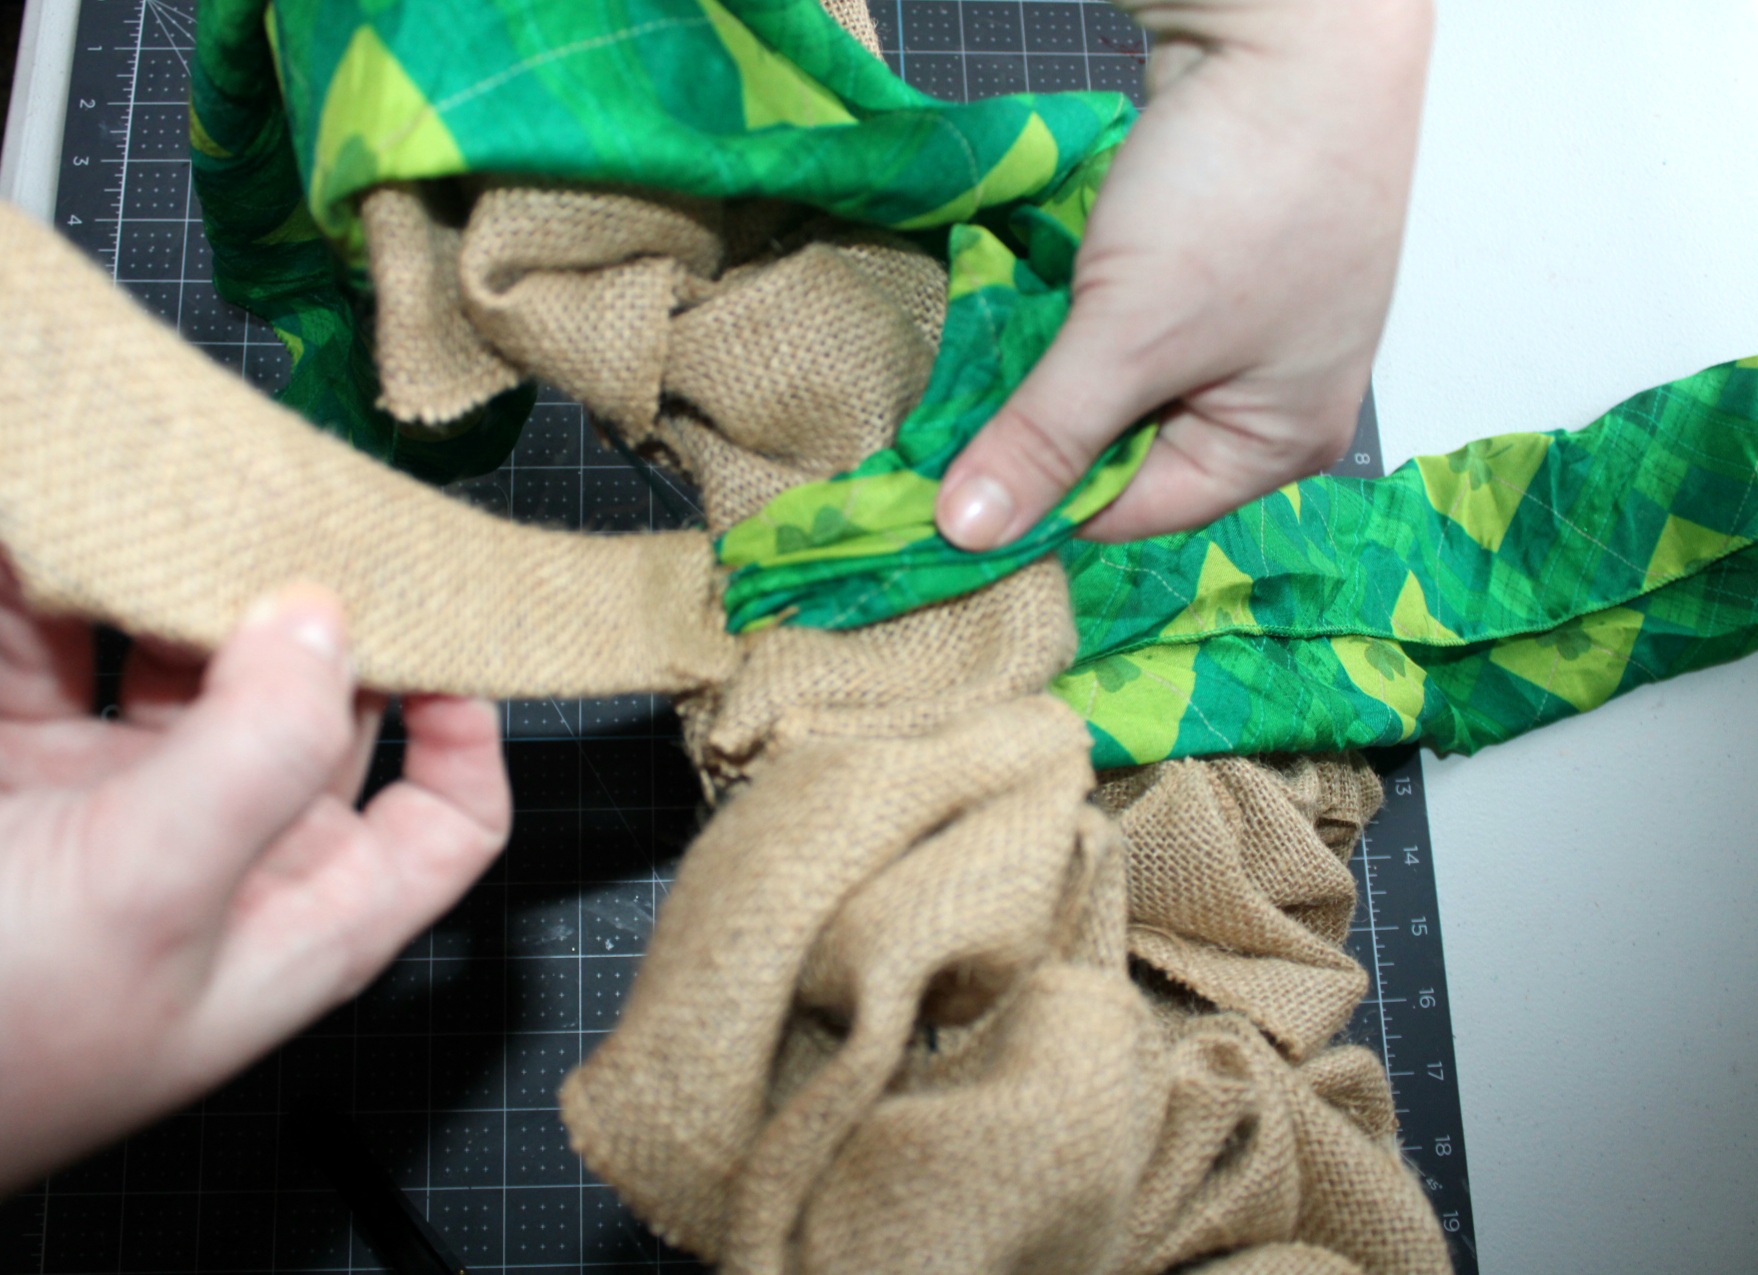
Tie the scarf into a bow just like you would your shoe or a hair bow. Adjust the bow so that it’s even.


If you can’t find a scarf or have ribbon that is perfect for a shamrock wreath, you can use this tutorial to make an easy loopy bow. If you’re horrible at holding ribbon loops together, there’s also this super easy tutorial that makes a loopy bow without that issue. It’s so easy my 10-year-old son can make it (not that he wants to lol)!
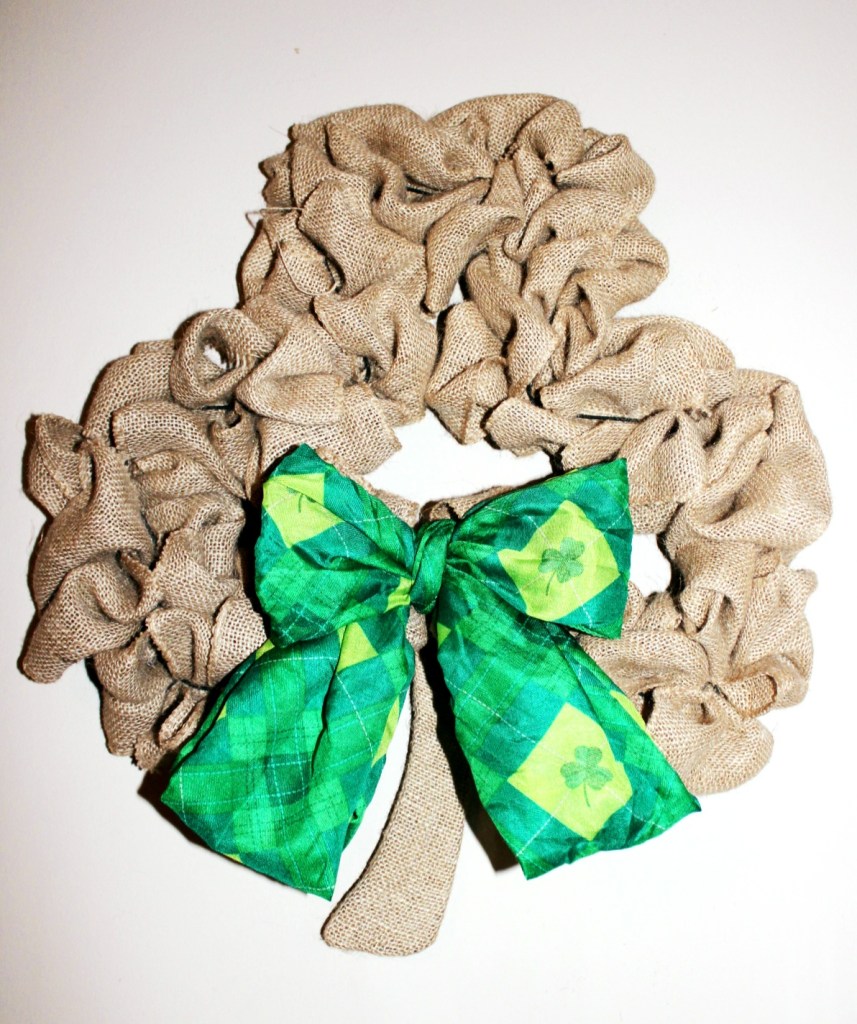
Your shamrock wreath is ready to hang!
That’s it! Pretty easy, right? The tails of the bow are really long. You can leave them like that or cut them, but I’m always reusing supplies, so I just folded them under. That way I can use the scar for something else later.


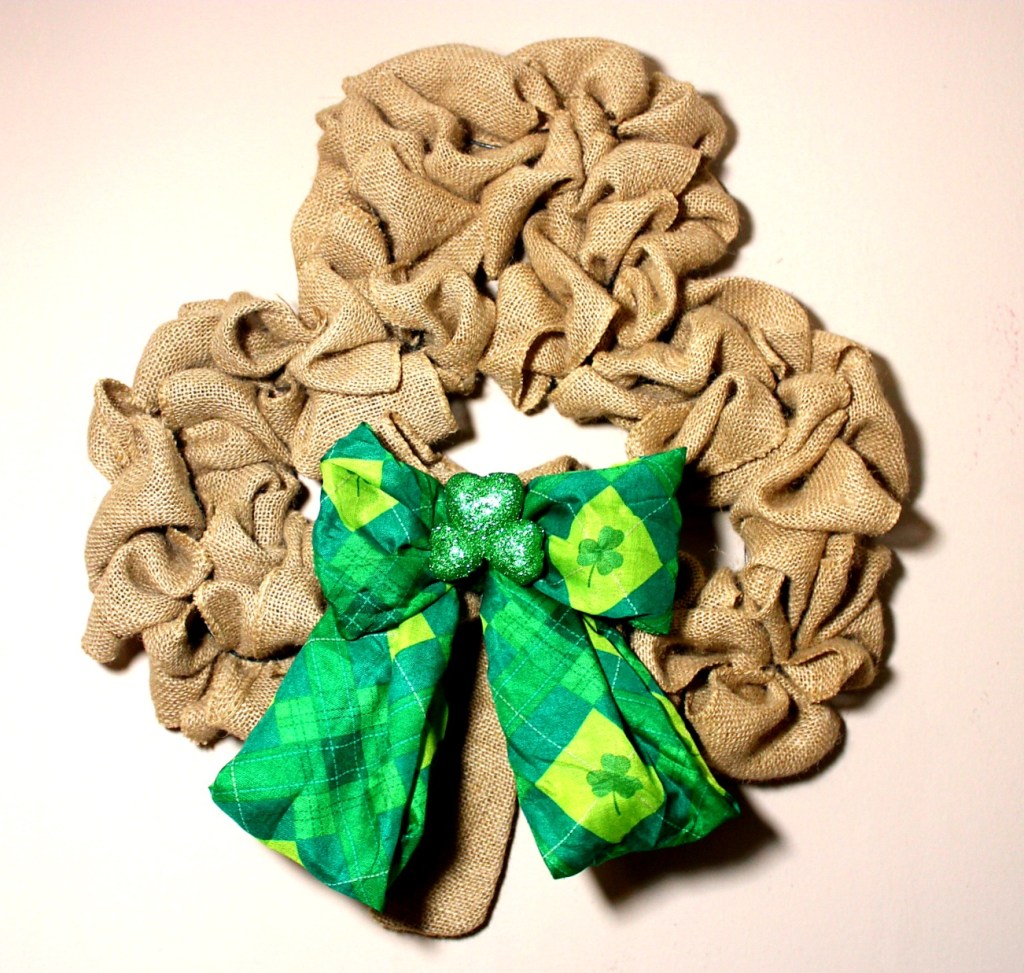
Once I hung my wreath, I decided I wanted a little something more on it. I tried pushing the shamrock pick through the wreath, but I didn’t like that too much. I removed the pick and placed the shamrock in the middle of the bow. Since the burlap and bow were dense, it held the shamrock in without glue. Great, because now I can take it off if I want.


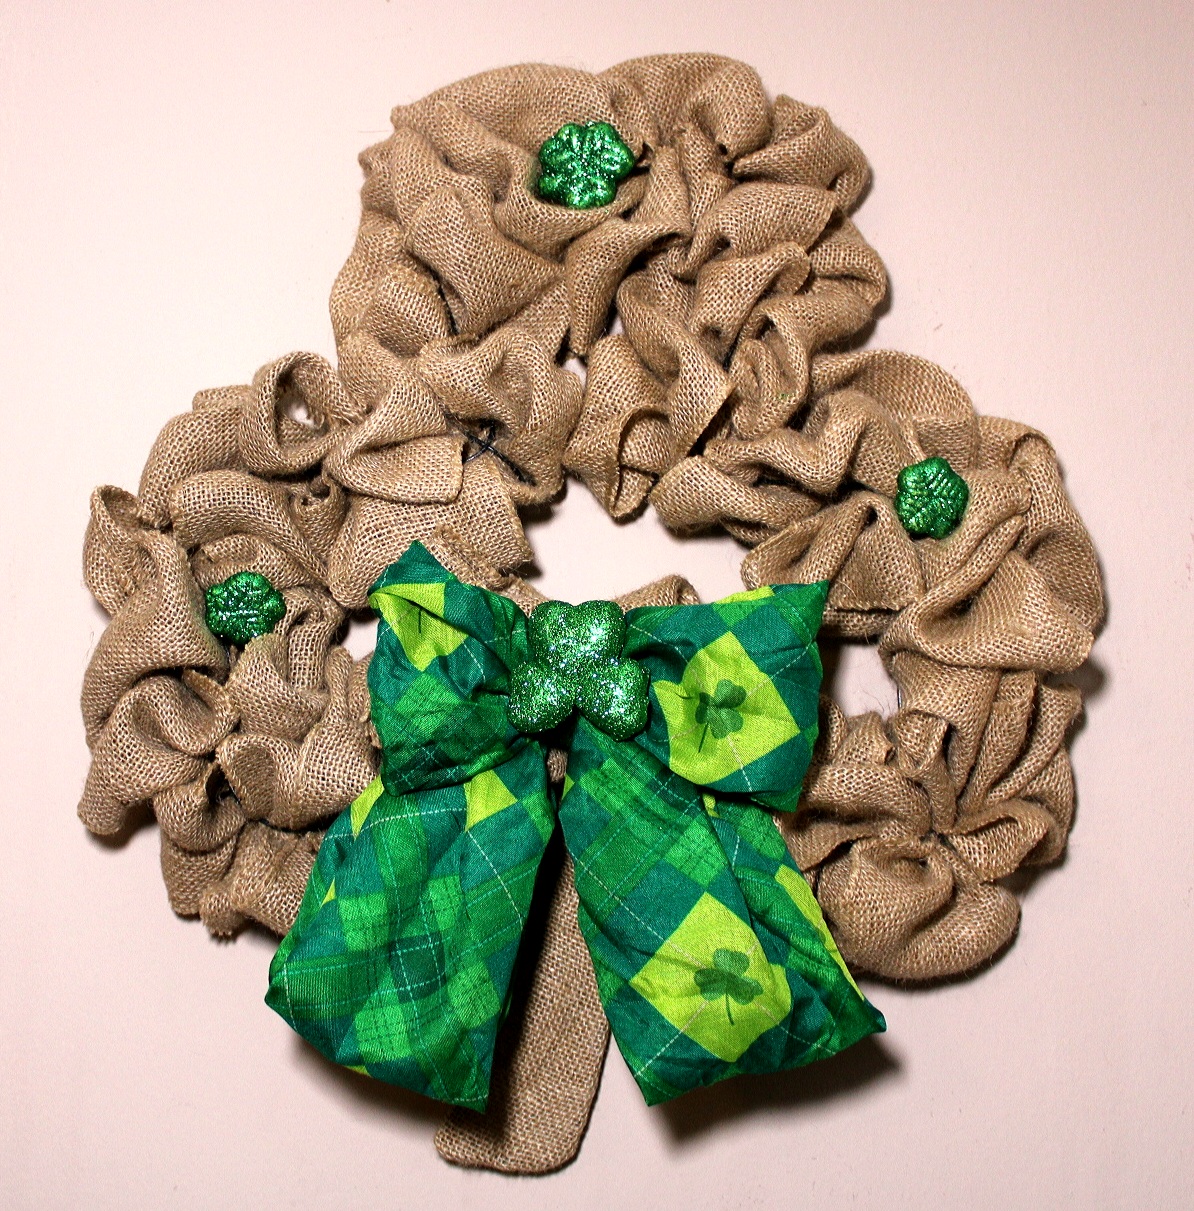
I had some foam scatter shamrocks, so I decided to add a few to see what it would look like. It was cute, but I removed them and left just the shamrock on the bow. You can add some to yours without glue, and if you like it, keep it, if not, take them off.


Remember to pin the image below or share this post with the buttons on the left side of the page so you can find it when you’re ready to start your project! Also, follow me on Pinterest for new ideas added weekly! Be sure that you never miss a great tutorial for decor like wreaths, signs and other home decor, free printables, crafts, and other fun posts! Enter your email address below to be notified of new posts! Use the buttons below to follow me on social media for other great content.
Today’s Scripture
I thought the perfect scripture to go along with today’s post is from Psalm 23 ESV, “The Lord is my shepherd; I shall not want. He makes me lie down in green pastures. He leads me beside still waters. He restores my soul.” As the world gets crazier and crazier, just remember that Jesus is there to shepherd you through life. He will provide everything that you need. When things get rough, lean into Him and He will restore you, mind, body, and soul!
Before you go, check out these posts!
There are way more great wreath, home decor, and craft tutorials around, so stick around! You can use the search box in the sidebar if you’re looking for something specific, or you may like these:


Follow me on Pinterest for new ideas added weekly!


I love this! I never do much for St. Patrick’s Day but this is too cute to pass up! Thanks for the great tutorial. Pinned!
Thank you! This is the first year I’ve done some St. Patrick’s Day decor. I just loved the little shamrock wreath form!
They do not sell the wire frame for clovers at Dollar Tree anymore. I went to Big Lots bought a sparkly one and took all of it off to have a frame. It costs $7 so I will have to charge like $30 to really make a profit.
Really? That’s interesting. I did find them at my Dollar Tree last month, but I’m not sure if they’re from a previous year. You can use 3 heart frames together though, if necessary. I don’t make these to sell, so I don’t know about making profit with them at all, lol. I do too much on the blog and all of my social media channels (particularly Facebook videos several times a week), so I don’t have time to make wreaths for other people- only my mom, lol!